Joe
Joe-
Pick Bridge: Take 2
09/01/2017 at 17:52 • 0 commentsThe first concept for the picks and Pick Bridge were more of a learning experience than anything (see my previous log post). I had two issues to overcome:
1) The picks would break easily after only a short period of use.
2) The pick axles were a loose fit in the Pick Bridge, and made a lot of clanking noises when the picks were turned quickly.
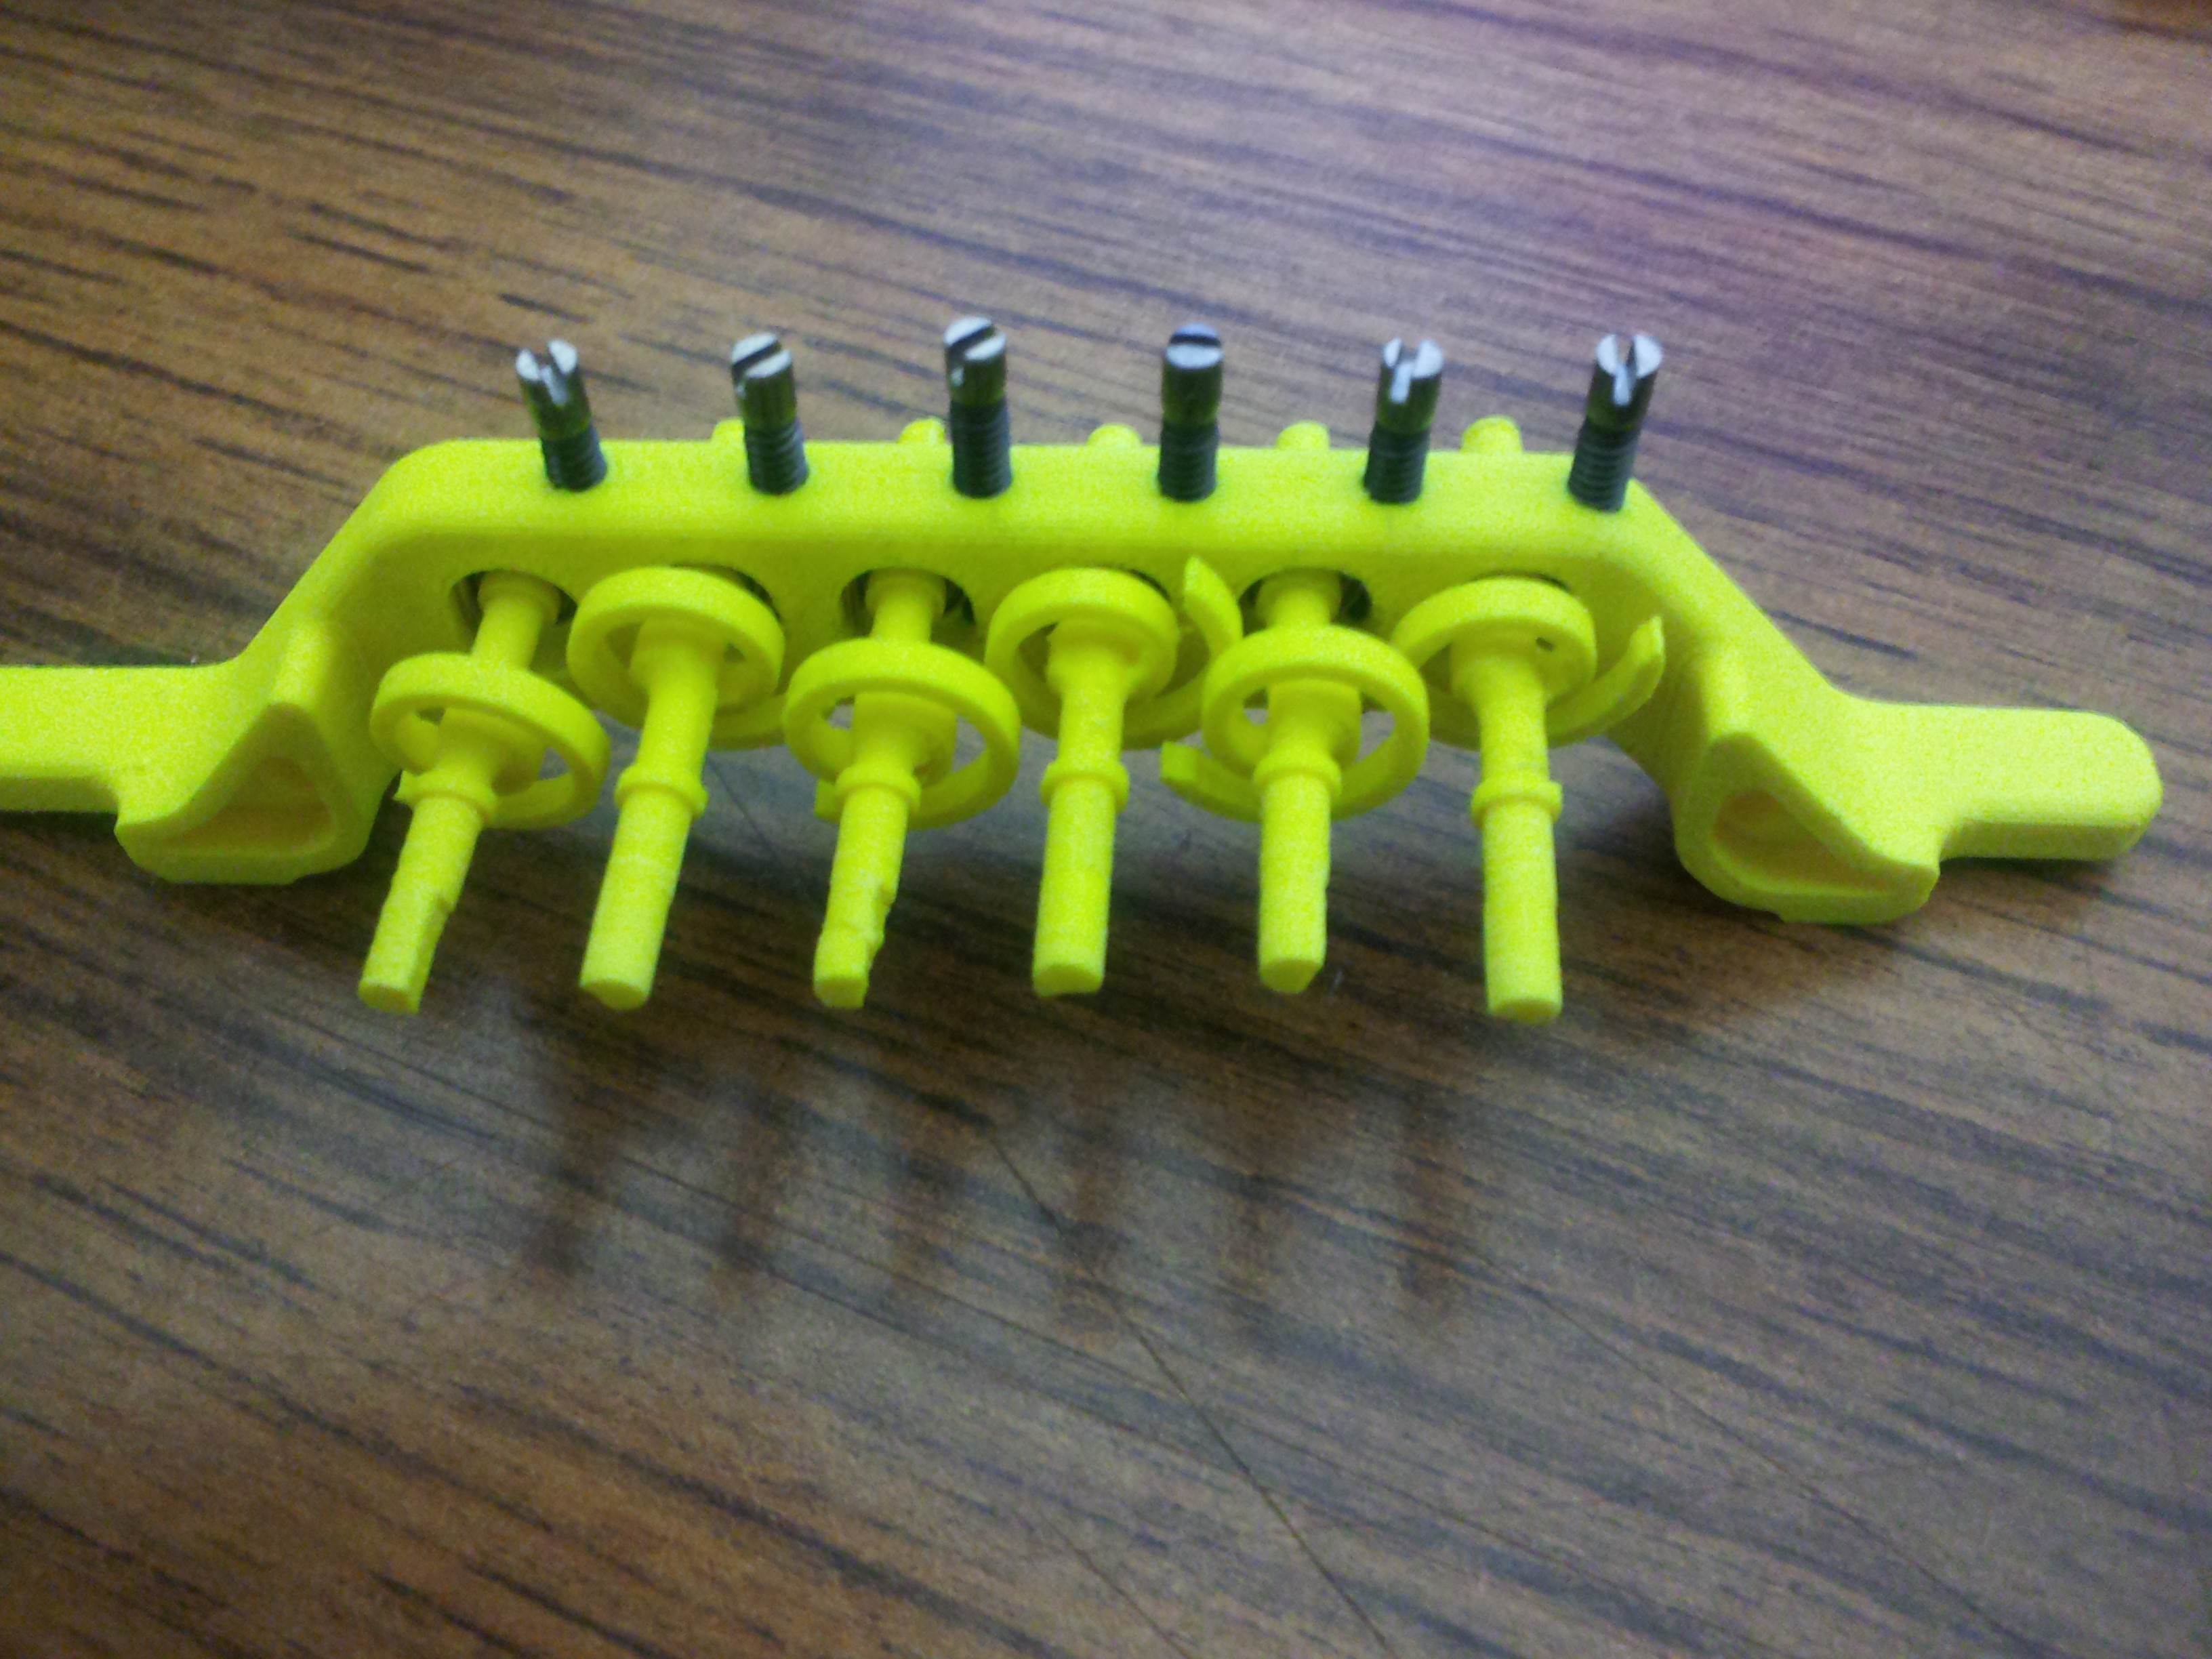
The solution to #1 was a new pick design concept, which I call the Spiral Pick, where spiral-shaped fingers protruded from the pick axle to make contact with the string when the pick was rotated. The spiral design reduced the strain on the pick features, and eliminated the breakage problem while still allowing the required flex of the pick when the string is strummed.
The solution for the noise issue was to move to a ball-bearing setup (obvious?). I also added set screw height adjustments for each pick, so that you could make the sound more consistent between strings. Here's the new design with half of the pick bridge set aside:
![]()
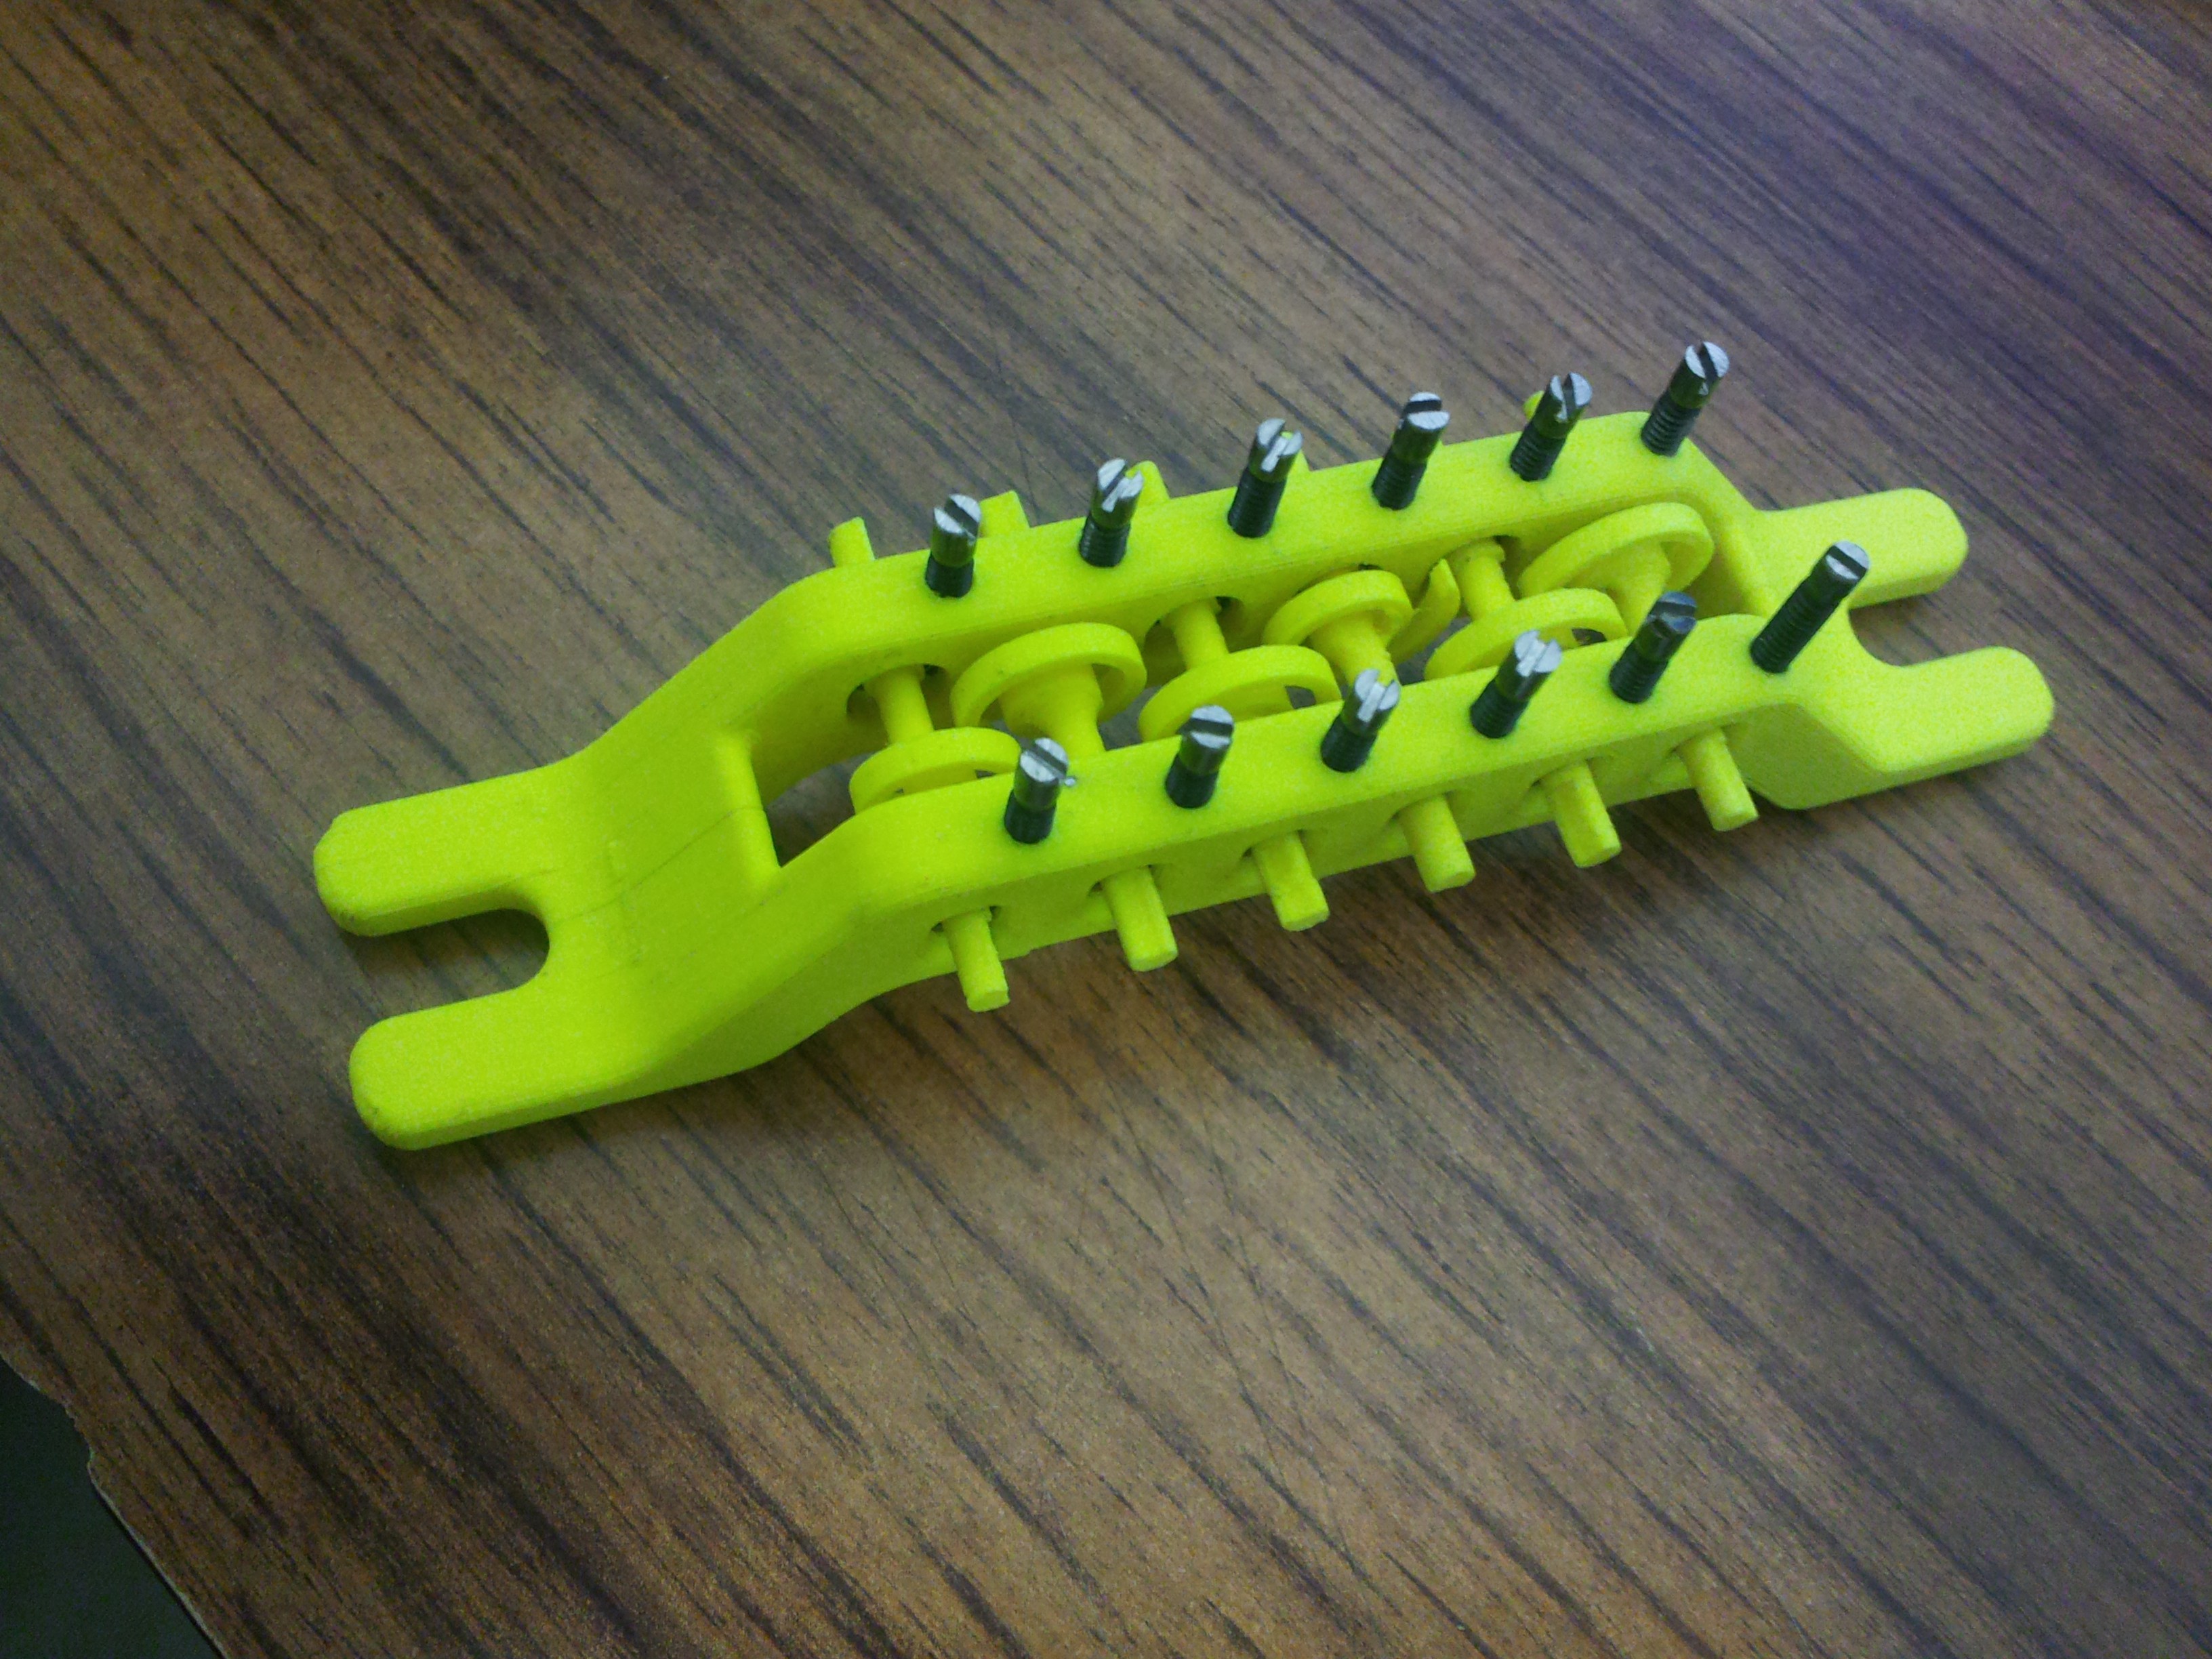
Here's the Pick Bridge assembly, completed.
![]()
The new picks worked beautifully! No more breakage, no more clanking noise from the pick axles slopping around, so now we can move on to the drive system.
-
First Try, Pick Concept
09/01/2017 at 17:41 • 0 commentsThe first concept of the Adaptive Guitar was actually a lot different from it's current form. The original idea was to rotate a (custom) "pick" ( made of a flexible piece of plastic on an axle ) over the string to make it sound. While I considered using hobby servos, they were way too slow and noisy, so I figured I'd go straight to a more tailored approach.
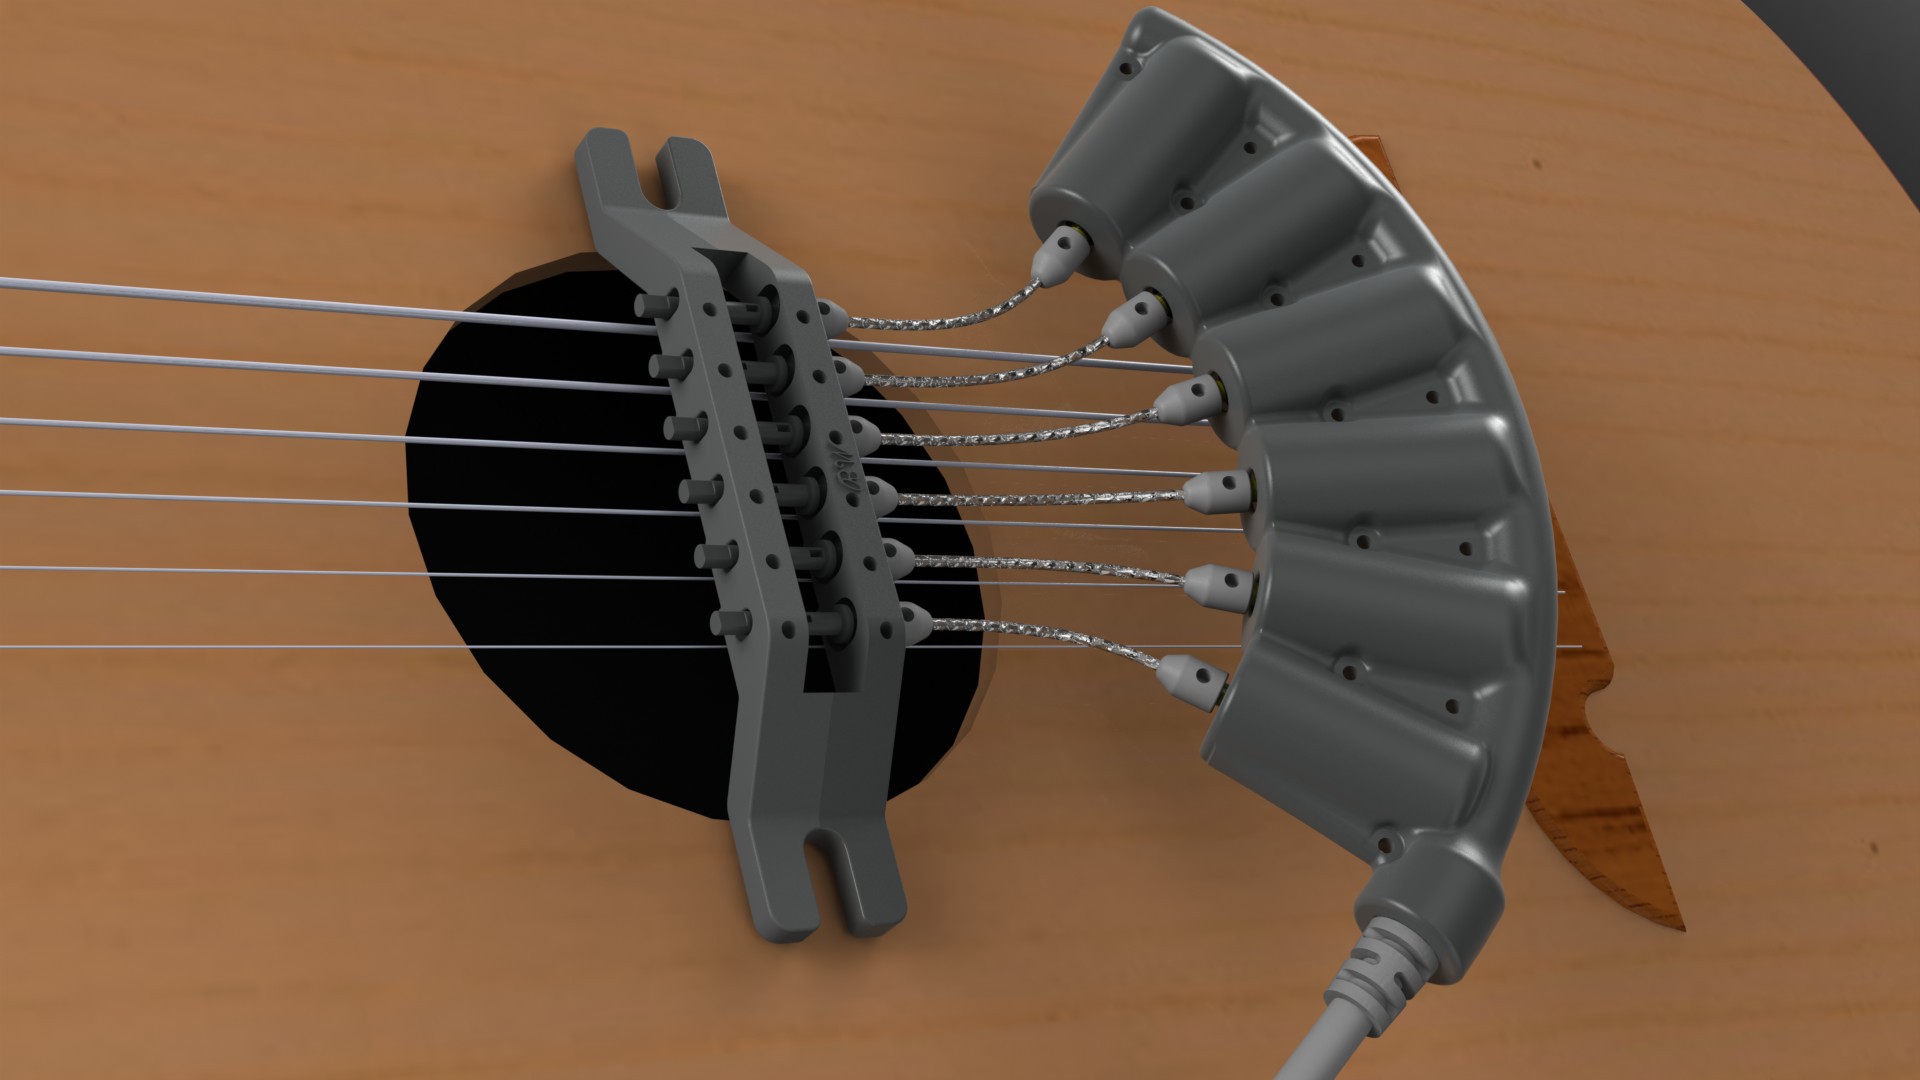
Each string got it's own pick, and the picks are held in place by what I call the Pick Bridge (since it bridges the sound hole). Each pick was to be driven by a small rotary motor, connected to the pick by flexible drive shafts and custom couplers. Power and control was external...we'll talk about that later.
Here's an early render. There are certain elements missing, but you get the picture: A motor turns, which rotates the corresponding pick, which strums the string. Each strum is one revolution of the motor. The shafts are braided steel cables, similar to bike brake cables, but lighter gauge. I couldn't use rigid shafts because the motors were wider than the string spacing and couldn't be perfectly aligned. I thought of U-joints, but didn't know where to find any that size at the time. Note I didn't have the supporting features designed yet - I was just trying to get the main parts of the concept laid out, so stuff is floating...
![]()
The concept seemed solid enough, so I set off building my first iteration of the pick bridge assembly. Here's a picture showing the first Pick Bridge (aluminum at the time) and the original pick prototypes. The first prototype picks were made of a split pin with a piece of milk jug plastic pinched into place. Later, tried having them 3D printed (shown in orange, in position in the Pick Bridge).
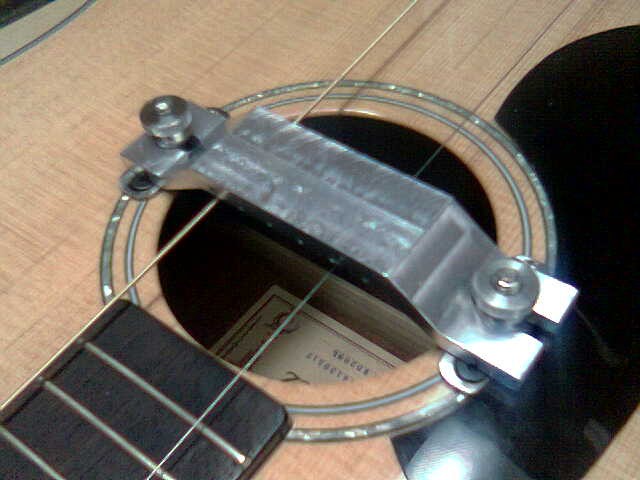
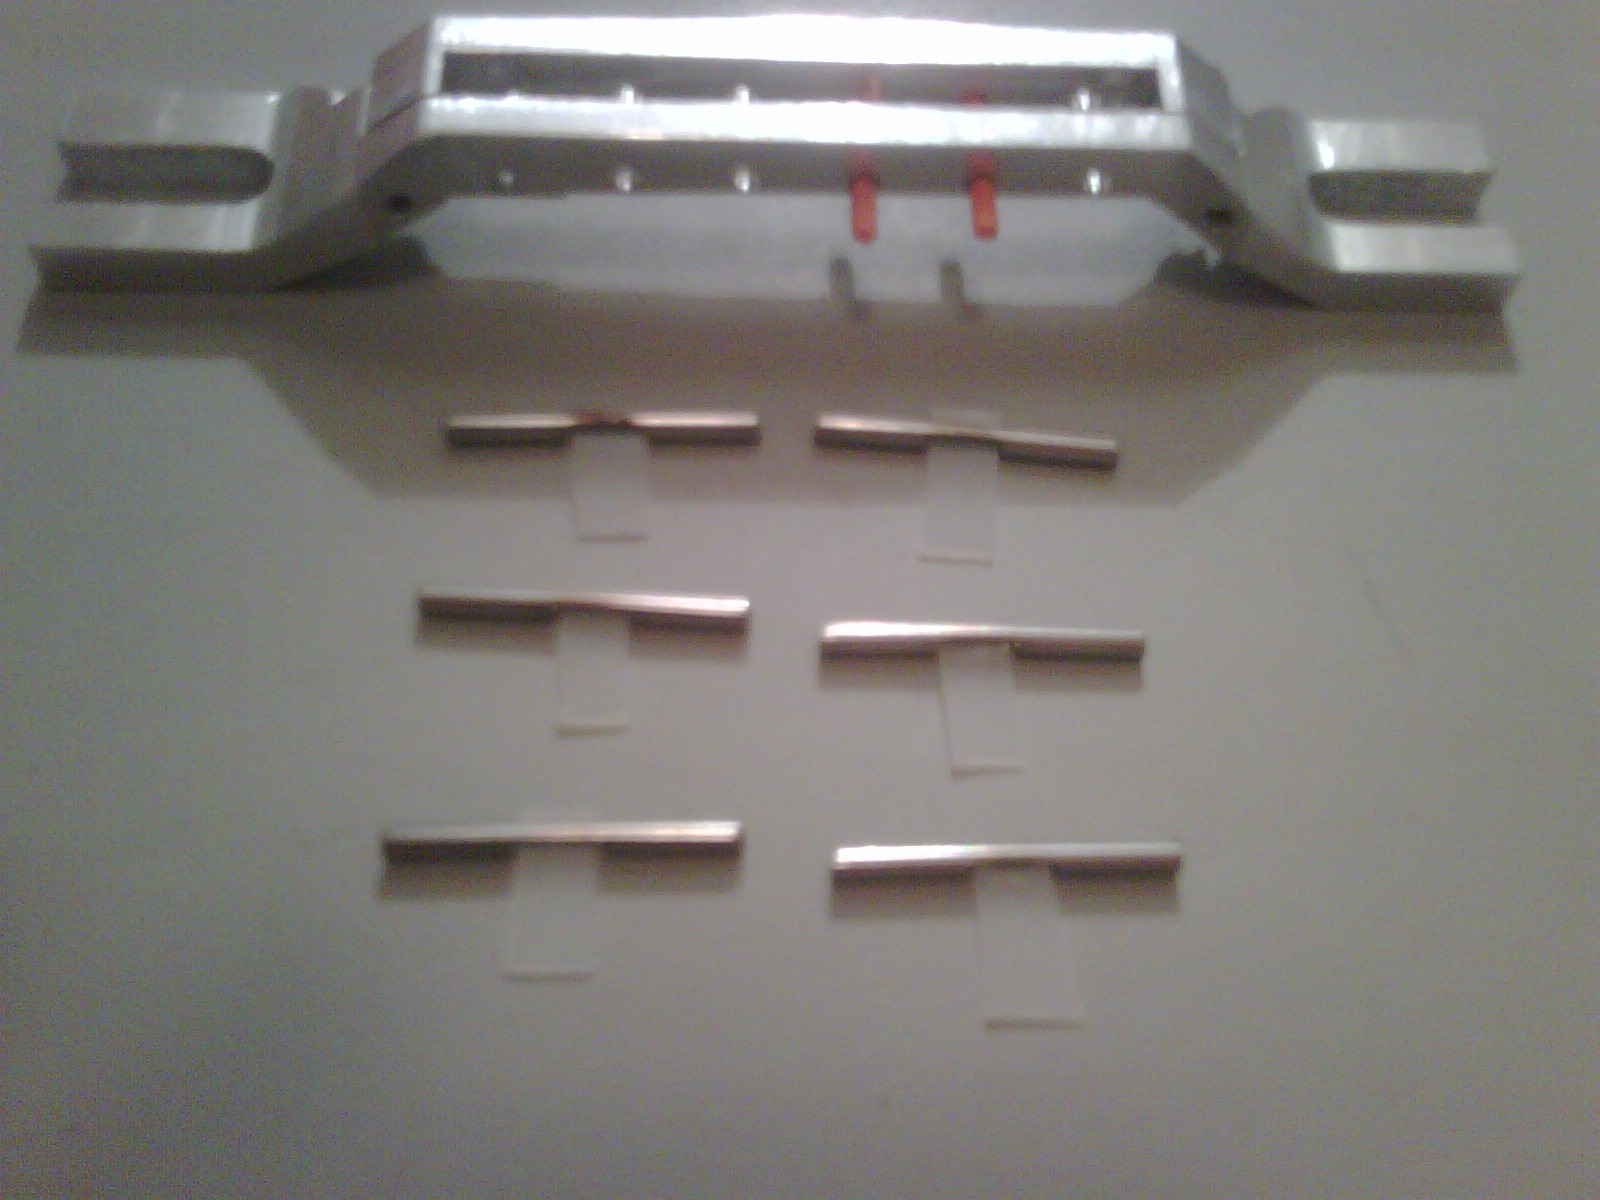
![]() Here's the Pick Bridge, mid-fab, showing my first mount concept, which required holes drilled in the guitar to mount PEM-type bolts. Thumb nuts held the bridge in place, and the slots on the bridge ends allowed horizontal alignment of the whole thing over the strings. I did all of the machining myself.
Here's the Pick Bridge, mid-fab, showing my first mount concept, which required holes drilled in the guitar to mount PEM-type bolts. Thumb nuts held the bridge in place, and the slots on the bridge ends allowed horizontal alignment of the whole thing over the strings. I did all of the machining myself.![]()
Here's a test video. I'm not going to talk about the control box yet, so bare with me.
Two primary issues plagued this version; Most notably, the plastic parts of the picks quickly broke due to repeated bending after only short periods of use, and the sound was inconsistent and not very loud. The pick axles were a relatively loose fit in their holes on the Pick Bridge, so they made a lot of racket when they were turned or moved. Time to try something new!
-
Birth of a Concept
08/31/2017 at 21:33 • 0 commentsThe very first task to do on this project was to figure out the most important question:
How do you play a guitar with on hand?
Of course, there are two functions that your hands perform when playing a guitar; strumming and fretting. So which function do you replace?
I saw plenty of youtube videos under "robotic guitars," and even the best fretting concepts were bulky and limiting. I decided to design the system to replace the strumming hand, since performing the strumming seemed easier than trying to figure out how to emulate the seemingly infinite number of fretting possibilities without compromises that would limit improvisation and flexibility of voicing and solos.
So now that I knew I'd be trying to design a strumming device, the question became how to do the actuation. The first concept was to use a single arm with a pick at the end that would swing back and forth somehow to strum the strings, kinda like this:
It's a simple concept, but the thing I didn't like was that it didn't lend itself to selective picking, or picking of multiple strings simultaneously. Since this was a project for a maturing musician, I knew that she would quickly outgrow those limitations - I needed selective / simultaneous picking capability, and the single concept arm won't cut it. I need an independently actuated pick for each string.
Some more digging on the internet turned up a few projects that used individual hobby motors to pick the strings, like this one (which is more recent, but uses the same concepts in videos I saw when I was at this stage):
Next: how to control it? I actually started off thinking I would do computer control with a Wii-mote strapped to the foot or a foot pedal, but then I came across Force Sensitive Resistors (FSRs). If you're like me, and didn't know what an FSR was, check out Sparkfun's tutorial here:
https://www.sparkfun.com/products/9674
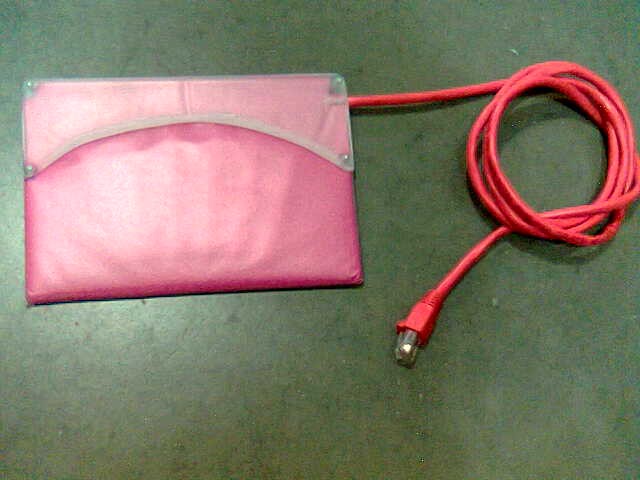
I immediately came up with a concept controller, which consisted six FSRs adhered to a rigid base, and laid out in a way where the musician could kind of "strum" across the sensors with their foot like they would if the guitar were at their feet. I found FSRs and got to work. The first prototype only took me about 4 hours to make (once the FSRs arrived).
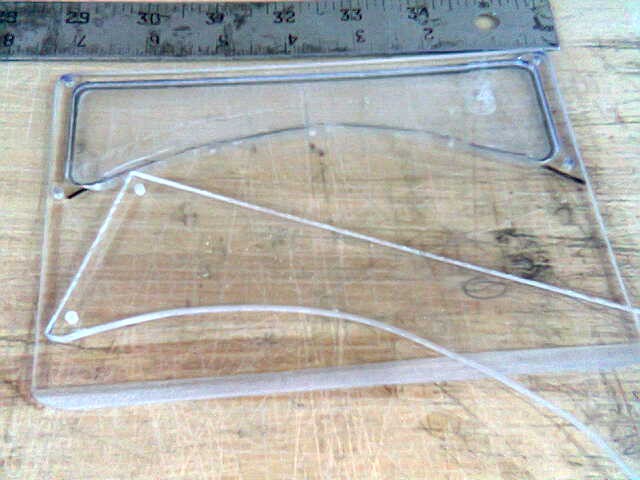
I milled a base out of acrylic with a recess for the wiring.
![]()
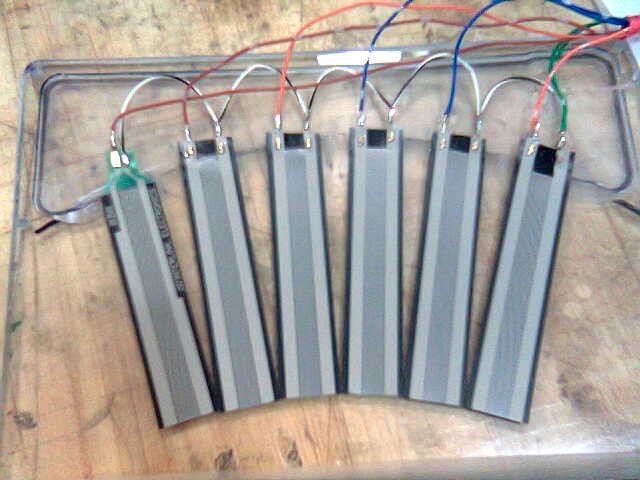
...then cut the FSRs to length, glued them in place, and wired them up:
![]()
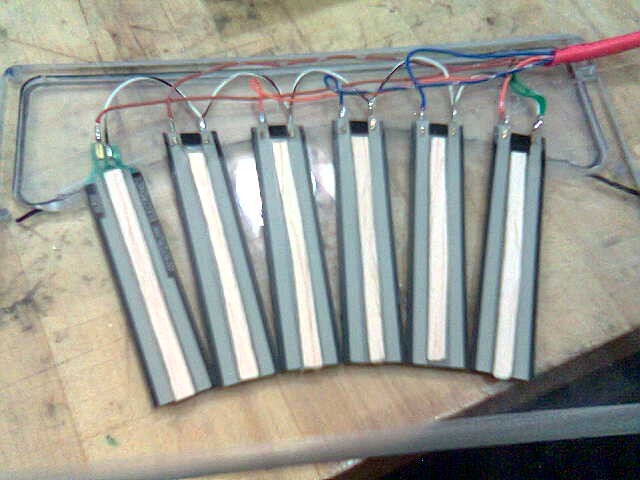
I figured I'd want some way to feel the sensors with my foot, so I cut some balsa strips and adhered those with spray adhesive to the center of each sensor:
![]()
Lastly, I covered the whole thing in nice soft felt, and a quick layer of contact paper (remember covering books in school?) to give it a slippery surface for a stocking'd foot. I also put an adhesive rubber pad on the back to prevent it from slipping on the floor, and a cover for the wire area. Here's the very first prototype of the foot controller!
![]()
The last thing to do was test, and unfortunately I don't have any more pictures of that process. But it worked exactly as it was supposed to! Now that I knew I had a control concept that worked, it was time to figure out how to strum the guitar.
Adaptive Guitar
An electro-mechanical system designed to allow a disabled musician to play the guitar with one hand (and a foot).
 Here's the Pick Bridge, mid-fab, showing my first mount concept, which required holes drilled in the guitar to mount PEM-type bolts. Thumb nuts held the bridge in place, and the slots on the bridge ends allowed horizontal alignment of the whole thing over the strings. I did all of the machining myself.