-
1Bare board assembly (for RPi placement skip to step 2)
Recommended tools and supplies
- Hot air reflow station
- Soldering iron
- Solder paste
- Flux pen
- Tweezers
Component placement
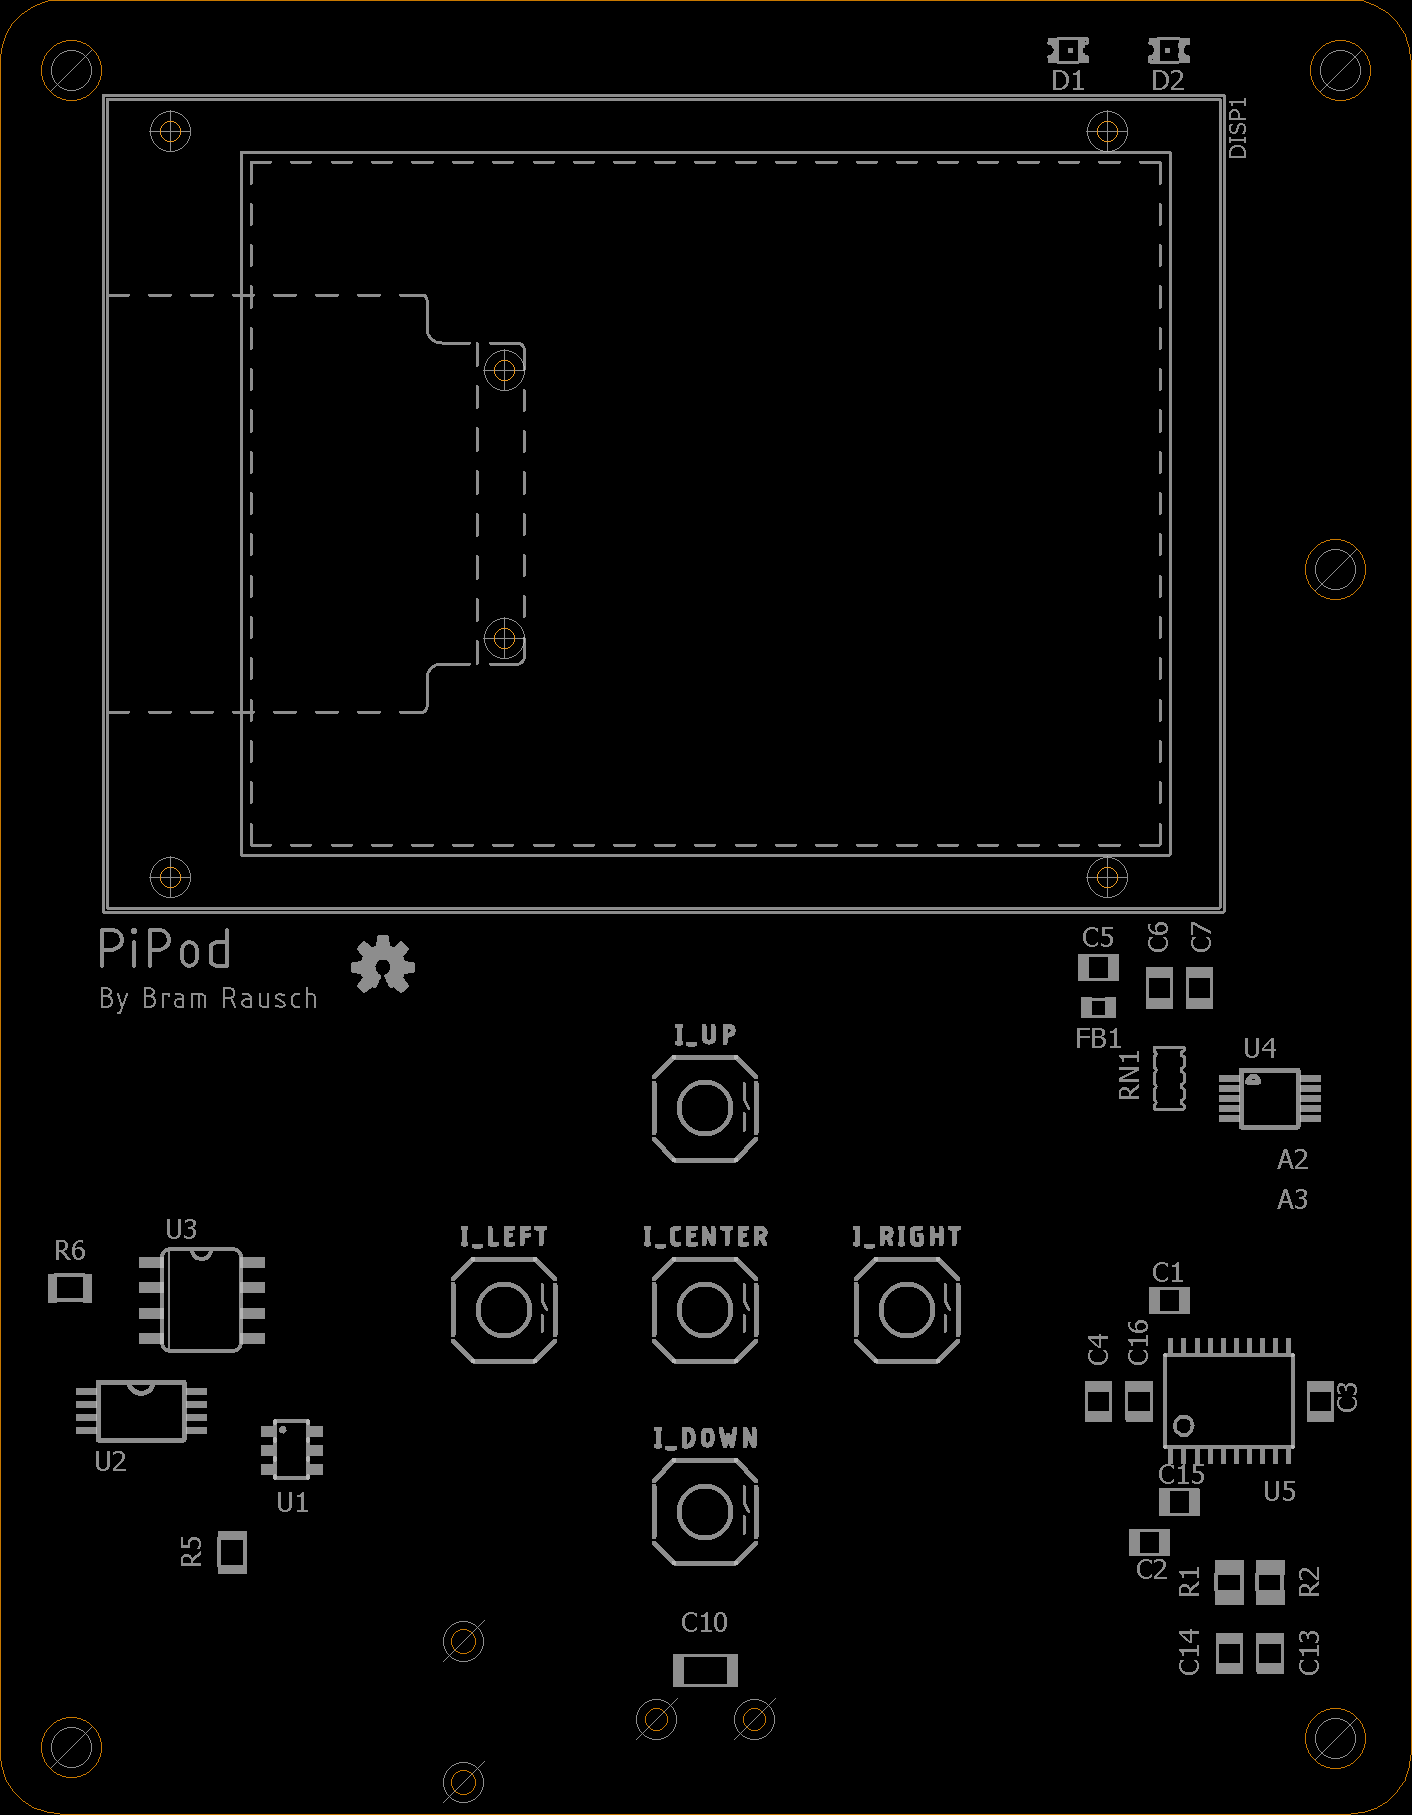
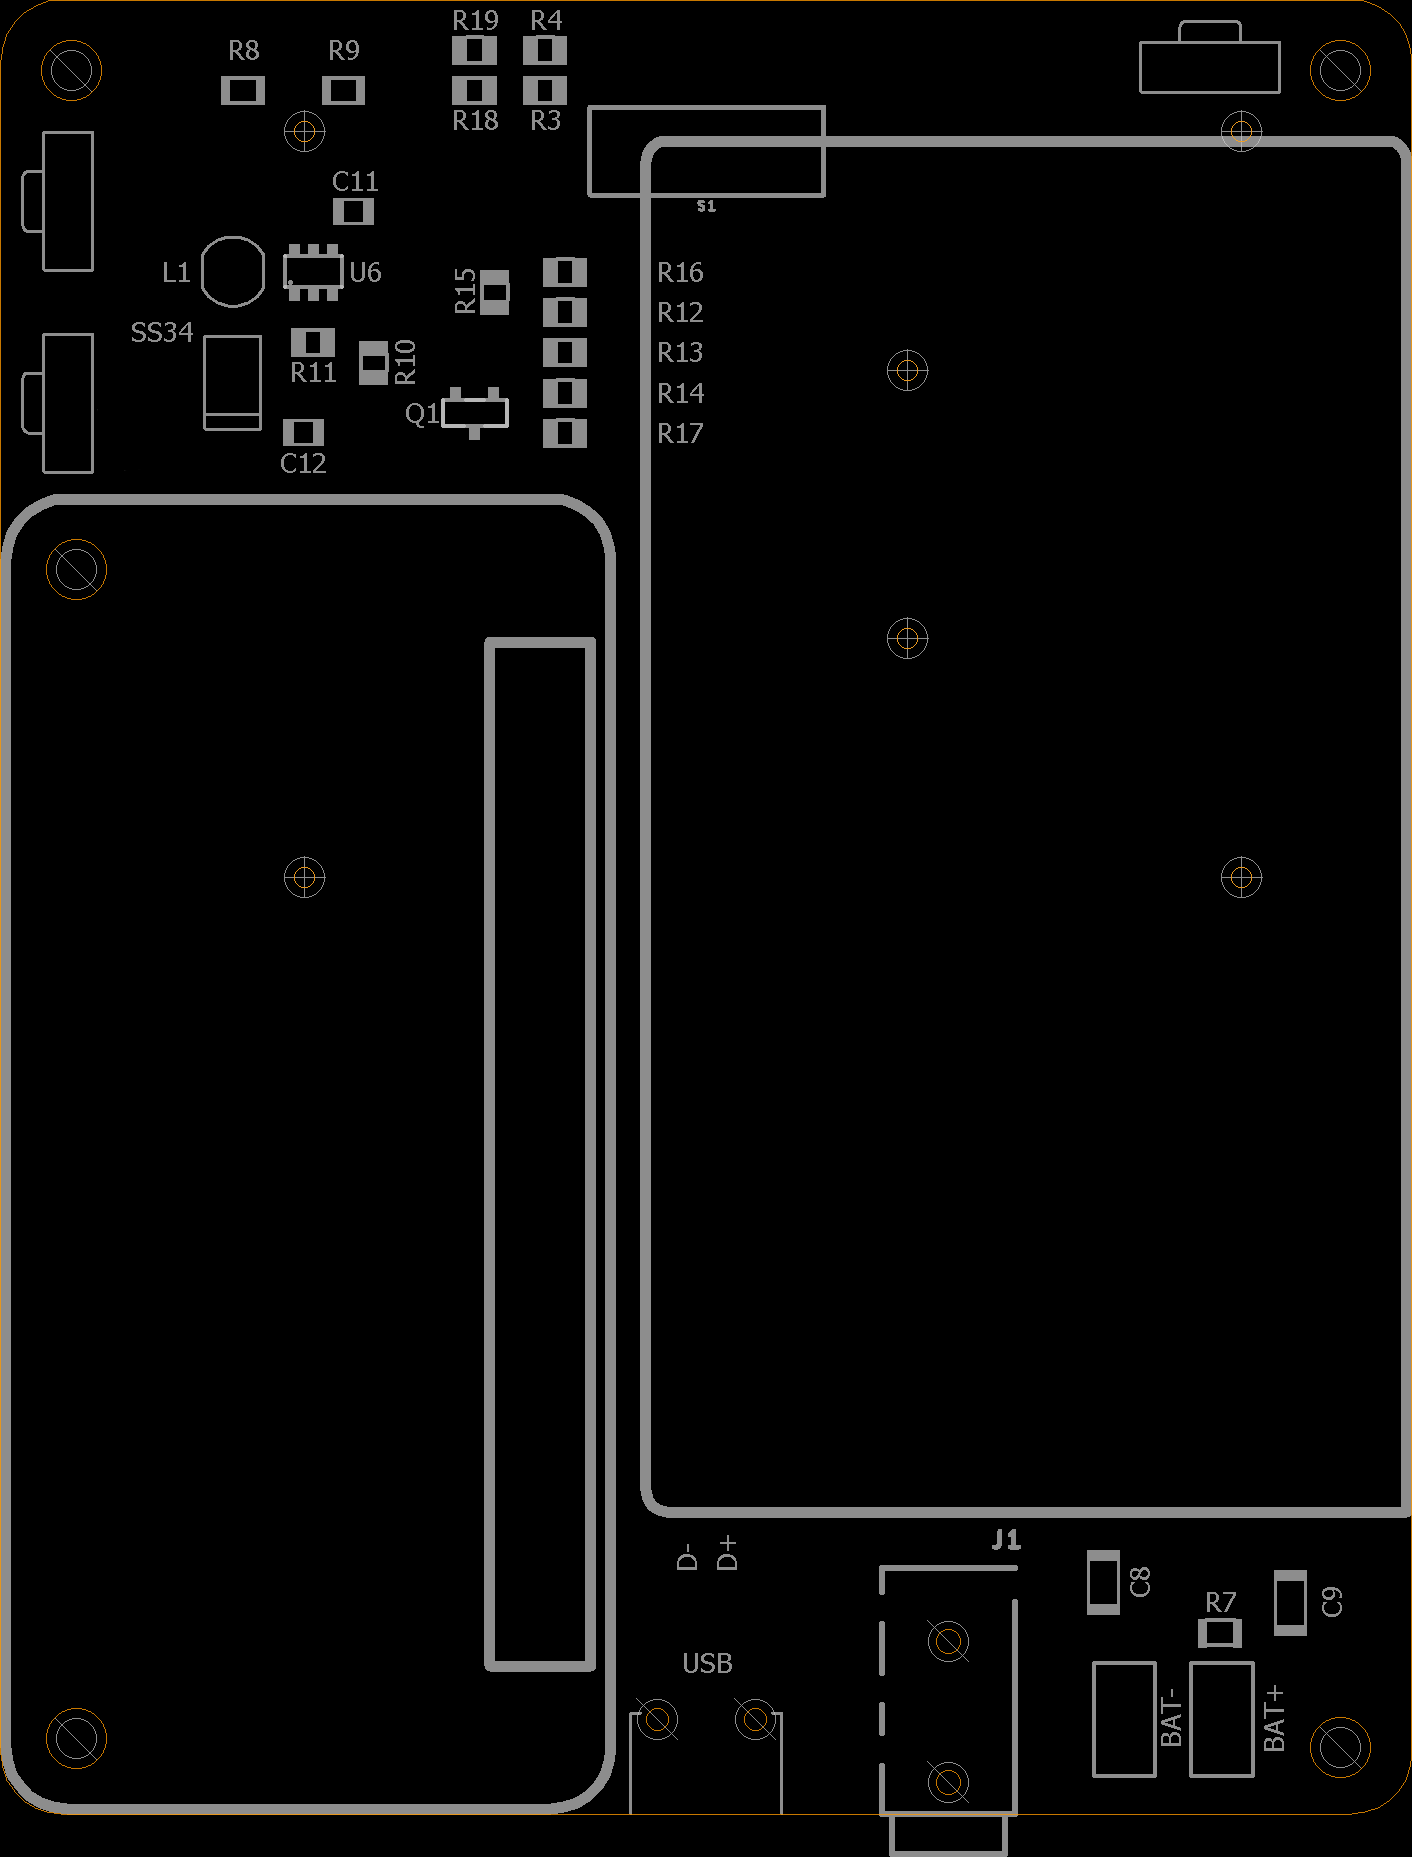
Start by soldering the SMD components to the board using a hot air reflow station. The names on the silkscreen (images bellow) can be matched using the part list.
While placing the SMD components pay attention to the orientation of the MT3608(B6287z) and DW01 IC, below you can find pictures of the orientation.
![Booster circuit Booster circuit]()
MT3608(B6287z) ![Battery circuit Battery circuit]()
DW01 orientation ![Silkscreen Top Silkscreen Top]()
Silkscreen Top ![Silkscreen Bottom Silkscreen Bottom]()
Silkscreen Bottom -
2Aligning the Raspberry pi
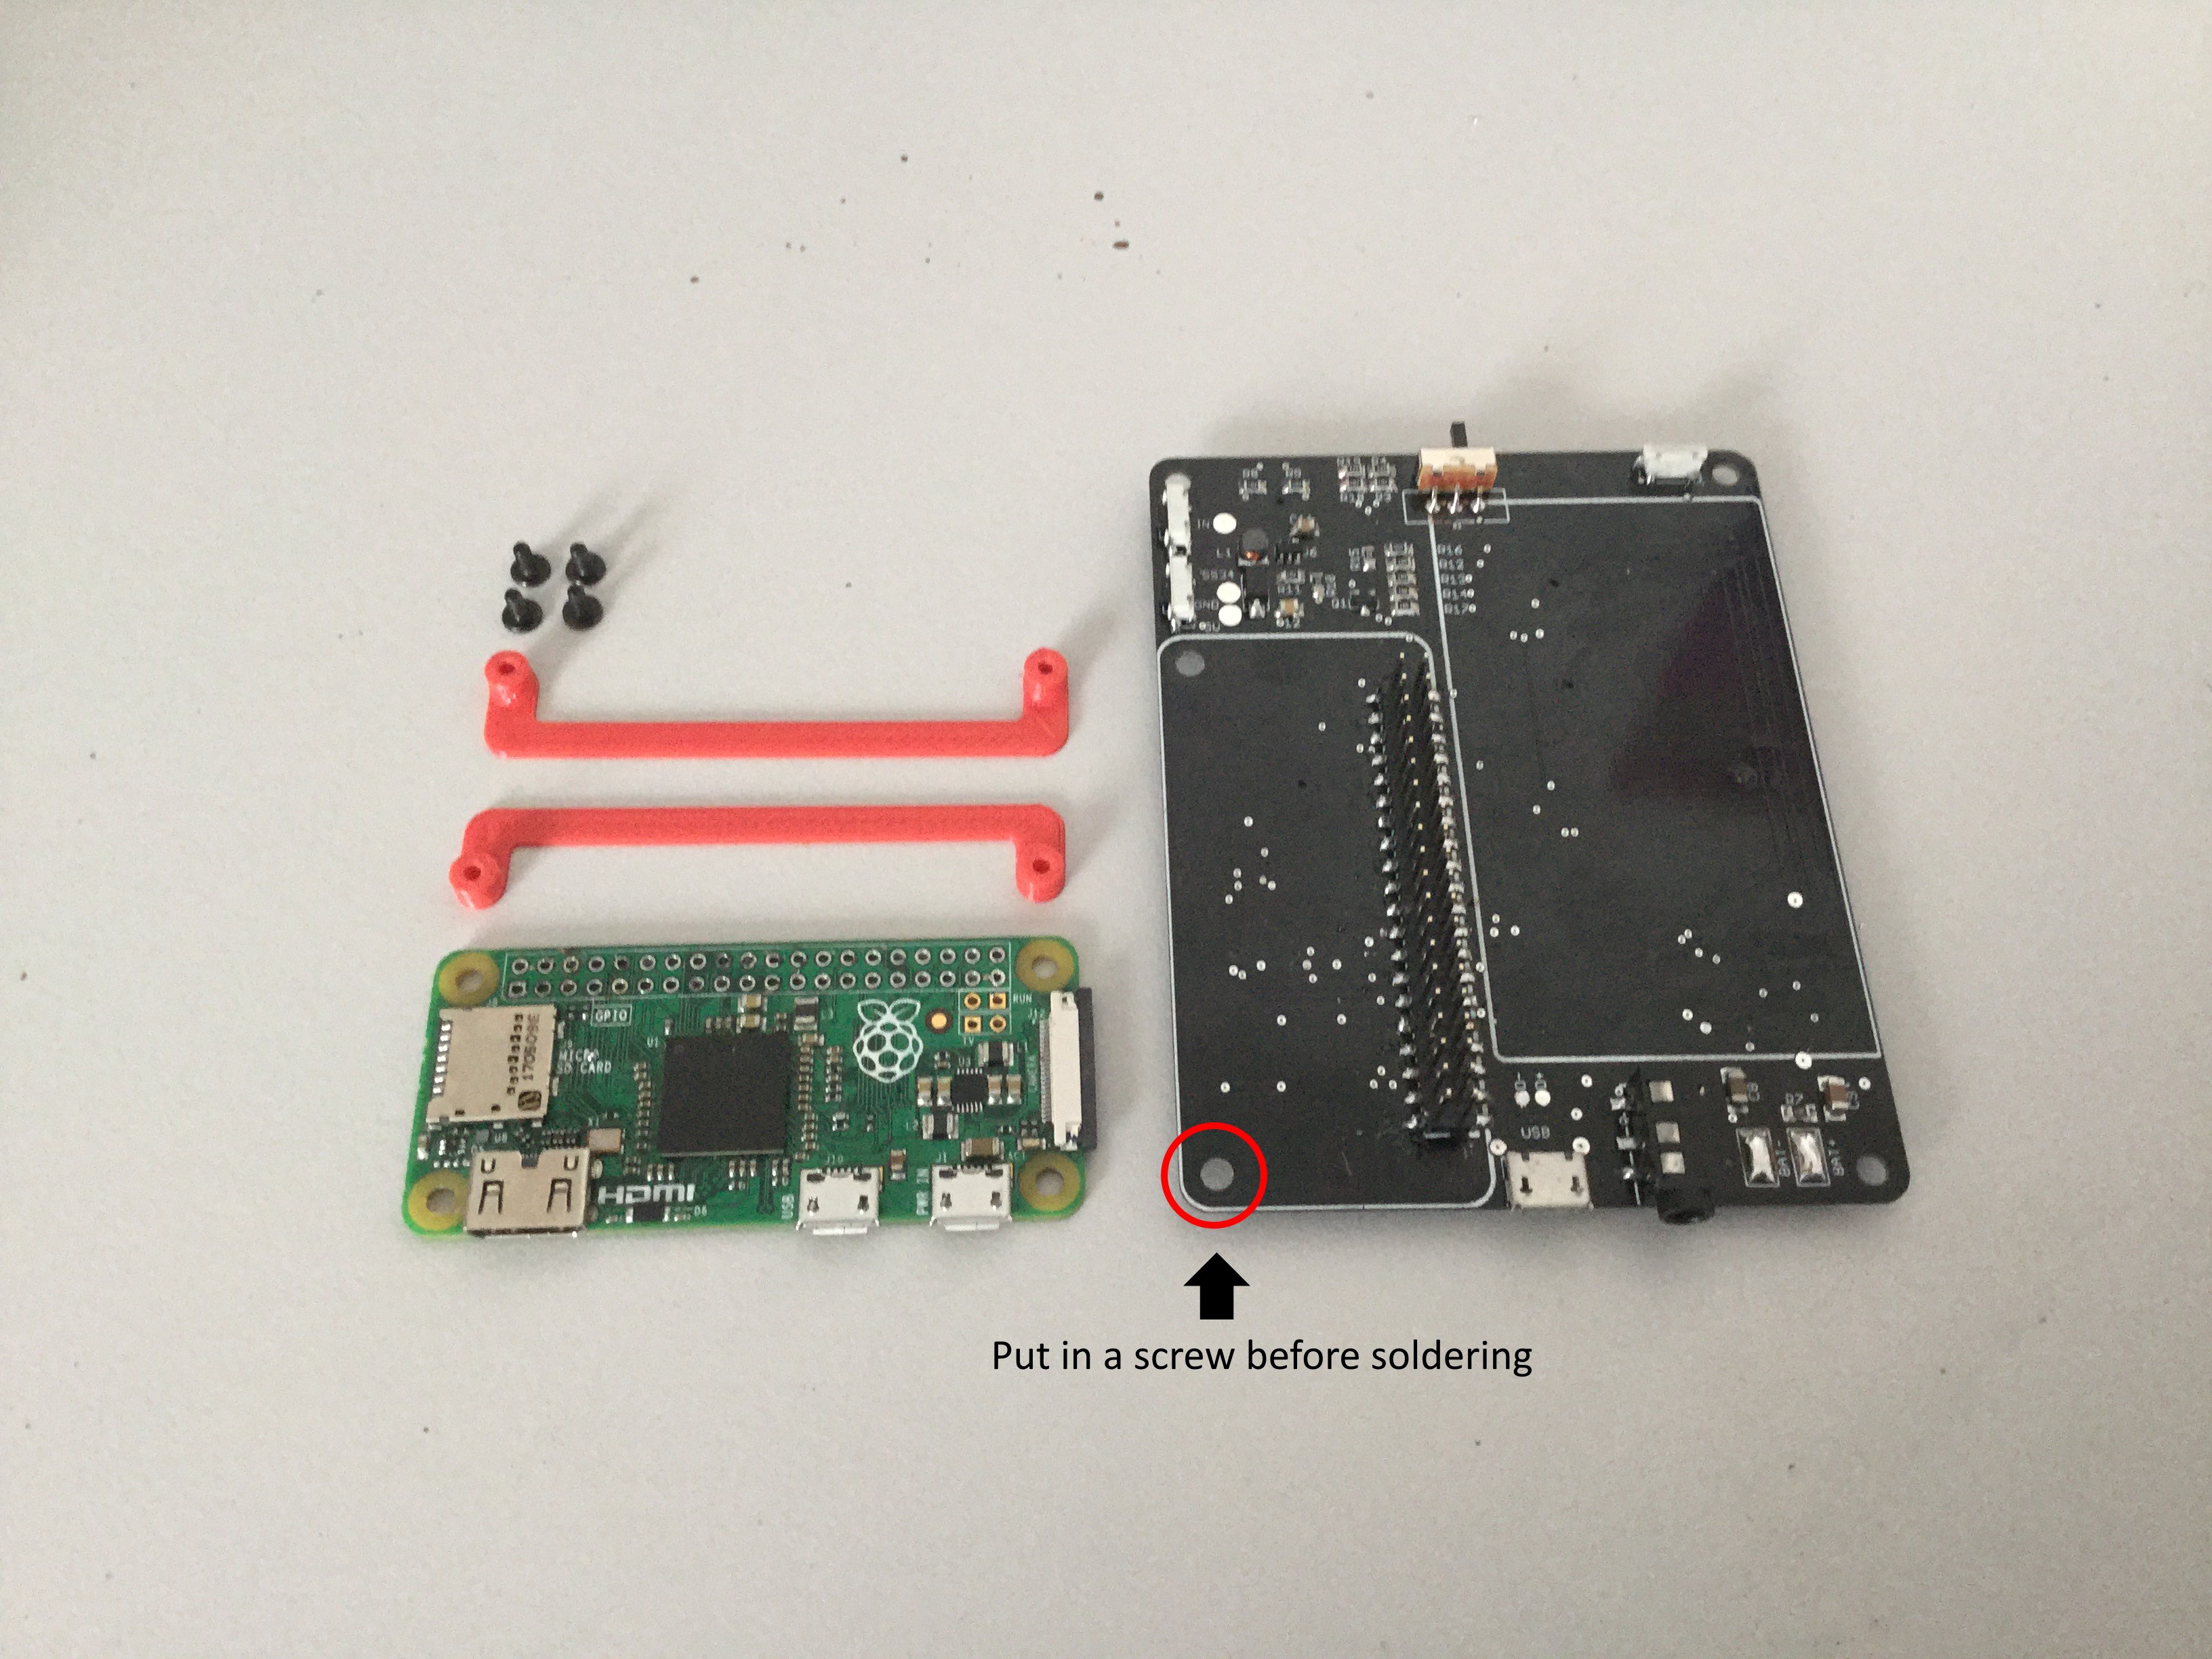
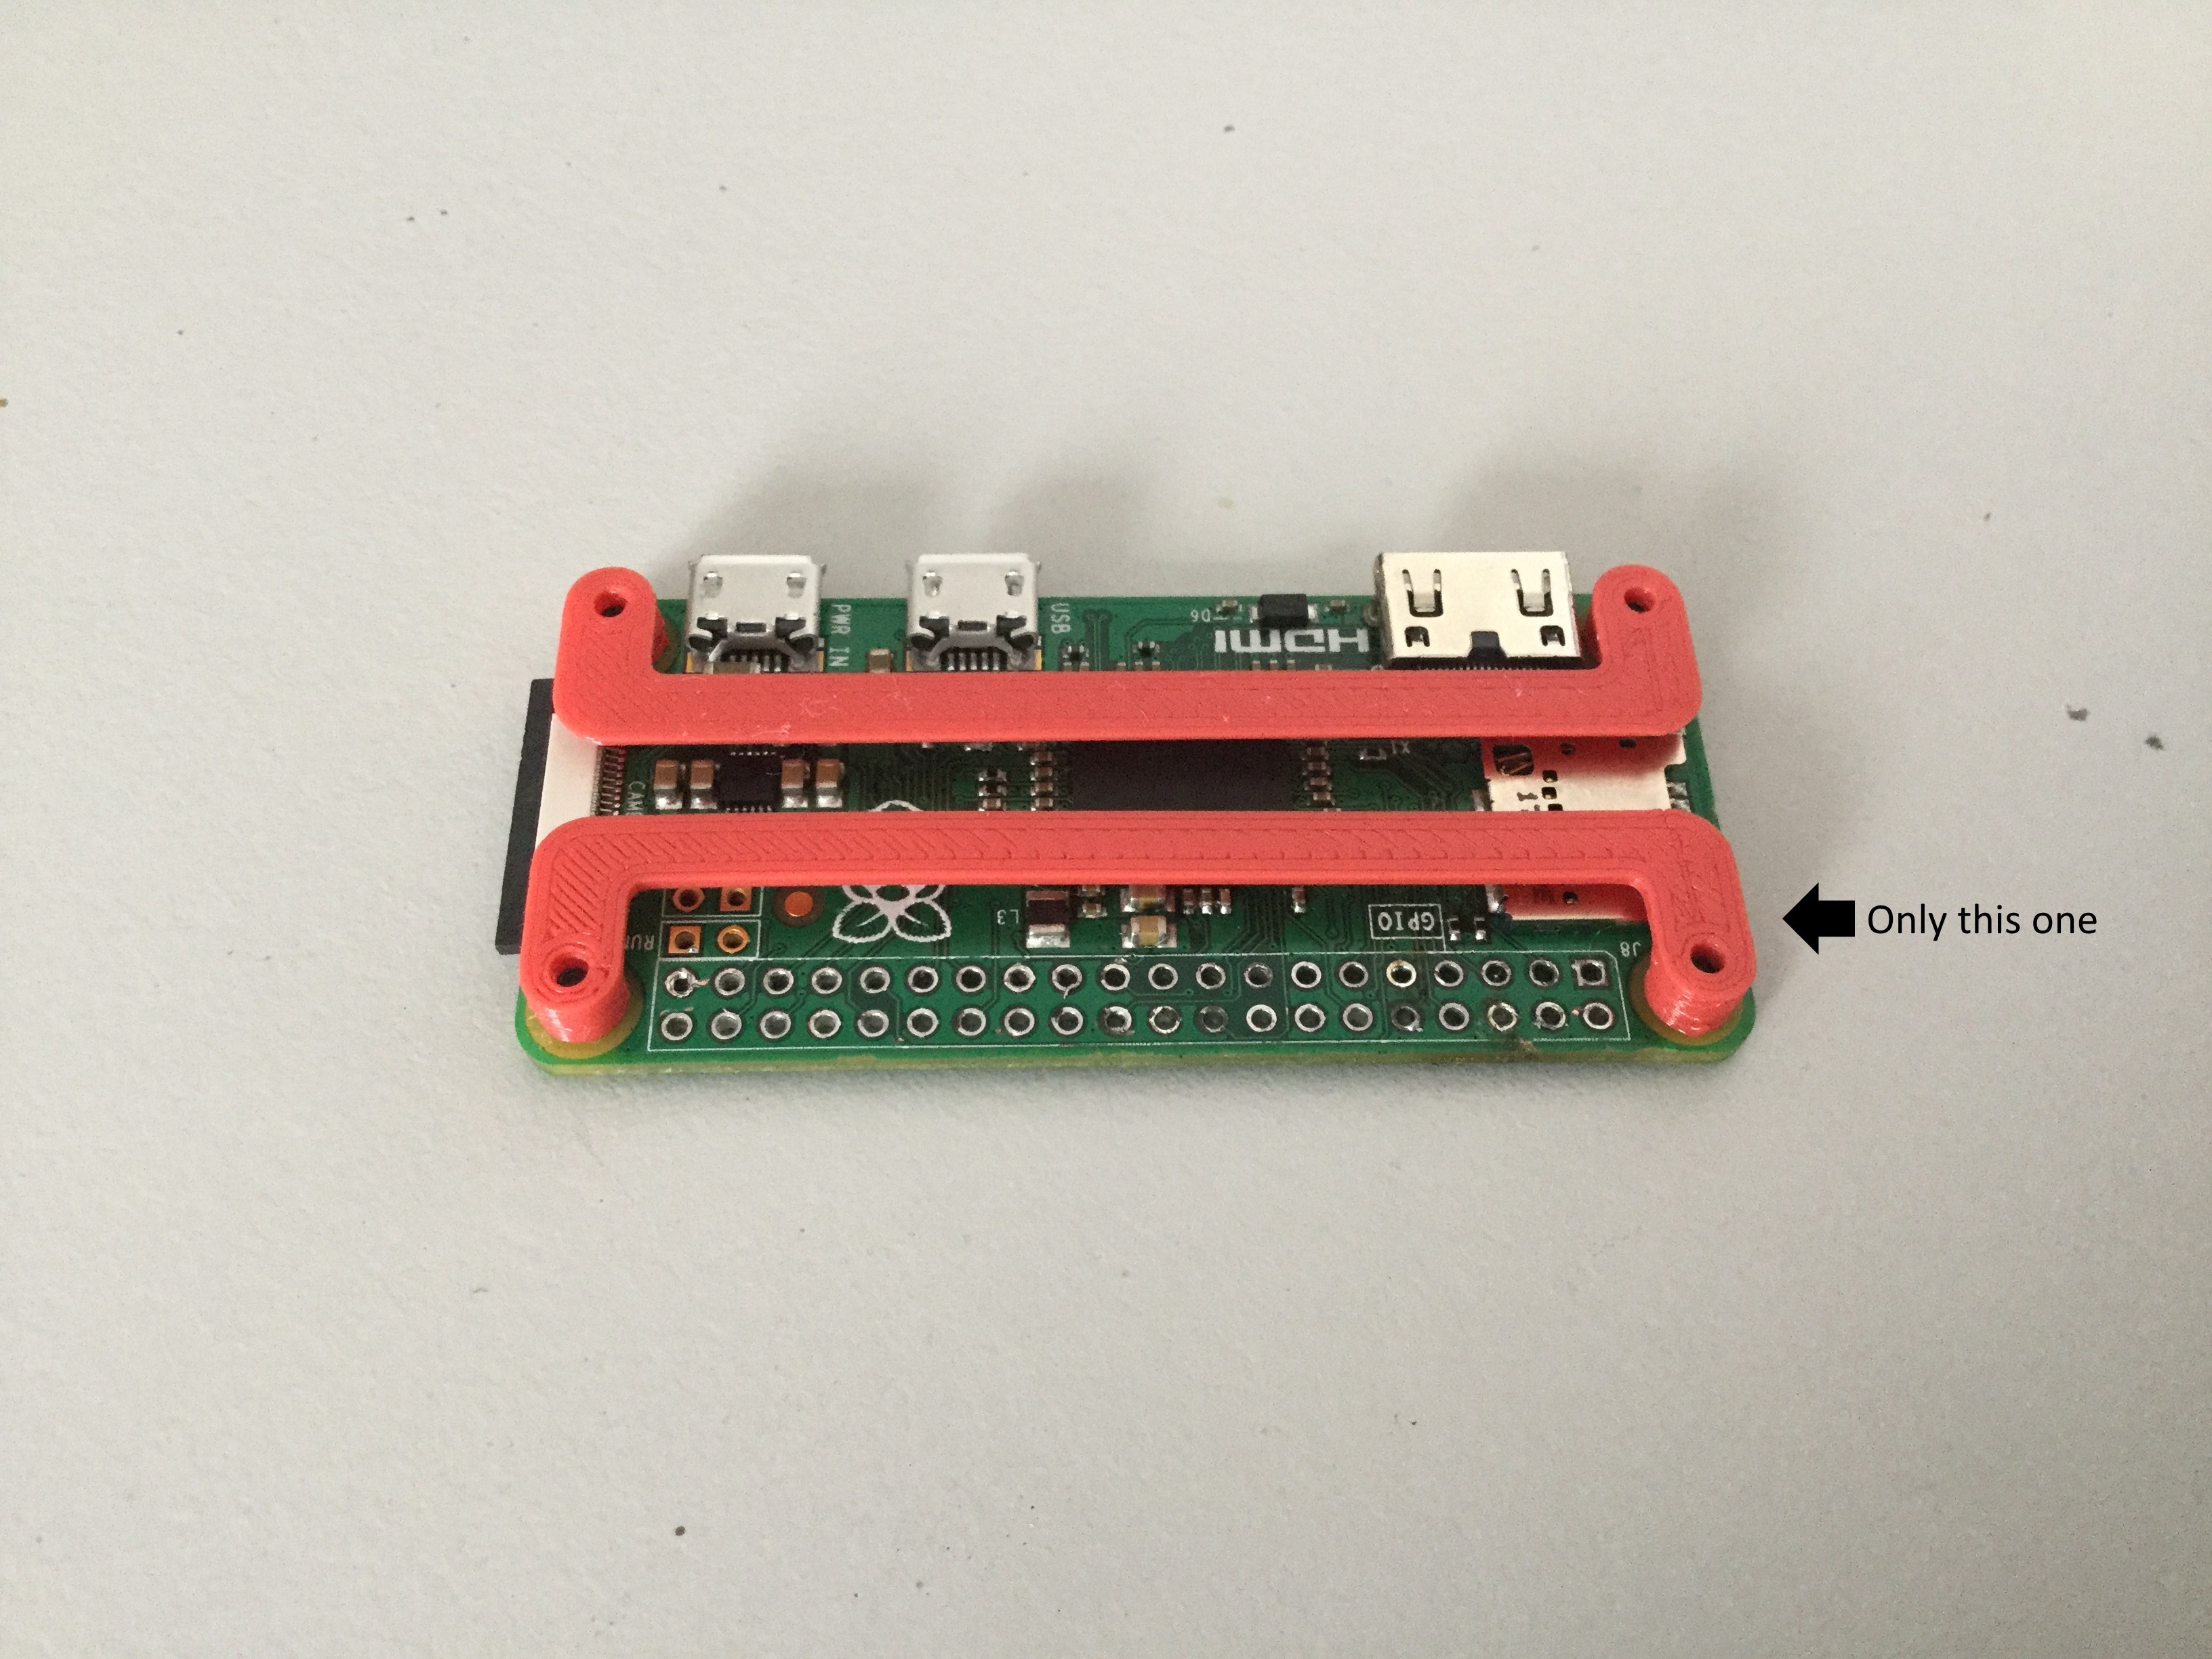
Align and solder the Raspberry Pi to the PiPod board with the 3D printed spacers. These make sure that the RPi is spaced 4mm from the PiPod board to fit the case.
1. Get all the parts
- 4x m2 screws
- 1x RPi spacers
- 1x RPi zero
- 1x PiPod board
![]()
2. Put a screw in the hole that is circled red
3. Screw down the spacer
4. Align the edges of the two PCBs and solder down the RPi
![]()
-
3Case assembly
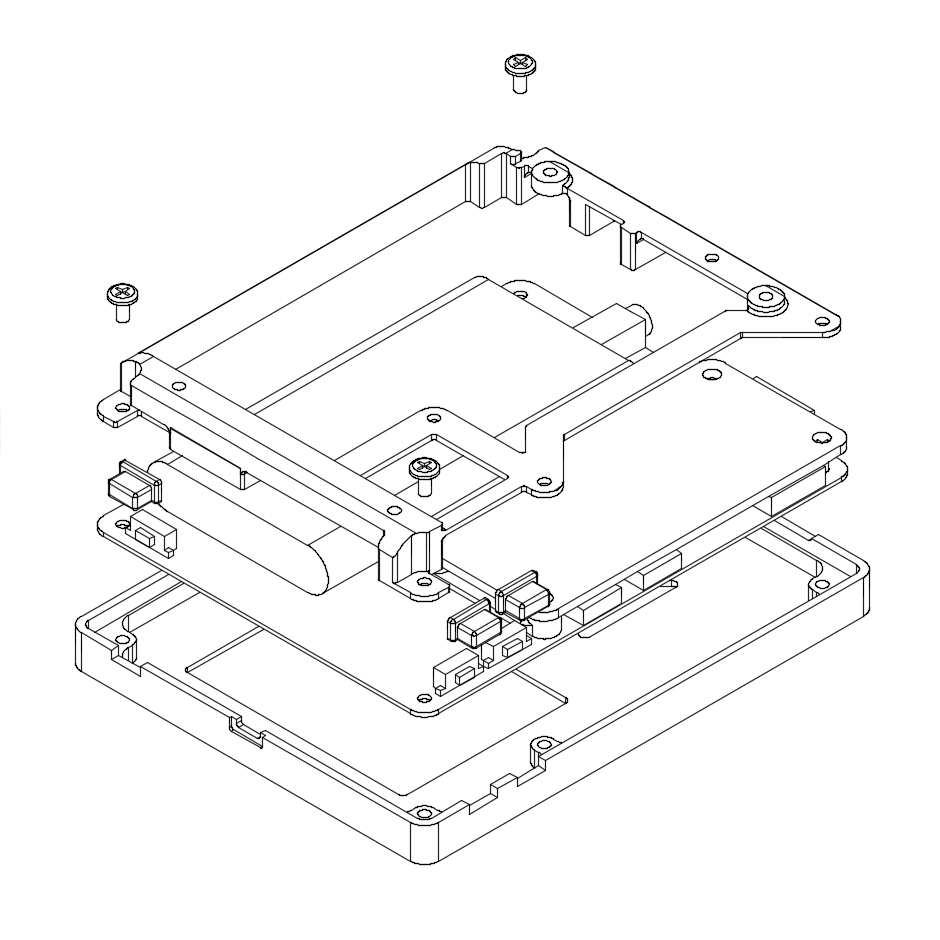
1. Place the top down
2. Put the navigation buttons in place
3. Put the PiPod board on top (make sure you've put in the screw between the RPi and PCB circled in red)
4. Put the side buttons in place and make sure they have a loose fit. If they are too tight you might want to file them down.
5 & 6. Put the frame on top and screw it in place, make sure you don't overtighten them.
![]()
![]()
7a. Screw the frame into the RPi frame using the red screws.
7b. Place the printed rings under the RPi and screw down the blue screws.
![]()
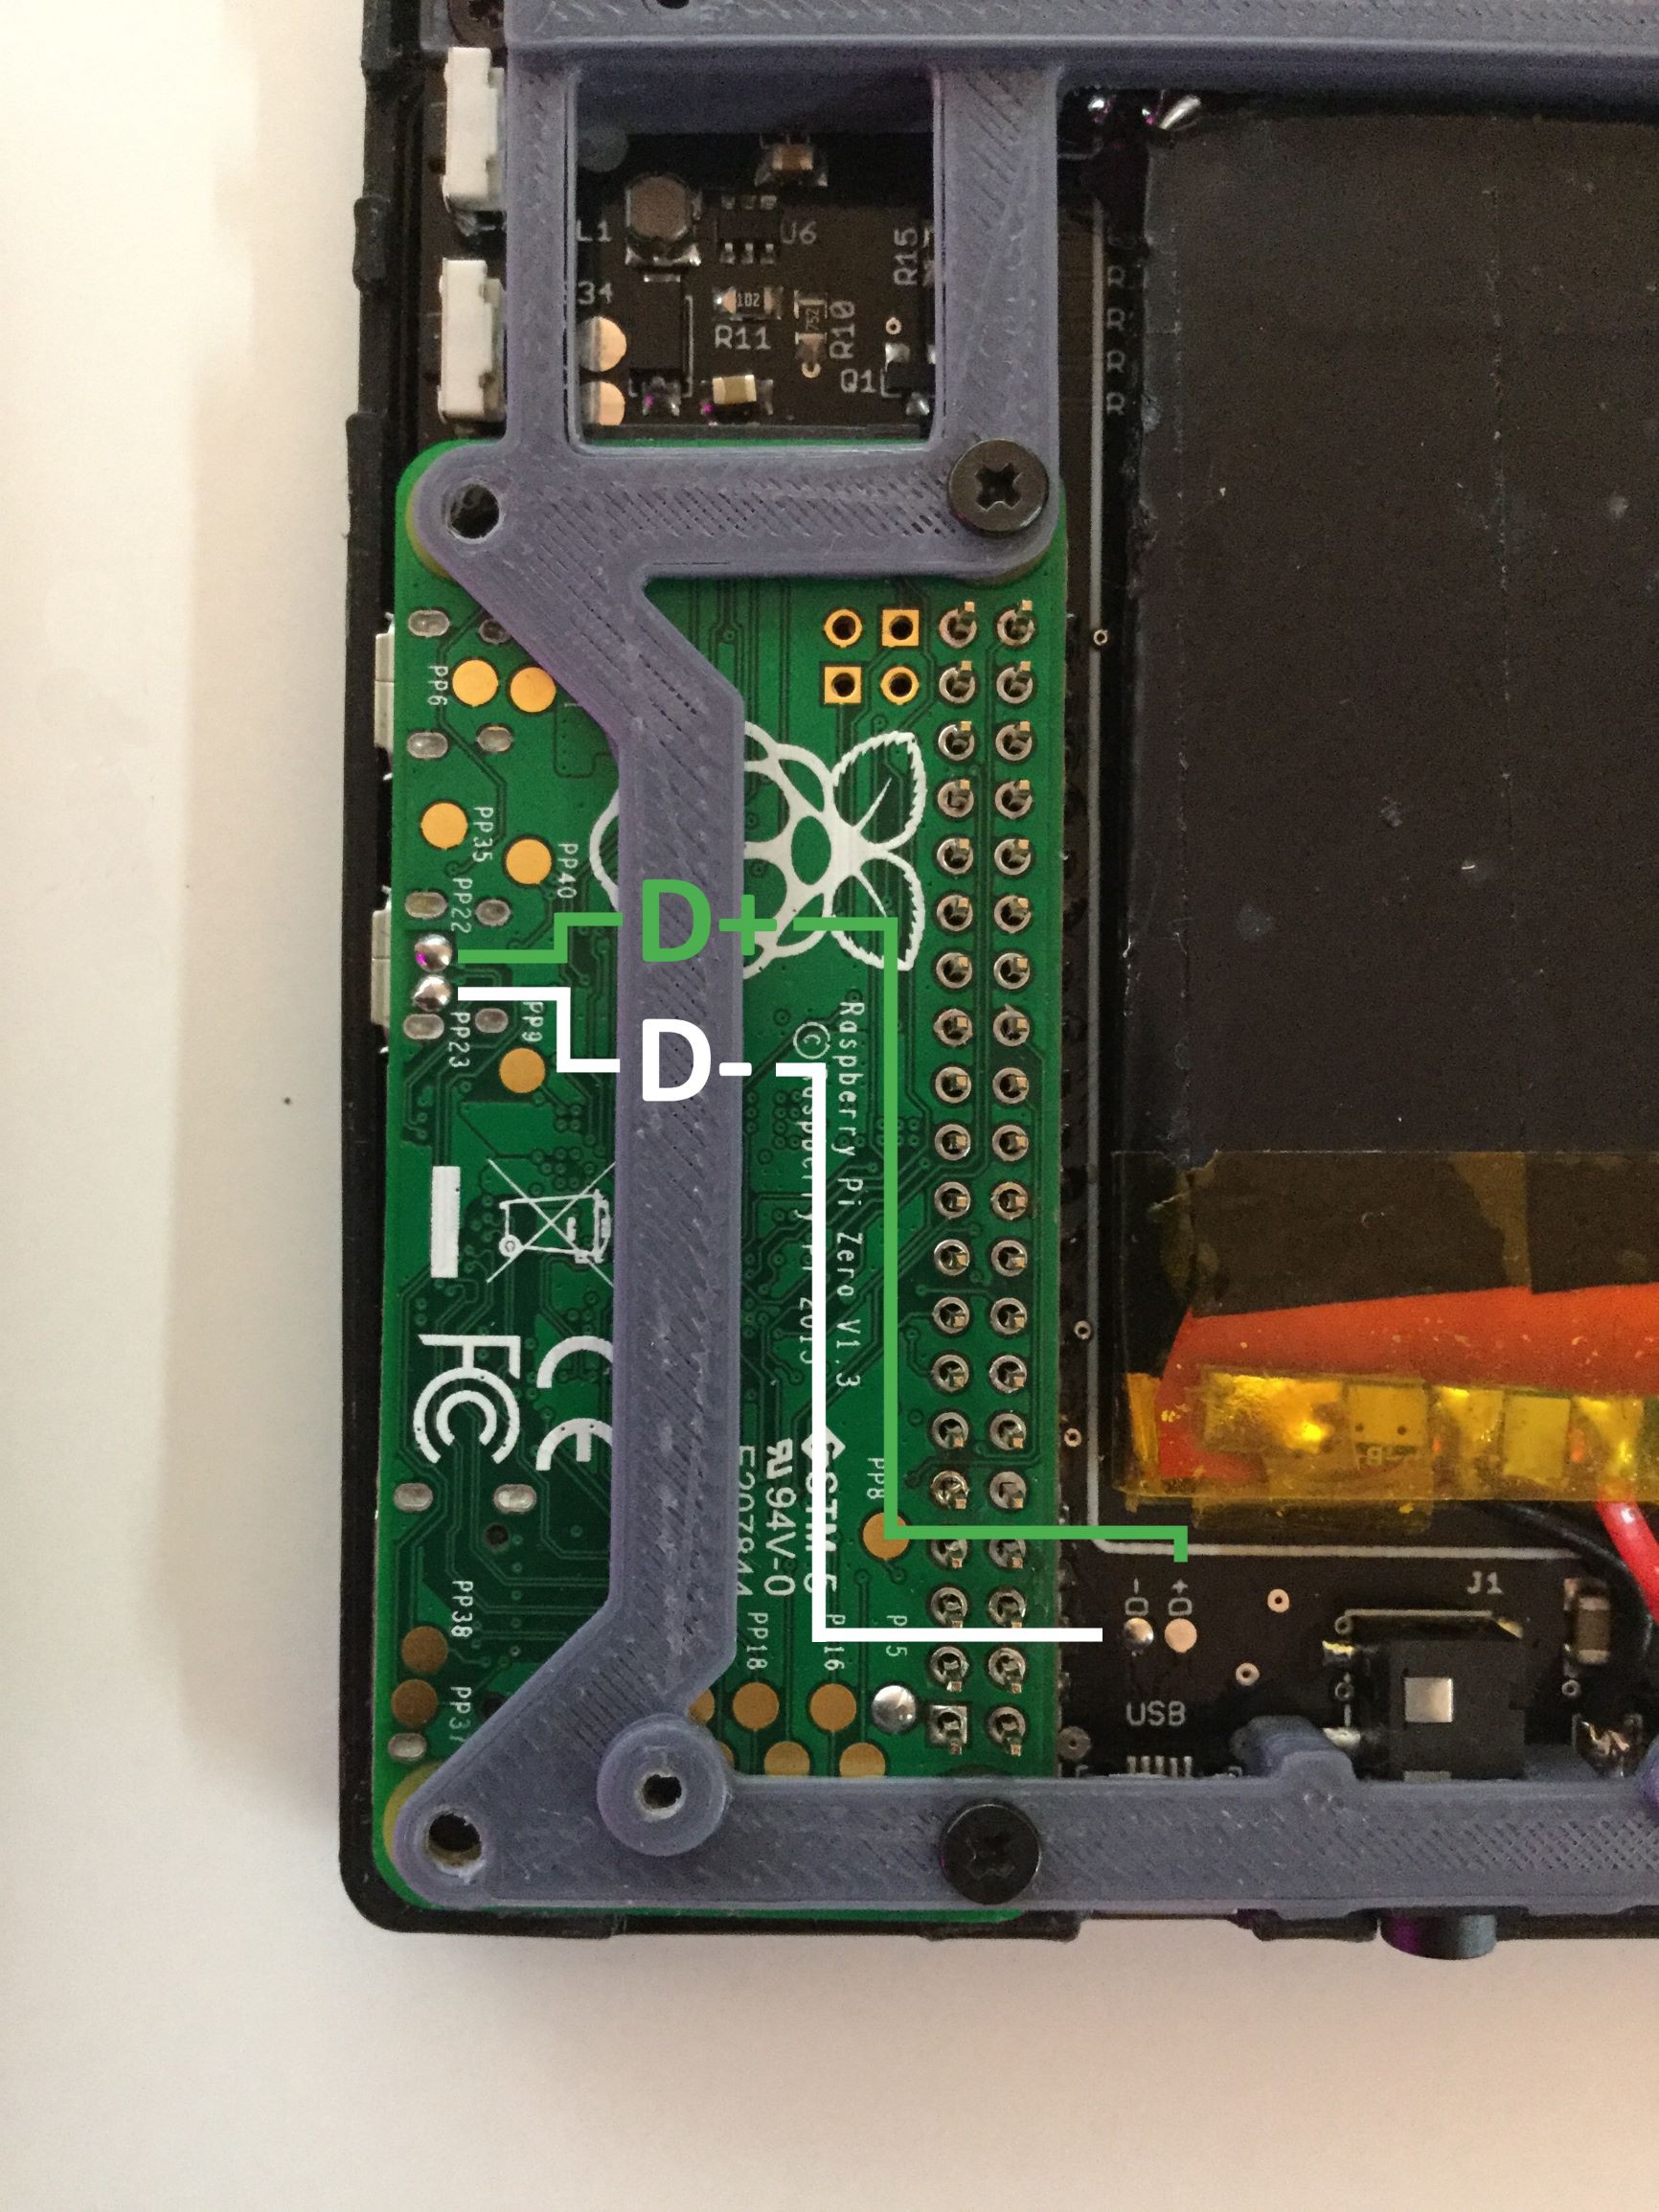
8. Solder the USB data connections
![]()
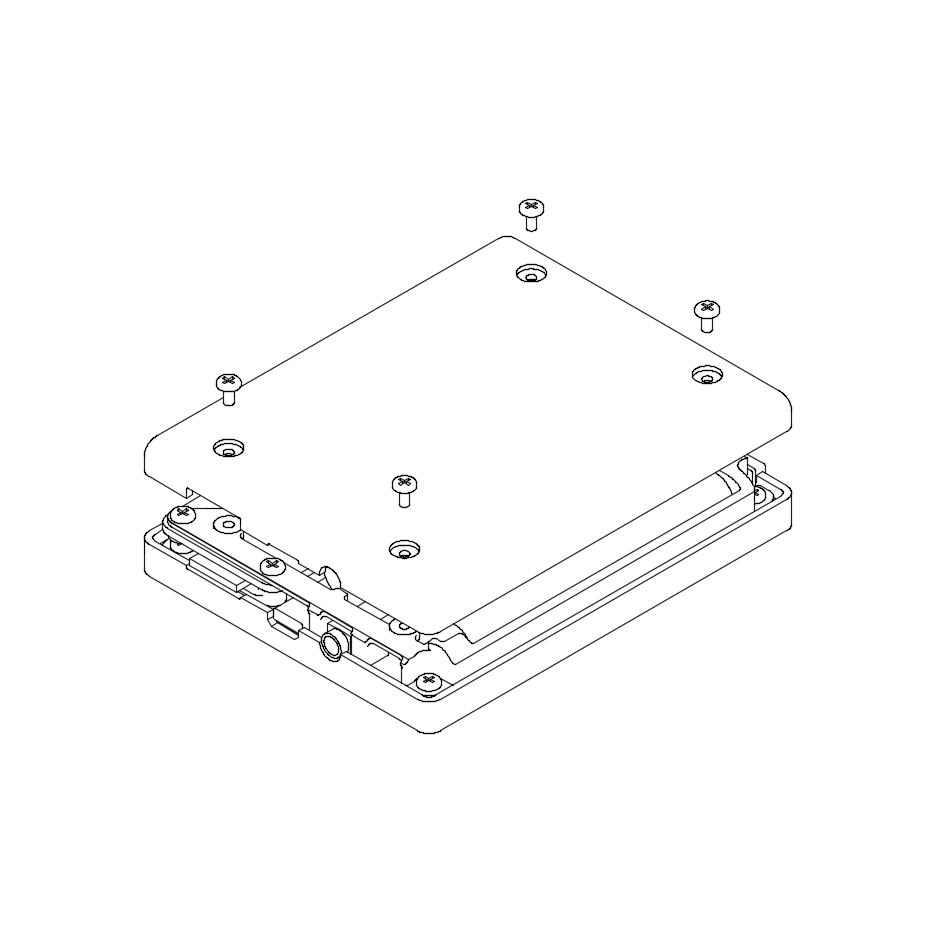
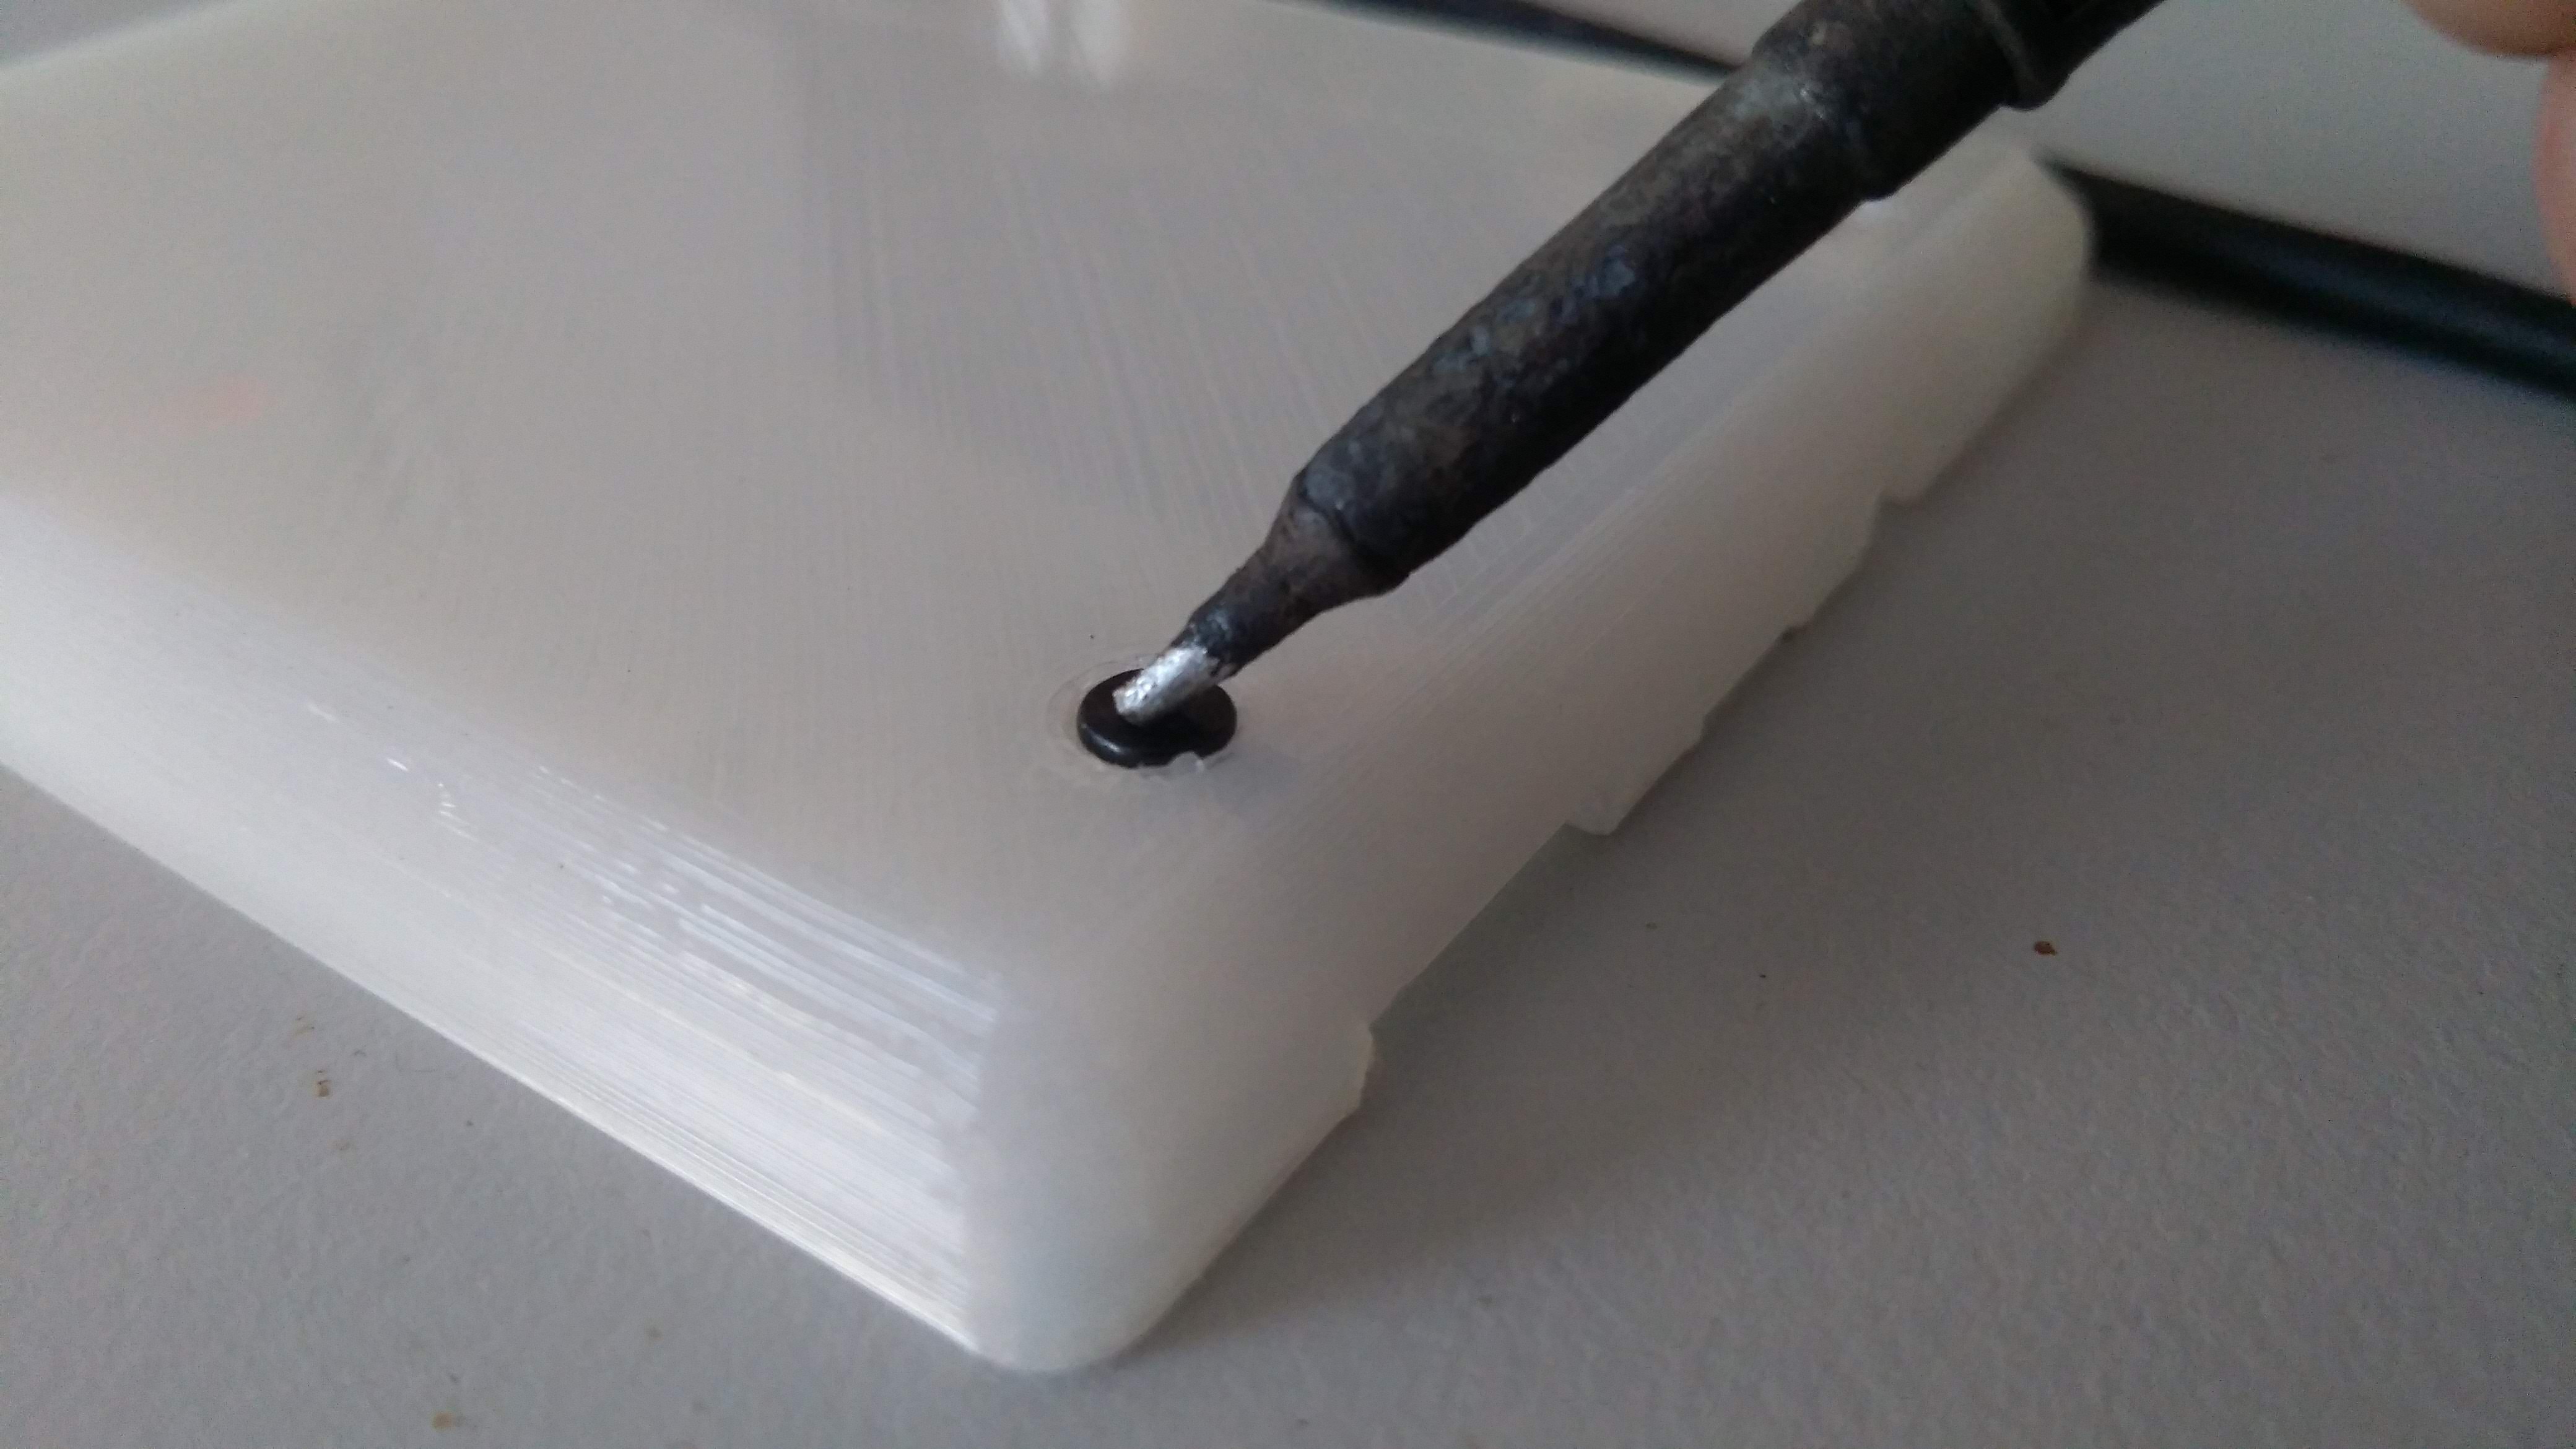
9. Before putting it all together remove the support from the countersunk holes. After the support has been removed use a screw and soldering iron to clean it up / make the top of the screw flush with the surface.
Put the bottom part in place and test if the buttons aren't too tight. If this is the case file down the bottom part.If everything fits nicely screw the part down.
![]()
![]()
-
4Installation
Download the custom image here
Adding music:
- Insert the SD card into your PC
- If your SD card is bigger then 8GB you can expand the third partition on the SD card to fit more music. (If you are using windows this partition can't currently be bigger then 32GB thanks to Microsoft)
- Locate the partition with the musicPlayer software and copy you music to the Music folder
- Put the SD card into your PiPod and boot
- Go to Menu -> Settings and select Update library when your library has been updated it will automatically restart the interface and you can access your music
Connecting over USB:
Use a serial console to log in to the RPi using the following information
Baudrate: 115200
Username: pi
Password: raspberry - Insert the SD card into your PC
 bram
bram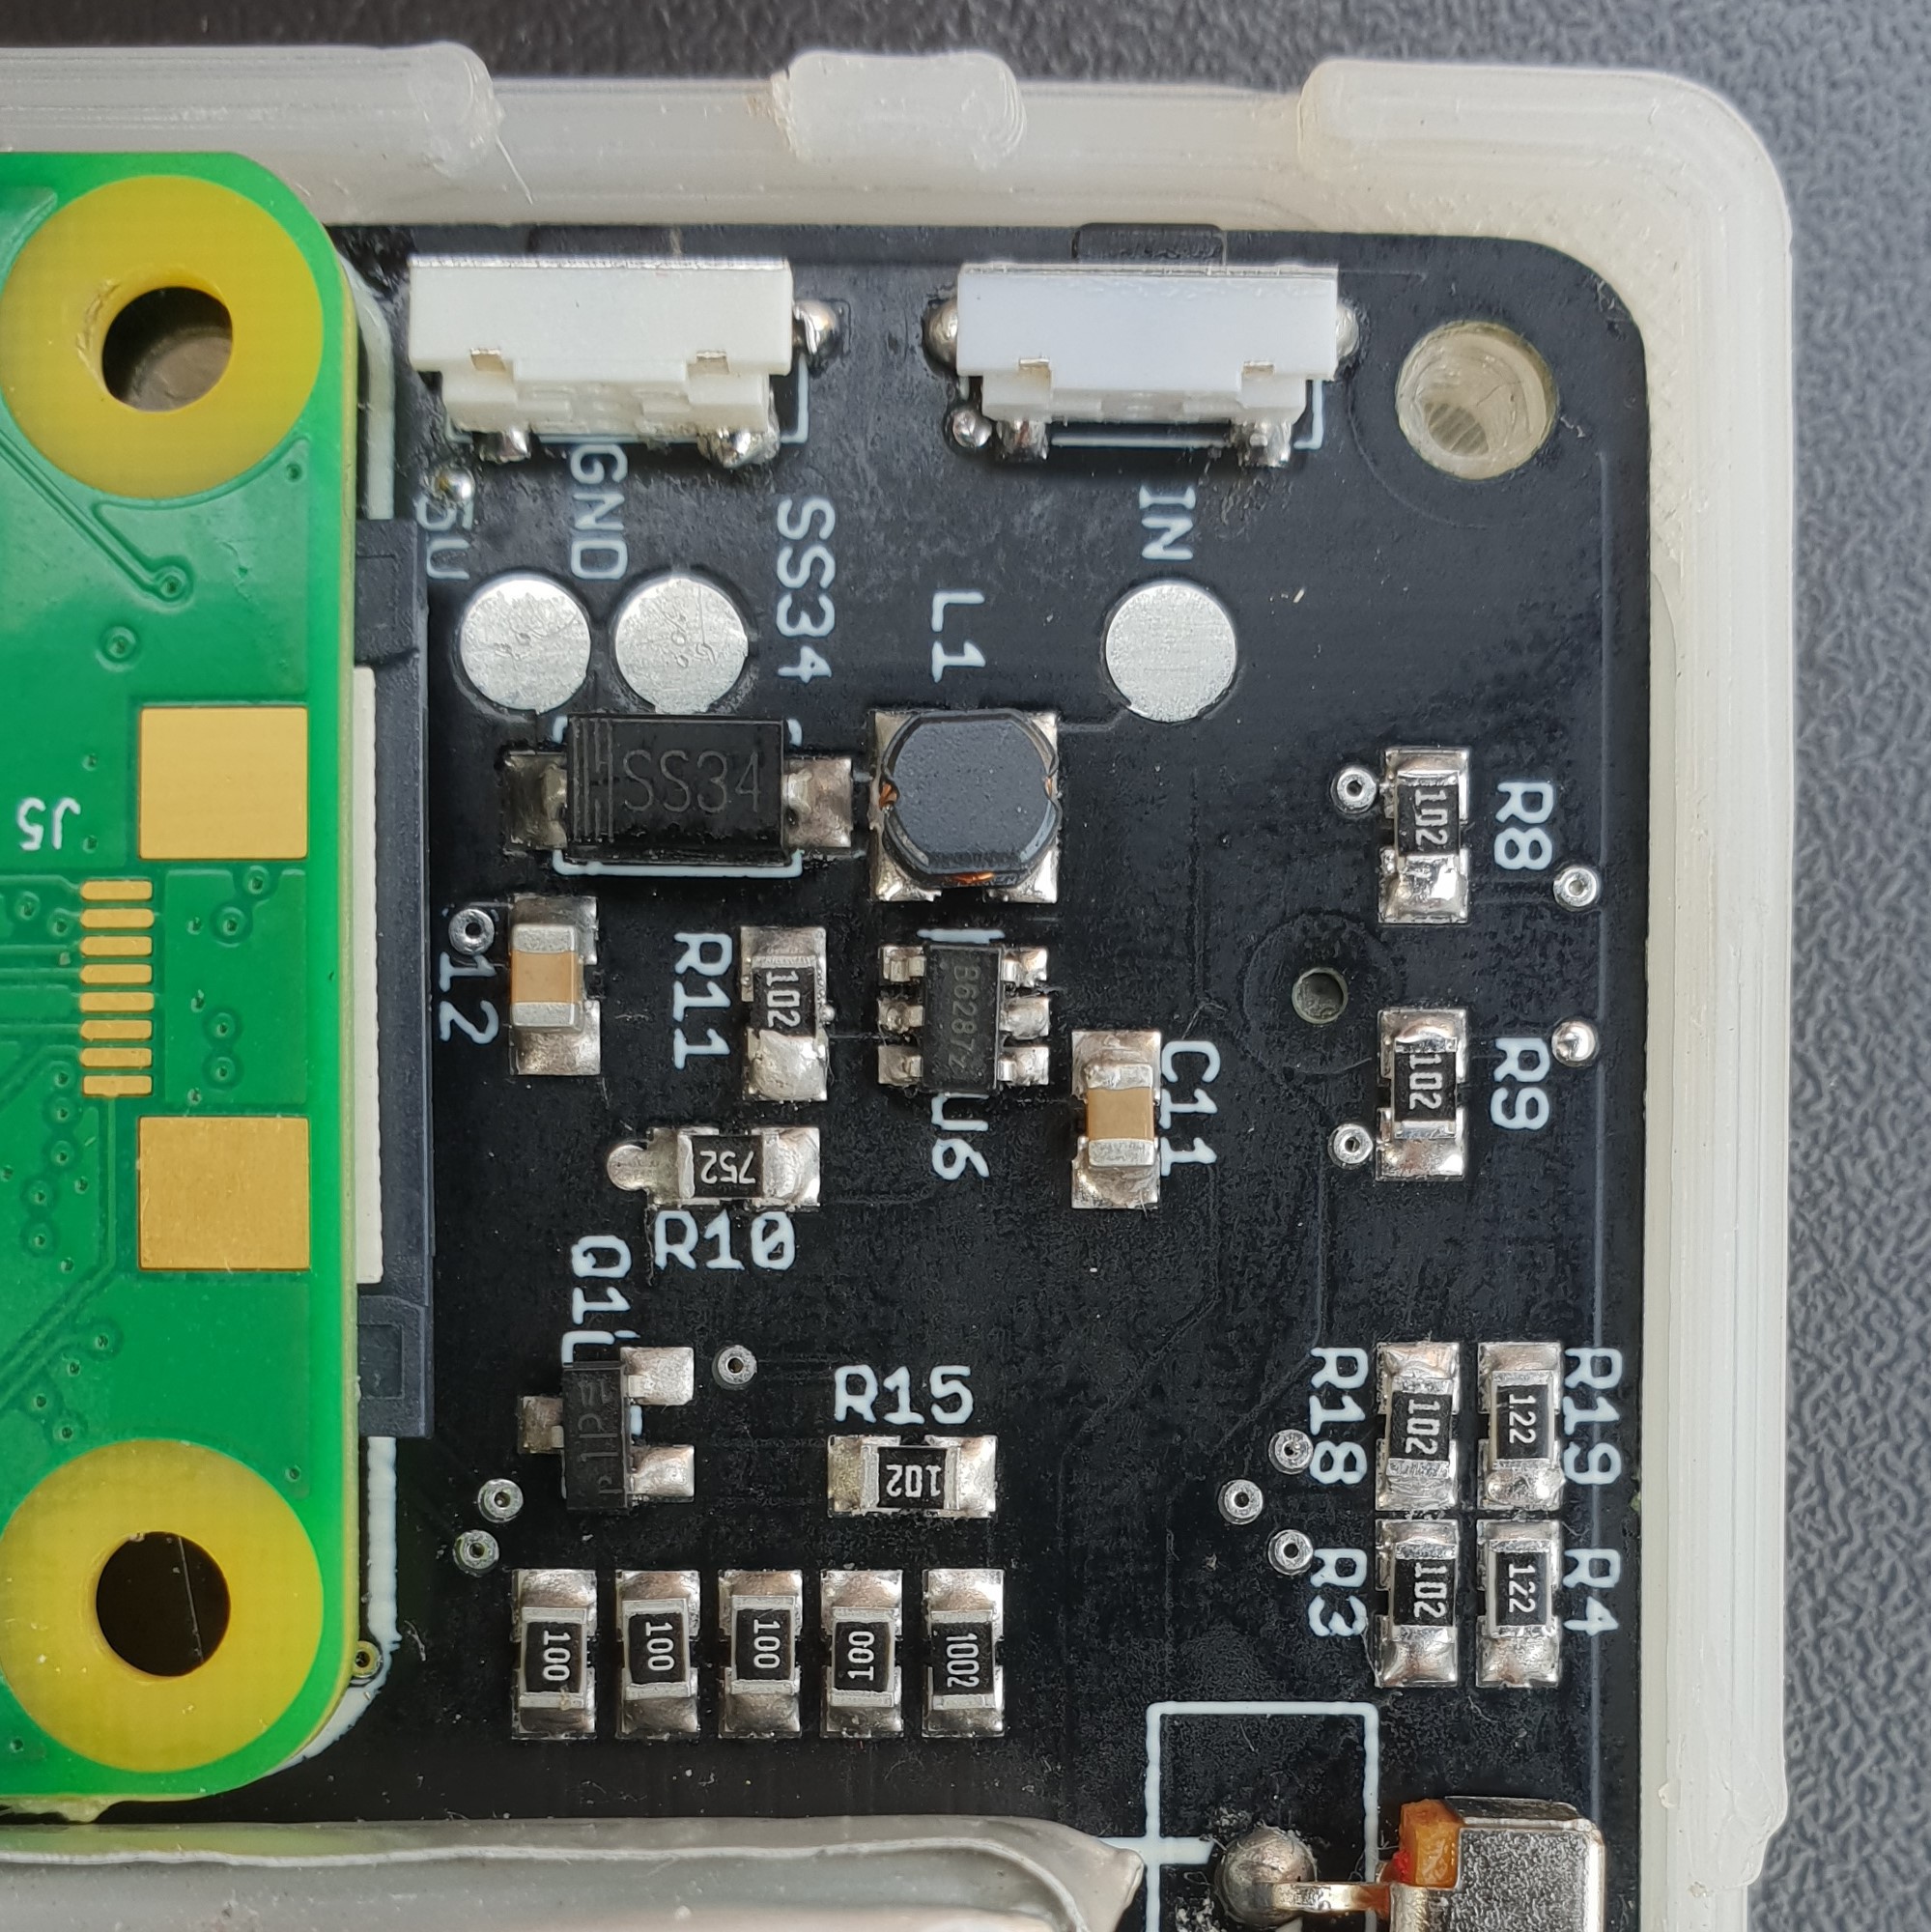



Discussions
Become a Hackaday.io Member
Create an account to leave a comment. Already have an account? Log In.