-
Log Entry 2
09/26/2017 at 23:32 • 0 commentsSadly, I have had to put the project on hold for a little while due to a car accident. Also my access to the 3d printer has timed out and I will need to buy one now, instead of borrowing one. I am currently trying to figure out the capacitors and wiring so when i do get a new printer, I can continue with assembling the coil gun.
Cheers!
-
Log Entry 1: Progress So Far
07/31/2017 at 00:32 • 0 commentsin this log ill add pictures for all of the components ive printed so far. I am currently printing the inner barrel (with coil stops) at about 15.3" (388.5 mm) tall with about a 1.25" radius. Did a few test prints for the interface between the barrel and upper housing to make sure it was snug. Used a 45 degree chamfer on the the tip of the barrel receiver on the upper housing. Personally found this to be the easiest way to line up the barrel and the hole in the upper housing.
After dropping the jerk and acceleration values on the printer it seems to be printing out fine. Will also upload picture.
Worth mentioning. Tried two times to print the upper housing. Every time the print has failed. Still much to learn on 3d-printing. First attempt print upper housing, didn't include spot for the push-rod. Reprinted after adding push-rod slot, printed jammed. Guess my basement is too dusty.
![]()
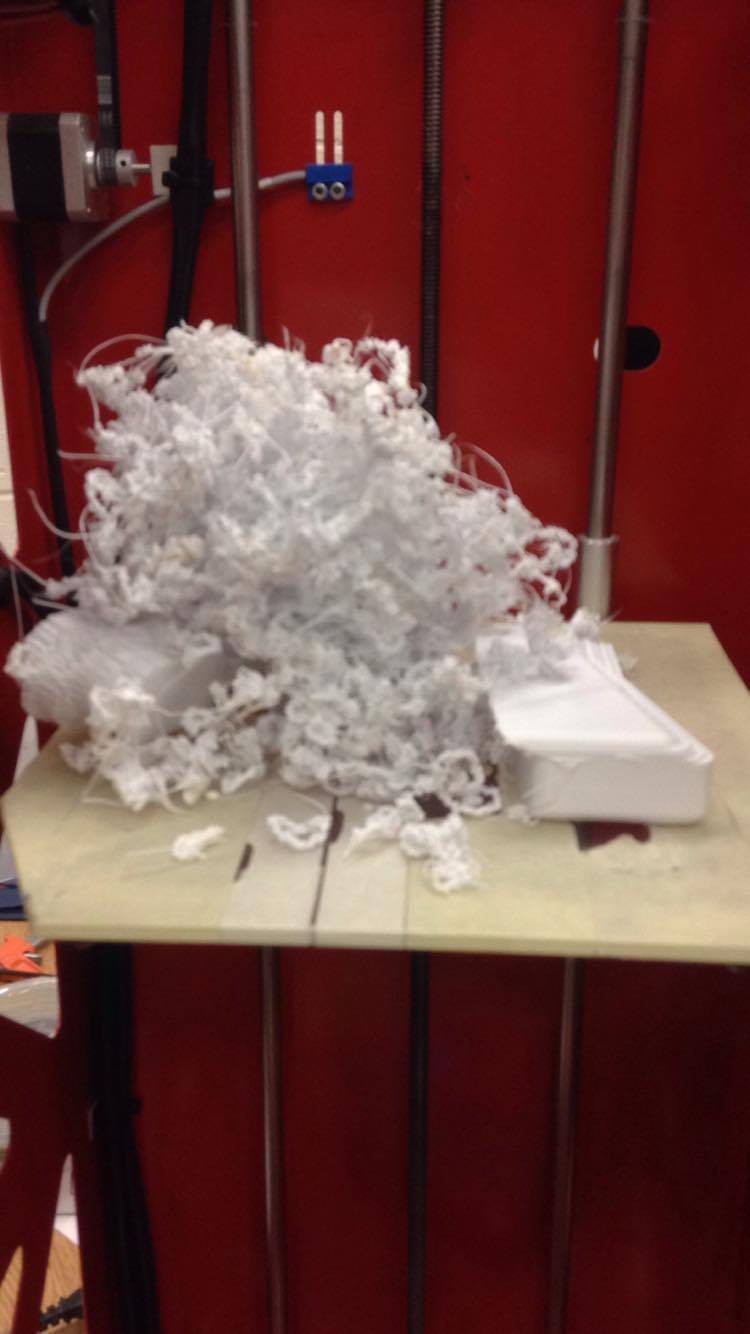
what happened on my first attempt to print both the upper housing and grip. Forgot to enable filament retraction, causing multiple layer slips.
![]()
In the failed print there were more layer slips in the upper housing since it was taller than the grip.
![]()
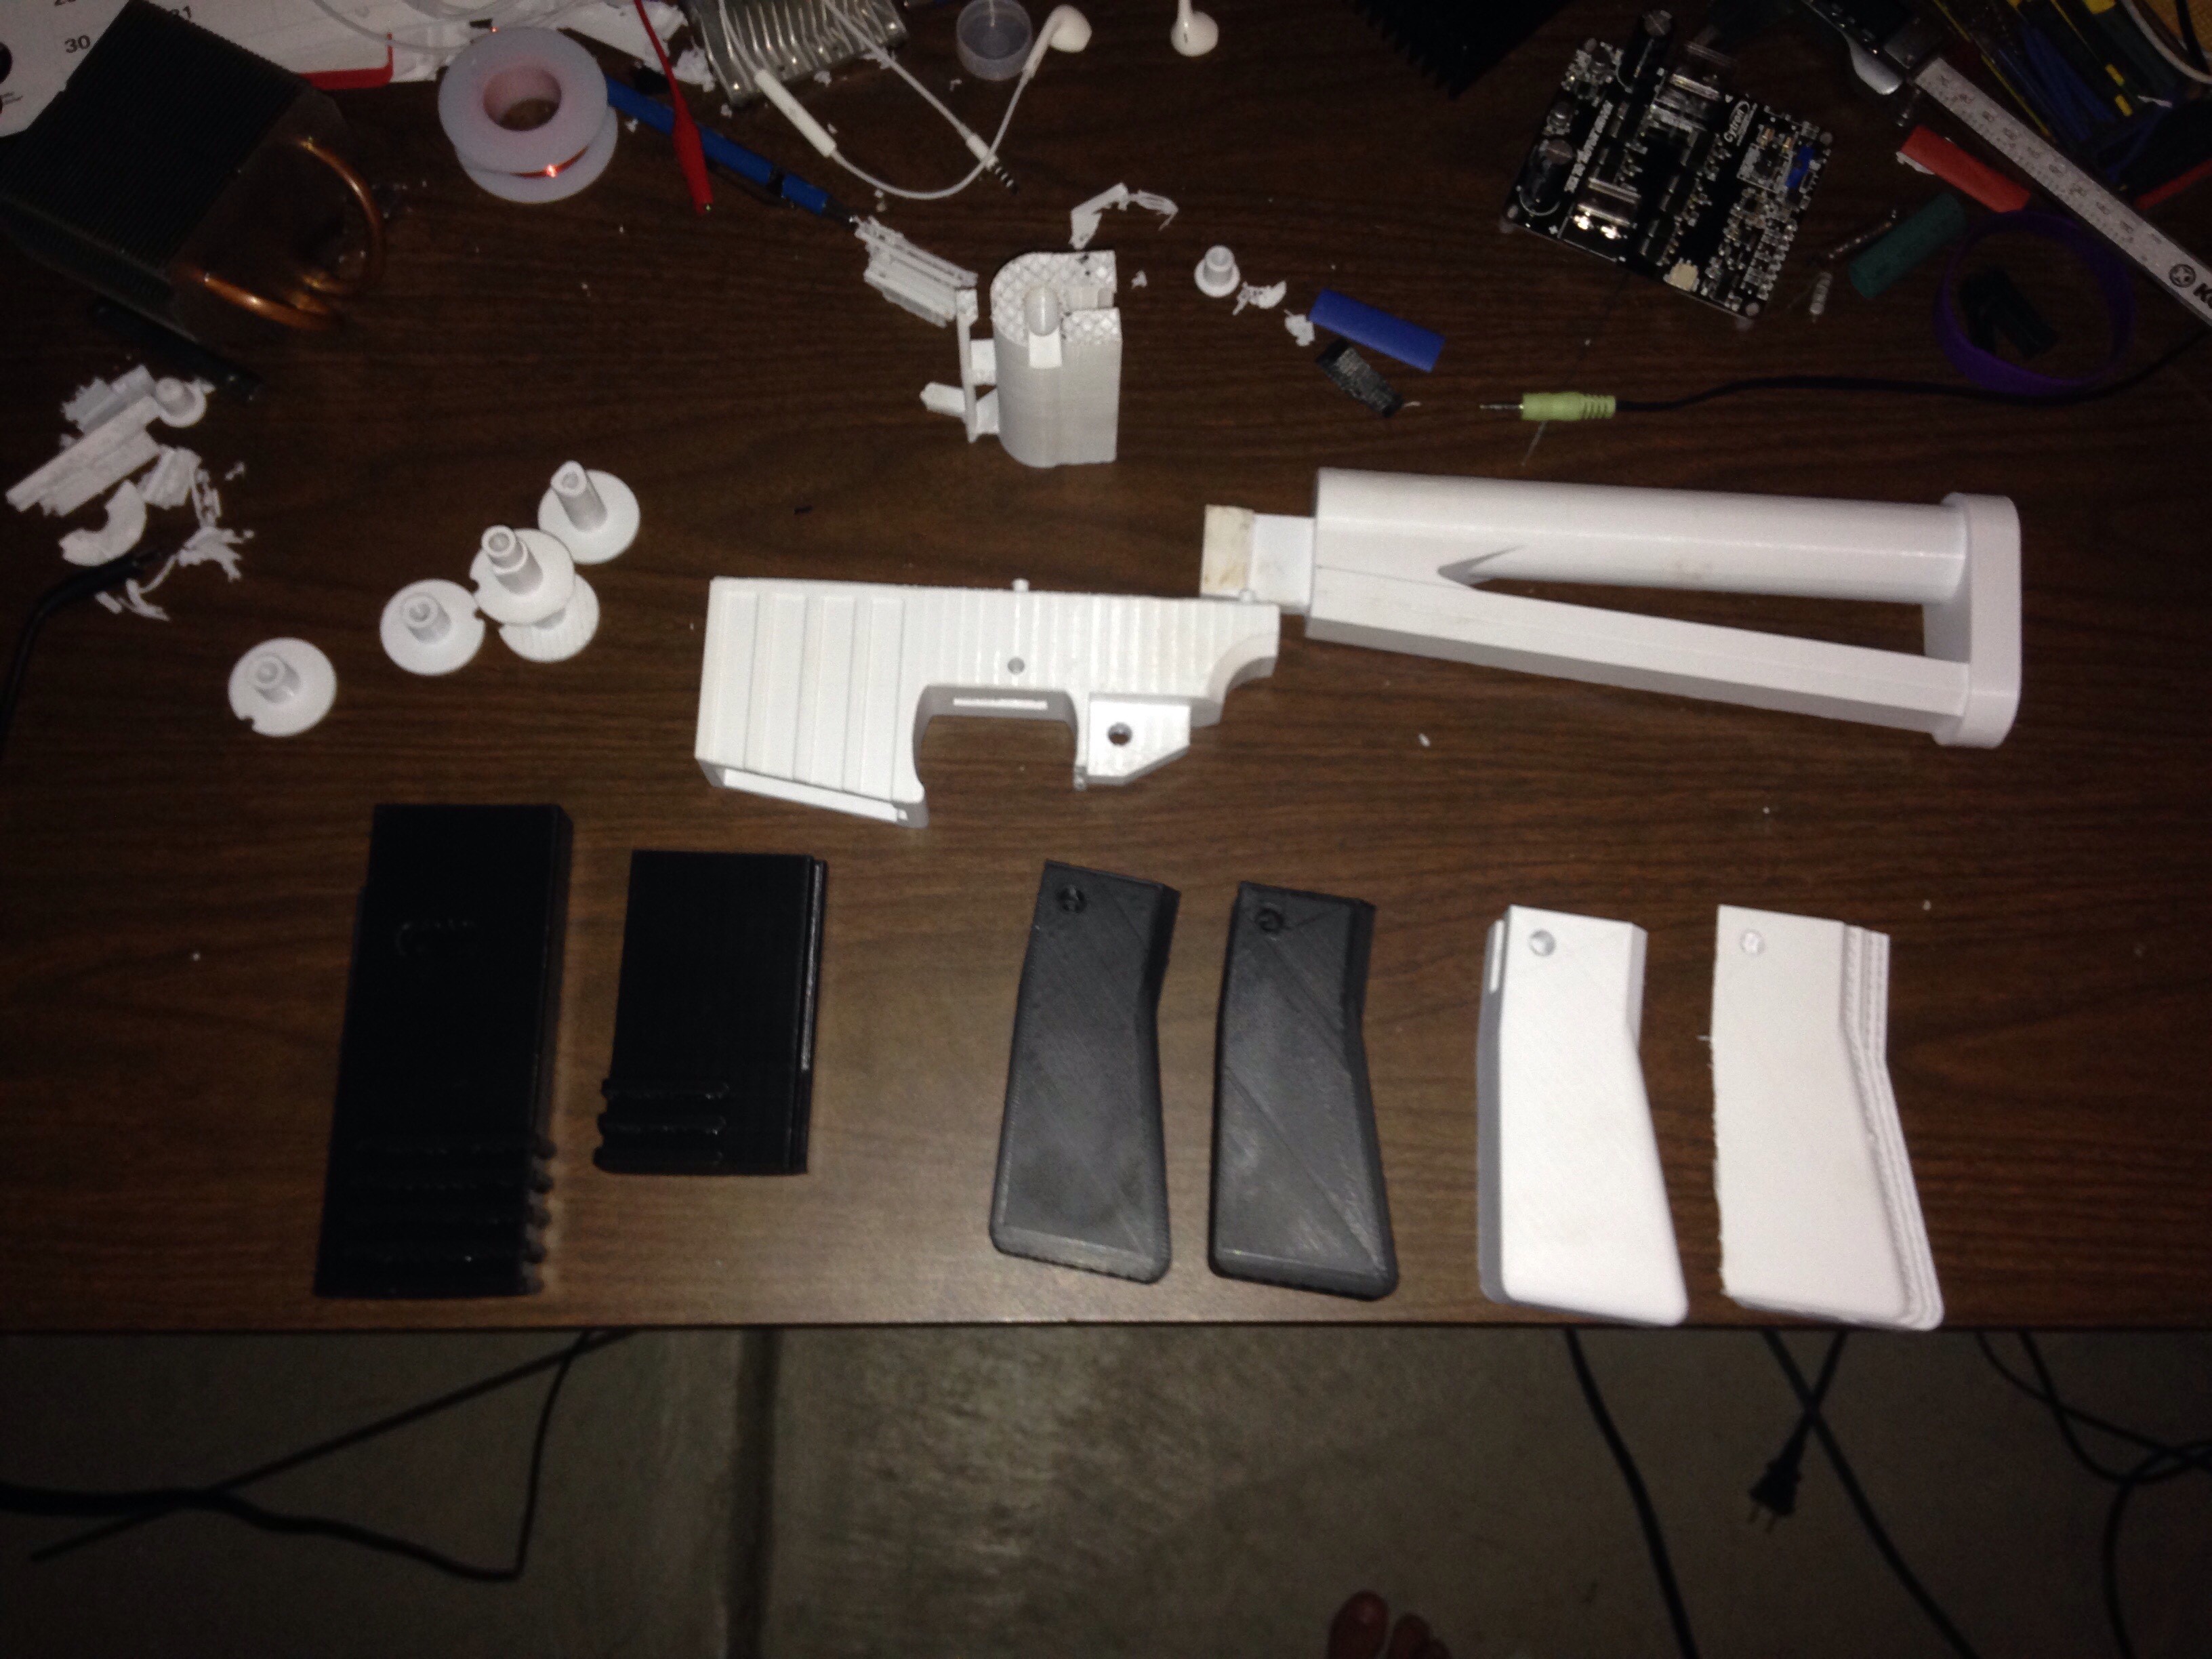
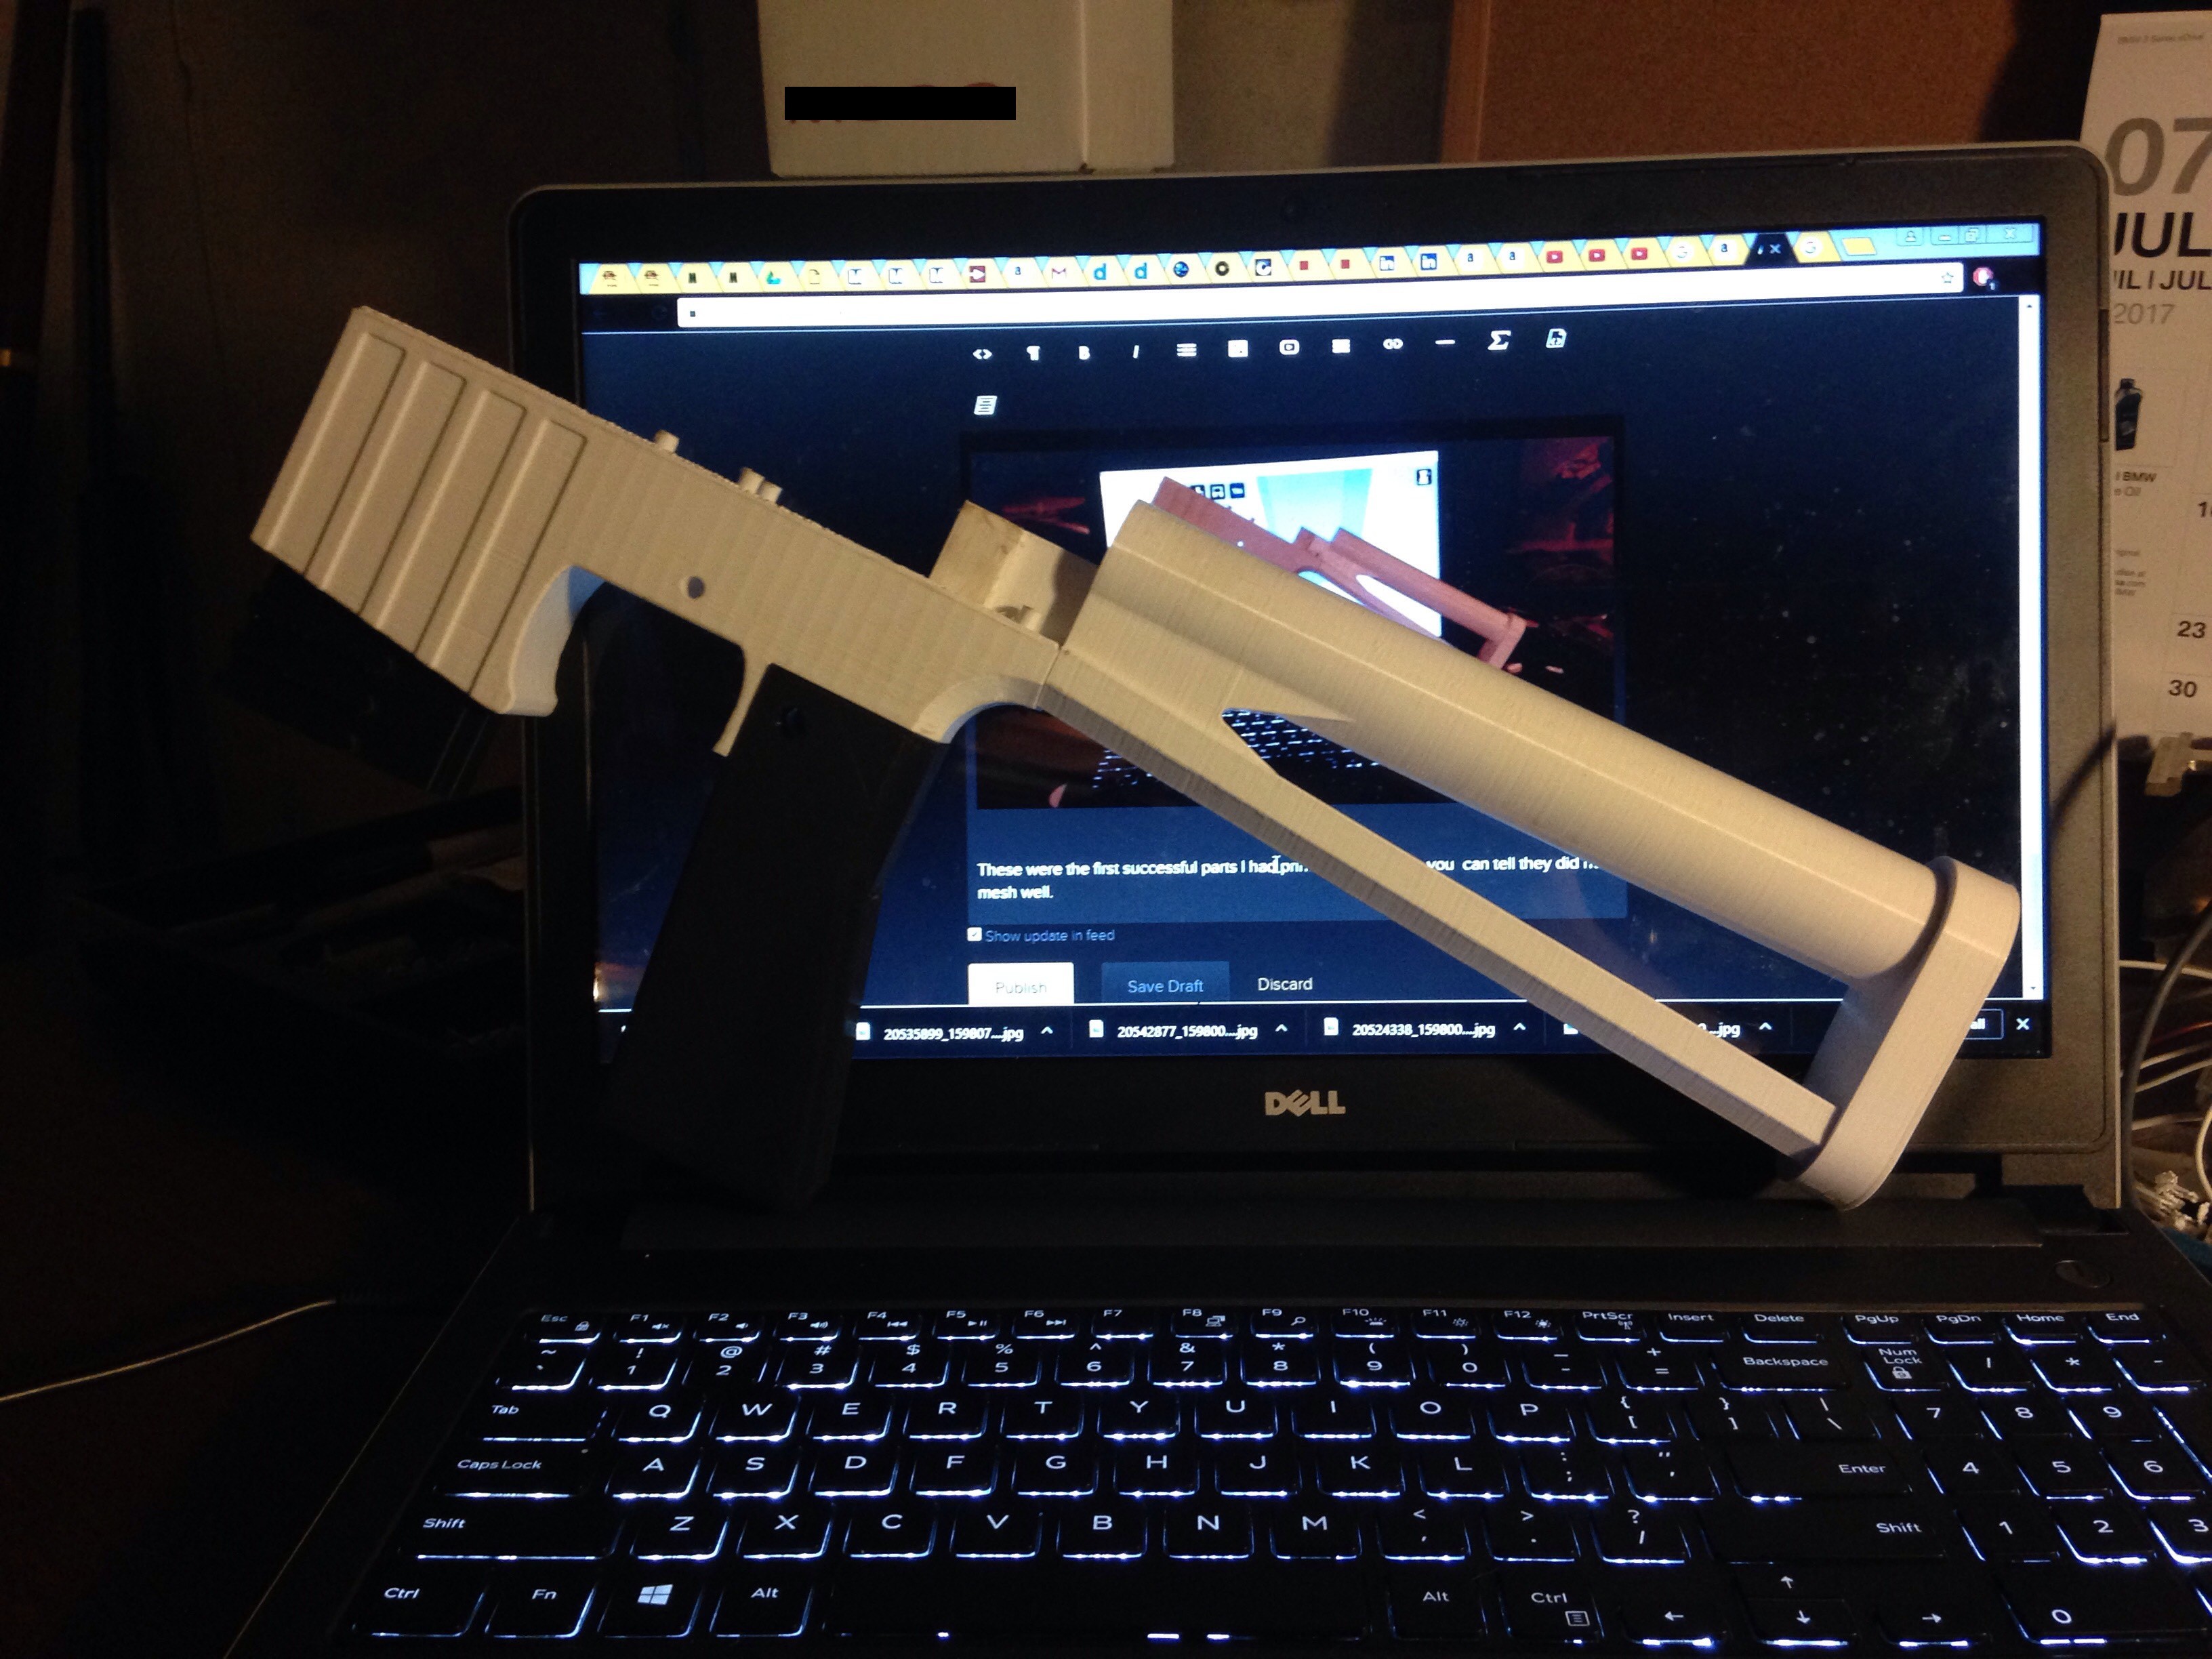
The above picture contains the AR-15 lower receiver (center, white), the butt stock (upper right, white), the 4 prints of handles I have so far (bottom right, black and white), the two mags both short and long (bottom left, black) and the test prints for barrel alignment and coil stopper (top left, white). Also in the top center of the picture you can see the second failed print of the upper housing in white.
![]()
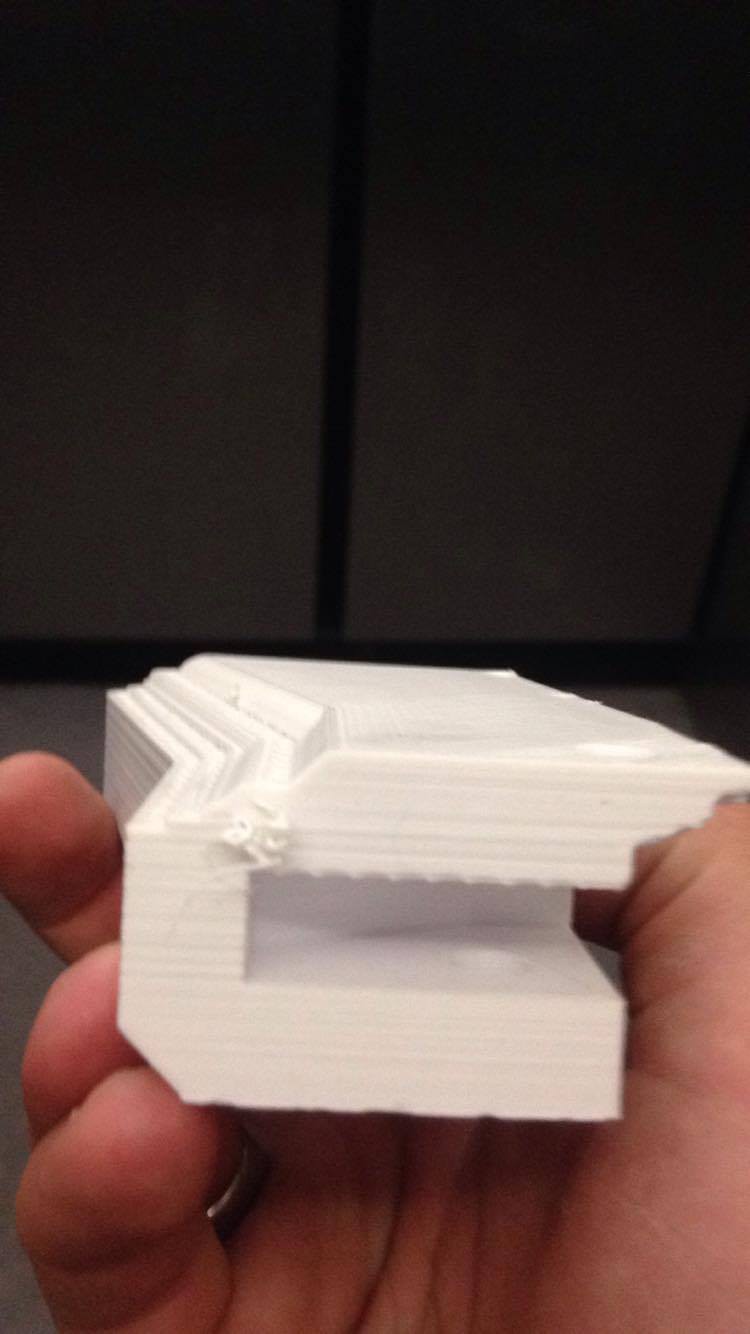
These were the first successful parts I had printed, however as you can tell they did not mesh well.
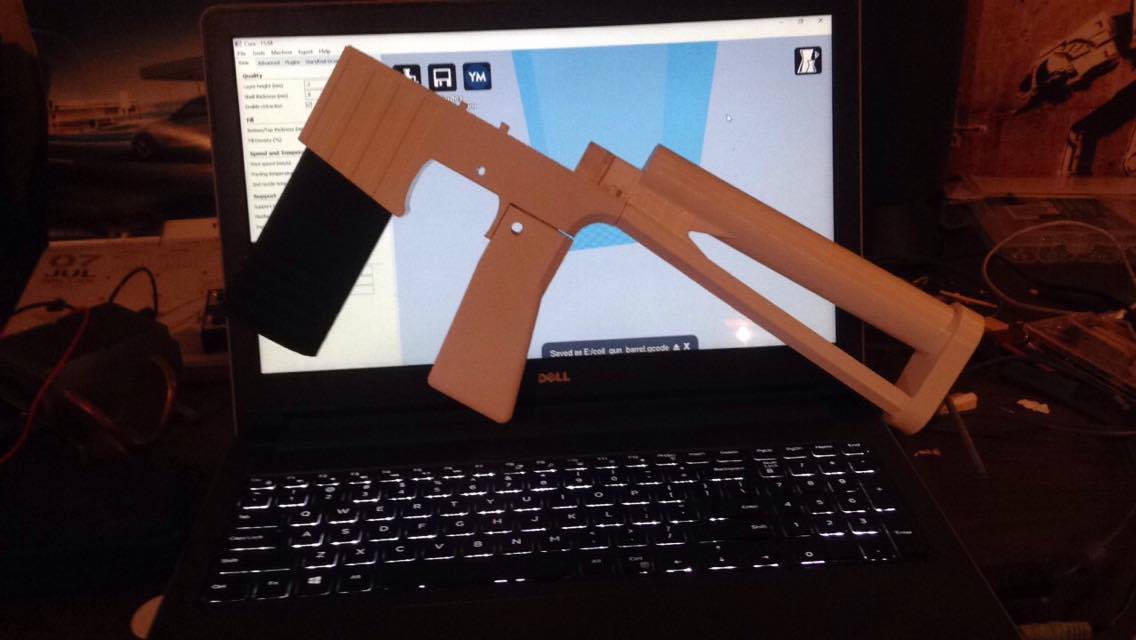
After printing new parts and changing tolerances, I came up with this following assembly...
![]()
(sorry, redacted a logo i didn't notice until i took the picture)
![]()
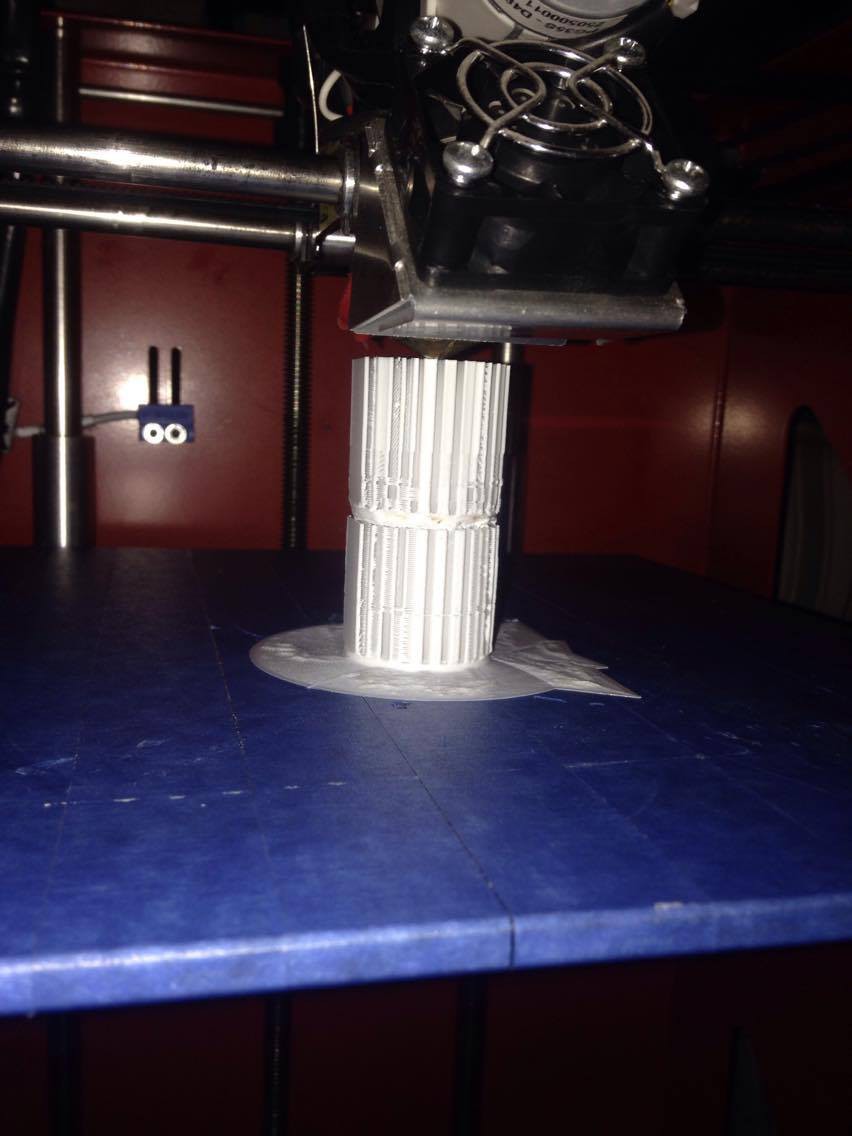
Barrel print at about 12% progress. A brim was used to stabilize the print from wobbling as the extruder head moved around on the top surface. The break you see in support is the second coil stop, the first being on the print bed. The space between these two coil stops will be where the copper wire coils will go. The coil stops will help keep the wrapping neat. This will also help me get a more consistent coil length for each of the three coils.
![]()
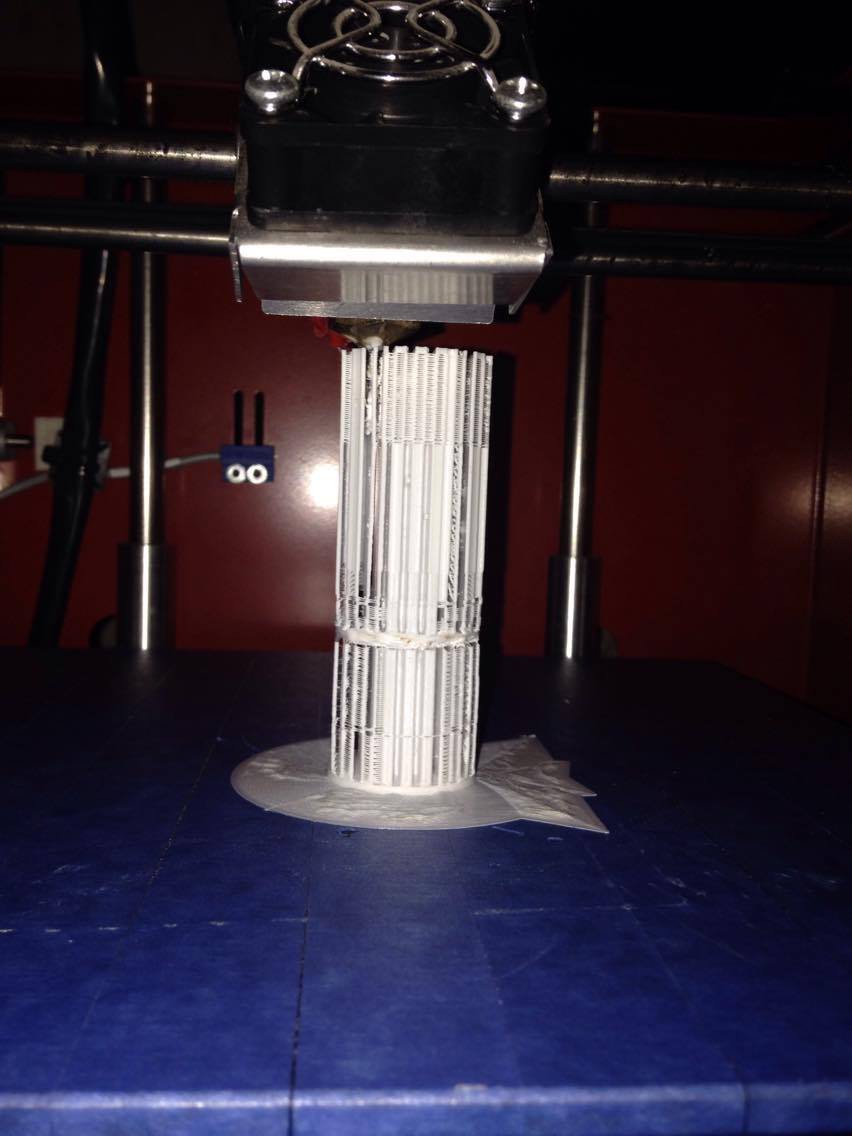
Barrel print at 20% progress. I dropped the jerk value for X and Y to the minimum. Same with the acceleration value for the extruder head motion.
Excel-ARK Kinetics Coil Gun
Building a coil gun inspired by Halo and Mass Effect artwork and started with an AR-15 lower