 jegatheesan
-
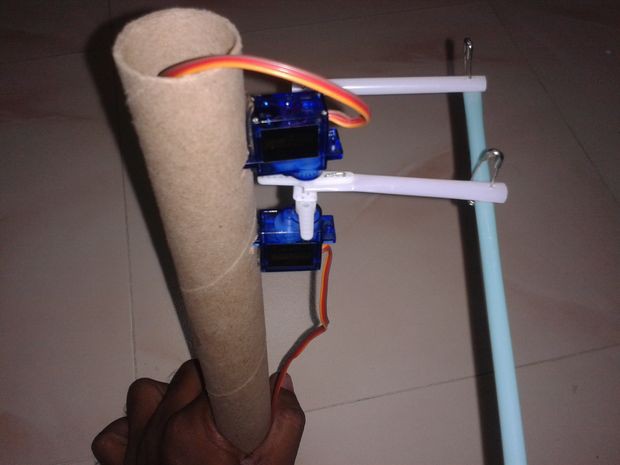
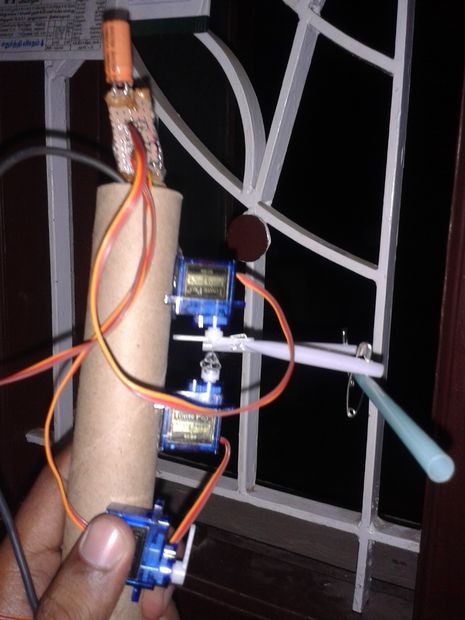
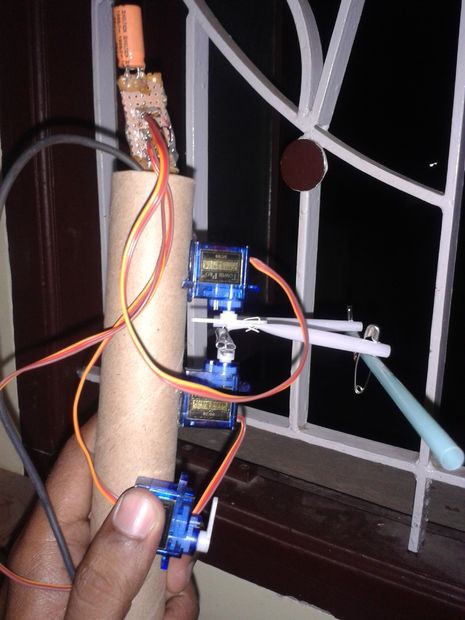
1Building Servo Shield
![]()
![]()
![]()
![]()
![]()
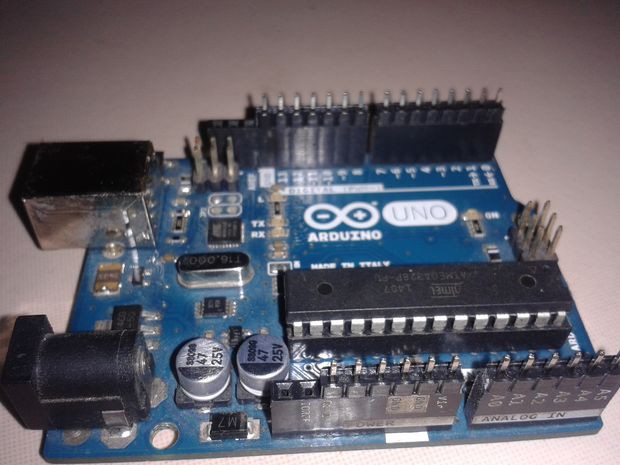
1) First step is to build a arduino shield to drive 3 Servos. In motero shiled 1 we only drive 2 servos. So i make my own shield.
2) I use the pins 3,5 and 6 in the arduino to drive the servos.
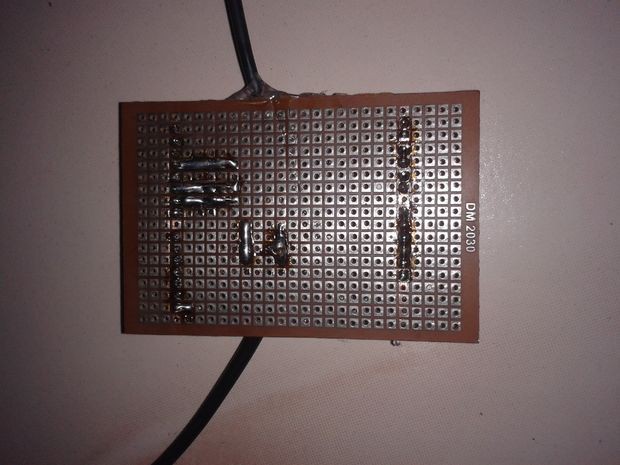
3) From arduino to Servo i use a thin long flexible wire (I Use my old mouse wise it has 5 wires very thin and string). Two wires for +5V and 3 wires for servo driven.
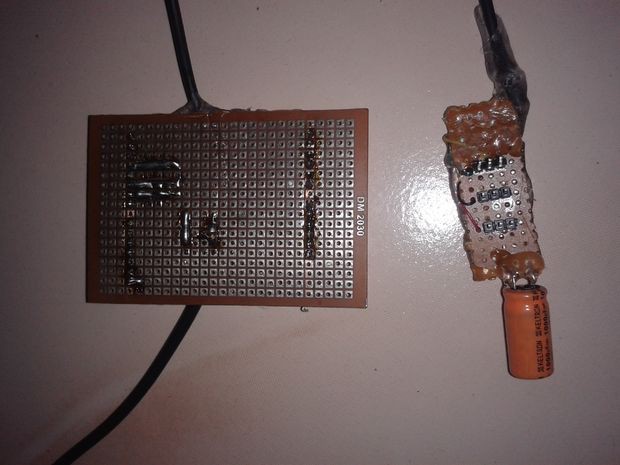
4) A separate board in the side of the device to control servos. I that board i use 3 X 3 Male connector to connect servos.
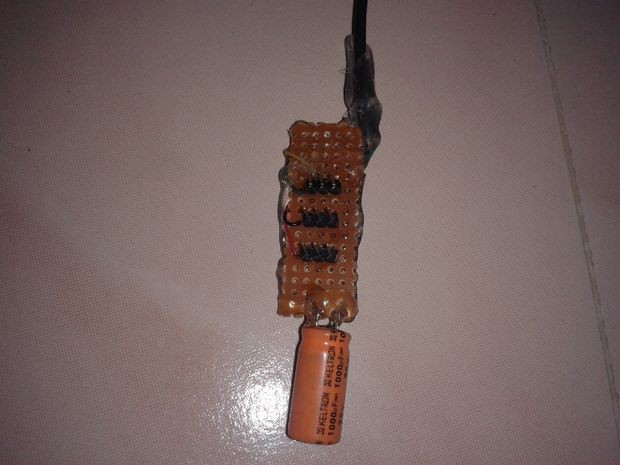
5) A capacitor 1000 micro f between Power supply for servos is soldered. and to avoid short circuit and wires break from soldering, i cover all soldered wire with hot glue gun.
-
2Check the Concept
![]()
![]()
![]()
![]()
1) After make a startup software and check the angles generated. I want to test that this servo is correct for my application.
2) So i just use straws at first to find its working correct.
3) Straws dimension are 50mm 2nos, 32mm 1no and 82mm 1Nos.
4) Its working fine and the test pass. But some more calculation is missing. So some calculation want to change.
-
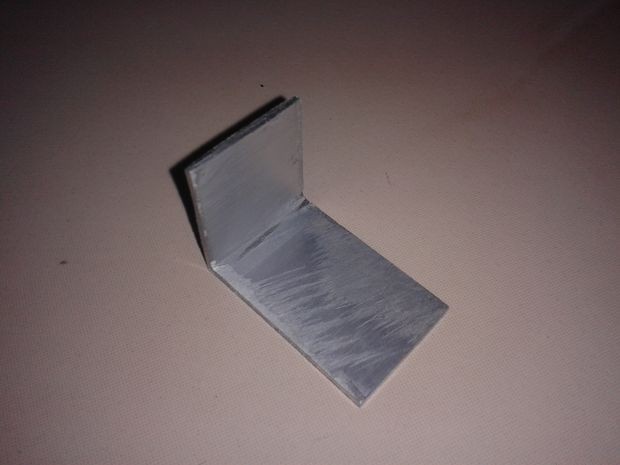
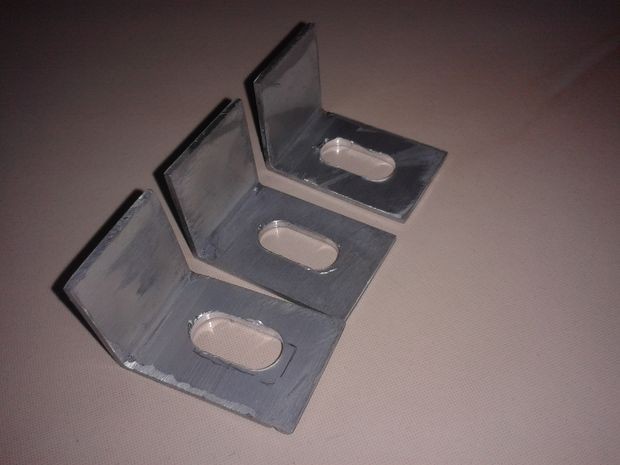
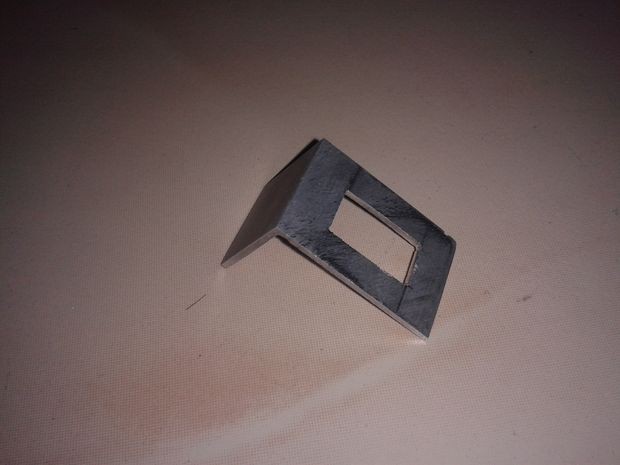
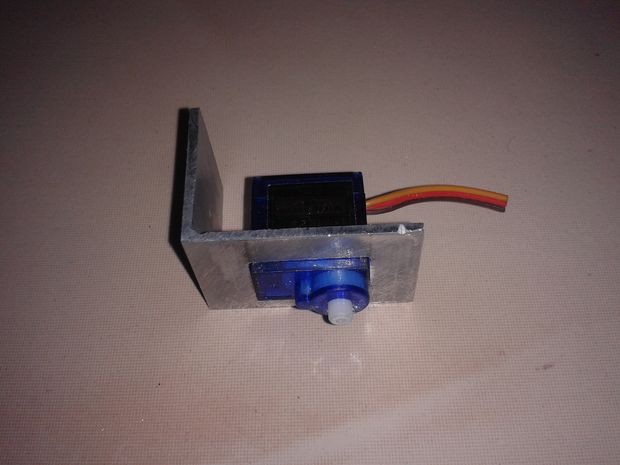
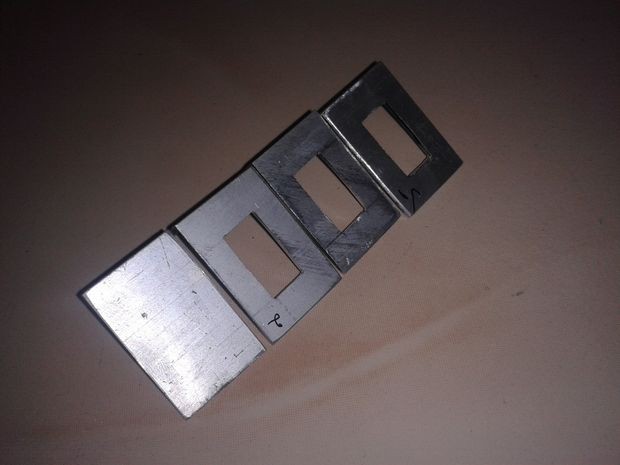
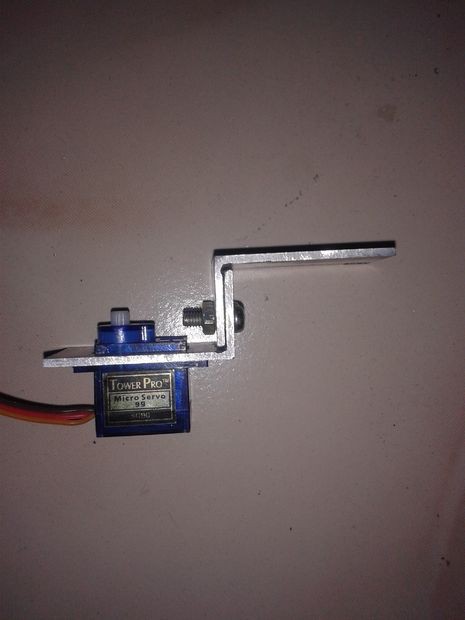
3Make Servo Holders
![]()
![]()
![]()
![]()
![]()
![]()
![]()
1) Its time to assemble my drawing buddy. But this is the very hard work.
2) I use ALuminium from partion work waste from my friend to make 4 'L' bends of dimension 30 X 40 X 27.
3) Mark the portion for Servo and give it to a milling machine. They only able to take the shape as oval.
4) I use a triangle file to make it rectangle.
5) Take it for 3 pieces and another one piece for holding the up down servo.
6) Connect the two pieces using screws.
-
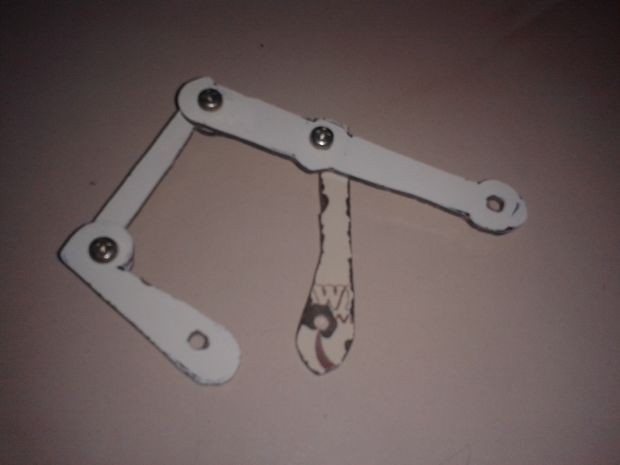
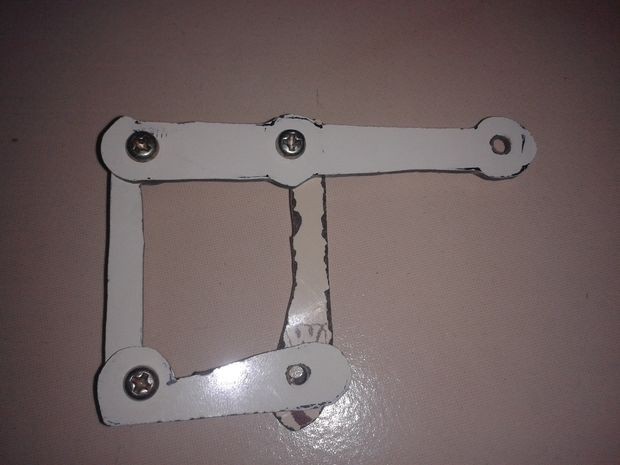
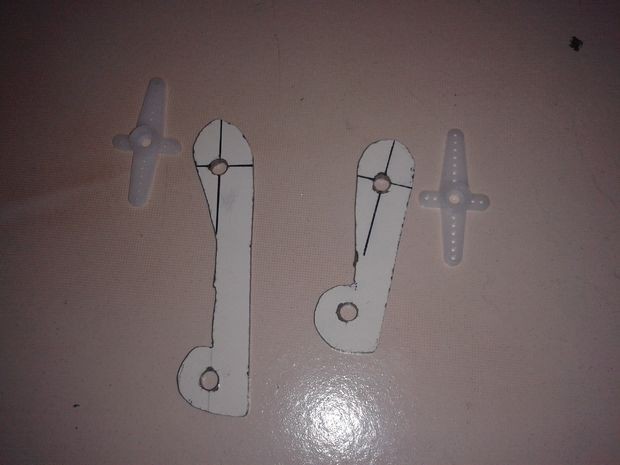
4Making Arms
![]()
![]()
![]()
1) Its the hand for my Drawing buddy.
2) I take the dimension 32mm one number, 50mm two numbers and 82mm one number.
3) Make it in the novopan sheet and give it to the switch slot taken work shop.
4) They make it as an art.
5) With 6mm hole for link they give it back to me in pieces.
6) I link the arm parts and check the rectangle dimension with my plan. Its excatly matched.
-
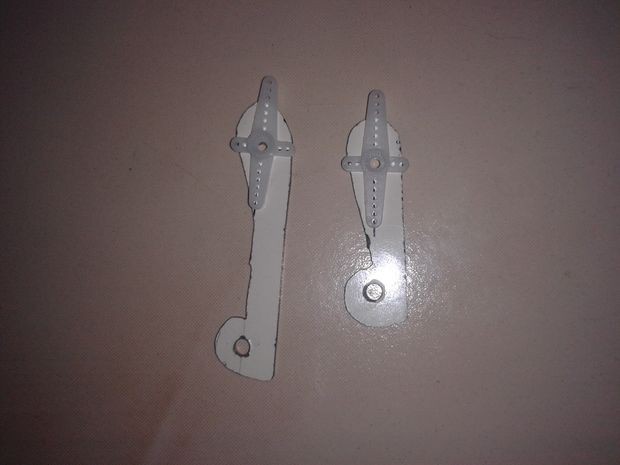
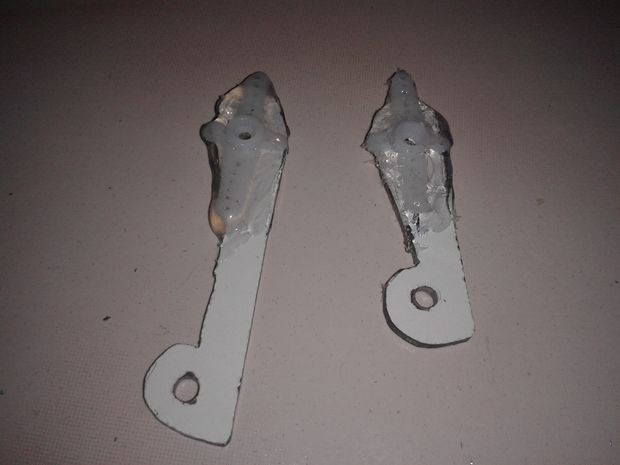
5Connecting Arm to Servo
![]()
![]()
![]()
1) Arms are now ideal when connect it with the servo only it get life.
2) stick servo arm connector straight to the novopan arm with hot glue gun.
3) connect this to the servo using screw. through the novopan arm hole.
-
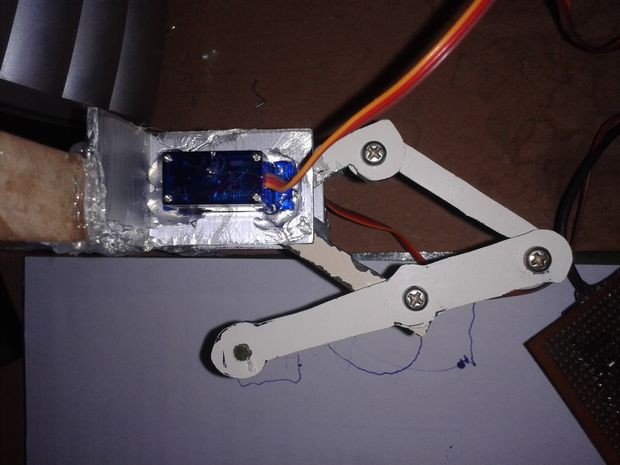
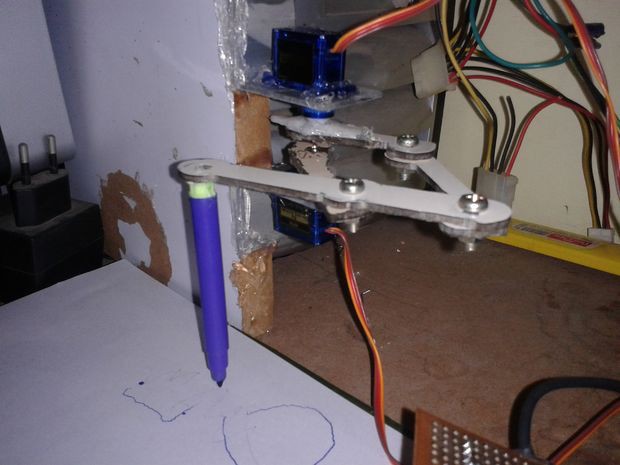
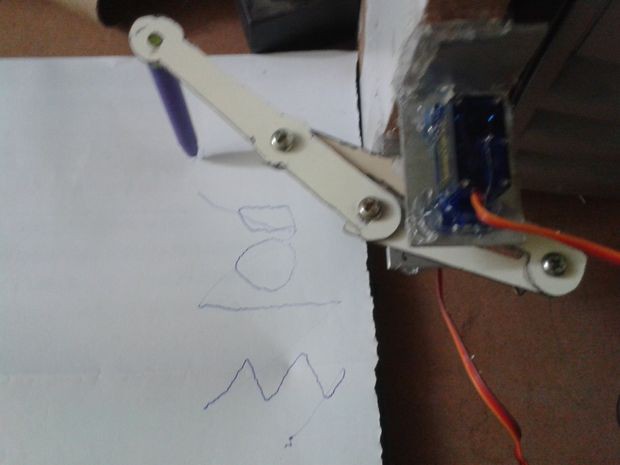
6Testing With Out Pen Up Down
![]()
![]()
![]()
![]()
![]()
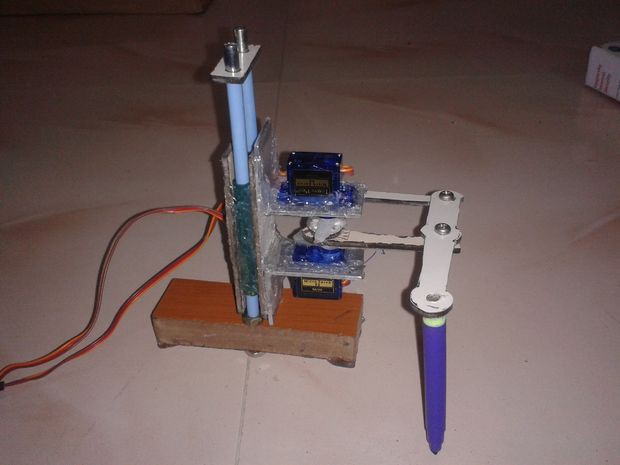
1) Now the 2 servos are fitted to the aluminium frame slot and stick with hot glue gun.
2) Join the arms with screws and before fitted fully, want to check and tune the software.
3) So paste the frame to a flat surface facing each other correctly center.
4) In the arm edge paste a sketch to draw.
5) Place a plain paper below the sketch.
6) Test it with the software and after some changes in software and angle in the servo arm connection finally the result is fine.
-
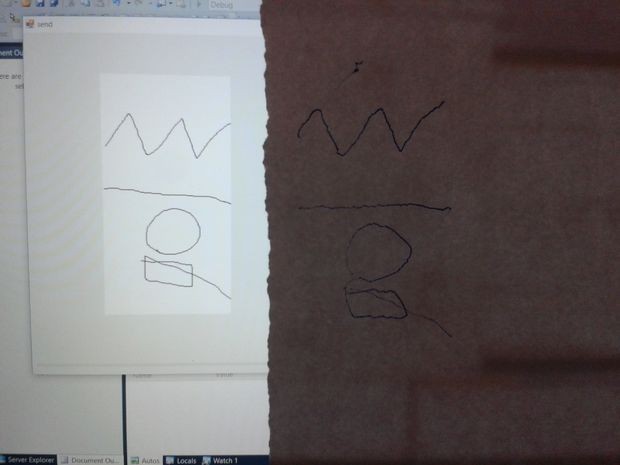
7Testing Video
This is the testing video for circle and waves
-
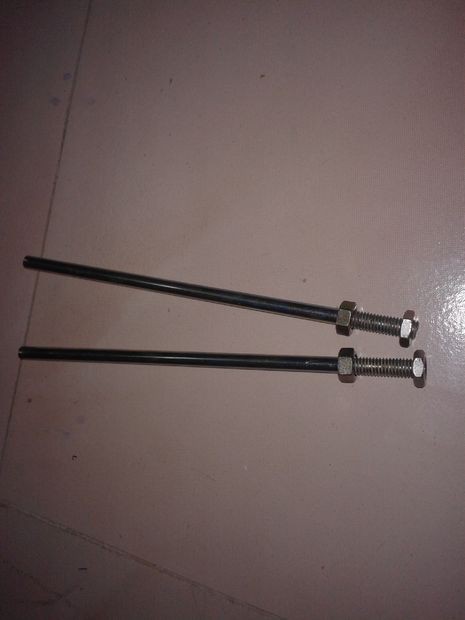
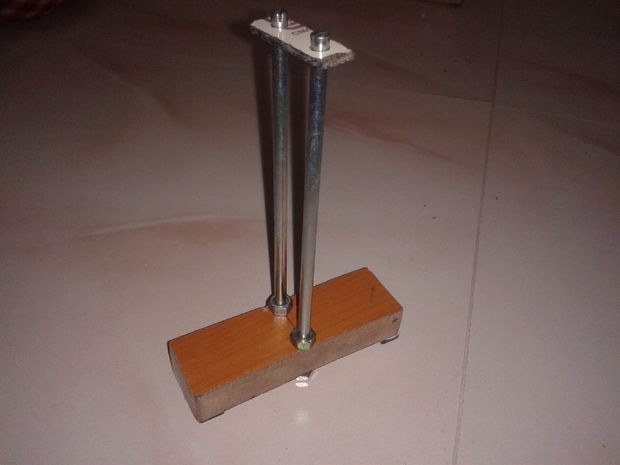
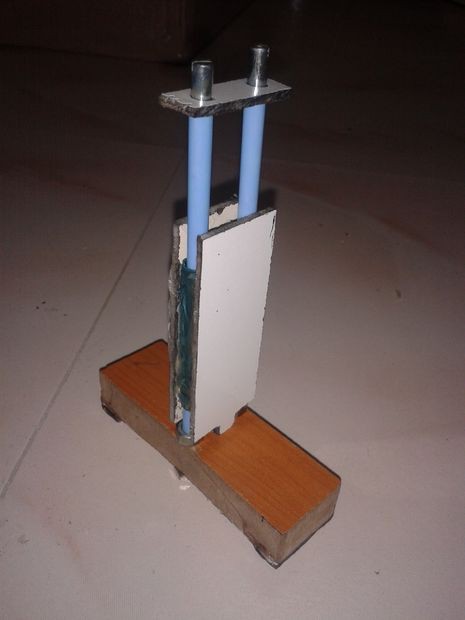
8Make Stand
![]()
![]()
![]()
![]()
![]()
1) Stand must be small then only its compact and also more space for drawing near the Buddy. It must be weight hig than the other assembly then only it stand still when arm move.
2) I got a waste play wood.
3) I cut it in the size of 30mm x 100mm and mark the center at 50mm.
4) Make a 6 mm hole in the two sides as shown in the figure (use bench drilling then only the holes are straight).
5) Make a small piece in navapan sheet and drill the same size hole in that one. (to keep the rails parallel)
6) Now Now scre the 6mm rod both sides tightly to make it stand straight.
-
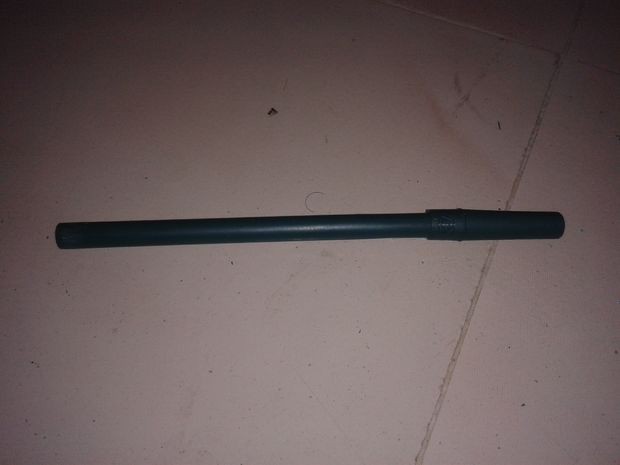
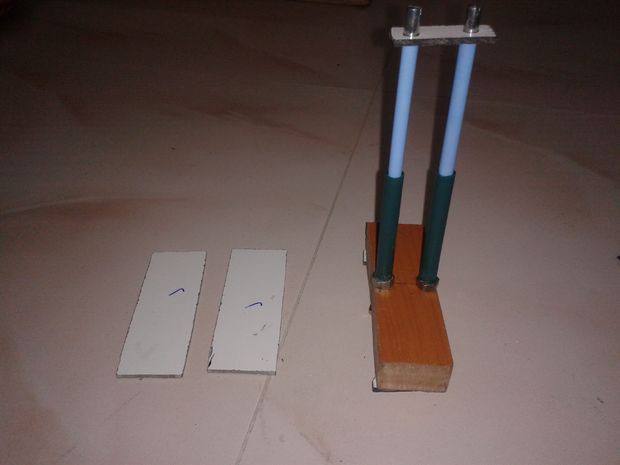
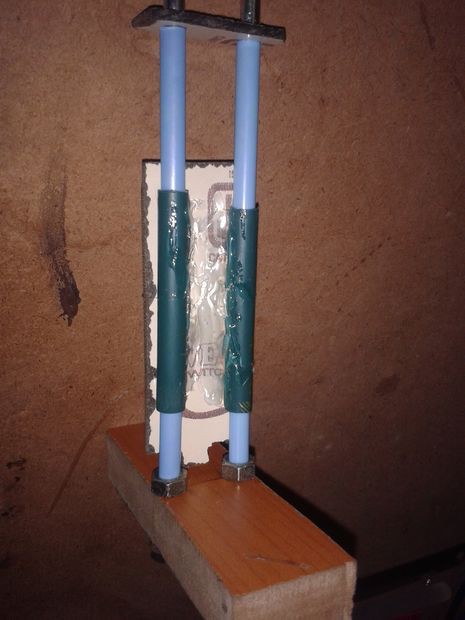
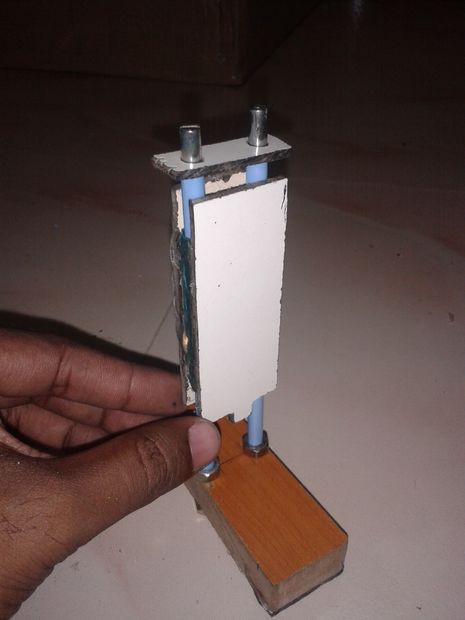
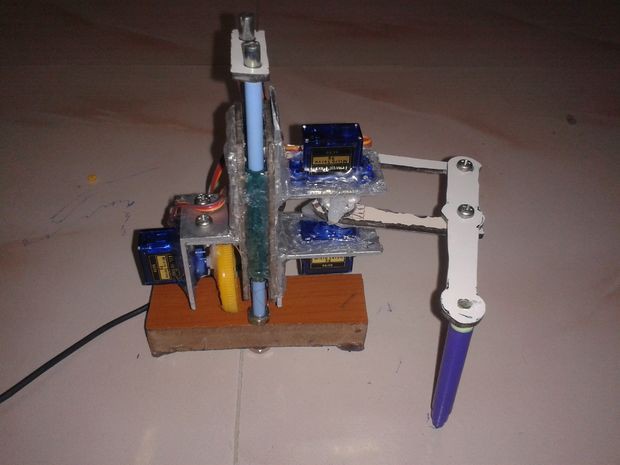
9Fix Up Down Arrangement
![]()
![]()
![]()
![]()
![]()
![]()
![]()
![]()
![]()
1) Now the stand is ready. We want an arrangement to hold the servos and move up and down in the rail.
2) I use a old pen. Cut the pen in to two pieces and insert into the rods, The pen inner dia is more greater than the rod dia. So i insert a straw firat in to the rod and straw is tight with the rod and when pen is put over that it moves fine with out shake.
3) Now cut two pieces of novopan sheet i take the dimension (30mm X 90mm) and take slot in the bottom for the space to nuts in the stand.
4) Then stick the two sheets in the both sides of the pen in the stand. Glue it fully then only it hold the weight.
5) Now check the movement of up/down action.
6) Fix the Writing servo arrangement on one side of the slide with hot glue gun or screws.
7) Now check it by fixing the arms.
-
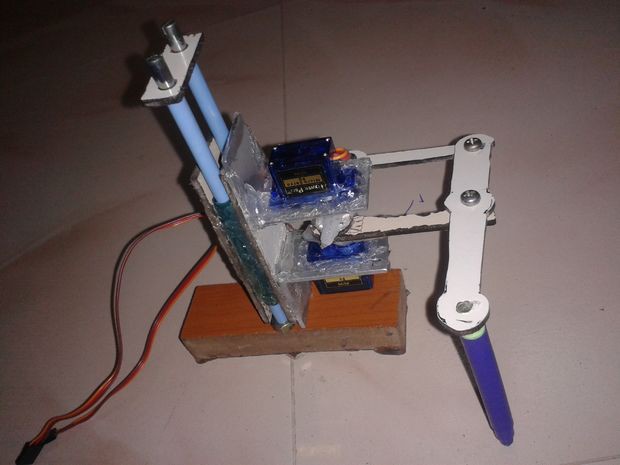
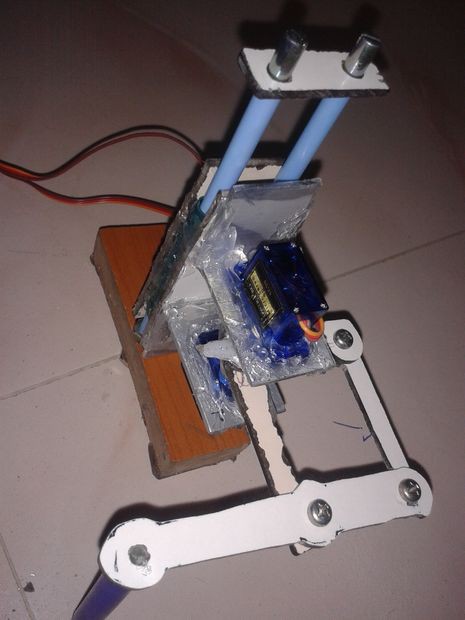
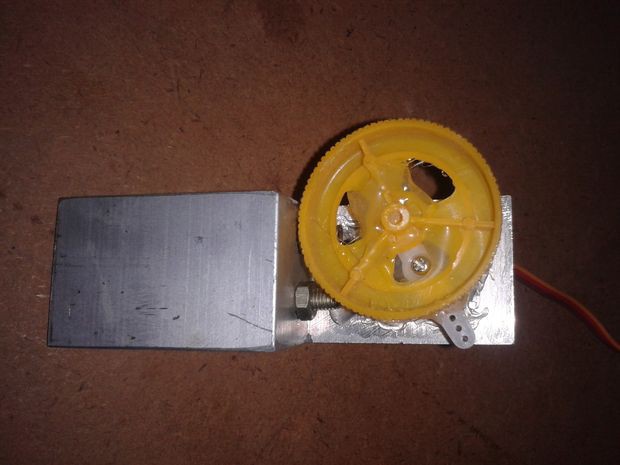
10Up Down Mechanism
![]()
![]()
![]()
![]()
![]()
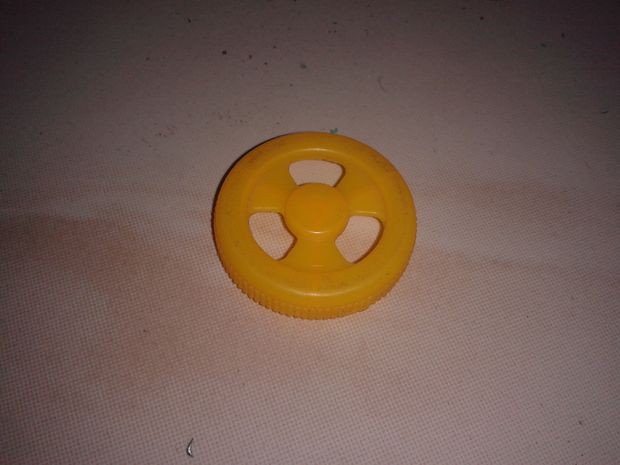
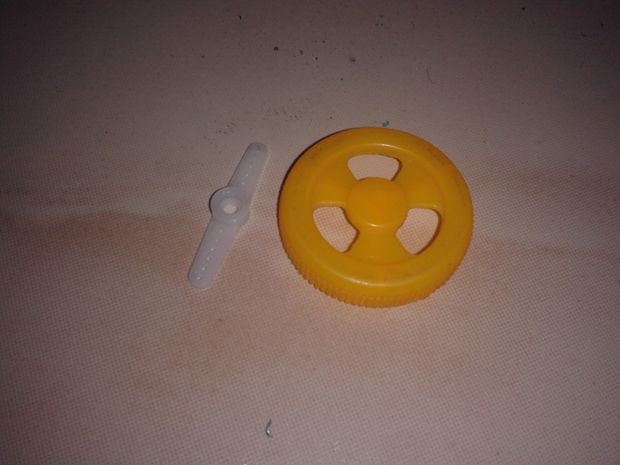
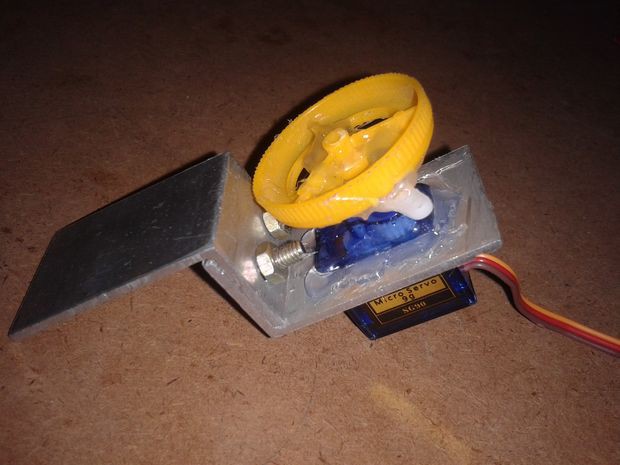
1) Up down mechanism is quite easy using a old toy car wheel.
2) Just Hot glue the old toy car wheel to the servo arm away from the center. This acts to lift the arrangement smoothly.
3) Fix the arrangement to the other side of the slide.
Cute Drawing Robot - Servo and Android
Very very low cost drawing robot draw like what u draw in the Computer. Its movement are not traditional its very cute. Every one like it.


Discussions
Become a Hackaday.io Member
Create an account to leave a comment. Already have an account? Log In.