Close
0%
0%

Monitor Data and Rmote Control from a WebApp

Internet-Of-Things open project - connect to the web, monitor data and control onboard LED with CC3200 and a simple web application.

Similar projects worth following
Building an IOT device with CC3200 wireless MCU. Detailed instructions on how to send data over the network.

This project demonstrates a basic web application example with the CC3200 development board, AK9753, and TMP006 sensors (web-application link.)
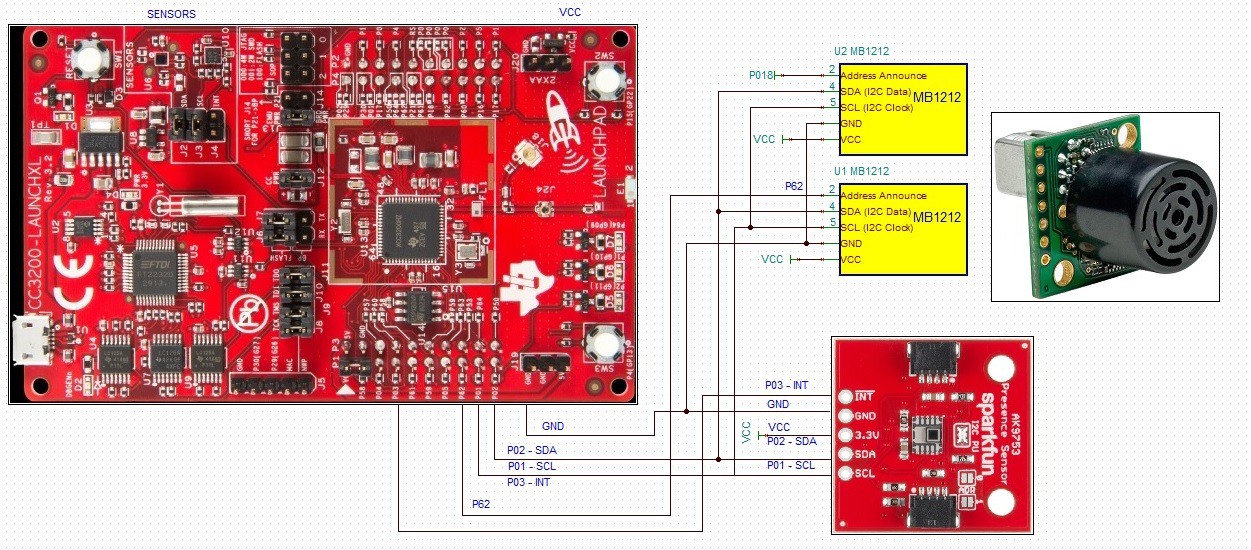
I have developed a simple web application for the CC3200 development board, an AK9753 Human Presence Sensor Breakout board , an on-board TMP006 sensor, and two MB1212 sonic sensors.
The web application displays data collected from all sensors and allows to switch (ON/OFF) the on-board Red LED. I am planning to add more functions to the web application. 

Show below is the image of my current circuit diagram. The MB1212 Maxbotix sensors will be used as motion sensors in the project.
To test the IOT project with your CC3200 development board:

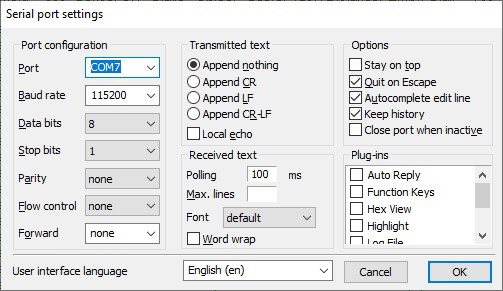
I recommend (it is not required) changing the MAC address from a default one. The MAC address will be used as a unique ID number to monitor data sent by your board. To set the new MAC address enter unique values as shown below. After the board is programmed you will need to press and hold SW3 and push the Reset button while pressing SW3. Afetr a 10 - 15 seconds you see " MAC address is set to: XX:XX:XX:XX:XX:XX" printen on a serial terminal:

//SET MAC address
GPIO_IF_GetPortNPin(SH_GPIO_13,&uiGPIOPort,&pucGPIOPin);//If SW3 button is pressed set MAC address
ucPinValue = GPIO_IF_Get(SH_GPIO_13,uiGPIOPort,pucGPIOPin);
if (ucPinValue == 1){
	sl_Start(NULL,NULL,NULL);
	_u8 MAC_Address[6];
	MAC_Address[0] = 0x8;
	MAC_Address[1] = 0x0;
	MAC_Address[2] = 0x28;
	MAC_Address[3] = 0x22;
	MAC_Address[4] = 0x69;
	MAC_Address[5] = 0x31;
	sl_NetCfgSet(SL_MAC_ADDRESS_SET,1,SL_MAC_ADDR_LEN,(_u8 *)MAC_Address);
	sl_Stop(0);
	UART_PRINT("\n MAC address is set to: %02x:%02x:%02x:%02x:%02x:%02x \n",
	MAC_Address[0],
	MAC_Address[1],
	MAC_Address[2],
	MAC_Address[3],
	MAC_Address[4],
	MAC_Address[5]);
}

 Enter your WiFi credentials (SSID name and password) in the common.h file:
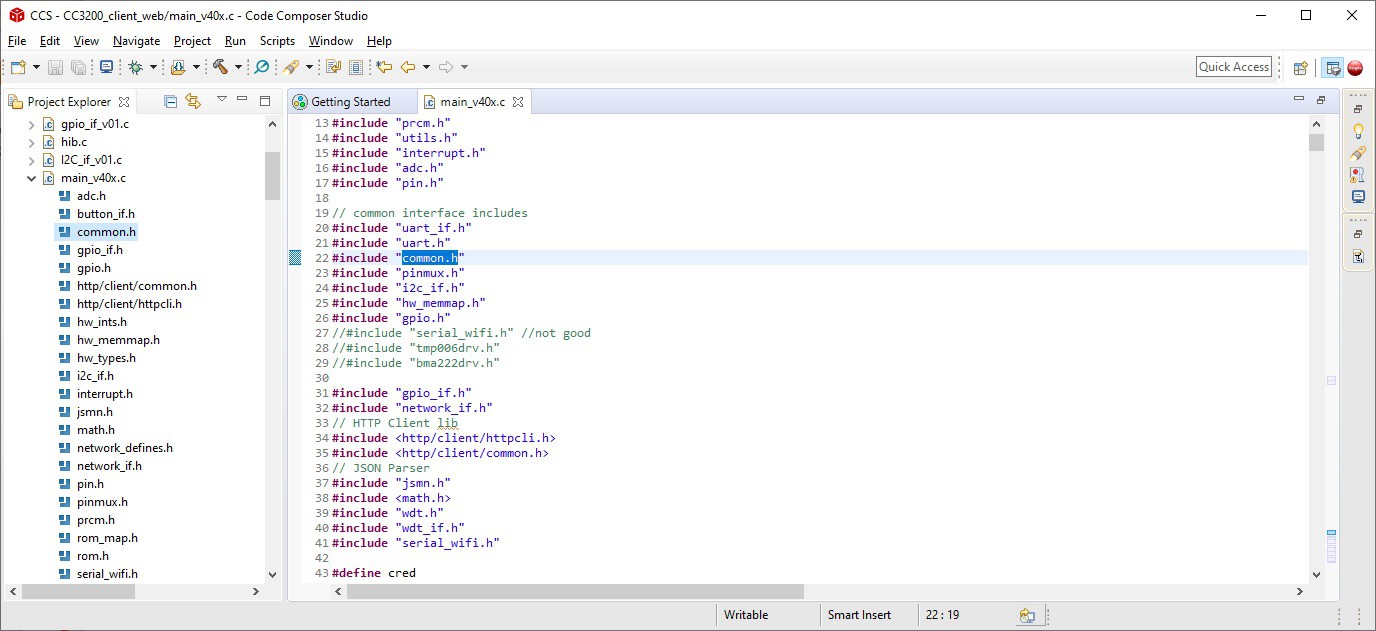

Save your project with the new credentials and compile it.
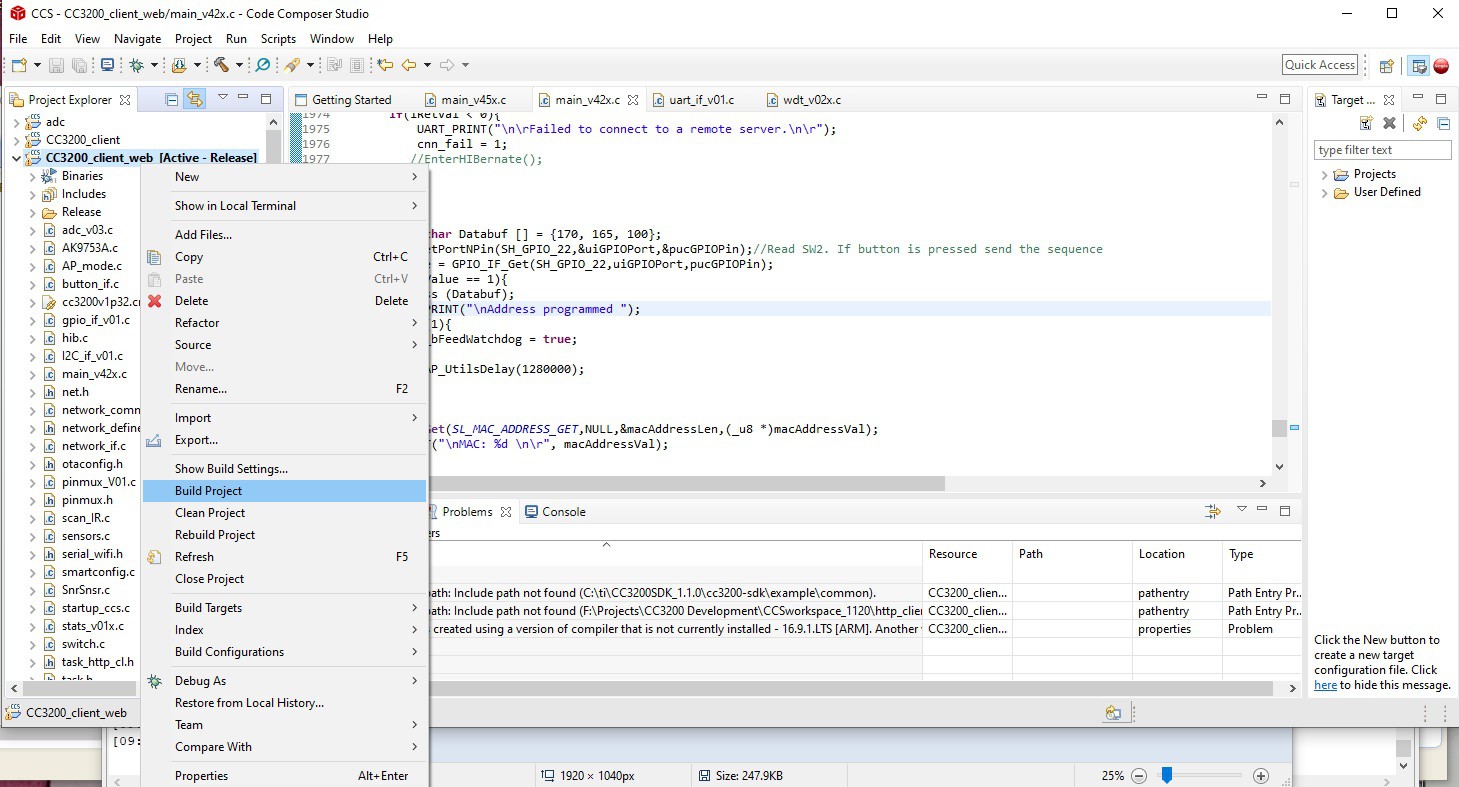
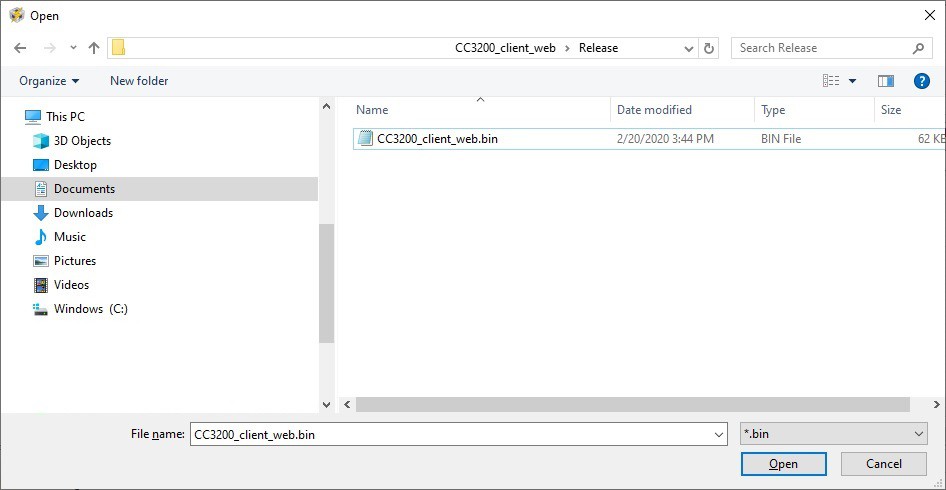
Once the project is compiled the "CC3200_client_web.bin" will be located in the Release folder:
  • Program the CC3200 board with the CCS uniflash.
  • If you want to change the MAC address from the default one, press and hold SW3 and push the reset button. Keep SW3 pressed untill the new MAC address is set and printed. This may take 15-20 sec
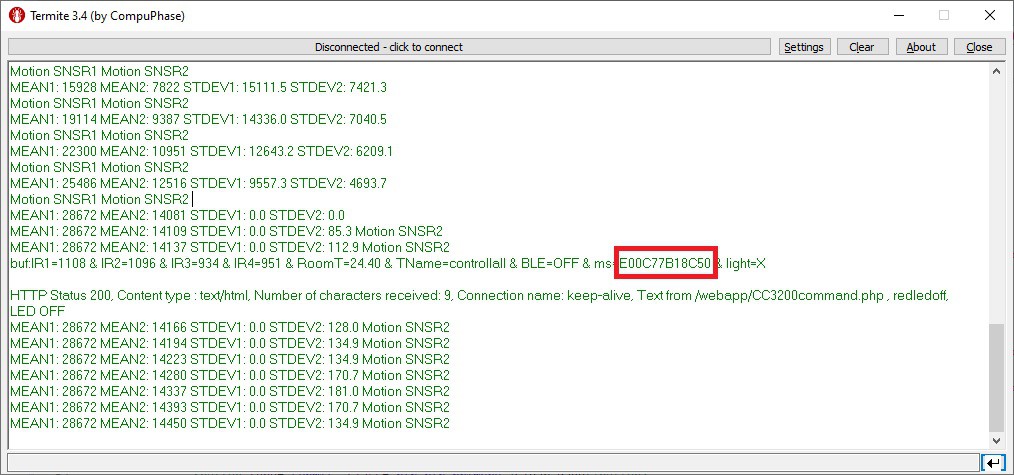
  • Write down the number shown below. This is the ID number of your board. You will need it to display your data on the web-page. Conver the HEX value to a decimal and enter it on the web-app page as the ID number:
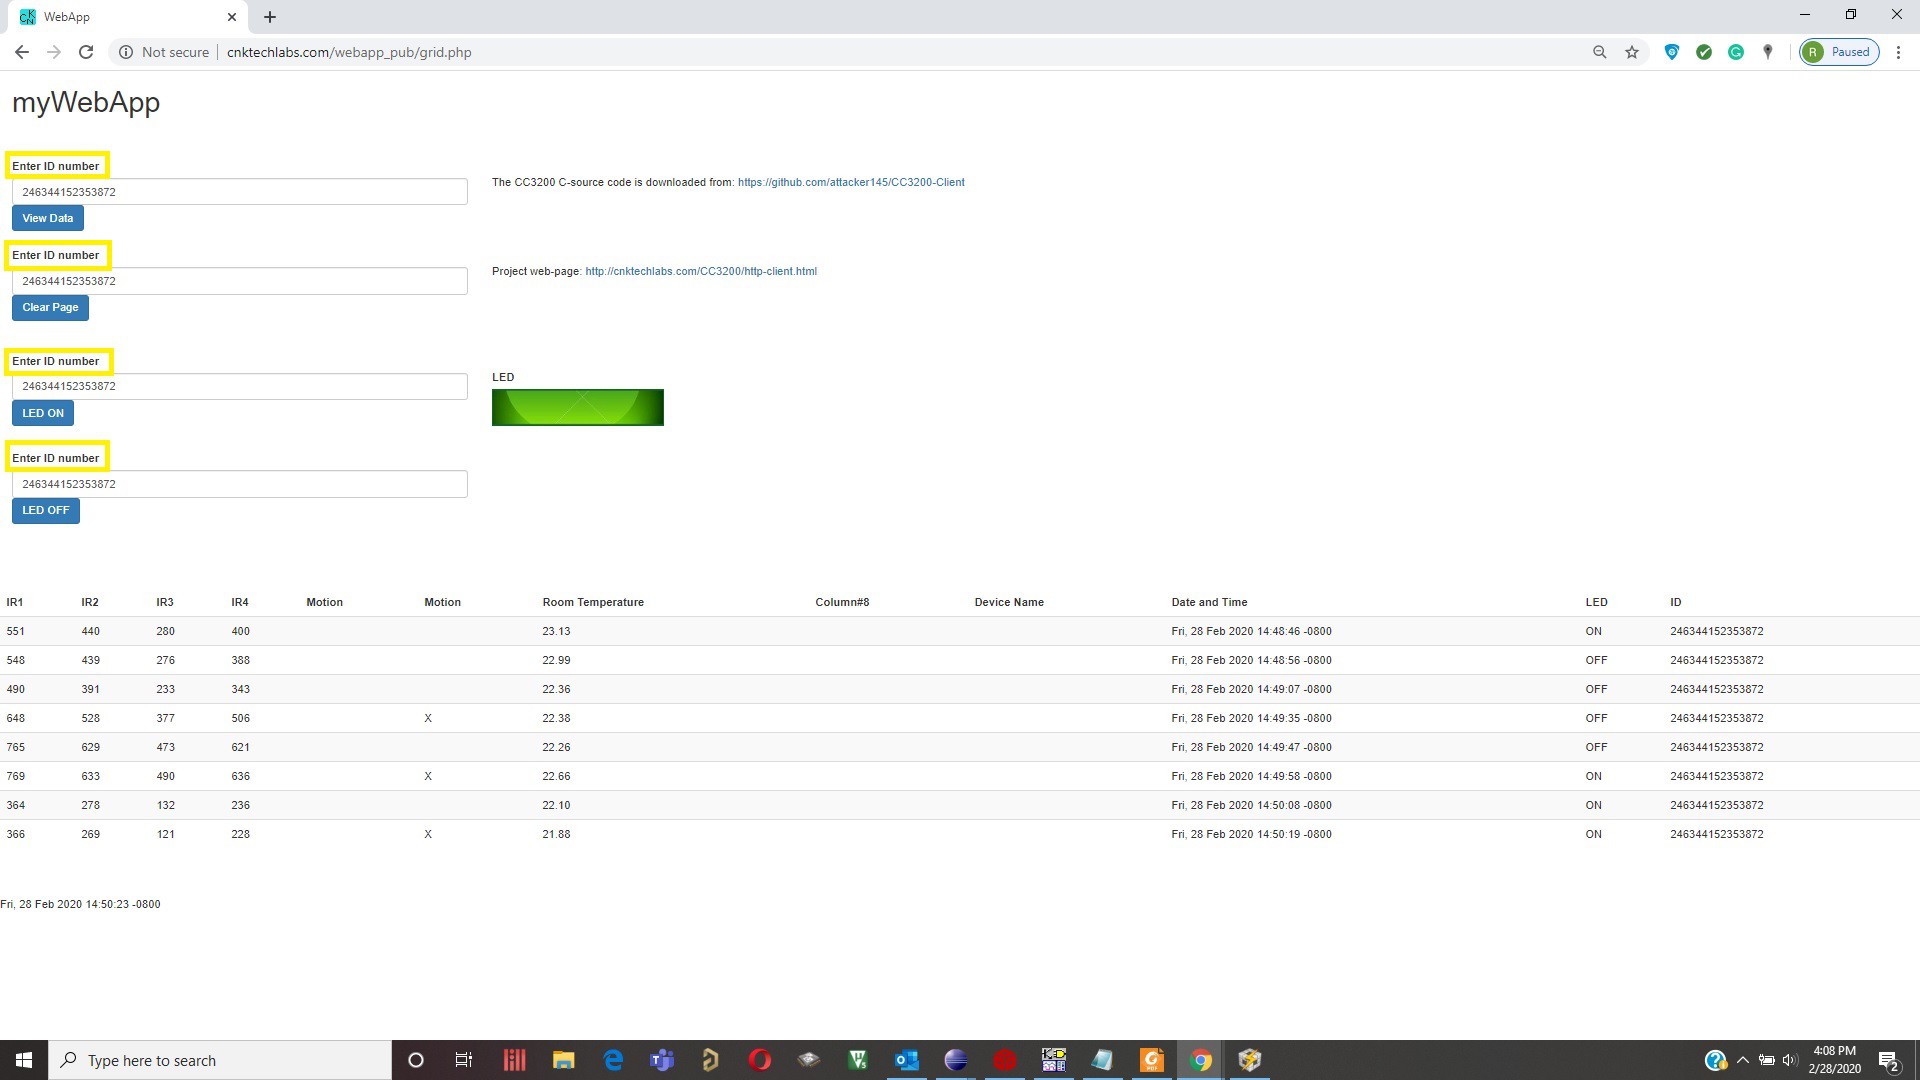
Monitor and control CC3200 board from cnktechlabs.com/webapp_pub/grid.php.

Enter the ID number in a decimal format:

How the data is transmitted and received over the web:

In the main file there are two functions:

  • HTTPPostMethod_data(&httpClient);
  • HTTPGetPageMethod(&httpClient);

that are used to transmit data to, and receive from the grid.php webpage. The first function posts data to the grid.php web-page approximately once a minute.

if(t_cntr > 250){//285 ~60 sec
    if(cnn_fail == 0){        
        t_cntr = 0;         
        lRetVal = HTTPPostMethod_data(&httpClient);//Post data to the grid.php        
        if(lRetVal < 0){// If failed post data to the web-page            
            f_cntr++;            
            UART_PRINT(", Failed Post Method");            
            EnterHIBernate();...
Read more »

CC3200-LAUNCHXL_sch.pdf

Adobe Portable Document Format - 141.32 kB - 09/13/2017 at 17:06

Preview

  • 1 × SimpleLink Wi-Fi CC3200 LaunchPad The SimpleLink™ Wi-Fi® CC3200 LaunchPad™ development kit (with QFN-packaged device) is an evaluation development platform for the CC3200 wireless microcontroller (MCU), the industry’s first single-chip programmable MCU with built-in Wi-Fi connectivity. The board features on-board emulation using FTDI and includes sensors for a full out-of-the-box experience. This board can be directly connected to a PC for use with development tools such as Code Composer Studio™ Cloud integrated development environment (IDE) and IAR Embedded Workbench. Visit dev.ti.com and get started with your SimpleLink Wi-Fi CC3200 LaunchPad kit today.
  • 1 × LDR Light Sensor Board

  • A new data download feature

    Roman03/05/2020 at 04:17 0 comments

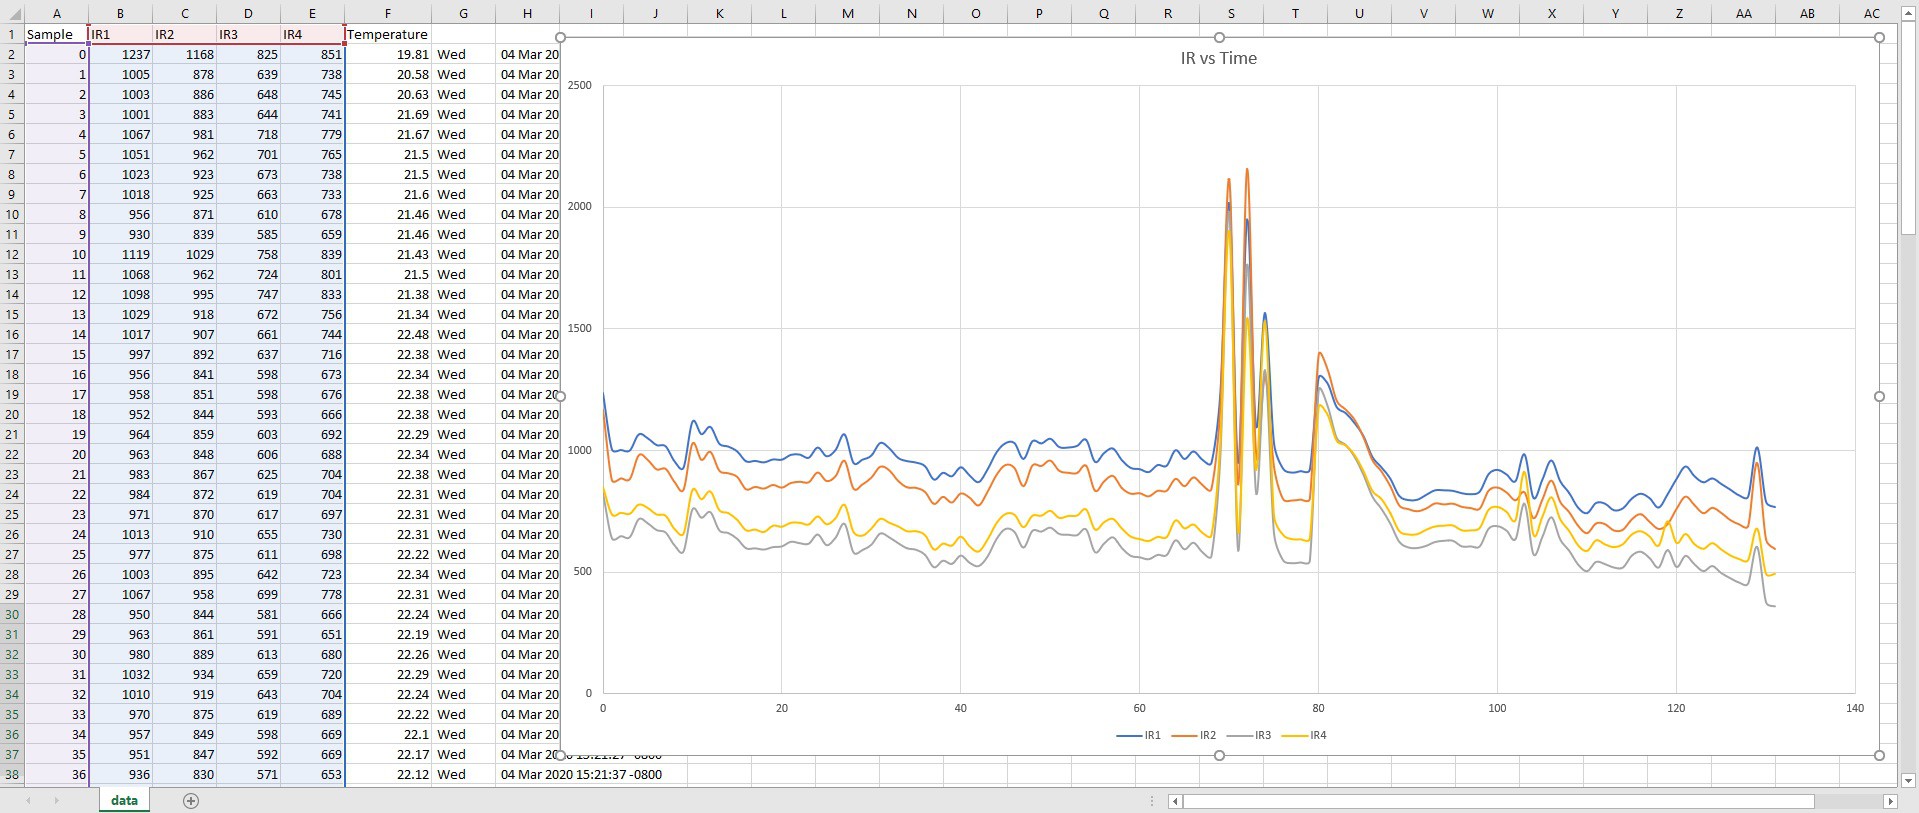
    I added a new feature to the web-app: http://cnktechlabs.com/webapp_pub/grid.php. The data stored in the SQL table now can be downloaded as a CSV file.  I ran my system for a couple of minutes and recorded data from the sensors. The IR-sensor plot in Excel looks as follows:

    It recorded my heat signature moving around.

  • Uploaded source code to github

    Roman01/29/2020 at 19:02 0 comments

    I finally got the code working. The code is uploaded to Github: https://github.com/attacker145/CC3200-Client

    This code does remote control and monitoring of the CC3200 board with AK9753 (Qwiic) (https://www.sparkfun.com/products/14349) sensor connected to I2C port. The board reports data collected from the AK9753 Human Presence sensor, the onboard I2C digital temperature sensor, and current status of the Red LED to the http://cnktechlabs.com/webapp_pub/grid.php webpage. The same webpage can be used to turn ON or OFF the onboard red LED. AK9753 is connected to I2C lines on the board - PIN_01 is the SCL and PIN_02 is the SDA. Compile and download CC3200_client.bin file into CC3200 development board. Connect Dev board to a PC. View USB messages on a Serial terminal on your PC. Monitor status of CC3200 sensors and Red LED as well as control the Red LED from http://cnktechlabs.com/webapp_pub/grid.php webpage.

    At this point I removed the light sensor and added AK9753 Human presence sensor.

  • Project update

    Roman01/24/2020 at 20:52 0 comments

    I am working a web application that will allow me to control GPIOs as well as monitor sensors connected to the CC3200 development board from the following webpage:

    http://cnktechlabs.com/webapp/grid.php

    At this point, I am able to turn ON and OFF the Red LED as well as monitor three different I2C sensor attached to the board. I will be posting all the C source code a bit later.

  • CC3200 12 bit ADC

    Roman10/07/2017 at 16:56 0 comments

    ADC initialization (main.c):

    //ADC ####ADC####ADC####ADC####ADC####ADC####ADC##############################################################
        //
        // Pinmux for the selected ADC input pin
        //
        MAP_PinTypeADC(PIN_60,PIN_MODE_255);
        uiChannel = ADC_CH_3;
        //
        // Configure ADC timer which is used to timestamp the ADC data samples
        //
        MAP_ADCTimerConfig(ADC_BASE,2^17);
        //
        // Enable ADC timer which is used to timestamp the ADC data samples
        //
        MAP_ADCTimerEnable(ADC_BASE);
        //
        // Enable ADC module
        //
        MAP_ADCEnable(ADC_BASE);
        //
        // Enable ADC channel
        //
        MAP_ADCChannelEnable(ADC_BASE, uiChannel);

    Inside the man.c while{ } loop:

    //ADC  ##########################################################################################################
        	while(uiIndex < NO_OF_SAMPLES + 4)
        	{
        		if(MAP_ADCFIFOLvlGet(ADC_BASE, uiChannel))//If a sample is ready
        		{
        			ulSample = MAP_ADCFIFORead(ADC_BASE, uiChannel);//Read the sample
        			pulAdcSamples[uiIndex++] = ulSample;//Load the sample into an array
        		}
        	}
        	//MAP_ADCChannelDisable(ADC_BASE, uiChannel);//
        	uiIndex = 0;
        	ADCsum = 0;
        	while(uiIndex < NO_OF_SAMPLES + 4)
        	{
        		//UART_PRINT("\n\rVoltage is %f\n\r",(((float)((pulAdcSamples[4+uiIndex] >> 2 ) & 0x0FFF))*1.4)/4096);
        		ADCsum = ADCsum + pulAdcSamples[uiIndex];
        		uiIndex++;
        	}
        	ADCsum = ADCsum / (NO_OF_SAMPLES + 4);
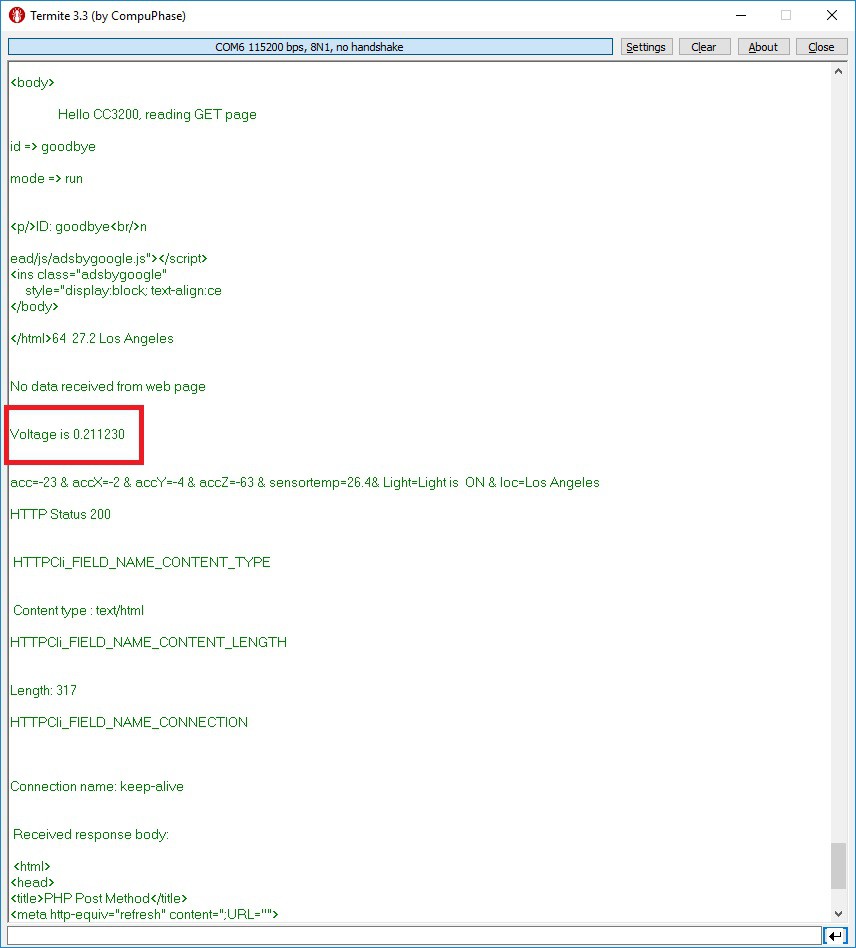
        	UART_PRINT("\n\rVoltage is %f\n\r",((ADCsum >> 2 ) & 0x0FFF)*1.4/4096);
        	//UART_PRINT("\n\rVoltage is %f\n\r",((pulAdcSamples[4] >> 2 ) & 0x0FFF)*1.4/4096);
        	UART_PRINT("\n\r");
    //################################################################################################################

  • Ambient Light Sensor

    Roman09/20/2017 at 20:01 0 comments

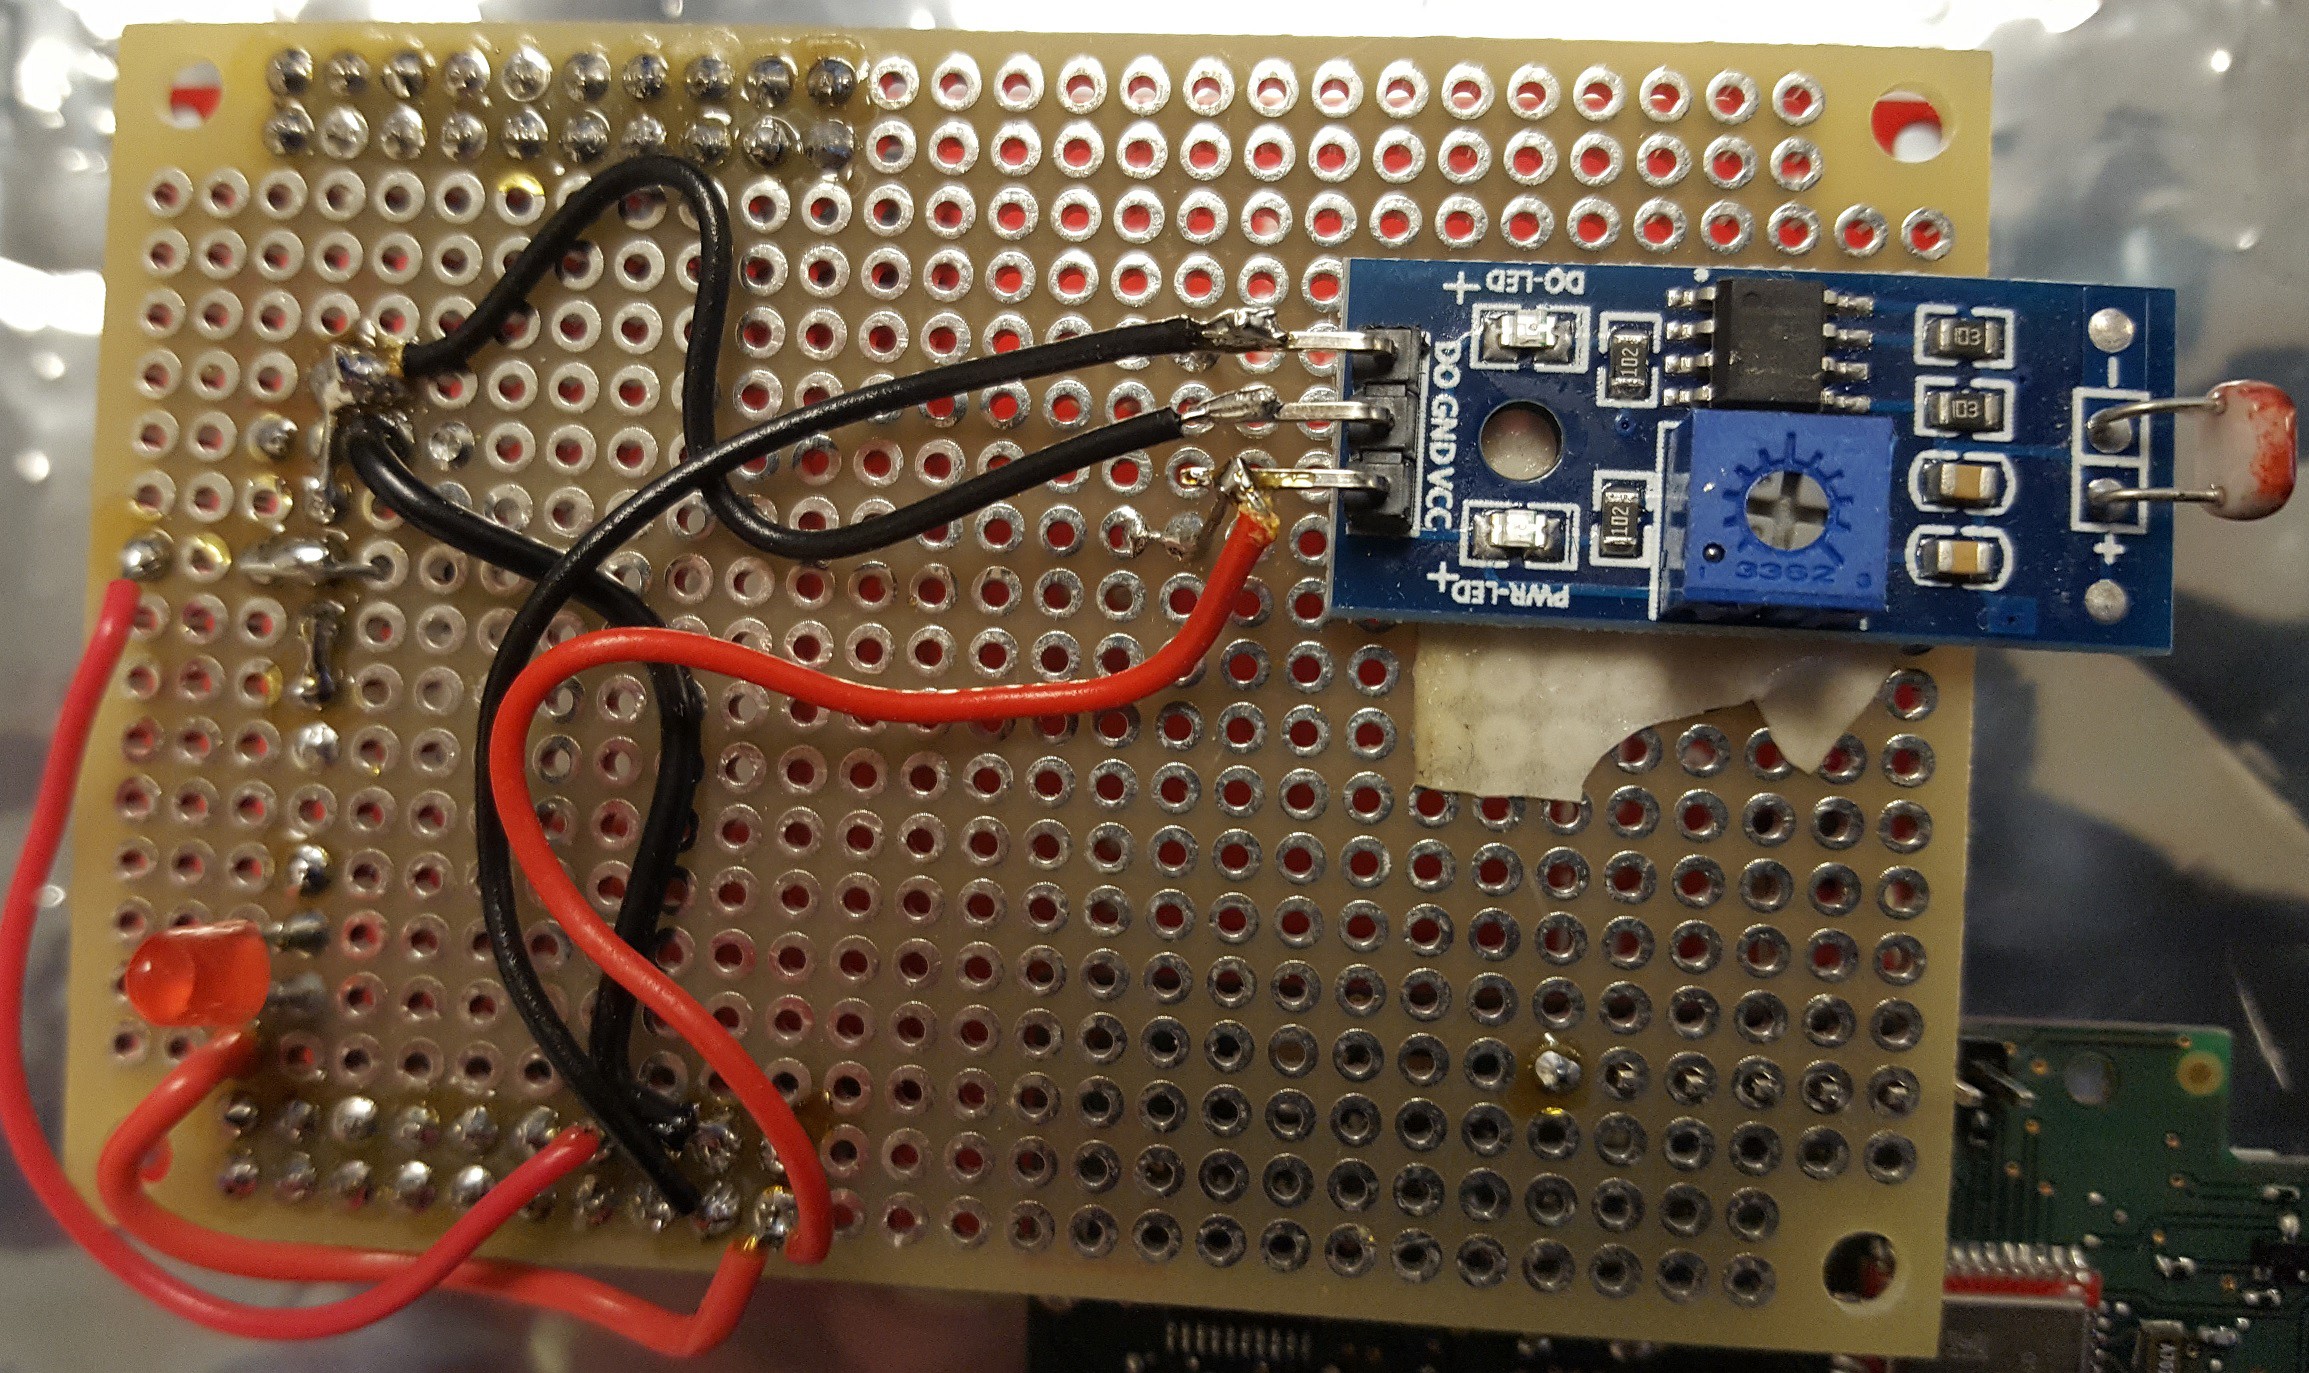
    I have connected an ambient light sensor to PIN58 of the CC3200 board:

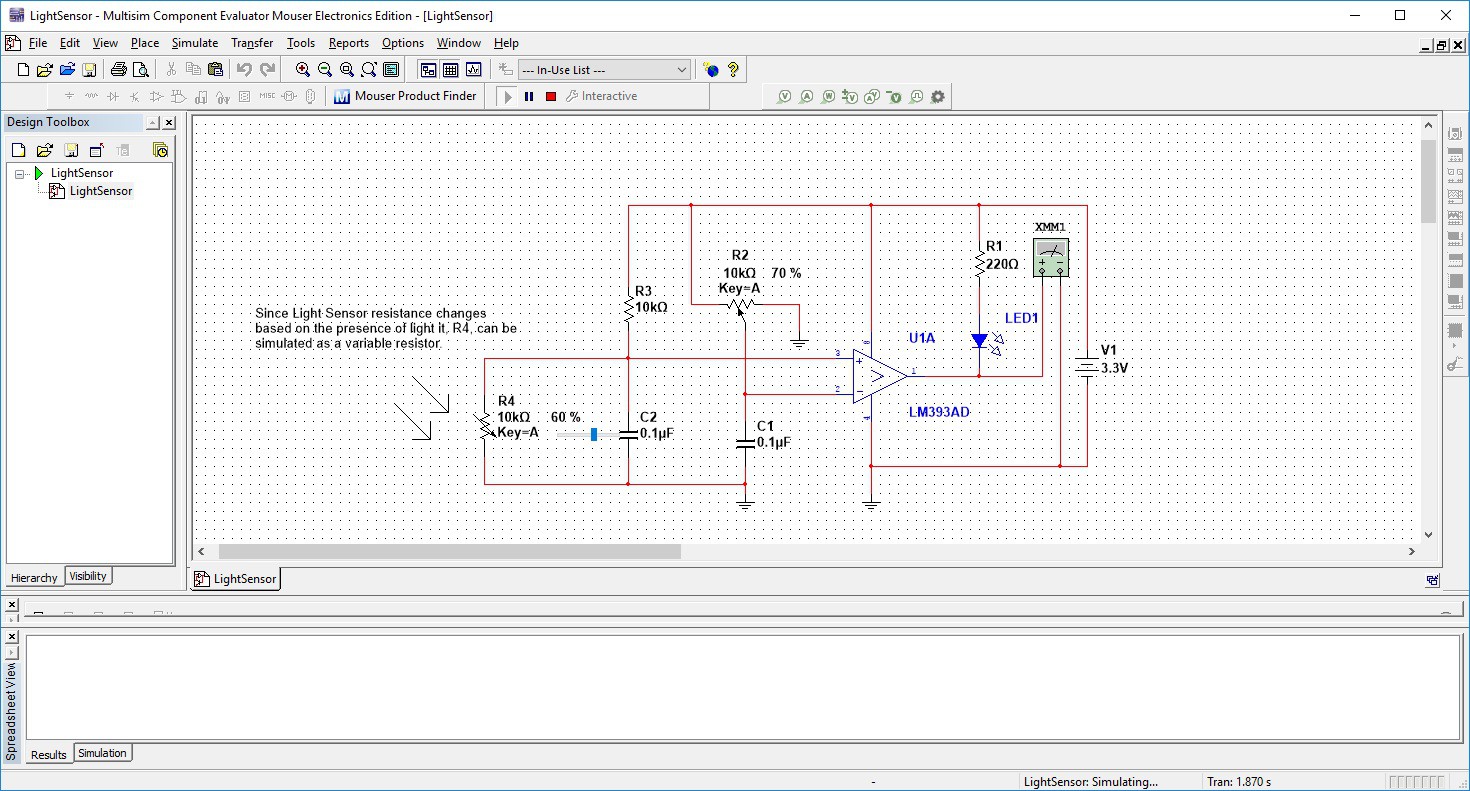
    The sensor board circuit diagram:

    I have created a web page for the light sensor board, you will find additional information here.

View all 5 project logs

Enjoy this project?

Share

Discussions

Similar Projects

Does this project spark your interest?

Become a member to follow this project and never miss any updates