-
Next Steps
08/21/2014 at 05:06 • 0 commentsMy next step with the project is to create a mold for polyurethane casting the blocks in somewhat larger quantities. I also need to go to the metal store to pick up some steel to cut rails out of.
More details coming.
-
Third Prototype
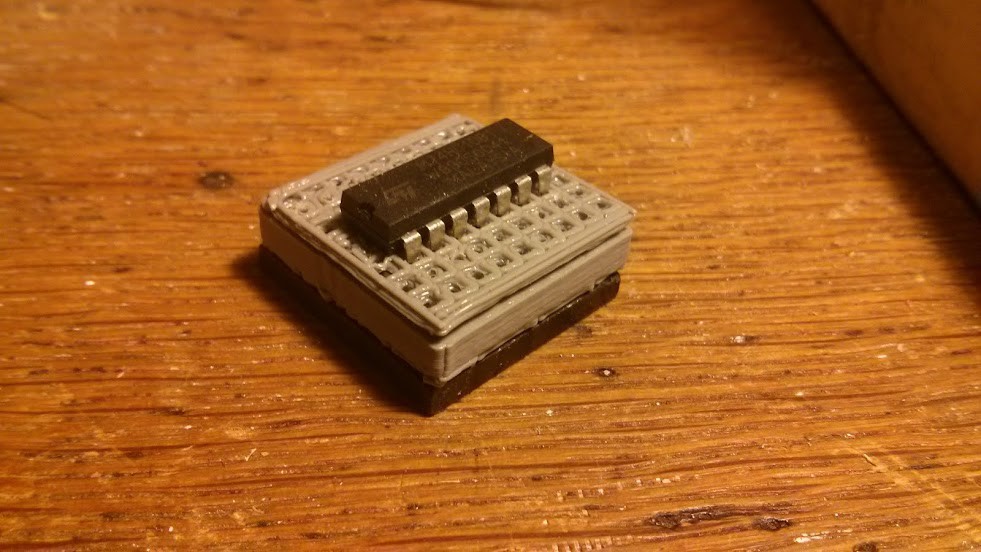
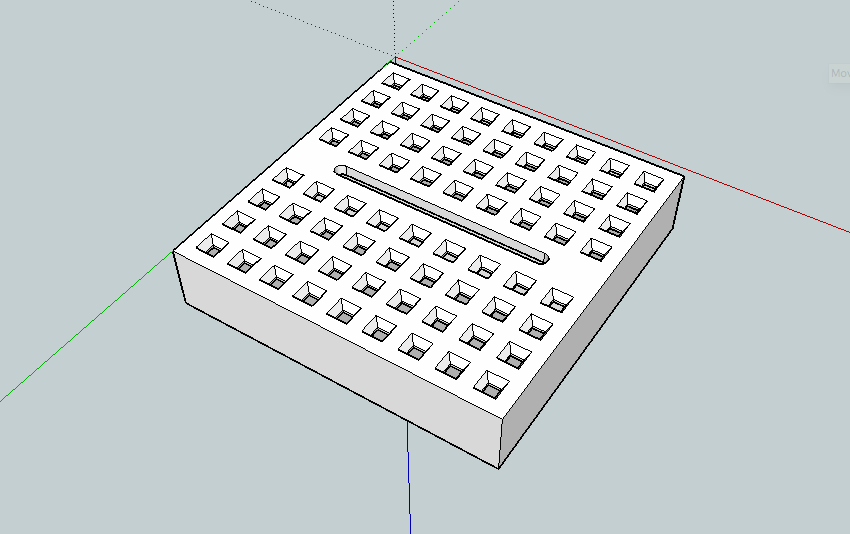
08/21/2014 at 04:50 • 0 comments![]() The third prototype is designed to print as good as a CubeX Pro 3d Printer can produce at this small of a detail. I will post a sketchup file and a .stl file for the top and middle portions of this prototype. The bottom layer is a lego board with the pins sliced off (x-acto knife and concentration).
The third prototype is designed to print as good as a CubeX Pro 3d Printer can produce at this small of a detail. I will post a sketchup file and a .stl file for the top and middle portions of this prototype. The bottom layer is a lego board with the pins sliced off (x-acto knife and concentration). -
Second Prototype
08/21/2014 at 04:45 • 0 comments![]()
![]() The Second prototype was designed to be 3D Printed. This was more or less successful. Some reaming of each hole was required to make sure they are large enough to work. This design has the wrong pin spacing, because I designed it without a chip at hand, right before I printed it, just to get the idea into the physical world.
The Second prototype was designed to be 3D Printed. This was more or less successful. Some reaming of each hole was required to make sure they are large enough to work. This design has the wrong pin spacing, because I designed it without a chip at hand, right before I printed it, just to get the idea into the physical world.Rails are again made of aluminium can. Again, no lego integration yet.
-
First Prototype
08/21/2014 at 04:39 • 0 comments![]() This first prototype is made of a wooden block with 0.1" slots cut with a bandsaw by eye. The rails are cut from aluminum can material, and fatigue quickly, but these have held up to many insertions of the chip. This prototype was primarily to figure out the best way to construct the breadboard component. I was not focusing on Lego integration at this point.
This first prototype is made of a wooden block with 0.1" slots cut with a bandsaw by eye. The rails are cut from aluminum can material, and fatigue quickly, but these have held up to many insertions of the chip. This prototype was primarily to figure out the best way to construct the breadboard component. I was not focusing on Lego integration at this point.
 The third prototype is designed to print as good as a CubeX Pro 3d Printer can produce at this small of a detail. I will post a sketchup file and a .stl file for the top and middle portions of this prototype. The bottom layer is a lego board with the pins sliced off (x-acto knife and concentration).
 The Second prototype was designed to be 3D Printed. This was more or less successful. Some reaming of each hole was required to make sure they are large enough to work. This design has the wrong pin spacing, because I designed it without a chip at hand, right before I printed it, just to get the idea into the physical world.
 This first prototype is made of a wooden block with 0.1" slots cut with a bandsaw by eye. The rails are cut from aluminum can material, and fatigue quickly, but these have held up to many insertions of the chip. This prototype was primarily to figure out the best way to construct the breadboard component. I was not focusing on Lego integration at this point.