Close
0%
0%

Rotovis-Mod1

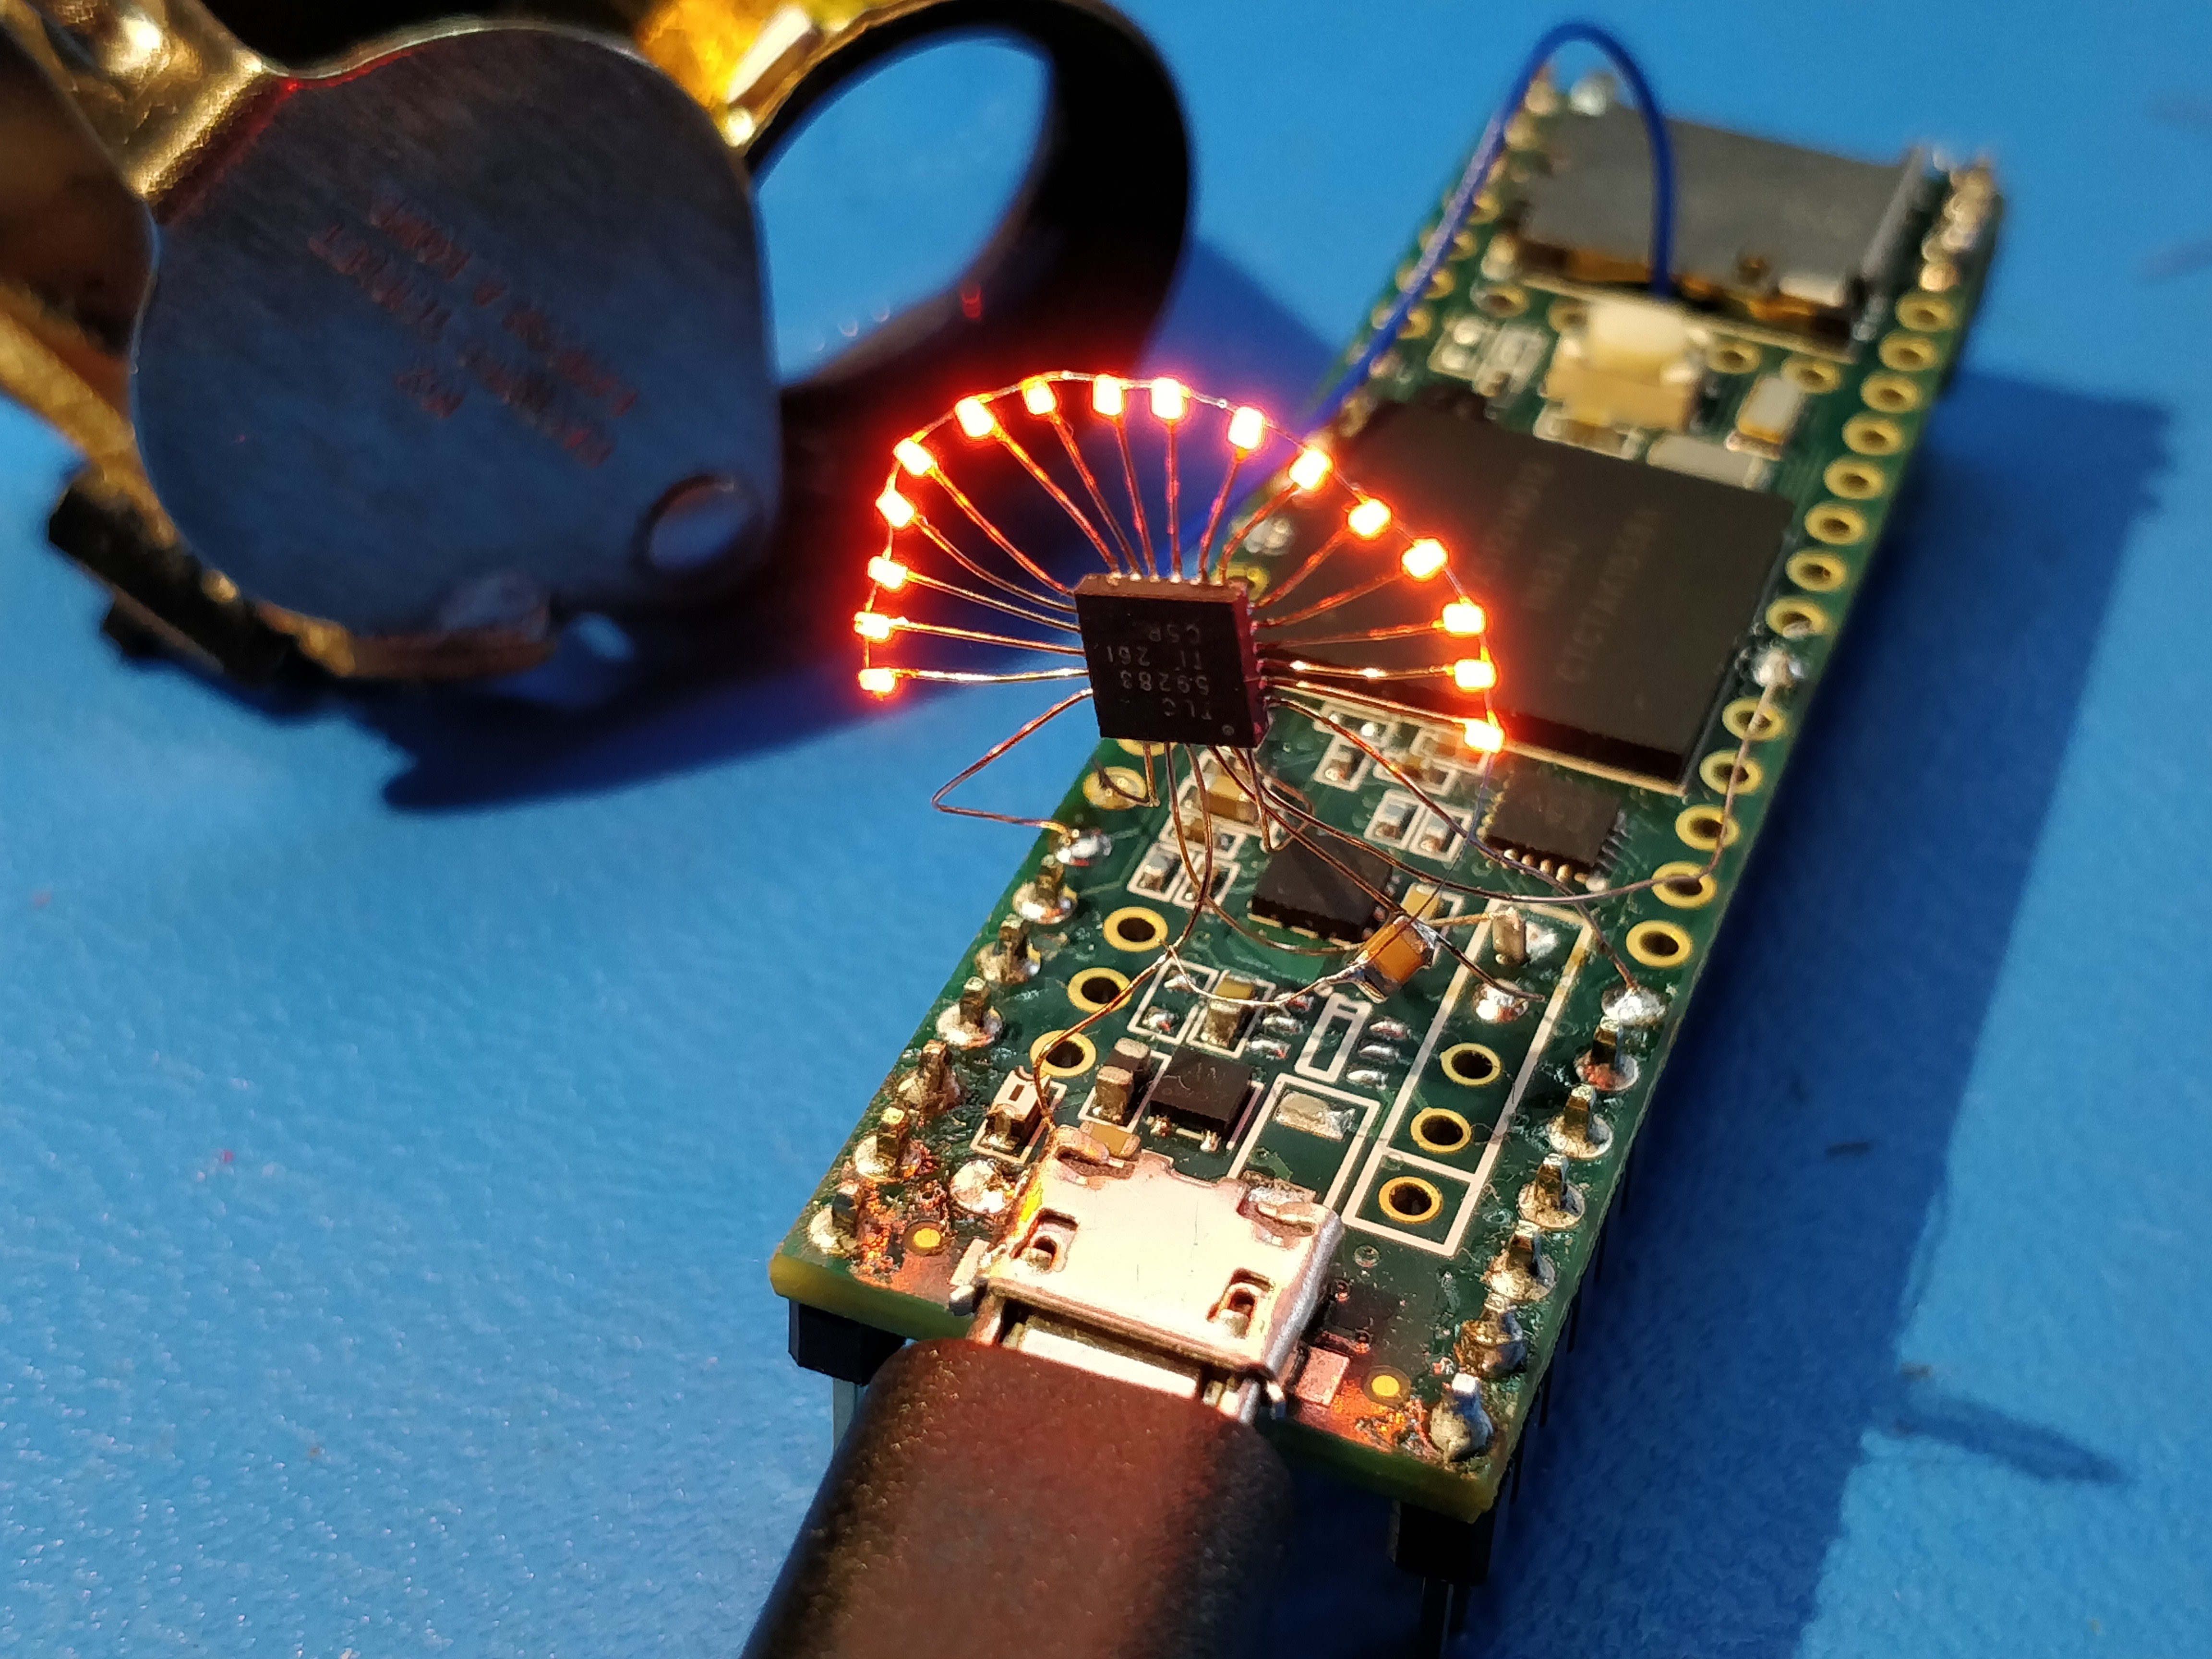
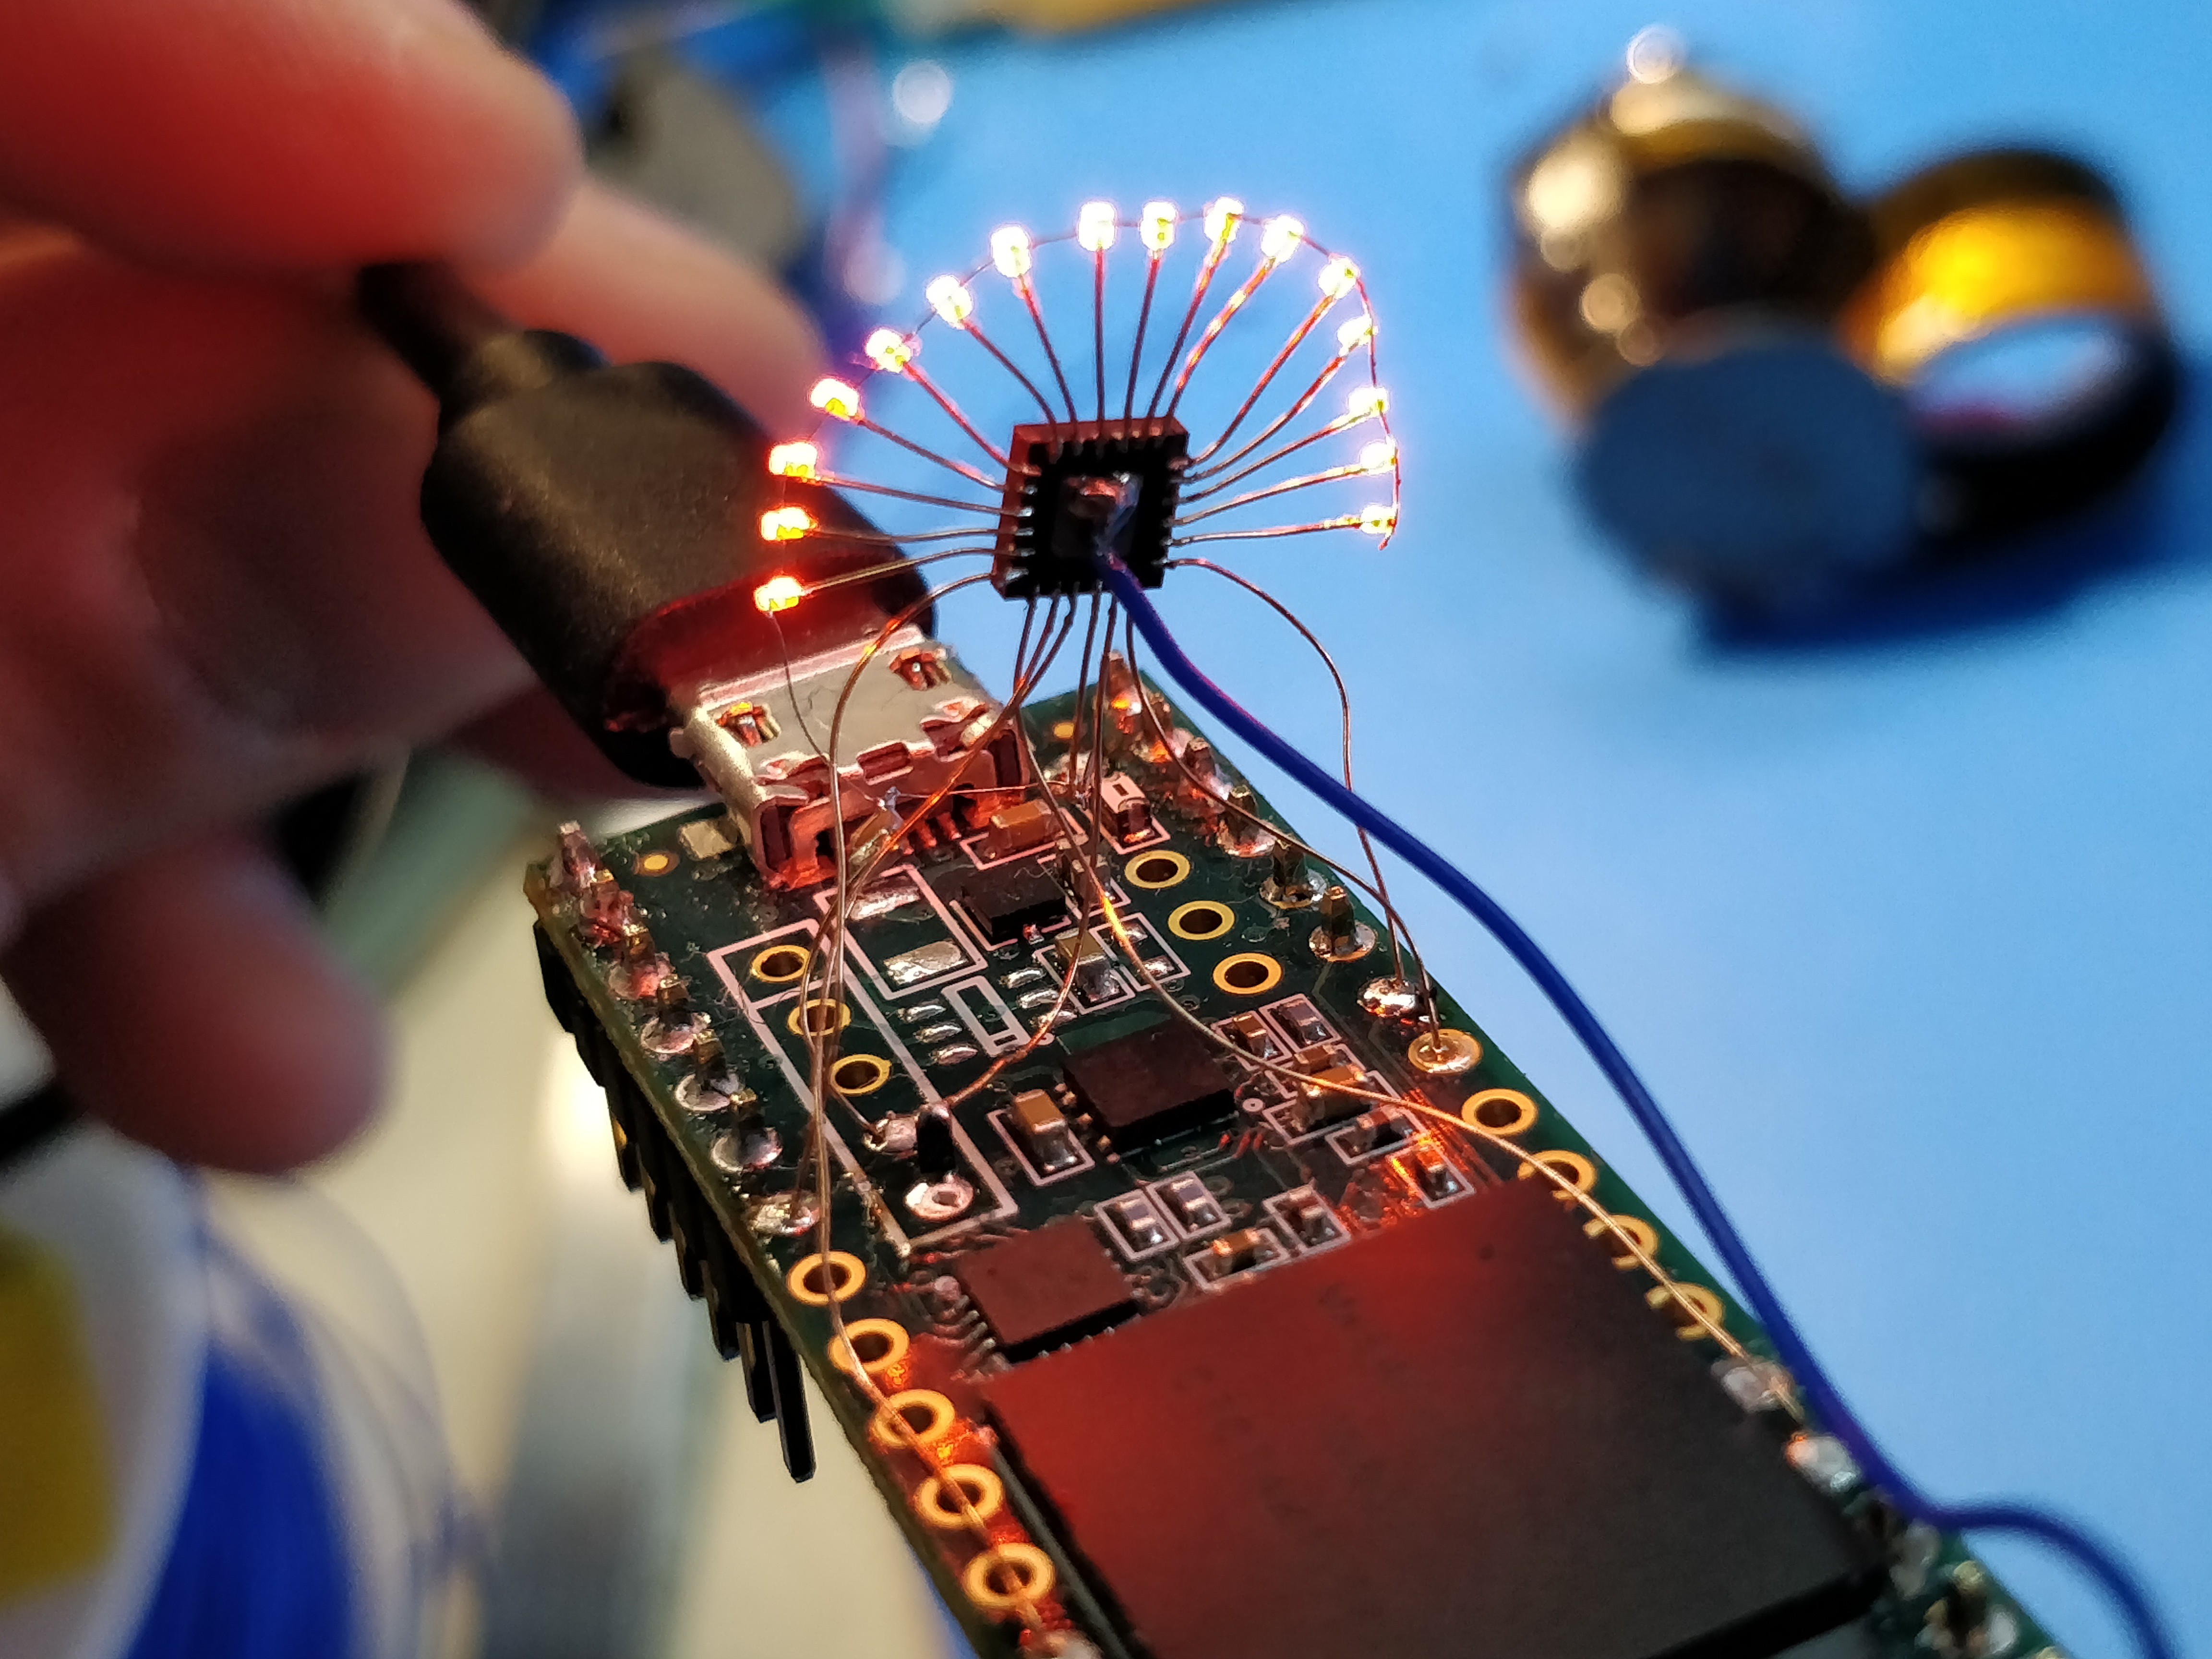
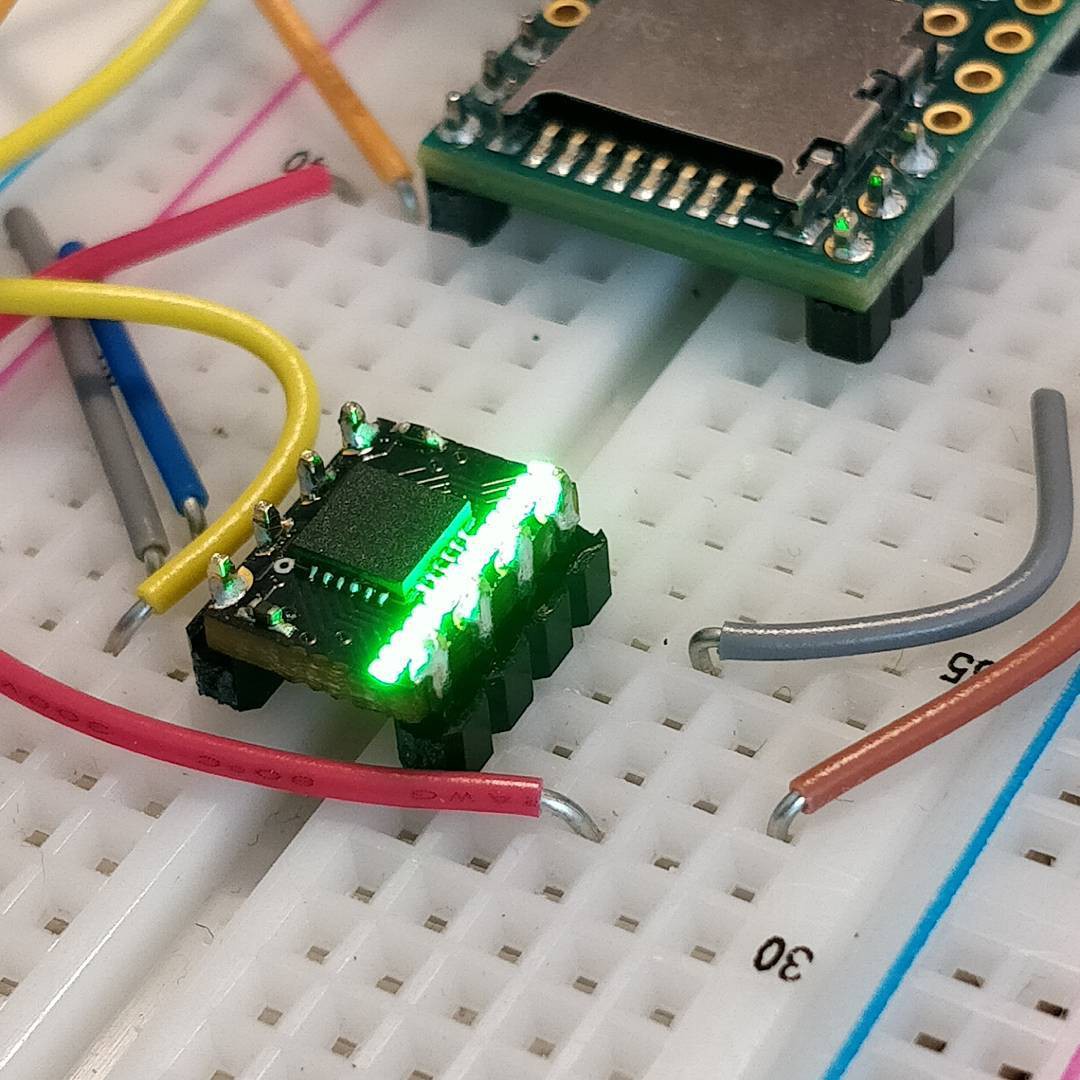
40-DPI monochrome LED module designed for persistence-of-vision displays. 16-element bargraph in an 8-pin castellated DIP package.

Similar projects worth following
Persistence-of-vision displays are cool, but high density ones can get a bit tedious to build. Rotovis-Mod1 to the rescue!

This is a project I have been pushing along on infrequent weekends for the last year. The latest boards work so it is time to publish details. I have a few ideas in the works that use these displays, but I encourage any interested party to build one (or more!) yourself and start experimenting with persistence-of-vision display concepts.

40 DPI is really really really high LED density. It's not Virtual Boy level, but it's better than what you may be used to. You will need a stainless steel stencil, a 0.15mm / 6 mil capable PCB process, and a steady hand (along with your reflow platform of choice) to make a Rotovis-Mod1. Components cost < $5 per module if you're building a dozen, as I am.

Released under the terms of the MIT license. See GitHub repo for all hardware design files.

The Rotovis-Mod1 is designed to help users quickly create high-density (40 DPI, roughly equal to a TI-83) persistence-of-vision displays. Each board is the size of an 8-pin narrow DIP package, and can be used with or without header pins due to its castellated terminals. Rotovis-Mod1s can also be used for other tiny 1D display applications such as tiny bar graphs or tiny KITT scanners.

The Rotovis-Mod1 is essentially a tiny breakout board for one of TI's 16-channel constant current LED driver ICs with LEDs added on for good measure. As such, you should really go read the IC's datasheet; in particular, take a look at the timing diagram on page 11 and the current value setting table on page 14. Or you can just slap the board onto the nearest SPI port and add a bit of logic for handling the BLANK line; these devices just are shift registers with some LED drivers tacked onto the outputs. 

The eight pins and sixteen LEDs on the Rotovis-Mod1 are numbered as follows, if viewed from above with the LED bar graph on the right:
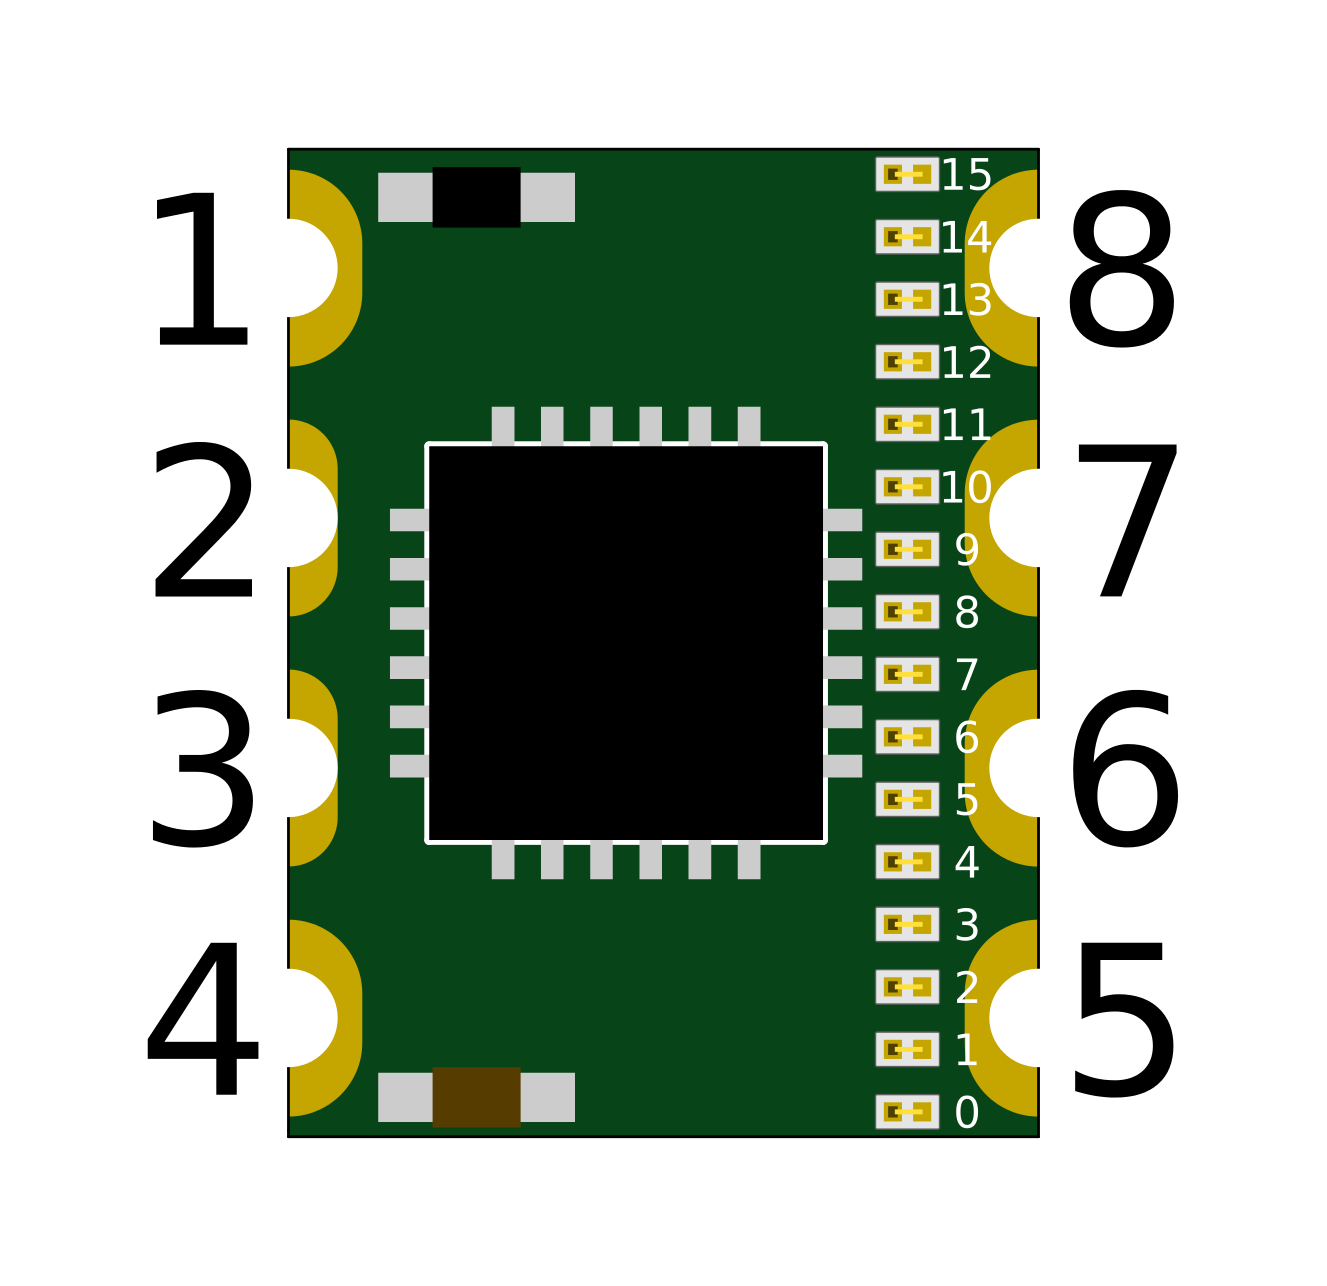
These eight pins function as follows:

PIN
FUNCTION
1SOUT: Serial data out. Connect to downstream Rotovis-Mod1 boards.
2VCC: 3.0 - 5.5 VDC
3, 7
GND
4SIN: Serial data in. Can be driven from an SPI port (connect to MOSI).
Only connect to the first Rotovis-Mod1 board.
5SCLK: Data clock. Can be driven from an SPI port (connect to SCK).
Connect to all Rotovis-Mod1 boards.
6LAT: Data latch. Drive using a GPIO pin. Latches data when low.
Connect to all Rotovis-Mod1 boards.
8
BLANK: Display blank. Drive using a GPIO pin. Blanks display when high.
Connect to all Rotovis-Mod1 boards.

  • 1 × TLC59283RGER Texas Instruments 16-channel constant-current LED driver, 24VQFN
  • 16 × 0201 LEDs I used devices from the SunLED NanoPoint-0201 series, but I'm guessing others would work too. Footprint pad size is 0.175mm x 0.25mm, with the longer dimension perpendicular to the LED's body.
  • 1 × 0402 current limiting resistor Read the TI datasheet, but roughly: 5k = 10 mA, 10k = 5 mA.
  • 1 × 0402 0.1 uF 10 VDC ceramic capacitor This might need to be embiggened.

  • the obligatory free-air version

    zakqwy06/08/2018 at 17:14 0 comments

    because why not?

  • Building these boards is its own special brand of hell

    zakqwy11/05/2017 at 23:23 1 comment

    I built a handful of Rotovis-Mod1s today. The task ended up being a bit more tedious than I'd hoped, and I usually don't mind 'tedious'. I kept track of time per build and found that typical times ranged from 15 minutes (fast paste and place and zero rework) to well over an hour (replacing half a dozen LEDs, maybe resoldering the TI chip for good measure). Gah.

    In the process I did try a few interesting techniques that @Radomir Dopieralski , @davedarko , @Jarrett , @christoph and I discussed last week:

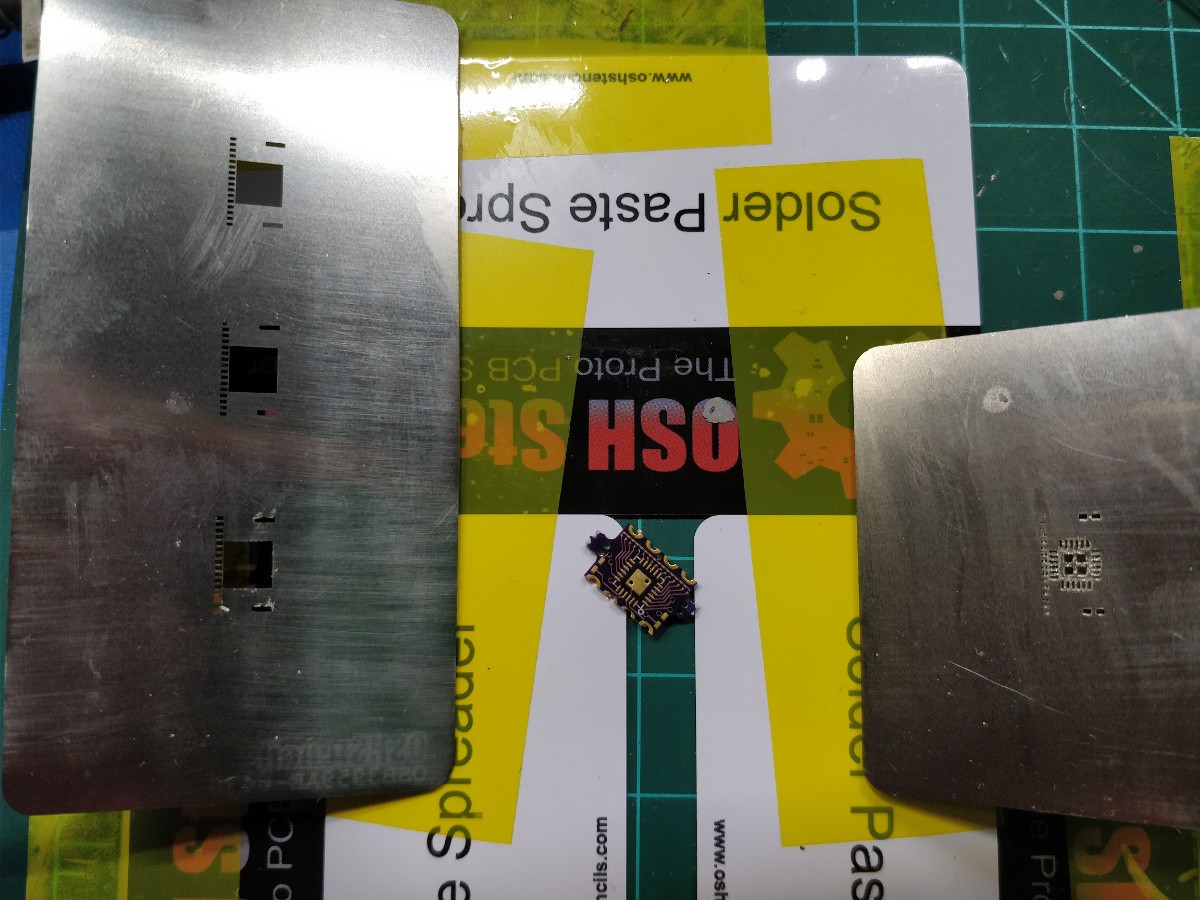
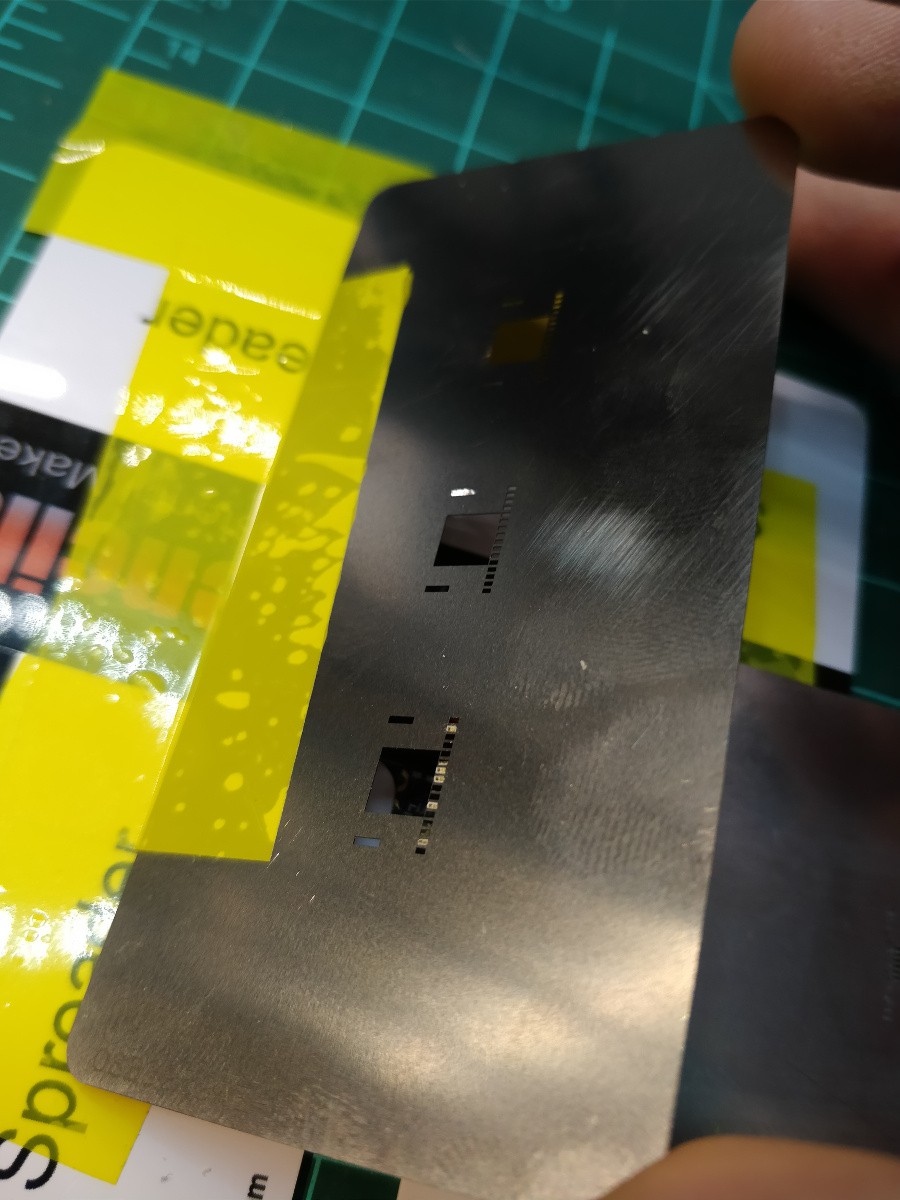
    [above, a Rotovis-Mod1 board with a solder paste stenicl on the right and an alignment stencil on the left. They're both carefully taped down so one can be flipped onto the PCB after the other. I think the reason OSHstencils doesn't sell 1/32" alignment jigs is that their paste spreaders are the right thickness for that size PCB. And yes, the actual board gets its mousebites carefully sanded off before assembly...]

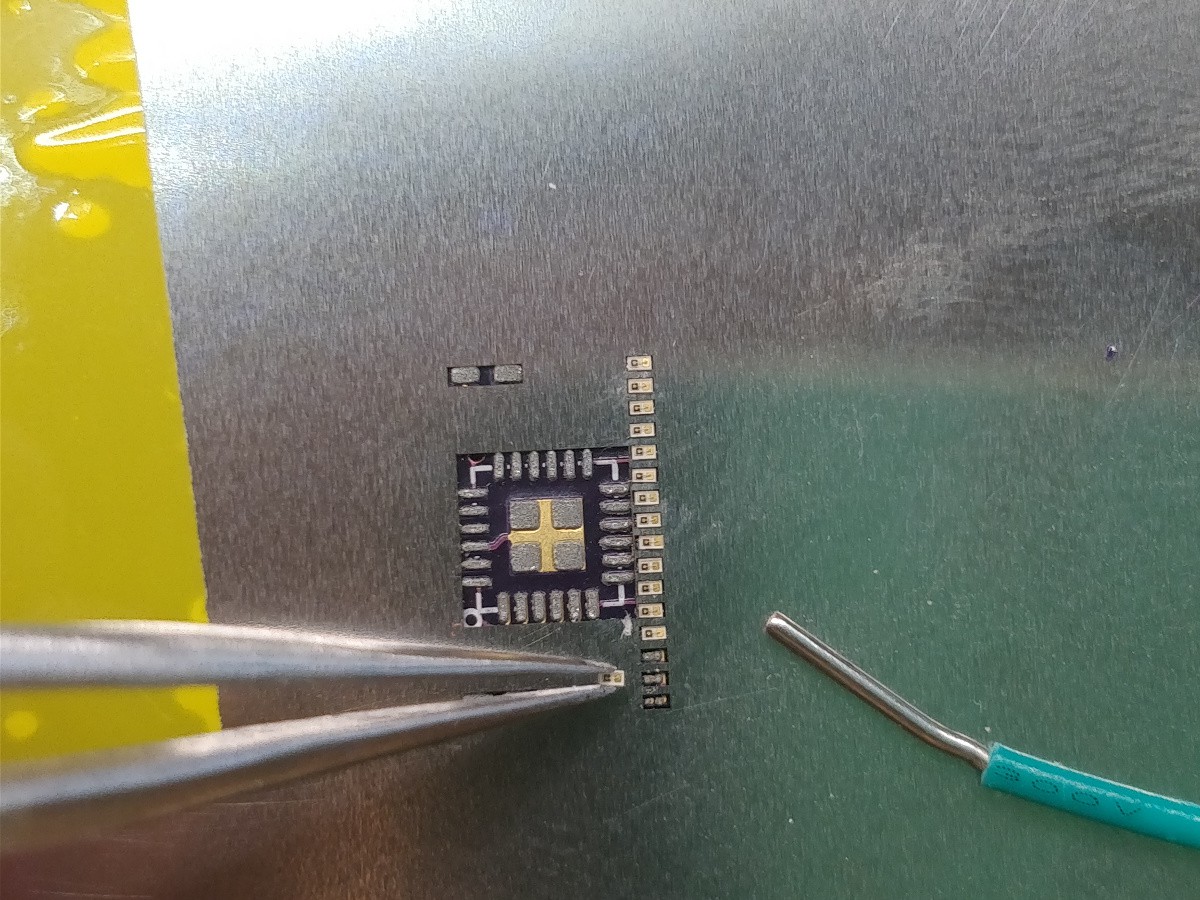
    I wanted a better method for actually applying the 0201 LEDs to the PCB after paste. I sent a paste Gerber to OSHstencils that fit the outline of each component: extra clearance for the passives and IC, and three different sizes for the LEDs -- nominal (0.65mm x 0.35mm), +0.03mm per dimension, and +0.06mm per dimension. The largest one fit best:

    [above, inserting the 14th of 16 LEDs onto a pasted Rotovis-Mod1 board through the alignment stencil. Breadboard jumper for scale... ]

    ...but the stencil fit was still a little bit tight on a few LEDs:

    [GAH NO NO NO NO NO NO THIS IS HORRIBLE]

    The issue above -- LEDs sticking in the alignment stencil -- was actually pretty easy to fix; I just lifted the stencil a tiny bit and used tweezers to poke through any LEDs that held on. This worked well and helped me avoid rework on a few (but certainly not all) of the boards. Going 16 for 16 often resulted in a shout of joy, which is one reason I'm doing this on a weekend.

    I don't take good care of my SAC305 solder paste; it sits in a syringe on my workbench until I need it, as opposed to being kept in a food-free refrigerator and tossed after 6 months. So I also started mixing a bit of gel flux in with the solder paste so it was a bit more sticky -- maybe 20% flux by volume. This made the QFN paste print look pretty rough, but helped the LEDs stick to the board and survive a trip through the toaster oven. Which, as I've said before, isn't special -- it's just a stock convection toaster oven that I run on preheat mode for ~4 minutes at 205 C.

    Rework wasn't pleasant. Lots of hot air and cursing, but I managed to avoid scrapping any boards. Okay, I scrapped one board. And probably two dozen LEDs. Ah well, that's why I bought a ton.

  • inspiration & history

    zakqwy10/31/2017 at 15:32 0 comments

    Persistence-of-vision displays are fascinating. They can create text and images out of thin air, and the hardware can be quite small compared to the size of the display if user-generated motion is used to create the 'scan' dimension. I think POV displays never took off commercially (with a few notable but small exceptions) for a few main reasons: it's tough to make a rectilinear display; high-speed mechanical display scanning is loud, power-hungry, and somewhat dangerous; and blue LEDs weren't viable until well into the age of LCDs. 

    The first part of this log will cover a few POV projects and products that I feel are interesting; if you think of any others, feel free to add a comment below. The second part discusses two of my projects that evolved into the Rotovis-Mod1.


    inspiration


    Virtual Boy

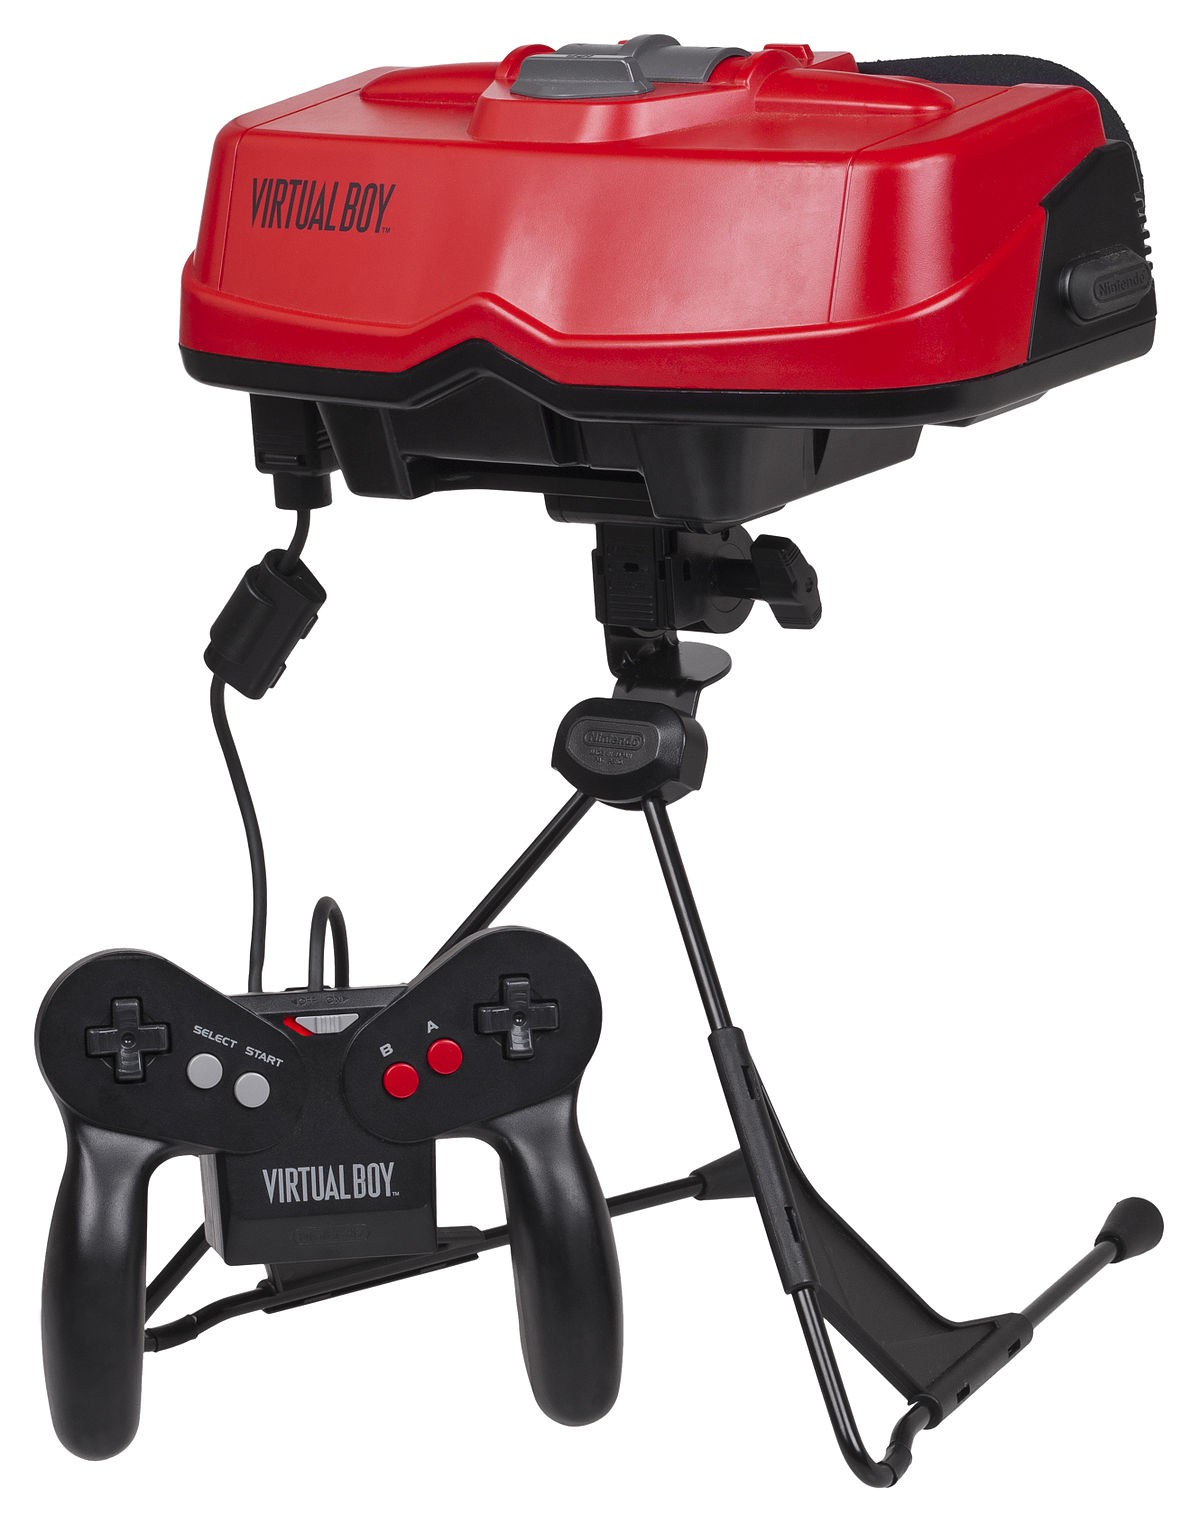
    [Virtual Boy system. Photo by Evan-Amos, available here.]

    The Virtual Boy is a game system developed by Nintendo in the early 90s. It's a fascinating system for many reasons, including the unique form factor (the device sits on a table during use) and the unique true-3D games. However, the display technology is the key for this project.

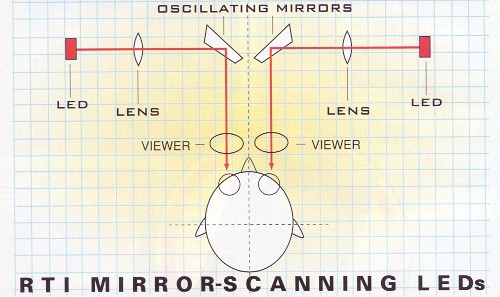
    [Virtual Boy display diagram. The mirrors rapidly scan back and forth, turning the linear LED arrays into a full image. Photo from Micro-64, available here.]

    As shown in the diagram above, the Virtual Boy used a pair of 224-pixel red LED arrays that were rapidly scanned using two oscillating mirrors to create two 384x224 images. The LED arrays, which are occasionally available on eBay as replacements for broken VB units, were designed by a company called Reflection Technology Inc.

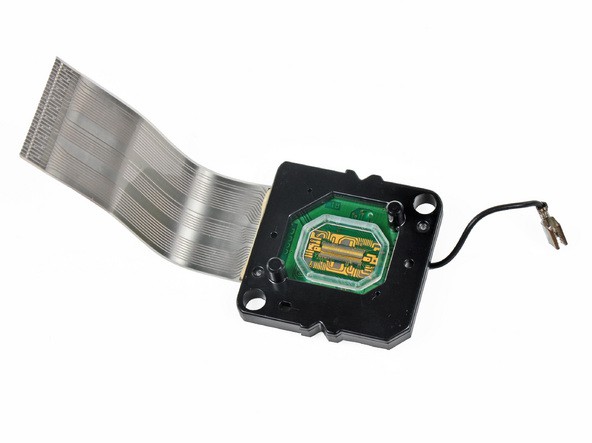
    [Virtual Boy display module, showing the tiny 224-element LED strip. Photo from iFixit's excellent and thoroughly documented teardown of the game system, available here.]

    As far as I have been able to tell, the RTI display modules are by far the highest resolution POV-specific LED arrays ever created, and I don't believe they were ever used for any other products. I wish the modules were more readily available, as I would feel bad using eBay'd displays and potentially depriving a Virtual Boy fan of the parts need to fix their broken game system.

    SpokePOV

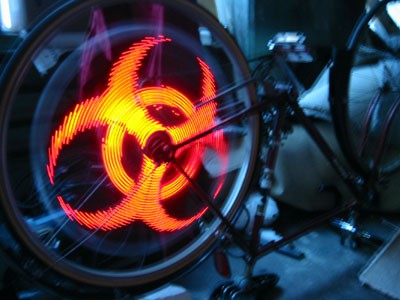
    [SpokePOV installed on a bike, showing the biohazard symbol. Photo by Limor Fried, available here.]

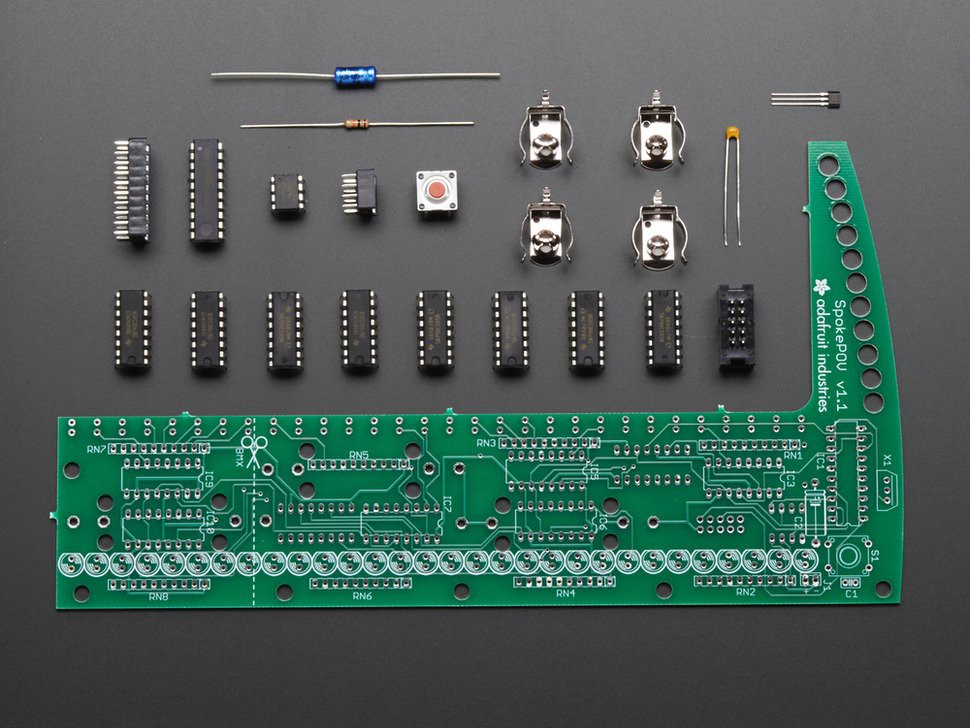
    The SpokePOV, from what I can tell, was one of Adafruit's first products. The kit used an array of 30 LEDs and a bundle of shift registers to create images, and is driven by an ATtiny2313 microcontroller. Combined with a Hall Effect sensor and a rare earth magnet mounted to a bike frame, the SpokePOV would display simple graphics on a user's bike wheel.

    [SpokePOV kit, no longer for sale but info still available here.]

    I became aware of the kit when I started buying USBtinyISP programmers; that product is also called the 'USB SpokePOV Dongle', as it was originally intended for use programming SpokePOV boards. The SpokePOV is quite low resolution, but for its use case (bike safety + teaching basic soldering) it was a great product; viewed from ten meters away, the images were crisp enough and quite bright. 

    voLumen

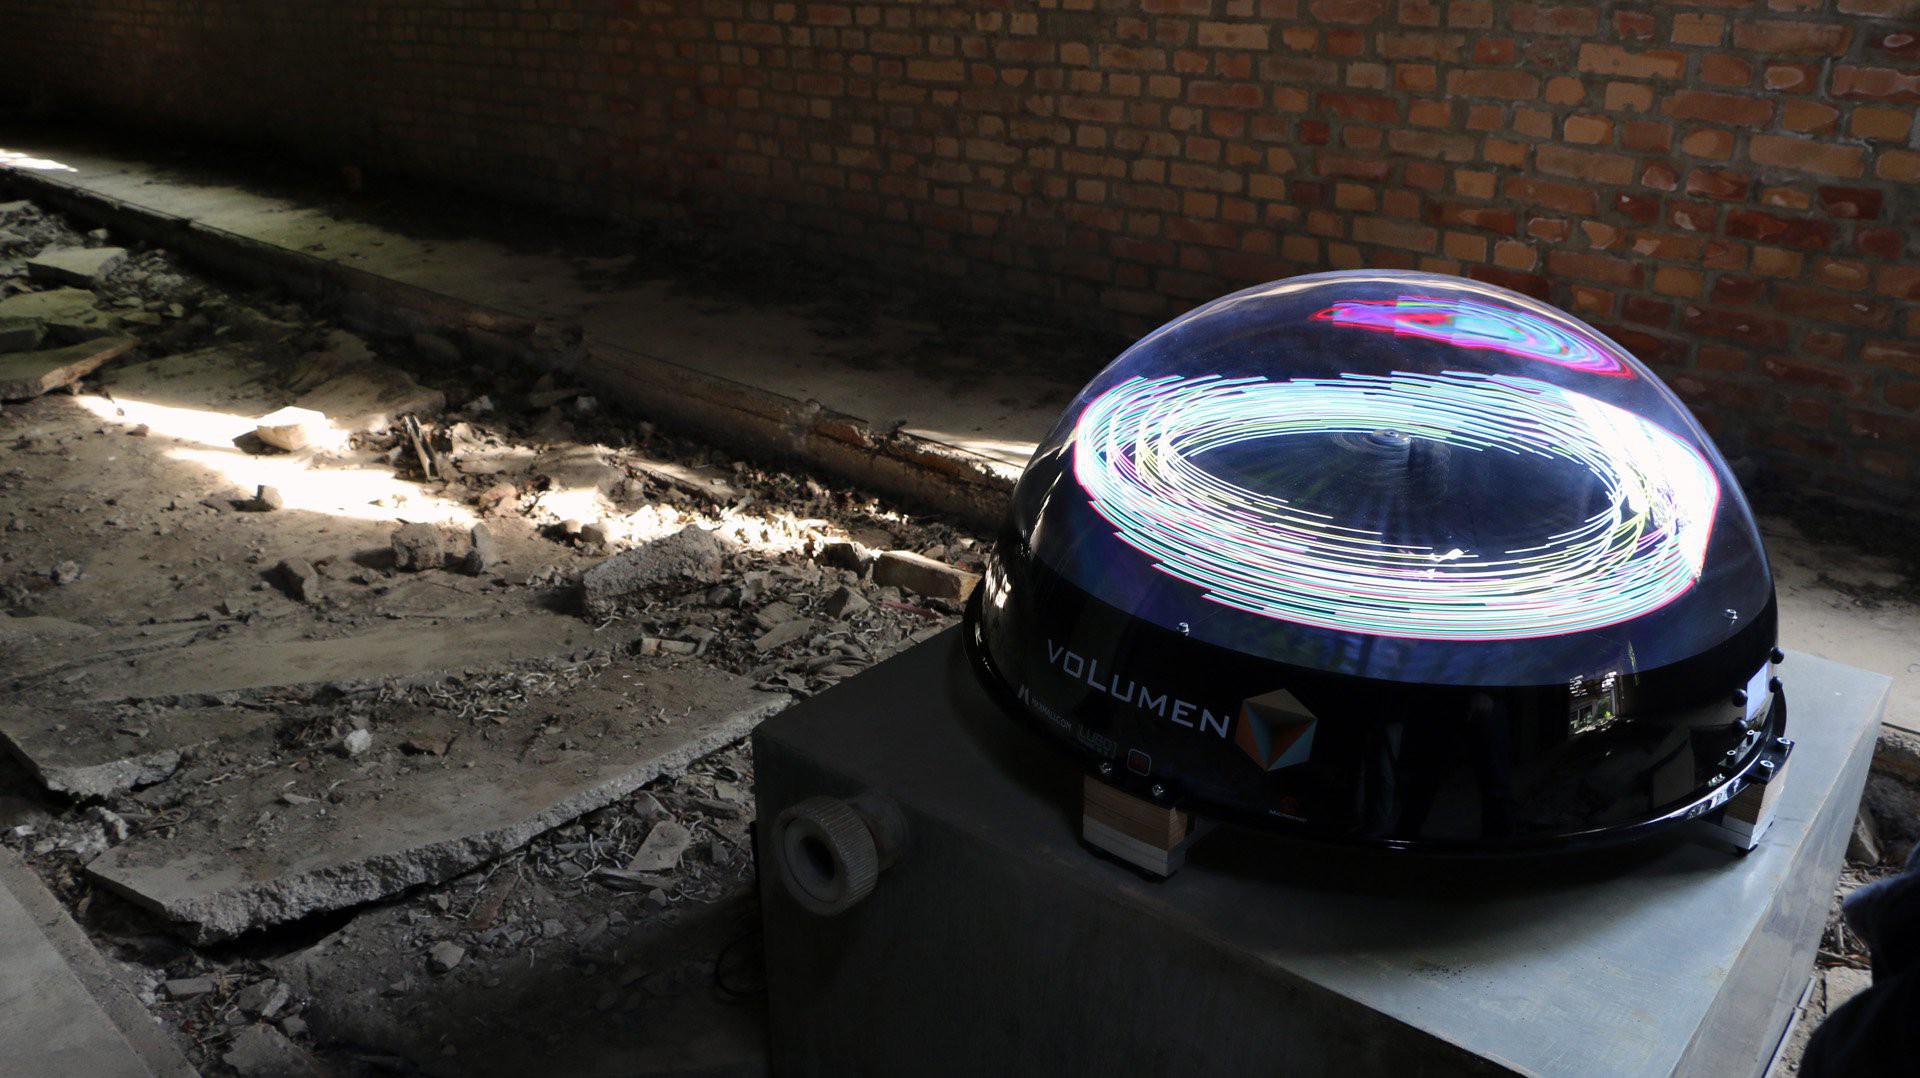
    [voLumen gallery image, available on the project page here.]

    Currently, there are 28 projects on Hackaday.io that include the 'Persistence of Vision' tag. #voLumen isn't one of them (it's under 'POV' instead), but it was one of the first I saw when I joined the site and still stands out as one of the most polished examples around. As suggested by its name, voLumen uses...

    Read more »

View all 3 project logs

Enjoy this project?

Share

Discussions

HP (@banjohat) wrote 08/22/2018 at 17:45 point

This is amazing! I really look forward to see where you get with this! Great job on those 0201 LEDs that's just masochistic ;)

  Are you sure? yes | no

Jan wrote 08/23/2018 at 06:02 point

Absolutely true. His write-up regarding soldering the PCBs is quite the fun read as well. Have switched from 0805 to 0603 and feel quite progressive doing so. I mean my drawers are still full with DIL parts and wired resistors etc :)

  Are you sure? yes | no

Bastiaan wrote 01/05/2018 at 18:56 point

Did you make the image with pin assignment manually or did you use some script which takes the .kicad_pcb as input? Awesome project and great write-up!

  Are you sure? yes | no

zakqwy wrote 08/27/2018 at 01:40 point

Nothing too fancy. I exported *svg board images from KiCad and added color and annotations in Inkscape.

  Are you sure? yes | no

Jarrett wrote 10/31/2017 at 08:40 point

Looking at this again, I feel like you should probably take a picture of it in your hands or something with better scale. You want people to appreciate the size of 0201 LEDs!

  Are you sure? yes | no

zakqwy wrote 10/31/2017 at 13:38 point

ah that is an excellent idea. will do!

  Are you sure? yes | no

zakqwy wrote 10/31/2017 at 20:17 point

okay I added a T-1 3/4 blue LED for scale.

  Are you sure? yes | no

Peter McCloud wrote 11/02/2017 at 02:31 point

Really awesome image! I really appreciate the scale now. Props to @Jarrett for the suggestion.

  Are you sure? yes | no

davedarko wrote 11/02/2017 at 07:27 point

That's a 10mm LED, right? ;)

  Are you sure? yes | no

Jarrett wrote 10/29/2017 at 07:57 point

Hah, I've been working on a TLC5947 board for my #Global View POV globe

It's a good line of chips

  Are you sure? yes | no

zakqwy wrote 10/29/2017 at 13:45 point

24 channels! daaang

  Are you sure? yes | no

Similar Projects

Does this project spark your interest?

Become a member to follow this project and never miss any updates