-
Man! Some roadblocks, and it works.
12/01/2017 at 15:21 • 0 commentsSince I have a day off, I tried to test the circuit further to see what works and what doesn't.
Here's the video:
And the github page: https://github.com/uncle-yong/pic16f1579-music-box-pbver
What works:
- I have to use a 74HC125N (tri-state buffer) to convert this 1 and 0 from the PWM to the 1 and Hi-Z. The /OE pin is coupled to the PWM, the A to the +5V and the Y is the output. Just simply toggling the /OE pin gives you the +5V or the Hi-Z, so that's done already!
- Used the melody parsing system by Len Shustek and made up a 3-tone music box, with very less overheads compared to the original PICBasic's design.
- The microcontroller is a PIC16F1579 - with 4 independent PWM modules. Some more space too!
What doesn't work:
- The PWM generator doesn't alternate between 1 and Hi-Z. There is no way I can have a microcontroller with that feature! Using an external 74HC125N solves that problem.
- After the tri-state buffers, the decay envelope isn't complete! R-C combination at the bottom of the circuit - I have to replace the 2.2uF and the 100K resistor to the 10uF and 10K resistor, for the decay sound envelope to reach almost +5V, or when it passes through the bypass cap before the LM386, it is almost 0V.
What is difficult:
- Controlling the attack and decay envelopes. I had to do many trial and errors on the RC combinations. Since the RC is also coupled to the input/outputs of the microcontroller, the behaviour of the decay has been altered. If I have used a separate attack/decay generator earlier, that wouldn't have happened easily.
The schematic (1/2):
                                           +5V
                                           ^
                                           |
                                           +---------------------------------+
                   PIC16F1579              |       74HC125                   |
                  +------------------+     |      +-----------------+        |
                  |                  |     |      |                 |        |
                  |                  |     |      |                 |        |
                  |                  |     |      |                 |        |
  Gate1  +--------+ RB5          RB7 +------------+ 1/OE            |        |
                  |                  |     |      |                 |        |
                  |                  |     +------+ 1A              |        |
                  |                  |     |      |                 |        |
                  |                  |     | +----+ 1Y              |        |
                  |                  |     | |    |                 |        |
  Gate2  +--------+ RB4          RC7 +------------+ 2/OE       3/OE +-----+  |
                  |                  |     | |    |                 |     |  |
                  |                  |     +------+ 2A           3A +--------+
                  |                  |       |    |                 |     |
                  |                  |       | +--+ 2Y           3Y +--+  |
                  |                  |       | |  |                 |  |  |
  Gate3  +--------+ RC2          RB7 +----+  | |  |                 |  |  |
                  |                  |    |  | |  |                 |  |  |
                  |                  |    |  | |  |                 |  |  |
                  +------------------+    |  | |  +-----------------+  |  |
                                          |  | |                       |  |
                                          +-------------------------------+
                                             | |                       |
                                             | +----+SqWave CH2        |
                                             |                         |
                                             +------+SqWave CH1        +-----+SqWave CH3
Schematic (2/2):
             EACH CHANNEL:
                                              100K

         SqWave CHx +----------------+--------/\/\/\/\------------>Output_x
                                     |
                                     \
                                     /
                                     \ 10K
                                     /
                                     \
                         220         /
                                     |
            Gate_x  +----/\/\/\/\----+
                                     |
                                   + |
                                    ---  10uF
                                    ---
                                     |
                                    +++
                                    ///


MIXING THREE CHANNELS TO LM386 MODULE:

                                                                            //
SqWave CH1  +---------------+            +-----------------+               //
                            |  100nF     |                 |           +--+/+
                            |            |                 +-----------+  | |
SqWave CH2  +---------------+-----||---->+ LM386 module    |           |  | |
                            |            |                 +-----------+  | |
                            |            |                 |           +--+\+
SqWave CH3  +---------------+            +-----------------+               \\
                                                                            \\

                                                                        4 OR 8 OHM SPEAKER
ASCII Art From ASCIIFlow Infinity.
Note: Basic connections like +5V and GND on the microcontrollers and the other chip is not shown here. You need to connect these or else it won't work!
Finally this works. After what many troubles I had in 2009. Accomplished? It is very far from it.
What would it be if there's none of the microcontroller which supports the independent PWM? You gotta need to have a separate square wave generators (use an RC with the CD40106) and a digital potentiometer, and then this tri-state buffer. More components, and more hassles! So here, might as well use that PIC16F1579 instead (or the PIC16F1578)!
There are many rooms for improvisation too. That's one fun little project I've been doing so far! :)
The midi source - I lost the webpage's address! I'll put this in when I found it!
-
Hitting a note, some positive results!
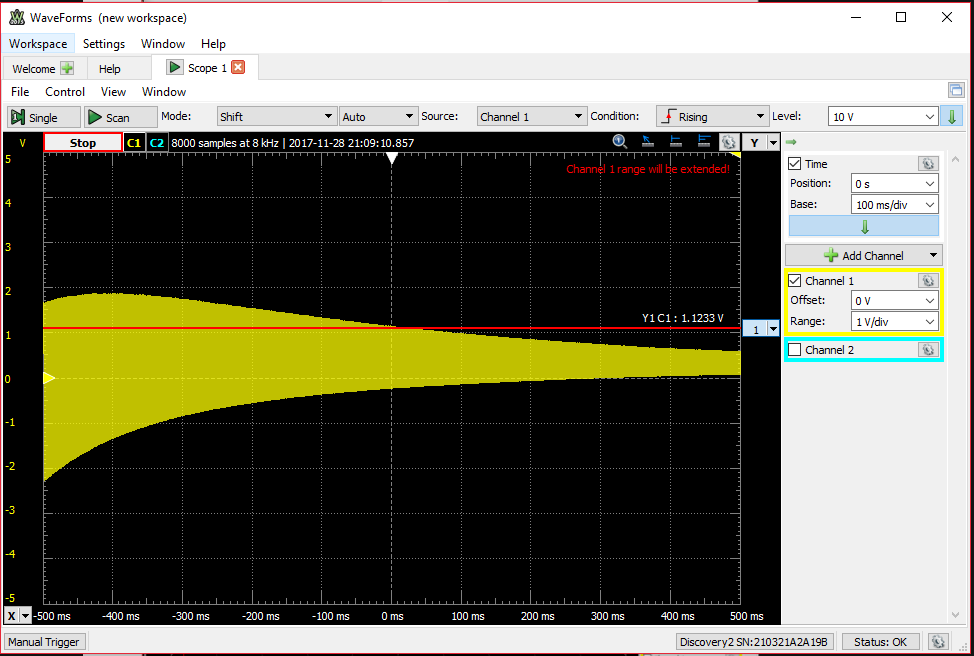
11/28/2017 at 13:29 • 0 commentsAfter adding a 100nF capacitor in between the 100K resistor and the scope input, the DC is remove, left the square wave centered, peak to peak around +4 and -4V. Fair enough.
The reason of the previous log' incomplete decaying of the amplitude is due to the Analog Discovery 2's I/O tool which doesn't supply the full +5V on it. When I connect the +5V supply in their "Supplies" tool, the whole decay is complete!
There is a huge jolt when the note is struck. I'm also investigating that a bit. I have programmed a simple run where it keeps hitting and releasing the note at 500Hz. The code is as follows (use MikroC, within the Demo limit!) :
void timer1interrupt() iv 0x0004 ics ICS_AUTO {

     TRISA.TRISA4 ^= 1;
     //PORTA.RA4 ^= 1;
     TMR1 = 64536;
     PIR1.TMR1IF = 0;
}


void init() {

    //OSCCON.SPLLEN = 1;      // PLL turned off.
    //OSCCON.IRCF = 0b1110;   // 8mhz internal oscillator.
    //OSCCON.SCS = 0b10;


    OSCCON.SPLLEN = 0; // disable Software PLL.
    OSCCON.IRCF3 = 1;  // 8mhz -> 32mhz if PLLx4 set.
    OSCCON.IRCF2 = 1;
    OSCCON.IRCF1 = 1;
    OSCCON.IRCF0 = 0;
    OSCCON.SCS1  = 0;  // system clock select: internal osc.
    OSCCON.SCS0  = 0;

    APFCON.P1SEL = 0;
    APFCON.P2SEL = 1;
    ANSELA = 0x00;
    TRISA = 0x00;
    LATA = 0b00010000;

    INTCON = 0x00;

}

void init_intr() {
     // Please look at the datasheet for the PIC12F1572 for more info!
     PIR1 = 0x00;
     PIE3 = 0x00;
     PIE1.TMR1IE = 1;
     INTCON.PEIE = 1;
     INTCON.GIE = 1;
}

void init_timer1() {
    // Timer1 clock source follows instruction clock!
    T1CON = 0x00;
    T1CON.T1CKPS0 = 1;     // 1:8 prescale value.
    T1CON.T1CKPS1 = 1;
    TMR1 = 64536;
    T1GCON = 0x00;
    T1CON.TMR1ON = 1;
}

void main() {

     init();

    delay_ms(50);

    init_intr();

    PORTA.RA5 = 0;

    init_timer1();

    while(1) {
         TRISA.TRISA5 = 1;
         delay_ms(2500);
         TRISA.TRISA5 = 0;
         delay_ms(100);

    }

}
And here it goes, it keeps hitting the note and decays for 2.5 seconds over and over again.
Now I'm gonna attach the thing to the cheap LM386 module I have here and hear it. Hopefully it'll be good this time! :)
-
It works, but not a lot of it!
11/27/2017 at 14:34 • 0 commentsYes! It actually worked... but this whole thing needs improvement.
- The original PICBasic program had to toggle the pins in the timer interrupt, and spent all the time to do this kind of thing. I could not coax these PWM modules to toggle the TRIS instead - it has no High-Z or one alternating.
- By the time all that are toggling, very little time left to do the remaining calculation. All the frequencies and the timings are off, and there is no proper structure left in the program. Yeah, I would have added the third channel, but sooner or later it sounds like a warped broken toy.
- The original article suggested cranking up to 40MHz for all that, but again, from the last two points, it only leaves too little room for other improvement.
- The code from the previous log was only two channels - adding one more of it resulted in a terrible warped and slowed sound. Not even good, and that was why I tore it down afterwards.
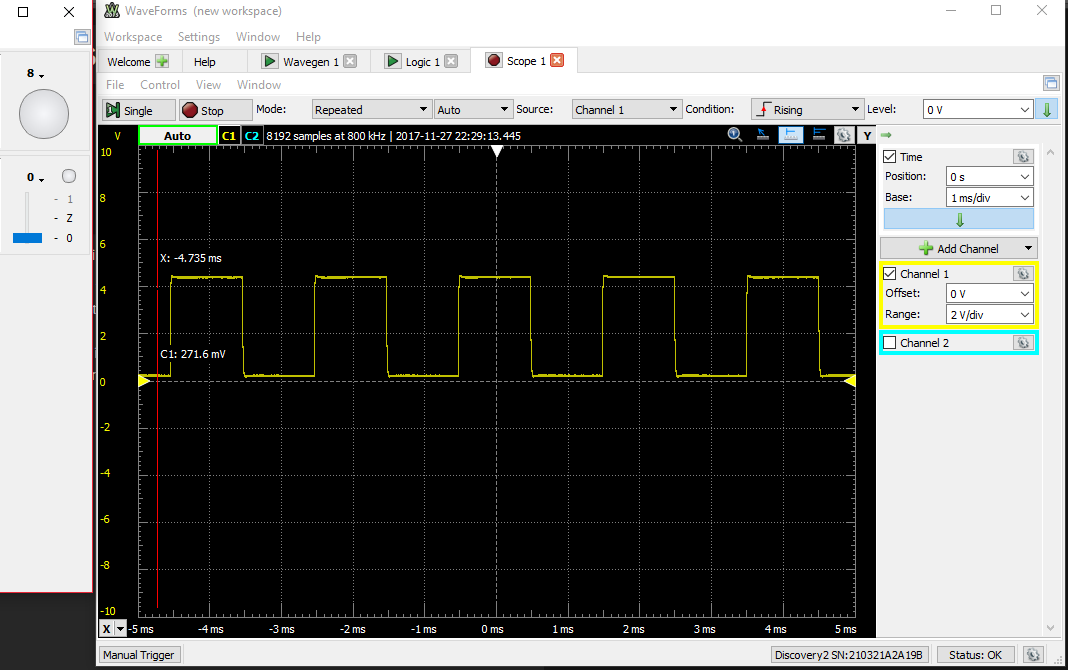
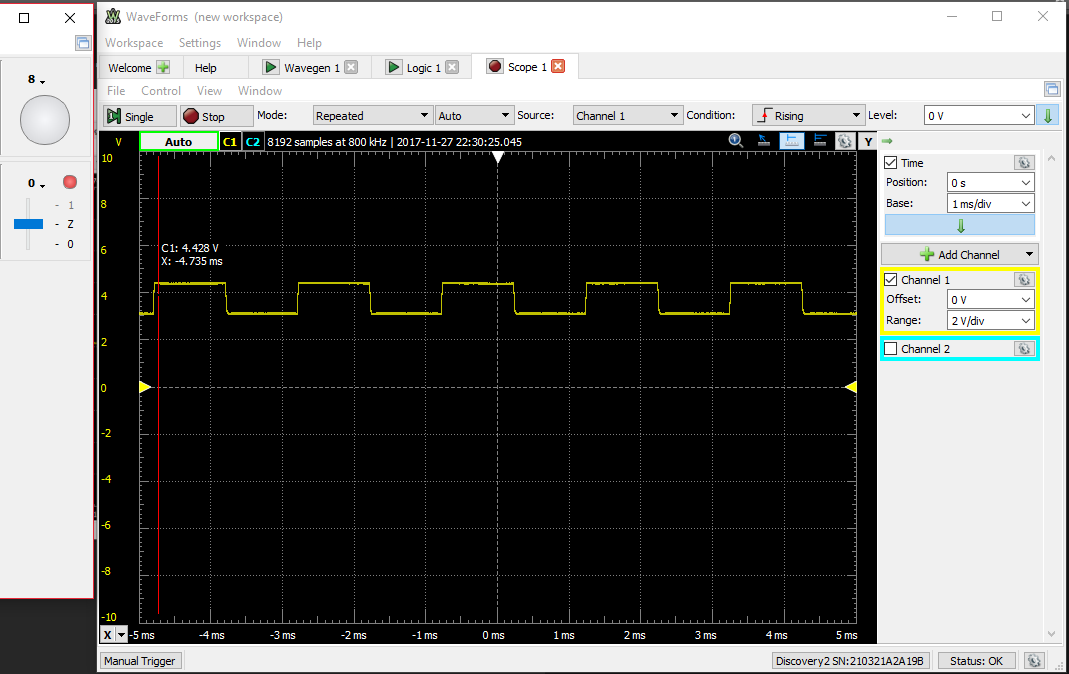
Here are the results, using the first schematic on the first log, and toggling the TRIS instead of the PORT bit:
The switch is at 0.
The switch at High-Z.
What you did not see was the amplitude of the square wave decreases slowly, but it is moving upwards instead of downwards. I suspect the sound has diminished, but not a lot. There was some modifications earlier which I needed to manually recover...
-
Rummaging the old archives!
11/27/2017 at 13:26 • 0 commentsOh my goodness! I suddenly remembered that I may have still keep that program code, despite me taking apart that actual hardware. That actual program code could still tell me some stories of how it would work (or not).
So I rummaged that old archive of mine, all that paper-work from my college days in 2009 (man, how time zips past me!), a mountain of really failed PIC projects code, and finally, here it is!
The project was compiled using MPLab C18, which is no longer in use nowadays, but it can be ported to MPLab XC8 with some modifications. That PIC18F4221 was because my lecturer (and my former colleague later) advised me to buy it because he was going to use it in his new syllabus in his Microcontroller subject. After that semester ended, I 'rehomed' it on that decoration for two years.
Here is the fragment of the code that contains what made that first design (probably) work. There are errors on it of course, and this copy is not edited, or in other words - "Thus it had been written" (sic erat scriptum) :
void T0_ISR(void)
{
        f_count1++;
        f_count2++;

        if (f_count1 == 0)
                TRISAbits.TRISA0 = 0;

        if (f_count1 > f_maxcount1)
        {
                TRISAbits.TRISA0 = ~TRISAbits.TRISA0;
        //        PORTAbits.RA0 = ~PORTAbits.RA0;
                f_count1 = 0;
        }

        if (f_count2 == 0)
                TRISAbits.TRISA1 = 0;

        if (f_count2 > f_maxcount2)
        {
                TRISAbits.TRISA1 = ~TRISAbits.TRISA1;
        //        PORTAbits.RA1 = ~PORTAbits.RA1;
                f_count2 = 0;
        }

        TMR0H = 0xFF; // reload values into the TMR0H and TMR0L
        TMR0L = 0xBD;

        INTCONbits.TMR0IF = 0;
}

void T1_ISR(void)
{
        t_count1++;
        t_count2++;

        if (t_count1 == 25)
                PORTBbits.RB0 = 1;

        if (t_count1 == 1250)
                PORTBbits.RB0 = 0;

        if (t_count1 == t_maxcount1)
        {
                chan1_num++;

                if(chan1_num == chan1_max)
                {
                        count1++;
//                        if (count1 == 2)
//                                count1 == 0;
                        chan1_sw(count1);

                                //break;
                                //default: count1 = 0;

                }

                t_count1 = 0;

                PORTDbits.RD0 = 0; // chip enable
                SPI(0x03);
                SPI((char)((chan1_freq_address + chan1_num) >> 8)); // send MSB address first
                SPI((char)(chan1_freq_address + chan1_num));
                f_maxcount1 = SPI(0xff);
                PORTDbits.RD0 = 1;

                PORTDbits.RD0 = 0;
                SPI(0x03);
                SPI((char)((chan1_dur_address + chan1_num*2) >> 8)); // send MSB address first
                SPI((char)(chan1_dur_address + chan1_num*2)); // send LSB address afterwards
                buffer_lo = SPI(0xff);
                buffer_hi = SPI(0xff);
                 PORTDbits.RD0 = 1;

                duration_b =  buffer_hi;
                duration_b = (duration_b << 8) | buffer_lo;
                t_maxcount1 = duration_b;

  //f_maxcount1 = channel1_f[chan1_num]; // next frequency
//t_maxcount1 = channel1_d[chan1_num]; // next duration
        }

        if (t_count2 == 25)
                PORTBbits.RB1 = 1;

        if (t_count2 == 1250)
                PORTBbits.RB1 = 0;

        if (t_count2 == t_maxcount2)
        {
                chan2_num++;

                if(chan2_num == chan2_max)
                {
                        count2++;
//                        if (count2 == 2)
//                                count2 == 0;
                        chan2_sw(count2);

                }
                t_count2 = 0;

                PORTDbits.RD0 = 0; // chip enable
                SPI(0x03); // read
                SPI((char)((chan2_freq_address + chan2_num) >> 8)); // send MSB address first
                SPI((char)(chan2_freq_address + chan2_num)); // send LSB address afterwards
                f_maxcount2 = SPI(0xff);
                PORTDbits.RD0 = 1; // chip disable

                PORTDbits.RD0 = 0;
                SPI(0x03);
                SPI((char)((chan2_dur_address + chan2_num*2) >> 8)); // send MSB address first
                SPI((char)(chan2_dur_address + chan2_num*2)); // send LSB address afterwards
                buffer_lo2 = SPI(0xff);
                buffer_hi2 = SPI(0xff);
                PORTDbits.RD0 = 1;

                duration_b2 =  buffer_hi2;
                duration_b2 = (duration_b2 << 8) | buffer_lo2;
                t_maxcount2 = duration_b2;

//        f_maxcount2 = channel2_f[chan2_num]; // next frequency
//        t_maxcount2 = channel2_d[chan2_num];
        }
        TMR1H = t1_b_hi;
        TMR1L = t1_b_lo; // 0xfeff

        PIR1bits.TMR1IF = 0;
}
There was SPI inside because the little music box draws out the music note values from an SPI EEPROM. I do not know why I did that when the microcontroller has like 4KB of space. Probably I thought of swapping that EEPROM out later to change tunes, who knows?
Anyway, that trick was to toggle the TRIS, not the PORT bit. The code in the webpage mentioned is the same, but in BASIC flavour:
'----[INTERRUPT HANDLER]------------------------------------------------
      NOTE_INT:
      TIMER1 = 65490                      ' Load TMR1 with a preset value
      Inc NOTE_COUNTER                    ' Increment the note counter
      If NOTE_COUNTER > NOTE Then         ' Is it time to toggle the pin ?
      TRISB = TRISB ^ 1                   ' Toggle pin PORTB.0
      Clear NOTE_COUNTER                  ' Clear the note counter
      Endif
      Clear PIR1.0                        ' Clear TMR1 interrupt flag
      Retfie FAST                         ' Exit the interrupt
I have not tested this again - since this give me some ideas, why not try it? It wouldn't hurt to try something new, right?
Note: Do not struggle to understand that code fragment I wrote earlier. It was an unorganized mess and I wrote all that when I was a college student. I will fix all that and place it in my github soon.
-
Improvement - Using independent PWM modules.
11/26/2017 at 08:30 • 0 commentsSome of the newer PIC12F and PIC16F have three independent PWM modules - it means that these PWM can be configured to operate at different frequencies. Since we are here to minimize component count, these microcontrollers are helpful to get this done.
I happened to have a PIC12F1572 on my hand, and this is the smaller microcontrollers that have these three independent modules. So, over the day I whipped up a prototype and hook it up to an LM386 speaker, and importing (and porting) whatever it is from my github, I managed to replicate that mini-music box that the PICBasic's website offered, but using Len Shustek's midi parser system.
The program uses MikroC and it can compile within the demo limit.
As usual, the link: https://github.com/uncle-yong/PIC12F1572-Music-Box
The sound is, of course, square waves, and not really a pleasant thing to hear for some people.
I'm attaching the remaining decay generator that I discussed later - I'm gonna need to solder the whole thing so that it won't fall apart or make more bad sounds! -
Envelope generator - redone with a few extra components!
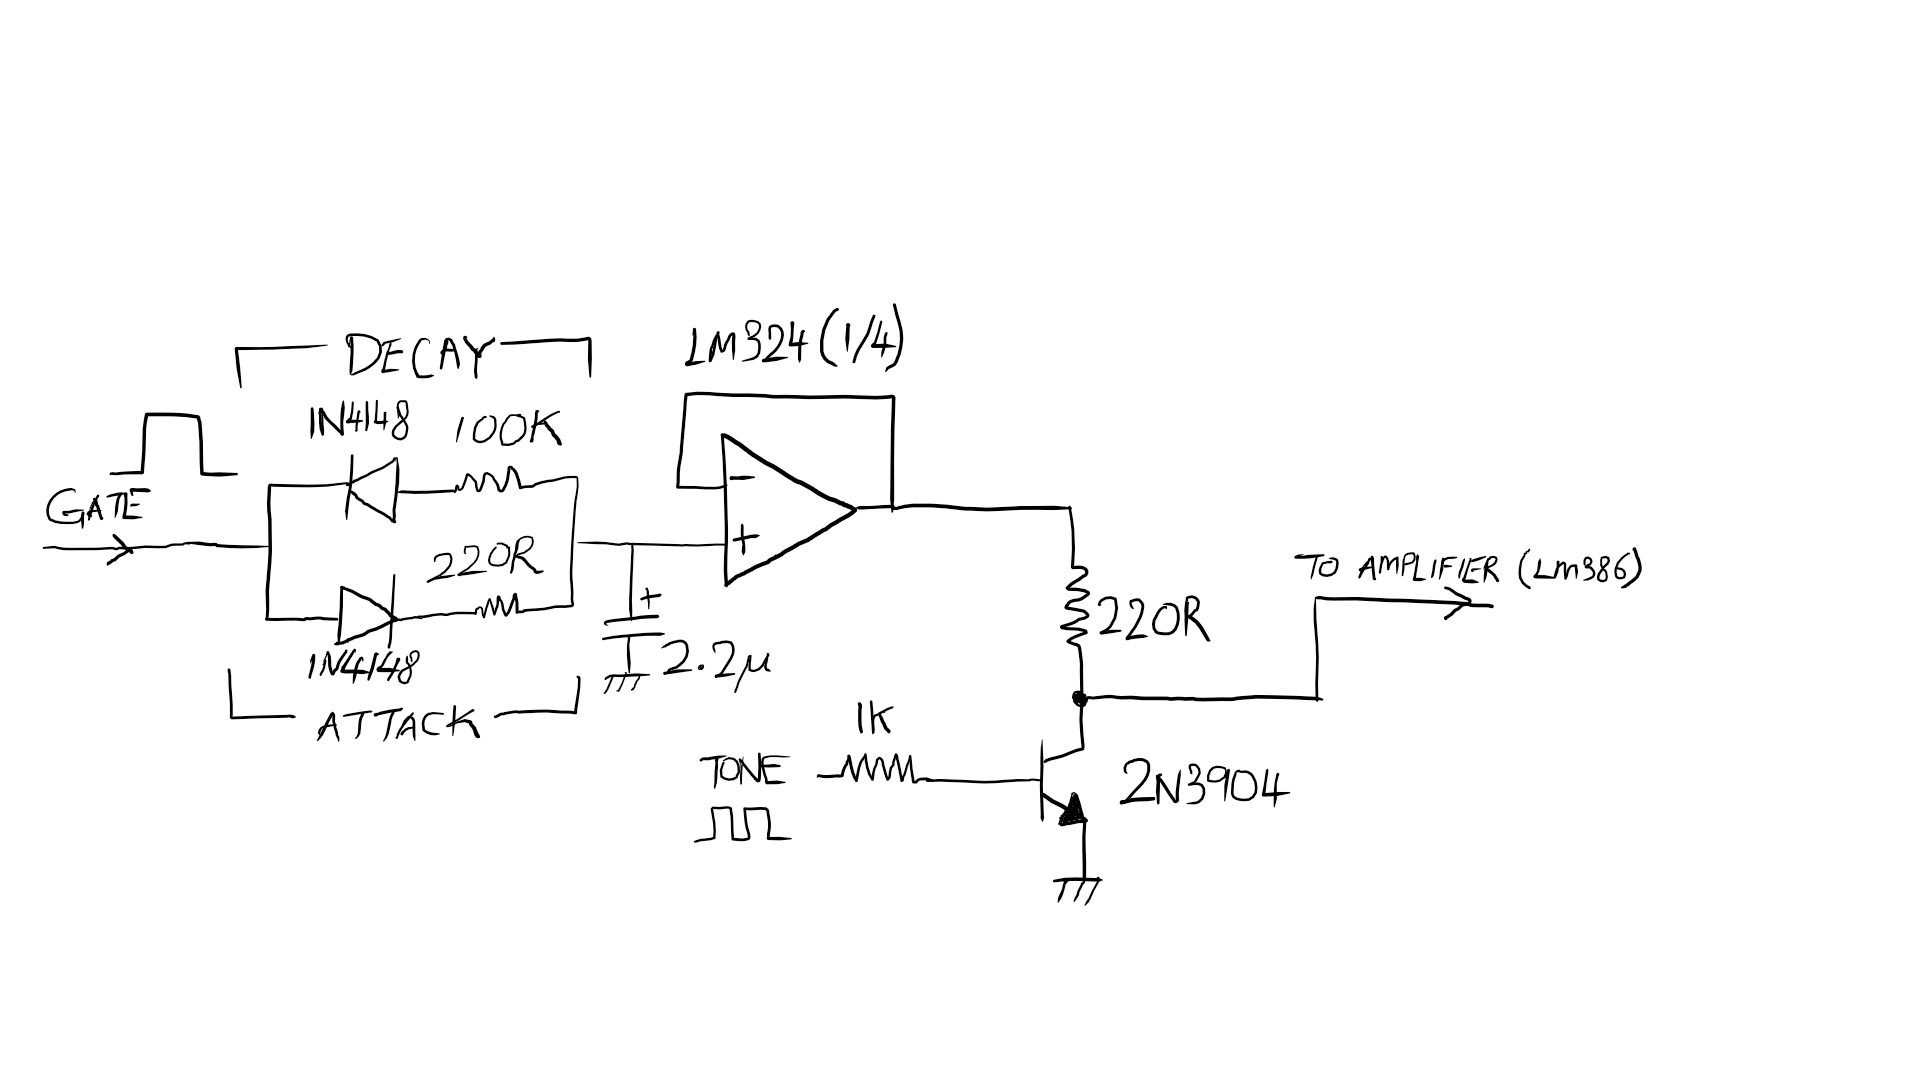
11/05/2017 at 03:00 • 0 commentsMy goodness! After reading some of the stuff online, I found this Envelope generator by Nathan Ramsden for one channel. To reduce the extra components used and as a prototype, I modified this to the following schematic: (apologies for my crappy handwriting, I used a cheap drawing tablet to do this!)
Note: You have to connect the +5V and the GND of the LM324 too! It is not shown in the schematic.
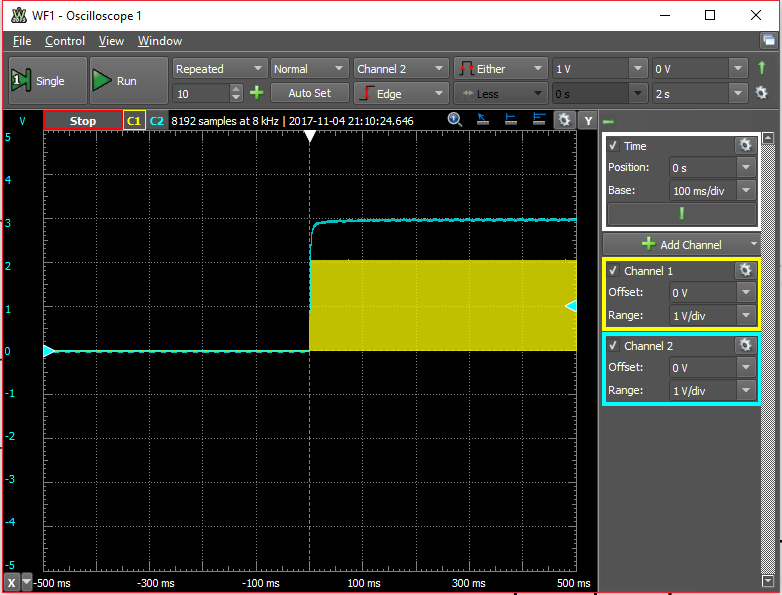
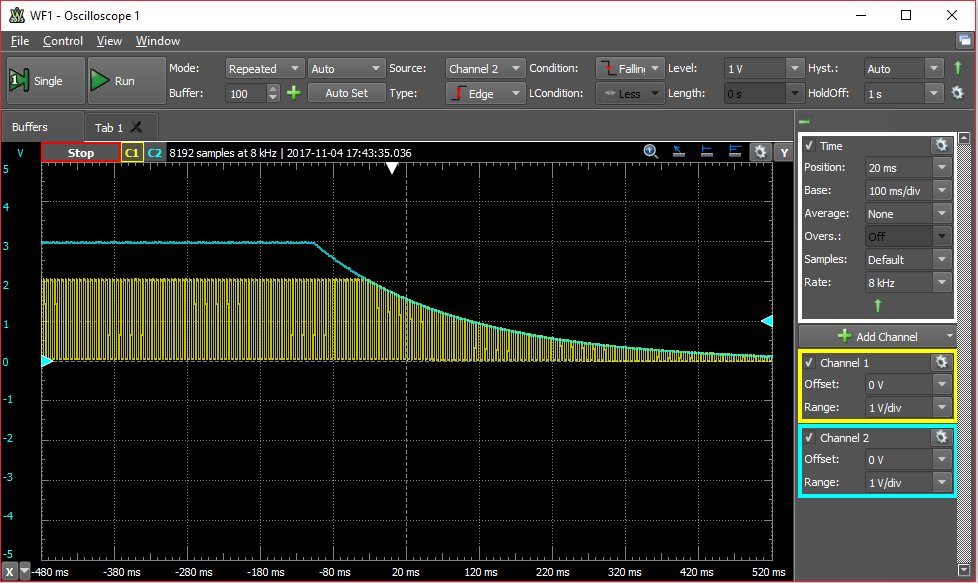
I placed them on the breadboard, and wired it accordingly. Ah, here is the test results too, using the Analog Discovery 2:
The decay works as usual, but I need to bump the resistor for the DECAY part to 100K for a longer chime sound.
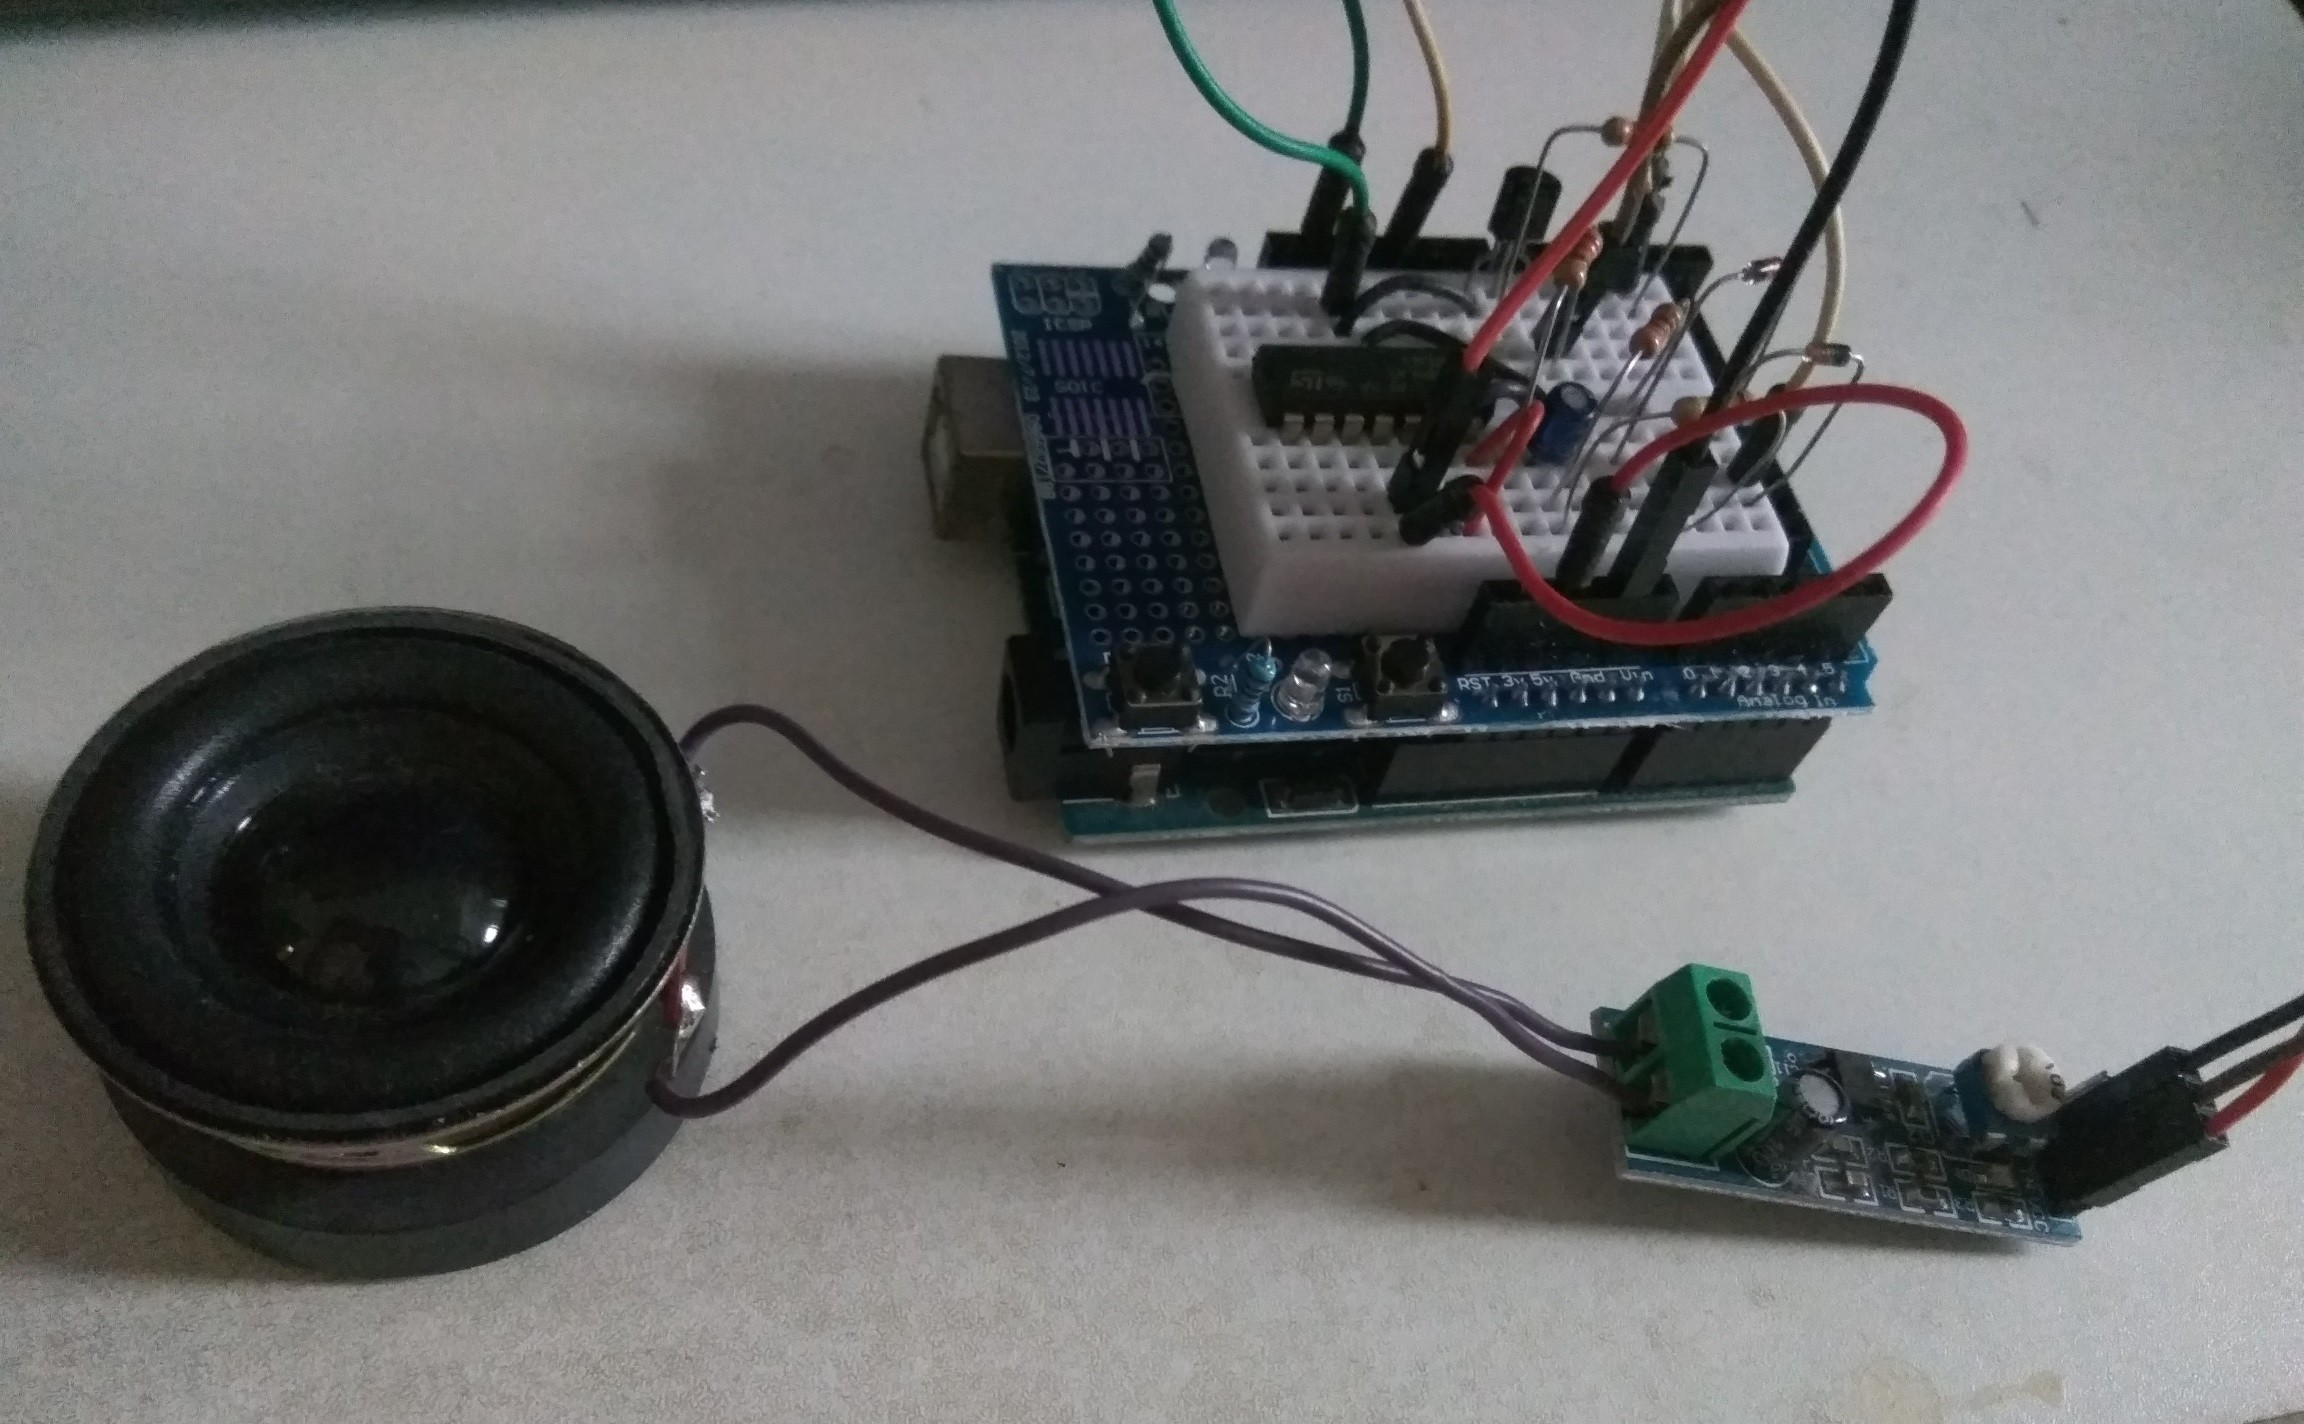
To test this, I used a cheap Arduino Uno and connect:
- GATE to Arduino pin 3
- TONE to Arduino pin 11
And with the following Arduino sketch:
void setup() {
  // put your setup code here, to run once:
  tone(11,440);
  pinMode(3, OUTPUT);
  digitalWrite(3,LOW);
}

void loop() {
  // put your main code here, to run repeatedly:
  tone(11,440);
  digitalWrite(3, HIGH);
  delay(250);
  digitalWrite(3, LOW);
  delay(1500);
  noTone(11);
  tone(11,880);
  digitalWrite(3, HIGH);
  delay(250);
  digitalWrite(3, LOW);
  delay(1500);
  noTone(11);
}
This test loops between playing 440Hz and 880Hz tone, the input high time is 250ms, and then 1500ms for the low time.
Unfortunately I have to use a few more extra components like the op-amp, two diodes, some resistors and the transistor for each channel. Luckily, the cheap LM324 has four inside, and with all that, you can wire three of them as shown in the PICBasic article. I suggest to use a perfboard for this, since shaky connections on the breadboard doesn't really help in having a good clean sound out.
![]()
-
Second attempt - back to drawing board!
11/05/2017 at 01:07 • 0 commentsHere it is after swapping all the resistors and capacitors in the previous design, I did not get any results. I might had a radical change of design earlier which involved many trial and error. Sadly, back then I hadn't got any oscilloscope or signal generators (was a college student many years back) and seeing what was going on was almost impossible. Even with my new Analog Discovery 2, this arrangement did not work at all! There must be some way to generate a simple envelope in a simple manner without using too many components.
However, I'm wrong - I may need an op-amp, a transistor and two diodes to make this all happen. I'm not sure if the authors at the PICBasic tested the design, but let's not brood over other's problems for now. I'm here to improve whatever it is on the page, and this time it will be good!
-
First test - Fail!
11/04/2017 at 08:12 • 0 commentsOkay, here is the first test, following the schematic given.
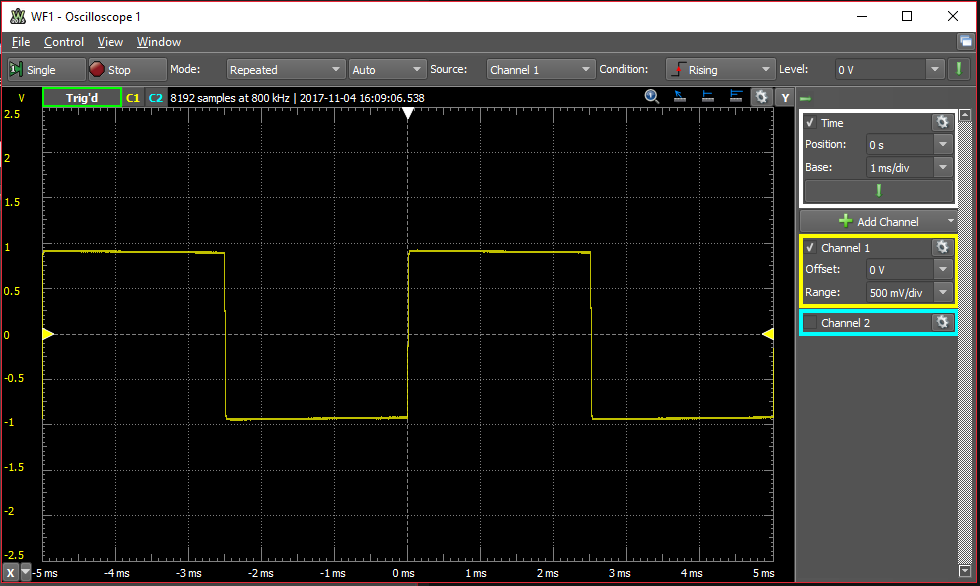
I have used the Analog Discovery 2 and applied the probe as it is shown in the diagram:
![]()
Ignore the microcontroller for now.
The square wave is configured at 200Hz, offset 1V and 1V amplitude.
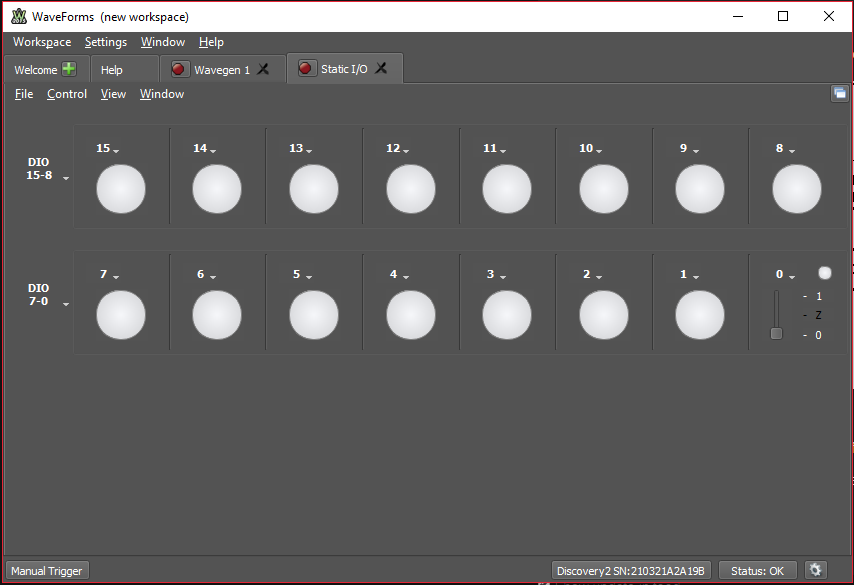
For the switch, it is substituted by the channel 0 in the Analog Discovery 2.
The channel 0 is selected as Switch->Push-Pull.
And the output: (the 100nF capacitor is placed before the R3 which is not shown there)
Flicking the switch up and down doesn't do any effect. Believe me, nothing at all! But how did I managed to get it to work earlier? My fault for not jotting this down, and I'm going to probably recreate it (with a different resistor combination), or possibly ditch this design permanently.
-
Snapshot of the webpage and other supporting materials
11/04/2017 at 03:23 • 0 commentsAs a start, I have uploaded the snapshot of the mentioned webpage in PDF since that current webpage have those schematics and some pictures missing.
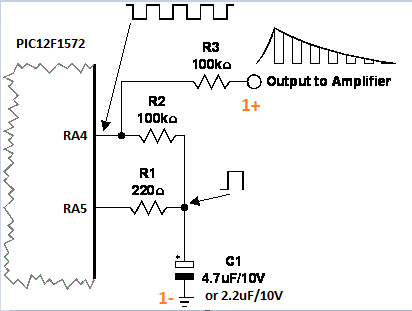
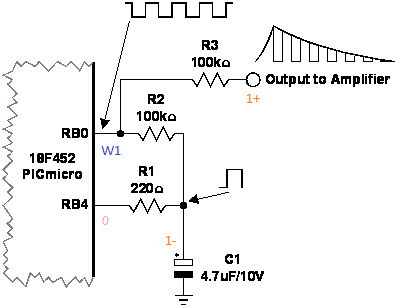
I am also uploading the schematics from the website here for reference.
Case study: A polyphonic PIC18F music box
Does this work? An online article discusses about building this music box.
