Pero
Pero-
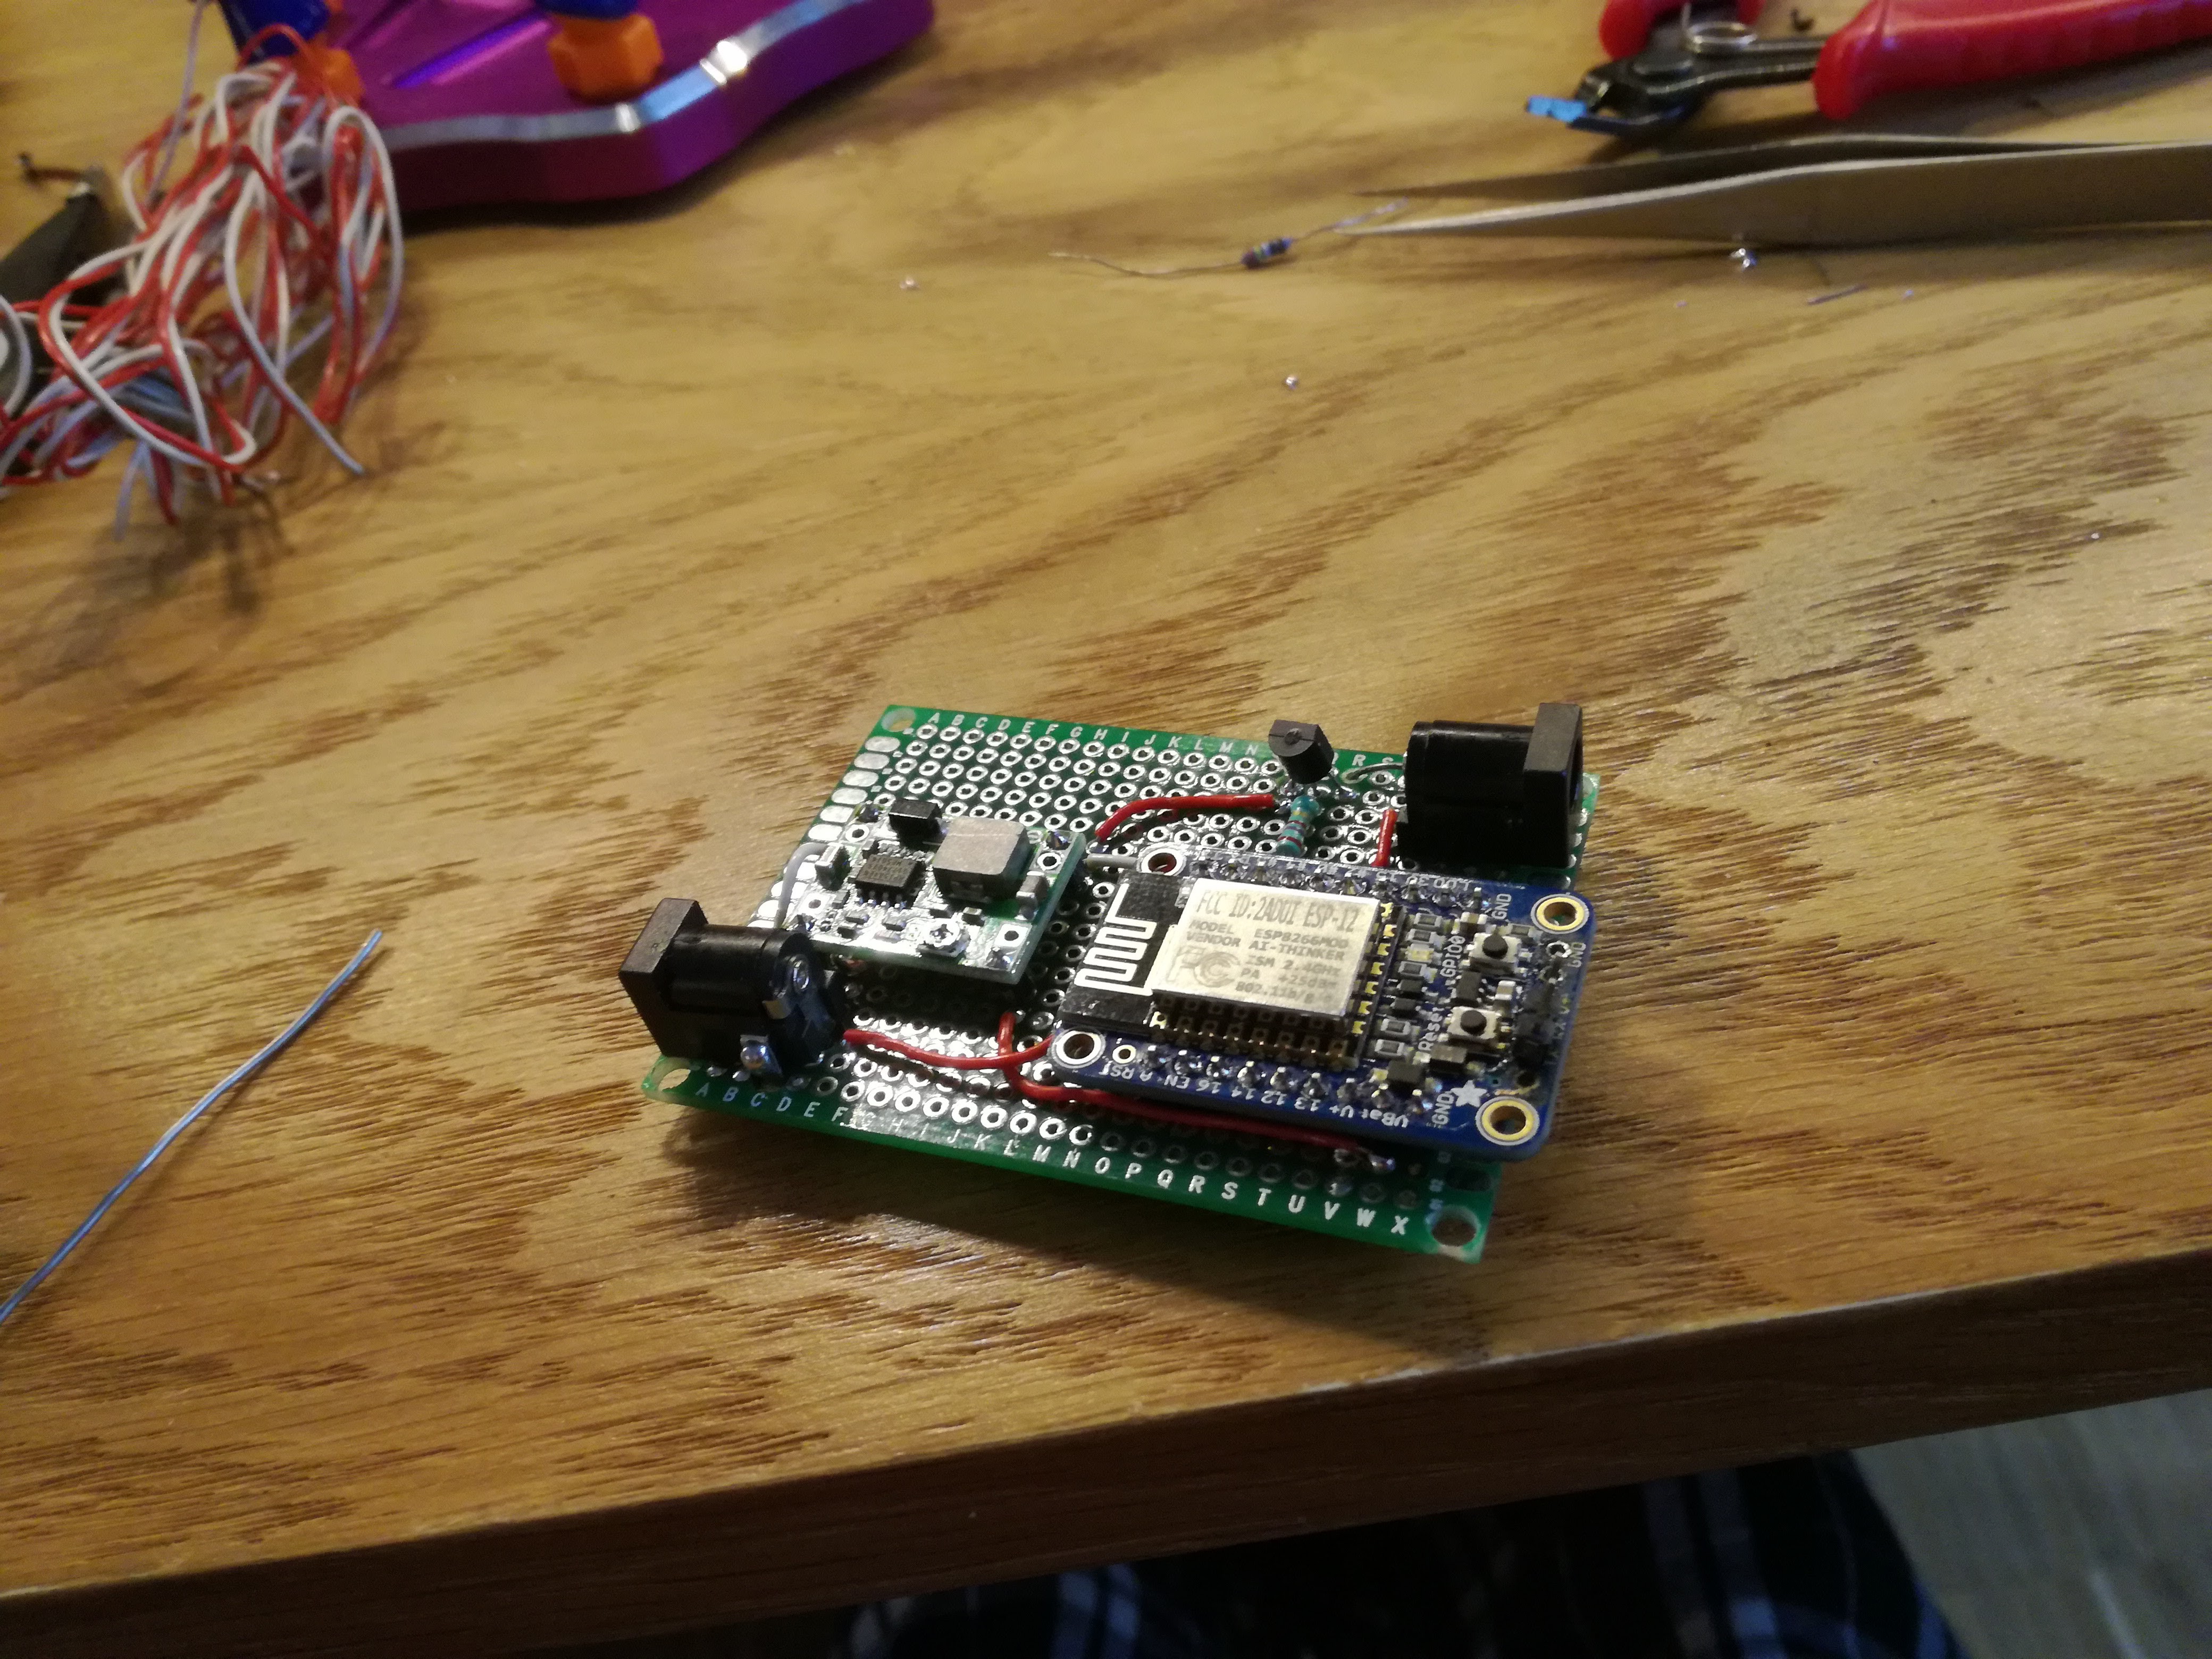
Moving to the protoboard
12/05/2017 at 18:14 • 0 comments
I am not really a fan of breadboards, but for a design so trviail I really didn't feel like spending time and money to produce PCB. I hooked up everything on my desk and got it running in no time. The whole thing should be enclosed anyways, so it doesn't matter if it's ugly or not.
I also did some power optimization. Instead of linear regulator I got $0.80 MP1484 step down module from e-bay. I felt kinda terrible to allow 12-5=7V drop across the poor component. With current bursts of up to 500mA, I can only imagine how short the linreg would survive.![]()
-
Code
11/21/2017 at 22:45 • 0 commentsComplete code so far:
// Adafruit IO Digital Output Example
// Tutorial Link: https://learn.adafruit.com/adafruit-io-basics-digital-output
//
// Adafruit invests time and resources providing this open source code.
// Please support Adafruit and open source hardware by purchasing
// products from Adafruit!
//
// Written by Todd Treece for Adafruit Industries
// Copyright (c) 2016 Adafruit Industries
// Licensed under the MIT license.
//
// All text above must be included in any redistribution.

/************************** Configuration ***********************************/

// edit the config.h tab and enter your Adafruit IO credentials
// and any additional configuration needed for WiFi, cellular,
// or ethernet clients.
#include "config.h"

/************************ Example Starts Here *******************************/

// digital pin 5
#define LED_PIN 0
#define ventilator 5

// set up the 'digital' feed
AdafruitIO_Feed *digital = io.feed("xxxxx");
AdafruitIO_Feed *state = io.feed("yyyyy");

void setup() {

  // set led pin as a digital output
  pinMode(LED_PIN, OUTPUT);
  pinMode(ventilator, OUTPUT);

  // connect to io.adafruit.com
  io.connect();

  // set up a message handler for the 'digital' feed.
  // the handleMessage function (defined below)
  // will be called whenever a message is
  // received from adafruit io.
  digital->onMessage(handleMessage);
  // wait for a connection
  while (io.status() < AIO_CONNECTED) {
   digitalWrite(LED_PIN, LOW);  // toggle LED during connecting phase
   delay(500);
   digitalWrite(LED_PIN, HIGH);
   delay(500);
  }

  // we are connected
   digitalWrite(LED_PIN, LOW);
   delay(3000);
   digitalWrite(LED_PIN, HIGH);
   state->save("Active");
}

void loop() {

  // io.run(); is required for all sketches.
  // it should always be present at the top of your loop
  // function. it keeps the client connected to
  // io.adafruit.com, and processes any incoming data.
  io.run();

}

// this function is called whenever an 'digital' feed message
// is received from Adafruit IO. it was attached to
// the 'digital' feed in the setup() function above.
void handleMessage(AdafruitIO_Data *data) {

  // write the current state to the led
  digitalWrite(ventilator, data->toPinLevel());

}