-
1Setting up an IFTTT webhook
This instruction assumes you have an If This Then That (IFTTT) account, if not you will need to set one up here IFTTT Home Page.
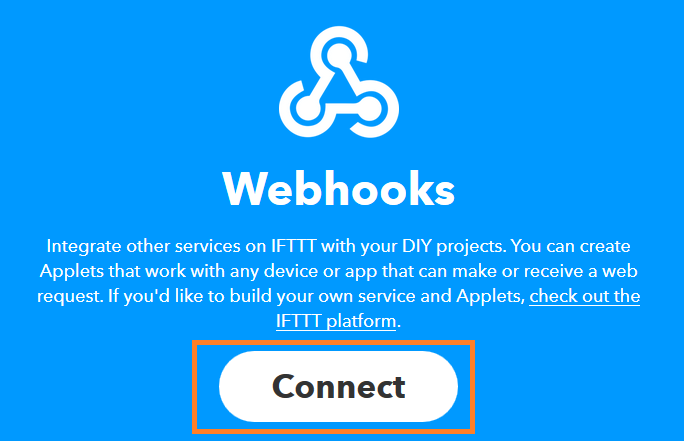
To create a webhook you need to visit the Webhook maker space. You will need to connect a webhook so hit the connect button
![]()
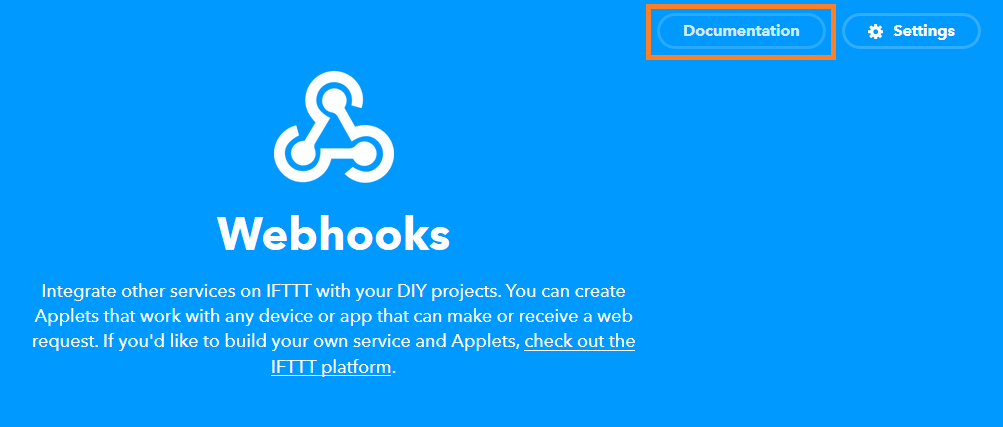
With Webhooks activated you can bring up the documentation slide.
![]()
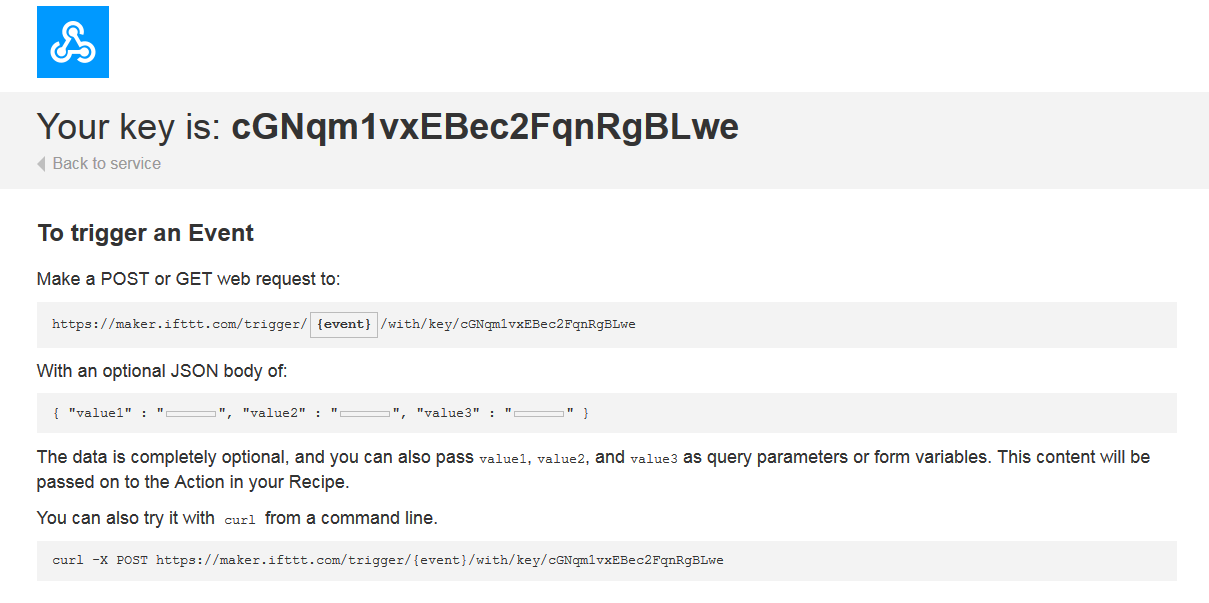
This provides the URL that you can now access to cause the webhook to trigger.
![]()
In this case the link is:
https://maker.ifttt.com/trigger/{event}/with/key/cGNqm1vxEBec2FqnRgBLwe
The random jumble of numbers and letters at the end is your specific code, this can be changed to a new number using Settings facility. The {event} part of the code is the variable that gives you some control. If {event} is changed to ‘turn_on’ or ‘turn_off’ then these events can be made in to trigger specific IFTTT tasks. The text needs to be saved as this is what is used in the google script later to run the IFTTT task.
-
2Using IFTTT webhook to control a switch
From the IFTTT home page. Click on the 'My Applets' link at the top
![]()
From this window you can then create a new applet.
![]()
This brings up the following screen, which takes a more of graphical perception of what you are wanting to do. So you need to click the ‘+ this’ blue part of the screen. This indicates the ‘if this’ part of the code.
![]()
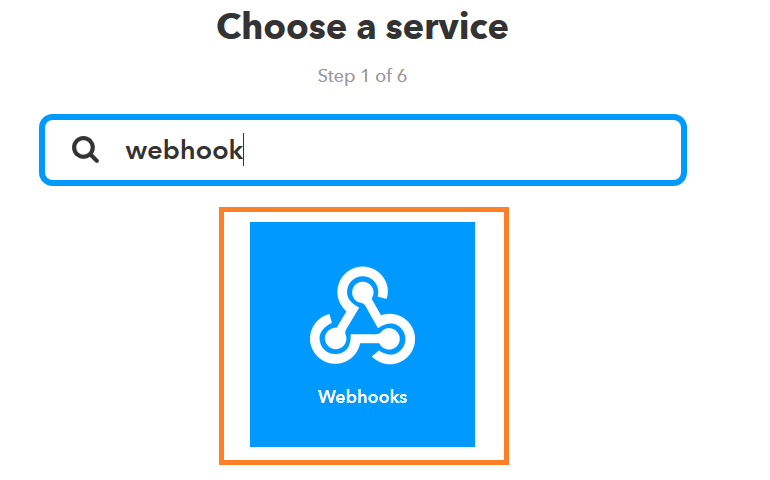
You need to choose a service to instigate the start of the applet, search for a “webhooks” and click on the service required.
![]()
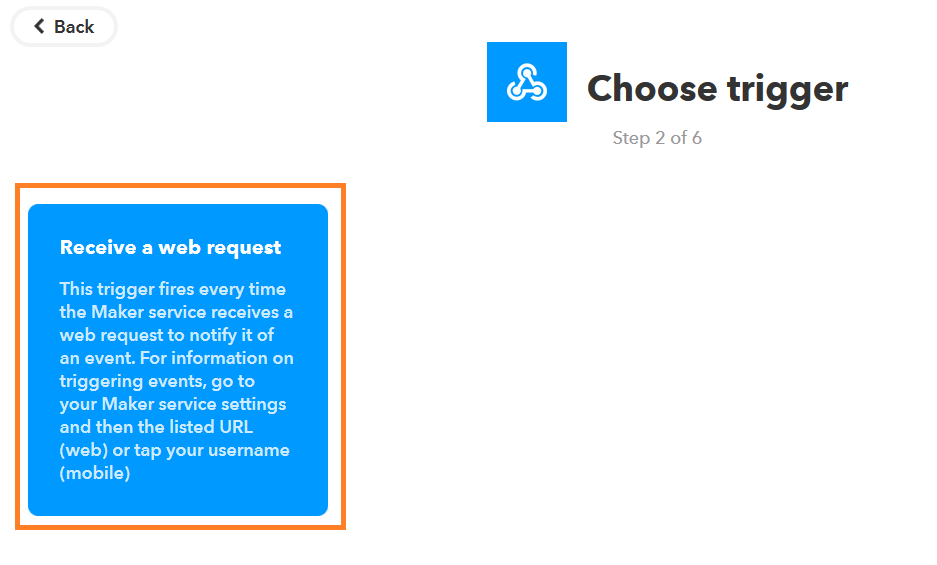
There is only 1 trigger that webhooks allows, that is once a web request is received the trigger is fired.
![]()
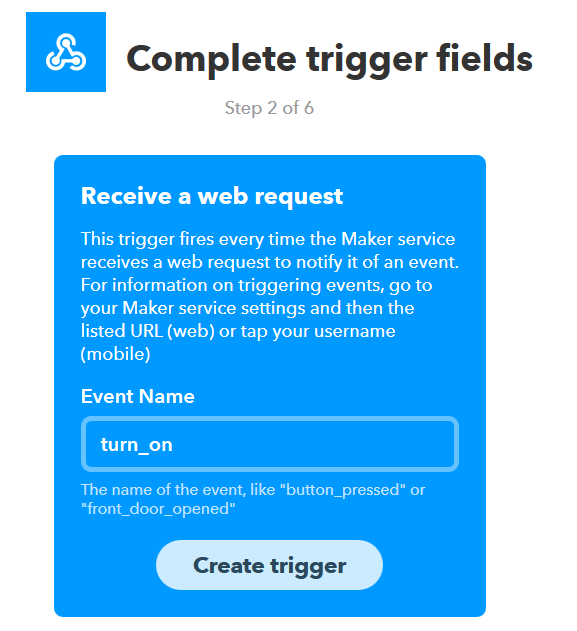
The next gives you option of the name of event. As this is to turn on the switch a sensible event name of ‘Turn_on’ seems appropriate.
![]()
This then returns you the ‘If this then that’ screen, only this time you have click on the second part of the screen.
![]()
The WiFi socket I have chosen to undertake this project is TP-link HS110. Reasons for this choice :
- Cost – at time of writing HS110 can be purchased for £19.99
- Specifications –
- The HS110 can work with up 13A so suitable for heavy heating circuits
- Also has inbuilt power monitor
- Specifications –
- Works with IFTTT using KASA app, though is only in BETA.
Samsung SmartThings, Z-wave switches, Belkin Wemo Smart plugs, Dlink smart plug, energenie Mi Home, wifiplug, wattio to name the few I am aware of.
First, comes the setup of the plug. Each comes with its own setup. The HS110, involved the installation of an App. Creation of a Kasa account and setting up the smart plug.
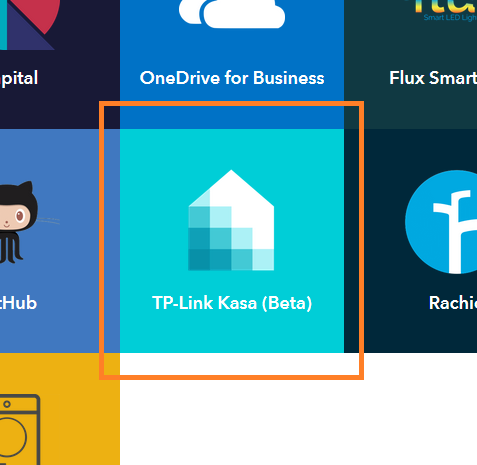
For this project I selected TP-link Kasa (Beta) is the selected output.
![]()
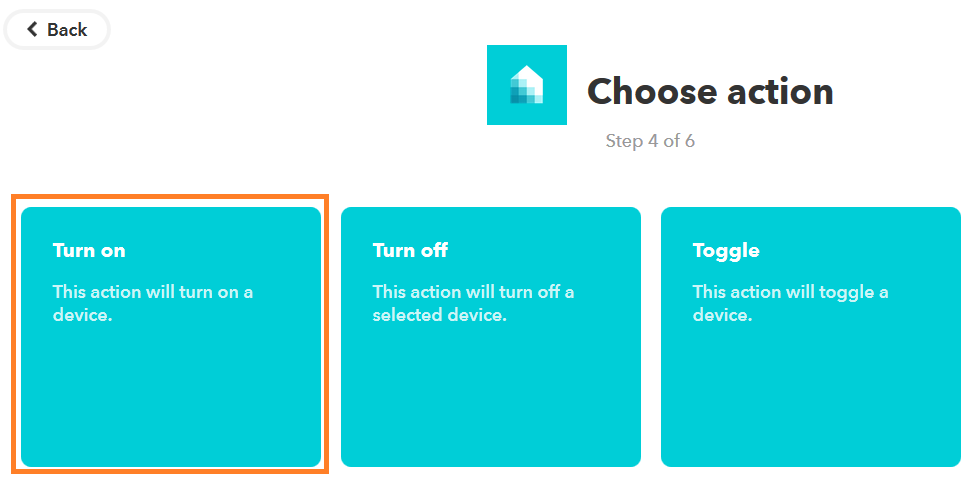
When selecting TP-Link Kasa (Beta) you will need to link you IFTTT to Kasa, after giving it authorisation you can select one of the actions Kasa offers. As this action is to turn on the light.
![]()
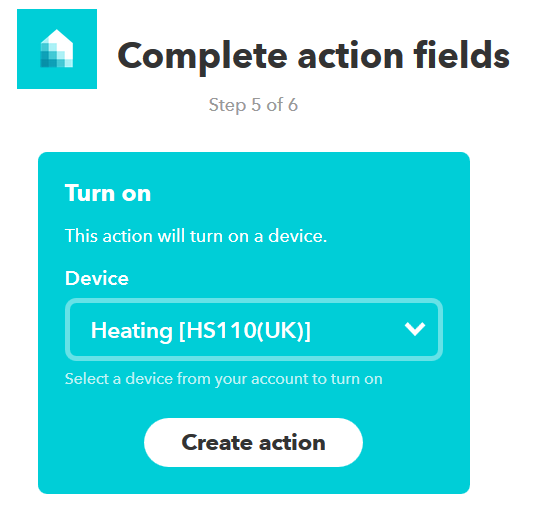
This loads the switches you have available in Kasa and the names you have given each switch.
![]()
Creating the action and finishing the action.
You can now test if this works using the URL from the webhook earlier –
https://maker.ifttt.com/trigger/{event}/with/key/cGNqm1vxEBec2FqnRgBLwe
We can change {event} to turn_on making it :
https://maker.ifttt.com/trigger/turn_on/with/key/cGNqm1vxEBec2FqnRgBLwe
Change the link to the one you have been given and going to the link should turn on the switch.This task needs to be repeated but instead of creating an event to turn on the light you can create one to turn it off.
- Cost – at time of writing HS110 can be purchased for £19.99
-
3Get carbon intensity of UK electricity grid
The carbon intensity of electrical grids varies as the amount of coal, gas, nuclear, wind, solar or other energy sources are used to provide it. Various companies provide services that can give you the current data being used in a current grid, https://www.electricitymap.org/ gives an international over view of the countries, states and regions that provided data. GridCarbon provides a smartphone app to tell you what the current grid emission is and gives you a few nice details.
In the UK a consortium of EDF (environmental defence fund), National Grid (UK transmission firm), Met Office (UK Weather forecaster) and WWF (now simply known by its initials) created a website which both tells the current GB electricity carbon intensity and forecasts the next 48 hours (http://carbonintensity.org.uk/). For the point of this project the most useful part of this website is the ability to use an API (application programming interface) to their data. Whilst their API provide a range of facilities such as carbon intensity in the past and intensity forecast for the future. This project takes the simple approach of what is relevant now and the intensity function. If you click this intensity link , then depending on your browser it responds differently. Internet explorer tries to get you to download a JSON (javascript object Notation) file which when opened in a text editor looks like:
{
  "data":[{
    "from": "2017-11-24T16:00Z",
    "to": "2017-11-24T16:30Z",
    "intensity": {
      "forecast": 368,
      "actual": 408,
      "index": "very high"
    }
  }]
}
If you open in another browser it would probably just show you the text. The data suggests that for the half an hour time window just finished the carbon intensity of the grid was 408g CO2e (carbon dioxide equivalent) for each kWh (kilowatt hour) of power generated.
If only this data could be extracted in an automatic manner every 15 minutes or so
-
4Compare carbon intensity with a value using google script
Enter google scripting. Google drive provides a cloud based location to store data, but it also offers web platform to run code at frequent intervals to complete automated tasks.
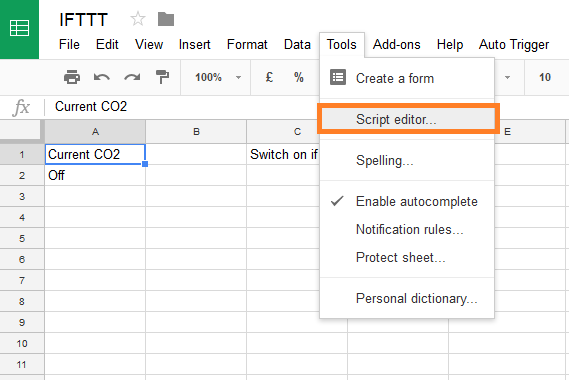
The way I access this is by creating a new google sheet, might aswell call it something relevant (IFTTT). I have also input a couple of names and bits of data. Cell A2 will indicate if the switch is on/off so above it in cell 1 I have given it a suitable cryptic name. Cell C2 gives the grams of Co2e that you want to switch on below or off above, I have use 184 for C2 (see appendix for estimated calculations). C1 is then named switch of if above. Then in the tools menu click on script editor.
![]()
The first requirement of the code is to access the JSON data provided by the carbon intensity website. Luckily, Paul Gambil has written a rather techy piece over here about how to import JSON into google sheets as there is no inbuilt function.
Paul suggest copying the script from https://gist.github.com/paulgambill/cacd19da95a1421d3164 into your script editor. If you click on 'Raw' then you get just the code and can select all and copy and paste into Google script editor. I removed the first two of his functions ( readrows() and onOpen) and used the code from line 36 onwards.
The onOpen function completes every time the document is opened and adds the readrows into a new menu. These functions are not particularly useful for this project. So I have left them out.
You can check if the ImportJSON function is working by typing '=ImportJSON("https://api.carbonintensity.org.uk/intensity")' into one of the cells on the spreadsheet. If you are not using internet explorer the cells and neighbouring ones should fill with the most recent carbon intensity.
Create a new function at the top of the script editor called GetIntensity() and copy and paste the code I have written below
function GetIntensity() {
/*This function gets a value from JSON API from carbon intensity
 *then compares to a cell on the spreadsheet (C2)
 *If the value is below this it fires a turn on webhook
 *If the value is above then it fires a turn off webhook. */


/* Get current spreadsheet */
var ss = SpreadsheetApp.getActiveSpreadsheet();
/* Get current sheet */
var sheet = ss.getSheets()[0];
/* Select Range of location for CO2 to switch on
 * (2,3) is cell C2 -> (row,column) */
 var range = sheet.getRange(2,3);
 /* Get the value from the range and assign to variable co2limit */
 var co2limit = range.getValue();
/*Use the ImportJSON function and feed it the correct part of the api
store the array which is from the ImportJSON in the variable carbon */

var carbon =ImportJSON('https://api.carbonintensity.org.uk/intensity');

 /*  The array is the JSON file parsed into the sections  of rows and columns suggest below:
*From  |To     |Intensity Forecast |Intensity A | Index
Start  |End    |  358              |334         |high
*Both row and column start with an initial value of 0, so [0][0]
would be the "From".
*To get the actual intensity row 1 column 3 is required hence  */
 var currentCO2 =carbon[1][3];

/* probably need to check current is actually a value and sensible ?*/


  if (currentCO2 < co2limit) {
/*If the current value is less than co2 limits, then turn switch on */

   SpreadsheetApp.getActiveSheet().getRange('A2').setValue('On');
/*The part of the url after key needs to be changed to the key you have been given by ifttt */
  var fetchOn = UrlFetchApp.fetch('https://maker.ifttt.com/trigger/turn_on/with/key/cGNqm1vxEBec2FqnRgBLwe');
  }else{
/*If the current value greater than co2 limits,then turn switch off */

  SpreadsheetApp.getActiveSheet().getRange('A2').setValue('Off');
  /*The part of the url after key needs to be changed to the key you have been given by ifttt */
  var fetchOff = UrlFetchApp.fetch('https://maker.ifttt.com/trigger/turn_off/with/key/cGNqm1vxEBec2FqnRgBLwe');
  }
  }
This code needs to be modified to adjust for the codes you took from your webhooks.
Finally this code needs to be run at specific times. Within the google script options for you code there is a button which looks like a clock watch,
Clicking on this provides trigger functions for the code. The carbon intensity api updates every 30 minutes, so if this updates every 15 minutes then it should give reasonable accurate time.
With everything now setup, ever 15 minutes your google script will query the carbon intensity website. If the current grid intensity is lower than your value in the spreadsheet the script will call a webhook from IFTTT turning the switch on. If the carbon intensity is high then it calls a webhook on the IFTTT turning the switch off.
-
5Appendix
Picking a value for a suitable carbon intensity to operate the switch is system dependent. As I have suggestedd I have a modern boiler that is probably about 85% efficient. A range of values for the amount of carbon dioxide equivalent releases are available on the internet, I have chosen 184g from Carbon Calculator. To heat the water in the boiler is then 216g Co2e.
Heating the water using the immersion heater will take longer (as it is less powerful), and may happen a longer period of time from use than using the boiler. If the switch is turned on at 3AM and no hot water is used till 7AM then the water may have cooled down. The hot water tank I have loses ~2 kWhr for each 24hr period. Assuming linearity loss over the 24hour so for a 5 hour period (average time for over night period). If the immersion heater is used for a 1 hour then then 3 kWhr will be put into the tank, within 5 hours time it will drop to 2.58 kWhr. This works out to be about 86% efficient. As both systems are approximately the same I uses the 184g value.
Further works
- Currently use intensity for the last half hour, not predicted for the next half hour. So will always be out of date.
- Create an alternate function for using the least amount of carbon within a certain time frame. For example I want to turn the dishwasher on, it requires 2 consecutive hours on in the next 12 hours. This would be able to control the switch from these three pieces of information - Time on needed, in the next how many hours and if if needs to be consecutive.
Carbon Intensity controlled Mains Socket Switch
Combining the current carbon intensity of the UK electricity grid, some google script and an application of IFTTT to control a Wi-Fi switch



Discussions
Become a Hackaday.io Member
Create an account to leave a comment. Already have an account? Log In.