Stanislas Bertrand
-
Controller Board Update
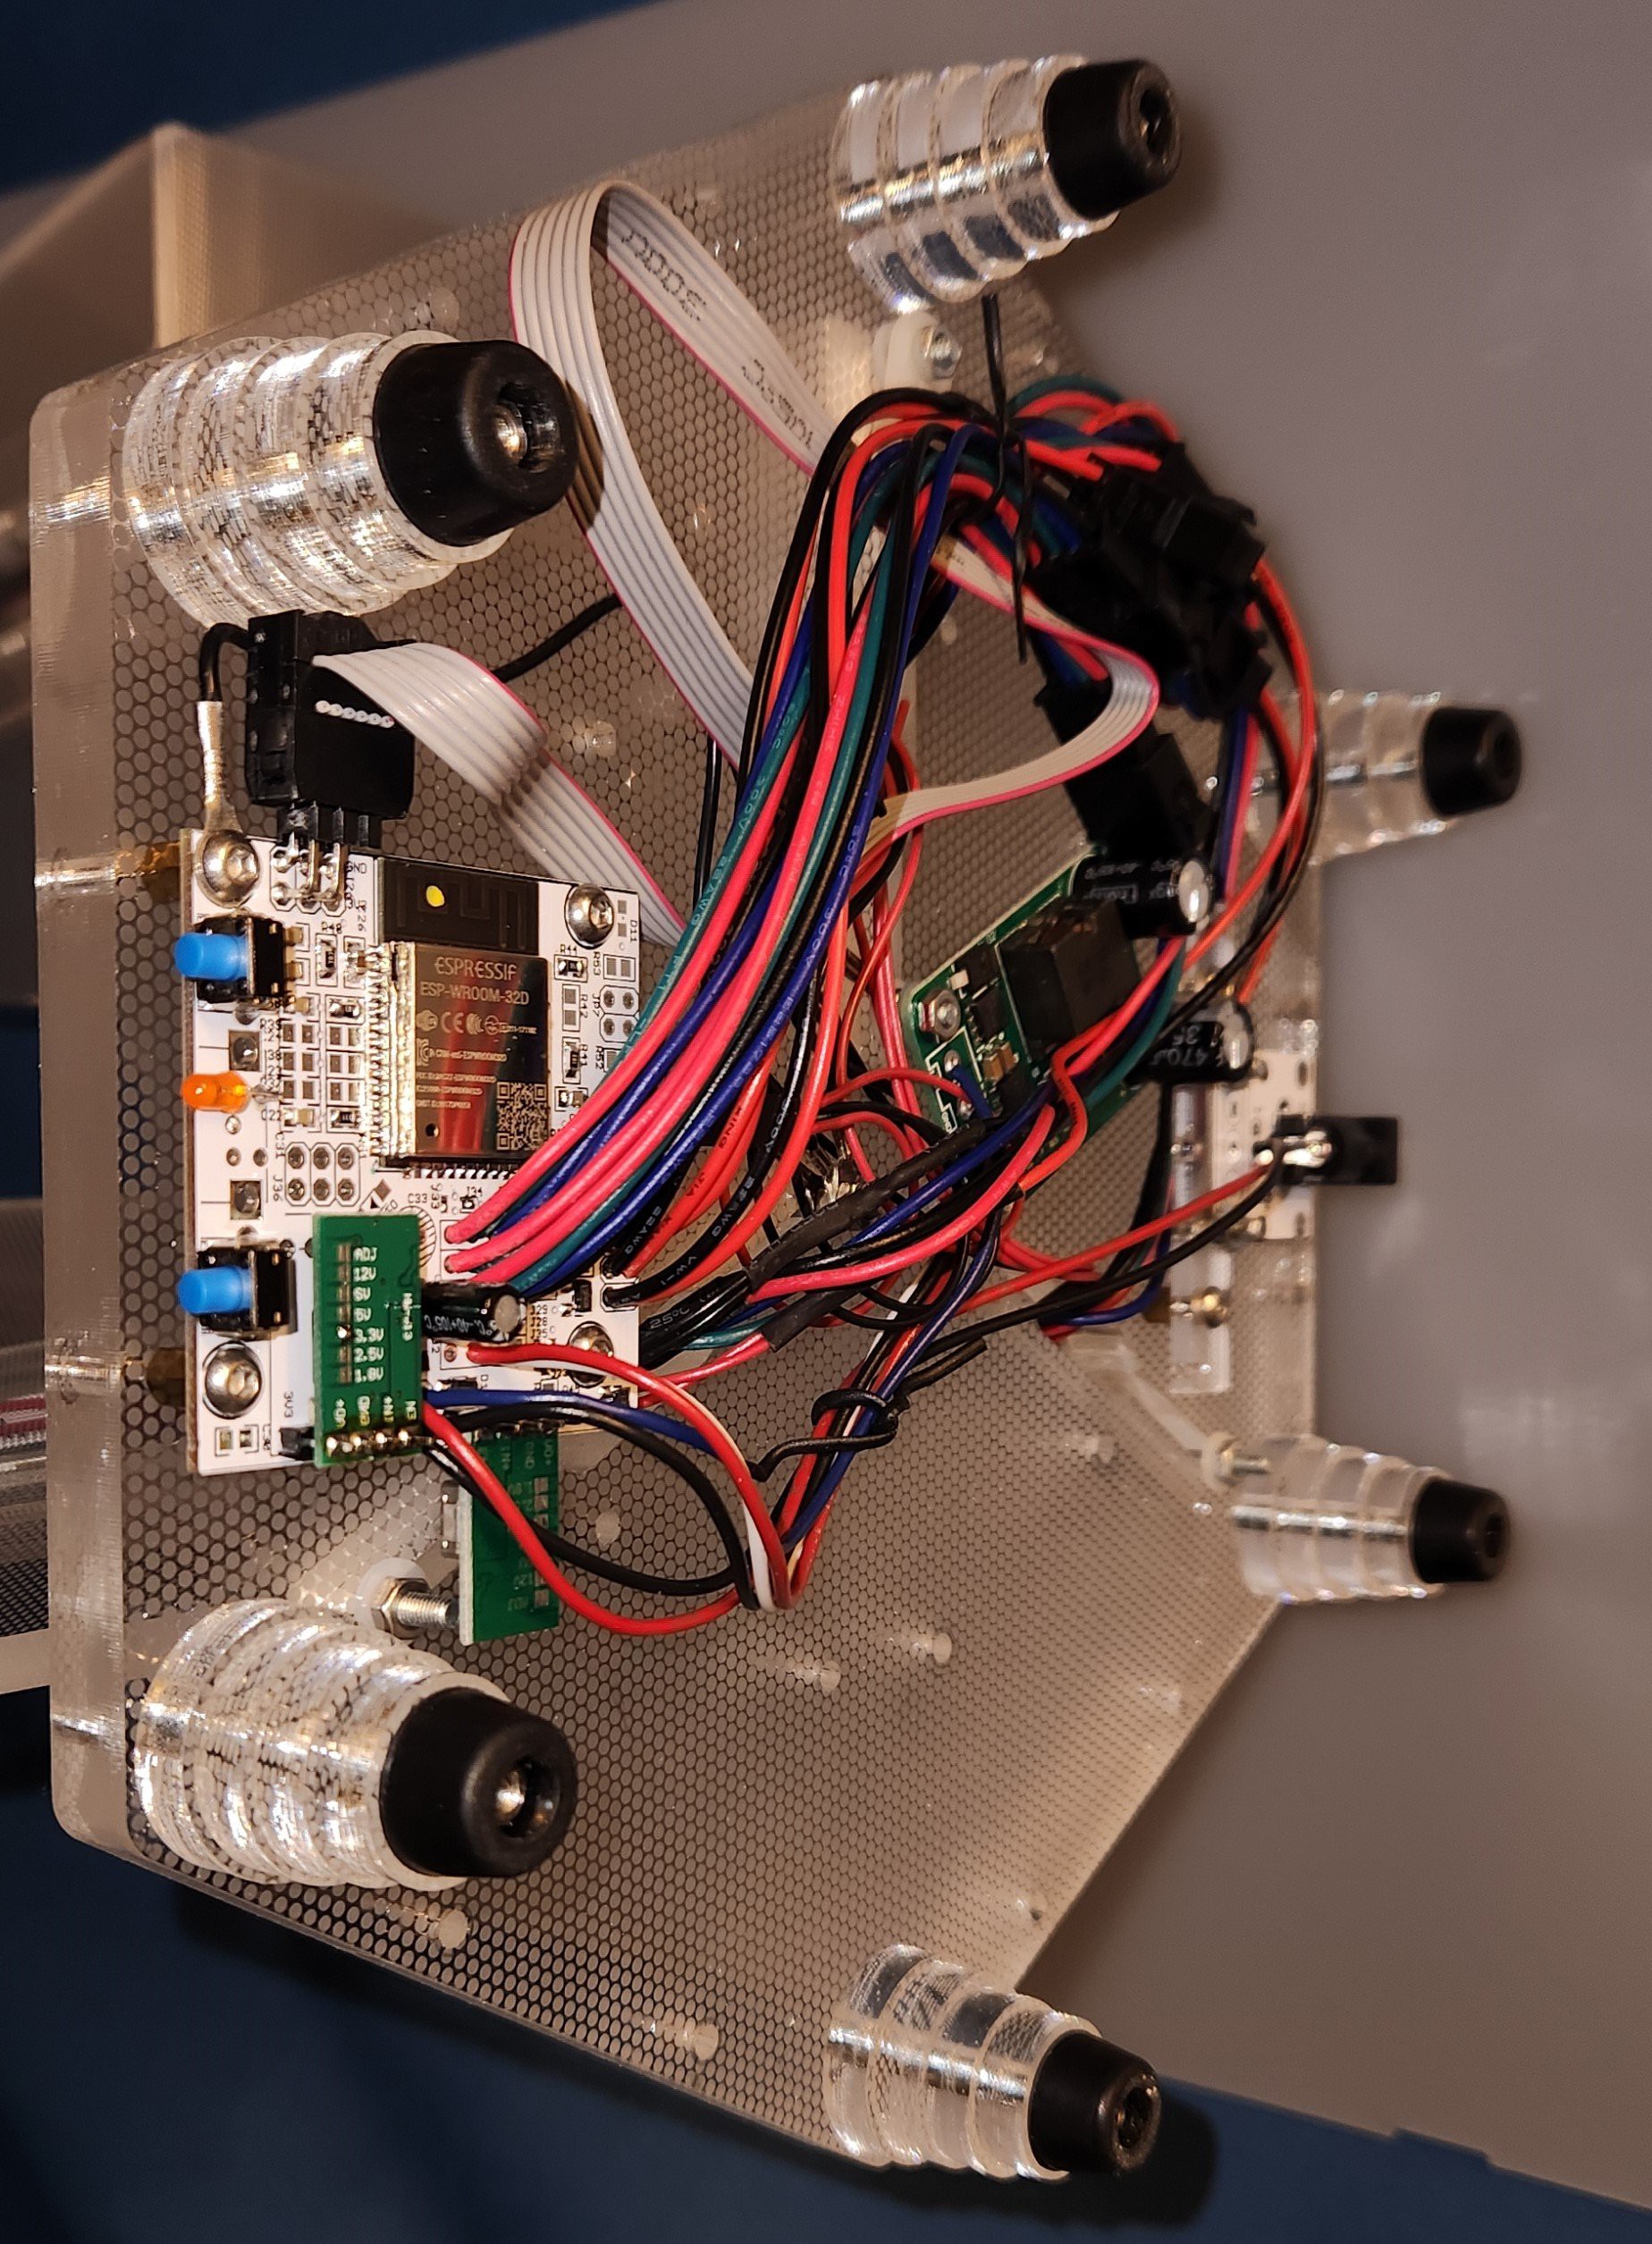
12/31/2022 at 03:44 • 0 commentsIn March 2022, I designed a custom PCB for the controller board.
The PCB has the routing for 4 individual or continuous addressable RGB strips, 3 PWM mosfet control for white LEDs, 3 regulator placement.
The main benefit is the 2 push button that come nicely on the side of the base.
![]()
The same controller board goes onto the RingLight-Trio.
-
LED PCB Strip Assembly
08/06/2018 at 01:15 • 0 commentsThe LED PCB strips assembly consist to solder and test the 4 white and 5 RGB LED. The DiamondLight design uses 24 strips. Overall I have assembled 105 strips across the different project.
The set of 4 strips took around 30 to 45 min to assemble and test.
-
Power Controller Board
04/19/2018 at 20:01 • 0 commentsThe DiamondLight has RGB and White LED requiring 5V 5A and 12.6V 0.480A. The power controller board provides the suitable power can control for each LED.
The regulators are power-off by default to save power. Each panel white LED are control with a mosfet for dimming operation. A switch controls the white LED so the light can be turned on without the microcontroller controller board.

Power Cabling 
White LED -
Acrylic Assembly
04/12/2018 at 18:56 • 0 commentsThe assembly of the DiamondLight starts with the 6 feet made of 4, 6mm rings and a rubber pad. The base is 10mm thick with cutout slots for the cable and adjustment for the U bracket screws.

Base Assembly The U brackets are mounted on the base with screw and nylon washers.

Base with brackets Assembly of a panel requires the following. The standoff are embedded in the acrylic, hex cutout were made with the laser. The side cover have minor horizontal adjustment thanks to 4mm long slot holes. Painter tape covers the acrylic for protection during preparation. The outside edge of the main acrylic piece were sanded to smooth light diffusion. The LED assembly was completed on a support to get the required position and angle.
- 20 x 4mm flat head M3 screws
- 5 x 5mm flat head M3 screws
- 5 x M3 nuts
- 10 x 6mm M3 Hex standoff

Panel Elements First assembled panel. Peeling off the painter's tape is a careful task. The side cover is only 2mm thick acrylic.

Assembled Panel After one done, 2 more to go. All 3 panel assembled.

DiamondLight Panels The panel is mounted on the base. The cable is passed thru the hole in the U-bracket. Screw secures the panel on the base. The panel has slot holes on the bottom and the top to allows for adjustment.

Panel Mount All the panels are mounted on the base. The top plate is assemble with its U-brackets and completes the DiamondLight.

DiamondLight