A realistic, yet another Stranger Things alphabet
The simplest, most efficient way to talk with the Upside Down
The simplest, most efficient way to talk with the Upside Down
To make the experience fit your profile, pick a username and tell us what interests you.
We found and based on your interests.
I found some old pictures of this project, for which I was quite satisfied, so I decided to put a last log on it.
After the project was done and fun enough for the whole house, I got motivated to improve it, thanks also being a RevSpace member back then. From SHA2017, they got tons of leftover badges (afterall, they were made there...). They look like this on the outside:
With a bit of X-ray power, looking through them shows sacrificable parts:
You guessed which one? The hint is in the following picture:
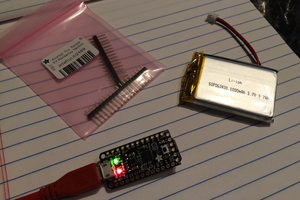
Exactly, I just needed the interfaces for power and control the same LEDs like before with the Arduino Nano and no more, while needing more space. Who knew that a handsaw would give you a free small ESP32 development board!
The sketch works by getting through a "simple" (not for an 8-bit MCU guy tho) REST protocol, the string to show through the LEDs. This was quickly doable thank to the aREST library.
One can connect to its address from the local network, which set in the code below, put the text on the web page, and click send. This was implemented in a simple Android app for sake of simplicity, for which I don't have the code anymore, but I still have the sketchy ESP32 code, linked below.
The snippet is here.
That's all for now.
Good things must come to an end. Here, thanks to our willingness to finish, we managed to find the letters, print them out and try the alphabet fixing. Printed on 200 grams paper, we've used the "official" font:
So the next step is to cut them and attach on the wall. But where? Here!
And this is the result:
And a stranger video here! I know, the lo-fi quality is almost made on purpose.
To control the lights in order to talk with the Upside Down, we need a proper blinking sequence.
Basically, we need to blink a light as many times as the representation of the letter in a sentence. Like in the movie.
But turn on only once was not enough. They need to be even more creepy.
The first step is to locate the letter in the alphabet index, use the index as a number to select the LED and blink. But how to blink it? It needs to be similar to an electric issue of the lamp, due to the master interference with out dimension with the Upsidedown world, which, of course, will cause electric conduction in the copper wires and make the light blink. Hmm.
In other words, the letter shall blink a given amount of times, but with a turn ON-OFF sequence with a random period per each ON-OFF. By adjusting the range of the random duration and the number of blinks, the effect can be tweaked; the picture here will show what will happens. The number of blinks is down to 6 blinks per letter, but the resolution in the sketch is way higher than 1/6th shown here:
The sketch will start with a default sentence looping (in the pic is shown RUN, but it will be MERRY CHRISTMAS), and will display a new one when new sentences are received from serial line (through the USB of the Arduino).
To understand how to map everything, we sketched something on paper and tried to understand the letters location.
The result is that the sketch will also have to take into account the fact that, to keep the letters, we had to go in a serpentine shape. There will be 3 rows:
ABDCEFGH
IJKLMNOP
QRSTUVWXYZ <- input
and the line is continuous from the H to P, from I to Q, and the connection starts from Z, so it must be reversed as well. Therefore a remapping is needed: for example, the LED #26 it is the A, the LED #19 the H, the LED #11 the I, the #18 the P and so on.
When we built the bulbs, we also thought to make a regular color repetition.
This allow the color replication with the RGB of the plastic bulbs, since the same sequence of 4 colour is followed: orange, blue, green, red. So, with an RGB LED, why not enhance the color by turning on the same color of the plastic bulb? With a modulo 4, can be found which color is the current plastic bulb that shall be light up and then turn on the LED with the corresponding one, increasing the color vibrancy (or making combinations of them to obtain different colors of course).
To change the sentence, for now it is used just a simple serial interface. While looping, the letters are blinking up to the end, then fading all of them to signal a new start of the sentence and so on. When from serial a new word (or sentence) is issued, as soon the previous sub-cycle...
Read more »After building up the bulbs, it is time to making a proper enclosure in order to put everything in it. And selecting all the components needed. While regarding the box we already have it, it is missing a proper supply for the LEDs, in case of full brightness is wanted.
We wanted to power up both from USB and from an external power supply, so that it is possible to communicate with the lights and removing the USB form the PC without removing the power form them.
We used a cheap buck converter to scale down to 5V, 3A with input between 6V and 40V. That is why I make a female power jack to to be fit inside the enclosure and being connected to the step down converter. This should be fine, since the all 26 LEDs shall absorb less than 2A at full brightness. Moreover, keeping the same power supply, it is possible to power the strip from both sides in case too much drop on the wire happens. But each APA102 is absorbing, somewhere around 50mA with all the LEDs on. This means that we may be fine with our supply.
As mentioned before, from the local hackerspace, the first grabbing choice was an Arduino Nano. Turns out to be cloned, with all the issues of the compatibility of the USB to serial converter. But is the fastest choice. So, here below the Arduino, the converter and the jack.
I also suspected that the APA102 LEDs can get damaged if reversed supply is applied. Therefore, a removable couple of parallel anti-reverse shottky diodes are inserted to handle up to 2A on the string, despite nominal voltage will be less due to the drop. And I had no time on setup an ideal diode circuitry. They are removable just in case the drop will create problems in the string.
The diagram of the electrical connections described above is shown here, where all the power is taken form the external supply and, if possible, when the supply is not present it is taken from the Arduino USB.
In the box, surprisingly, everything fits:
Now, there is the need to put the LEDs somewhere, accoding to the original show:
The first (strange) thing that we need is to put the LEDs inside a bulb. It is known that you can cheaply buy from China a prepacket Christmas light with a Neopixel or the like already inside. But the holidays are coming, and there is no time to wait for the shipment.
The first idea was to print the bulbs and the support for the LEDs, but with a reduced size, spiraled PLA print like this:
it took around 8 minutes. To keep the quality while increasing the size to the needed one, with a nozzle size compromise, it is not possible to go lower than 15 minutes per lamp. Which means more than 6 hours of printing.
The second idea was to exploit some chinese Christmas lights. Once we found from eBay a general outdoor Christmas lights, the shape was good and we take the risk to try to recycle them for the alphabet purpose. Once arrived they were like this:
and with a big surprise, the lamps for external use are designed to be open, or at least these in particular:
So it was done. The base of the transparent bulb is large enough to host many LEDs package, like the 2020 size. So I tried with the APA102 LEDs, by cutting them individually, and solder wires of a length which should correspond to the spacing of each lamp, strengthening with hot glue e fit on the base of the lamp:
and by bending laterally the LED, fit into the colored bulb:
Et voilà:
Repeating the work by 26 times it is way less than 6 hours and it is very practical.
The next steps will be the firmware and the enclosure design.
There are moment in which the faith get lost, that is why I personally allocated some time to finish all the bulbs at once, to keep motivation and spinning momentum among friends that were willing to help, so that keeping hard we can go through all the steps up to the end!
The first step was to brainstorm a bit on how to make what we wanted.
We need 26 lights, in order to blink any word. Does it need to be hardwired, is it feasible, is it cheap? The answer was to use cheap individually addressable LEDs, even just only white.
To go fast and cheap, there were also the need to add a microcontroller, where an Arduino system turns out to be the fastest prototyping solution, considering the availability of libraries.
Now there are many circuits capable to make any LED individually addressable, but the effort and the cost shall be multiplied by 26 times. So the focus was on a LED module which contains already everything per each LED and being as small as possible. The main popular solution may be the Neopixels and similar ones, but our budget was limited and we needed to complete this in one week.
It is now that I went to the local hackerspace, to think how to do the enclosure. It is there that I met [Benadski], who kindly provide to me a huge strip of individually addressable LEDs. So I tried to connect them but, sadly, they have a different pinout w.r.t. the Neopixels. After trial and errors, analyzing the pin-out, then shrinking the search to the interesting small silicon die, I discover them to be the APA102 parts. Then I discovered that on one extreme of the strip, it were mentioned the "APA102" on the silkscreen.
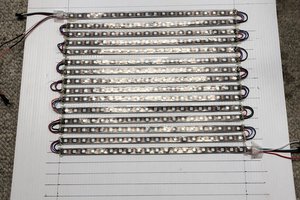
Then, with an Arduino Nano still from the local hackerspace, I just connected all together, following the indications on the strip:
According to the datasheet (honestly, barely understandable) seems that I should not turn on all the LEDs on the same time at the maximum brightness, because with 26 letters the current absorbed would be almost 2A at 5V. But I turned on a strip of 60 LEDs with the sample sketch. But in the end, the first check is promising, despite ignoring any power requirement:
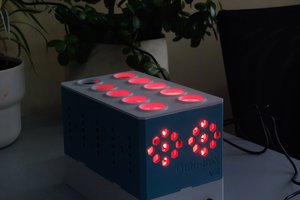
The Cr@isisjungl3 crew finally accomplished to make a box. The first trial without any particular supporting electronics seems to work:
Now it is time to build the bulbs.
Create an account to leave a comment. Already have an account? Log In.
Become a member to follow this project and never miss any updates


 Korishev
 Alan
Alan
 Wriju
Wriju
Vocabulary choice was great and apart from that this article really had a nice flow throughout . <a href="https://www.amazon.com/Decrum-Mens-Stranger-Things-Shirt/dp/B078JJKSTB">Stranger Things T Shirt</a>