-
3D Printed Case
12/26/2017 at 17:03 • 0 commentsEven though the Gecko Node does not have to be water proof, it will be used outside. Because of this the PCB needs some kind of protection. I decided to make a simple 3d printed case in Fusion360.
![]()
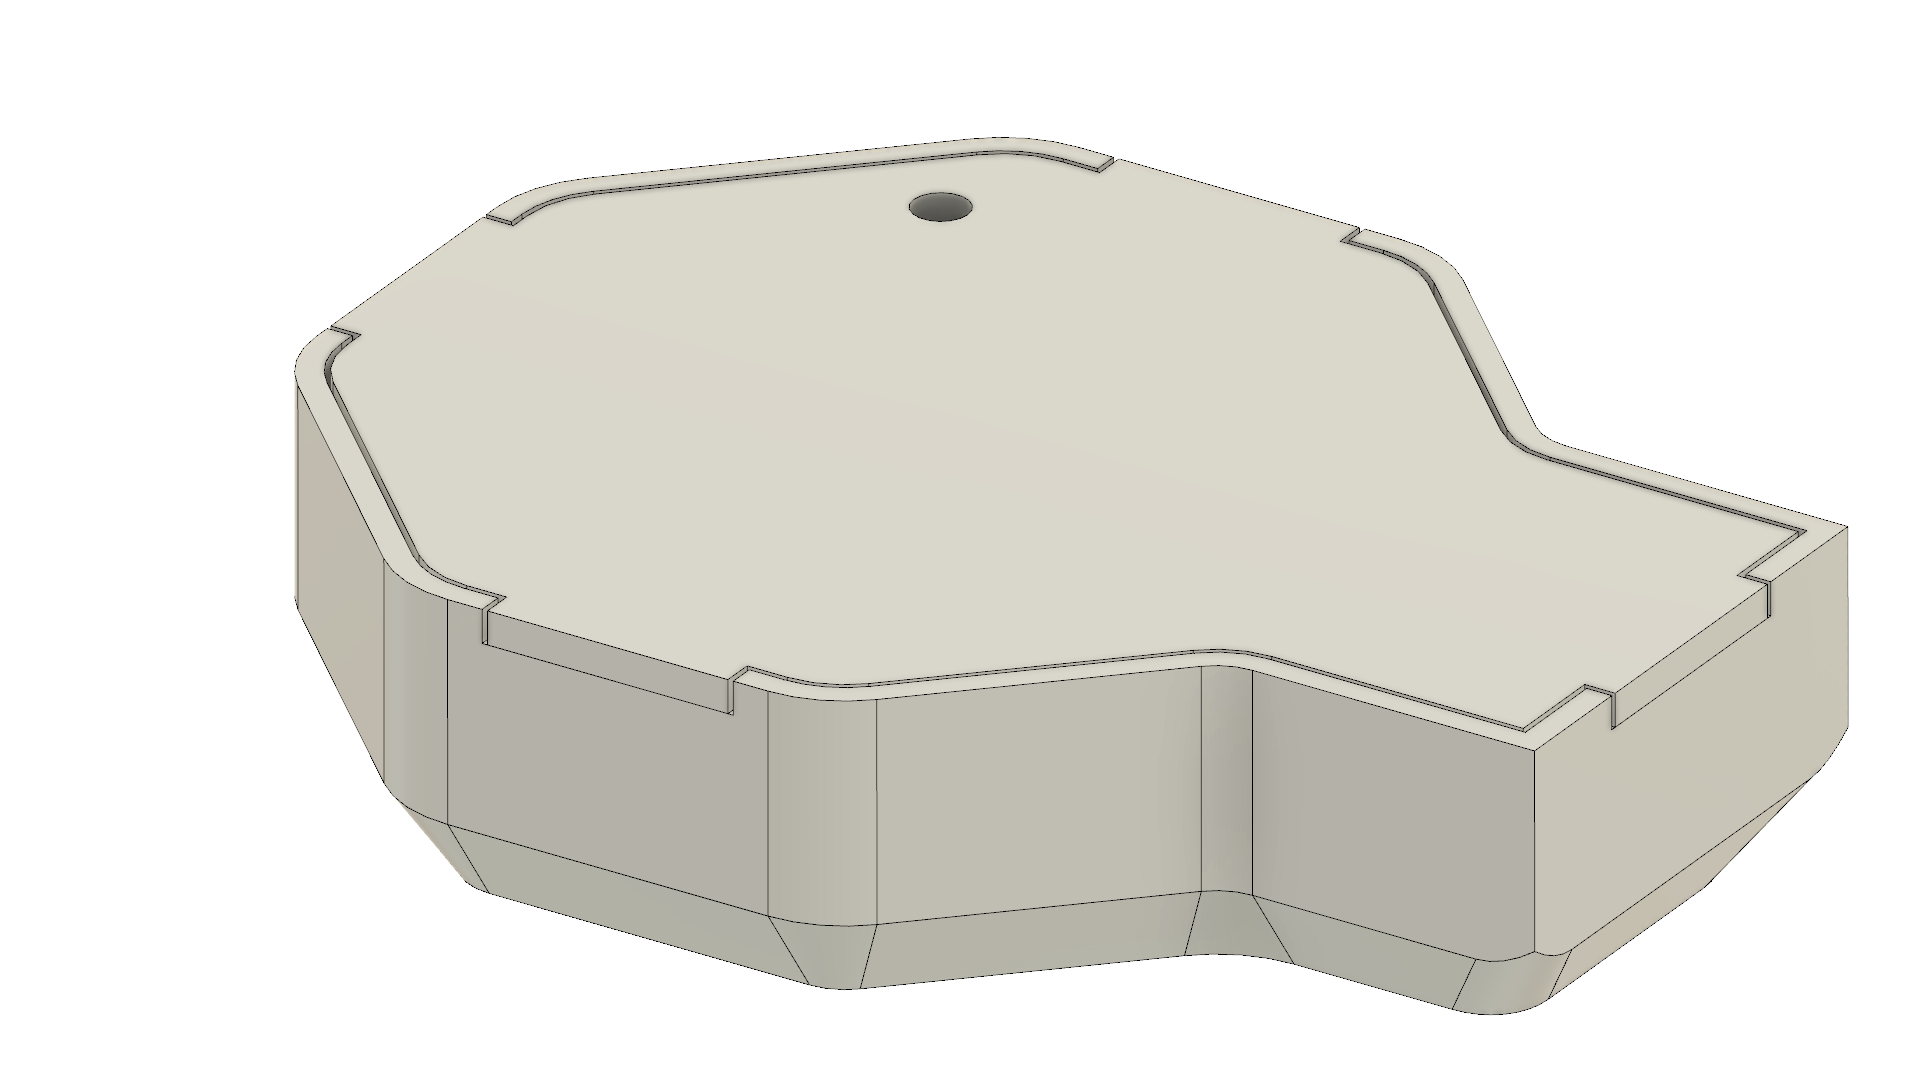
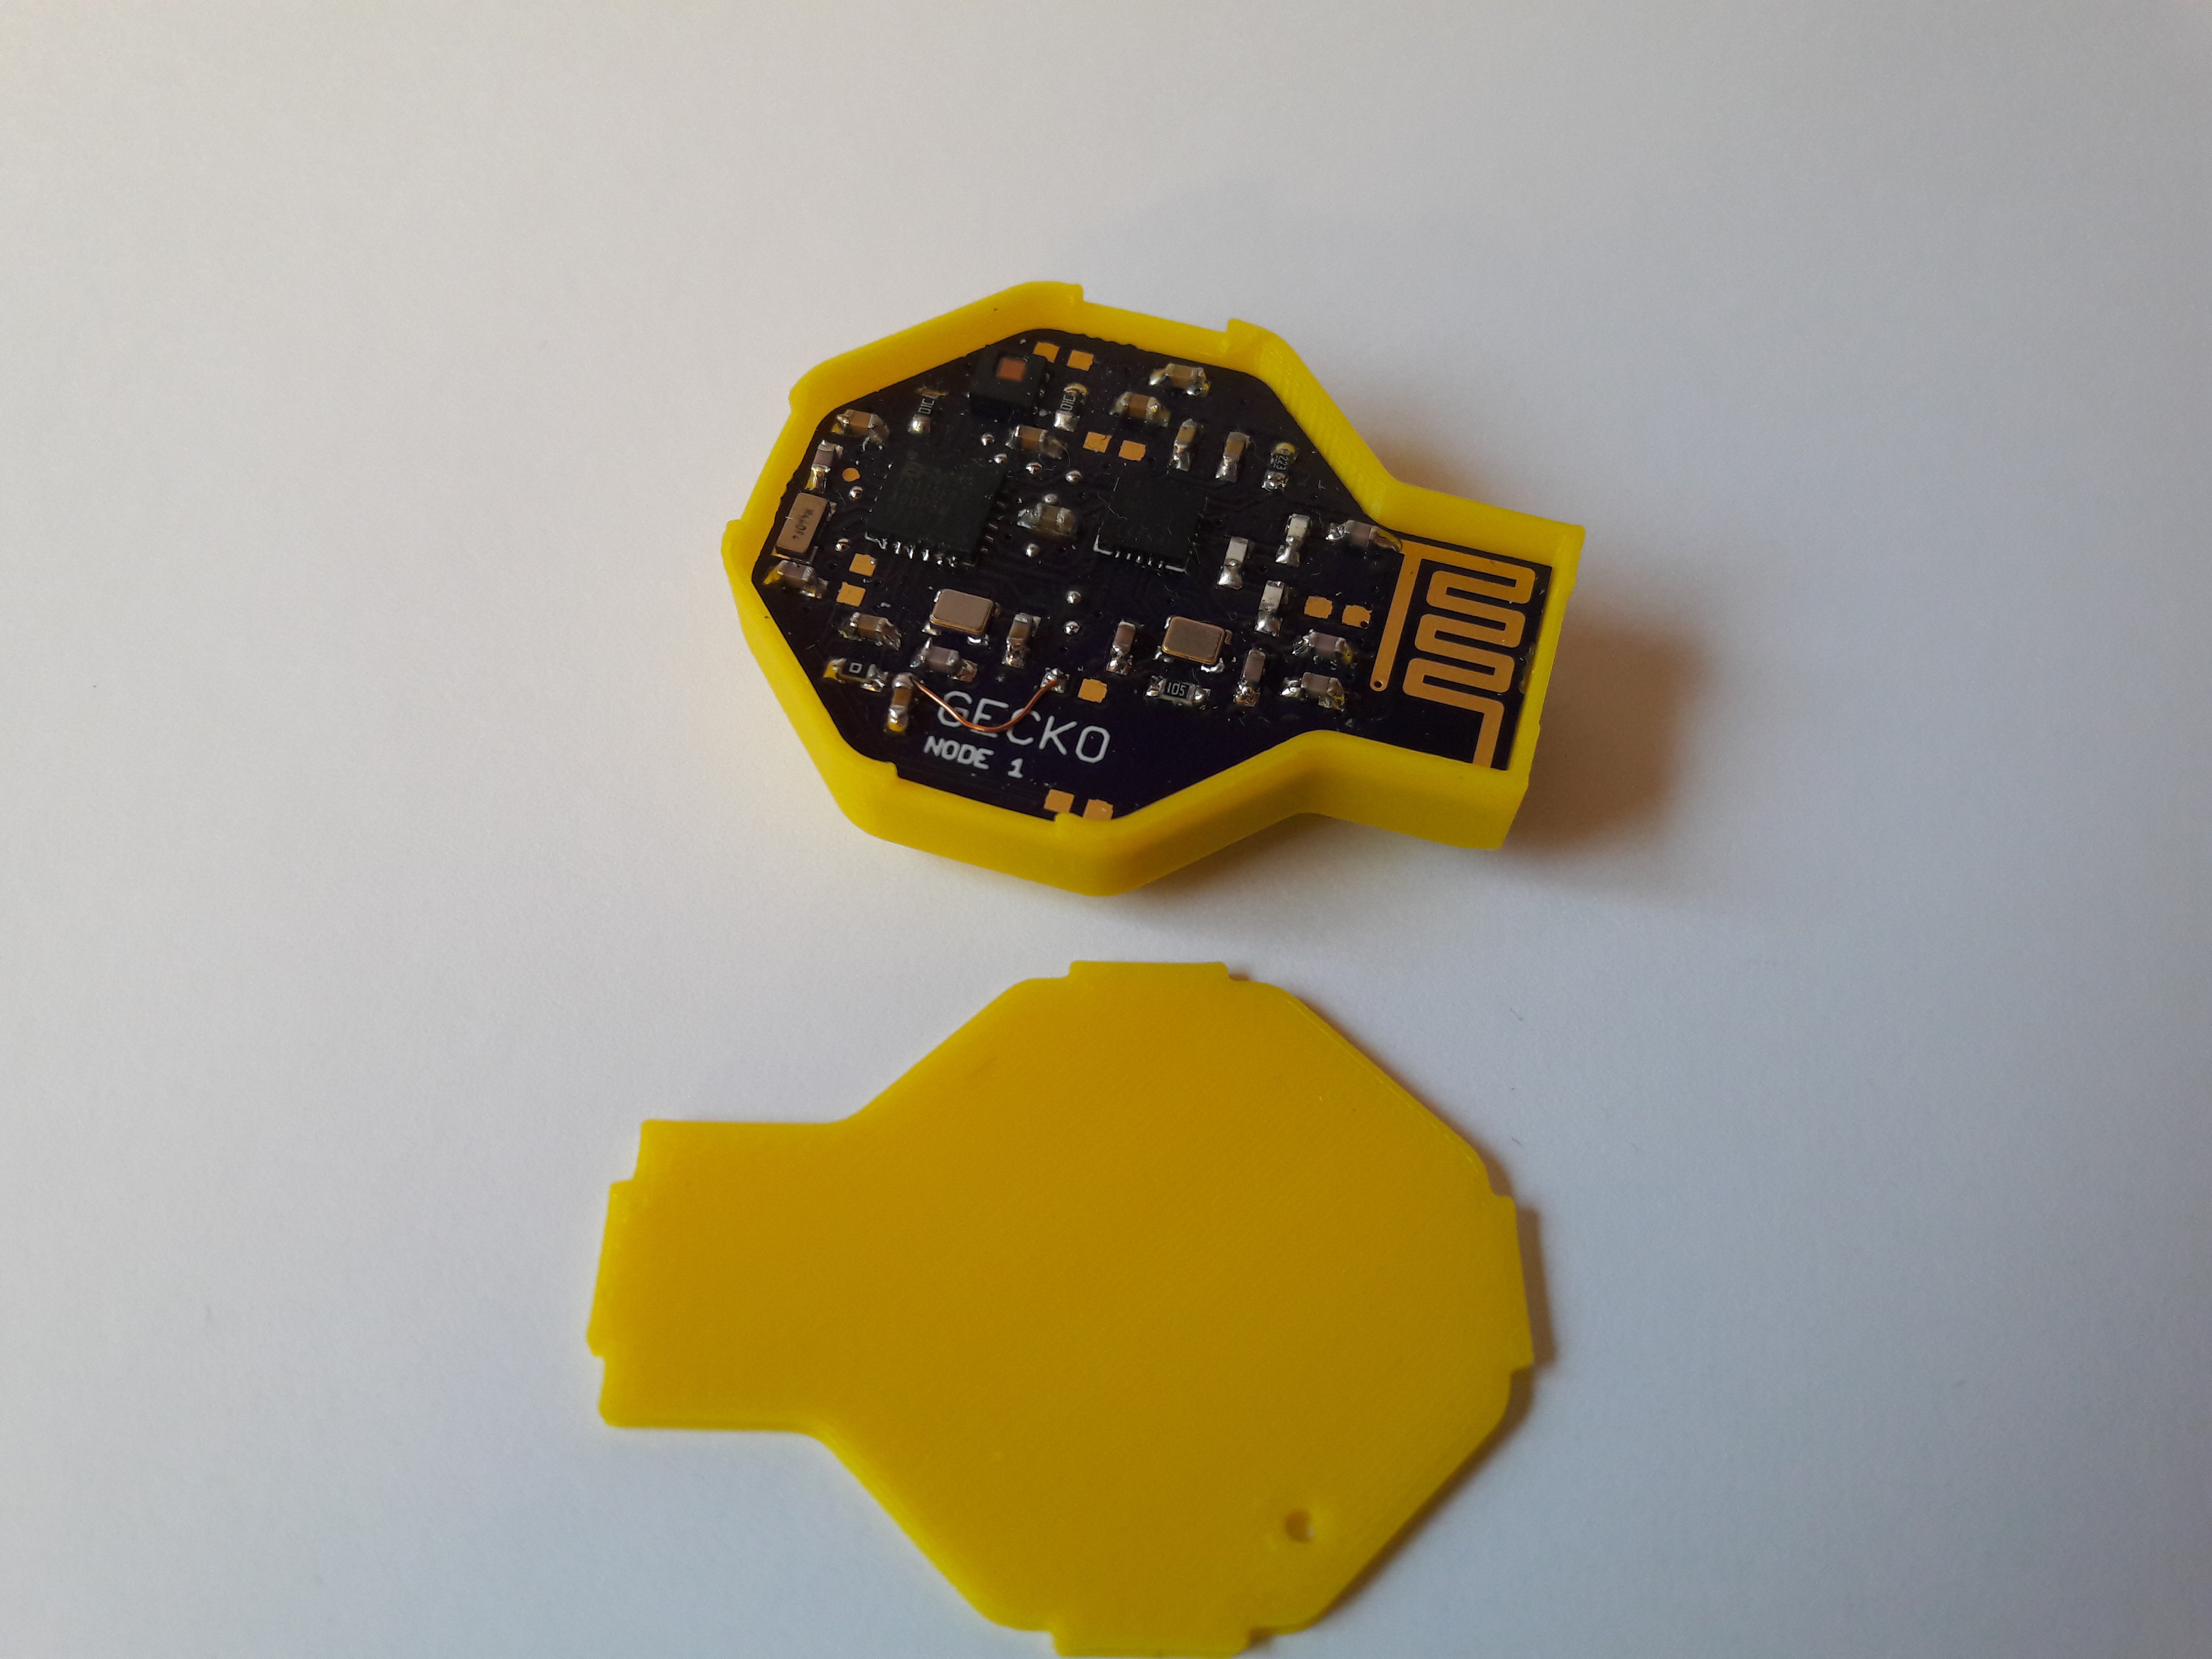
This is what I came up with. It's the smallest shape to include the pcb with its battery holder. The lid is press-fit to the shell so there are no screws needed. A small hole above the HDC1080 ensures accurate humidity readings.
![]()
-
Power Consumption
12/26/2017 at 16:51 • 0 commentsThe device saves power by putting the EFM32 into energy mode 2 for most of the time and only waking it up to perform measurements and to transmit them. The rf24 module also has a sleep mode, which can be activated by setting a bit in its config register. The HDC is already configured to stay in a deep sleep mode until its i2c address is transmitted. When I was still measuring 19µA on the device, I was a little concerned.
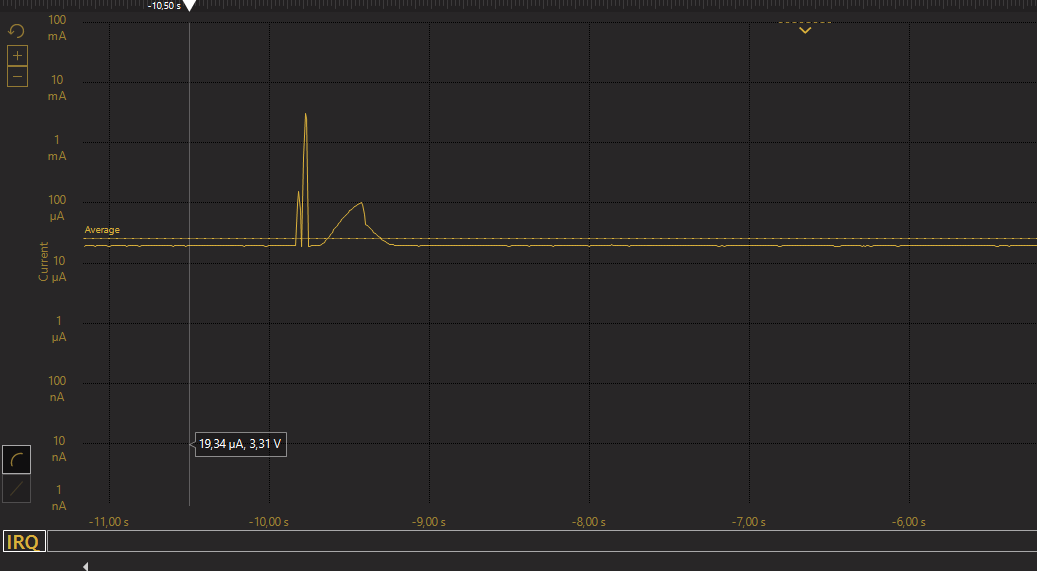
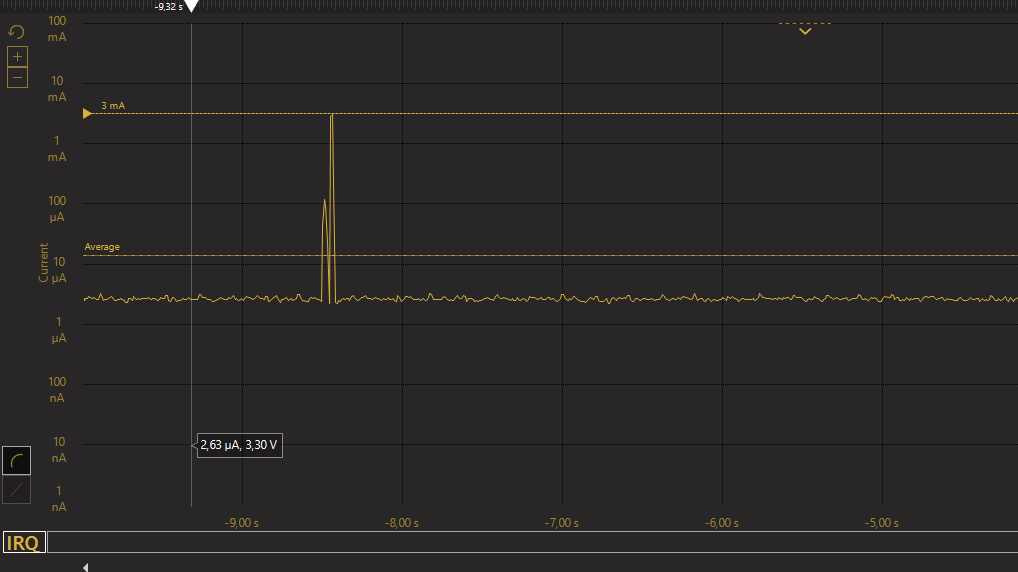
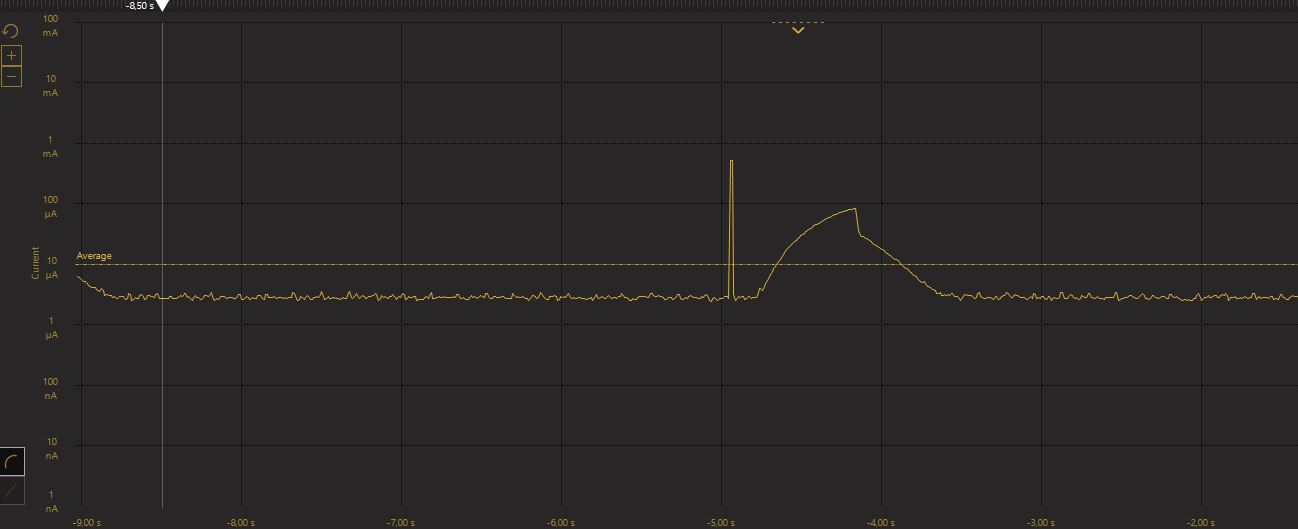
But as it turns out, disconnecting the debug pins reduces the measured current draw significantly to a more realistic 2.6µA. There also was a little charge-discharge-curve visible after the data is transmitted. Setting the chip select pin low somehow removes this bump. I am still not sure what's the explanation for this.
![]()
I love how the starter kit board measures and displays the current over time. You can clearly see a smaller 100µA peak where the EFM32 wakes up to request a measurement, then goes to sleep again. The second peak with the rf24 data transmission is much higher. It could be a bit more than the 3mA displayed here, but the transmission takes only a couple of milliseconds.
With the 2.6µA current consumption the device would theoretically run for more than 8 years. This does not take into account the self discharge of the coin cell (only around 1% per year actually).
-
Getting it to work
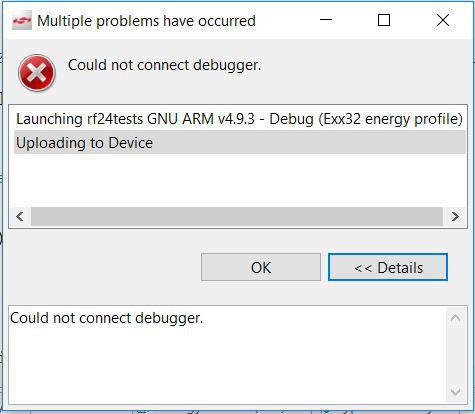
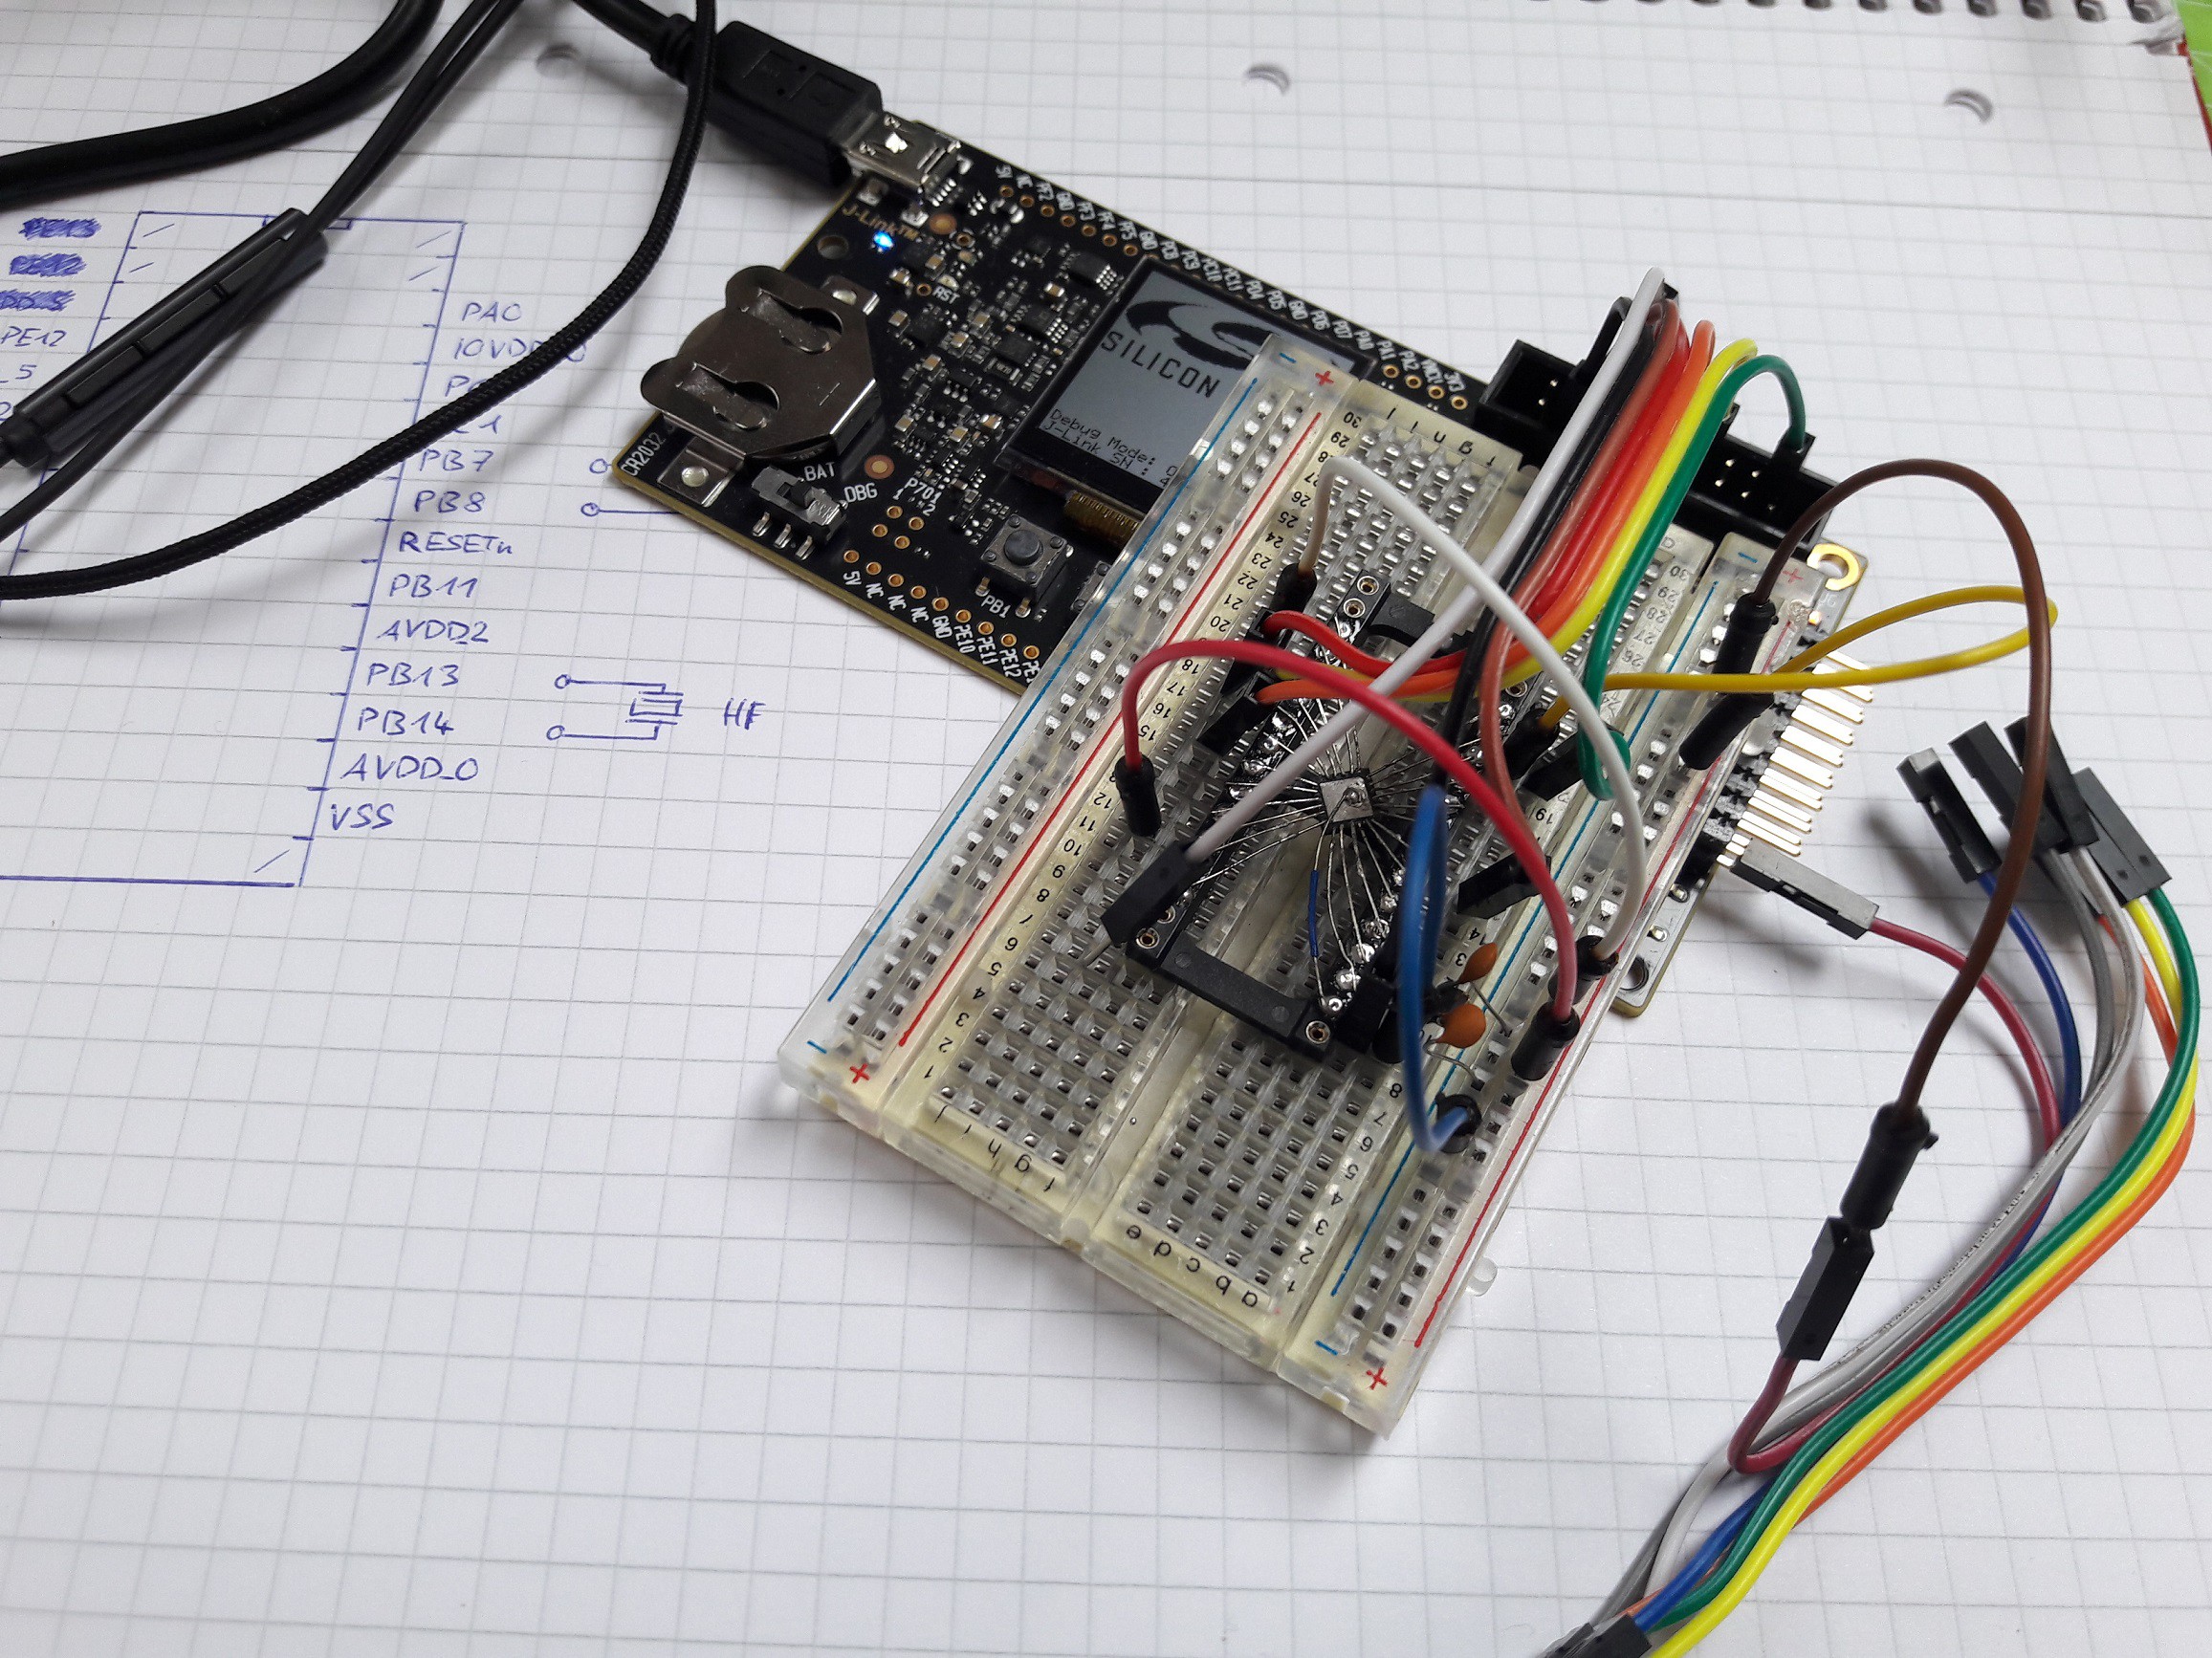
12/26/2017 at 15:57 • 1 commentAfter the PCB was mostly assembled, the next step was programming the EFM32. The starter kit board can be configured in software to program an external device. There is also a pin header which includes the needed pins (https://www.silabs.com/community/software/simplicity-studio/knowledge-base.entry.html/2014/11/24/using_an_efm32_start-H9Gy). From there I connected cables to the respective pads on the Gecko Node board (I didn't include a proper programming connector to save space). Because the model of the EFM Zero Gecko that I am using is different from the on in the starter kit, the code needs to be compiled again. When I tried to flash the code for the first time, I was greeted with this error message, which means that pretty much anything could be wrong:
Finding the solution to this was tricky and took me several days and the help of a coworker. I tried cleaning up the soldering connections, used voltages (it's important to power the external efm32 actively, the debug connector won't work for this) and even tried different versions of the Simplicity Studio without success. I also took another EFM32 and dead-bug-soldered it to a socket to rule out any bad connections on the board.
![]()
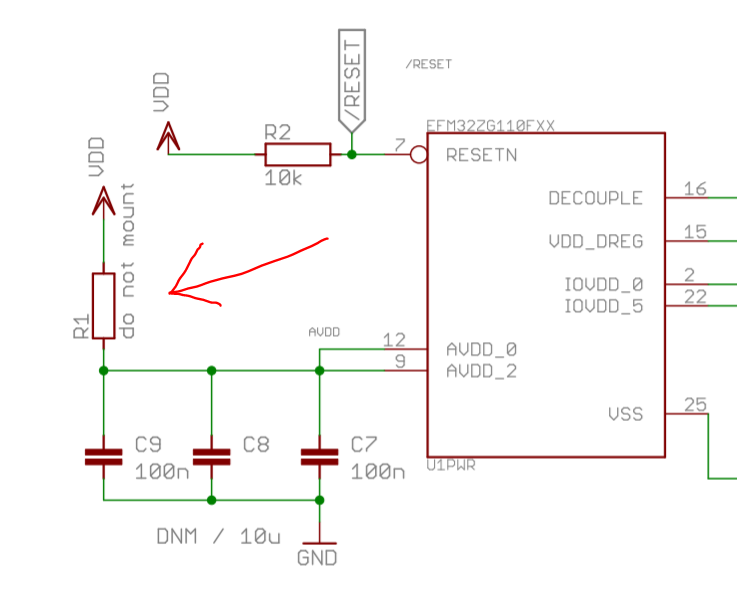
The solution: While doing the layout for the board I was not sure whether the analog voltage supply needs to be connected, since I am not necessarily using any of the analog features of the EFM32. I took this project from github as a template: https://github.com/lemcu/EFM32ZG110-quick-start-board. There, the AVCC pins are separated from VCC by a "do-not-mount" resistor, meaning that they could be left floating.
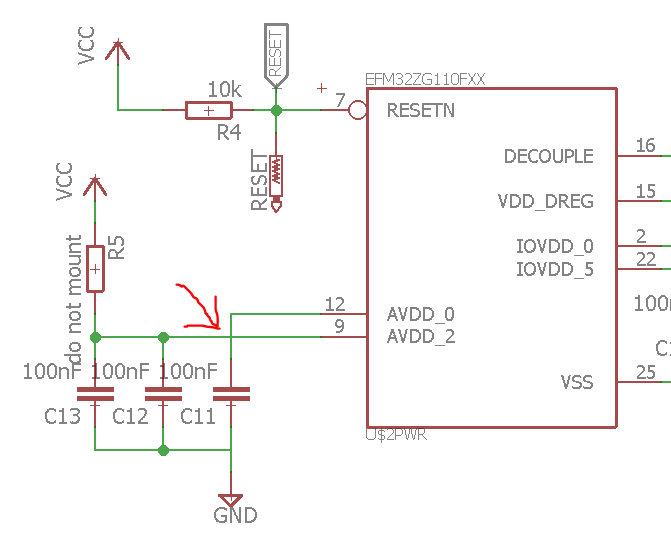
During the troubleshooting I even bridged this connection to see if that was the cause of the problem, which did not make a difference. What I had overlooked was an error in the layout, where a node was missing from one of the AVDD pins.
Because of this, only one of the pins was set to VCC during testing. After finding it, the error was easy to fix with a piece of wire and I was finally able to program the EFM32.
Because the code was already running on the starter kit board, most features were already implemented. Sending messages with the rf24 was working almost immediately. The only component I had not tested was the HDC1080, which is connected via i2c. The communication is very simple: Sending the i2c address and a write command requests a measurement. After waiting a few milliseconds, the data can be received with a read command. I had some problems getting the HDC1080 to respond to its address at first, because I didn't bit-shift the address at first.
For the base station I am still using an ESP8266 with a rf24 module. I slightly modified the code from the LP Mini (https://hackaday.io/project/16724-lp-mini-low-power-dev-board/log/51421-a-more-complex-example-cat-logging). The ESP now receives a struct of data containing, the temperature, humidity, a char as an ID (to identify the Gecko Node if multiples are used) and a "battery-bit". The battery bit is a neat little feature of the HDC1080, which tells you when the supply voltage drops below 2.8V.
-
Making the board
12/25/2017 at 23:08 • 0 commentsUntil now my projects have been restricted to using components that I can solder by hand with a regular soldering iron. This time, I have access to a lab with a hot air rework station. This means that things like the QFN24 Zero Gecko with no visible pins can be soldered. The nrf24l01 also comes in a QFN package and will be soldered on the board directly instead of using its breakout module. The price for these chips starts at around 3€ for single quantities. Instead of ordering them I decided to take apart the breakout boards. Surprisingly these boards cost only 1€ from sites like Banggood (https://www.banggood.com/5Pcs-NRF24L01-SI24R1-2_4G-Wireless-Power-Enhanced-Communication-Receiver-Module-p-1059601.html?rmmds=search&cur_warehouse=CN), while also including the necessary passive components that can be repurposed. Either Shenzhen managed to make perfect clones of the chips or they are buying them at ridiculous quantities.
What's left is the sensor. I chose a hdc1080 from TI, which can measure temperature and humidity at a high accuracy. Its standby current of just 100nA is perfect for this application.
The EFM32, the rf24 and the hdc1080 can all run at 3V. Because of that the entire device can easily be powered by a coin cell. In this case a voltage regulator would only consume more power. The thickness of the device is not that important, so a CR2032 is used.
Here is a quick calculation for the cost of the device (not including the pcb itself):
Price in single quantity Price for 1000+ units EFM32ZG110F32 0.91€ 0.83€ NRF24L01 1.86€ 1.42€ HDC1080 2.43€ 1.25€ Oscillators etc. ~3€ ~1.50€ 8.20€ 5€
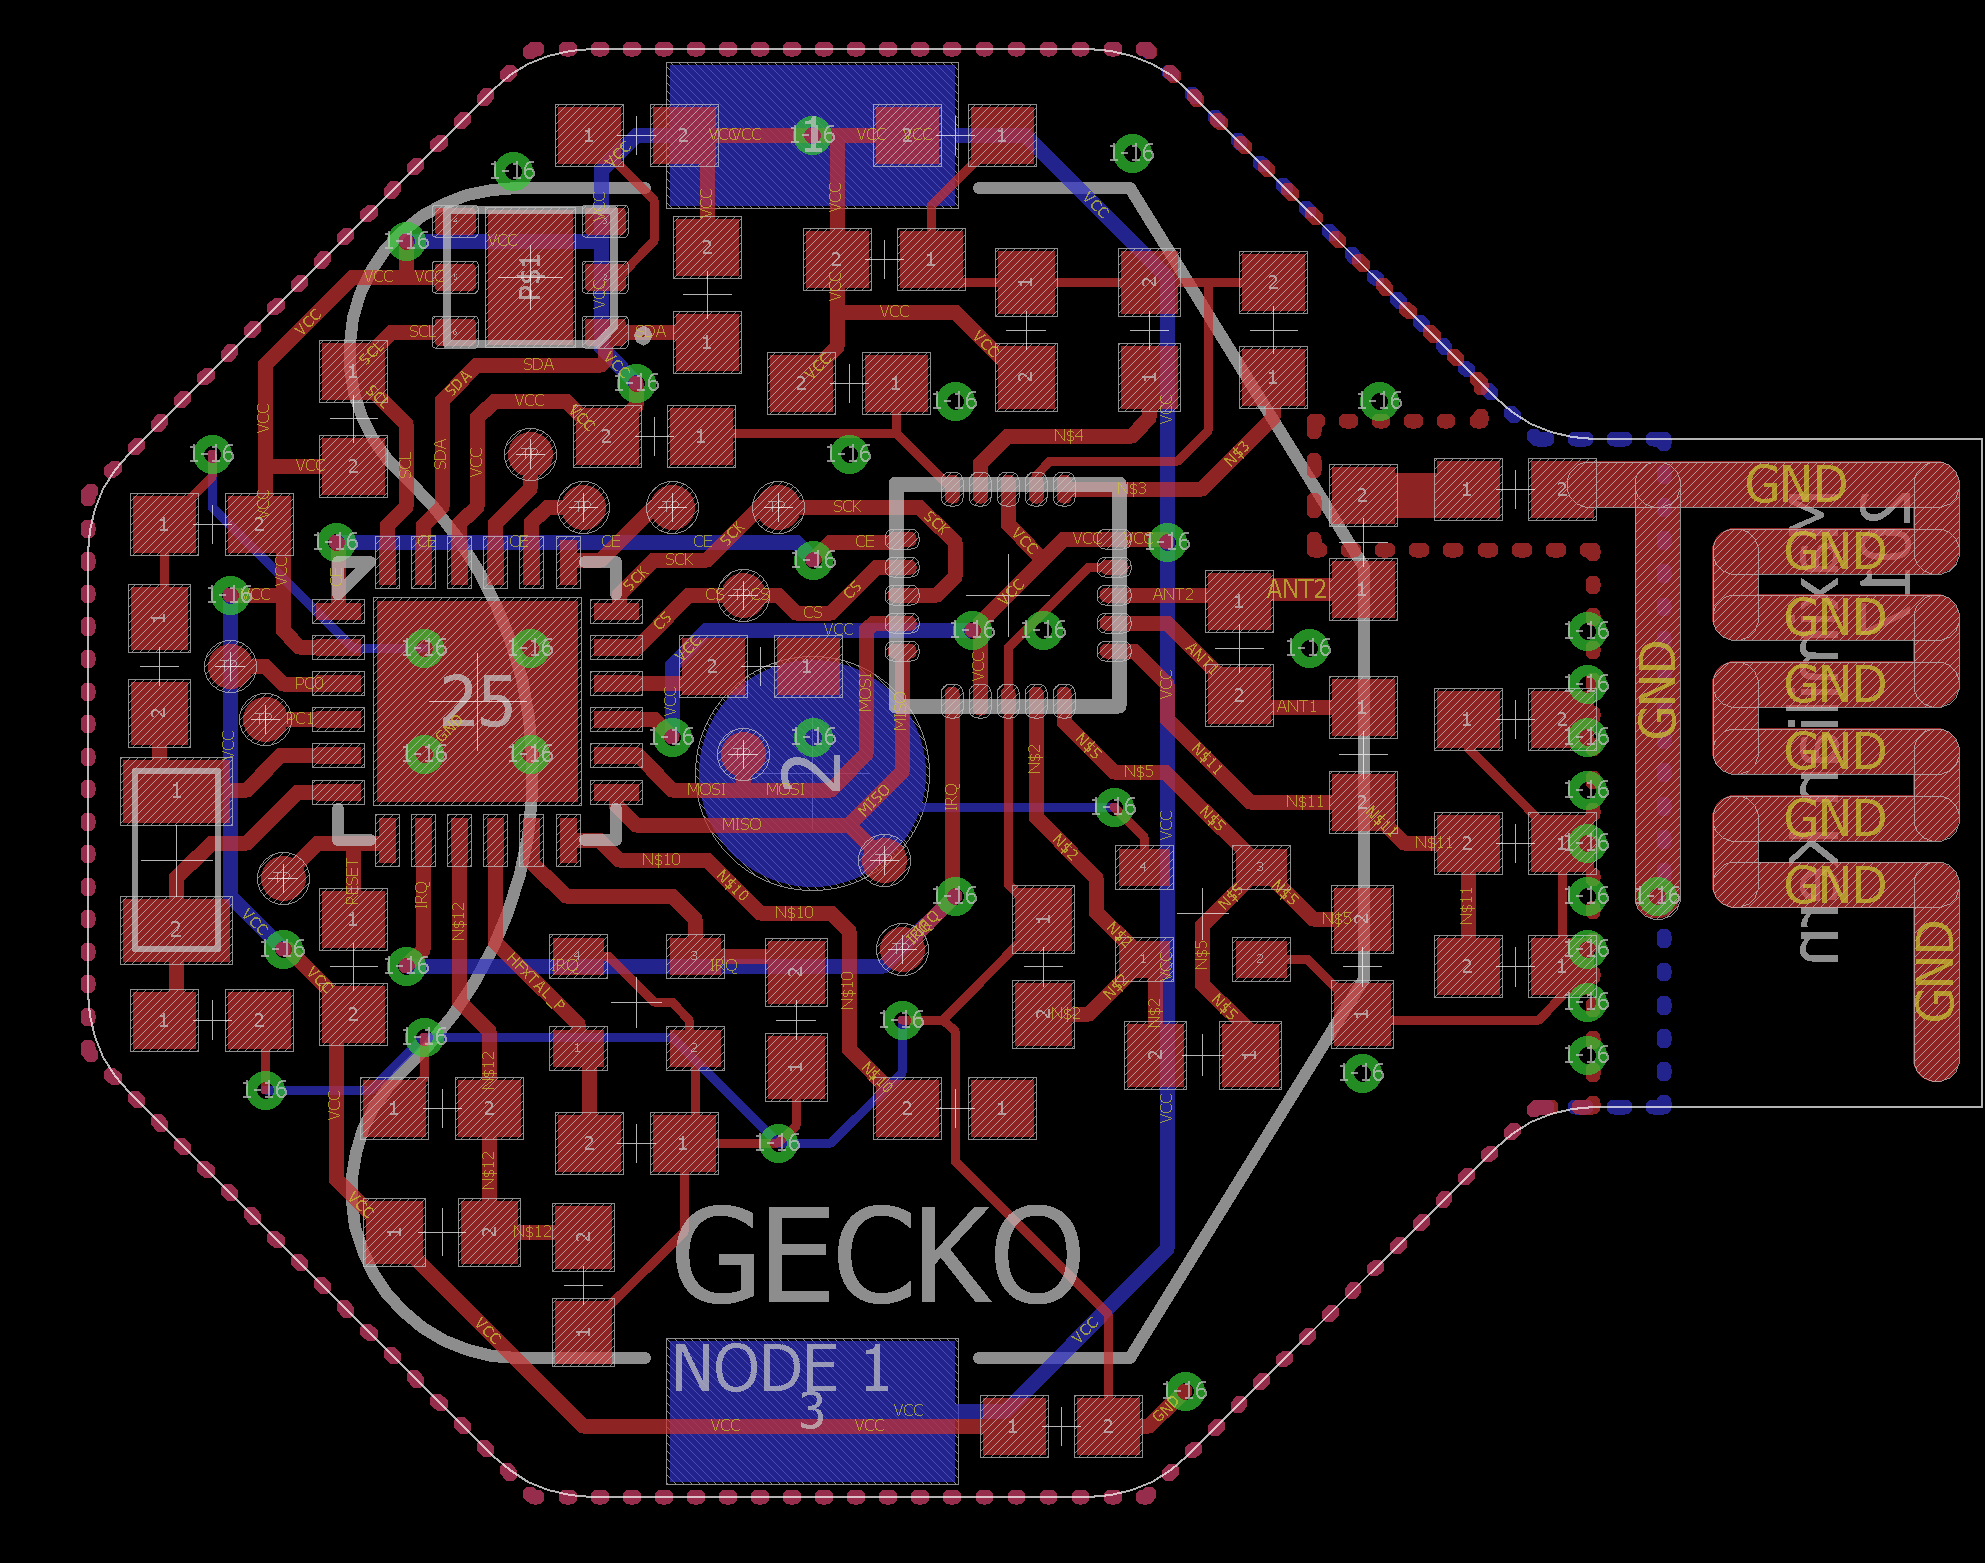
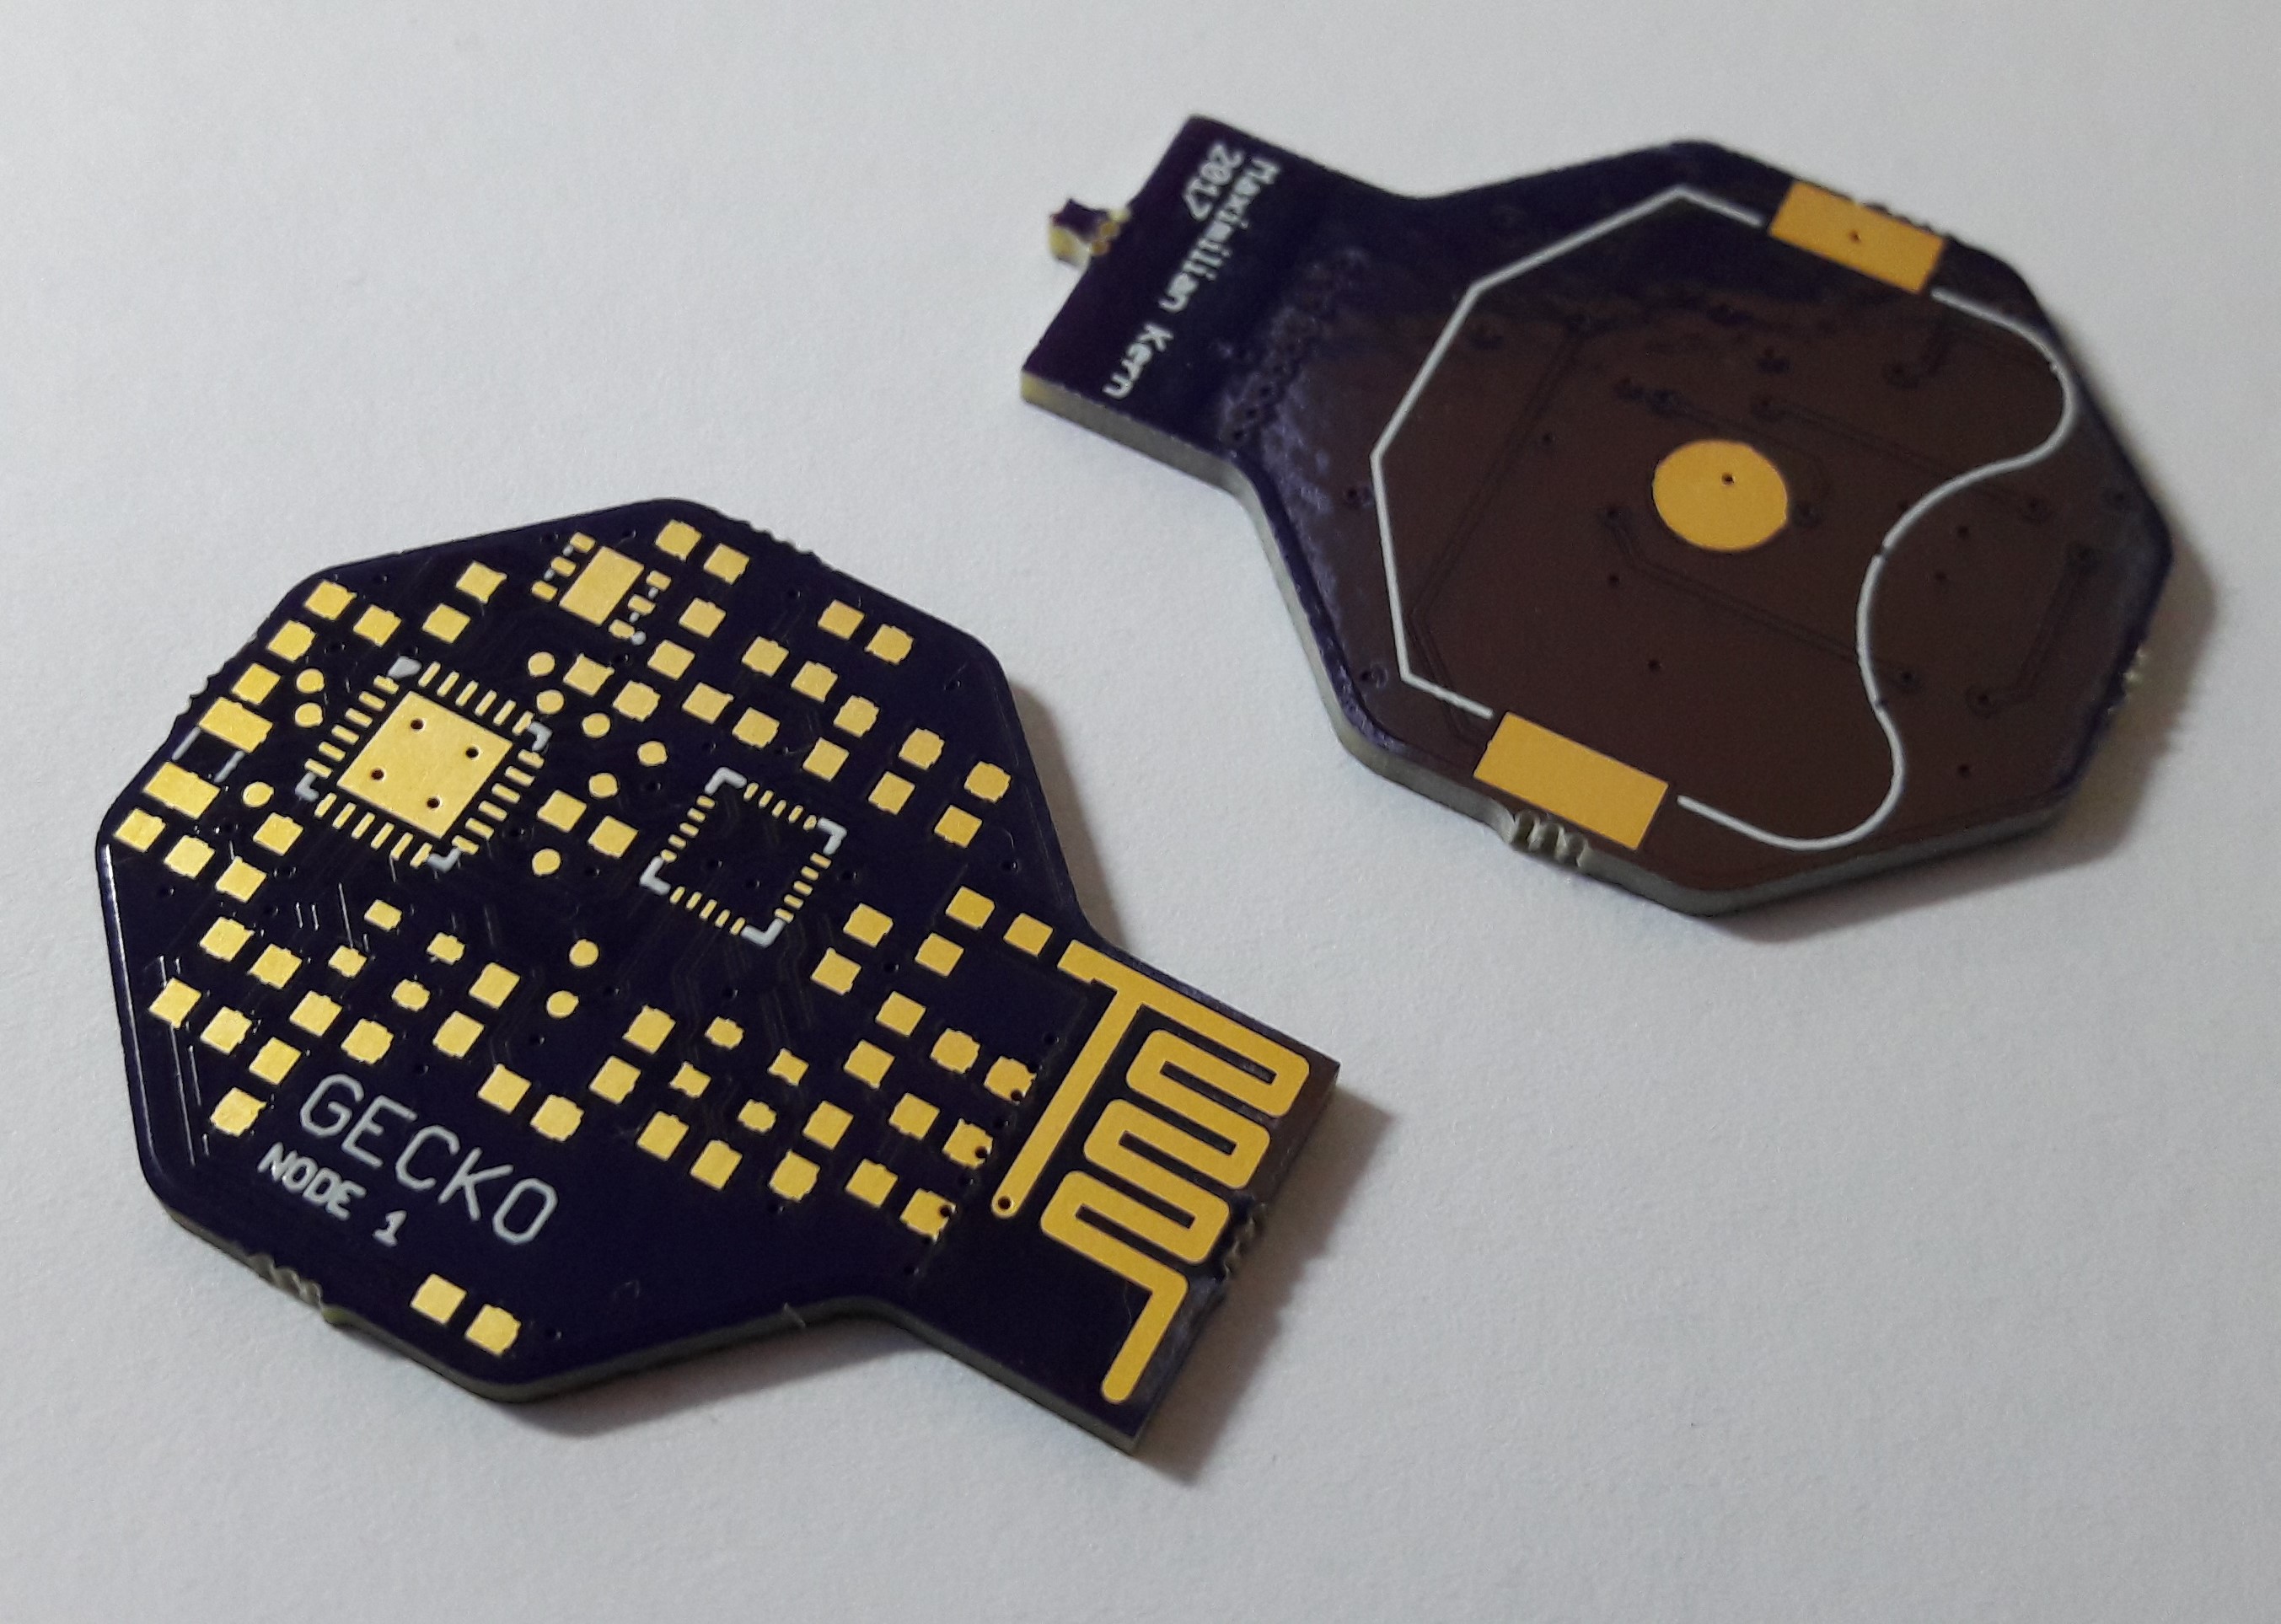
The size of the PCB is mostly limited by the coin cell holder, which is the widest part. I would have liked to make the board circular, but the antenna needs some space as well. I decided to copy the copper layer antenna that the rf24 modules uses. This way no additional components are required.
![]()
The PCBs were ordered from OSH Park and, as usual, all three are perfect apart from my own design flaws, which I'll get to later.
![]()
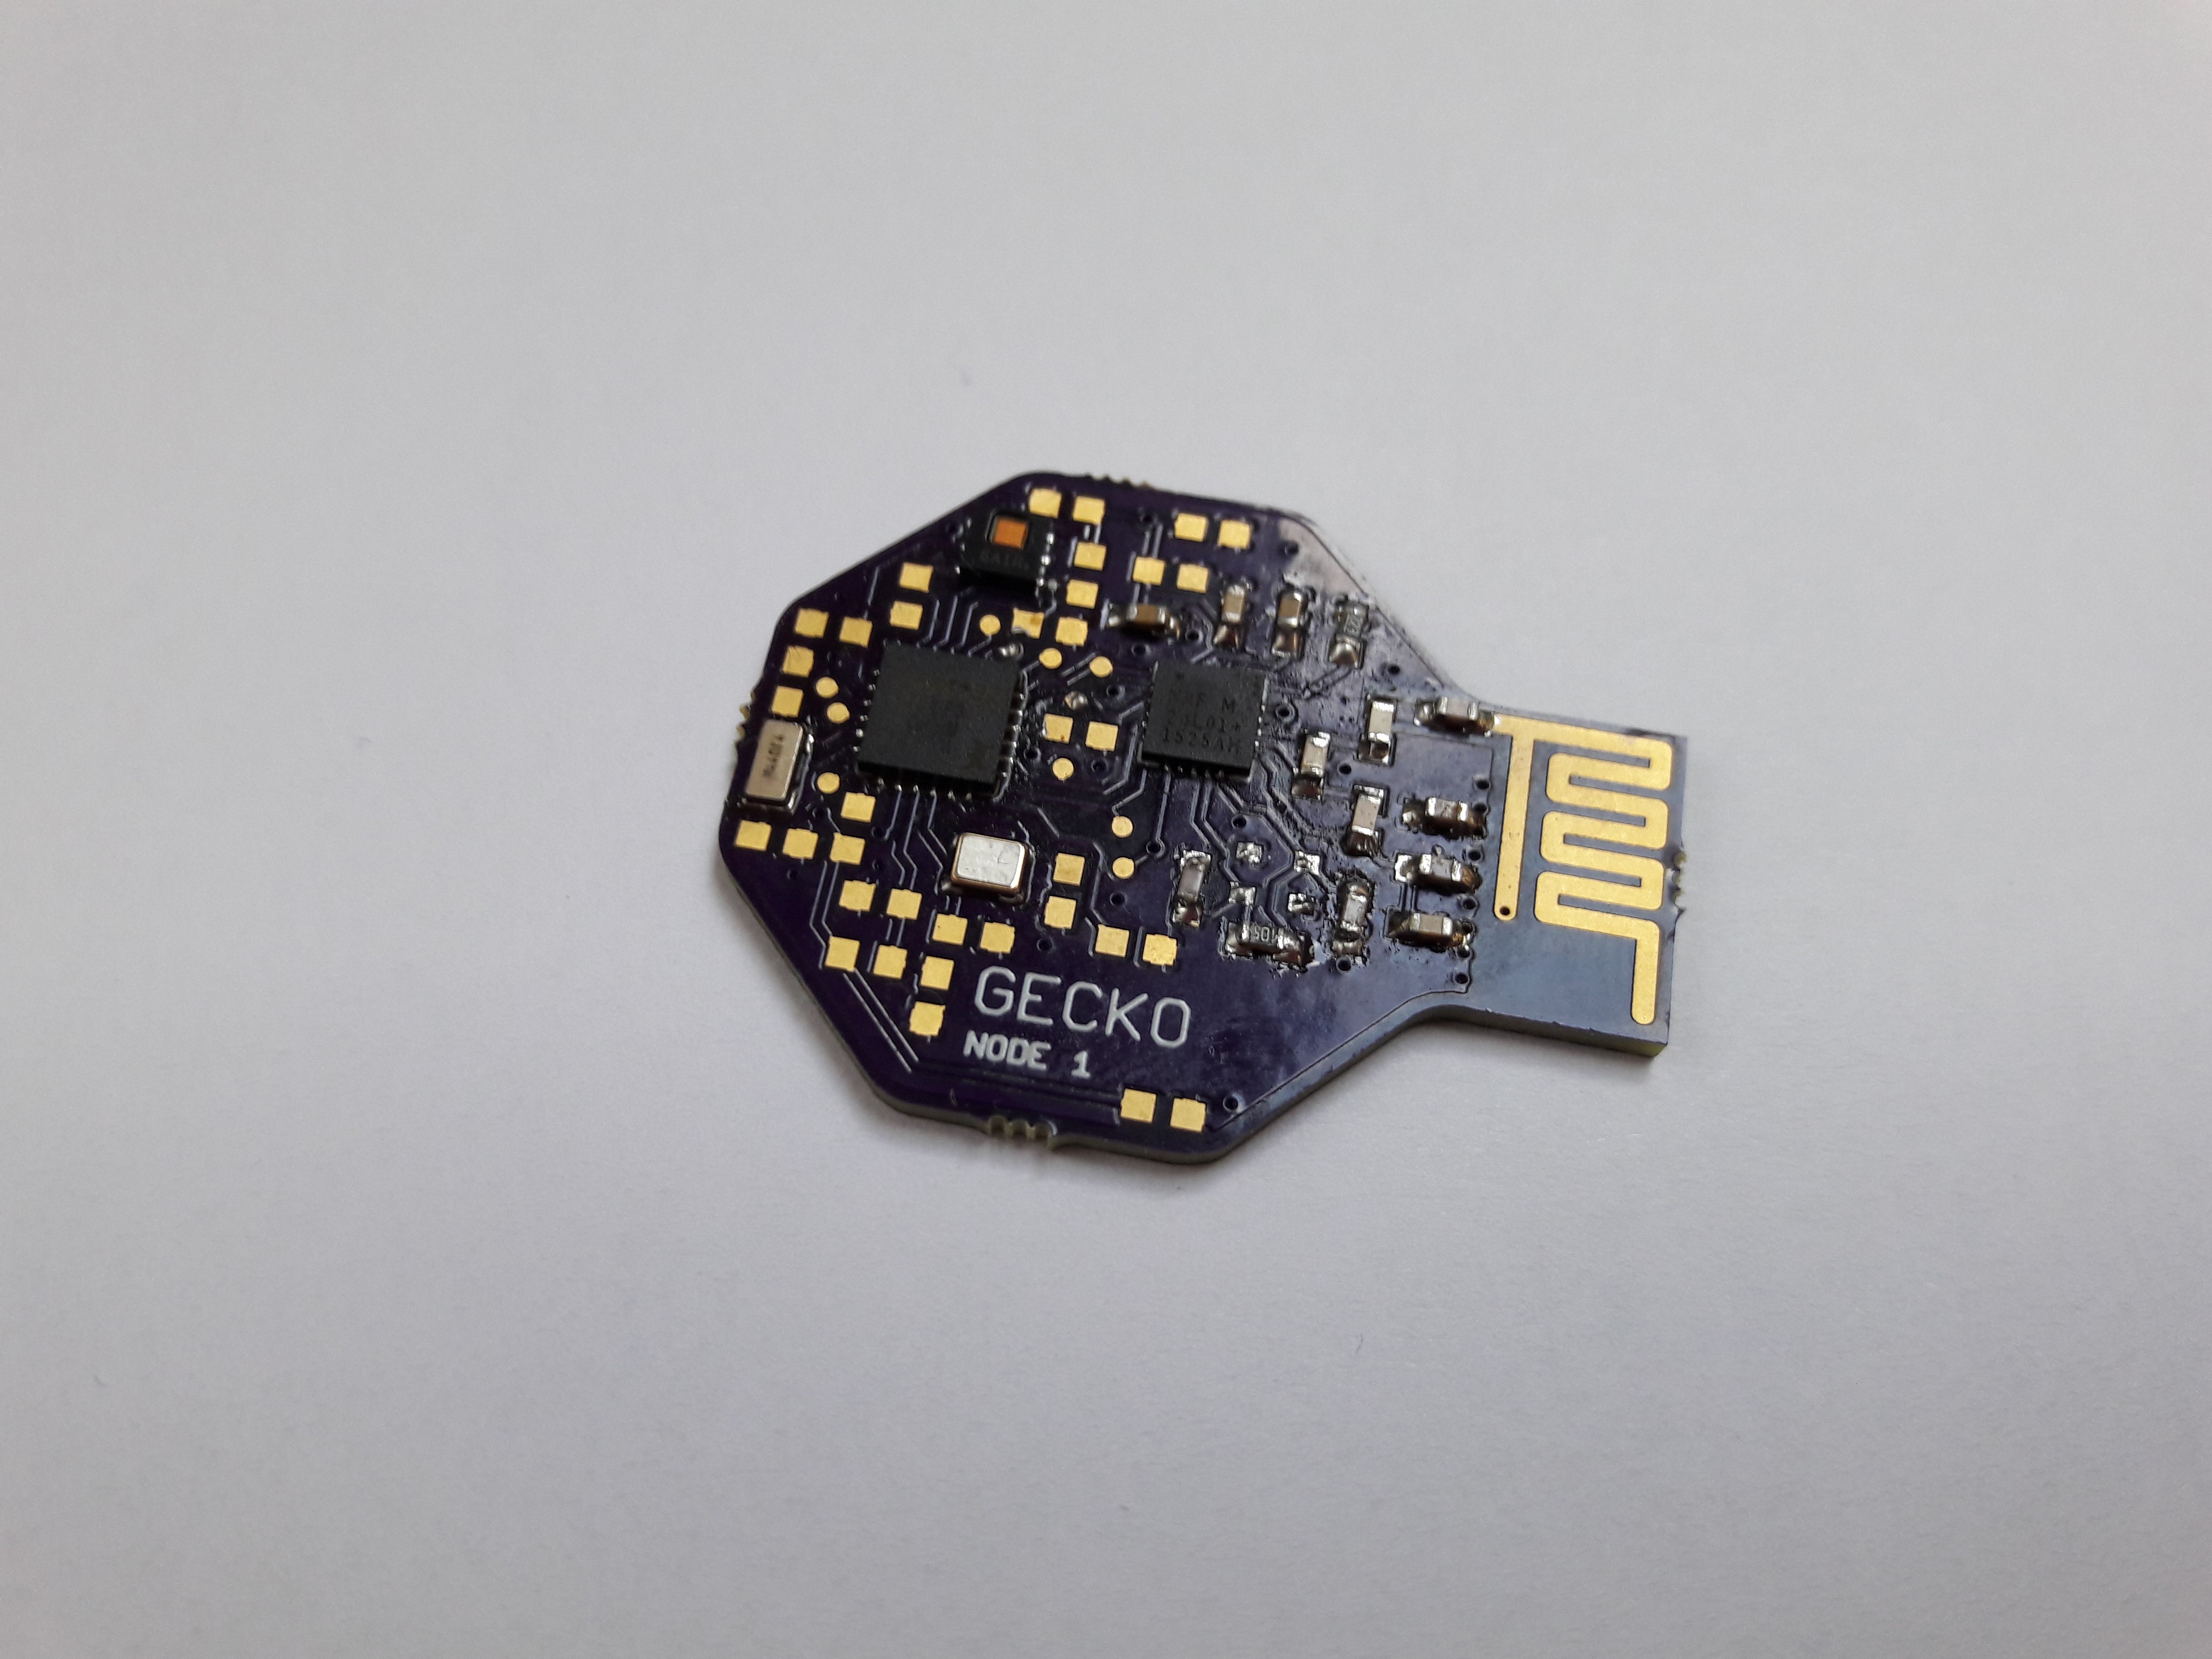
For me, this was my first time working with a hot air station. To add another level of difficulty there was no solder paste at hand, which meant that regular solder had to be applied to the pins. Fortunately, most components are very forgiving when it comes to high temperatures. I botched the first of the three PCBs which meant that it was fully working in the end but the rf24 was drawing more power than it should. I will have to increase the size of the pads for the ICs in the next revision.
Getting the nrf24l01 off the breakout board and onto the new pcb was fairly easy. It is important not to confuse the three different inductors on the board, because at only a few nH they are difficult to measure.
![]()
-
Concept
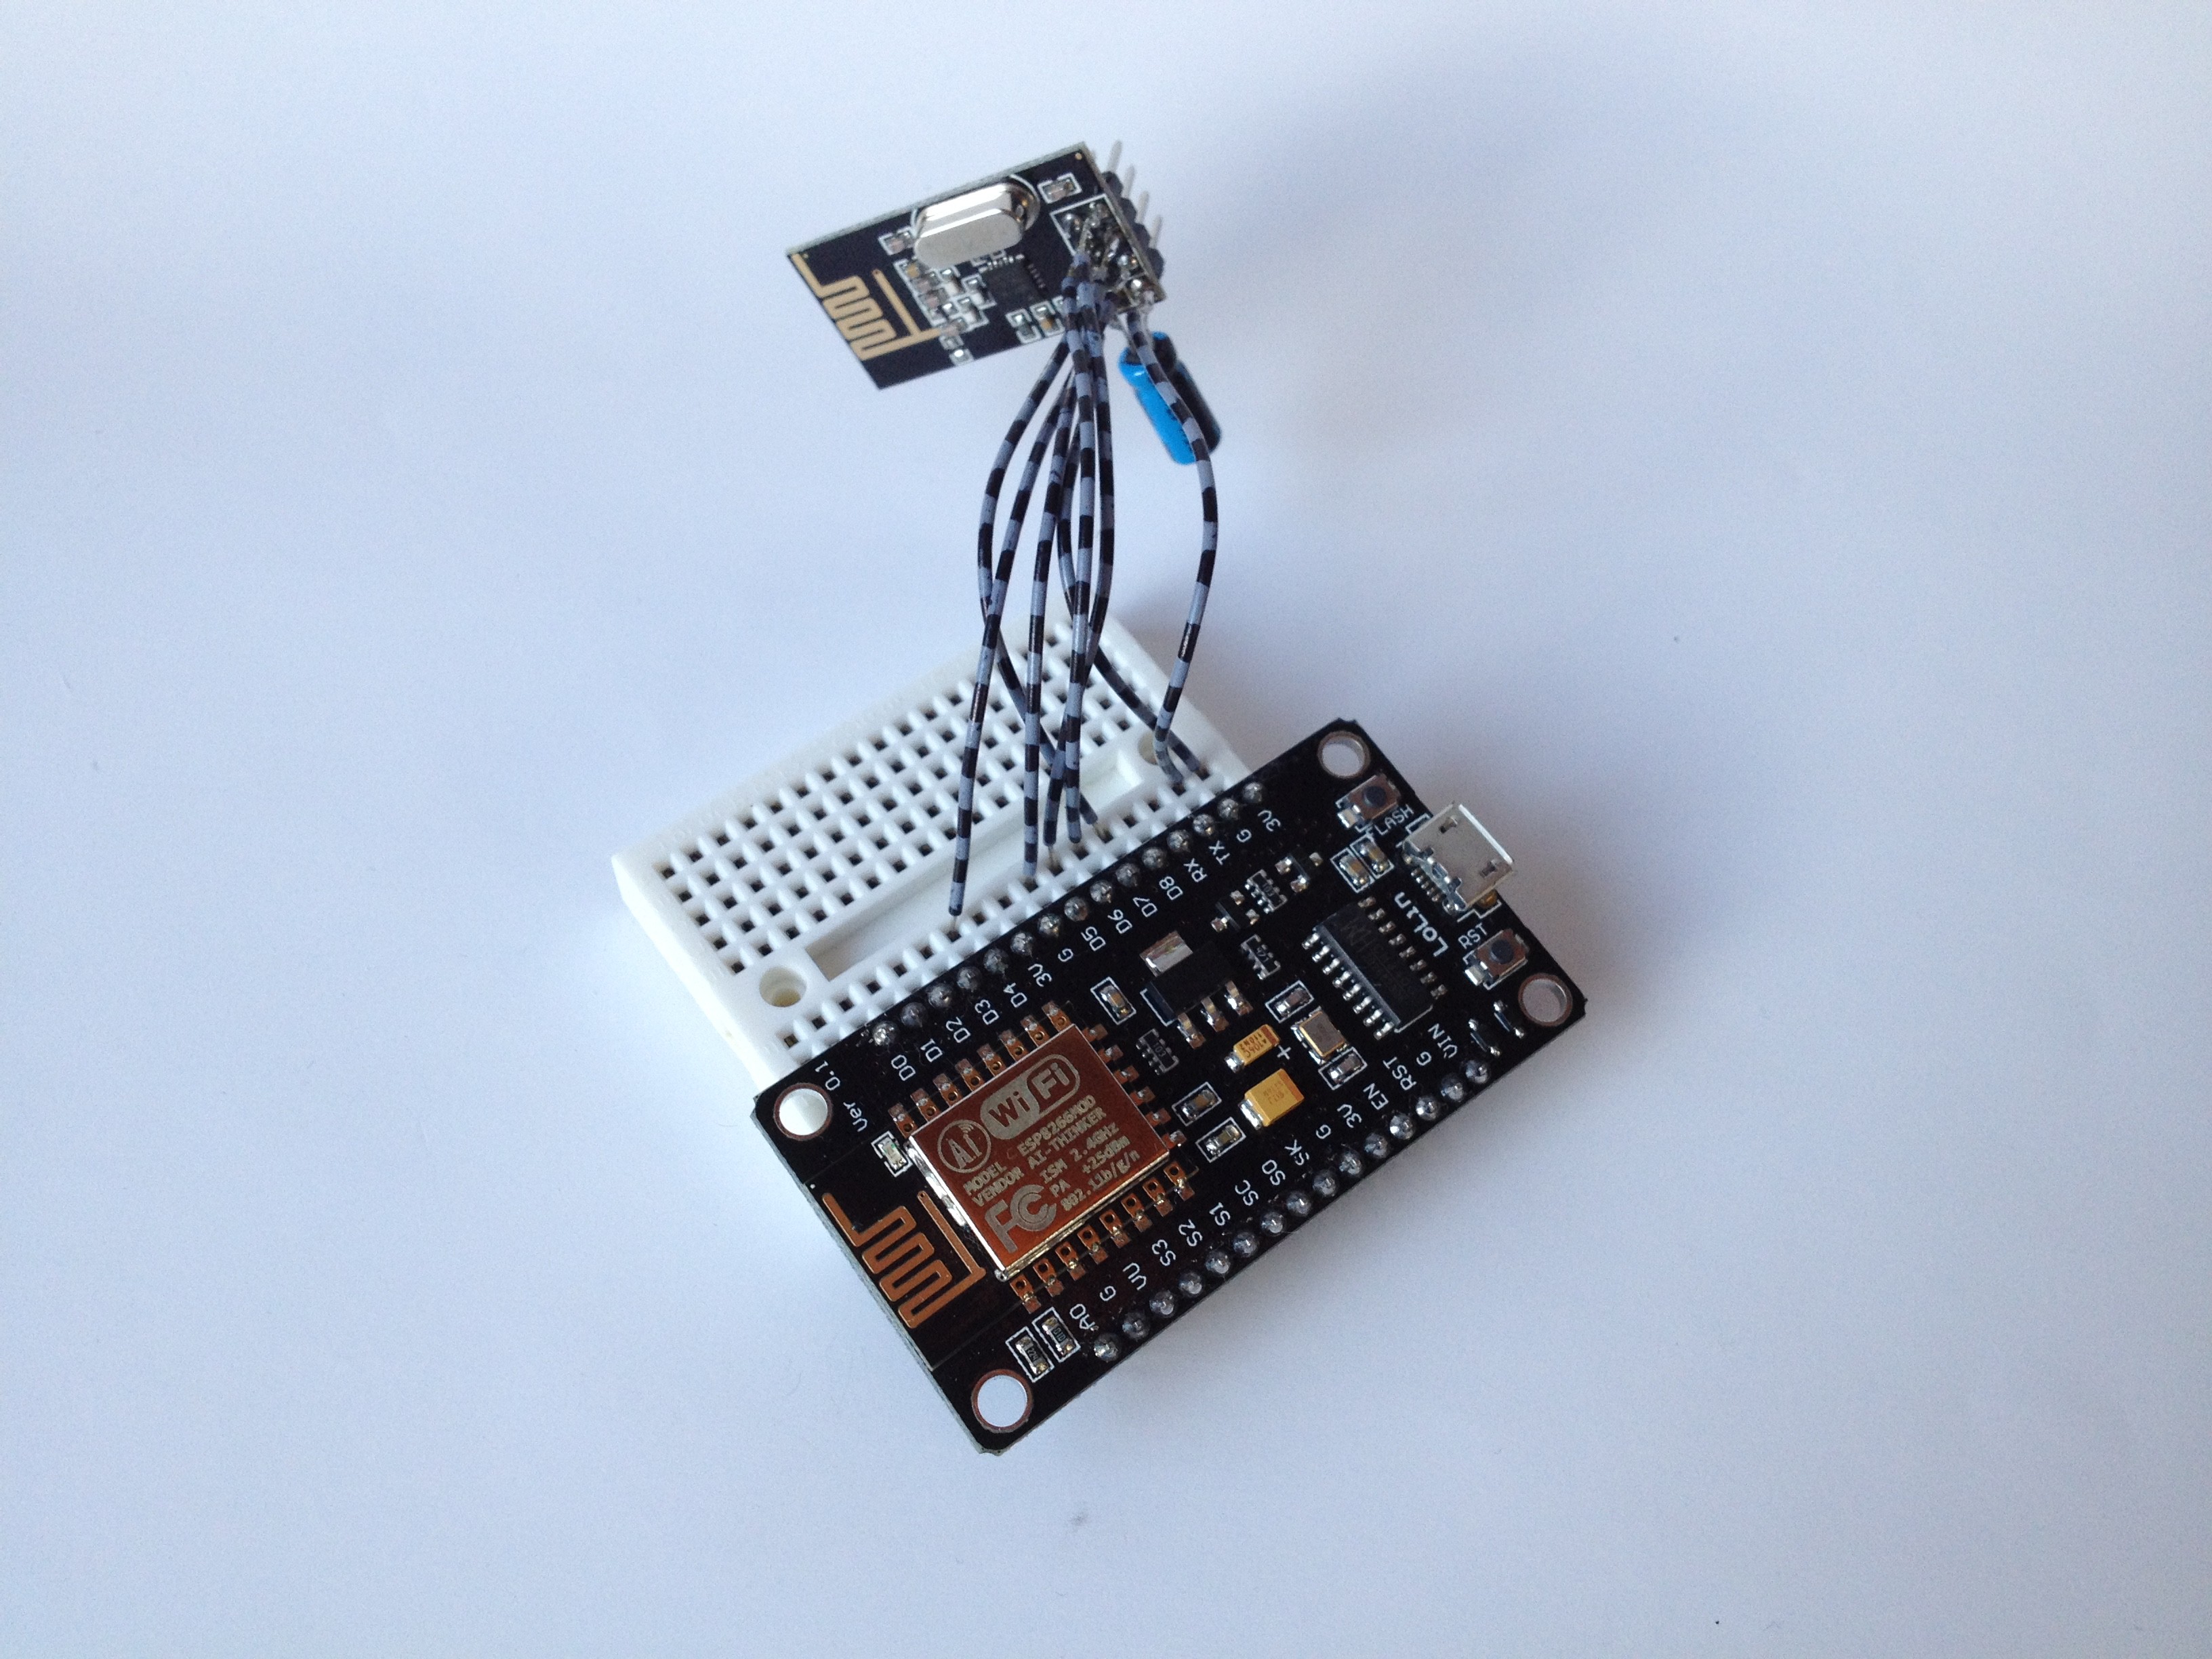
12/25/2017 at 18:26 • 0 commentsAlmost all of my electronics projects of the past five years have been built around an Arduino or used Arduino code. A recent example is the low power Arduino Mini board that I made last year: https://hackaday.io/project/16724-lp-mini-low-power-dev-board. I have been using this board in combination with a rf24 module and temperature sensor to monitor my cat's outdoor house during winter: https://hackaday.io/project/16724-lp-mini-low-power-dev-board/log/51421-a-more-complex-example-cat-logging. Unfortunately there were some problems with this setup that led to the battery suddenly draining after only two weeks. I couldn't find the source of the problem, so the plan for this winter was to make an entirely new non-Arduino-board.
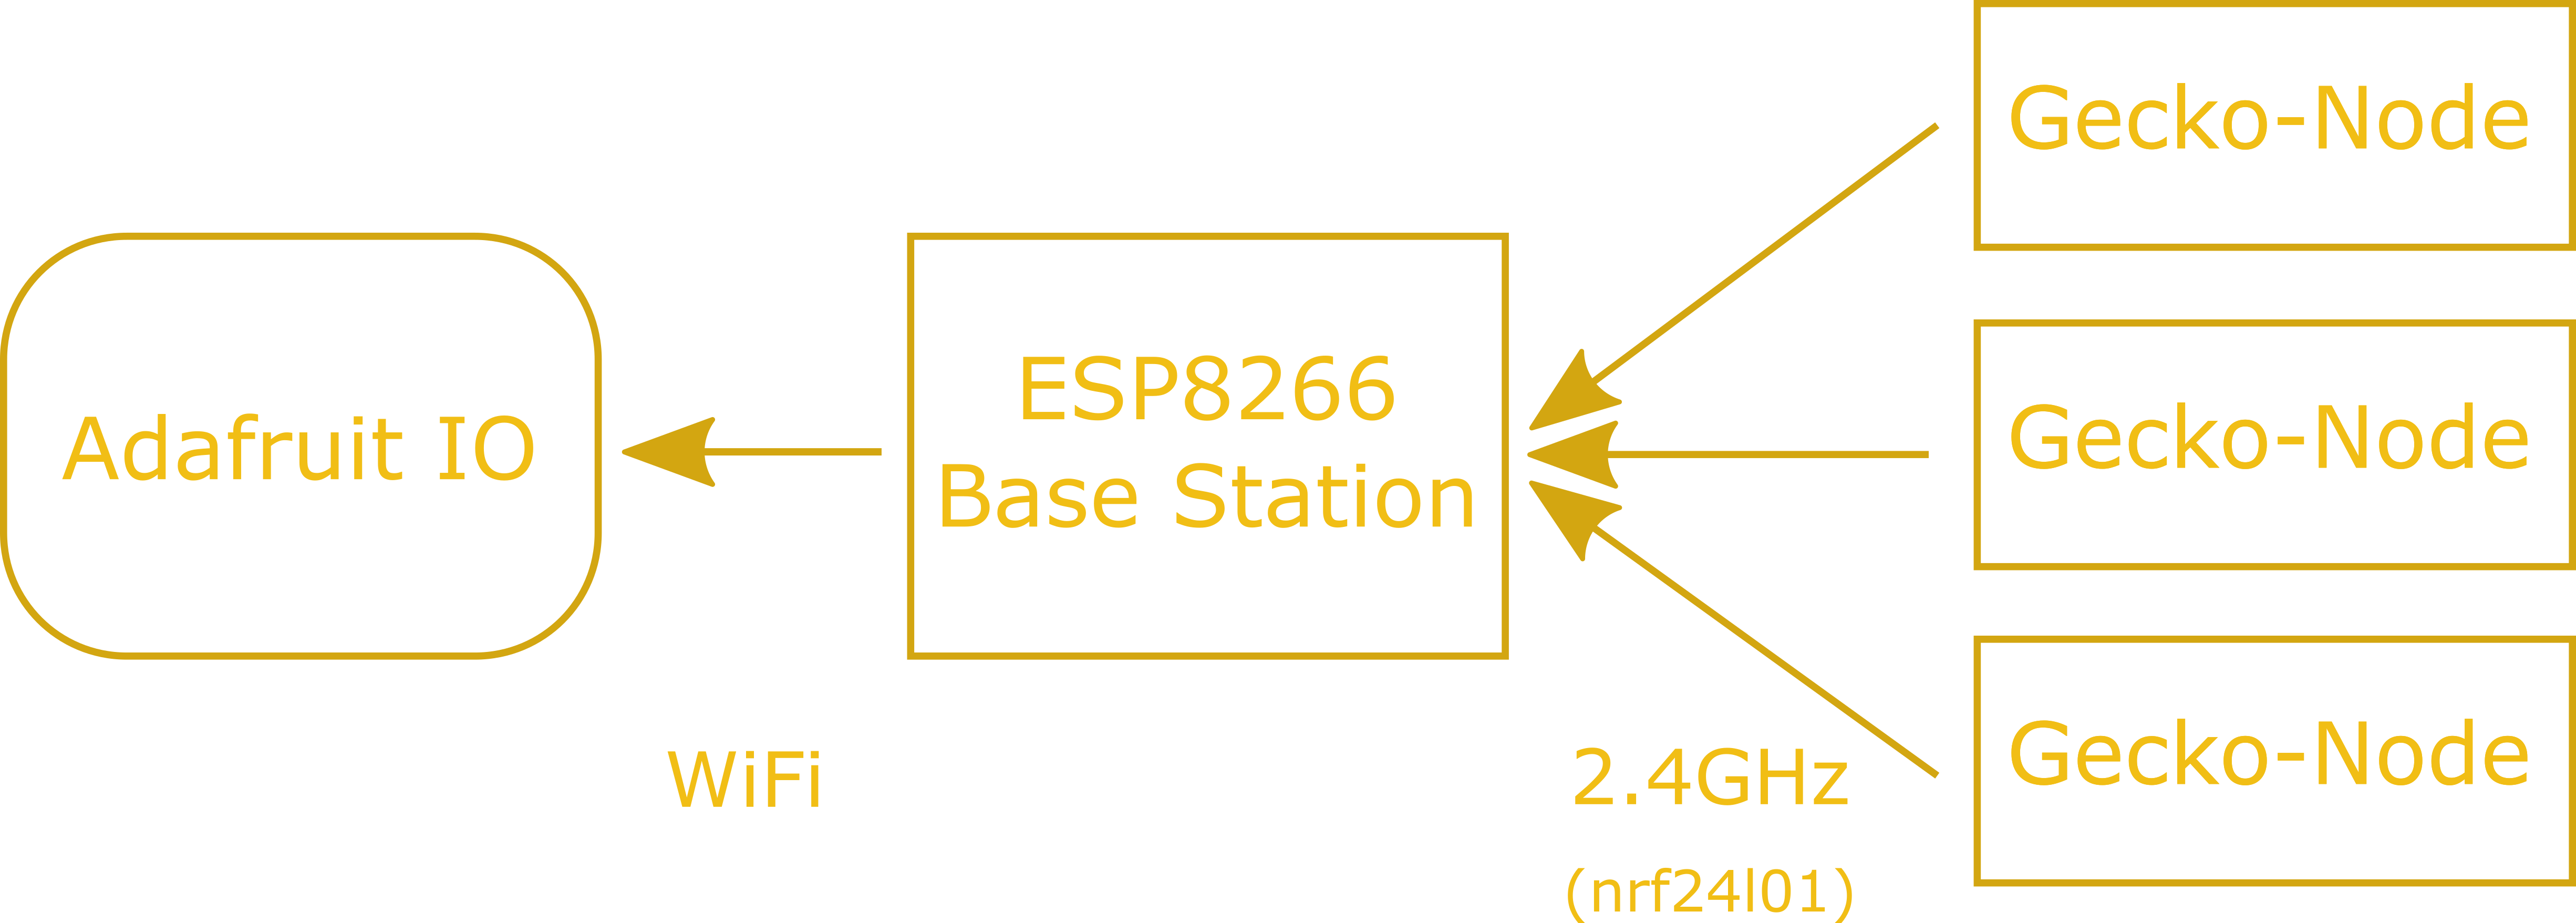
The basic concept is this: There are several sensor nodes including rf24 chips that send measurements to a ESP8266 base station. The base station then transmits the data to Adafruit.io or a similar service over WiFi. The nodes will be powered by a coin cell, while the base gets continuous power via USB.
![]()
Instead of an Atmega328, the new board uses an EFM32 Gecko MCU from SiLabs. The Gecko family of microcontrollers is designed for low power applications and has some of the best development boards. I chose an EFM32ZG110F32, which is one of the cheapest EFM32s at less than 1€. Still, it has all features that are needed for this project: 32KB Flash, 4KB RAM, 17 I/O Pins, I2C, SPI, a RTC. And it runs at just under 1µA with the RTC powered on.
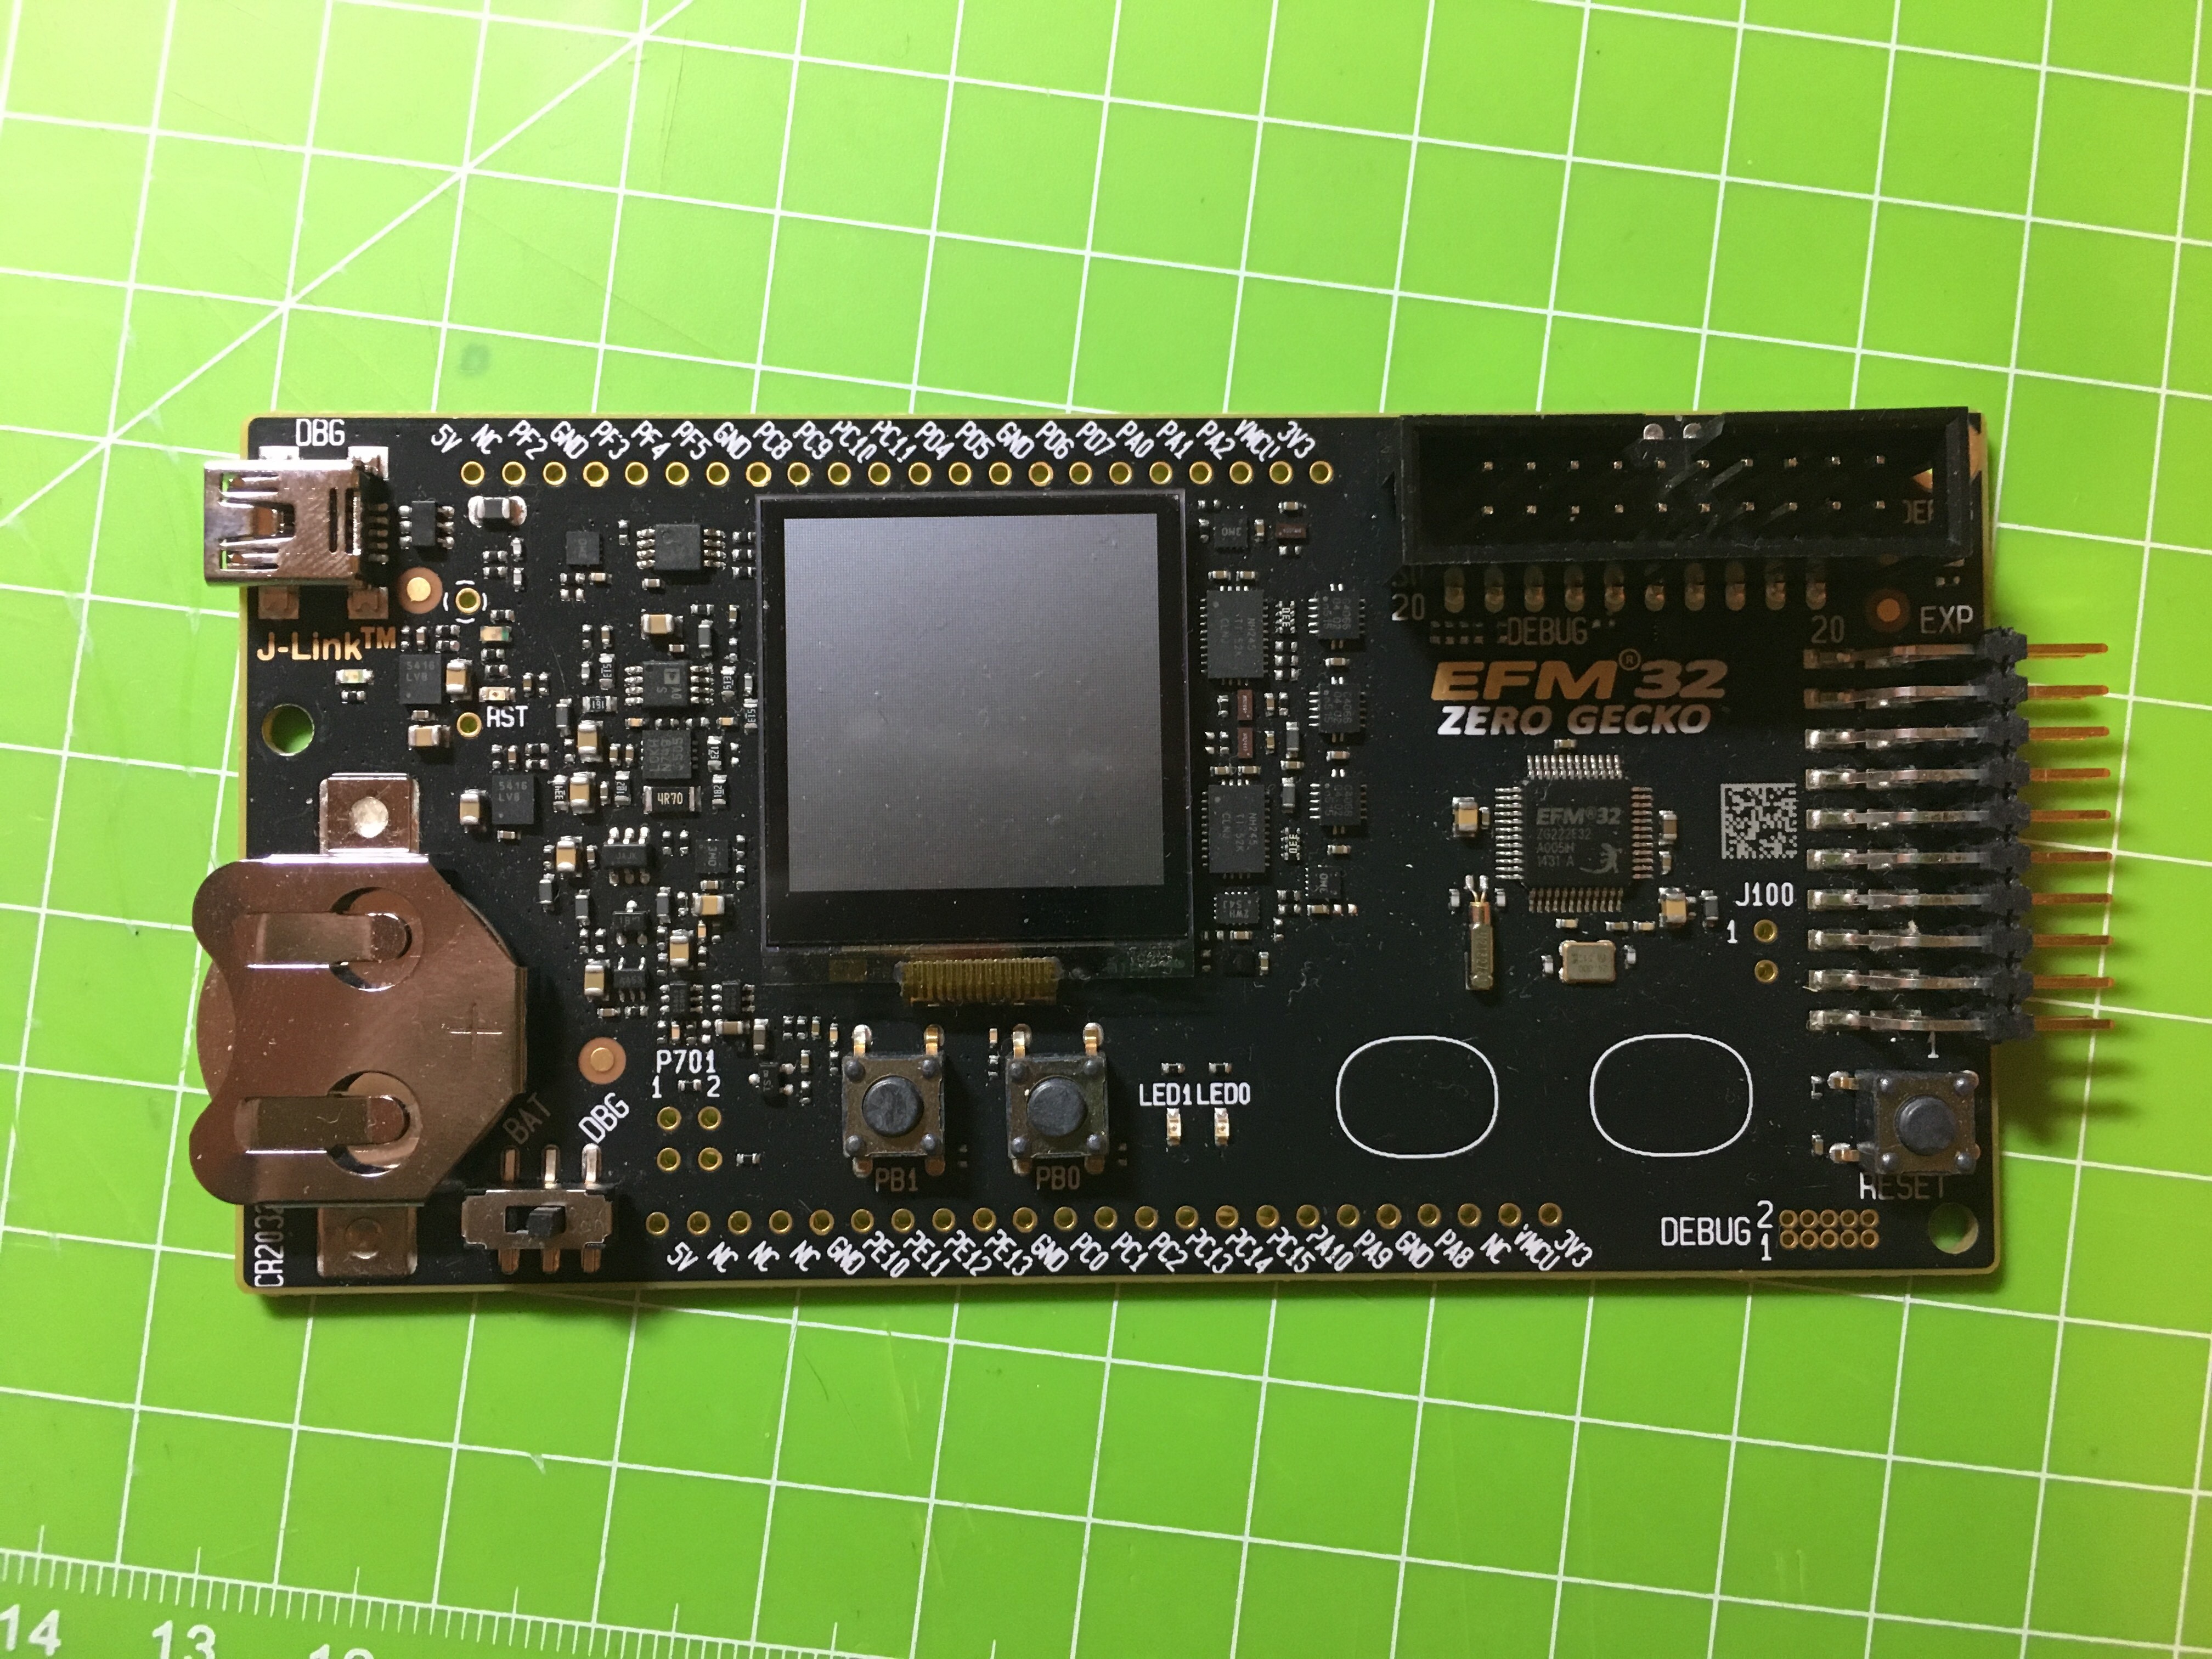
I started with the Zero Gecko development board. It features the EFM32ZG222F32, which is the 48-pin version of the zg110 (https://www.silabs.com/products/development-tools/mcu/32-bit/efm32-zero-gecko-starter-kit). The dev board also includes a Sharp Memory Display (similar to the one I used for the Chronio watch: https://hackaday.io/project/12876-chronio), and mechanical/capacitive buttons. While Microchip PIC boards usually need a separate 40€ PICkit programmer, this 20€ boards has an on-board Segger J-Link debugger, which can be used to program the dev board as well as external MCUs. There also is a very handy energy profiling feature which lets you measure the power consumption of the hardware in real-time.
![]()
As a first step, I plugged a rf24 module into the expansion port of the dev board and tried to get it to work. After the SPI was working, the RF24 Arduino library (https://github.com/nRF24/RF24) had to be ported to the EFM32. The sending of files as well as many other features work now but I didn't test the functions for receiving. A logic analyzer was very helpful during this part (I am using a cheap Logic Pirate by Dangerous Prototypes). I also tested the i2c port with an oled display.
The most complicated step was getting the power consumption down. Usually, this means putting the microcontroller in sleep mode for most of the time and waking it up in intervals to perform measurements and to transmit the data. The EFM32 has different sleep modes / energy modes:
- EM0 (Run mode): CPU is running, consumes 114µA or more depending on active peripherals.
- EM1 (Sleep mode): CPU is sleeping, peripherals are still powered (48µA)
- EM2 (Deep Sleep): High frequency oscillator is off, RTC is still running at 0.9µA
- EM3 (Stop Mode): Low frequency oscillator is off, i2c etc can still wake up the device (0.5µA)
- EM4 (Shutoff Mode): Only the reset pin and pin interrupts can wake up the EFM32 (20nA)
The best mode in this case is EM2, because the RTC must be running to wake up the device. This part was not trivial. You have to choose the right clock source, configure interrupts and set the interval.
With a simple command the rf24 can be put into sleep mode as well. In theory, this reduces its power consumption to under 1µA. I ended up with an overall current draw of ~3µA during sleep. The power consumption while measuring and sending is almostnegligible considering it's only needed for a few milliseconds every 10 minutes or so. There is still a strange 'charge/discharge-curve' visible after the data was send and the rf24 was put to sleep.
![]()
Next up: The PCB
 Max.K
Max.K