Close
0%
0%

Growing vegetables in sealed containers

I want to work out whether or not it is possible to grow vegetables indoors in sealed, airtight containers.

Similar projects worth following
This project is about growing vegetables in sealed containers. I became interested in this after reading about vivaria, and in particular about a tree which is claimed to have grown inside a large sealed bottle for the past 40 years.

I’d like to be able to grow vegetables during the winter. I had thought about doing this outside in heated pots in a small greenhouse, with artificial lighting to compensate for the shorter day length. Growing them inside on a window ledge in sealed containers is more convenient, and potentially requires less maintenance. Artificial lighting might still be required.

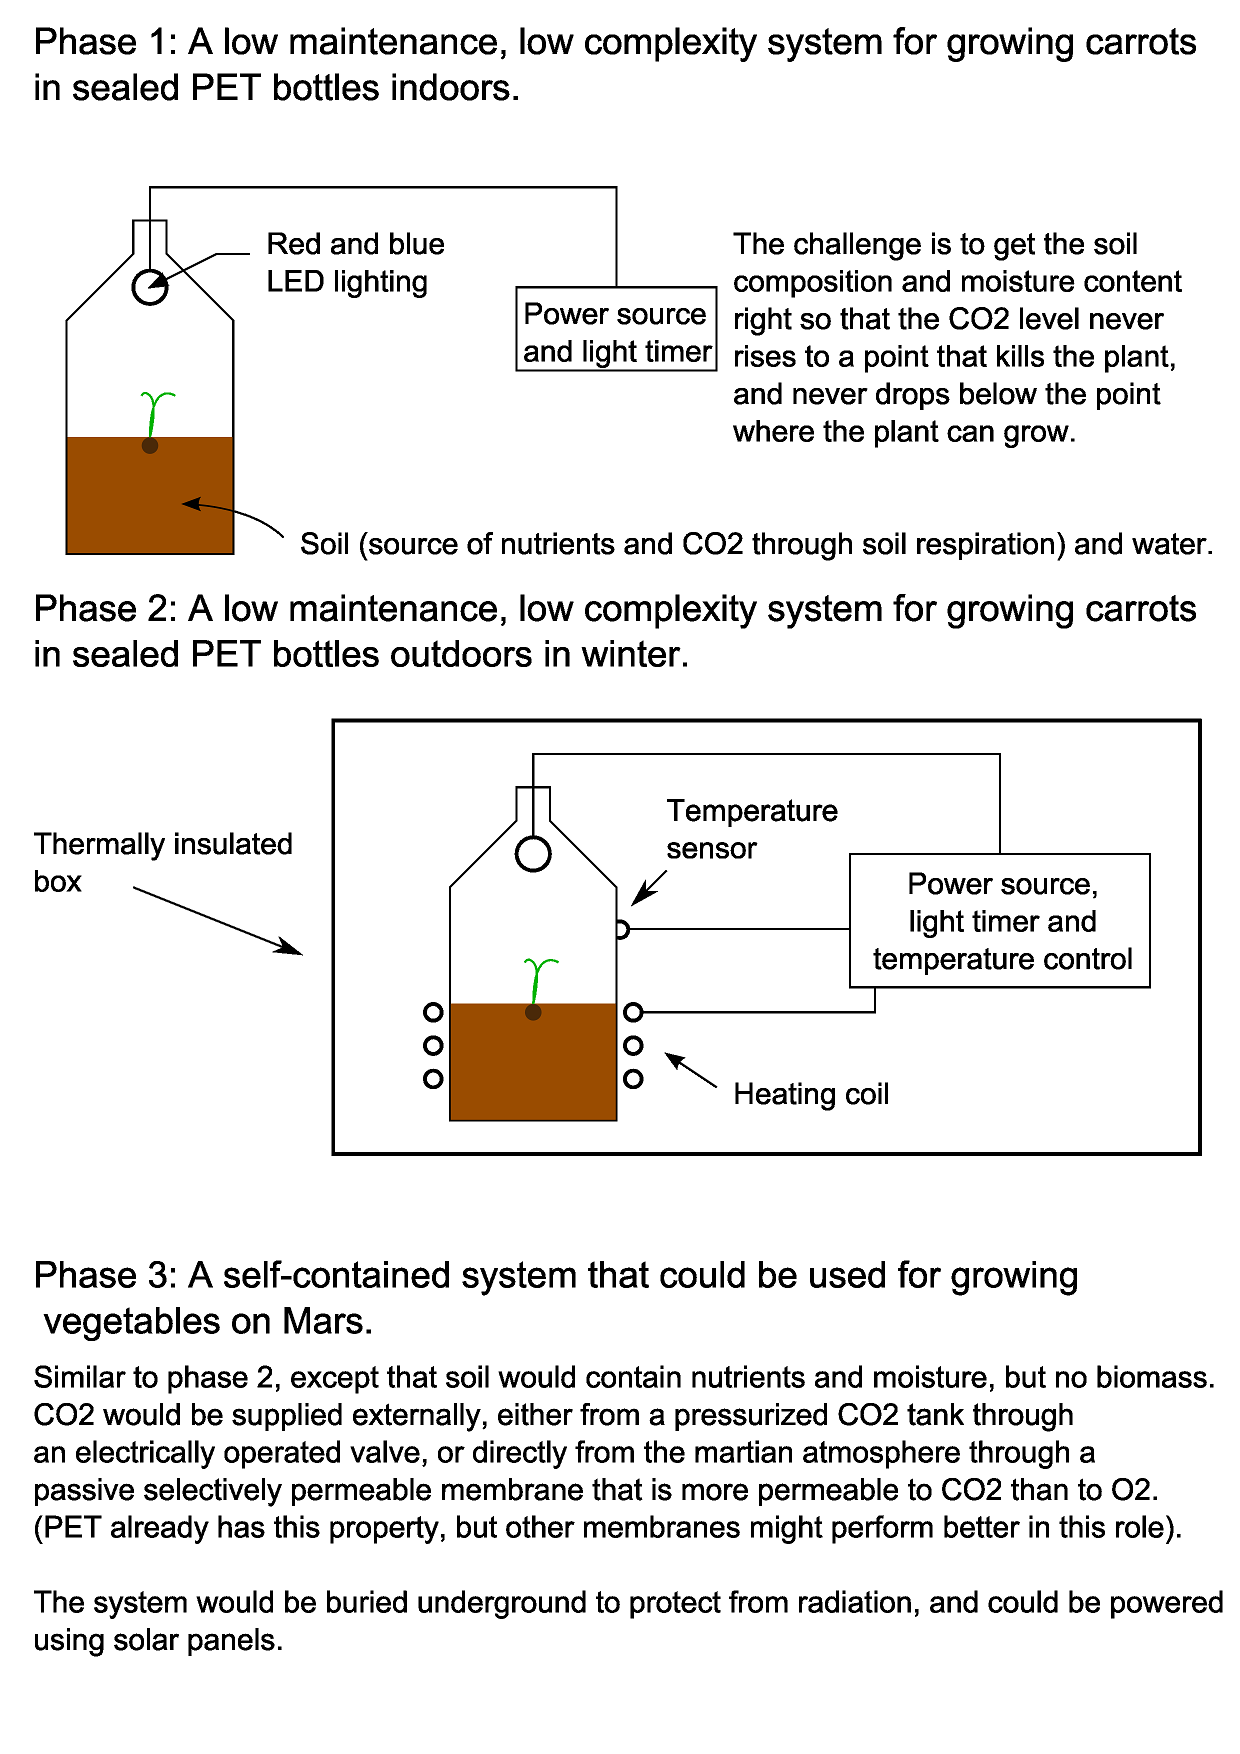
If it is possible to grow vegetables in this way, with no maintenance, no moving parts, no monitoring, no feedback except perhaps closed-loop temperature control, then this could be useful not only for growing vegetables indoors or outdoors during the winter, but also for growing plants on Mars.

Below is an image illustrating the different phases involved in this project:
My initial experiments involve seeing whether carrot seeds will germinate in sealed PET bottles containing soil and enough water. Why carrots? There are several reasons: they are the right shape to be able to extract from a bottle once they have grown without having to cut the bottle. They have quite a high energy density (about 40 calories per 100g). Fibres from carrots and other similar root vegetables can also be used as the basis for making composite materials, so could potentially be used as a construction material on Mars as well as a food source.

I’ve chosen to use PET bottles because they are readily available, and because the screw-on cap makes it easy to attach a CO2 sensor. Once I’ve spent a bit of time figuring out whether carrots can be grown like this, I want to produce a set of instructions so that anybody can do it, using PET bottles that they have at home.

Everything that the carrot needs to live and grow must be contained within the bottle. An obvious question is where the carbon dioxide that the carrot needs to grow will come from, since the air in the bottle when it is sealed contains only a small amount of CO2. From reading around the subject, I believe that decomposing organic material in the soil will release CO2, which the carrot will make use of. Microorganisms in the soil will in turn consume the oxygen that the carrot produces during photosynthesis.

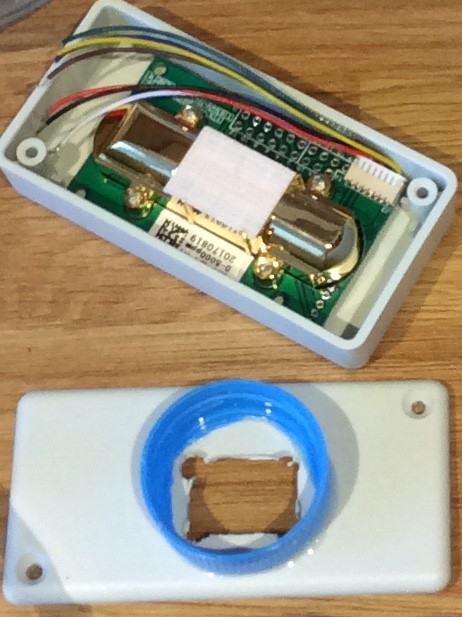
At what rate does soil produce CO2, and at what rate will the carrot consume it as it is growing? Since the carrot will consume less when it is smaller, there might be an overproduction of CO2 initially. Will this matter? These are some of the questions that I hope to answer during the course of this project. I purchased a CO2 sensor (MH Z14A) and mounted it in an enclosure that will screw onto a bottle in place of the cap to see what happens to the CO2 level in the bottle.

All software source code and hardware designs that are part of this project are covered by the GNU General Public Licence version 3: http://www.gnu.org/licenses/gpl-3.0.en.html. You are free to change and share this work, but in doing so you must make sure that others are free to do the same under the same terms as this license.

  • More on artificial lighting

    will.stevens04/13/2018 at 21:01 0 comments

    In an earlier log entry I made about artificial lighting, I wasn’t sure how efficient the LEDs I was using were, and so I didn’t really know how much light the plant that was under them was receiving.

    A lot of LED datasheets don’t contain data directly about the efficiency of the LED – i.e. how much light energy the LED outputs per unit of electrical energy.

    I found this useful post about how to calculate/estimate the efficiency of an LED from the datasheet parameters: https://electronics.stackexchange.com/questions/325949/how-can-i-estimate-the-optical-power-that-a-single-color-led-generates

    For example, the red LEDs I had been using for previous experiments is a Cree C503B-RCS 624nm Red 5mm dome LED.

    The forward voltage is 2.1V, so with a forward current of 20mA the LED consumes 42mW

    The luminous intensity is 6.6cd. The 50% power angle of the LED is 30 degrees, so lets say that the intensity is on average 4.95cd within the 30 degree angle, and ignore anything outside of this.

    The solid angle is 2*pi*(1 – cos 15 degrees) = 0.214 steradians, so the luminous flux of the LED is 4.95*0.214 = 1.06 lumens.

    The luminousity function at 624nm is 0.333 (obtained from http://www.ies.org/definitions/table-134-definitions/table-134-definitive-values-of-the-special-luminous-efficiency-function-for-photopic-vision-v/ ). The radiant flux is therefore 1.06 / (683*0.333) = 4.66mW, so the efficiency of the LED is 4.66/42 = 11 percent.

    Realising that this LED wasn’t very efficient, and also can’t tolerate sustained currents of more than about 30mA, I ordered some more efficient LEDs that can take a higher current: the OSRAM OSLON Signal 120 LJ CKBP JZKZ 25-1-35. The datasheet gives the luminous intensity, but it also gives the luminous flux, and in one place it gives a figure for efficiency, so I can use these to check my estimates. The calculations below all assume a forward current of 350mA because that’s what the datasheet parameters are based on, but when I use this LED I’ll actually be using less current than this.

    The forward voltage is 2.15V, so with a forward current of 350mA the LED consumes 753mW

    The luminous intensity is typically 21.8cd at 350mA. The 50% power angle of the LED is 125 degrees, so lets say that the intensity is on average 16.4cd within the 125 degree angle

    The solid angle is 2*pi*(1-cos 62.5 degrees) = 3.38 steradians, so the luminous flux of the LED is 16.4*3.38 = 55.4 lumens.

    The data sheet doesn’t give the typical value for the luminous flux, but it gives a minimum and maximum value, and the average of these is 66 lumens, so my estimate is low (perhaps because I haven’t accounted for anything outside the 125 degree angle) but not too far off.

    The luminosity function at 625nm is 0.321, the radiant flux is therefore 66 / (683*0.321) = 301mW, and the efficiency of the LED is 301/753 = 40 percent.

    In one place in the datasheet (under text for the “Electrical thermal resistance junction / solder point”) an efficiency figure of 38% is mentioned, so my calculation is not far from that.

  • Fifth attempt

    will.stevens04/08/2018 at 21:13 4 comments

    In the fourth attempt one of the seedlings developed a true leaf, but all seedlings died 5 weeks after planting. I believe that the cause of death was excessive CO2 concentration in the bottle.


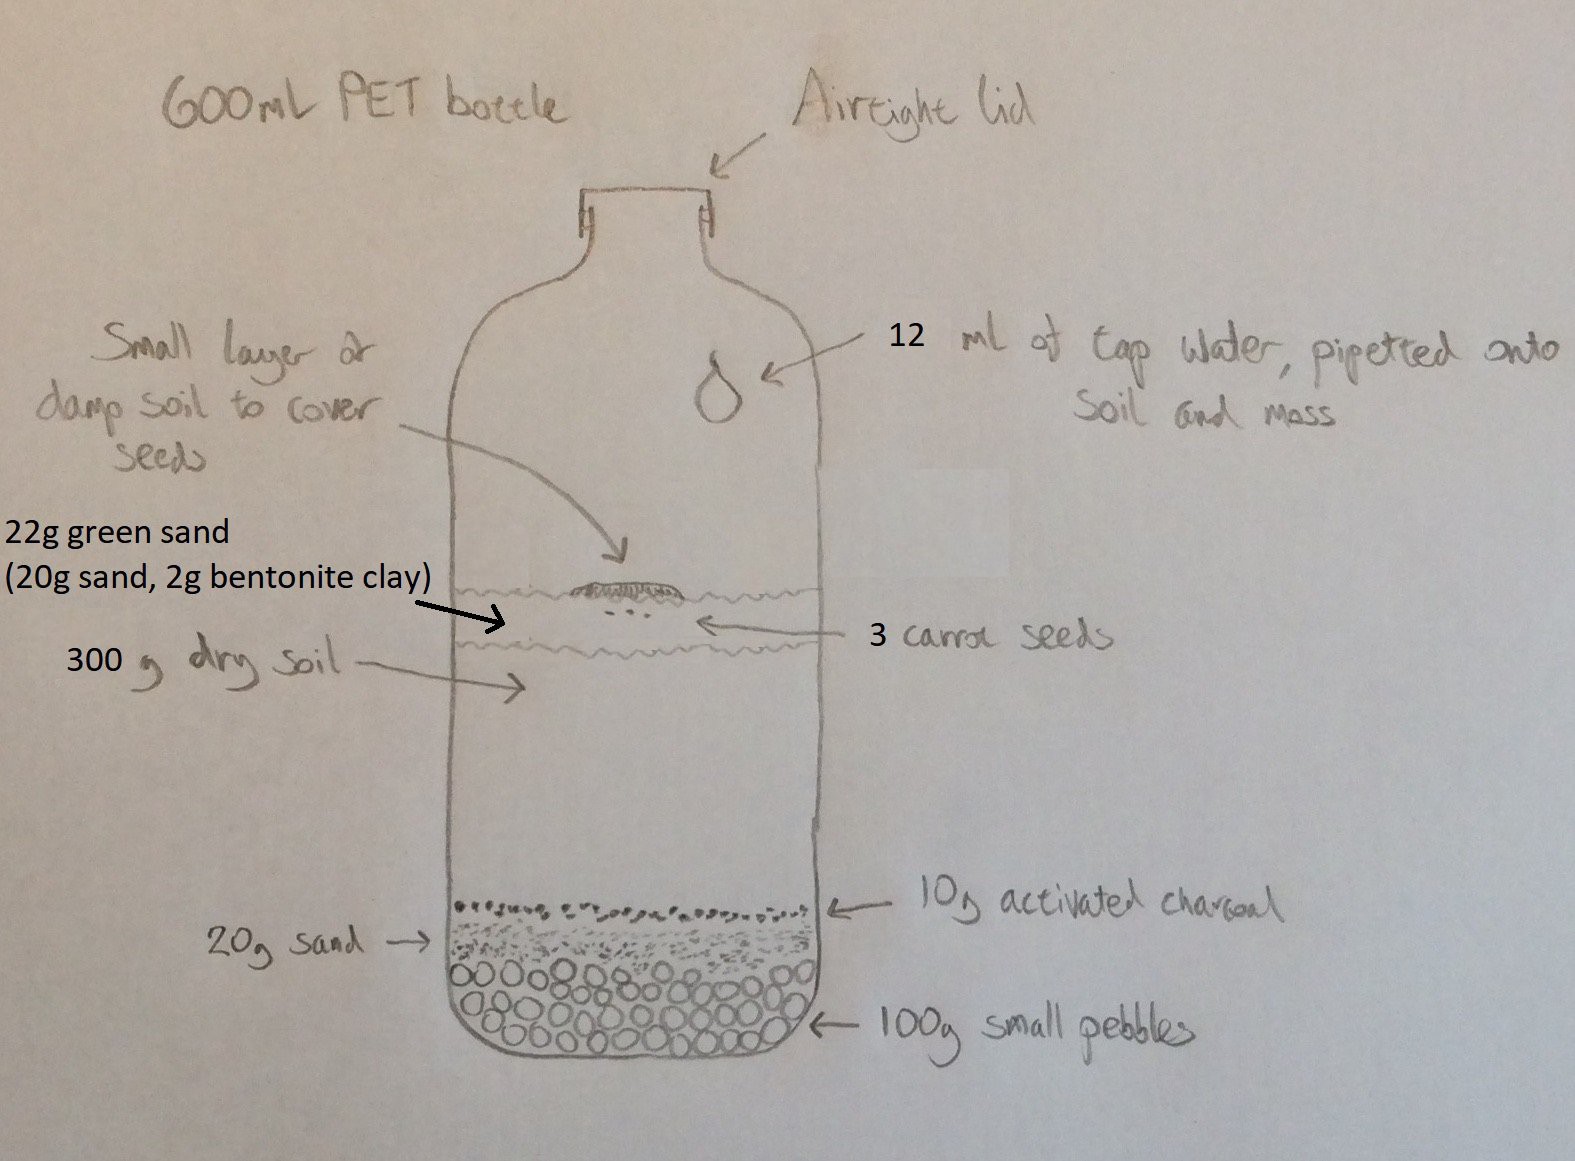
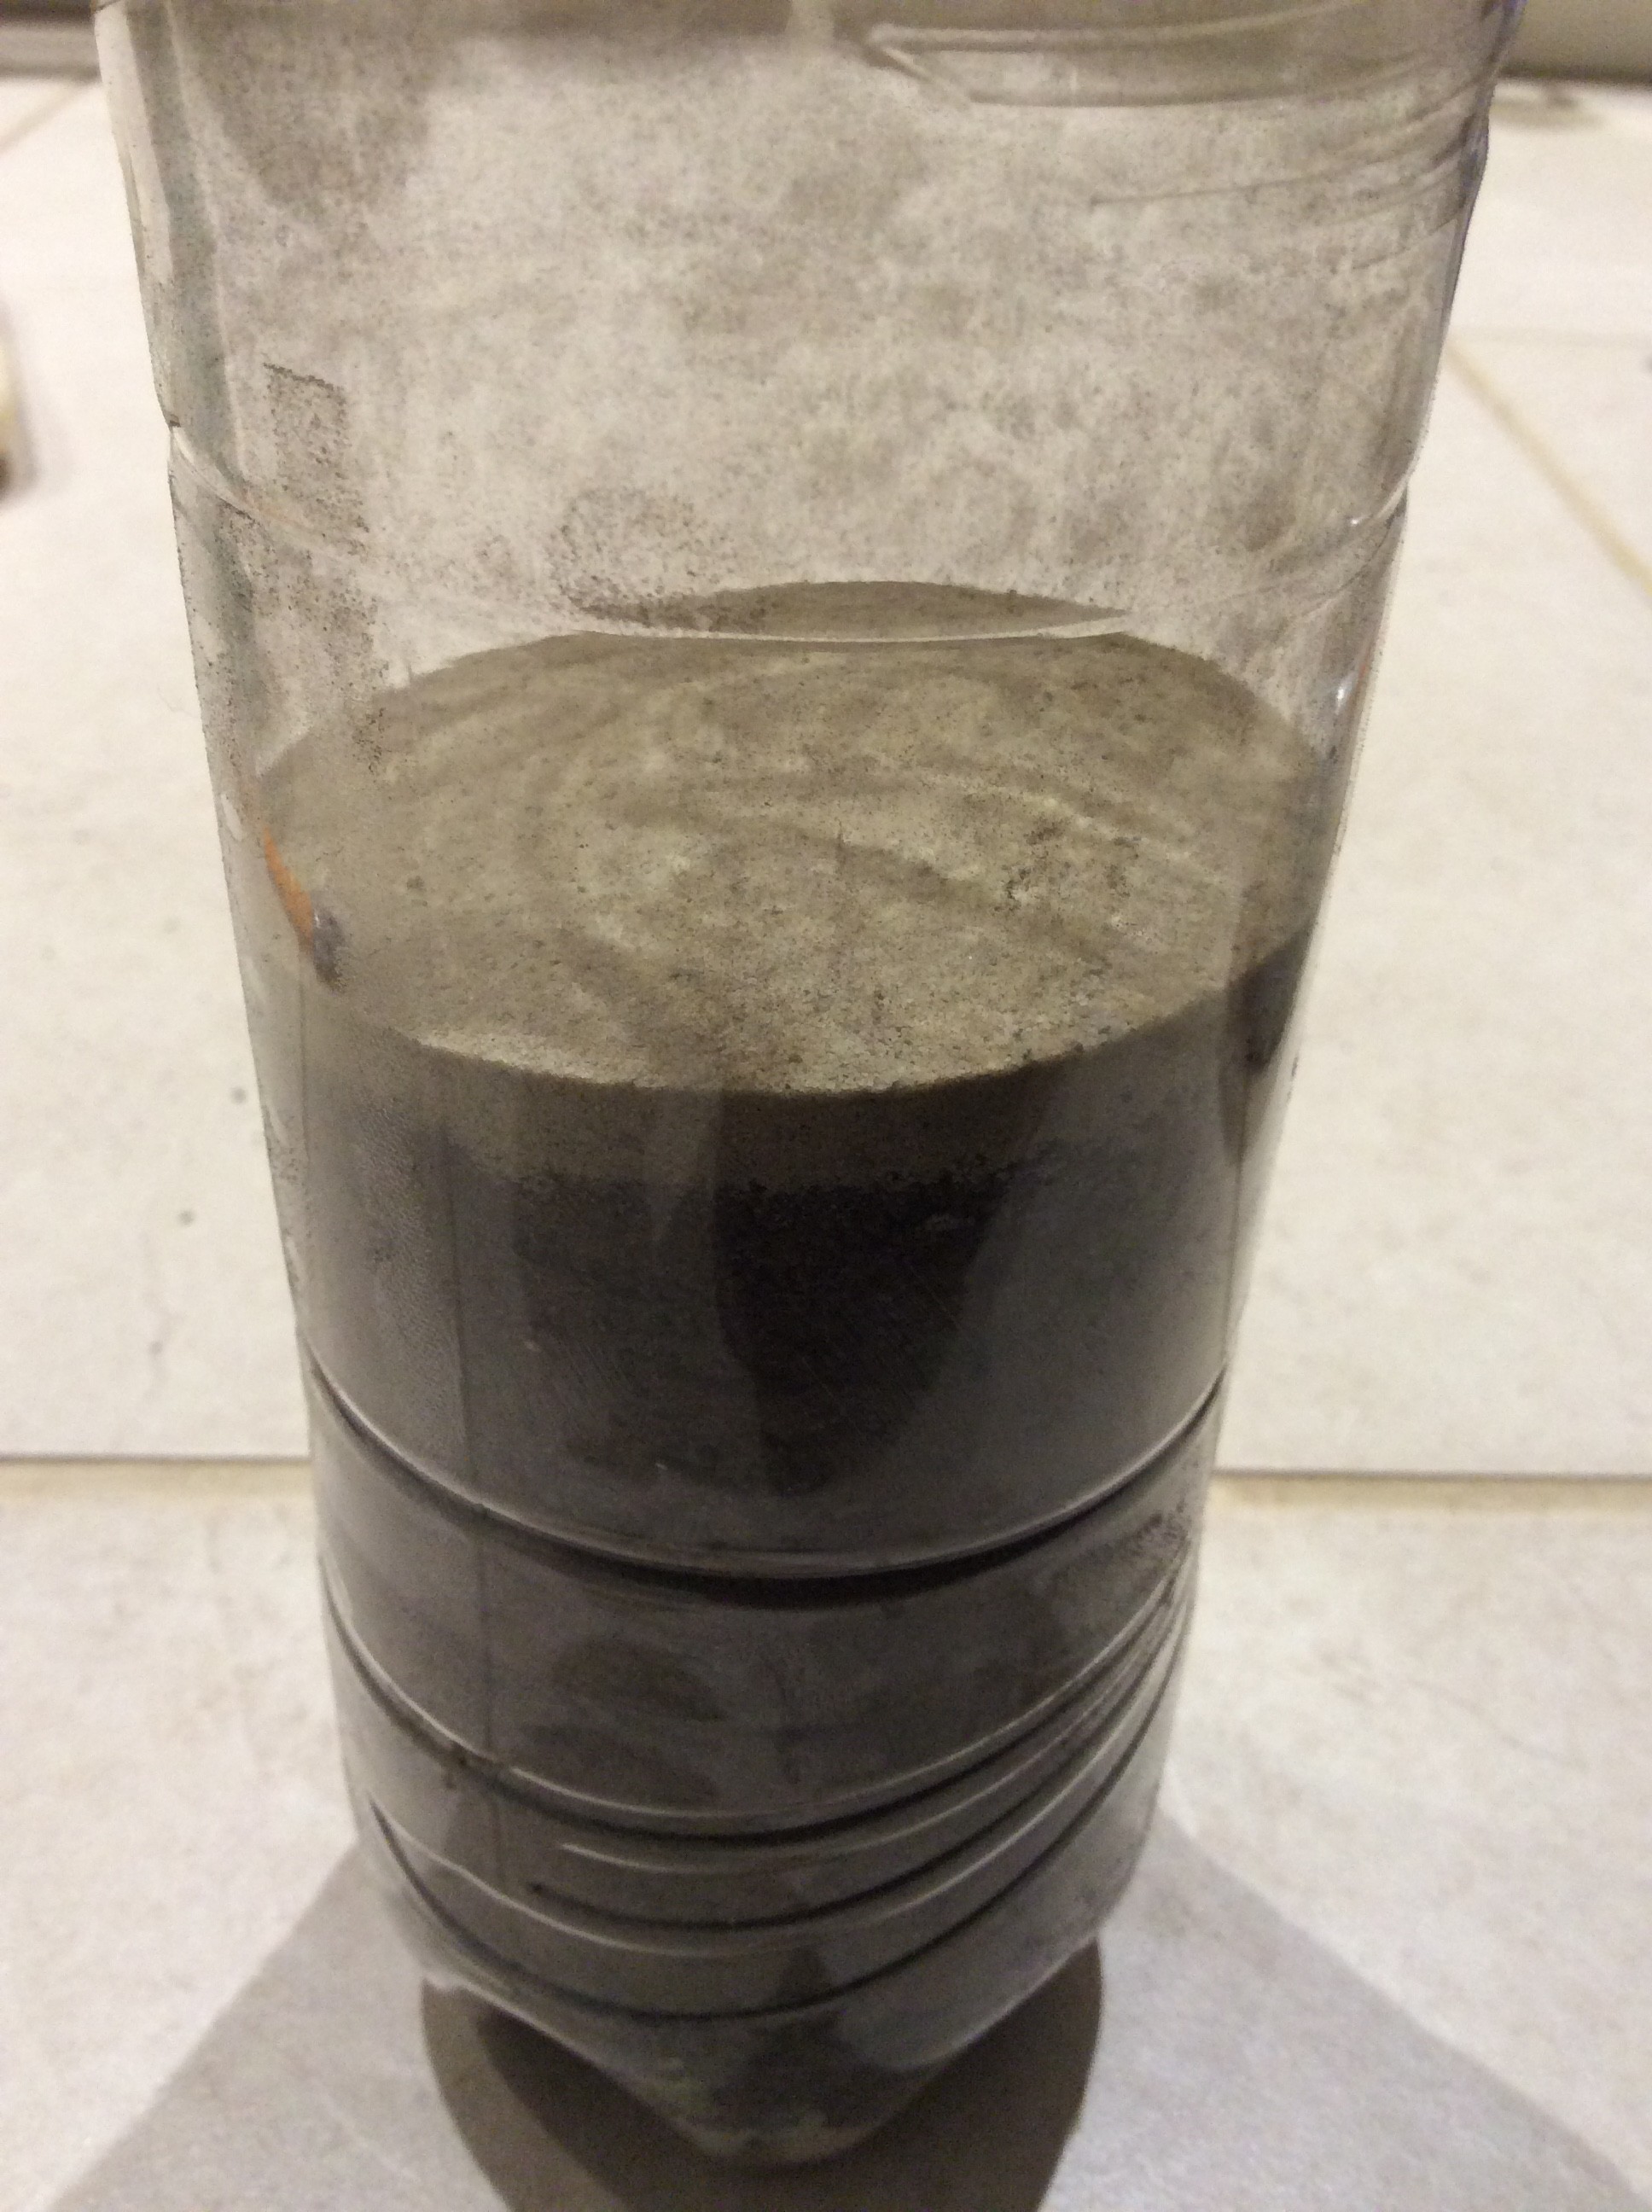
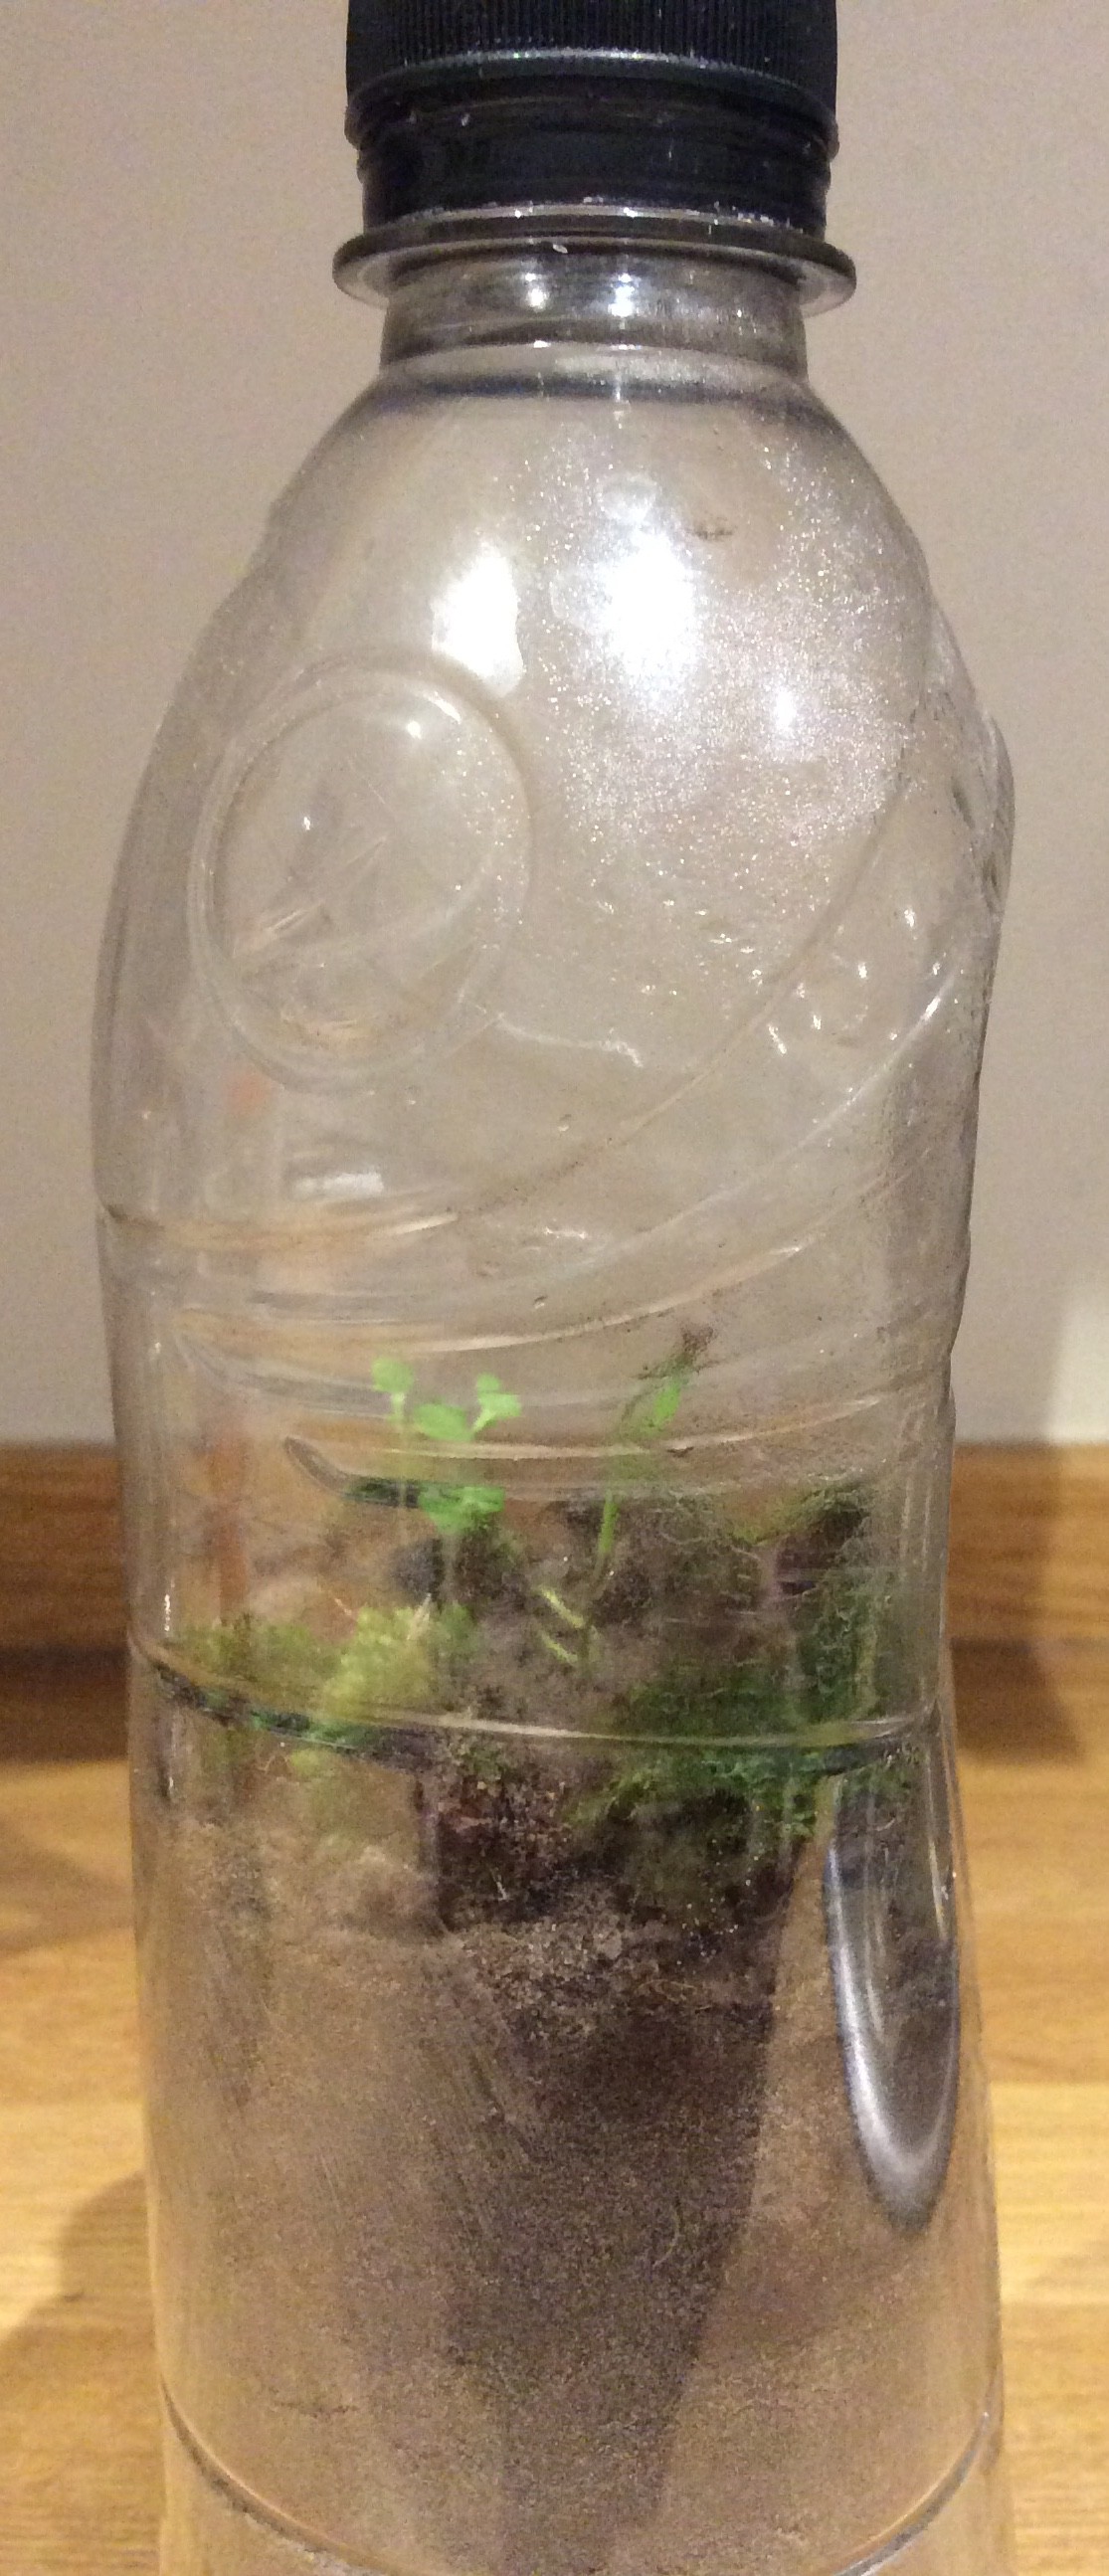
    In this experiment (started on 5th April) I'm taking an additional measure to reduce the rate at which the soil releases CO2. I have the same amount of water in the bottle (12ml), but I'm replacing some of the soil with green sand. The diagram below shows the setup for this experiment. The photo beneath this shows the layer of green sand above the soil. I’ve used green sand rather than ordinary sand because I believe it will hold more water than ordinary sand.

    I made the green sand by mixing some general purpose sand with powdered bentonite clay (from clumping cat litter). Note that no additional water was added to the green sand - it was a dry mix of 20g sand with 2g bentonite clay.

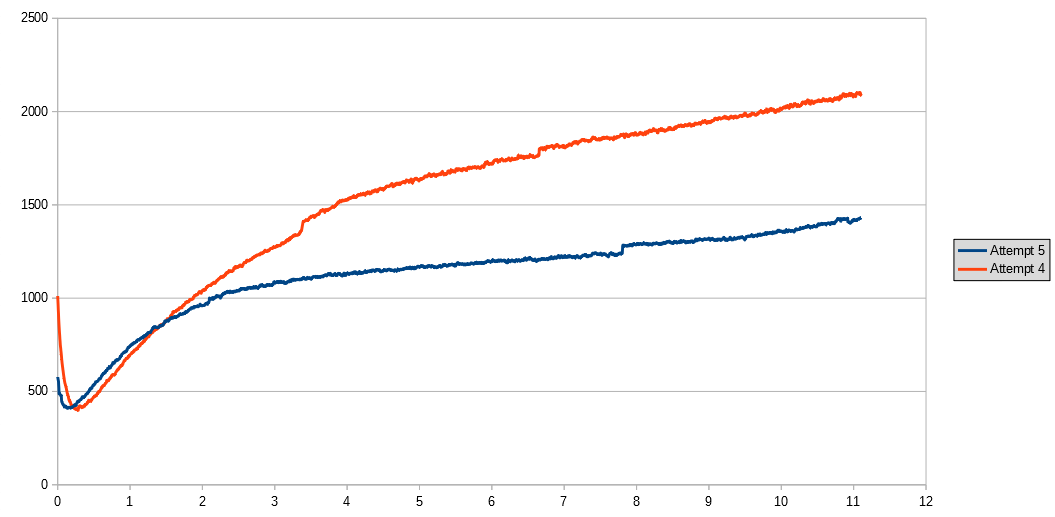
    The idea is that some of the initial water in the bottle will be absorbed by the green sand, which won't contribute to CO2 production. The graph below shows the CO2 concentation for the first 11 hours of this experiment, compared with the fourth attempt. The graph does show a slower rate of CO2 release in this experiment. I've also measured the initial CO2 level for a longer period of time than in the previous experiment - I'll post details of this in a few days.

    It remains to be seen whether the sand will affect seed germination. The seeds (3 this time rather than 5, because I believe that having 3 still gives a good chance that at least one will germinate and begin to grow) were placed into dimples in the sand and covered over with a small amount of damp garden soil to introduce microbes (I haven't yet experimented to see whether it is really necessary to cover over with damp soil - perhaps some microbes survive in the soil that I dry out on the radiator prior to putting it into the bottle?). In previous experiments the seedlings took about 8 days to appear, so I expect to see them on about 13th April.

    UPDATE 13th April 2018

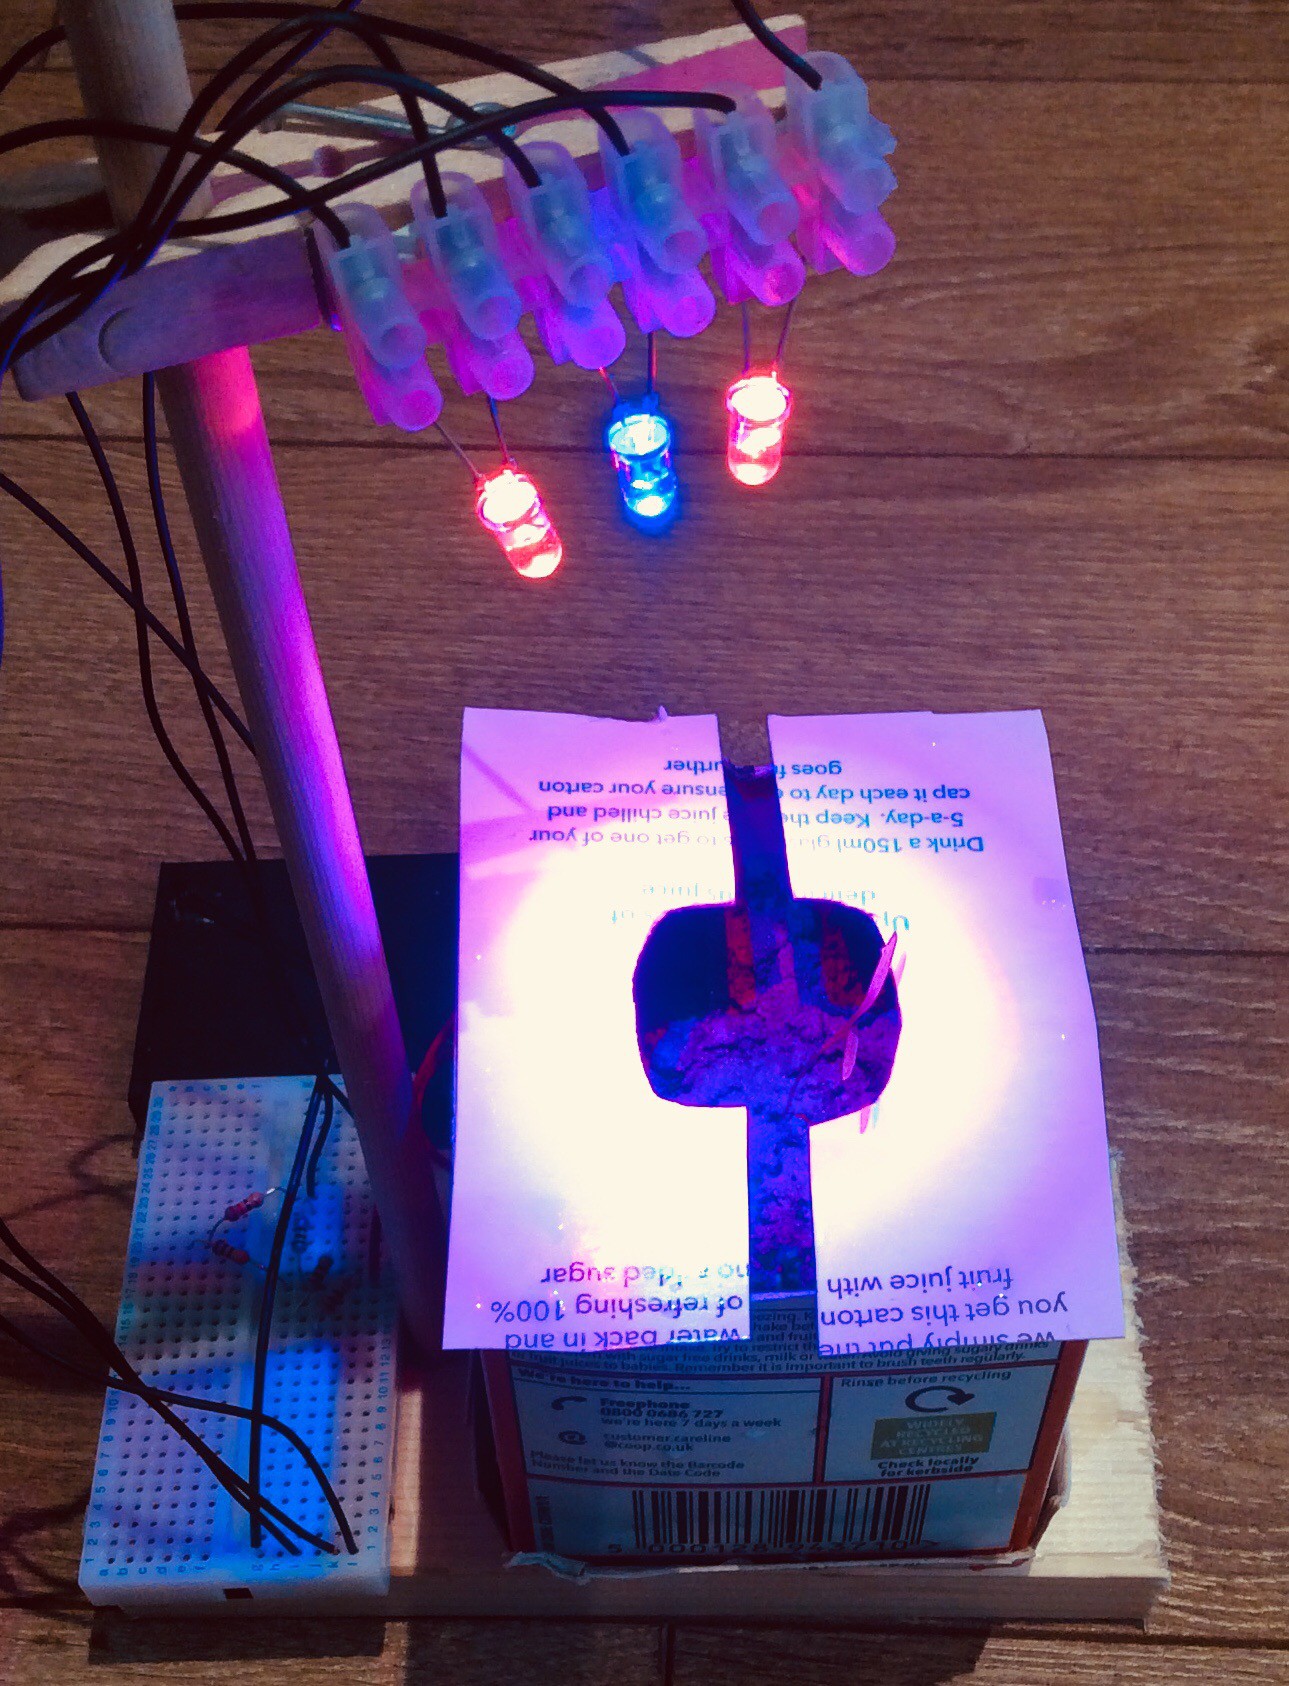
    The first green shoot was visible this morning. I’ve added LED lighting to this bottle, using brighter and more efficient LEDs than I’ve used previously (see log entry ‘More on artificial lighting’). I’ve used 3 red LEDs and 1 blue LED. I believe that the illuminated area is receiving about 100 W/m2. The LEDs are mounted inside the bottle. I had wondered whether using more powerful LEDs would cause the bottle to heat up too much. I measured the temperature increase at the surface of the soil and it was only about 1 degree C above the temperature in the room. The LEDs are controlled by a timer circuit which switches them on for 18 hours then off for 6 hours. Reflective mylar is wrapped around the bottle to help prevent light from escaping.

    UPDATE 27th April 2018:

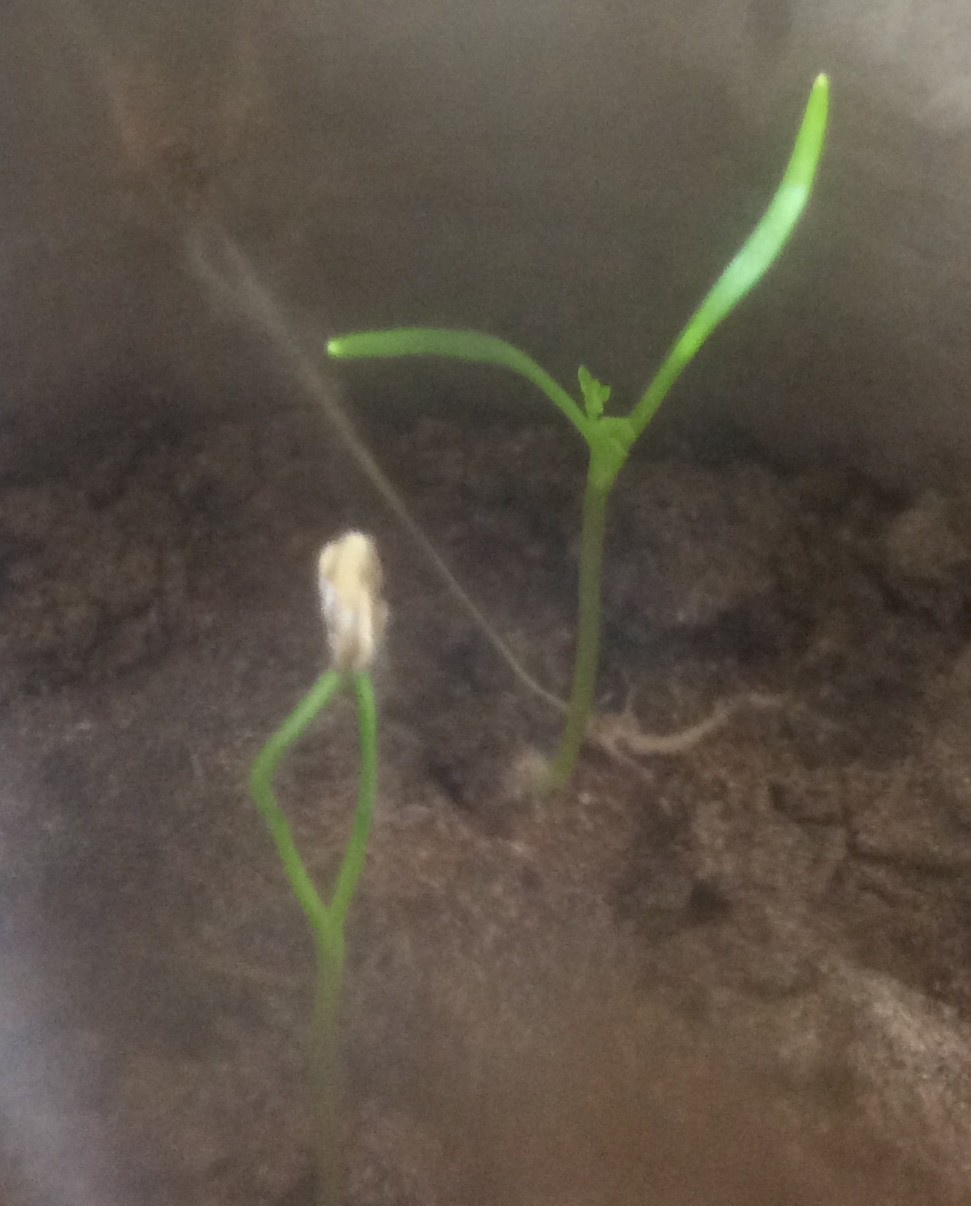
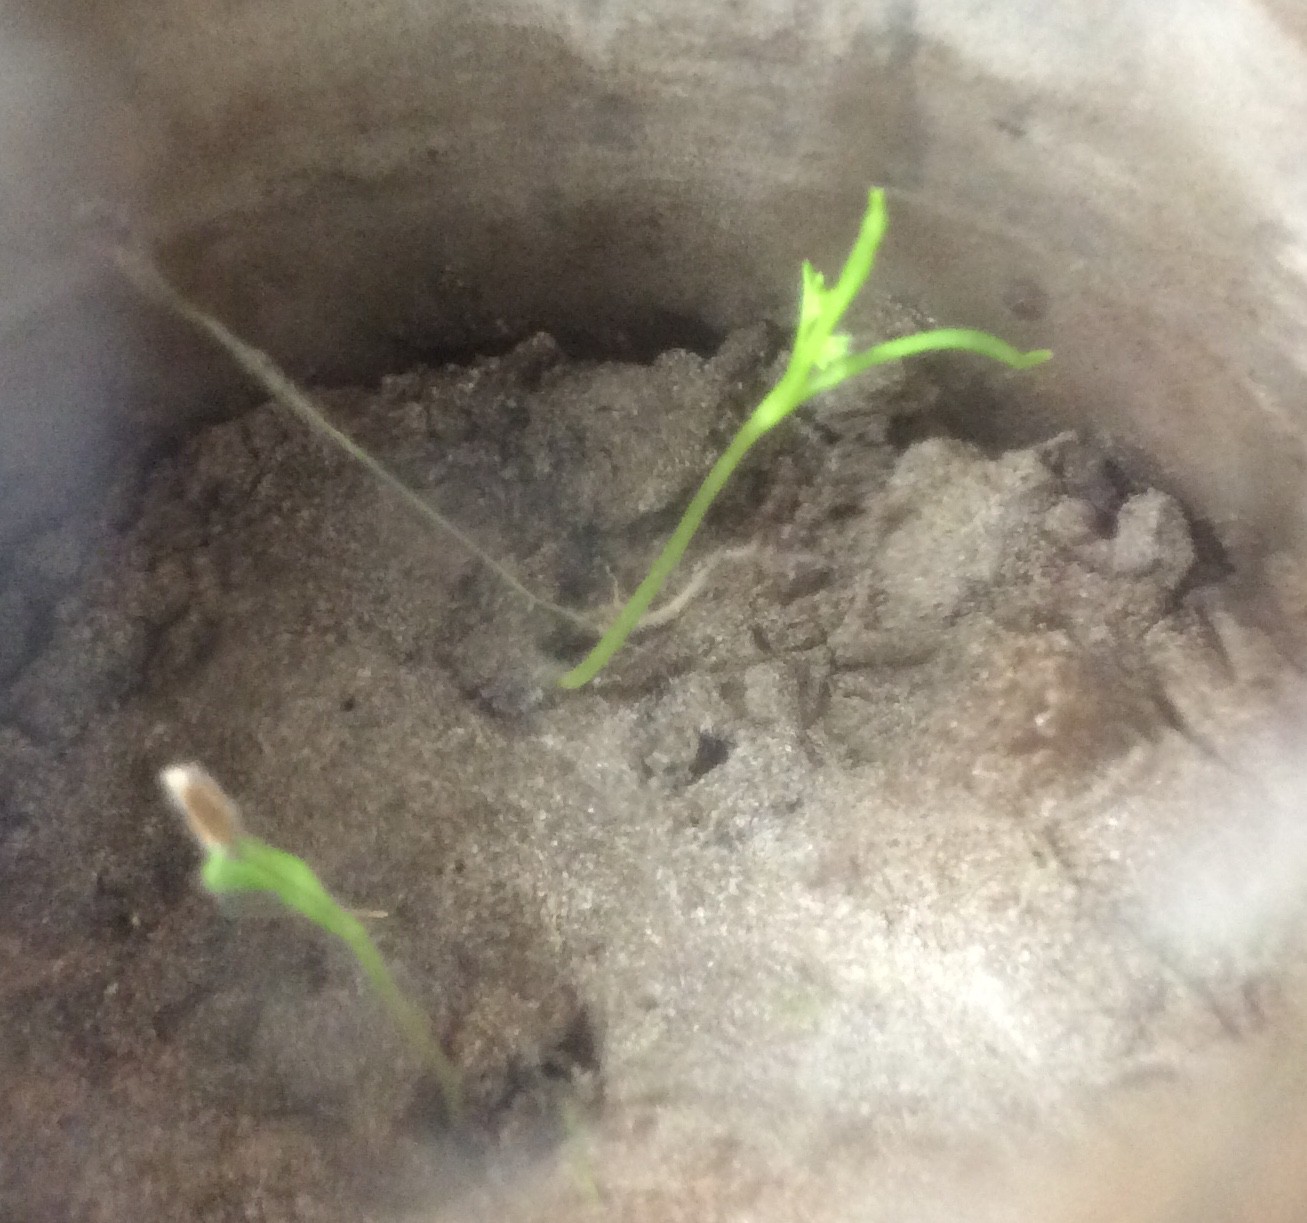
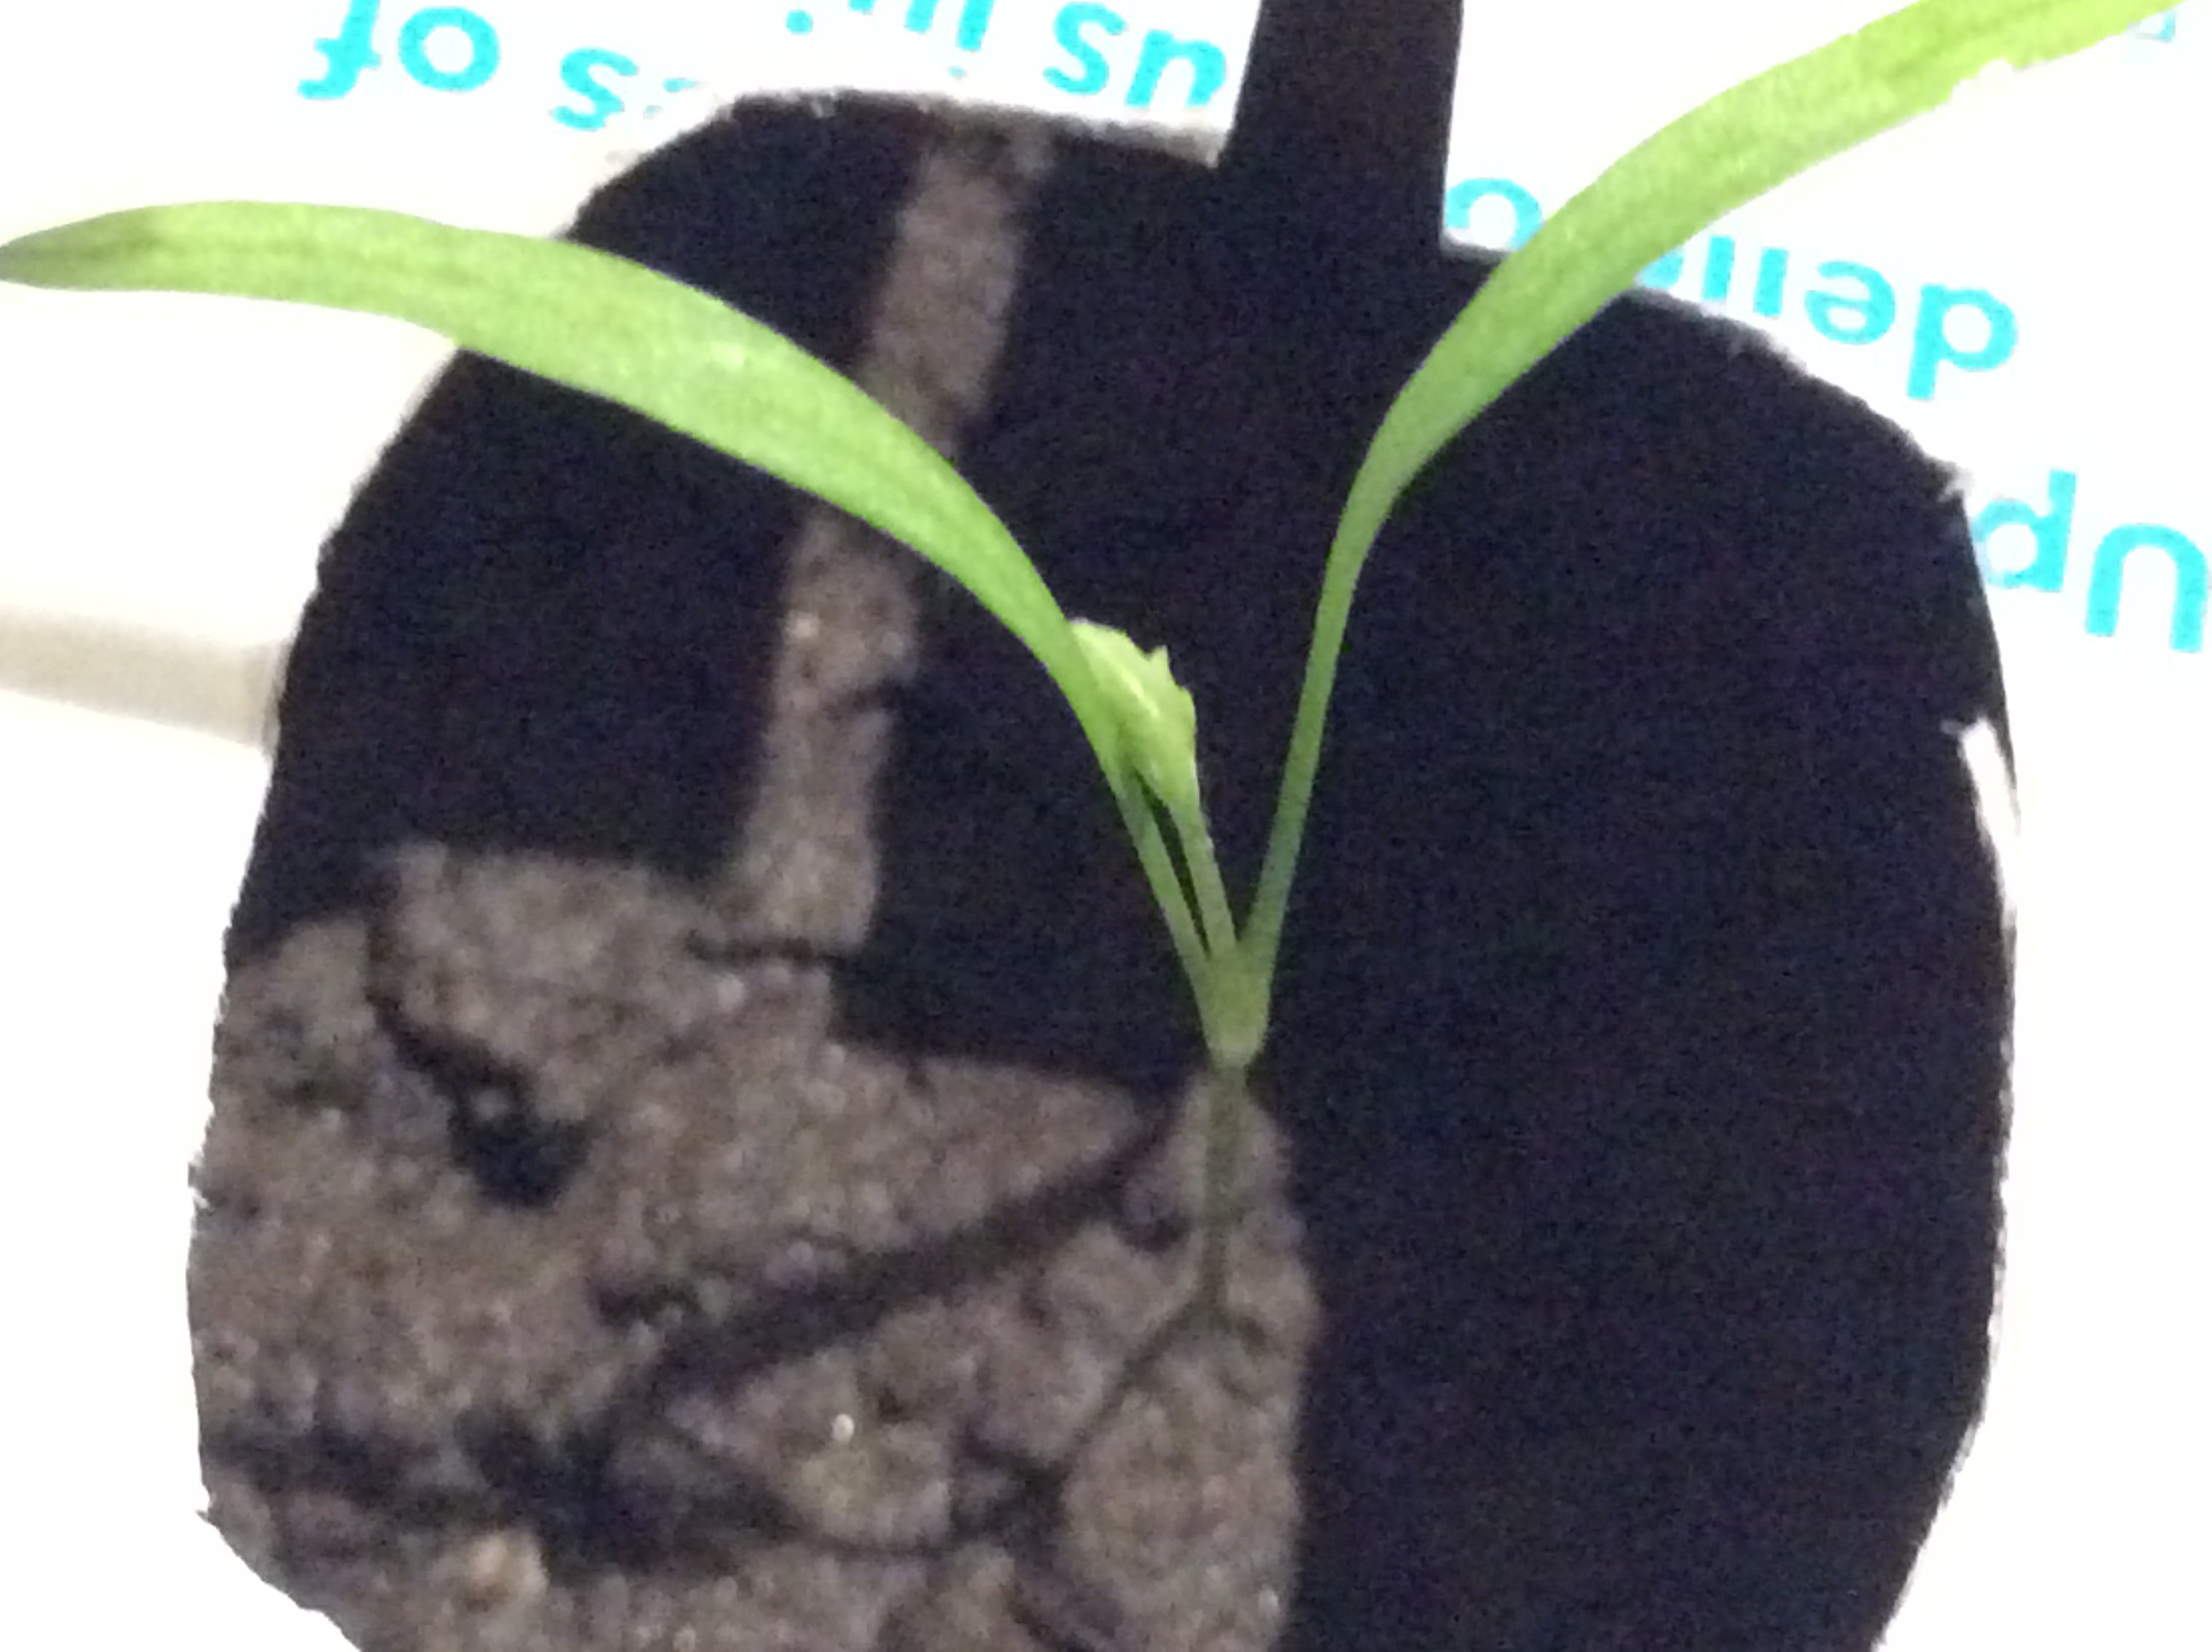
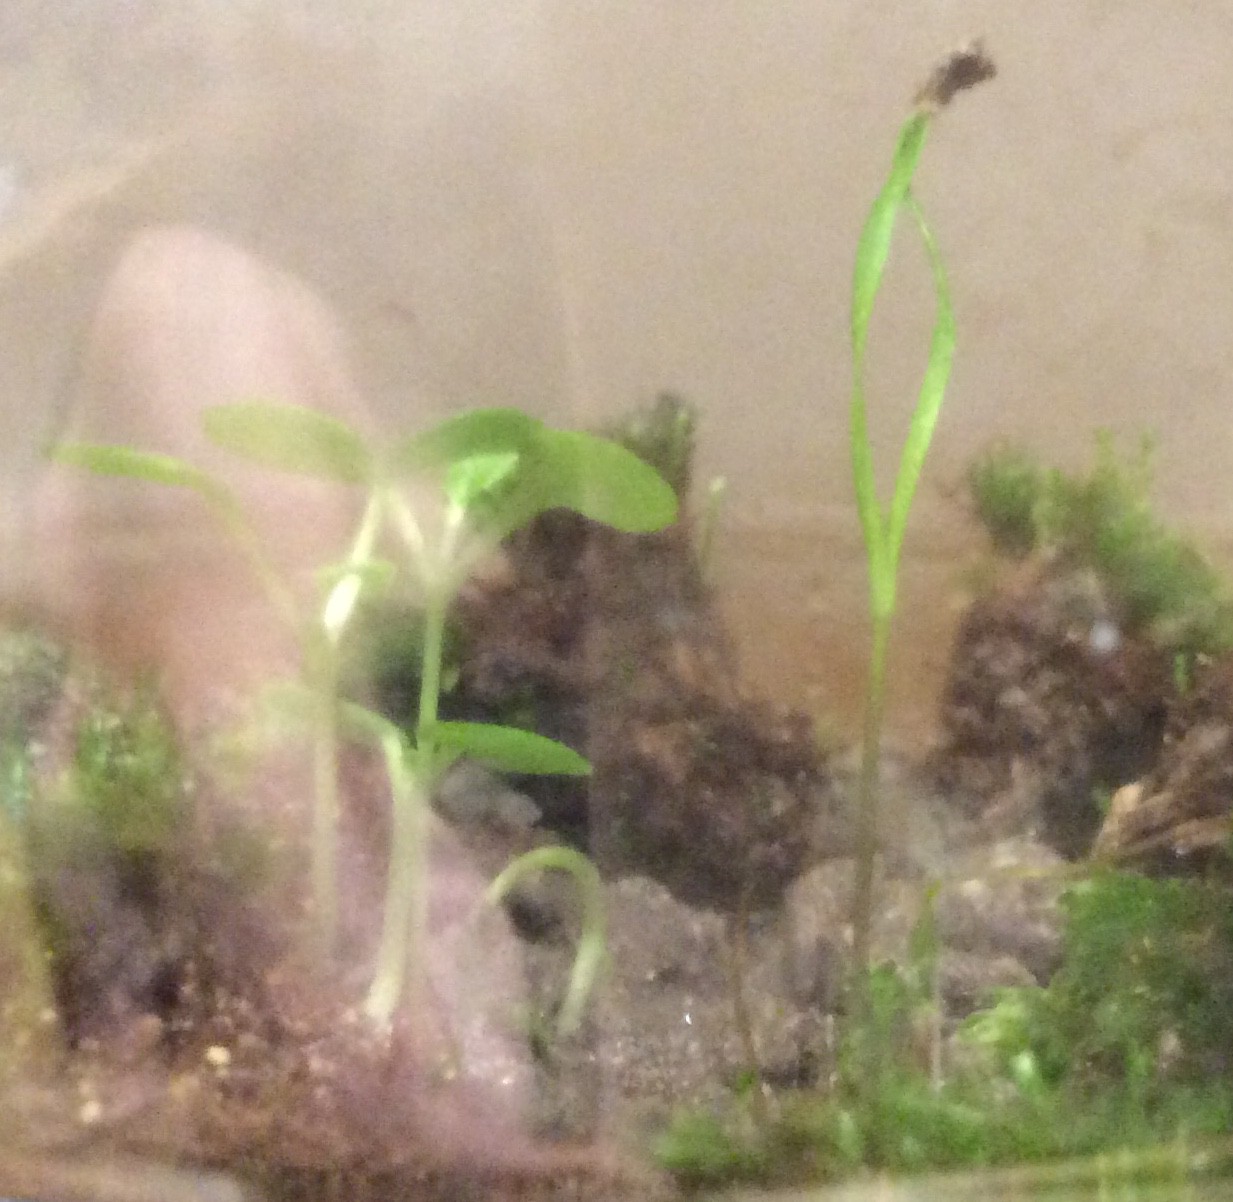
    The first true leaf has appeared on one of the seedlings, first noticed on 25th April (20 days after planting). I’ve also noticed that the stems of the seedlings are redder than in previous experiments.

    Note that the intention behind the three holes cut into the reflective mylar foil sheet was that one seedling would grow in each hole. One of the seeds didn’t germinate, and the seed in the middle hole ended up sprouting from the neighbouring hole, so although the two seedlings in the photo appear to be growing from the same place, but one has its root over towards the middle hole. 

    UPDATE 8th May 2018:

    The seedlings are both still standing and a true leaf has appeared on the smaller of the two. The red colouration of the leaves has steadily increased, so the seedlings are now very dark red. I don’t know whether this is an effect of the...

    Read more »

  • Measuring CO2 loss from a bottle when the lid is removed

    will.stevens02/20/2018 at 07:57 0 comments

    Sometimes I want to be able remove the lid from a sealed bottle to attach a CO2 sensor, then put the lid back on afterwards. How much CO2 is lost from the bottle when I do this?

    I performed the experiment as follows:

    1. CO2 level in the room at the start of the experiment was measured as 400ppm
    2. Temperature in the room at the start of the experiment was measured as 16.1C
    3. Breathed into 600ml bottle to raise CO2 level.
    4. Left sensor attached to bottle for 1 hour (to make sure the reading had stabilised)
    5. Removed sensor for approximately 10 seconds, then reattached. Removal and reattachment involve screwing and unscrewing. 10 seconds was the duration of the period when the opening of the bottle was unobscured by the sensor and open to the air in the room.
    6. Left the sensor attached until the reading was stable again.
    7. Temperature in the room at the end of the experiment was 16.3C
    8. CO2 level in the room at the end of the experiment was still 400ppm.

    The CO2 level measured at the end of step 4, before exposing the bottle to open air, was 9600ppm. At the end of step 6 the reading was 9100ppm.

    I believe that 10 seconds is longer than the total time that the bottle opening is exposed to the air when I normally attach then later remove the CO2 sensor. In most of the experiments I’m doing, the volume of air in the bottle is probably between 300ml and 400ml, the CO2 level in the bottle is generally less than 10000ppm, and the CO2 level in the room is between 400ppm and 1300ppm. So I think I lose 5-10% of the CO2 in the bottle when I attach and remove the sensor.

  • Fourth attempt

    will.stevens02/15/2018 at 08:36 0 comments

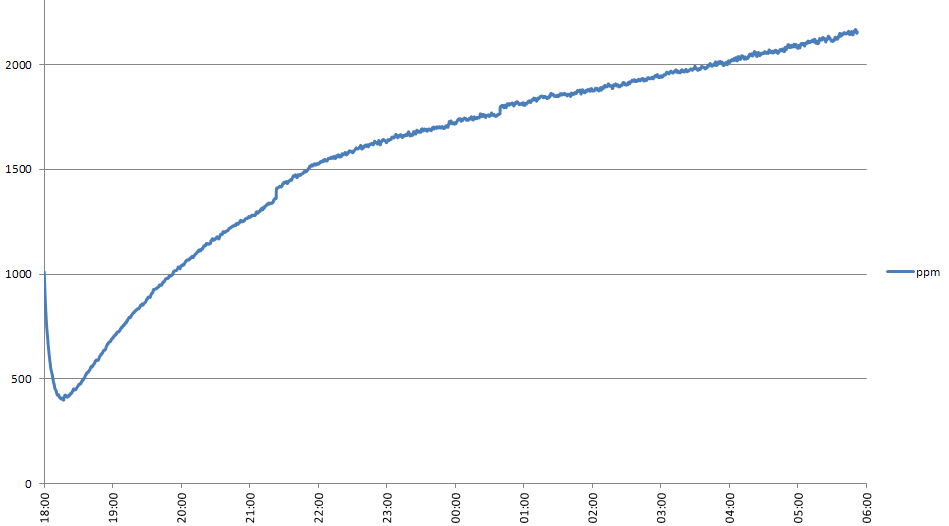
    This experiment (started on 11th Feb 2018) is like the experiment described in the log entry ‘Third Attempt’ dated 4th Jan 2018. There are a few differences. I haven’t used any moss this time. The moss introduced unintended seeds into the third attempt. Also, after planting the carrot seeds and watering with 12ml water, I put the bottle outside for 1 hour to vent off the initial carbon dioxide release that I believe happens when water is put onto dry soil. After 1 hour I brought the bottle back indoors and quickly connected the CO2 sensor. The graph below shows the result:

    The CO2 sensor reading drops initially because the sensor had previously been measuring the indoor CO2 level, which is usually slightly above 1000 ppm when I’m in the room. The minimum reading was 420ppm, which is consistent with what I expect the outdoor CO2 level to be, given that the sensor was attached to the bottle within about twenty seconds of bringing it indoors. The CO2 level rose rapidly at first, then the increase levelled off to a rate of about 500ppm every six hours. I disconnected to CO2 sensor in the morning, and quickly put the bottle lid back on so that not too much CO2 diffused out.

    By the time the seedlings start to appear and start photosynthesising, it seems that the CO2 level will be between 10000 and 20000 ppm - this may be too high.

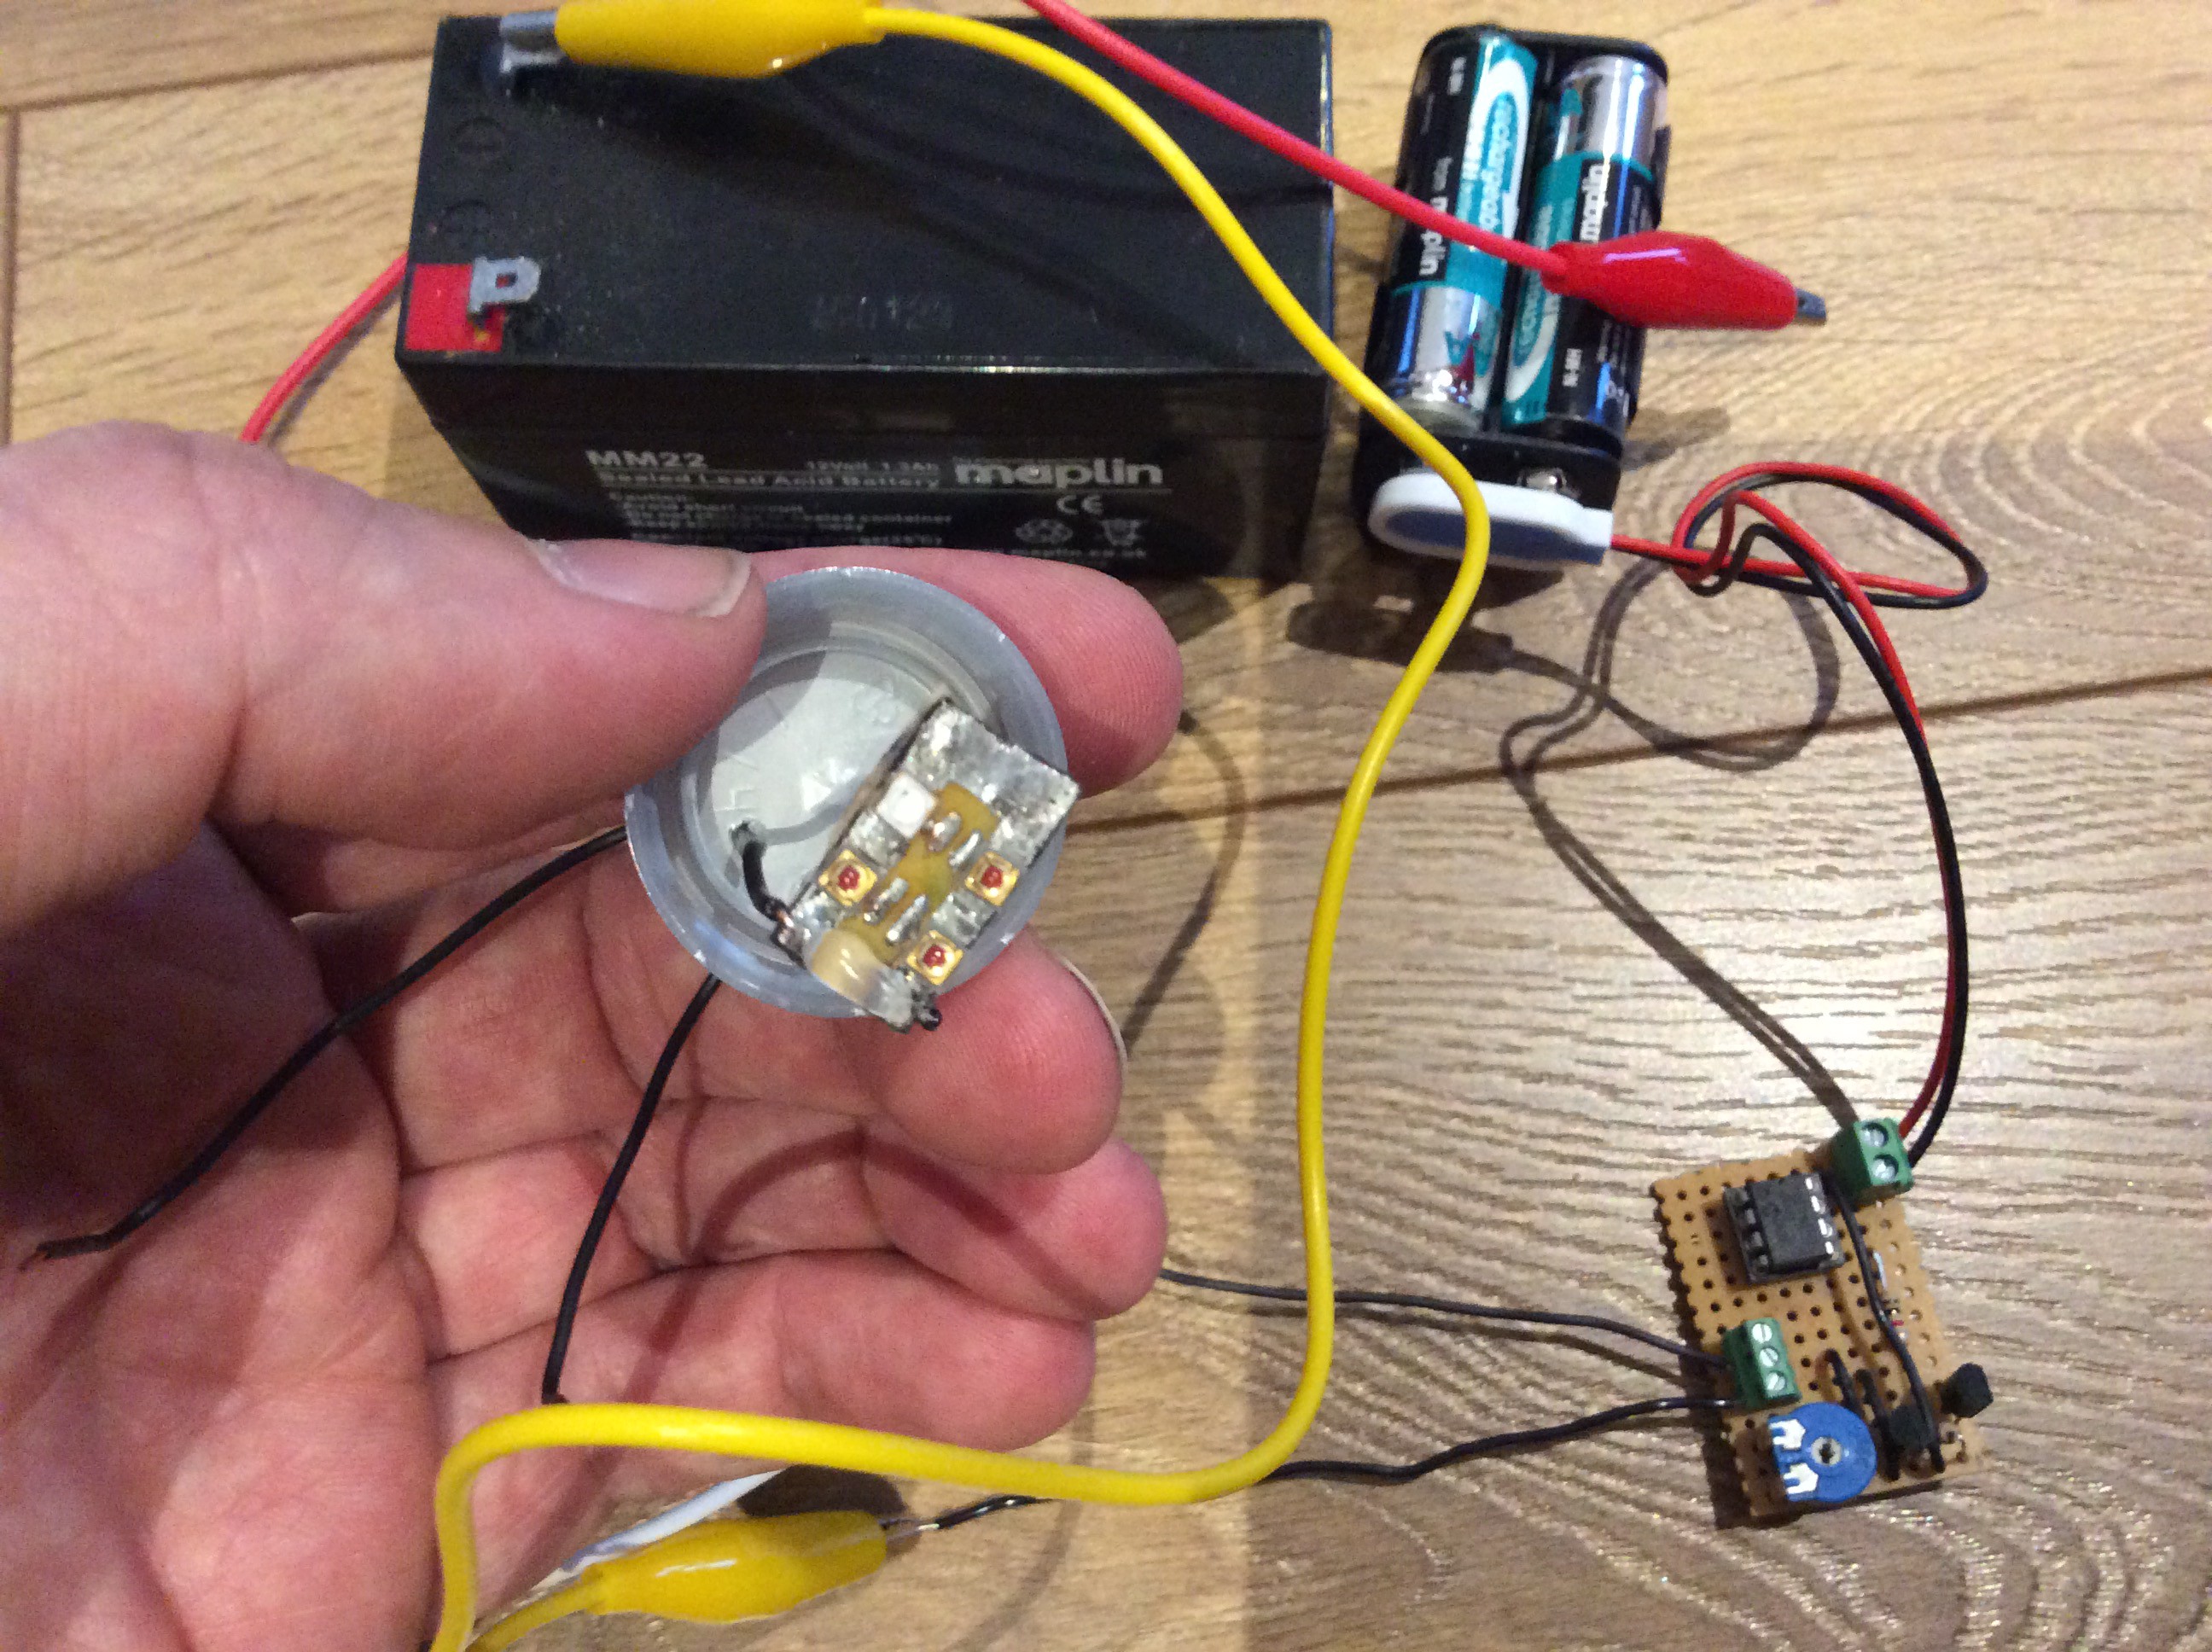
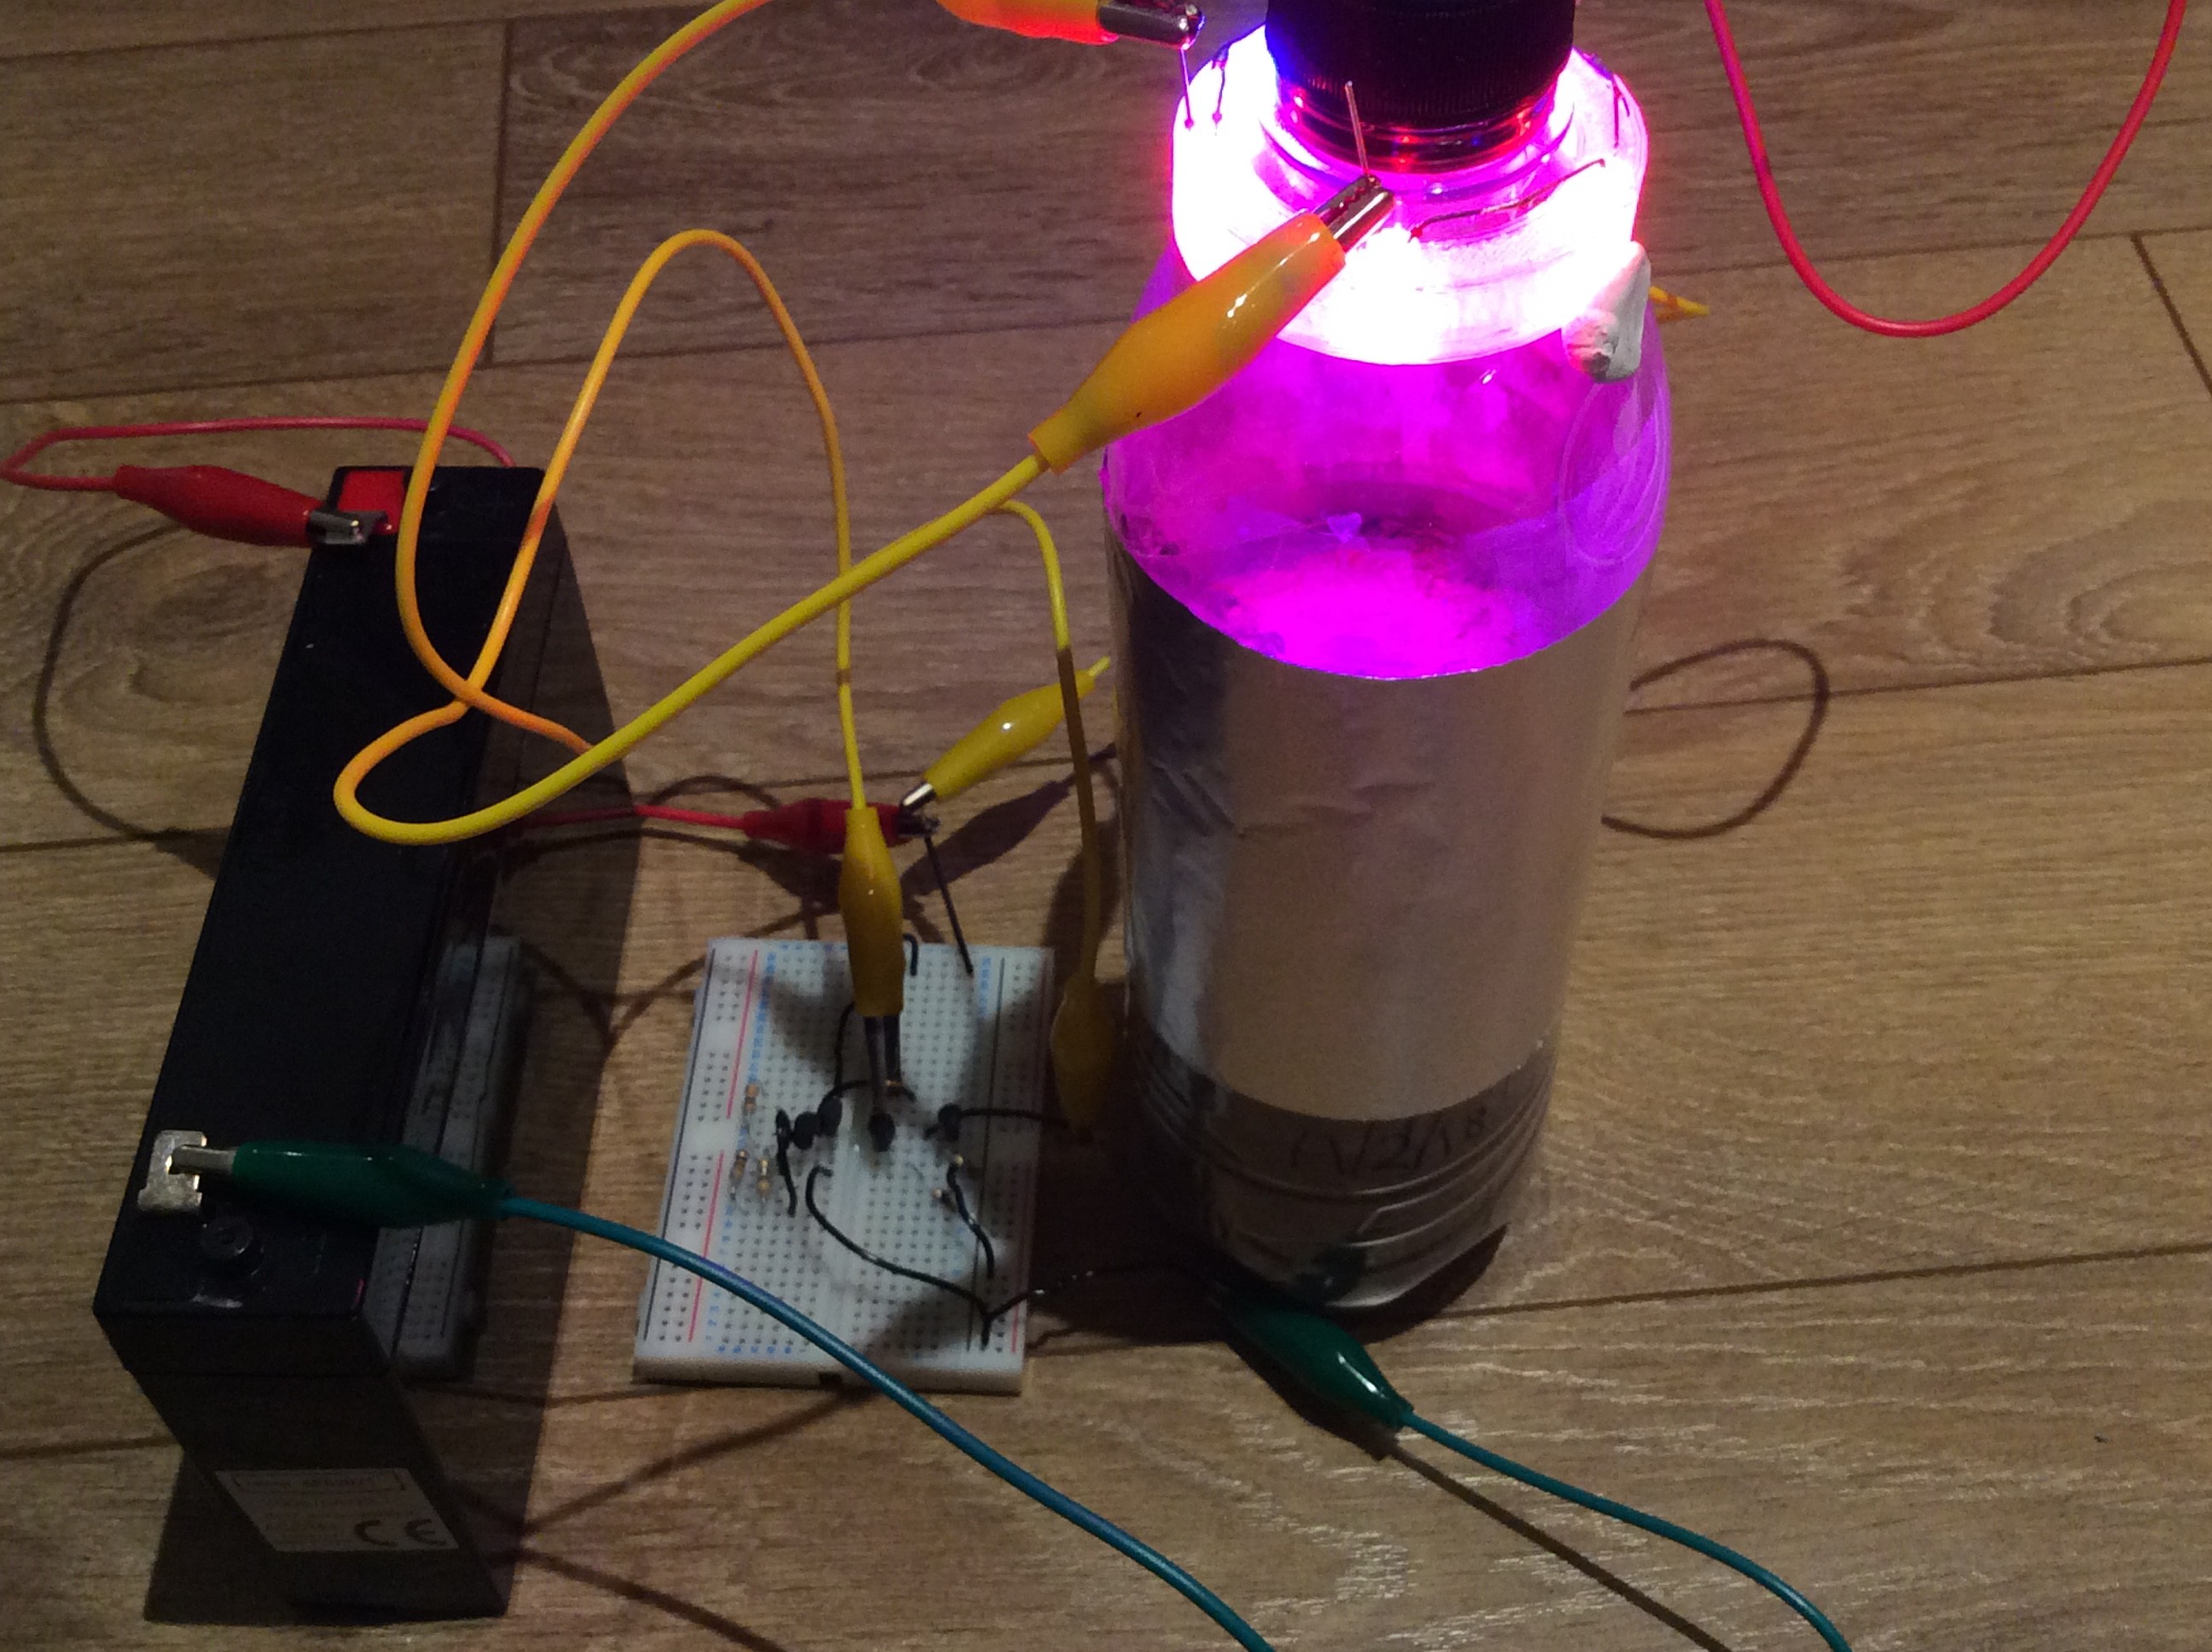
    I have LEDs attached to the bottle, as shown in the photo below, so that I can provide enough light for the seedlings once they start to grow, by which time the control circuit will be soldered onto stripboard. The bottle has some reflective aluminium foil wrapped around part of it to reflect some of the light that would otherwise escape.

    UPDATE 20th February 2018:

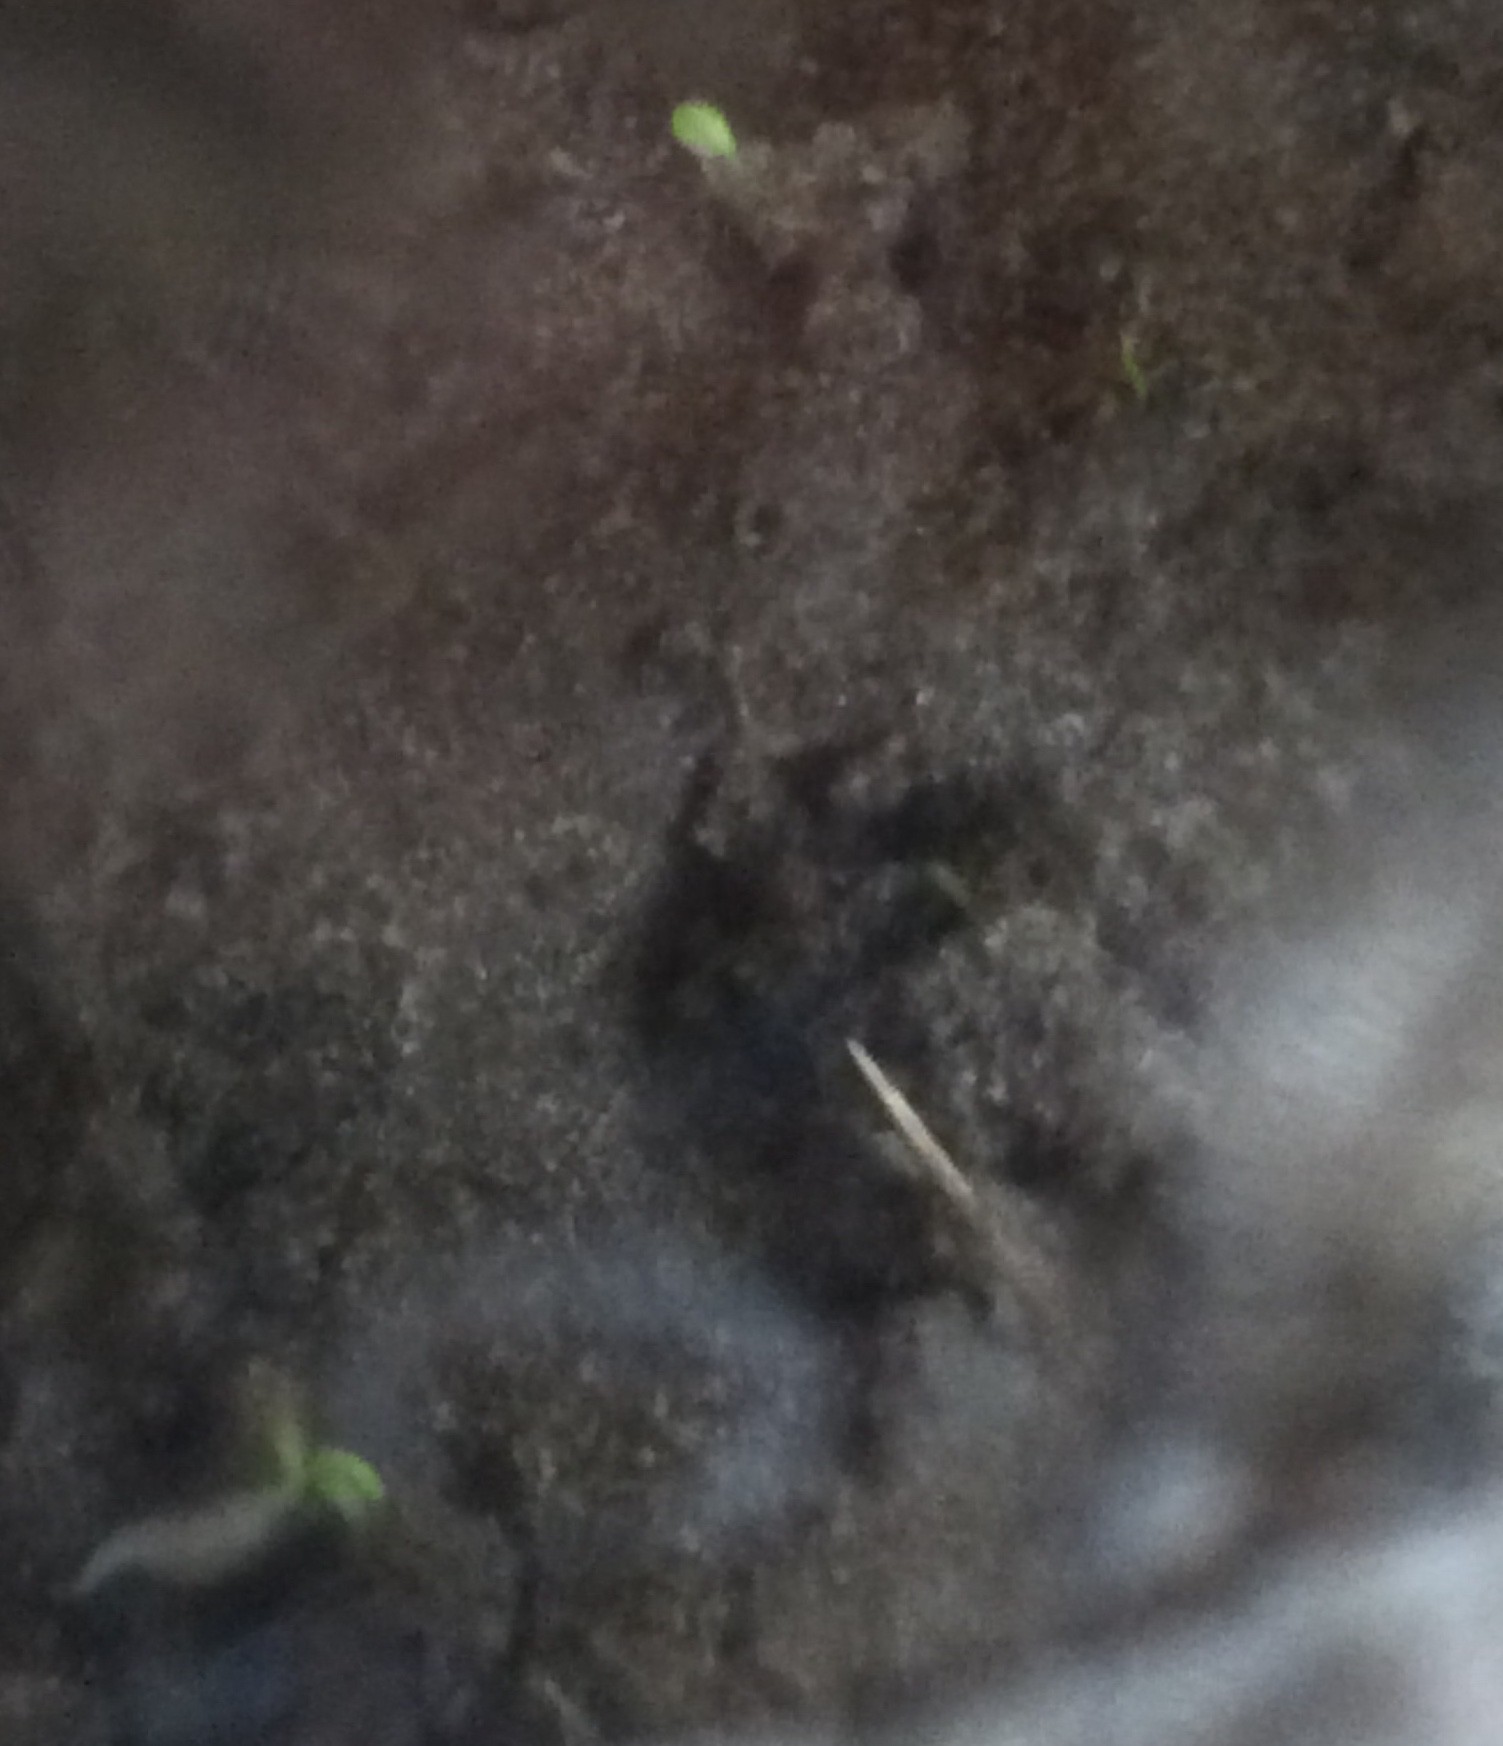
    The carrot seeds have now germinated (first noticed yesterday, 8 days after planting). One thing I’ll be watching out for here is whether the seedlings retain the seed case for a long time. I observed this for all seeds that sprouted in the previous experiments, and wonder whether it is in any way related to germinating in a high CO2 environment.

    UPDATE 27th February 2018:

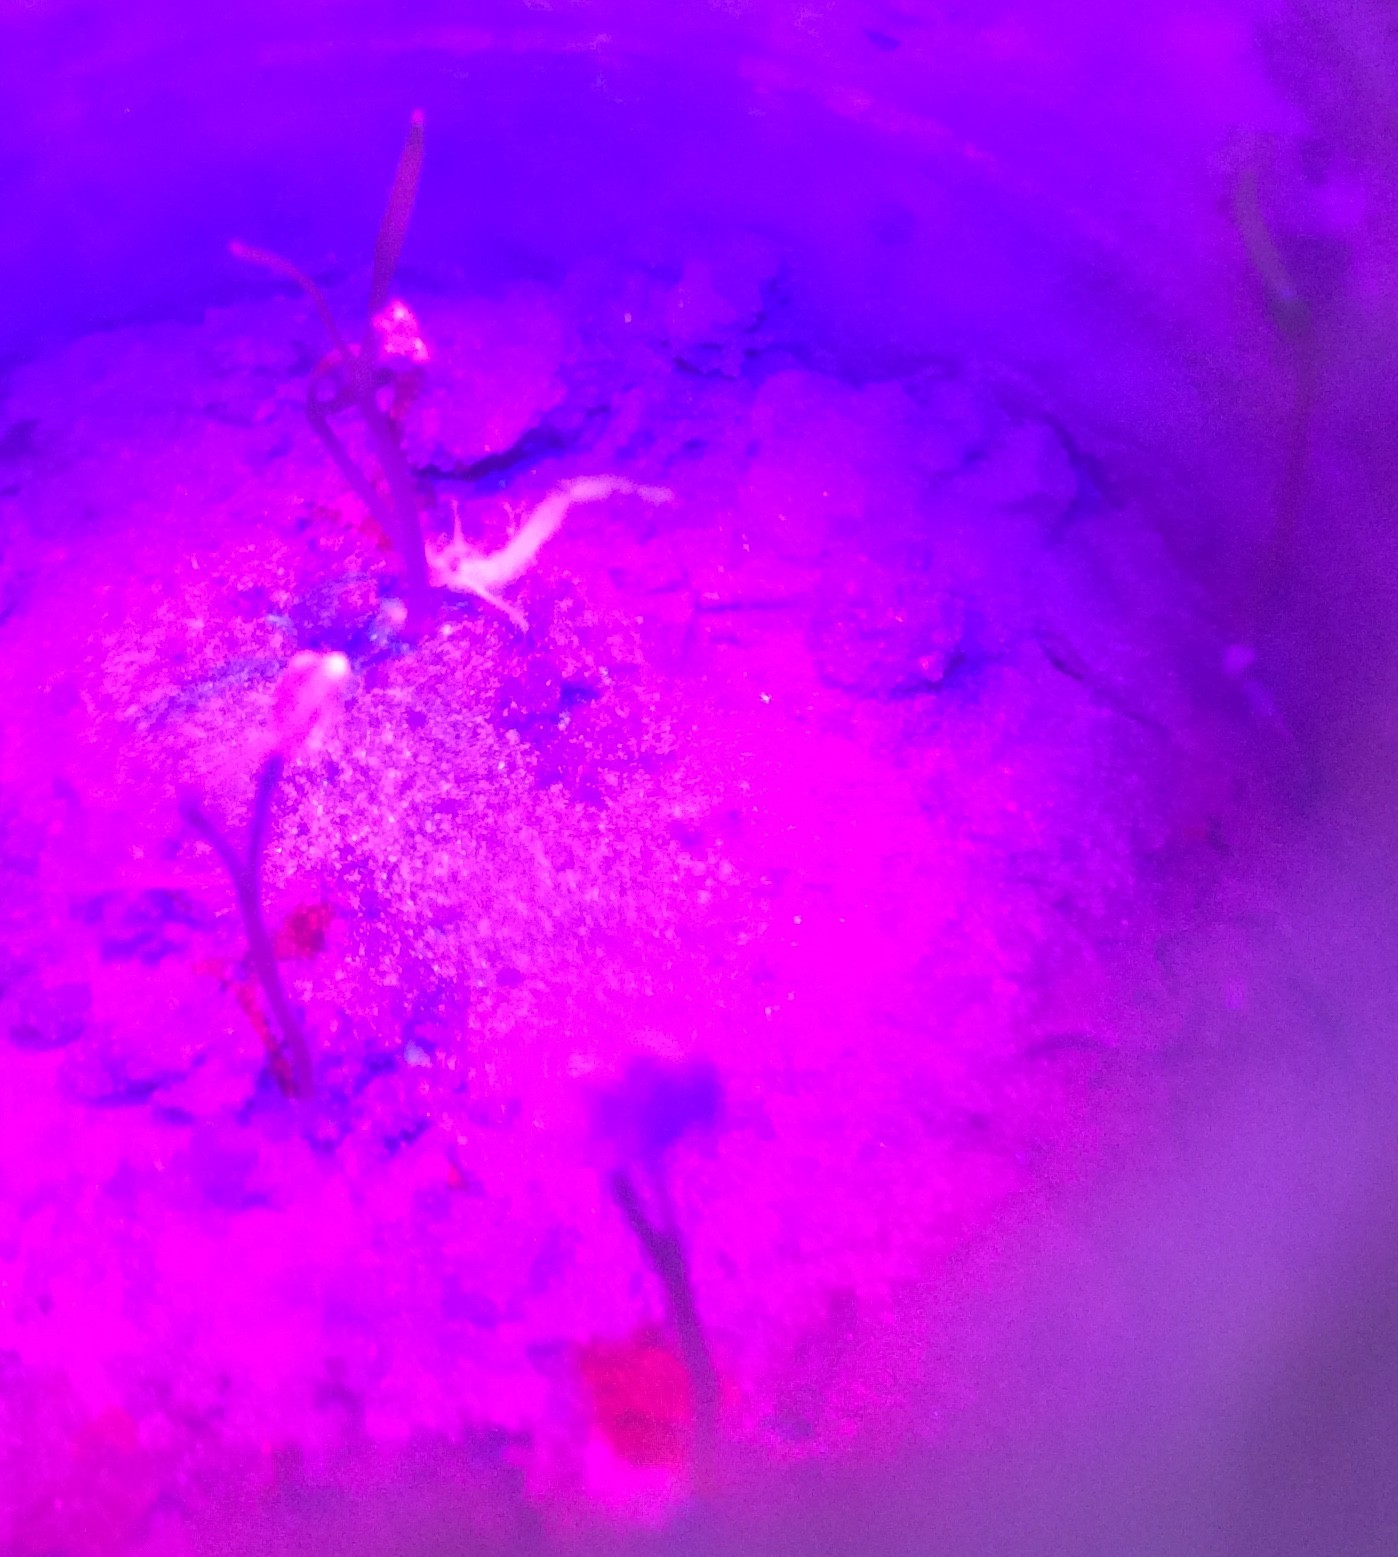
    The seedlings are still growing, all 5 have germinated (2 inadvertently planted next to each other, one planted near the edge of the container). The photo below shows the seedlings under the purplish light that results from having four red LEDs and one blue:

    UPDATE 11th March 2018:

    Two of the seedlings died after a mouldy growth grew on them. Of the remaining three, one is near the edge of the bottle and doesn’t receive much light, one Has the seed holding the seed leaves closed, but the third now has its first true leaf (first noticed yesterday, 27 days after planting):

    UPDATE 18th March 2018:

    Yesterday I noticed that the seedling with the true leaf began to lean over to one side, and today all three remaining seedlings had fallen over completely.

    My current belief is that this is due to the CO2 level reaching some threshold above which the seedlings rapidly die. I attached the CO2 sensor to the bottle and it read off scale (over 10000ppm), but I’m not sure exactly how high it was.

    Out of curiousity I’ve left the lid off the bottle so see whether the seedlings are beyond the point of recovery. 

    One further thing I could try to reduce the rate at which CO2 levels increase in the bottle is to reduce the amount of organic material in the soil. Ideally I’d like to produce a soil that has a known quantity of organic material. I have the ingredients for making green sand (a mixture of bentonite clay and sand) for metal casting, so I could mix this with crushed up dead leaves. I could have a gradient in the amount of organic material in the soil, so that the top part of the soil that is initially the wettest doesn’t have any organic material.

  • Artificial lighting

    will.stevens02/04/2018 at 17:52 0 comments

    If and when I manage to grow carrots in a sealed bottle, I want to be able to do it largely independently of the external conditions. So I’ll need to control the temperature of the plant’s environment and the amount of light it receives.

    I’ve set up a carrot seedling in a pot with three LEDs illuminating it. I used two red LEDs and one blue, having read that this proportion is supposed to be okay for plant growth.

    I’m not sure exactly how much light energy the LEDs are emitting, but I estimate that the illuminated area around where the plant is growing is receiving no more than 25 W/m2. Will that be enough? Even though it looks bright in contrast with the room lighting, I think that it’s only about the same intensity as an overcast day.

    UPDATE 15th February 2018:

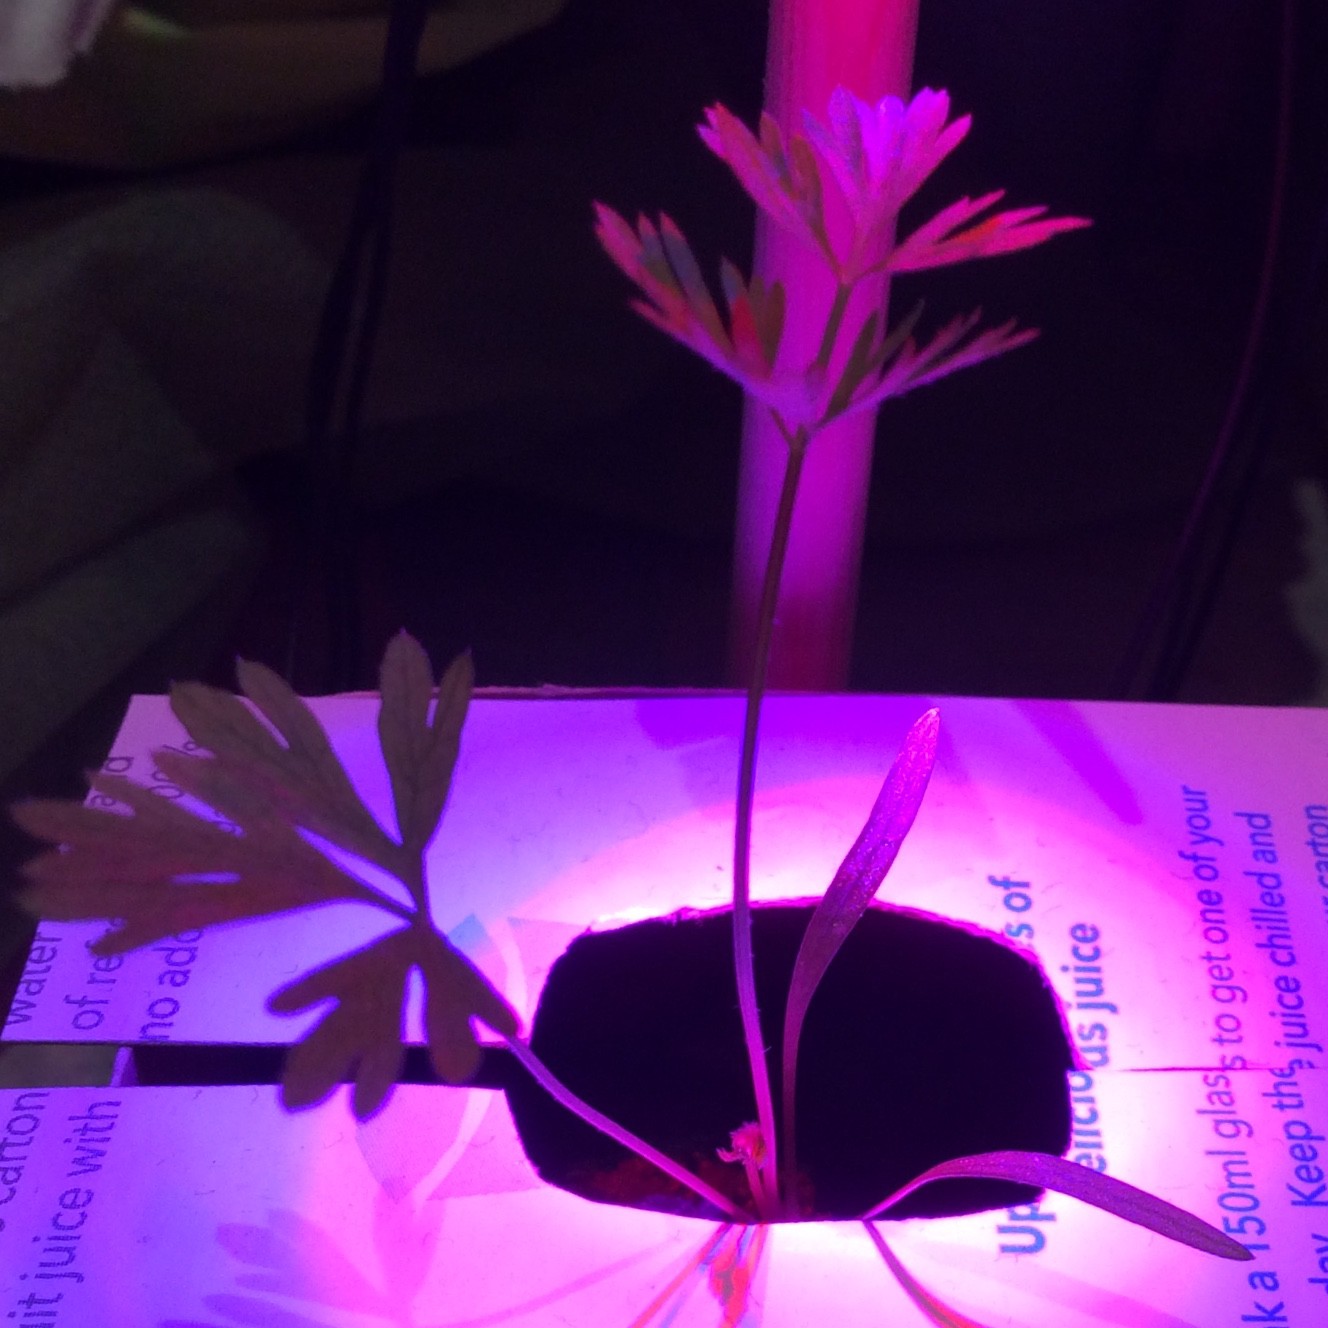
    The carrot seedling is now showing its first true leaf between the two seed leaves, as seen in the photo below.

    I’ve been thinking about how to make more efficient use of the light that shines on a seedling. When the plant is small, most of the light from the LEDs is wasted, only a small fraction lands on the seedling. With an array of smaller LEDs, each directed to a small area of soil, it will be possible to illuminate an area closely matching the shape of the plant. It would be possible to adapt the shape of the illuminated area to the plant by using a camera to monitor the plant. But this seems overly complicated. Plants are already capable of adapting themselves to their circumstances, so instead of having a complex system of monitoring with a camera, I plan to have a fixed sequence of illumination patterns. Over the course of 2 or 3 months the pattern of illumination will grow in size - a few more LEDs will be turned on every few days - at a rate matched to the expected growth rate of the plant. Hopefully the plant will adapt itself to fit into the illuminated area.

    UPDATE 11th March 2018:

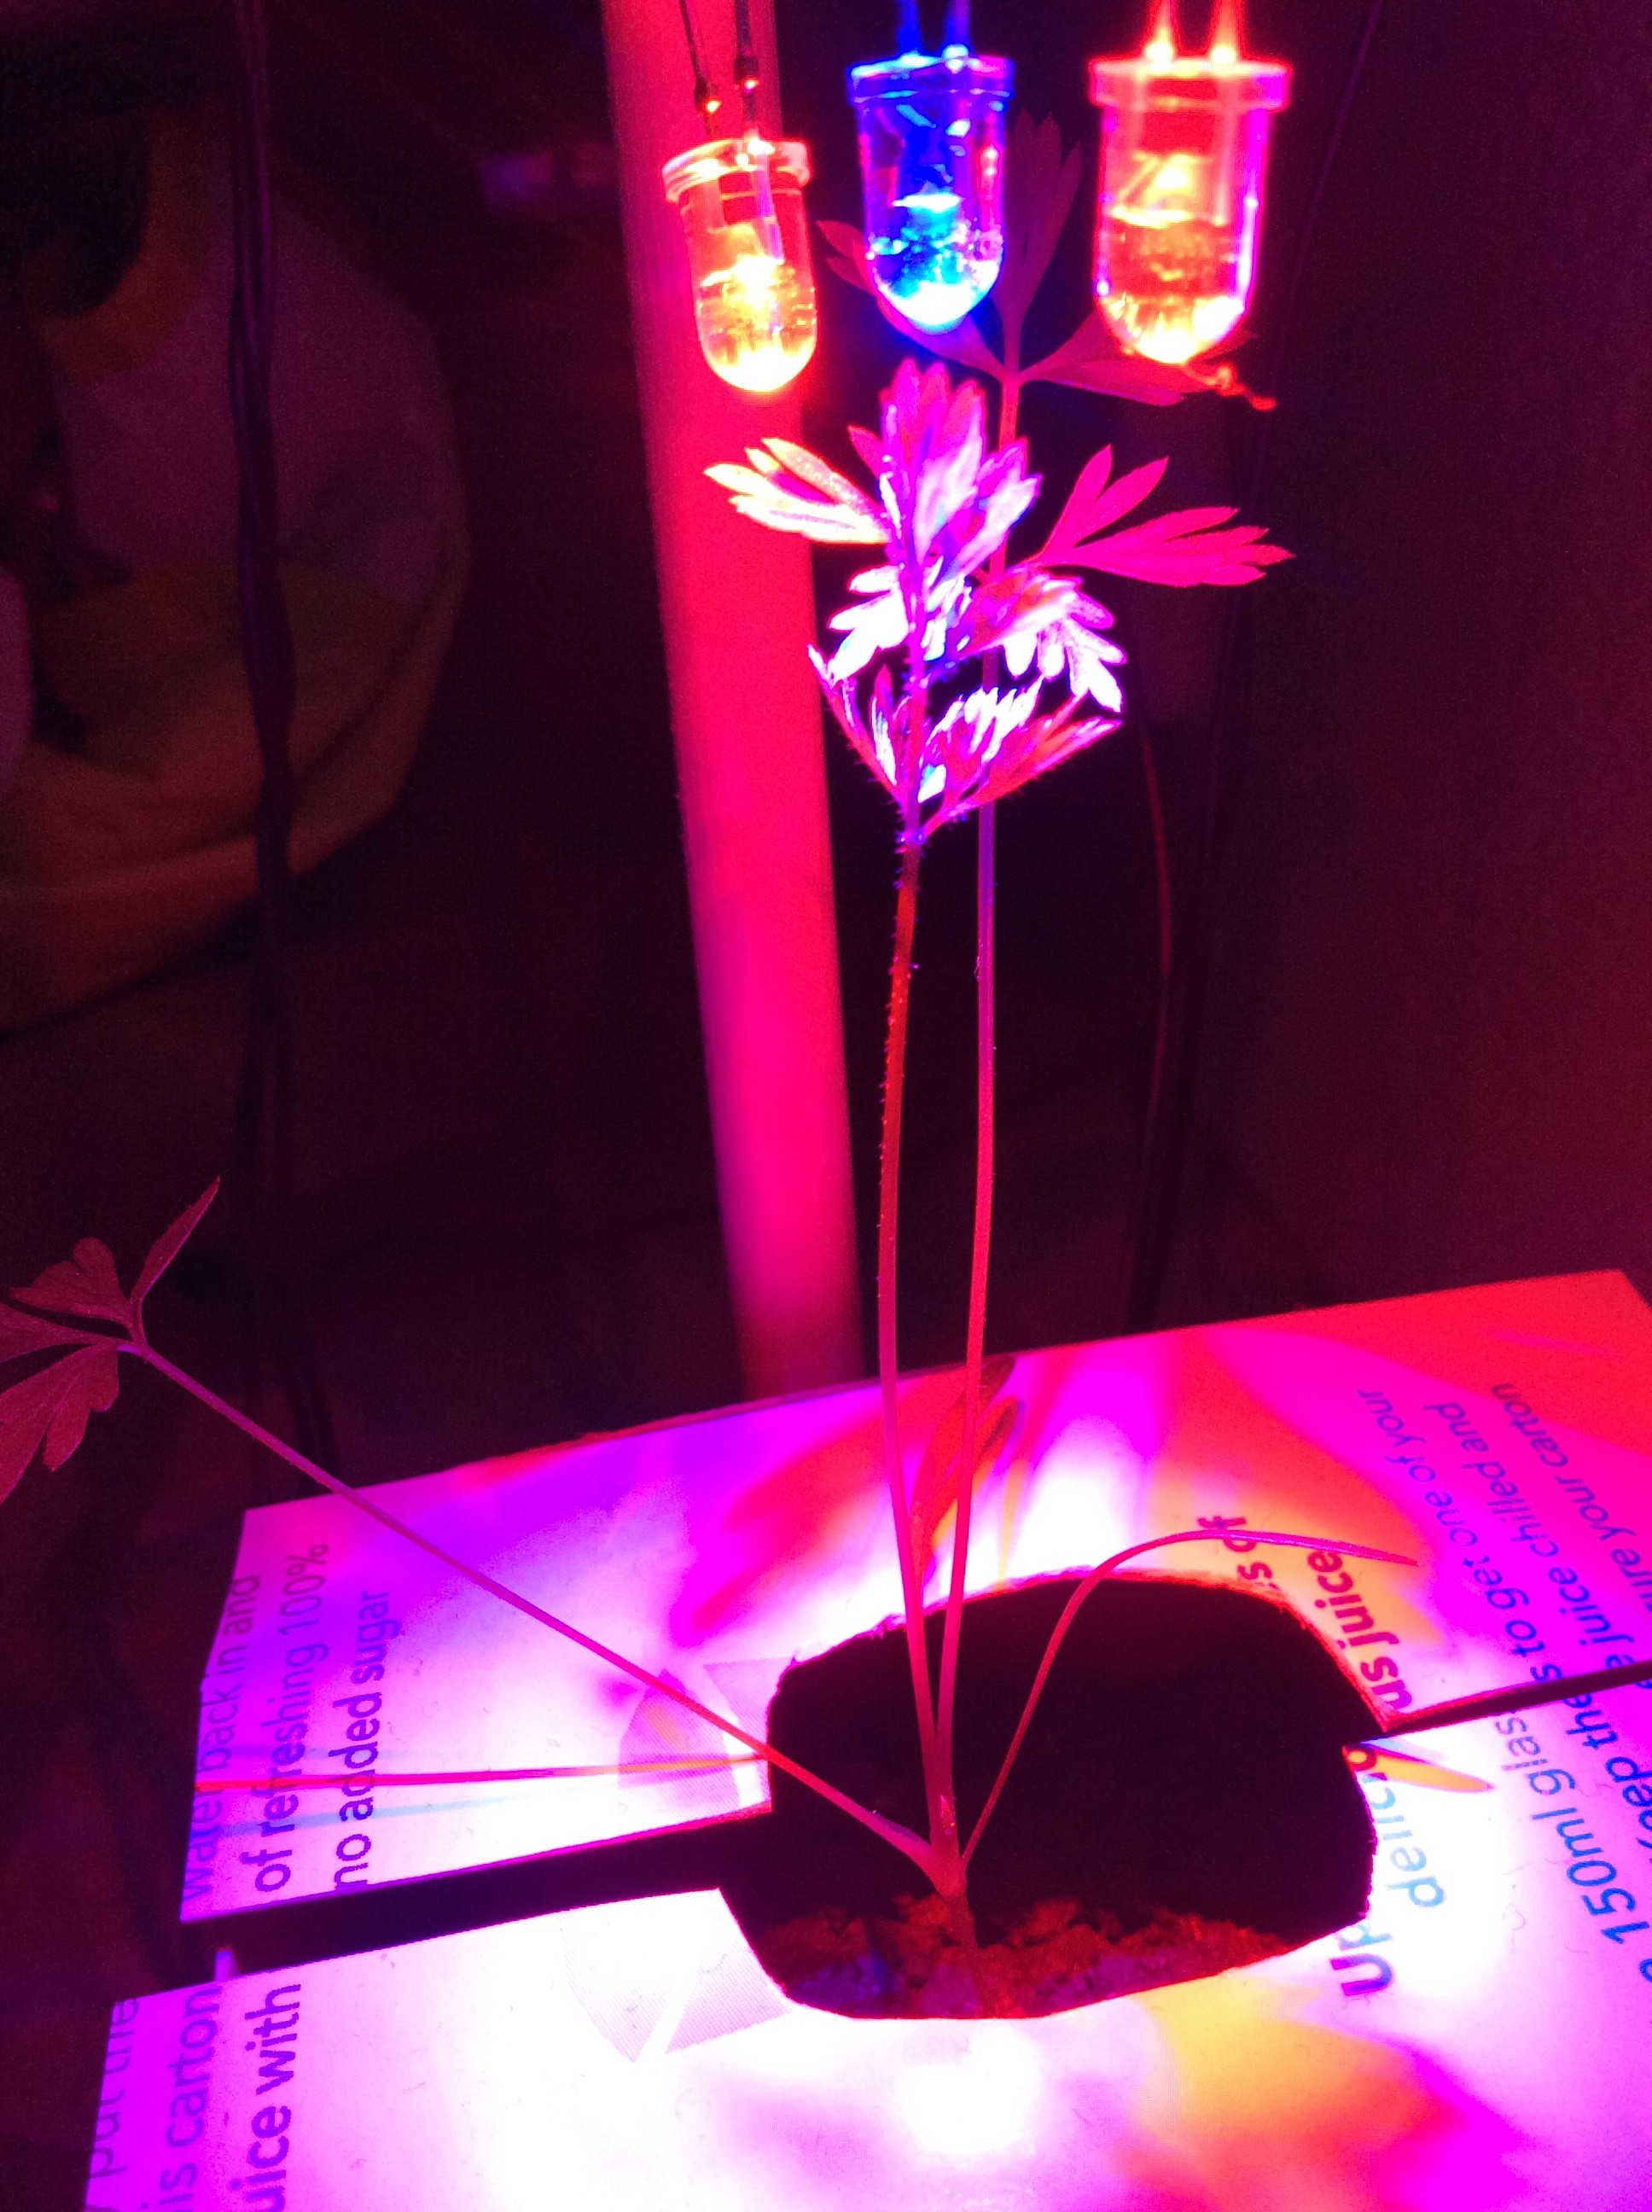
    The seedling has developed three true leaves now - two large ones that have been present for weeks, and one smaller one which appeared a few days ago. The stems are very elongated where the leaves grow upwards until they are almost touching the LEDs, so it seems as though they would prefer to have more light than this.

    UPDATE 17th March 2018:

    The third true leaf is already nearly as large as the other two. In the photo below you can see how two of the leaves have stretched right up to where the LEDs are to get as much light as possible. A fourth small true leaf has appeared, first noticed today. The main stem of the carrot, below where the leaves split off, is very thin and could not support the plant - the plant is held in place partly by the leaf in contact with the cardboard.


    UPDATE 13th April 2018:

    Earlier on where I wrote "no more than 25 W/m2", I wasn't sure how efficient the LEDs were. I've since estimated the efficiency of the LEDs (see log entry 'More on artificial lighting'), and I think the actual figure is about 7 W/m2, so a lot less light than the plant would receive outdoors.

  • Source code for using the MH-Z14A CO2 sensor

    will.stevens01/28/2018 at 21:28 0 comments

    I've put my source code for using the CO2 sensor (on Linux) here:

    https://github.com/WillStevens/co2_sensor

    It makes use of a command for turning off 'Automatic Baseline Correction', and also a command for setting the range of the sensor. Both commands can be found in the Chinese version of the documentation for the sensor, here:

    http://style.winsensor.com/pro_pdf/MH-Z14A.pdf

  • Some useful references

    will.stevens01/28/2018 at 19:59 0 comments

    I found out a few things about terraria, and about the effect of high levels of CO2 on plants in the following places:

    • N. Schwarz & B. R. Strain (1990) Carbon — A plant nutrient, deficiency and sufficiency, Journal of Plant Nutrition, 13:9, 1073-1078, DOI: 10.1080/01904169009364136
      This paper discusses the effect of exposing various vegetables to a CO2 concentration of 10000ppm (1%) for 6 days. Normal outdoor concentration is about 400ppm at the time of writing. Generally, the plants exhibited observable effects, and growth was delayed, but the plants recovered after the CO2 concentration was returned to normal levels. Out of curiosity I looked up what the maximum CO2 concentration is in spacecraft, and found here that it's usually about 0.5%, but that people can tolerate at least 2% for days with no obvious harmful effects.
    • Stephen L. Thompson (2007) Inquiry in the Life Sciences: The Plant-in-a-Jar as a Catalyst for Learning, Science Activities: Classroom Projects and Curriculum Ideas, 43:4, 27-33, DOI: 10.3200/SATS.43.4.27-33
      This paper discusses the educational value of growing a plant in a sealed jar. The activity prompts students to think about what plants need to grow and where they get it from, and how to answer those questions. This paper also mentions Nathanial Bagshaw Ward, who was one of the first people to grow plants in sealed containers. His work led to the use of sealed containers for transplanting plants on ships.
    • Martin et al. Extreme Physiology & Medicine 2012, 1:4. A paradigm of fragile Earth in Priestley's bell jar.
      This paper describes an experiment about sealing a person in a container for 48 hours with enough plants to produce the oxygen that he needed.
    • Marsarium 9
      A fern was grown for 30 days in soil thought to be similar to that found on Mars, in an atmosphere with the same composition as on Mars (albeit at 1 bar of pressure rather than the 6 mbar pressure found on Mars). The Fern in this project was apparently able to survive in a 96% CO2 environment for 30 days. The atmosphere wasn't monitored though, so I don't know how the atmospheric composition changed over time. Given the paper mentioned above about harmful effects of 1% CO2 concentration on plants, it would be interesting to know whether the CO2 level stayed at 96% for the whole 30 days, or whether the fern converted some of it to O2, or whether any of it leaked out.

    UPDATE 23rd April 2018:

    I found this guide to plant lighting very informative:

    https://horticulture.ahdb.org.uk/sites/default/files/u3089/Lighting_The-principles.pdf

    This review of growing plants in space was also interesting, although the problems of growing plants in a weightless environment (such as preventing pooling and maintaining airflow) are somewhat different from the problems of growing plants on Mars:

    https://www.sciencedirect.com/science/article/pii/S2214552415300092?via%3Dihub

  • Soil and CO2

    will.stevens01/06/2018 at 00:58 0 comments

    I want to test a hypothesis that if I start with initially dry soil, then add a small quantity of water (and some microbes on a small piece of damp soil), I will end up with an escalating production of CO2: the small quantity of water will allow some microbes to consume organic material in the soil, producing CO2 and water. The additional water will make more of the soil damp, allowing the microbes to spread and consume more organic material, until eventually all of the soil is damp.

    Based on observing the experiment described in the “Second Attempt” log entry, in which I started with 36ml of water and most of the lower part of the soil was obviously dry to begin with, and the very lowest part still looks dry now (4 weeks later), I think that this process will take several weeks to run.

    To begin with, I want to check that completely dry soil does not release CO2. I took 325g of dry soil and placed it in a bottle with the CO2 sensor attached. The CO2 level began at about 1100ppm. Over the course of 3.5 hours I was very surprised to see the CO2 level decrease to 850ppm. What could be the reason for this? One possibility that sprang to mind was that the apparatus had a leak, and the CO2 level in the room was decreasing. To test this I removed the CO2 sensor from the bottle at the end of the experiment and it quickly went back up to over 1000ppm, so a leak can be ruled out as the explanation.

    Another possible explanation is that the dry soil had come from a radiator, so it was warm (I estimate no more than 40C) when it went into the bottle. Is it possible that as the soil cools it absorbs CO2 from the air? Or could the temperature or pressure be affecting the sensor reading? Both of these seem plausible: I have read that some minerals adsorb gases when cooled and release them when heated (this is how adsorption pumps work - these have been proposed as a highly reliable way of compressing the atmosphere of Mars for use as a CO2 supply using few moving parts and with focused solar heating as the energy source); the CO2 sensor does not claim to a be highly accurate, and is influenced by environmental factors.

    UPDATE 8th January 2018:

    After a couple of days the CO2 level in the bottle containing dry soil was down to 650ppm. I decided to add the water (12 ml) and watch what happened to the CO2 level. I had expected that the CO2 level would increase gradually over the next few weeks. To my surprise there was a sudden increase over the next few minutes - it went up to 1600ppm quickly, then climbed more slowly. 9 hours later it was at 2300ppm. It is as though adding the water triggered an immediate release of CO2 from the soil. Could it be that gas adsorbed onto soil particles is released when it gets wet?

    If my interpretation of these experiments is correct (I’m not sure yet whether it is), then it means that I can greatly reduce the initial level of CO2 in a sealed bottle by setting up the bottle outside (where the CO2 level is lower than inside), by adding the soil warm and keeping it warm for about 30 minutes, and by waiting for about 30 minutes after I add water to the soil before closing the bottle, so that the initial release of CO2 from the soil escapes from the bottle.

    UPDATE 13th January 2018:

    My attempt to measure the change in CO2 level in a sealed bottle containing dry soil with 12ml of water and some soil microbes added is hampered by three issues. Firstly, I haven't yet checked my apparatus for leaks - I haven't seen any results which make me think it leaks, but I'm not certain because I haven't explicitly tested this. Secondly, I've found that there is a daily variation in CO2 level in the bottle which I believe is correlated with the temperature in the room. This can be seen in the graph below:

    I turn my heating off when I go to bed - shortly before midnight last night - and the CO2 level began to drop shortly afterwards. At weekends I...

    Read more »

  • Third attempt

    will.stevens01/04/2018 at 23:31 0 comments

    This experiment was started on 2nd January 2018. It is the same as the second experiment (started 8th December 2017), but with only 12ml of water added to the bottle rather than 36ml. I also tried not to powder the soil too finely when I added it to the bottle.

    I hope that because the soil is drier initially, CO2 will be released more slowly from the soil into the air, and the seedlings will last longer.

    The progress of this attempt will be added as updates to this log entry.

    UPDATE 17th January 2018:

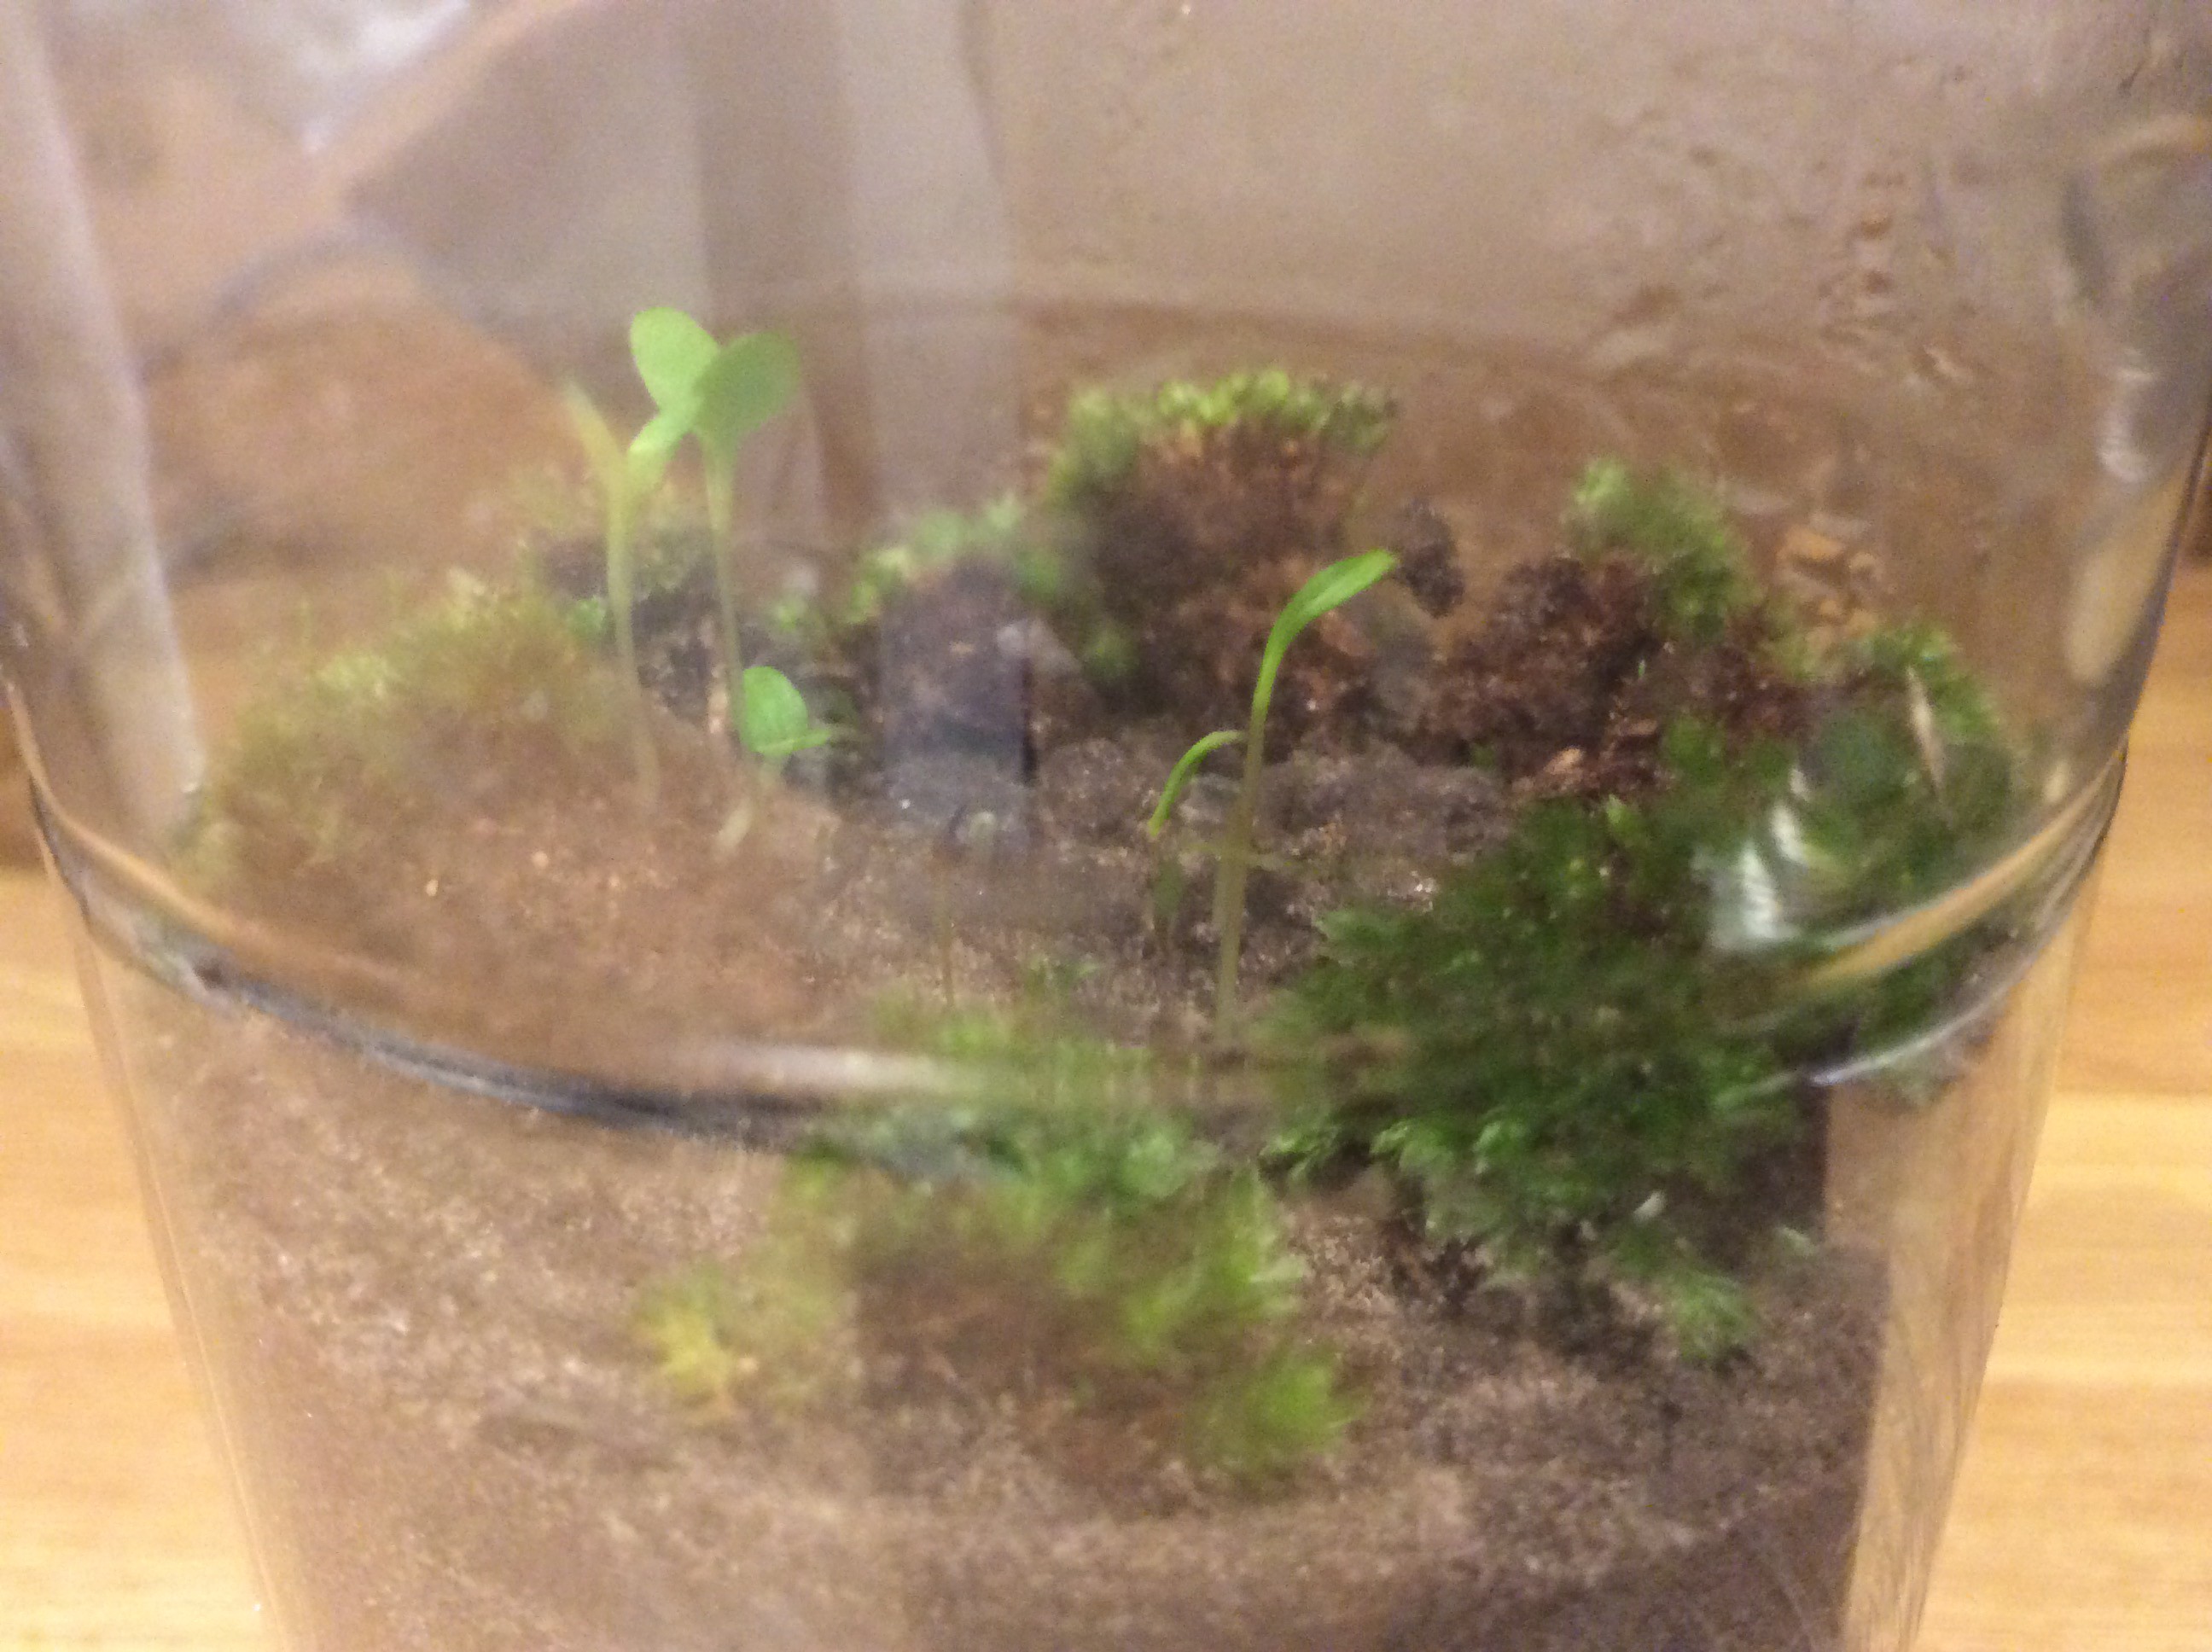
    The carrot seeds have begun to sprout (to the right of the centre in the photo below). Three weed seeds that were present on the moss have also begun to sprout (to the left In the photo).

    UPDATE 24th January 2018:

    One of the carrot seedlings died off. Furry growth developed around its leaves, and it collapsed. The larger of the seedlings is still doing well, and a third has sprouted and is unfurling itself (behind the weeds in the photo below). The weed seedlings are thriving, one of them has the beginnings of a second pair of leaves. 

    I’ve noticed in this and previous experiments that the carrot seed coat clings onto the first pair of leaves of the seedlings.

    UPDATE 28th January 2018:

    This experiment has now been running for 26 days and the largest carrot seedling still looks healthy. It has exceeded the time by which the seedlings in the 'Second Attempt' experiment had collapsed. 

    UPDATE 3rd February 2018:

    The number of molecules of gas in the bottle has decreased. The bottle is permanently indented because of the reduction of pressure inside:

    Could this be because some of the nitrogen in the bottle has been fixed by soil microbes?

    The carrot seedlings remains alive, but doen’t seem to be growing very much. The taller seedling still has the seed case stuck to the leaves, holding them together and preventing them from opening out. One of the carrot seedlings hasn’t straightened up, I wonder whether this is because it also has it’s leaves stuck to the seed case, which might be stuck to something in the soil. The weeds are looking fine, and the third leaf on each has grown to about half the length of the larger leaves.

    UPDATE 7th February 2018:

    I’m still puzzling over the loss of gas volume inside this bottle described above. I measured the loss of volume by immersing the bottle in a jug and comparing the displacement with a bottle full of air. The difference was about 50cc. So 50cc of gas has either escaped from the bottle, or been used up in some biological or chemical or surface process.

    I believe that both photosynthesis, respiration and nitrogen fixation result in no net change in the number of gas molecules. In photosynthesis CO2 is replaced with O2, in respiration O2 is replaced with CO2. In nitrogen fixation N2 is replaced with H2. Is there some other process happening that I’m not aware of? Is it true that the number of gas molecules is unchanged by these proceses? (My understanding of these things might be oversimplified). 

    I read that gases diffuse through PET slowly over time, so if the partial pressure of a gas is larger inside the bottle than outside, then that gas could leak out, leading to a decrease in the number of molecules of that gas inside the bottle. I guess that H2 would leak quite quickly, so if nitrogen fixation is taking place, and if this is producing H2, then that could be an explanation. But has there been enough nitrogen fixation to produce 50cc of H2?

    I’m fairly sure that the partial pressure of CO2 in the bottle is higher than the outside, so that will slowly diffuse out. But should it really happen that quickly? Even if all the O2 in the bottle were replaced with CO2 (which I don’t believe is the case), then the partial pressure difference of CO2 between inside and outside would be about 0.2 bar. And wouldn’t O2 leak in at the same time that CO2 leaked out? Or does CO2 diffuse...

    Read more »

  • Measuring CO2 levels

    will.stevens01/02/2018 at 23:11 0 comments

    What happens to the mix of gases inside a sealed bottle with a plant growing in it? My current understanding of the gas exchange processes that take place inside the bottle is as follows:

    Microbes in the soil consume dead organic material in the soil. They use oxygen from the air and produce CO2 and water from the organic material.

    Some microbes in the soil fix nitrogen from the air - I don’t know much about this yet, and don’t know whether nitrogen levels in the air will be a factor that I need to consider over the timescales that I’m interested in (months).

    During photosynthesis, plants in the bottle (moss and the carrot seedlings), take CO2 from the air and release oxygen (this also uses up water). The plants also respire - taking in oxygen and releasing CO2 and water. But so long as the plant is growing the net effect is to remove CO2 from the air and produce oxygen.

    In the log entry “First Attempt” I noted that nothing germinated in two bottles that I set up at the beginning of November, and all weeds that sprouted subsequently died. I wondered whether this was due to the soil producing more CO2 than the plants could consume. 

    I used an MHZ-14A CO2 sensor to measure the CO2 in one of the bottles described in the “First Attempt” log entry. Although this meant removing the cap of the bottle in order to attach the sensor, I thought that not much CO2 would escape when I did this. 

    The MHZ-14A seems easy to use. The one that I ordered didn’t come with documentation, but I found some here and here. It has a UART with 5V TTL compatible IO, and has a command for directly returning the CO2 level in parts-per-million (ppm), so it is straightforward to hook it up to a laptop and display the CO2 level on the screen.

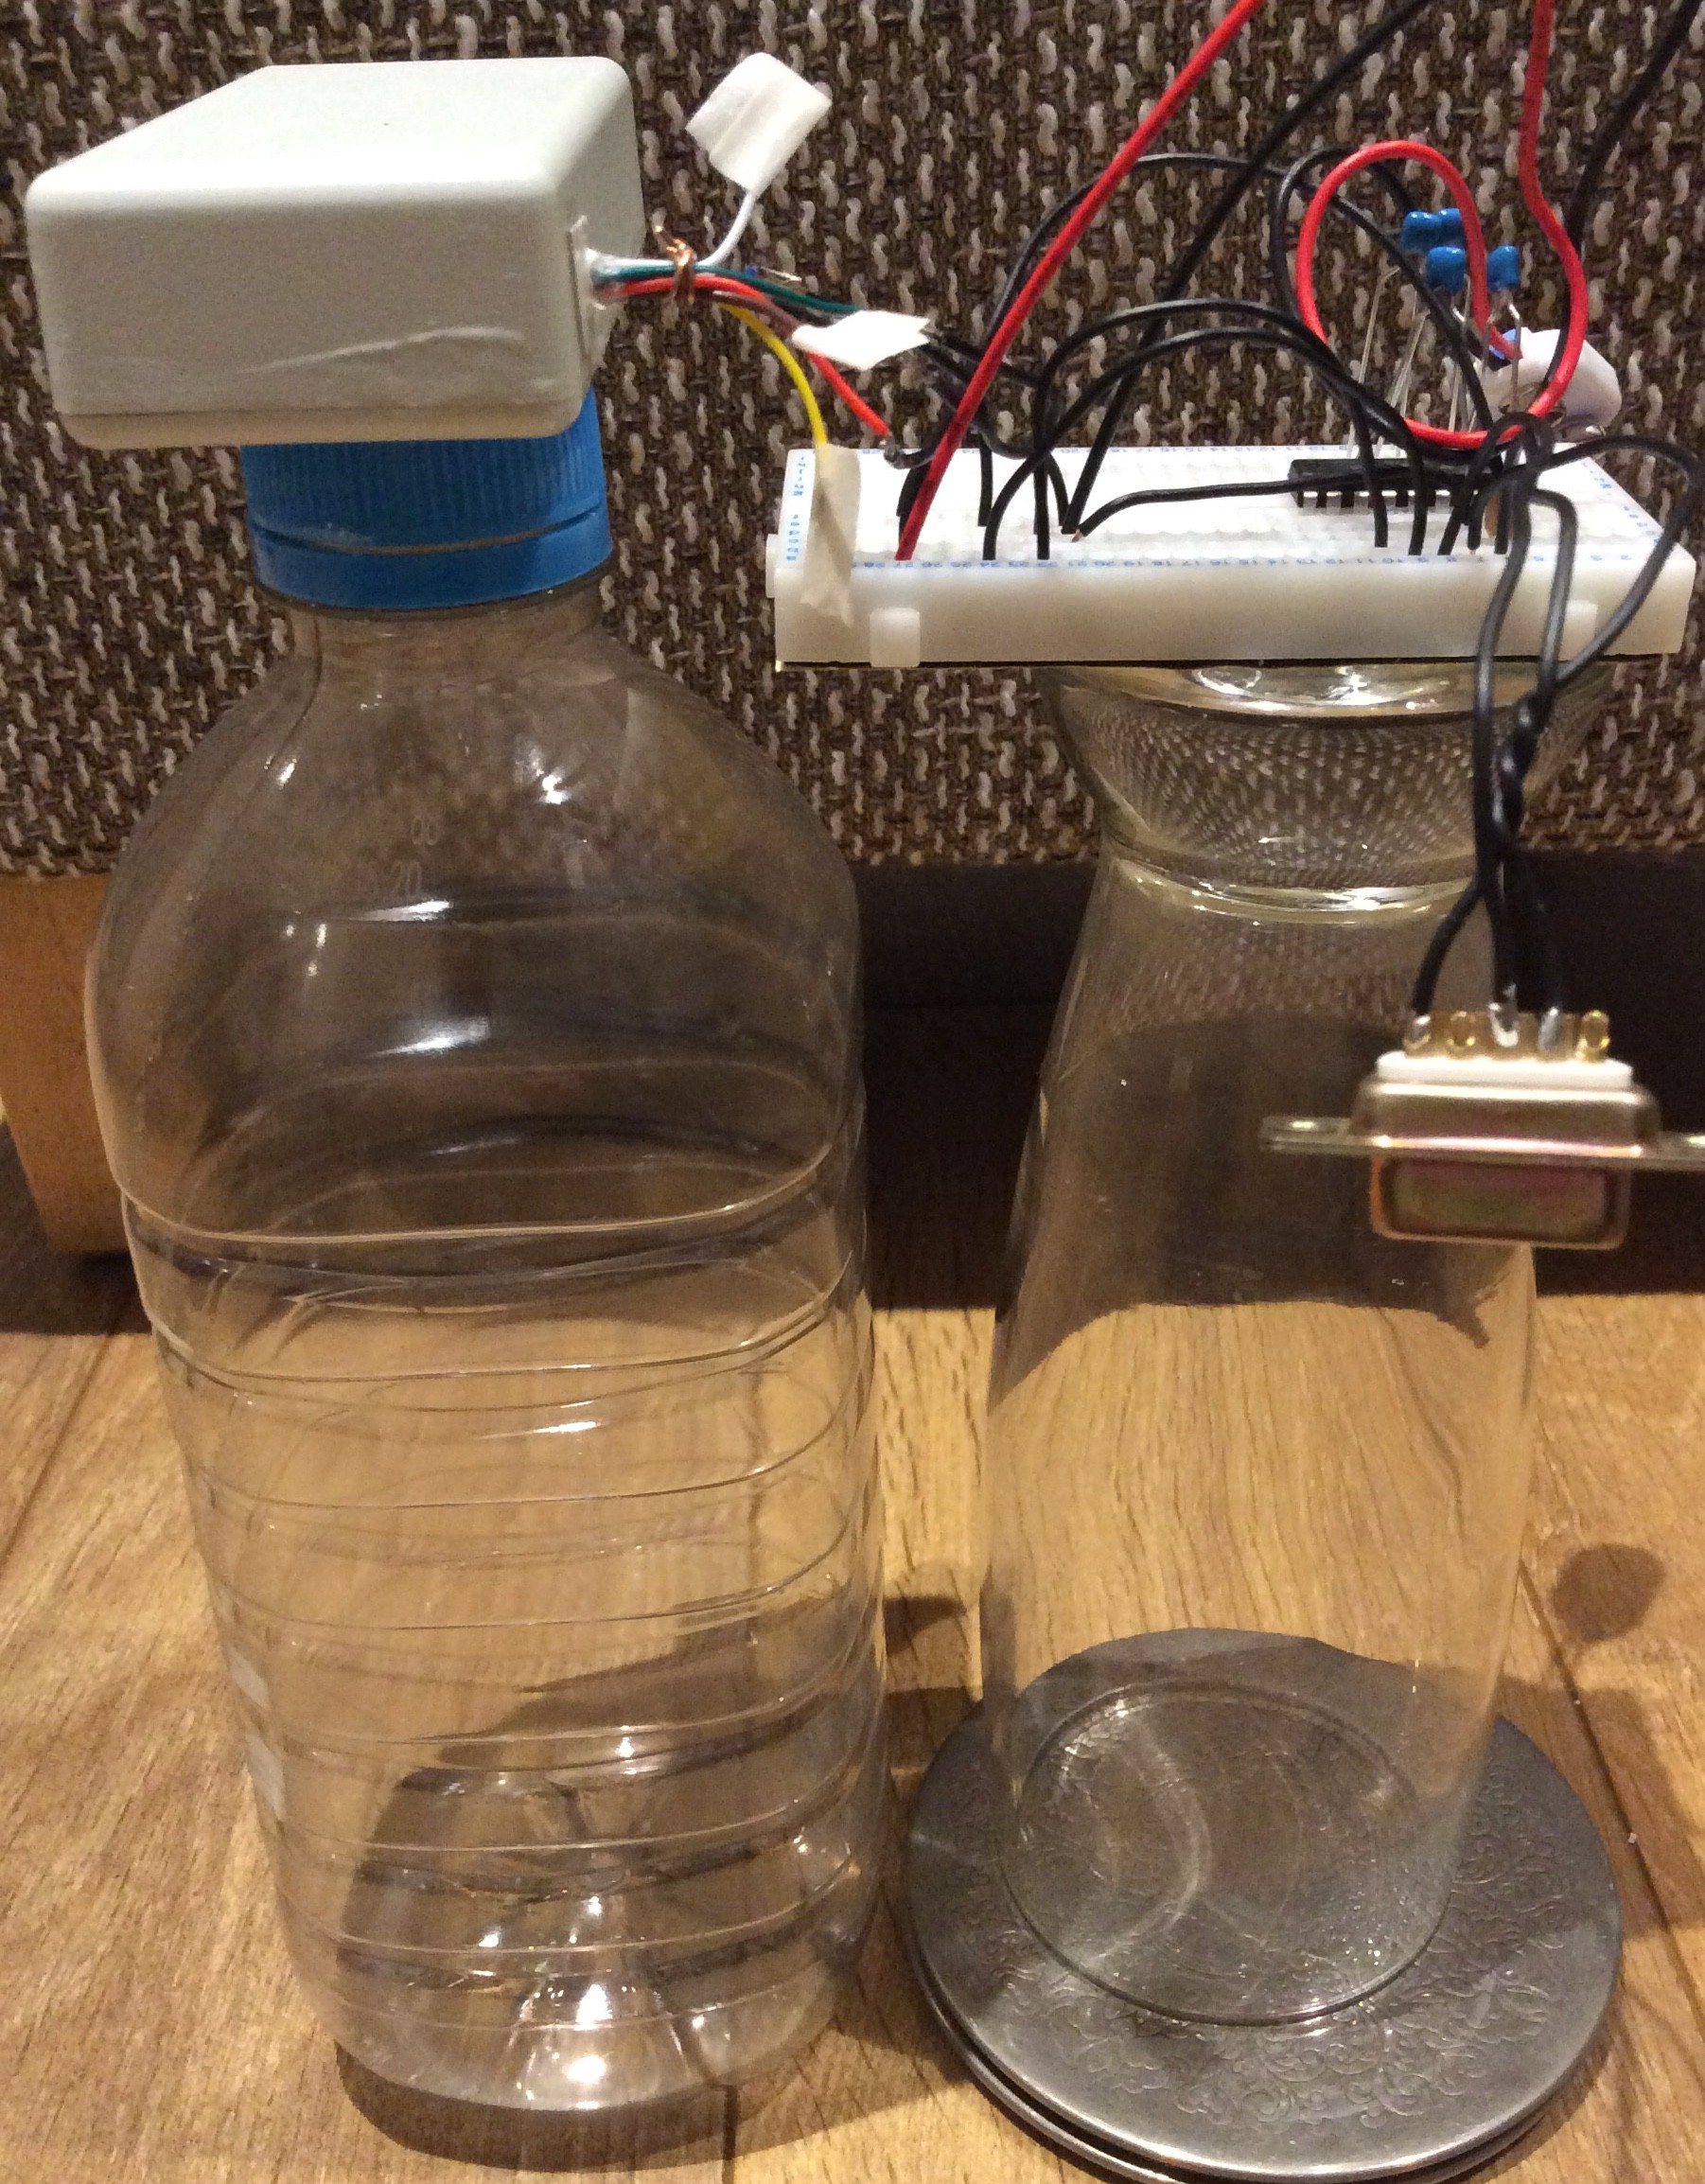
    I have the sensor mounted in an enclosure with a bottle lid glued onto it so that I can easily screw it onto the top of a bottle to check the CO2 level in the bottle. The photos below shows the sensor and its enclosure, and the sensor attached to a bottle (with a MAX232 circuit attached so that it can be connected to a laptop).

    I noticed that the CO2 level in my room was 1300ppm. When I opened the door to let in fresh air it went down to 750ppm in about 15 minutes. When I breathed into a bottle and attached the CO2 sensor it reported 5000ppm, indicating that the concentration was at or above the measurable range. I haven’t calibrated the sensors, but these levels seem reasonable.

    The CO2 reading in one of the bottles described in the “First Attempt” log entry was greater than or equal to 5000ppm, so this is perhaps the reason why everything died.

    How can CO2 production from the soil be slowed down? One way is to use less soil, another is to put enough plants in the bottle to absorb the CO2 produced, another strategy that might work is to limit the amount of water - perhaps drier soil will release less CO2. Limiting the water might not hamper plant growth because more water will be produced (from organic matter) by soil microbes at the same time that they produce CO2.

View all 12 project logs

Enjoy this project?

Share

Discussions

syedsaeedhussain913 wrote 03/16/2024 at 15:54 point

Growing vegetables in sealed containers is a convenient and efficient way to produce fresh produce, especially in urban or space-restricted areas. With the right containers, soil, and suitable vegetables, you can cultivate a variety of crops such as tomatoes, lettuce, peppers, and herbs. Regular monitoring of water, light, and nutrients ensures healthy growth, while minimal pest and disease risks make sealed container gardening an attractive option for home growers. Harvesting your own homegrown vegetables from sealed containers is a rewarding experience that provides a sustainable source of fresh, nutritious produce.wabpage you can see https://soilsculptor.com/spike-plants/

  Are you sure? yes | no

brinston wrote 03/22/2018 at 19:54 point

I love grow chambers and a single carrot grow pod is truly charming.

Now I'm super new and my actual technology skills are fairly raw however I can tell you are never going to get an actual carrot tuber with straw hat LEDs. Inadequate lighting is thee most common oversight I see on grow chambers. You're going to need something much beefier and its going to chafe against your desire for efficiency I suspect.  You're trying to replace the sun and carrots are a full sun plant. Most plants will germinate and do okay under low light conditions for a little while but you won't get a mature plant. This is especially true if you're trying to get an actual carrot which is a carbohydrate (direct by product of photosynthesis) storage organ. Not enough light for photosynthesis = not enough carbohydrates to store.

A very basic overview of light requirements for plants can be found here:
http://www.hort.vt.edu/ghvegetables/documents/GH%20Lighting/Light%20in%20the%20Greenhouse_JBrown.pdf

Something a bit more complex here:
https://www.ncbi.nlm.nih.gov/pmc/articles/PMC3949401/

For those who don't have the time to read those links. Although efficiencies can be had by just using specific colours of LEDs that correspond to the peak adsorption spectra of chlorophyl A & B you still have to hit them with enough photons to drive photosynthesis. Straw hats just don't have enough. Also it should be said that all though those other wavelengths of light that aren't the peak absorbance spectra for chlorophyl A & B can still be utilized for either photosynthesis by way of accessory pigments or for information about the surrounding environment (the proportion of red light relative to far red light reaching a plant on of the ways how they sense if they are being shaded by another plant).  See:

https://www.ncbi.nlm.nih.gov/pmc/articles/PMC4407068/

So by excluding other spectra of light you will still get growth but you can end up with a biochemically different end product. This isn't necessarily a bad thing and could actually be used to produce things like lettuces that are enriched for certain vitamins or nutrients simply by growing them under different lighting regimes. See:
https://www.ncbi.nlm.nih.gov/pubmed/?term=Sequential+light+programs+to+affect+kale+sprout+appearance

LEDGardner has a really solid write up on quantifying light in a way that makes sense for plants. Unfortunately most commonly used units for quantifying light (lumens, lus, footcandles, etc) are biased towards human colour perception (we see a lot green very well and most of us don't see UV at all) and/or don't quantify actual photon density). See:
http://ledgardener.com/lumens-par-ppf-and-ppfd-measuring-cob-grow-light-output/

Additionally LEDGardner has lots of helpful guides on how build yourself punchier growlight:
http://ledgardener.com/diy-guides/

Hopefully my info dump is both helpful and not discouraging. Its an opportunity to build a dope as growlight.

  Are you sure? yes | no

will.stevens wrote 04/09/2018 at 21:47 point

Thanks, this is really useful. LED gardener was interesting. I wasn’t sure how efficient the LEDs I am using are (CREE 503B-RCS 630nm), because the data sheet doesn’t list it. I’ve just tried to estimate it from the data given and I think it’s about 10%. I think the PPFD that I’m getting is about 50 micromol/m2/sec, which is a factor of 10 less than what I need. When I work it out backwards, starting from the energy in a small 5g carrot (about 8000J) and assuming the plant can convert 1% of the available light energy in the bottle into chemical energy (probably an overestimate), then it would take 400 days to produce a carrot!

Also came across this, which had useful information:

https://horticulture.ahdb.org.uk/sites/default/files/u3089/Lighting_The-principles.pdf

  Are you sure? yes | no

ERKSOME wrote 01/26/2018 at 01:35 point

I love this project!  Thank for the interesting data and exploration.

One thing: I think that the Thriving Bottle Garden thing is slightly misleading.  Sure, it hasn't been watered in forever, but that doesn't mean that it's sealed.  In order to create enough biomass, CO2 has to be fixed by the growing plants inside.  It may be that all the CO2 came from soil respiration or some critters living in the jug, but I suspect that more likely there is a leak allowing some CO2 in.  Even a small leak would allow enough CO2 in for some slow growth but restrict the amount of water loss enough so that it "never" needs water.  

I have built many flow-through gas exchange systems to measure CO2 uptake by growing plants and even the smallest leak has big consequences.  I have also killed plants by suffocation, sealing them in jars and neglecting them -- they do require O2 for their own respiration and can be out-competed during the night by soil microbes who are also respiring.

I'm very curious how you will do -- keep up the good work!

  Are you sure? yes | no

will.stevens wrote 01/28/2018 at 22:30 point

Thanks, I see what you mean about the bottle garden potentially being able to leak gas but not water.

At some point I want to use LEDs for lighting rather than daylight. Perhaps it will be possible to shorten the length of time when the plant is not photosynthesising if overuse of O2 by soil microbes needs to be dealt with. 

  Are you sure? yes | no

ERKSOME wrote 01/28/2018 at 22:59 point

If you can provide 24-hour light, then this may alleviate some of the problem - there will then always be O2 available.  Whether or not there is enough CO2 for net growth will be limited to how much decomposition is going on in the soil.  

LEDs will also be very good for temperature control.  A sealed bottle in a sunny window can heat up enough to kill your plants in a very short amount of time!

  Are you sure? yes | no

Jarrett wrote 01/05/2018 at 01:17 point

Cody of the Cody's Lab Youtube channel tried to do a closed ecosystem using algae and brine shrimp in water. They all died because of not enough biomass - I would guess that you need a pretty delicate balance of plant and microbial matter. You may need a larger container, to give you more of a window to find that balance! Like, one of those 4 gallon cider jars.

I'm following this one closely!

For your gas sensors, you should read up on this project, too:

https://hackaday.io/project/16809-electronic-nose-to-detect-fruit-ripening

The guys goes very deep into calibration and soak-in times and everything.

  Are you sure? yes | no

will.stevens wrote 01/05/2018 at 09:06 point

Thanks, the electronic nose project is interesting. Regarding biomass, I think I probably have a few grams of carbon in total in the 325g of soil that I have in a bottle (I have read about figures of 1%-5% for total organic carbon content in soil). Since a carrot is around 90% water, that should be enough carbon to grow a 10 gram carrot, but only if enough of it gets turned into CO2 by soil microbes. If I get past the stage of the seedlings being killed by excess CO2, then I might eventually reach a point where the growing plant can’t get enough CO2.

  Are you sure? yes | no

RoGeorge wrote 12/19/2017 at 08:41 point

Nice! Like this one?


  Are you sure? yes | no

will.stevens wrote 12/19/2017 at 14:01 point

Yes! That’s the one I heard about. I like that video, I didn’t realise this had been on Gardeners Question Time.

  Are you sure? yes | no

RoGeorge wrote 12/19/2017 at 14:24 point

PET bottles, or any other plastic containers, will not remain flexible and clear for the next 40 years. After a few years, PET bottles became matte and fragile, especially when left in the direct sunlight.

That movie raises big questions to me, like how that the bottle is still crystal clear clean on the inside? I will expect some dirt, or organic material film, to be deposited on the walls after so many ears.

That is why such a project was always on my bucket list.

I will be very curious to see the long term results for your closed terrarium experiment. Good luck!

  Are you sure? yes | no

Morning.Star wrote 12/21/2017 at 06:09 point

When I was at school I was given the task of watering the English teacher's plants in the classroom. The collection contained a bottle garden in a old glass sweet jar, with some Sedum and Transcantia growing in it. It became known as Jeremy's Jumping Jungle as it did so well. I didnt touch the damn thing the entire time so it was unjustified as far as I was concerned.

Being a lot smaller it did get cramped in there, but, the plants dont touch the glass much even with limited space. Any leaves that did lay flat on the glass died back and fell off, plus during the night it would get cold in the classroom, then be heated by the sun through a window. That made a lot of condensation which cleans the inside of the glass. It even washes away the dead leaves that stick over a few days.

I only looked after it for two years, the plants changed shape but rever really grew much, I guess they dont like touching the glass.

  Are you sure? yes | no

Similar Projects

Does this project spark your interest?

Become a member to follow this project and never miss any updates