Close
0%
0%

Long term time lapse

A time lapse setup intended to run off-grid for several months with only infrequent attention needed, eg. for recording building projects

Similar projects worth following
This is a time lapse rig based around a Raspberry Pi which aims to create a time lapse over the course of a five month building project, with the added constraints that no reliable power source would be available during the course of the build, there would be no reliable internet access, and manual interaction would be infrequent and by an unskilled user.

Here are some details of the eventual solution, I may do some updates to discuss other options that I considered, ask if anything in particular is of interest.

As you can see from the pictures, aesthetics of the final project were not a priority! The priority was making sure that the camera remains motionless during the five month project, hence copious use of gaffer tape. It was also a priority that this be as simple to use as possible, as the main user is intelligent but not a tinkerer.

Hardware

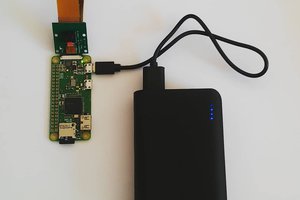
  • Raspberry Pi Model A (the brains, obviously)
  • MoPi power board (avoids SD corruption during loss of power, also wakes the system up at the requested period)
  • Camera
  • USB extension lead
  • Push button switch and extension lead

Camera

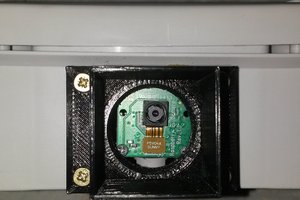
The camera used is the official Raspberry Pi Camera Module that plugs directly into the Raspberry Pi. It is a 5 Megapixel camera which is fully controllable, and had a suitable field of view for this project.

Power

There would be no mains power available to the camera setup, and the camera starts up periodically throughout the day from sunrise to sunset. The simplest solution was chosen, to use a battery consisting of 8xNiMH AA cells to power the RPi via a MoPi board - the user then switches out the battery with a replacement set periodically (approximately weekly).

Case

The product chosen is a pair of cheap Pelican-like cases from china. They were thought to be waterproof enough (it was damp but no expectation of heavy direct rain), and very reasonably priced.

User interface

For power, the user simply replaces the 8 cell battery wholesale, presses a button to notify the camera. There is no explicit success notification here, but this operation was never done independently of data backup.

For photo copying and backup, the user plugs in a USB thumbdrive (a fast model with a flashing LED), and presses a button. This triggers as many images as will fit to be copied to the USB drive. No photos are deleted until the user explicitly requests this (by creating a magic file). Logs are also copied off at the same time.

  • 1 × Raspberry Pi Model A
  • 1 × Raspberry Pi Camera module Comes with cable to connect to Raspberry Pi
  • 1 × DS3231 RTC Temperature compensated RTC, so should hold time much better than cheaper alternatives
  • 1 × MoPi: Mobile Pi Power (with stackable headers) http://shop.pimoroni.com/products/mopi-mobile-pi-power
  • 16 × AA NiMh rechargeable batteries 2 sets of 8; highest capacity possible (other batteries could be used - eg. 2x18650 Li-ion)

View all 10 components

  • Status: finished; partial success

    stoduk11/16/2015 at 13:35 0 comments

    This project was definitely a success, albeit not a total success. This biggest weak point was, as I expected, the user. There were other weak points though, so I'll document those here in case that helps others.

    These are roughly in date order

    Failures seen

    Intermittent power loss

    Some early problems were hit which were a bit odd, but the root cause was simply that the 8xAA cell holder had some really limp springs to hold the cells in place. Even gravity could cause the cells to lose their connection, and if any knock happened it would almost certainly cause an interruption.

    I never came up with a proper fix for this, but stretching the springs out periodically seemed to help. The real solution would just be a better cell holder, either with stiffer springs, or a better design. Sadly all the cell holders I could find (from ebay, Maplin, RS, etc.) all seemed to be the same poorly made item.

    Logging problems

    The script would logrotate at the beginning of running, then half way through it would copy the latest logs to USB drive, if present. This meant we could often end up with only a log for today (due to logrotate) and not a log for a full run (due to copying part way through the script). The easiest fix here would be to also copy off the rotated syslog files, but at no point did I hit a serious enough problem that I needed to fix that (which required updating the scripts, which was non-trivial).

    User failure

    The unit eventually died due to "fatal" problem. The fatal problem? Both sets of batteries died (the main power and the RTC backup battery), so things got a bit confused. Changing both sets of batteries would have fixed that.

    Doh!

    This is why making everything as idiot proof as possible is ideal, and remember that an idiot will always find a new way to be stupid that you didn't think of!

    System inaccessibility

    The top system box contained the RPi, the camera, the RTC, and extension leads running to the other box. This box was very firmly gaffer taped to a tree, to try to avoid any movement causing glitches in the time lapse output.

    To update the scripts required getting access to the RPi which I could do with a USB ethernet or WiFi dongle. Sometimes though accessing the RPi itself could have just made things quicker.
    To update the RTC backup cell would have definitely required opening the box, which would have risked disturbing the images. The lithium cell should have lasted long enough, but something cause premature death - maybe it was a cheap cell, or maybe the temperature fluctuations outside had a negative impact on life.
    Feedback to user
    The only feedback to the user when changing USB drive or batteries was the "accessing" LED on the USB drive. Good enough when everything worked, but not so good when things didn't work.
    To fix this would require better logging, or some sort of output indicating what problem had been hit - but to find something that was both low power and reliable was a challenge I didn't have time to fix. As with choosing the main power (where solar recharging would have been handy to reduce the number of site visits), I chose simplicity over everything else and that is a compromise.
    Sunlight
    We had problems early on with sunlight causing flare in images. Our attempts to make a makeshift lens hood caused more problems than they solved though, so in the end we intended to discard the few images a day that had the problem.

    Future improvement

    • Logging improvements, to at least beef up what feedback we had
    • Find a way to fix the camera securely but still providing access when needed. Alternatively: move everything to the second box or accessible from the second box.
    • Create a decent lens hood. 3D printing might be needed unless we can find something that already exists that exactly matches the field of view the camera requires.
    • solar charging of the main batteries would have been a massive improvement in one respect - as then if the user couldn't get on site things should keep running if all else was well (it obviously would mean...
    Read more »

View project log

Enjoy this project?

Share

Discussions

Similar Projects

Does this project spark your interest?

Become a member to follow this project and never miss any updates