In my initial research, before I even had a design in mind (beyond the idea of a machine that would sort M&Ms), I quickly discovered the biggest problem would be reliably extracting a single M&M from a random pile of them. Determining the color and moving a single M&M around the machine were relatively easy, but getting that single M&M in the first place, consistently, was a bear, and that's what took the better part of 10 years (not of constant work, fortunately; months would go by without me even thinking about it).
While it might be instructive to others to review all the dead ends I pursued, it would just be too depressing for me, plus it would take up more space than describing the finished piece. Suffice it to say that many of the approaches I pursued failed because any approach that subjected an M&M to shear forces would, sooner or later, lead to an M&M jammed in the mechanism, something like this:
As the years passed, M&M sorting kind of became a thing on the Internet and you now can find a number of videos on Youtube and elsewhere (including Hackaday) of machines happily sorting M&Ms. Curiously, a number of these machines use variants of mechanisms I’ve investigated and discarded due to unreliability. So, I contacted the builders of several of them to ask how they got them to work so well in their videos. The answer, consistently, was, “editing.” Now, my stuff needs to be reliable, not just because I like it that way, but, hopefully, someone buys it and puts it in their home or office where I’ll neither be able nor inclined to service it. Plus, they’ve paid good money for it and expect it to work longer than it takes to demonstrate a one-off for a final exam. Back to the drawing board.
Then, in 2017, during one of my periodic breaks from thinking about sorting M&Ms, I came across this post on Hackaday. That disk with the holes in it started me thinking about a similar approach for extracting M&Ms. I quickly built a proof a concept, and it worked:
I was off and running. Over the years, I’d given a lot of thought to various designs for the rest of the piece, so I was able to quickly settle on this:
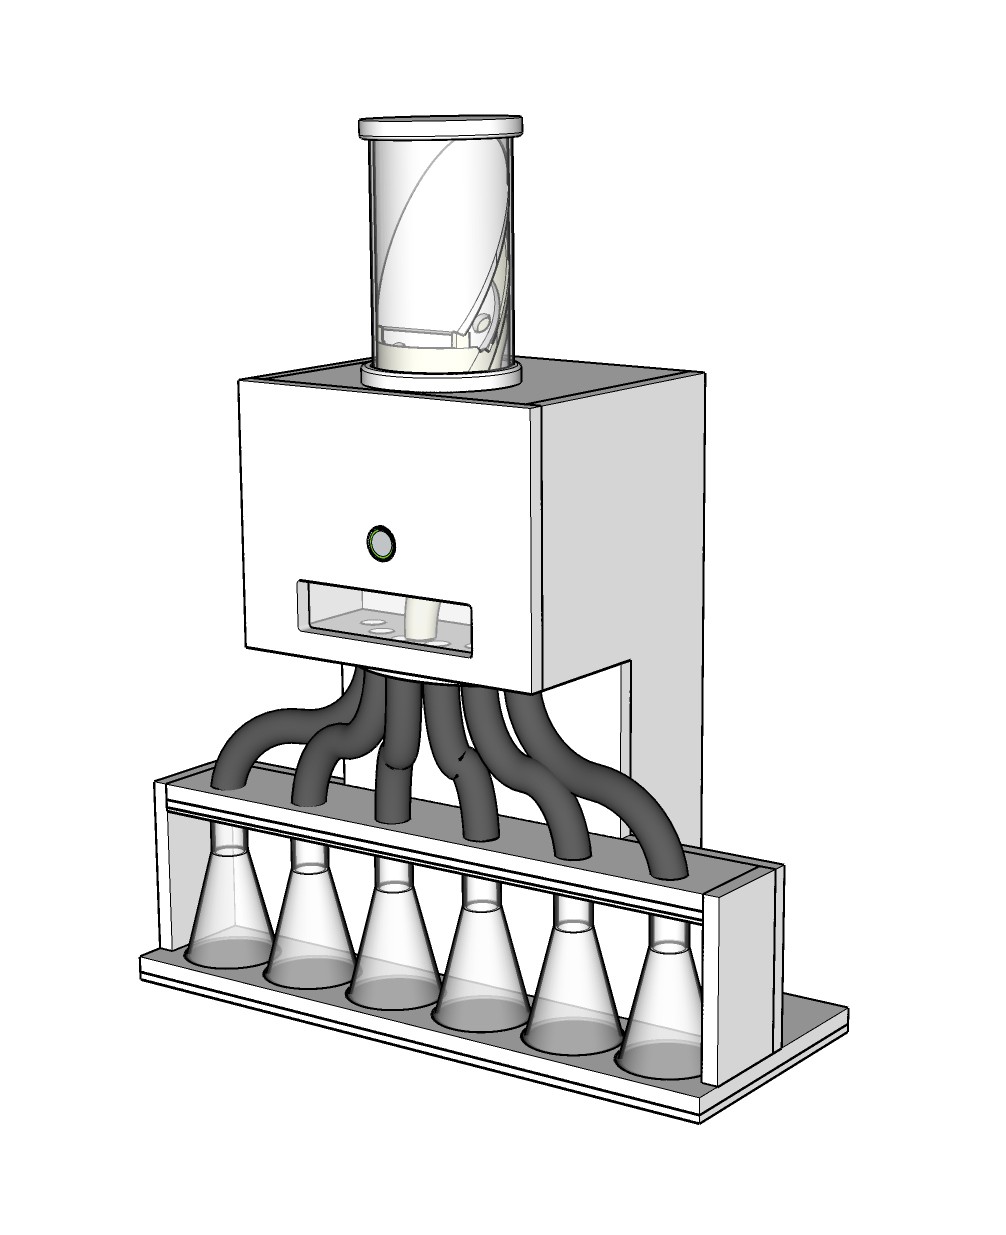
The piece is made primarily out of .5" MDF, cut on a radial arm saw and by hand, with some details CNC'd. You can see around the flasks I've used some .25" and .125" MDF laminations. None of the part lines are visible in the completed piece thanks to surface prep and paint. The opening beneath the pushbutton has a .063" piece of clear acrylic behind it to keep the machine's interior somewhat sealed.
The M&Ms start in a cylindrical hopper on top of the machine and are gravity fed to a version of the disk shown in the previous video. You can just see the disk underneath an oval plate which keeps the bulk of them off the disk. The plate and the disk attach to this 3D printed piece:
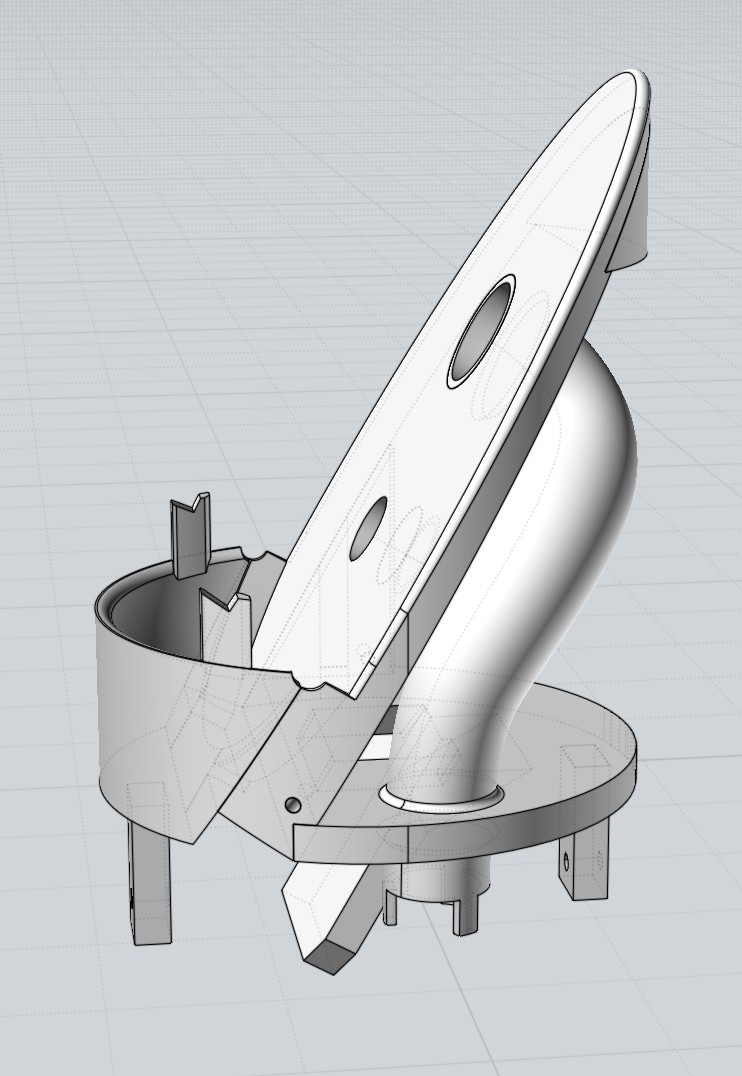
The disk is attached to a rotating shaft that passes through a bushing pressed into the lower of the two large holes you see above. It's turned by a Pololu #1200 5V stepper. When a hole in the disk aligns with the upper hole, the M&M falls out and into the tube you see bending down. The M&M comes to rest on top of a color sensor (an Adafruit TCS34725) which is housed in an acrylic frame attached to a servo:
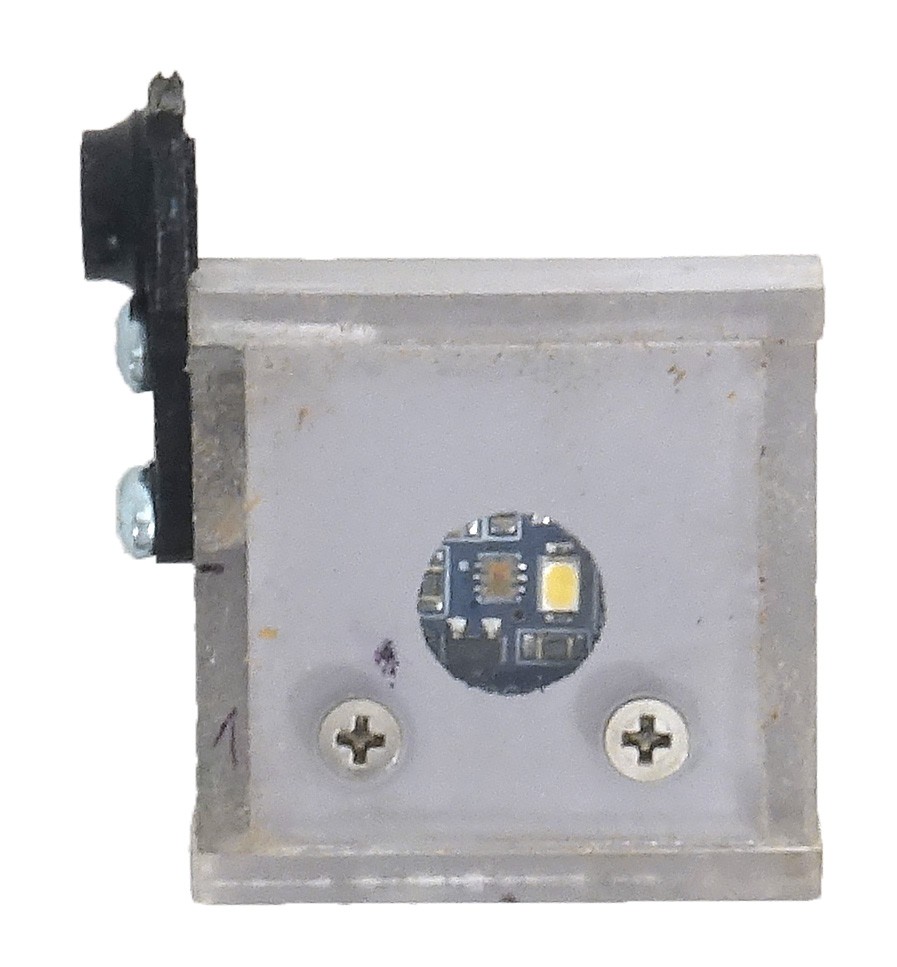
The color is determined by an Adafruit Pro Trinket - 5V (which controls the whole piece, btw). The S-shaped tube in the render below is rotated by another servo so it's aligned with the hole corresponding to the color:
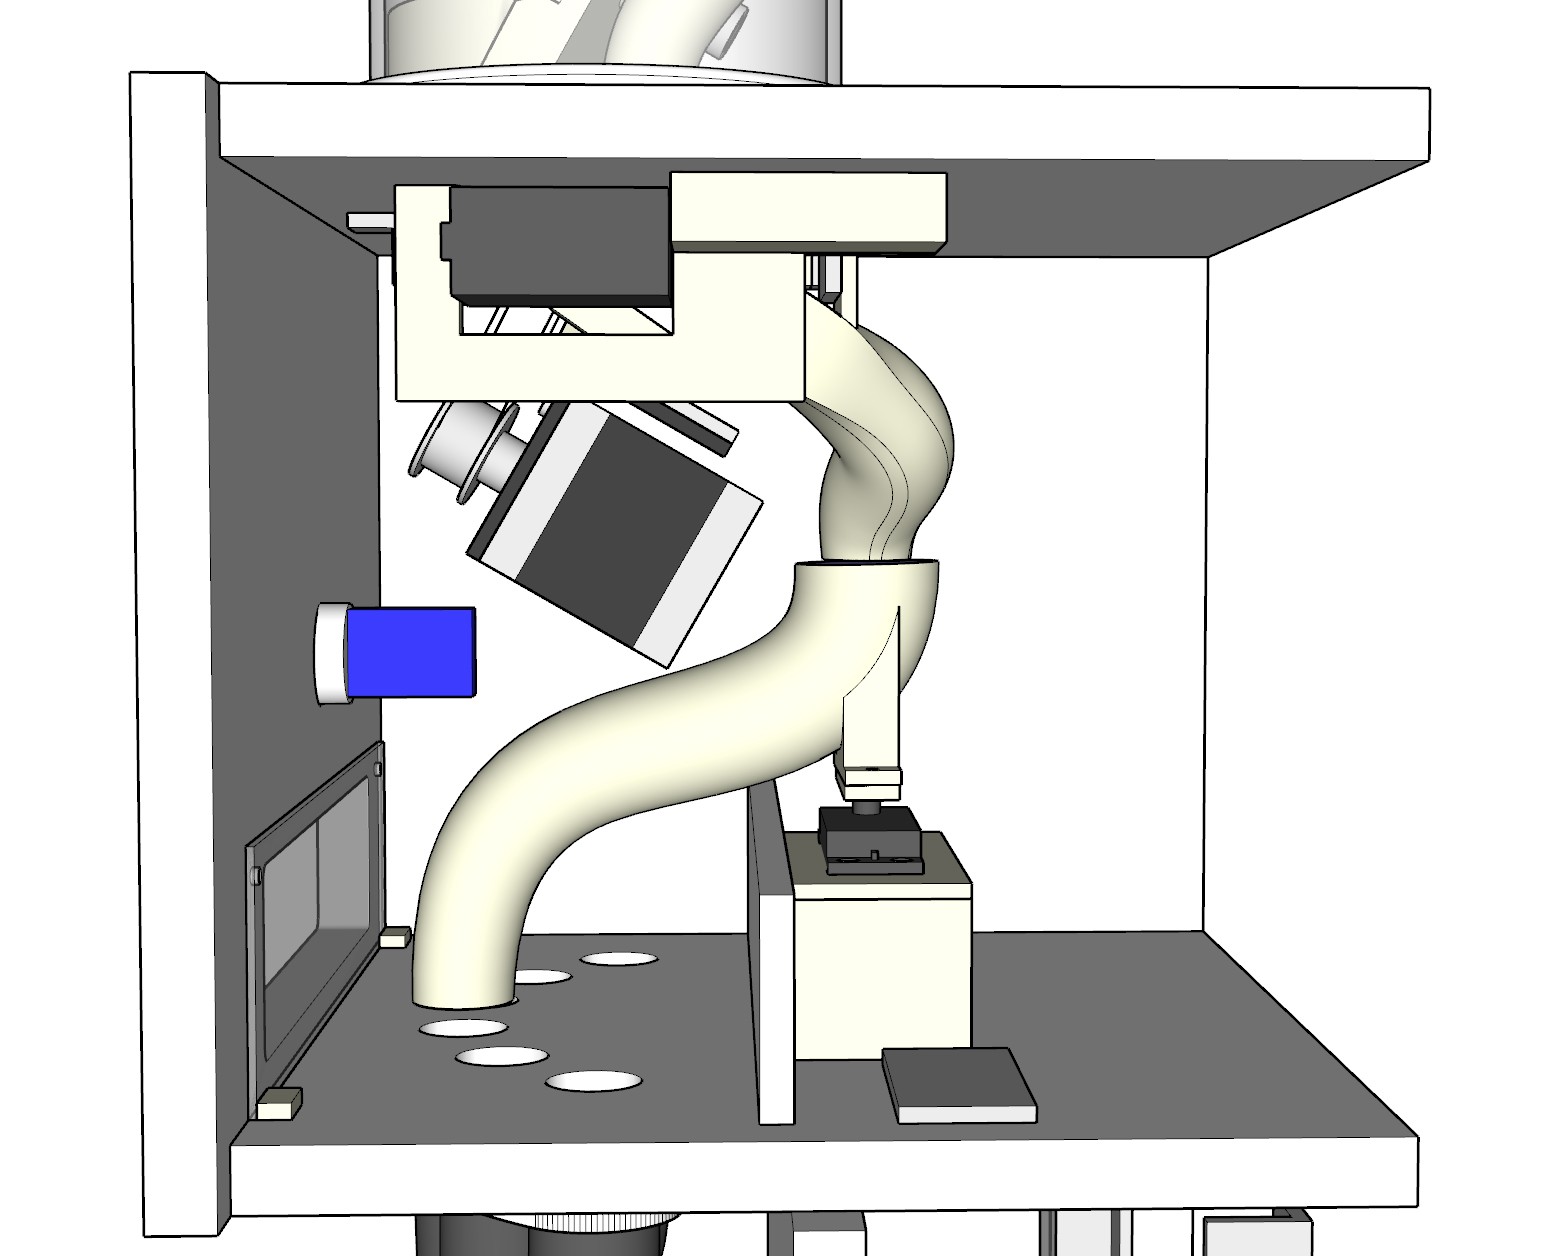
The first servo rotates the color sensor down, dumping the M&M into the oddly-shaped tube you see running between the upper servo (which is the one I'm calling "first") and the S-shaped tube, and the M&M falls into its corresponding Erlenmeyer flask. Here's a clip of...
Read more » Involute


 zittware
 Douglas Miller
 Kate Reed
Thanks. The approach you suggest might work. I considered it, but decided not to investigate it further because:
1. The sensor has a very narrow field of view. So, to get the most reliable reading, the M&M has to sit flat against it. As the M&Ms ride around on the disk, however, they're not always flat against the plate behind the disk; sometimes they even fall out, back onto the pile, to get picked up again later. This will always be the case, to a greater or lesser degree, for a disk that isn't horizontal. So, since the sensor would be in the plane of the backing plate, I wouldn't consistently get readings that were as reliable as if it were horizontal, allowing gravity to make the M&M sit flat against it. Would the readings still be reliable enough? Possibly, but at the time I was thinking through the design, I was trying to come up with an approach that was most likely to succeed on the first try, not exhaustively explore every conceivable route. A horizontal disk solves this problem (which is why I pursued it first), but introduces another, as you can see in the first video in the post.
2. Things are pretty tight in the cylinder containing the disk and the M&Ms. Even if I could fit the sensor AND its motion control stuff behind the disk, I'd still need the tube to send the M&M to the distributor tube that rotates back and forth lower in the machine. Putting the sensor at the top of the tube creates a packaging problem I don't have if I put it at the bottom, where there's a lot more space. I don't see what's to be gained by trying to put the sensor up top.