 John117
-
1Step 1
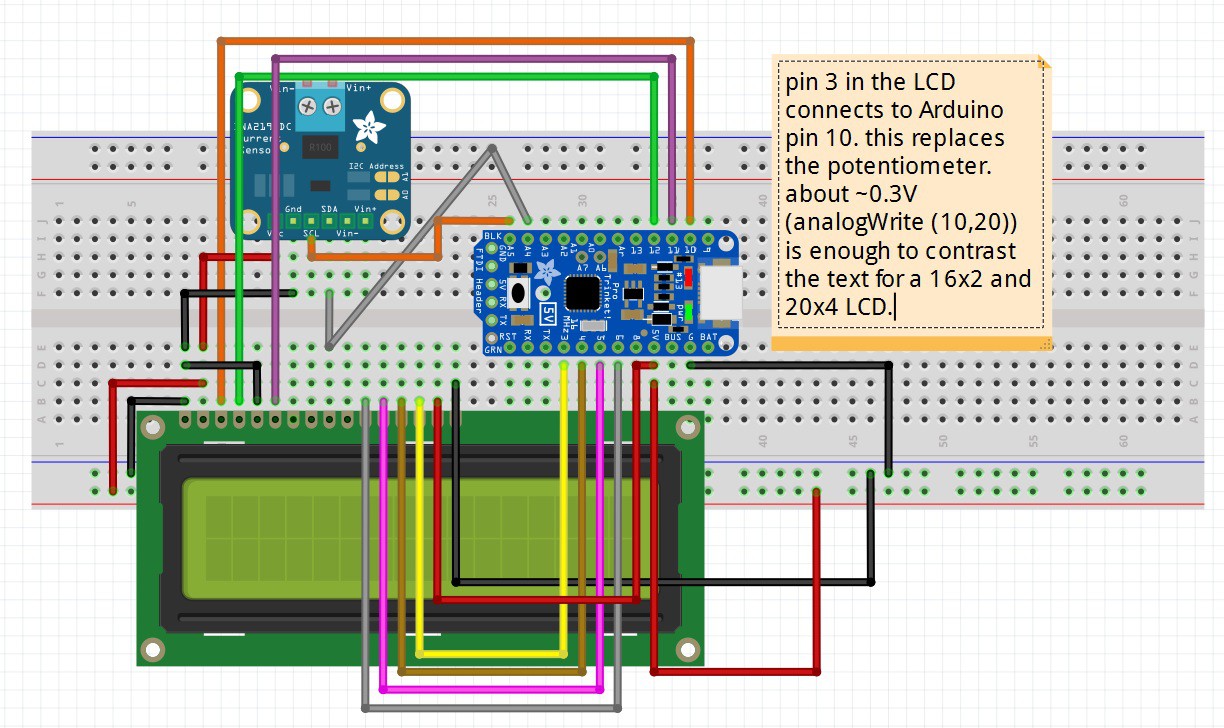
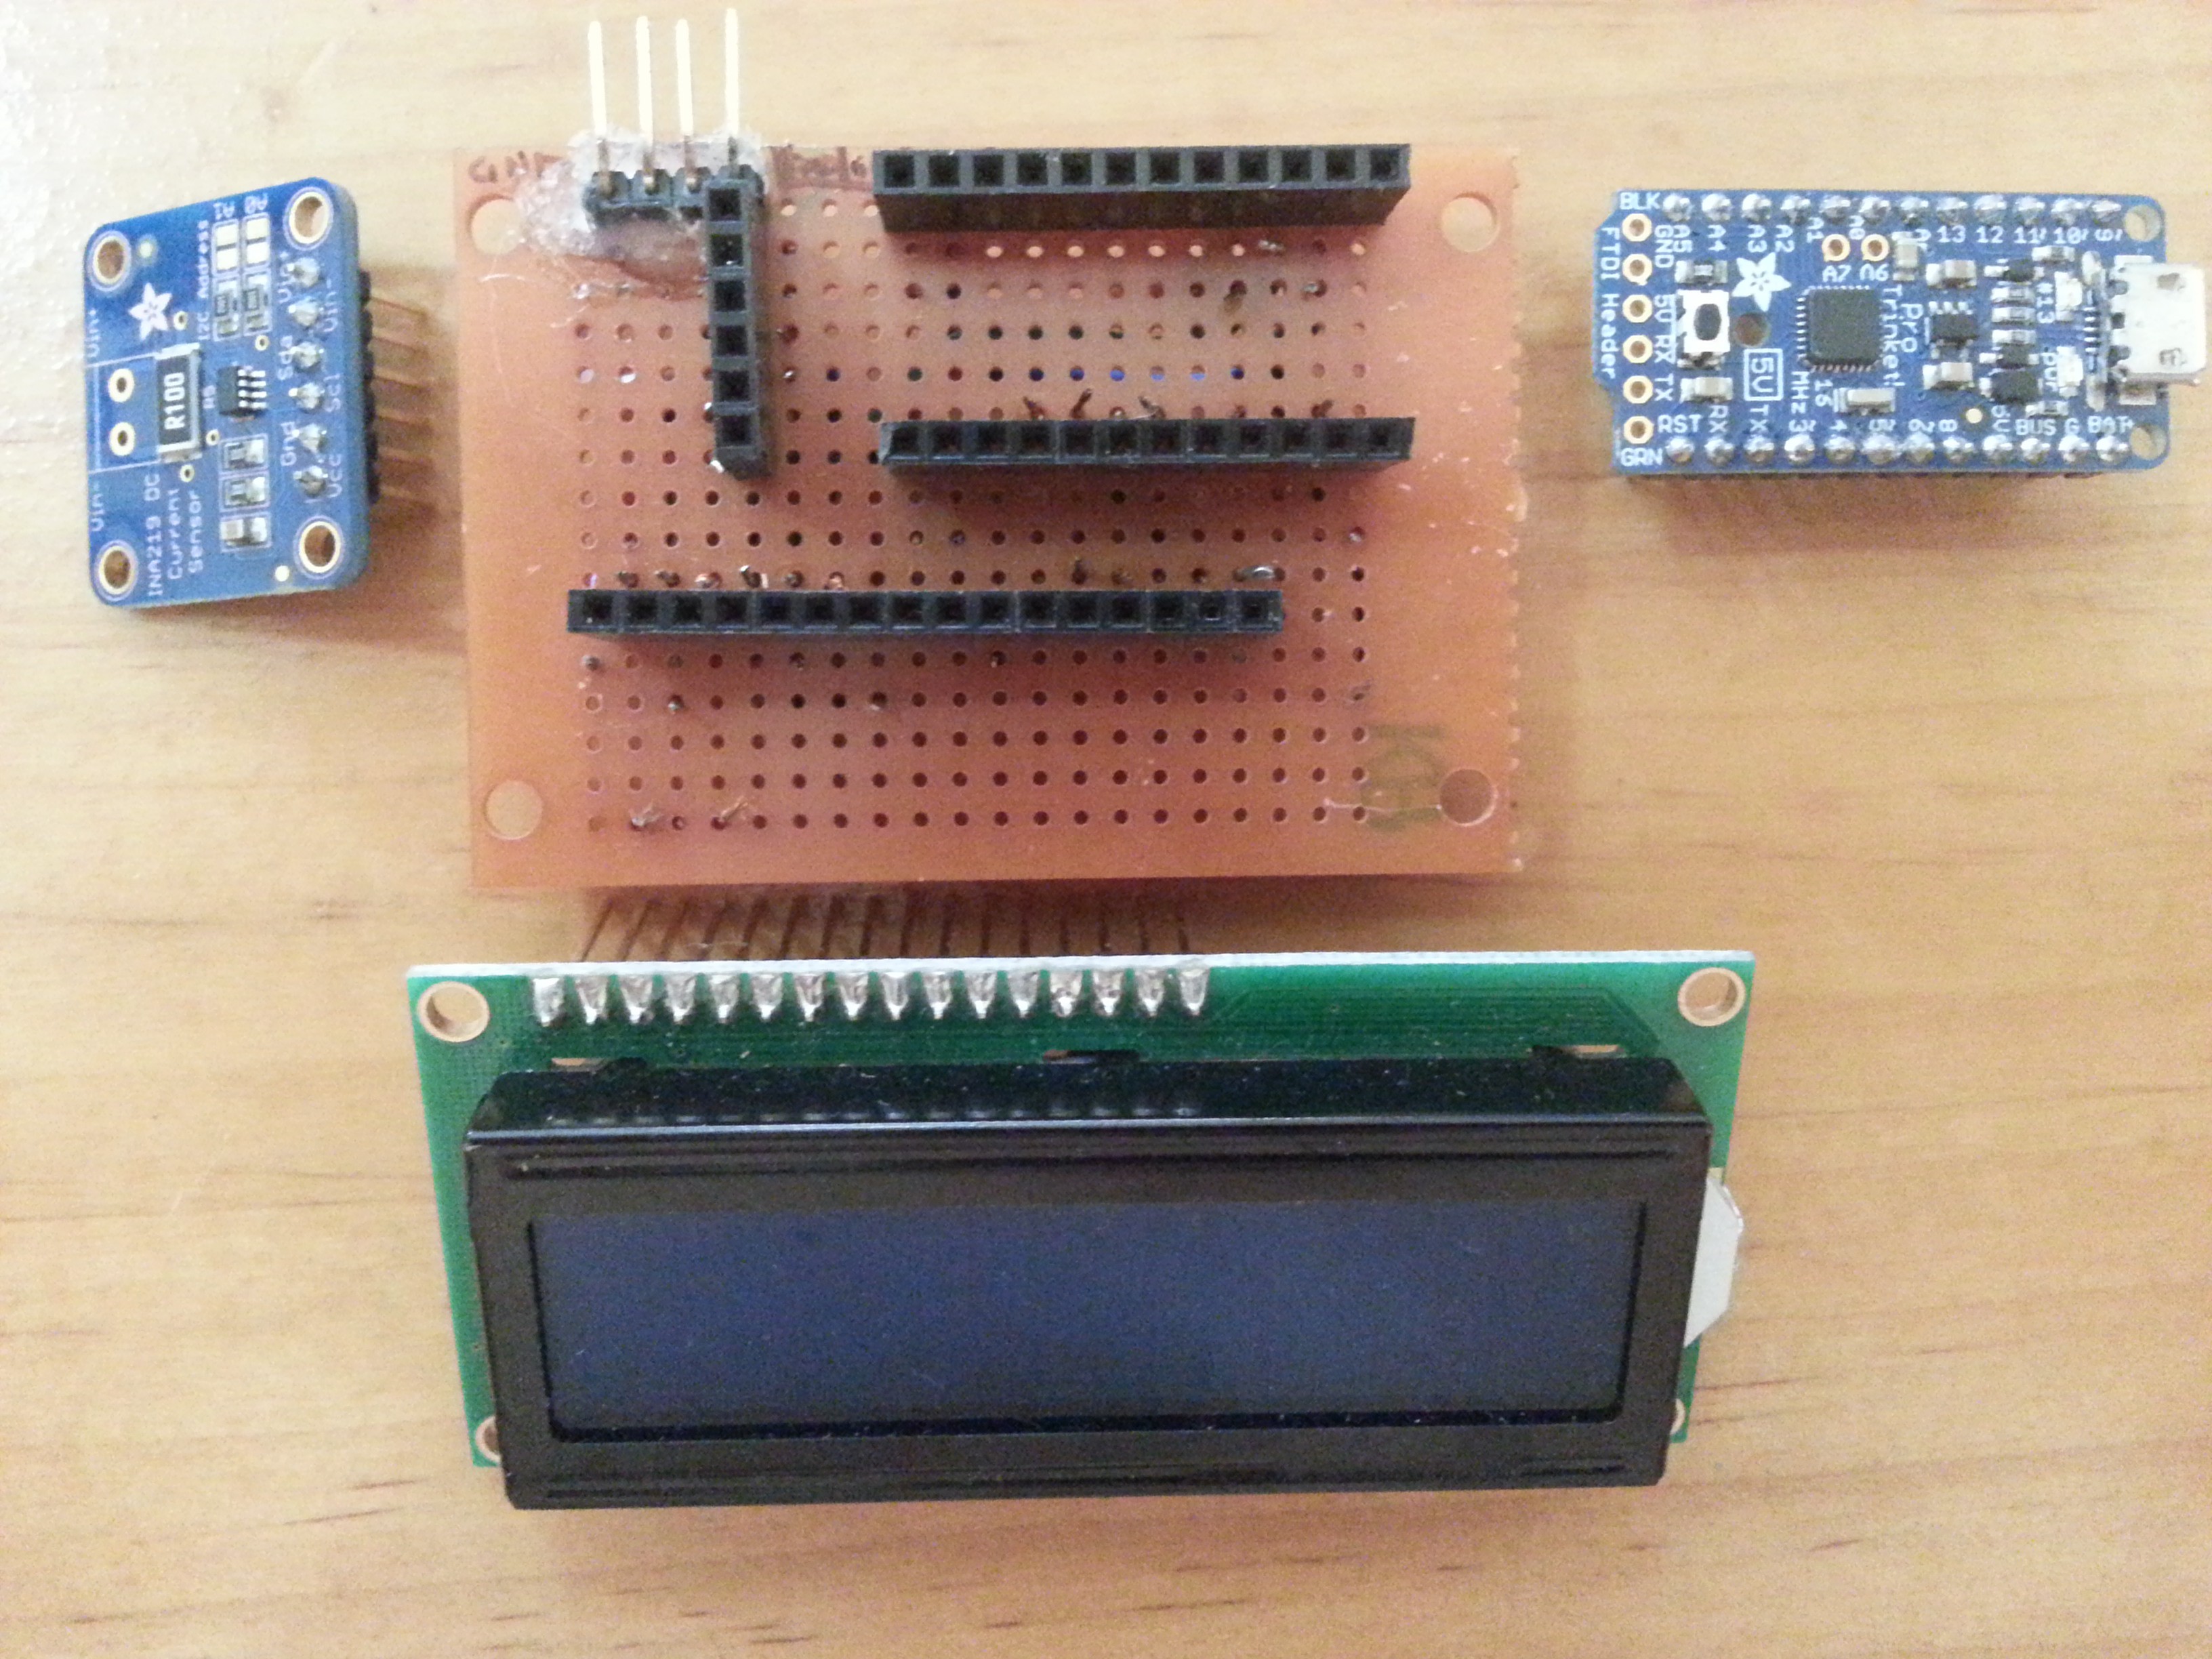
Wiring up everything in a breadboard.
![]()
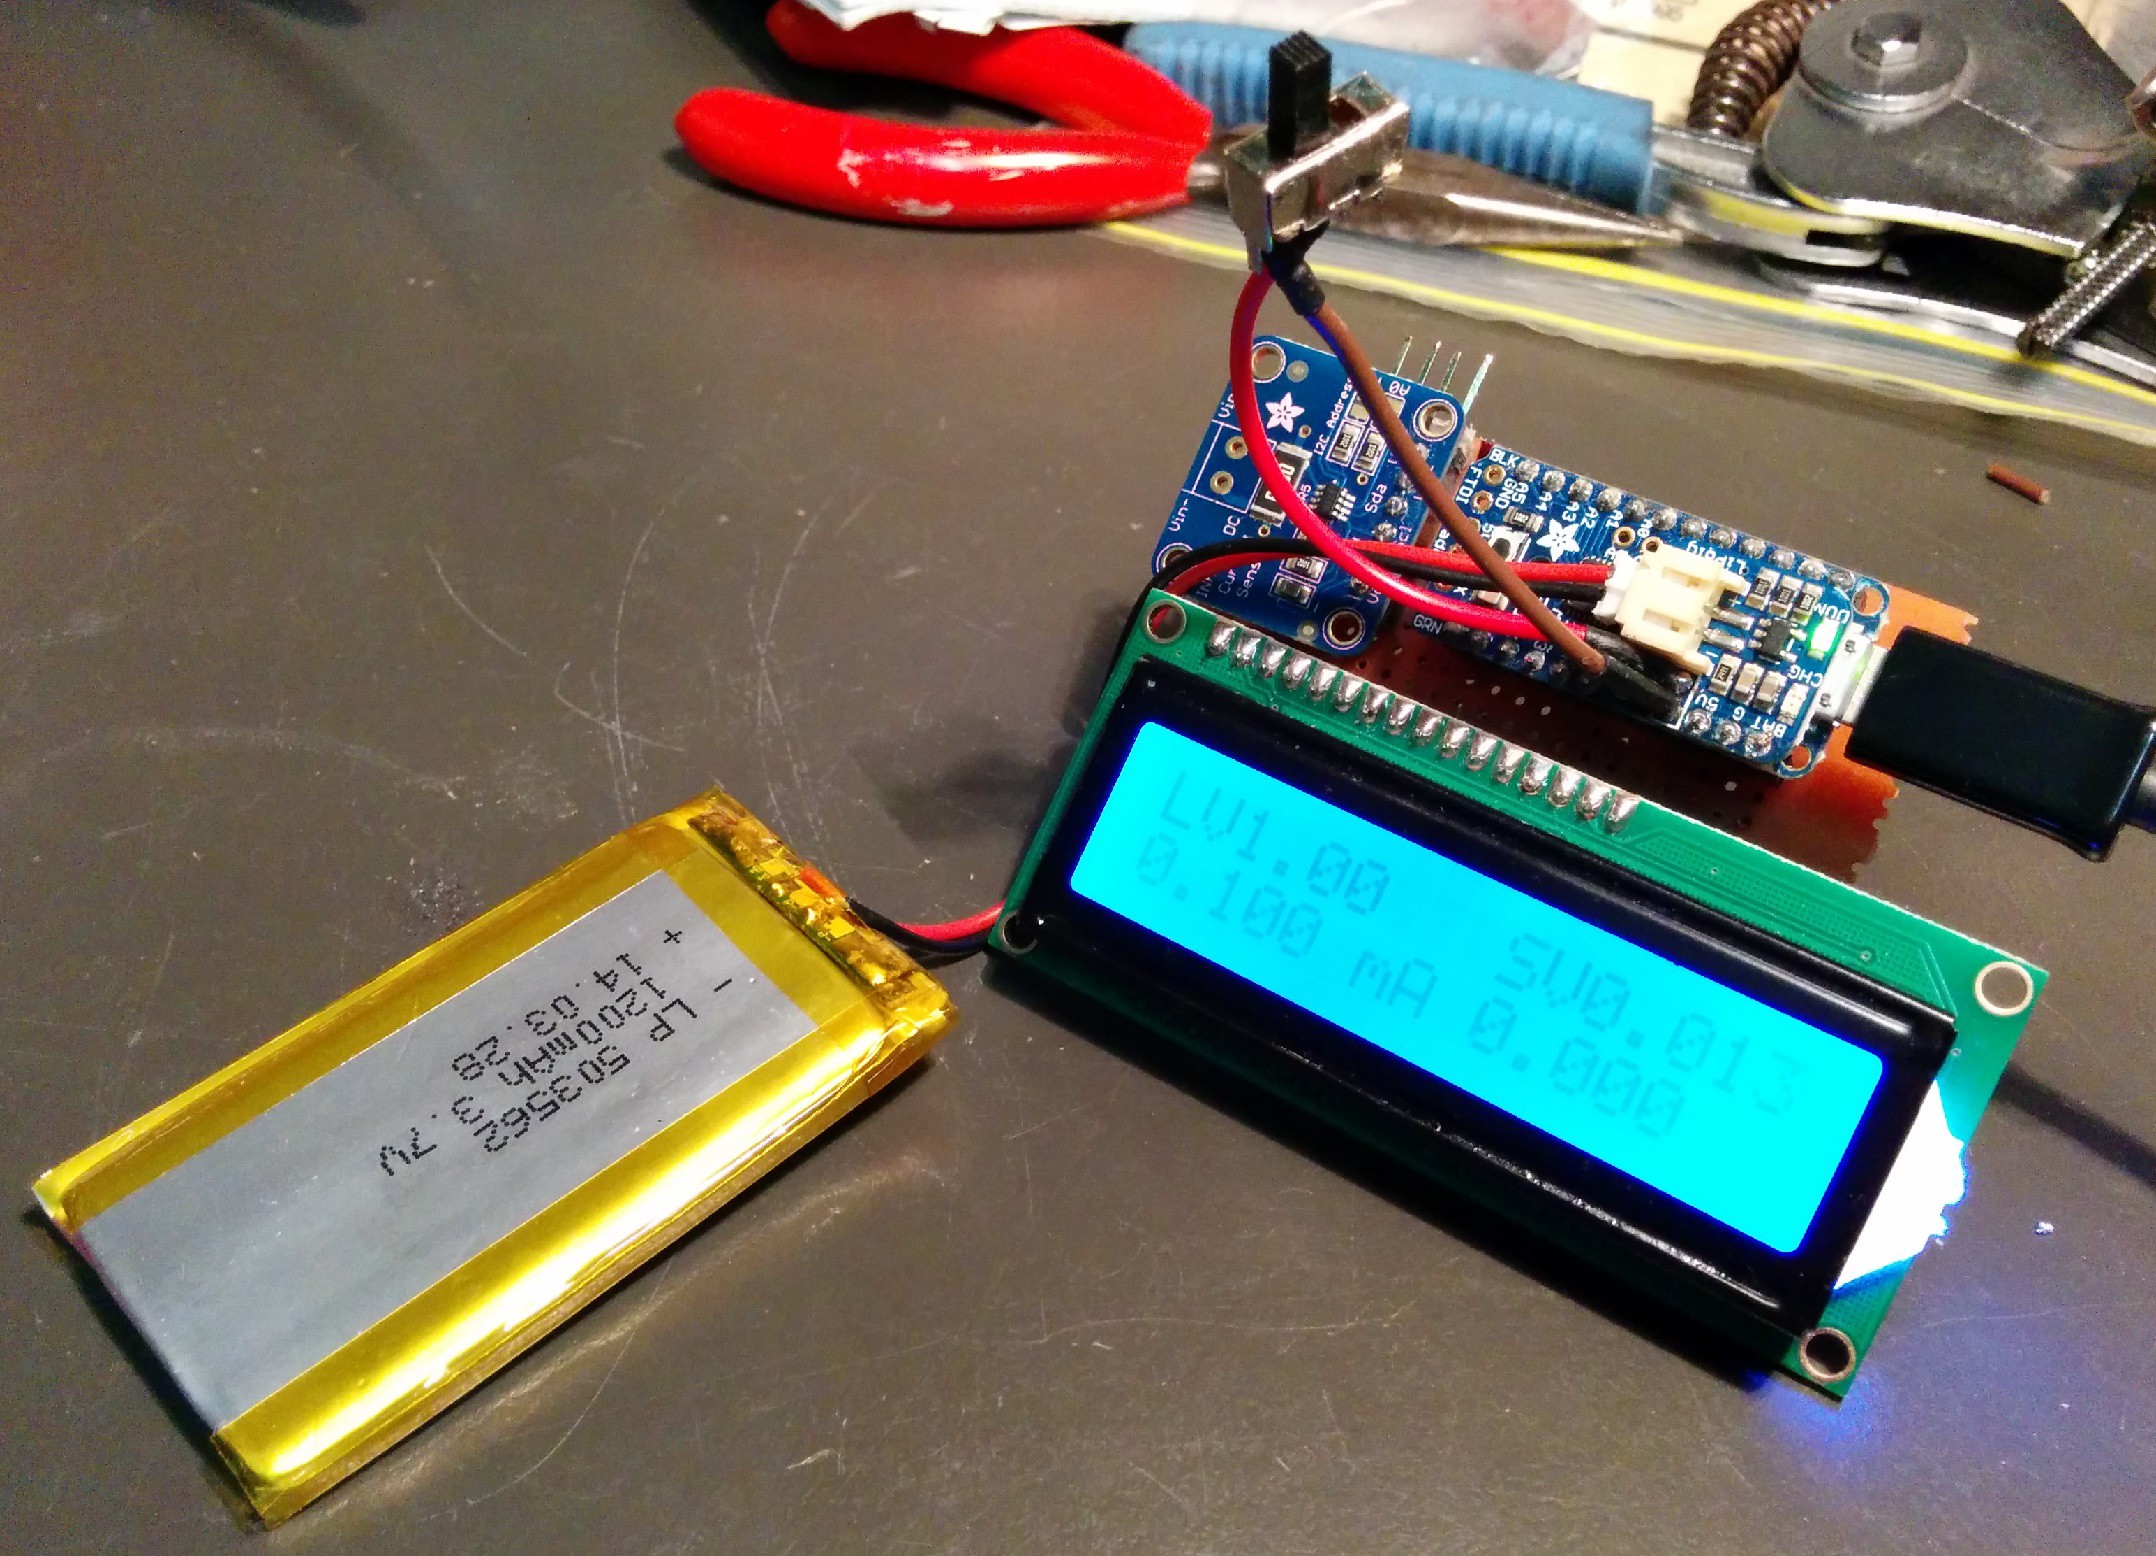
Be sure to solder in the Lipo back pack of you want the rechargeable capability. Adafruit Guide can be found here:
https://learn.adafruit.com/adafruit-pro-trinket-lipoly-slash-liion-backpack.
Also Solder on a switch to the lipo back pack for convenience:
The Lipo back pack I chose was 1200mAh. This is a little over kill but can operate for about 19-20 hours.![]()
-
2Step 2
Set up your Arduino IDE to load code onto your Trinket Pro. Adafruit's guide can be founde here:
https://learn.adafruit.com/introducing-pro-trinket/setting-up-arduino-ide
Also be sure to install the non-standard INA219 arduino library from git hub:
https://github.com/adafruit/Adafruit_INA219
more information for the INA219 can be found here:
-
3Step 3
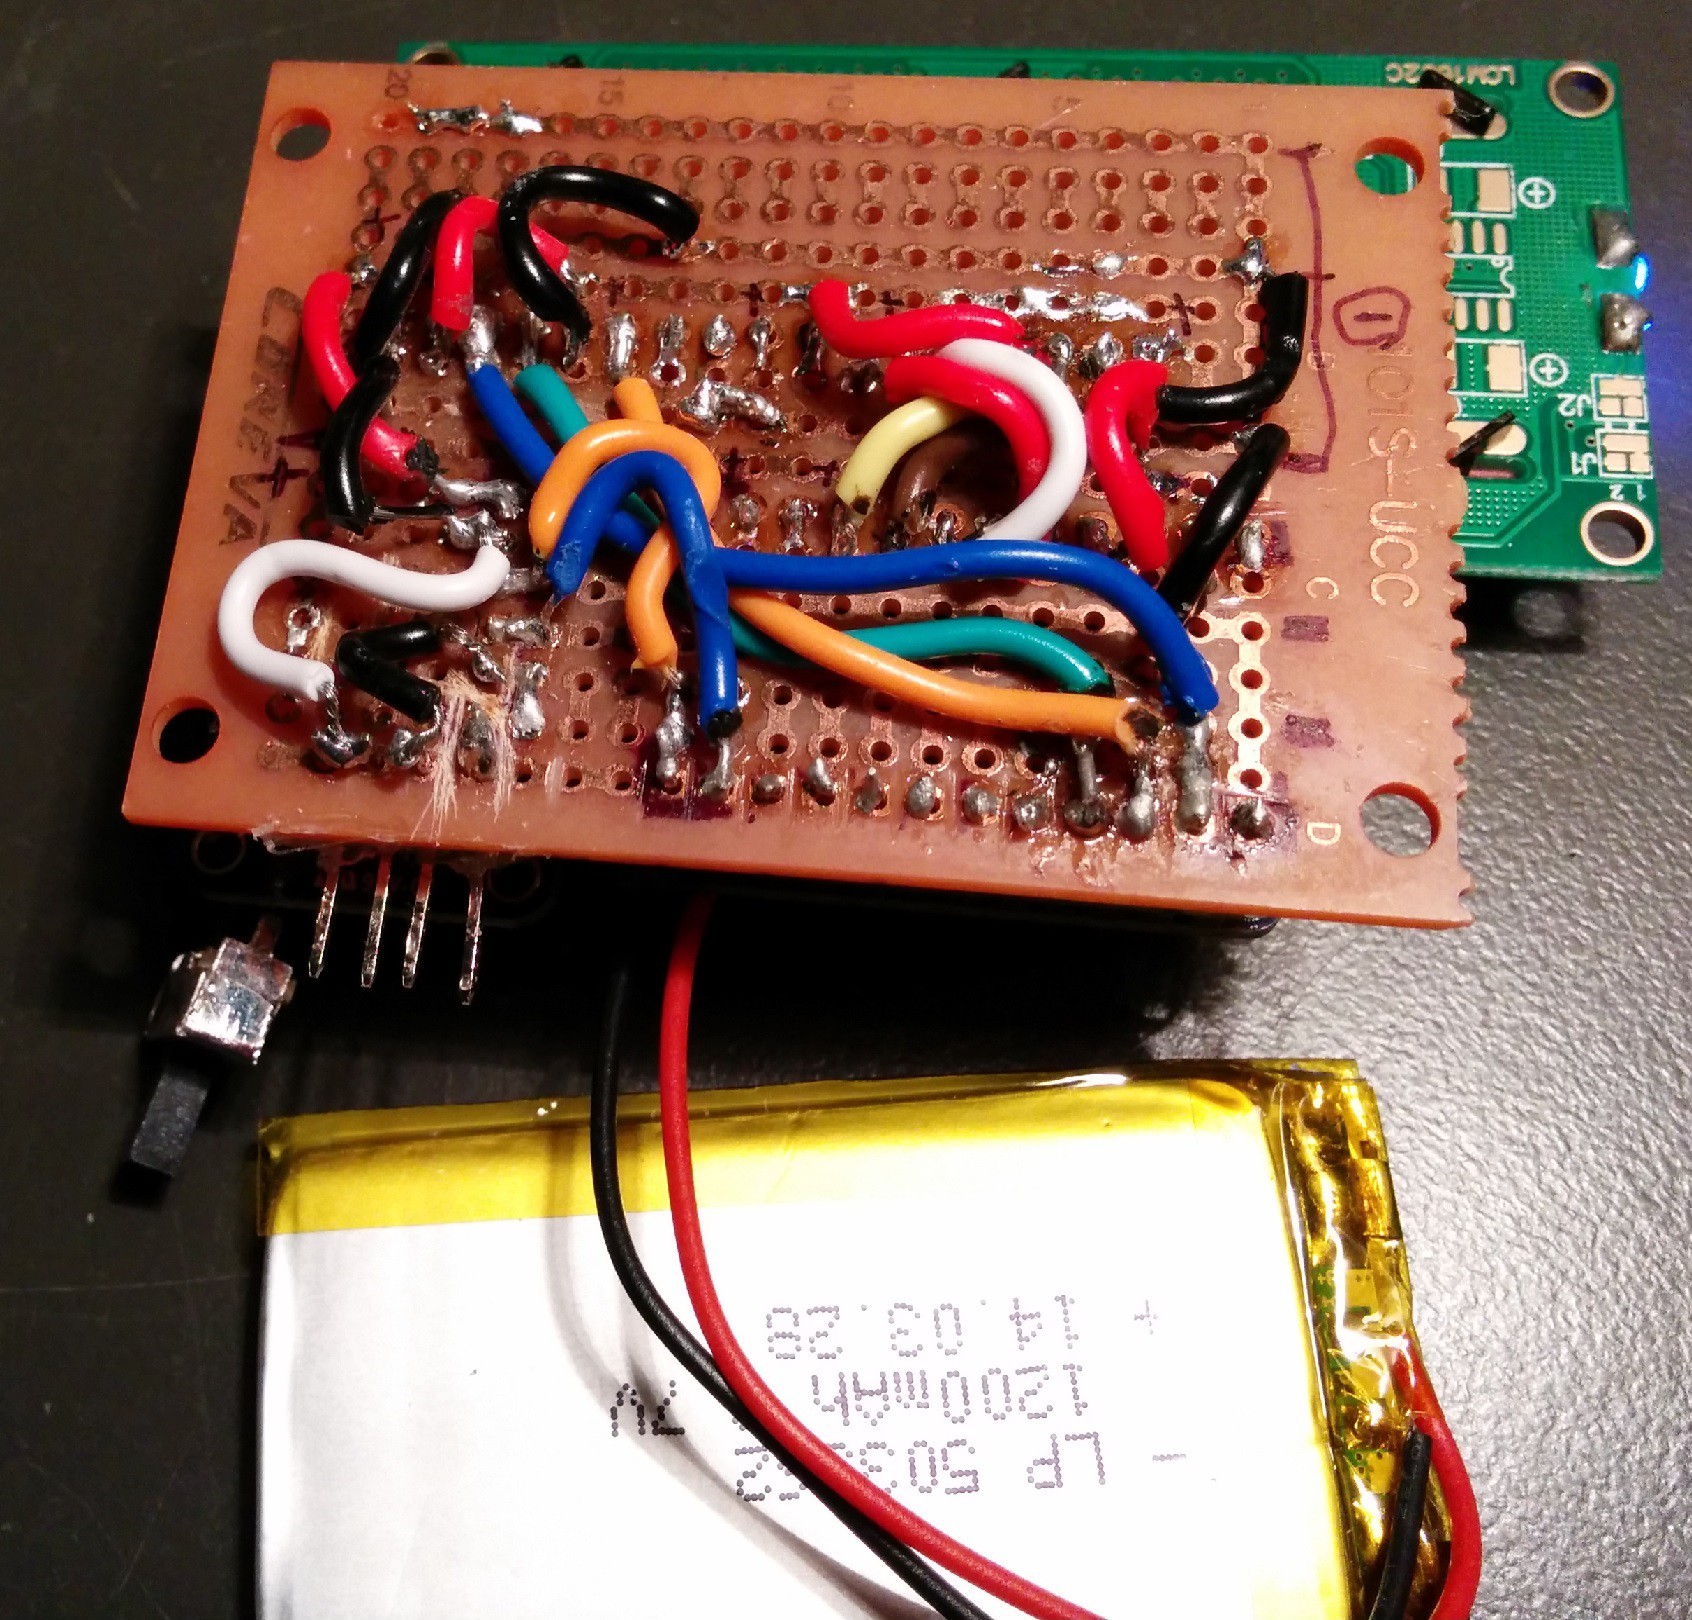
Once everything works on a breadboard, think about how you want to transfer everything onto a permanent proto-board. Refer to my Project Log to see the orientation I chose. I recommend not destroying your breadboard wiring as it an invaluable troubleshooting reference if things go wrong during the transition to a proto-board.
I recommend soldering on female headers on the proto board so that the components can get replaced should they fail, and the bulky LCD can be removed and assembled like lego to fit in your pocket.
I also broke out four male pins on the INA219 to be V+, V-, and two GND pins. This will enable me to build specific cable adapters such as USB and barrel jack.
![]()
-
4Step 4
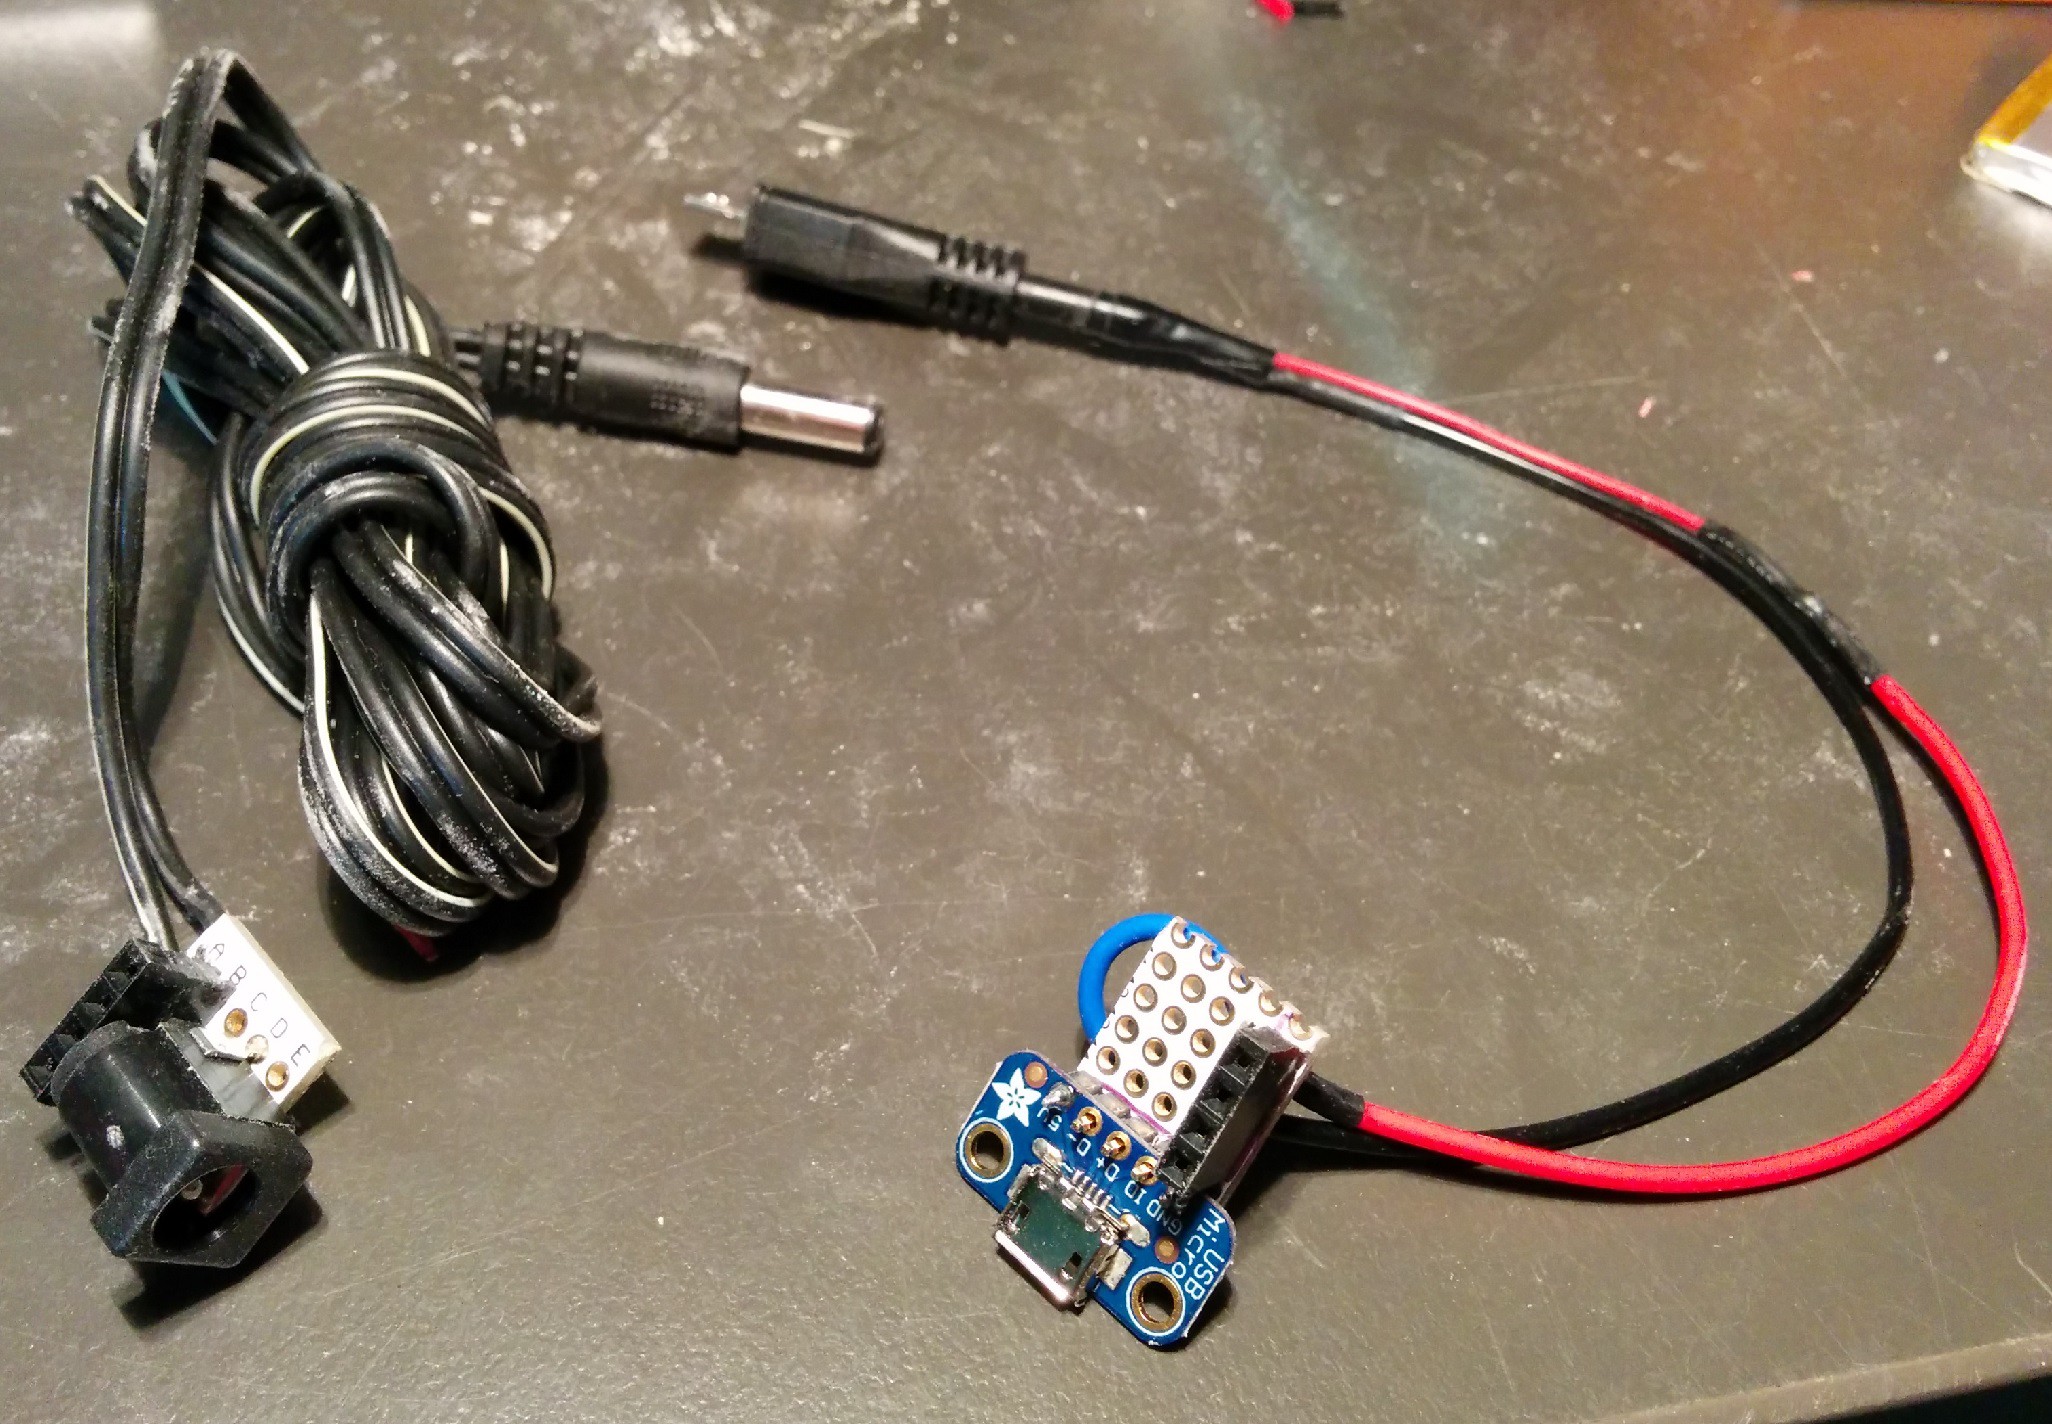
cut out small grids of proto board enough to fit four female headers to mate with the male pins on the main board. Here are my first versions of a usb cable and a barrel jack cable . These modular parts allow for quick change out if there are many types of power supplies you wish to monitor. I chose these two as they are most used in my projects but making others is not a problem:
![]()
-
5Step 5
Grab the code from:
https://github.com/jafo117/Arduino_16x2LCD_INA219/tree/master
be sure to select the right arduino code depending on your LCD size (16x2 or 20x4).
Feel free to move things around the LCD to suit your needs.
press the bootloader mode on the trinket, upload code, and enjoy!
P.S. This is my first attempt at documenting a project so any constructive feedback is welcome.
Trinket Pro Multi-Readout Multimeter
This portable device gives a live read-out of current and voltage between your DC power source and your load! (max 26V DC, 3.2 A).
Discussions
Become a Hackaday.io Member
Create an account to leave a comment. Already have an account? Log In.