Floz
Floz-
update... sorta
05/16/2015 at 02:09 • 0 commentsSo this project stalled when my Dell notebook crashed.
However, I have the software still, thanks to Hackaday! I also have a newer HP notebook that runs like a champ.
I also still have the hardware, and at some point will continue development in the DMX controller direction. We're currently waiting on a USB interface to arrive from god-knows-where... at which point a board becomes available for bench testing.
I don't want to control 75 channels with that board... But I will as proof that it works once I've hacked out the remainder of the code. I already have a small daughterboard with a RS-485 transceiver IC on the fixture.
Other projects, and my day job's development cycle are keeping this one slowed. That, and waiting on parts again.
-
throwing light.
02/15/2015 at 21:03 • 0 commentsThese little "neopixels" put out a fair amount of light. Especially when ganged together.
-
wow, that thing is bright
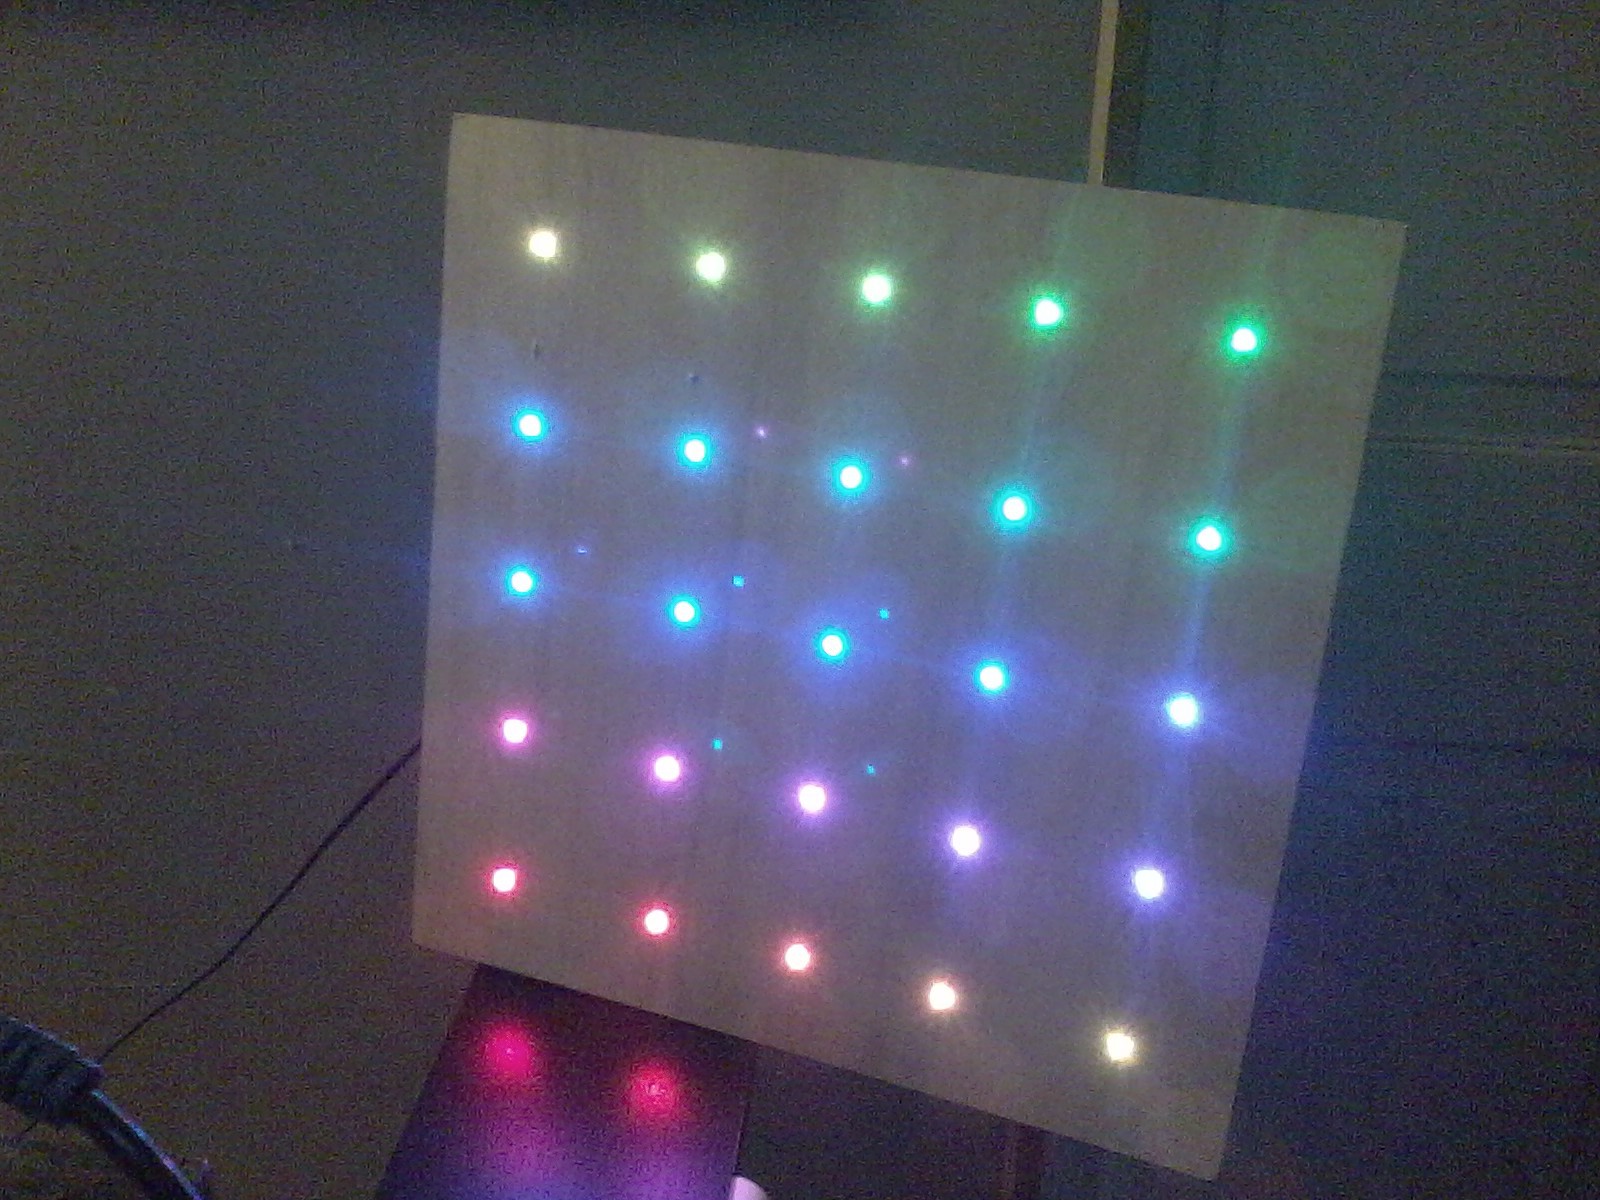
02/03/2015 at 02:03 • 0 commentsThe prototype is physically built! WOO!
![]() Sorry for the crap quality pictures and video, I have a crap smartphone.
Sorry for the crap quality pictures and video, I have a crap smartphone.Hopefully this time, the video works...
WOO! that's awesome, huh?
So, the gist of it is a 5x5 display... and it's DMX controllable. I explain ad-nauseum my plans for that in the video.
TODO:
DMX input software and testing
Procedures development (lots to do here)
5ch / 75ch mode... I'll elaborate on this now:
As a DMX fixture, it will accept RS485 serial data consisting of 512 pieces of information (channels), or DMX512. This is one of the most commonly used protocols for stage and theater lighting and effects. A single channel or piece of information in this data chain goes from 00 to FF. This can be a value for the red lamp, green lamp, or blue lamp. this can also be a trigger for software or other effects, such as overall intensity, pan/tilt in moving fixtures, etc. What this then means is we have to figure out what each channel in our DMX512 data chain will control within this fixture. The initial plan is simple:
5 channels
Channel 1 0 to 255 - procedure picker.
0 = off
1-10 = procedure 1
11-20 = procedure 2
...and so onChannel 2 0 to 255 - red color Channel 3 0 to 255 - blue color Channel 4 0 to 255 - green color Channel 5 0 to 255 - rate / procedure option 75 channels
Channel 1 pixel 0 red color Channel 2 pixel 0 green color Channel 3 pixel 0 blue color Channel 4 pixel 1 red color Channel 5 pixel 1 green color
...and so onSo with 25 pixels, one channel for each color of each pixel, that makes 75 channels. Even on a 3/4 universe board like the Chauvet Obey70, this is doable. It would be a royal pain to program on a board like that, and that brings me to the long-term TODO on external control:
Artnet.
That's all for tonight, happy making!
-Floz
PS: almost forgot the code. This is as-uploaded to the 'duino last night.
#include <Adafruit_NeoPixel.h>
#include <avr/power.h>

#define PIN 6

// Parameter 1 = number of pixels in strip
// Parameter 2 = Arduino pin number (most are valid)
// Parameter 3 = pixel type flags, add together as needed:
//   NEO_KHZ800  800 KHz bitstream (most NeoPixel products w/WS2812 LEDs)
//   NEO_KHZ400  400 KHz (classic 'v1' (not v2) FLORA pixels, WS2811 drivers)
//   NEO_GRB     Pixels are wired for GRB bitstream (most NeoPixel products)
//   NEO_RGB     Pixels are wired for RGB bitstream (v1 FLORA pixels, not v2)
Adafruit_NeoPixel strip = Adafruit_NeoPixel(25, PIN, NEO_GRB + NEO_KHZ800);

// IMPORTANT: To reduce NeoPixel burnout risk, add 1000 uF capacitor across
// pixel power leads, add 300 - 500 Ohm resistor on first pixel's data input
// and minimize distance between Arduino and first pixel.  Avoid connecting
// on a live circuit...if you must, connect GND first.

void setup() {
  // This is for Trinket 5V 16MHz, you can remove these three lines if you are not using a Trinket
#if defined (__AVR_ATtiny85__)
  if (F_CPU == 16000000) clock_prescale_set(clock_div_1);
#endif
  // End of trinket special code


  strip.begin();
  strip.show(); // Initialize all pixels to 'off'
}

void loop() {
  //
  // TODO: DMX Slave
  // take RS485 differential "DMX" input
  // and convert it into:
  // ch 1 = procedure chooser
  // ch 2, 3, 4 = color picker
  // and ch 4 = rate
  // maybe ch 5 "option" (theater chase spacing?)
  //
  // Some example procedures showing how to display to the pixels:
 colorFlood(strip.Color(0,0,0),1500);// Off between each demo
 //spinning_star(strip.Color(255,255,255),500); //grab a pixel make it white, spin the pixels around it
// colorFlood(strip.Color(0,0,0),1500);// Off between each demo//
// spinning_chase(strip.Color(96,0,255),100); //3x3 matrix outer perimeter Z configuration chase
 colorFlood(strip.Color(0,0,0),100);// Off / blackout
 colorWipe(strip.Color(255, 0, 0), 500); // Red
 colorWipe(strip.Color(0,0,0),500);// Off / wipe
 colorWipe(strip.Color(0, 255, 0), 500); // Green
 colorWipe(strip.Color(0,0,0),500);// Off
 colorWipe(strip.Color(0, 0, 255), 500); // Blue
 colorWipe(strip.Color(0,0,0),500);// Off
 colorWipe(strip.Color(0,0,0),1500);// Off between each demo
  stars(strip.Color(255,255,255),75);
  colorFlood(strip.Color(0,0,0),1500);// Off between each demo
  /*
  theaterChaseRainbow(175); // Send a theater pixel chase in...
  colorFlood(strip.Color(0,0,0),1500);// Off between each demo
  theaterChase(strip.Color(127, 127, 127), 150); // White
  colorFlood(strip.Color(0,0,0),1500);// Off between each demo
  theaterChase(strip.Color(127,   0,   0), 150); // Red
  colorFlood(strip.Color(0,0,0),1500);// Off between each demo
  theaterChase(strip.Color(  0,   0, 127), 150); // Blue
  colorFlood(strip.Color(0,0,0),1500);// Off between each demo
 */
  //pickapixel(7,strip.Color(255,255,255),1); //grab a pixel make it white
  //pickapixel(5,strip.Color(0,255,255),1); // grab a pixel make it cyan
 // pickapixel(3,strip.Color(255,255,0),1); // grab a pixel make it yellow
 // pickapixel(1,strip.Color(255,0,255),1);  // grab a pixel make it magenta
 // delay(3500); //let the pickapixel show for a moment.
  colorFlood(strip.Color(0,0,0),1500);// Off between each demo

  rainbow(20);
  colorFlood(strip.Color(0,0,0),1500);// Off between each demo
  strobe(27);
  colorFlood(strip.Color(0,0,0),1500);// Off between each demo
  rainbowCycle(20);
  colorFlood(strip.Color(0,0,0),1500);// Off between each demo

 stars(strip.Color(255,255,255),100);
 colorFlood(strip.Color(0,0,0),1500);// Off between each demo
 rainbowCycle(10);
 colorFlood(strip.Color(0,0,0),1500);// Off between each demo

}

// Fill the dots one after the other with a color
void colorWipe(uint32_t c, uint8_t wait) {
  for(uint16_t i=0; i<strip.numPixels(); i++) {
      strip.setPixelColor(i, c);
      strip.show();
      delay(wait);
  }
}

void colorFlood(uint32_t c, uint8_t wait) {
  for(uint16_t i=0; i<strip.numPixels(); i++) {
      strip.setPixelColor(i, c);
  }
  strip.show();
  delay(wait);
}

void stars(uint32_t c, uint8_t wait) {
  for(uint16_t i=0; i<strip.numPixels(); i++) {
    int pixeltopick = (random(0,strip.numPixels()));
    strip.setPixelColor(pixeltopick, c);
      strip.show();
      delay(wait);
      strip.setPixelColor(pixeltopick, 0,0,0);
      strip.show();
      delay(wait);
      }
}

void pickapixel(uint32_t p, uint32_t c, uint8_t wait) {
    strip.setPixelColor(p, c);
    strip.show();
    delay(wait);
      }


void spinning_chase(uint32_t c, uint8_t wait) {
for(uint16_t i=0; i<strip.numPixels(); i++) {

    strip.setPixelColor(0, c);
    strip.show();
    delay(wait);
    strip.setPixelColor(0, strip.Color(0,0,0));
    strip.setPixelColor(1, c);
    strip.show();
    delay(wait);
    strip.setPixelColor(1, strip.Color(0,0,0));
    strip.setPixelColor(2, c);
    strip.show();
    delay(wait);
    strip.setPixelColor(2, strip.Color(0,0,0));
    strip.setPixelColor(3, c);
    strip.show();
    delay(wait);
    strip.setPixelColor(3, strip.Color(0,0,0));
    strip.setPixelColor(8, c);
    strip.show();
    delay(wait);
    strip.setPixelColor(8, strip.Color(0,0,0));
    strip.setPixelColor(7, c);
    strip.show();
    delay(wait);or anyone I found information/software to build this with
    strip.setPixelColor(7, strip.Color(0,0,0));
    strip.setPixelColor(6, c);
    strip.show();
    delay(wait);
    strip.setPixelColor(6, strip.Color(0,0,0));
    strip.setPixelColor(5, c);
    strip.show();
    delay(wait);
    strip.setPixelColor(5, strip.Color(0,0,0));
    strip.show();
}}

void spinning_star(uint32_t c, uint8_t wait) {
for(uint16_t i=0; i<strip.numPixels(); i++) {

    strip.setPixelColor(0, strip.Color(0,0,0));
    strip.setPixelColor(2, strip.Color(0,0,0));
    strip.setPixelColor(4, strip.Color(0,0,0));
    strip.setPixelColor(6, strip.Color(0,0,0));
    strip.setPixelColor(8, strip.Color(0,0,0));
    strip.setPixelColor(1, c);
    strip.setPixelColor(3, c);
    strip.setPixelColor(5, c);
    strip.setPixelColor(7, c);
    strip.show();
    delay(wait);
    strip.setPixelColor(1, strip.Color(0,0,0));
    strip.setPixelColor(3, strip.Color(0,0,0));
    strip.setPixelColor(5, strip.Color(0,0,0));
    strip.setPixelColor(7, strip.Color(0,0,0));
    strip.setPixelColor(0, c);
    strip.setPixelColor(2, c);
    strip.setPixelColor(4, c);
    strip.setPixelColor(6, c);
    strip.setPixelColor(8, c);
    strip.show();
    delay(wait);
}
    }

void rainbow(uint8_t wait) {
  uint16_t i, j;

  for(j=0; j<256; j++) {
    for(i=0; i<strip.numPixels(); i++) {
      strip.setPixelColor(i, Wheel((i+j) & 255));
    }
    strip.show();
    delay(wait);
  }
}
void strobe(uint8_t wait) {
  uint16_t i, j;

  for(j=0; j<256; j++) {
    for(i=0; i<strip.numPixels(); i++) {
      strip.setPixelColor(i, 255,255,255);
    }
    strip.show();
    delay(wait);
   for(i=0; i<strip.numPixels(); i++) {
      strip.setPixelColor(i, 0,0,0);
    }
    strip.show();
    delay(wait);

}

}


// Slightly different, this makes the rainbow equally distributed throughout
void rainbowCycle(uint8_t wait) {
  uint16_t i, j;

  for(j=0; j<256*5; j++) { // 5 cycles of all colors on wheel
    for(i=0; i< strip.numPixels(); i++) {
      strip.setPixelColor(i, Wheel(((i * 256 / strip.numPixels()) + j) & 255));
    }
    strip.show();
    delay(wait);
  }
}

//Theatre-style crawling lights.
void theaterChase(uint32_t c, uint8_t wait) {
  for (int j=0; j<3; j++) {  //do 3 cycles of chasing
    for (int q=0; q < 3; q++) {
      for (int i=0; i < strip.numPixels(); i=i+3) {
        strip.setPixelColor(i+q, c);    //turn every third pixel on
      }
      strip.show();

      delay(wait);

      for (int i=0; i < strip.numPixels(); i=i+3) {
        strip.setPixelColor(i+q, 0);        //turn every third pixel off
      }
    }
  }
}

//Theatre-style crawling lights with rainbow effect
void theaterChaseRainbow(uint8_t wait) {
  for (int j=0; j < 256; j++) {     // cycle all 256 colors in the wheel
    for (int q=0; q < 3; q++) {
        for (int i=0; i < strip.numPixels(); i=i+3) {
          strip.setPixelColor(i+q, Wheel( (i+j) % 255));    //turn every third pixel on
        }
        strip.show();

        delay(wait);

        for (int i=0; i < strip.numPixels(); i=i+3) {
          strip.setPixelColor(i+q, 0);        //turn every third pixel off
        }
    }
  }
}

// Input a value 0 to 255 to get a color value.
// The colours are a transition r - g - b - back to r.
uint32_t Wheel(byte WheelPos) {
  WheelPos = 255 - WheelPos;
  if(WheelPos < 85) {
   return strip.Color(255 - WheelPos * 3, 0, WheelPos * 3);
  } else if(WheelPos < 170) {
    WheelPos -= 85;
   return strip.Color(0, WheelPos * 3, 255 - WheelPos * 3);
  } else {
   WheelPos -= 170;
   return strip.Color(WheelPos * 3, 255 - WheelPos * 3, 0);
  }
}
I never claimed to be a great, or efficient programmer... Instead I've found ruthlessly mutilating existing software works as well and is more entertaining. This started as the Adafruit strandtest example, and will continue to mutate.
http://www.deskontrol.net/blog/schematic-arduino-4-universes-dmx-shield/
for NeoPixel library and other Adafruit awesomeness:
https://learn.adafruit.com/adafruit-neopixel-uberguide/arduino-library
This whole thing is OpenSource/Humanistic in the sense that you can copy what I've done and build something like this, or something better/worse... and not owe me a single cent.
You still have to buy your own parts, though.
Please credit where credit is due if you use stuff other people wrote, of course... and be a nice person.
If you've learned something, great! If you want to contribute, great!
More updates to come.
-
Must go shopping, must go shopping...
01/27/2015 at 18:40 • 0 comments...must go shopping!
So I need to make a trip to Ye Olde Vendor Of Silicon. This is more for me to glance at when I'm there than anything else, but maybe it will help someone else make one less shopping trip.
1 spool wire (not red/black... I have plenty of that, I need something else for data)
1 bag 0.10" headers (a big bag, I use these little guys for all kinds of stuff)
2 sheets protoboard (large ones, I can cut them to size)
1 tube (qty 5?) MAX485 or equivalent transceiver ICs
2 male XLR connectors
2 project enclosures
10 ohm 1/4w resistor (a handful?)
Yes, I could just hang the PSU and 'duino on the back of the project-ply that I'm using... But that would look bad, and leave those parts woefully underprotected. So, I want a couple of project enclosures. I have run out of protoboard at the moment, and I'm 4 pixels short of completing one large-scale 5x5 matrix.
I can probably scavenge another MAX485 from one of the par-can lights that has failed in the last year. While I may do that, as well as scavenging the XLR connectors from it, I still need a few things, like support components for the MAX485, and maybe a couple of small sheets of protoboard to build the MAX485 and neopixel connections into a DIY shield.
In other news, there is an unmarked IC inside these PAR cans. It's a 20 pin IC with 10C1C printed on the underside.
10C1C Datasheet? Is the closest match I can find in a datasheet.... which would mean this is a 10 input logic array? I dunno, I'll keep digging and start experimenting. If I let the blue smoke out of this one, there are other failing/failed par-can lights in the inventory that I can rob these from.
-
My 'duinos are here!
01/25/2015 at 17:32 • 1 commentMy DCcduinos arrived. YAY!
Now I need to buckle down, finish building the pixel modules, and get ready to do some miniature carpentry. Lacking any luck in finding an enclosure I like already made or ready to modify, I'm going to build my own out of thin "project wood" ply.
So far in developing the software, I have the Adafruit library working and have been modifying the 'strandtest' example to get a feel for it. Since this will primarily be a DMX controllable fixture, I want to develop it as a procedure chooser/options chooser.
What's commonly found in DMX stage lights is pre-programmed procedures on ROM in the fixture. Since Matrices require specialized software and interfaces, and many smaller stage/theater setups simply use a console style board (eg, Chauvet Obey series), I'm choosing to go this same well-traveled route.
Here's my TODO: straight from the .ino
void loop() {
//
// TODO: DMX Slave
// take RS485 differential "DMX" input
// and convert it into:
// ch 1 = procedure chooser
// ch 2, 3, 4 = color picker
// and ch 4 = rate
// maybe ch 5 "option" (theater chase spacing?)
//
// Some example procedures showing how to display to the pixels:
Since almost every procedure in the sketch can take some parameters, we need to do the following in loop()
Read DMX input on ch1, determine what procedure we need to run.
Read DMX input on ch2, 3, 4, 5, etc. and math-magic these values into the appropriate values for the procedure we're going to call.
Pass values to the procedure we've chosen.
....since I'm potentially really only using a few cycles to do the needed math operations, I hope it all works out.
However, my Arduino clones arrived yesterday. This means after work last night, I was up until 0200 geeking out on stuff with reckless abandon, and today is my day off. I hear the call of a box full of 9g servos. It says "build a robot".
-
Making NeoPixels easier to handle
01/18/2015 at 23:04 • 0 commentsFrustrated that my Arduino clones have still not arrived, yet everything else has... I contacted GearBest customer support. They informed me that NL Post does not offer tracking information.
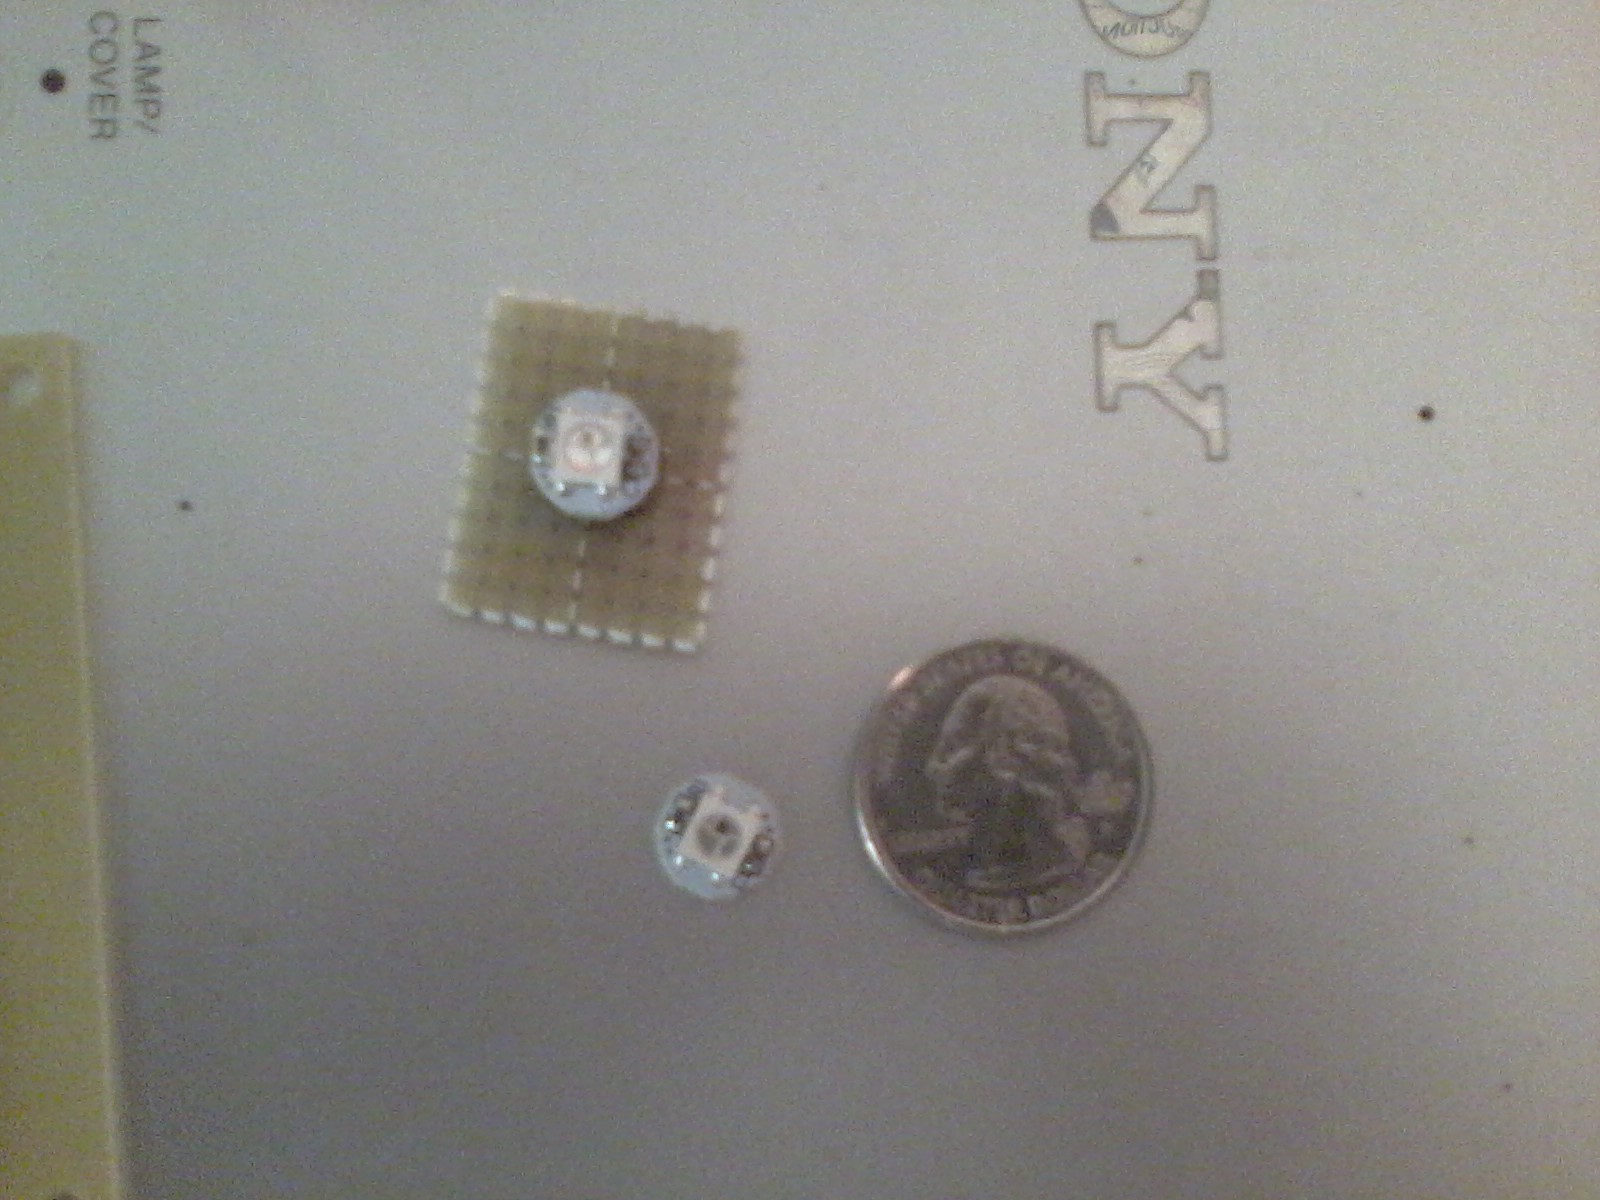
Guess I'll have to wait. However, my neopixels have arrived, and there is no sense in letting these LITTLE guys sit and collect dust.
![]()
They really are tiny, that's a US $0.25 coin, a NeoPixel (WS2812b) and one on a chunk of protoboard with pins. The breakapart board I ordered from Mr Zhang was 120 of these little tiny things that snapped apart cleanly. However, upon arrival, I immediately noticed that they have three solder pads for in and out each, and more importantly, those pads are roughly 0.10" apart.
Jackpot! Or, more work....
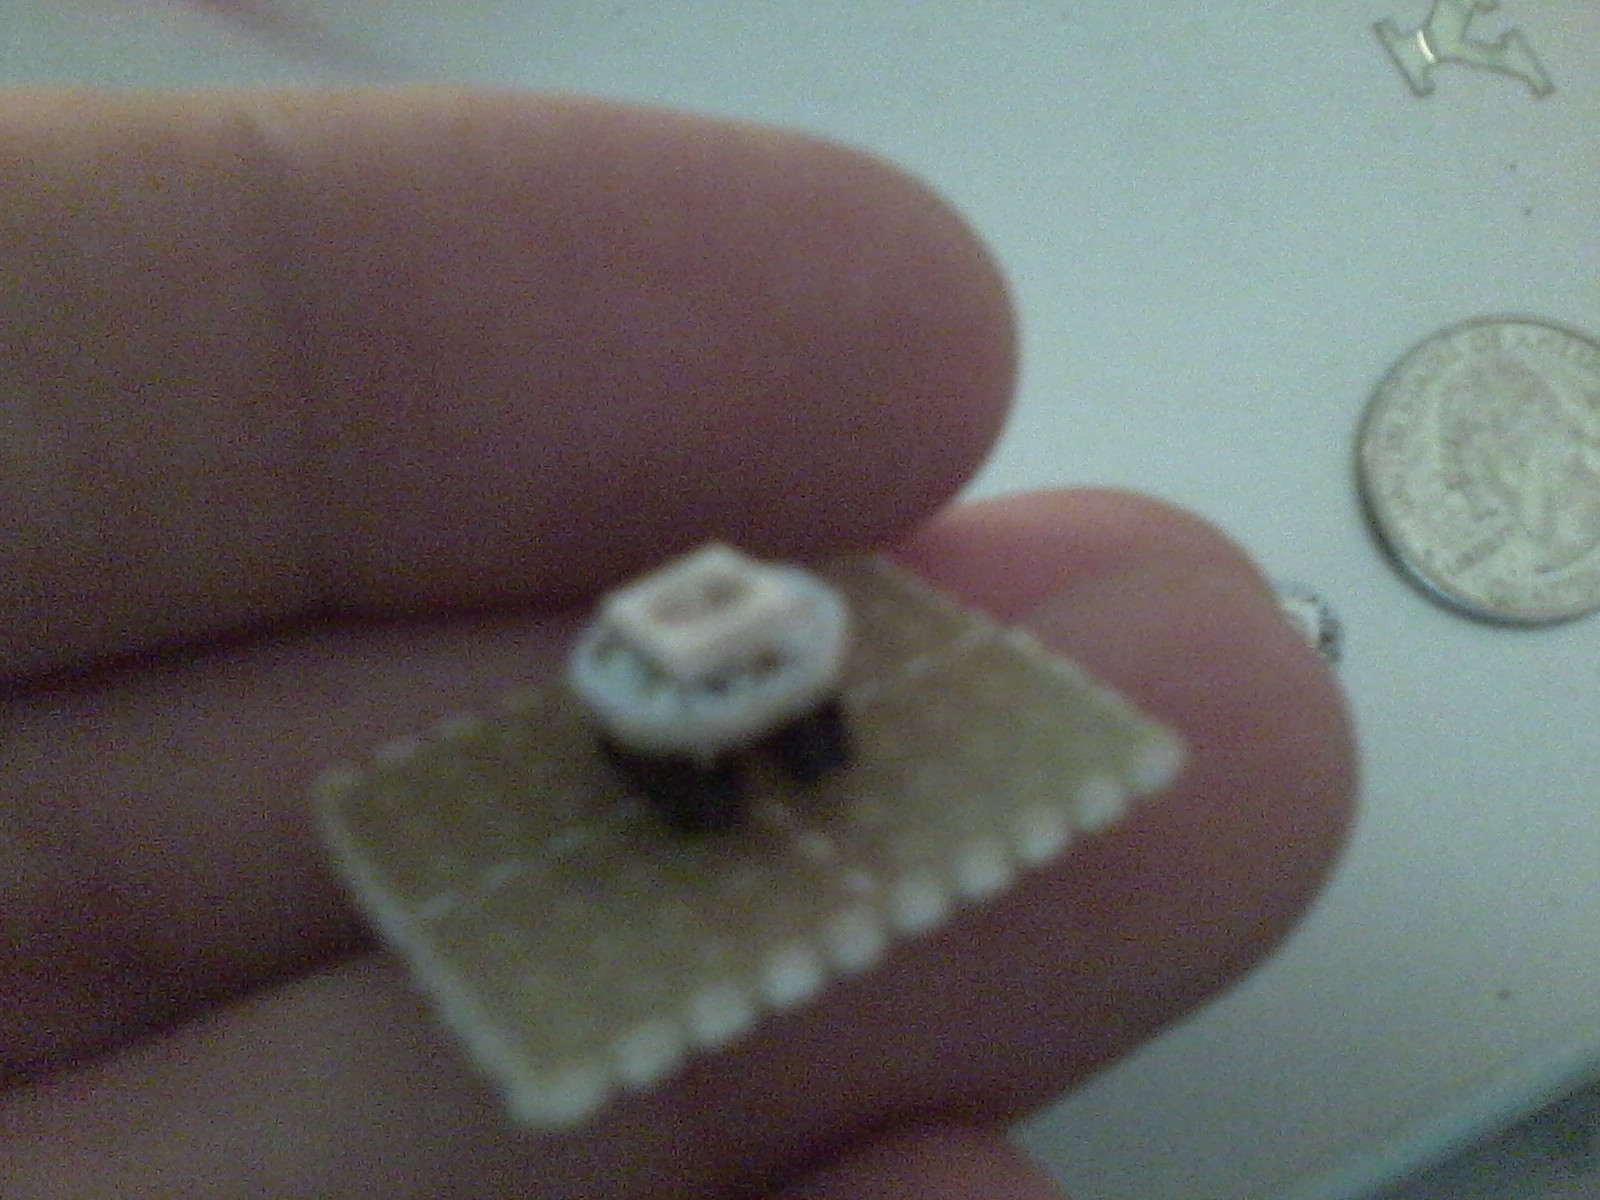
![]()
That's a NeoPixel with 0.10" male headers on either side, thru-holed to protoboard...
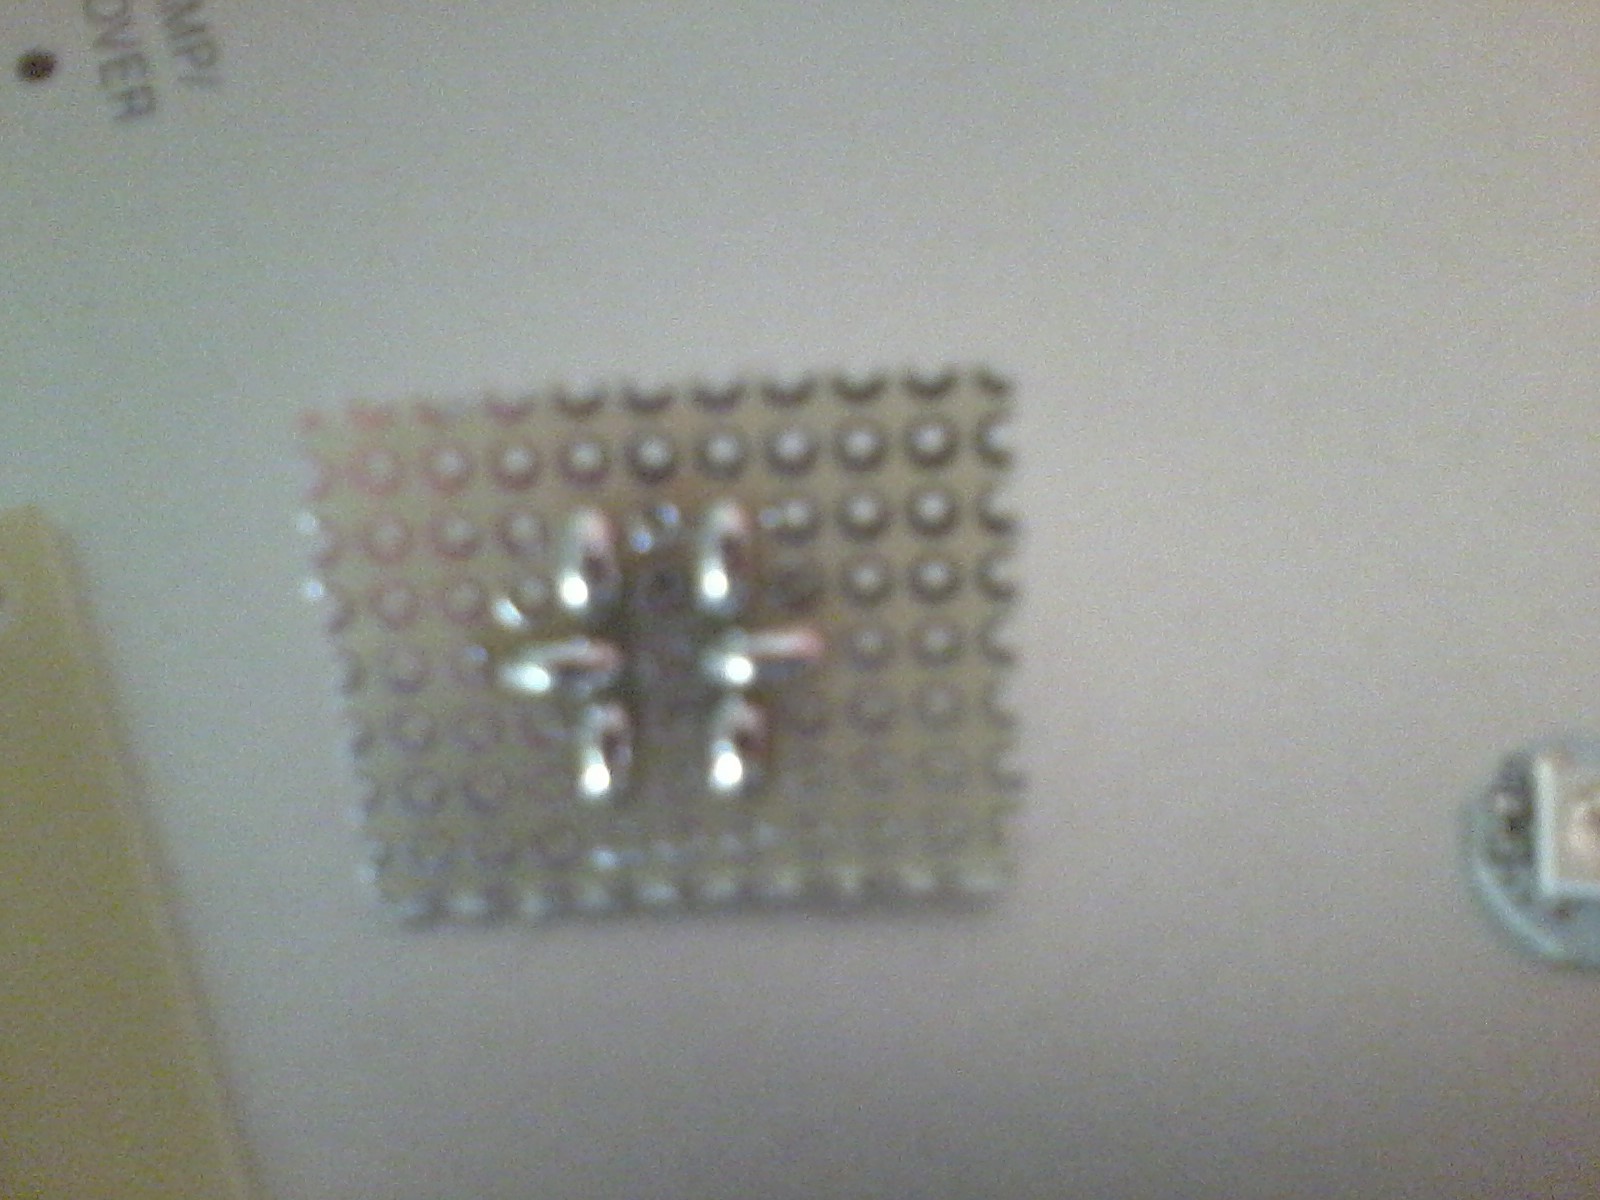
![]()
...and the reverse. I intentionally formed solder bridges to give myself an easier pad to solder the 5v, GND, and Serial Data lines onto.
Yup, I'm doing this 100+ times... once I go buy more male headers. I must remember on the next order to inquire if Mr Zhang would be kind enough to add pins for me.
DMX NeoPixel Matrix
There are now two of these lights. a 5x5 pixel matrix, and a 5x5 projector-type matrix
 Sorry for the crap quality pictures and video, I have a crap smartphone.