Close
0%
0%

Bench Power Supply

Designing an open source, modular bench power supply to rule them all.

Similar projects worth following
This is a design for an open source, modular bench power supply with enough features to compete with the mid-range commercial units in the $1000-ish range. This project includes features such as software calibration, programmatic control via USB Raw HID, etc. In its simplest form, it is very affordable, but can be easily scaled up to a larger, more powerful unit.

HaD Prize 2015 Questions:

What problem does this solve? Just about every hacker in the world needs a good power source. While re-commissioning an ATX supply is a rite of passage, these supplies are somewhat limited in what they can do. They tend to only have 4 fixed voltages (12, 5, 3.3, and -12); futhermore, you need to use multimeters to determine actual voltage / current output. There is no current limiting (if you short the rails the supply will turn off, but it will happily supply multiple amps of current up to that point). This project attempts to solve these problems in an economical fashion.

How does it solve the problem? This design is for a digitally controlled and calibrated multi-channel power supply with current limiting. It lets you set the voltage on each channel independently anywhere from 0 to 12V (or 0 to -12V for the negative channels), with configurable current limiting on each channel, and actual voltage / current display. It supports USB control from a PC (using RawHID packets) for calibration and automated setpoints / logging.

How to use it? Set the voltage / max current setpoints for the circuit under test (e.g. 5v, 500mA if testing a USB powered device). Plug in the device. Watch the voltage / current readouts to see how much current is being drawn.

License: As with all my other projects on HaD, this is released under a Creative Commons Attribution license. Make it, change it, sell it - just have fun while doing it and link back to my project so that others can benefit as well! Everything that I created while designing it - the AVR source code, KiCad source + Gerbers, Enclosure plans (QCad .dxf), simulations, etc are all available on Github.

Project Overview:

Some requirements of this project:

  • Modular power supply from 1 to 6 channels (I have implemented 4 channels: 3 positive, and 1 negative)
  • Each channel can independently be set from 0-12V (for positive channels) or -12-0V (for negative channels), and the output can go all the way to 0 (which is not the case with most DIY power supplies).
  • Configurable set points for voltage and max current for each channel
  • Actual readings for voltage and current for each channel
  • Low cost - it's not as cheap as scrapping an ATX power supply (which is what I used to use), but the extra features such as current limiting should more than make up the extra cost.
  • Active (fan) cooling combined with heat sinks to support sustained high current loads
  • USB control (voltage and current set points), logging of actual voltage / current readings, and computer-based calibration.
  • The ability to use potentiometers for voltage / current set points instead of a microcontroller, if desired (each channel has four analog I/Os: Voltage and Current setpoints, and Voltage and Current sense outputs. All of these are in the range of 0-5V, allowing easy control from either a potentiometer or a DAC.

The design has two distinct parts: the power channels, which are controlled by an analog value from 0 - 5v for both voltage setpoint and current limit and which output a value from 0 - 5v to indicate the actual voltage / current, and the control board which can generate said setpoints and read the actual values.

The design uses mostly basic components, with each channel based on the TI LM338 / LM337 with op amps for control. The digital control board runs an Atmel ATMega32u4, and generates the analog setpoints via the Microchip MCP4728 I2C DAC. The same board can be used for either positive or negative output depending on which optional components are populated. (For instance, you would use either an LM338 for positive, or an LM337 for negative; you would use a NPN transistor for current limiting on a negative channel, and a PNP for positive channels; there are different arrangements of 0-ohm resistors used as jumpers to configure positive or negative modes). If you choose to not bother with current limiting you can eliminate the transistor plus an op amp with supporting passive components.

The BOM costs break down as...

Read more »

  • 1 × TI LM338 (Positive) / LM337 (Negative) TO-220 Footprint
  • 1 × TIP107 (Positive) / TIP102 (Negative) TO-220 Footprint
  • 1 × 0.1 Ohm 1% Resistor SMD 2512 Footprint
  • 2 × Ohmite FA-T220-64E Heat Sink
  • 2 × MC3303PT Quad Op Amp TSSOP-14 Footprint

View all 66 components

  • Software Changes

    The Big One08/30/2019 at 22:25 4 comments

    In case anyone else has made one of these, I have recently made some software changes.  The biggest new feature is that calibration is supported directly from the power supply - no connection to a computer needed.  The reason for this is that I have had nothing but problems with the RawHID Python support on Linux and OSX; setting it up was nearly impossible, and if you did manage to get it installed (with custom compiled code) it would just segfault when you try writing stuff.  After many hours of debugging it, I gave up.

    In addition to adding calibration, I did some code cleanup, updated the code to use my latest build scripts and toolchain, and fixed some minor bugs that I had never bothered fixing before.

    The latest code is on my github page: https://github.com/thebiguno/microcontroller-projects/tree/master/projects/power_supply/avr

  • 6 Months Later...

    The Big One12/24/2015 at 07:54 3 comments

    My power supply has been completed for about 6 months now. I cannot begin to explain how nice it is to have a real power supply; I wish that I had obtained one years ago! For anyone who is on the fence about a real power supply vs. a hacked ATX job, go for the real one, even if it costs a bit more time / money.

    I find that I am using this supply all the time; just today, for instance, I was debugging a power supply issue on my Drum Master board (I have a 3.3v linear regulator which is supposed to source up to 250 mA, but which is browning out when I try to write to the SPI flash chip). By using my power supply in place of the wall wart, I was able to determine what was actually happening and how to fix it (spoiler alert: my wall wart's voltage was too high, and thus the linear regulator had to dissipate too much heat and would go into thermal shutdown). Could I have figured this out without an adjustable power supply with actual current readings? Of course. But it would have been harder.

    Anyway, 6 months on, and I am loving it.

    Merry Christmas, all!

  • Semifinals Video Added

    The Big One09/17/2015 at 01:46 0 comments

    I have just added the Hackaday Prize Semifinalist Video. This shows the power supply in action, powering another WIP project that I am currently working on. I also discuss some of the other features (USB calibration and control, etc) and some of the shortcomings of the design (requires a dual supply; difficult to isolate).

  • Free Adjustable Dummy Load

    The Big One08/23/2015 at 01:24 2 comments

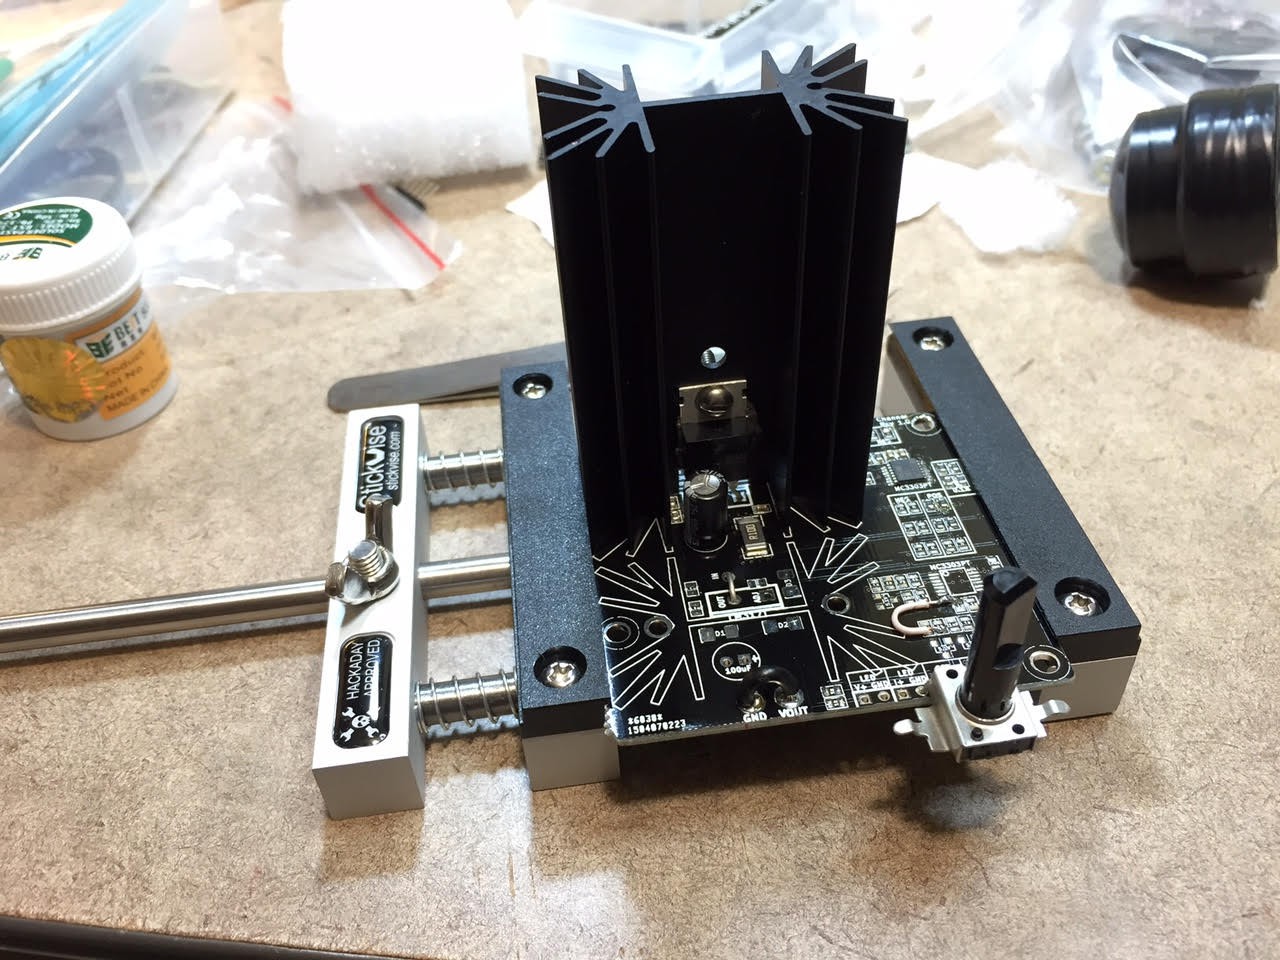
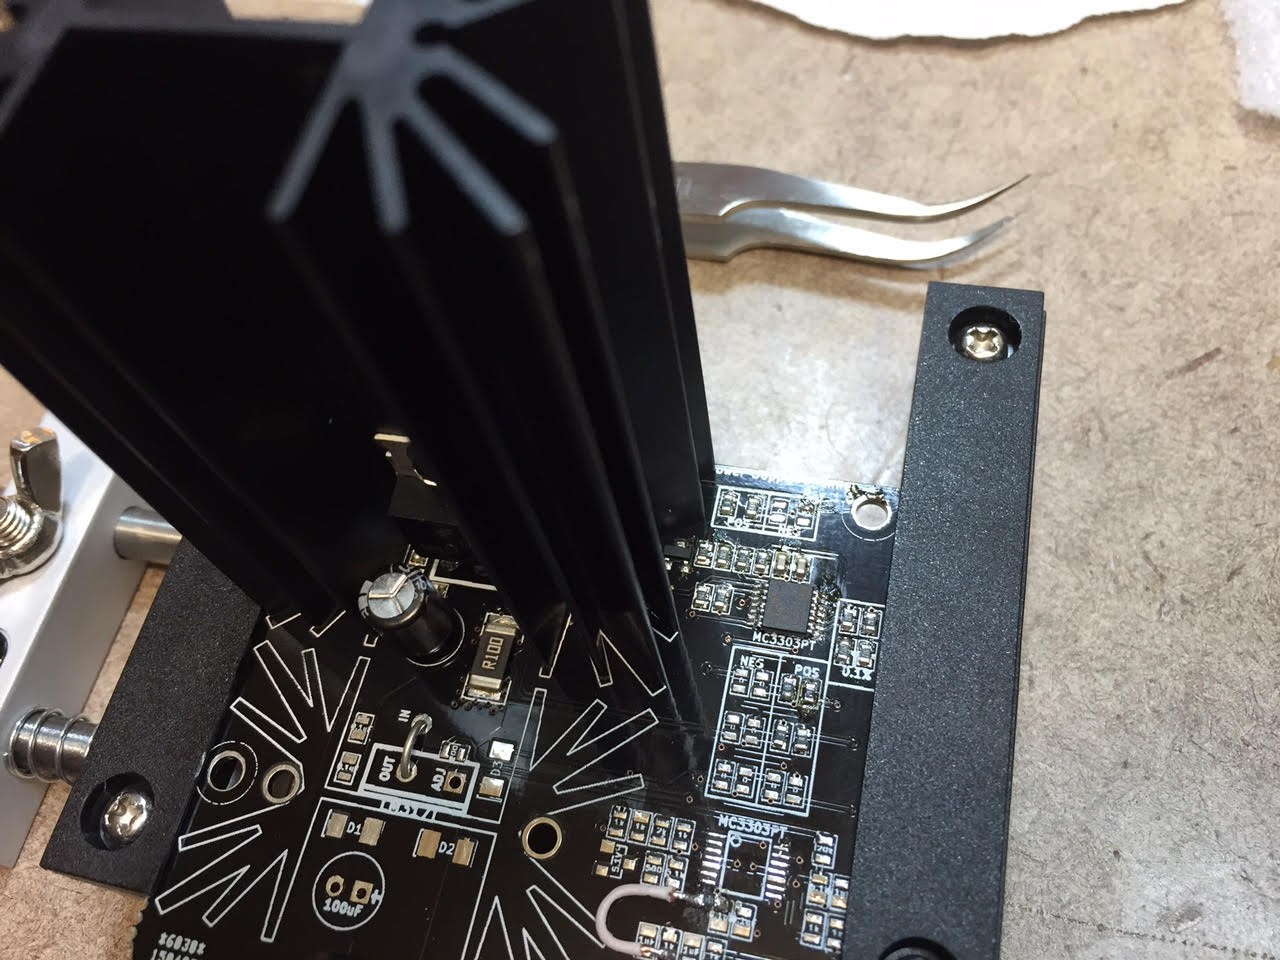
    For those who have ordered the PCBs, you probably have a bunch of boards left over. Rather than just let them accumulate dust in your desk, you can use one of the channels as an adjustable dummy load. It's not the best dummy load, as it was not designed specifically for it, but it does the job decently.

    Basically, you just need to populate the top of the board and add a few jumper wires. Place a jumper between OUT and IN on the voltage regulator chip, and between GND and VOUT at the very bottom. Just as with the power supply channel, you can control the current by applying a voltage on the I SET pin. The lower the voltage the less current will pass. If you use the recommended component values, it will allow for 5v I Set = 5A current. I put a potentiometer on this pin to let me easily control it, but you could also use a DAC or something.

    To use it, you plug in the power supply under test to VA / GND, and supply a negative voltage (I use one equal to VA in magnitude) to VB. (Yeah, it's annoying that you need to provide a dual supply for a dummy load... but that's the way I designed the power supply.)

    If you wanted to improve on things a bit, you could not solder on the top 0 ohm resistors, and instead connect the logic supply (+/-/GND) to those pads; you can then connect the power supply under load to the VA / GND pins. This should give better results since the logic supply is separate from the main supply. Take a look at the PCB layout to see exactly where to solder things...

    Enjoy!

  • Other Makers

    The Big One08/18/2015 at 15:00 1 comment

    To my knowledge there are currently 4 people attempting to make this (at least I can see that 4 people have ordered the Rev 1.0 boards from DirtyPCBs). I have no idea who (if anyone) has attempted to use the new Rev 1.1 gerbers I have posted a few days ago.

    Please let me know if / when you get this working, I would be very interested to see other's versions (especially if you do your own enclosures, but even if you just do it as a bare PCB I would love to see it!)

    Cheers

  • Rev 1.1 Gerbers

    The Big One08/13/2015 at 16:06 0 comments

    If you want to make this yourself, please use the Rev 1.1 gerbers, available on github. This fixes the issues in the Rev 1.0 board, and should make for a smoother experience overall.

  • Project Completed

    The Big One06/18/2015 at 03:32 2 comments

    Yesterday I put the final touches on the wooden case. Everything has come together wonderfully, and just under 6 months of work has paid off:

    Read more »

  • Almost There...

    The Big One06/16/2015 at 15:21 0 comments

    The past week or two has been very busy and productive, although I have not posted many updates. Most of the work has been related to the case.

    I have always planned for the case to be made of wood. I had a rough idea of the design (two sides + top, joined with finger joints, sliding down over the aluminum faceplates and secured with screws on the sides). In order to do this, though, I needed to make some tools... read more for details and to see all sorts of pictures!

    Read more »

  • First Real-World Use

    The Big One06/10/2015 at 05:04 0 comments

    Even though it is not quite finished, I used my power supply for the first time today (the first time for a real project, not just testing the supply itself). I was powering on an H-Bridge circuit for the first time, and wanted to a) ensure that it didn't suck too much current if there was a bug, b) see how much current was being drawn. It performed both tasks flawlessly (and for the record, there was in fact a problem with the H-Bridge board, so current limiting came in handy!

  • Multi Point Calibration Working

    The Big One06/09/2015 at 16:56 0 comments

    Over the weekend I have implemented multi point calibration. I currently use 8 calibration points, which seems to work just fine. I use linear interpolation to get calibration values between the calibration points. Testing shows that things are working quite well. Current limiting is working, and accurate down to less than 20mA (I can even plug an LED directly into the power supply outputs without it blowing up!)

    I also added the ability to set startup voltage / current limiting on a per-channel basis. This is configured via the calibration script (run on the computer, talking to the power supply over USB Raw HID).

    I will post a demo video when I get the chance, although that may not be for a few days given my workload right now...

View all 49 project logs

  • 1
    Step 1

    PCB Rev 1.0 Errata:

    1. Diode D3 is reversed in the board silkscreen. Place it backwards (opposite of what is shown) for a positive supply, and normal (as shown on the silk screen) for a negative supply. Rev 1.1 has been changed to be correct.
    2. Crystal X1 is rotated 90 degrees on the board silkscreen. Instead of placing it with the long side oriented up / down, place it with the long side oriented left / right. Rev 1.1 has been changed to be correct.
    3. There is a problem with the ISP circuit, which prevents you from programming a bootloader (or flashing fuses, or doing anything with the ISP) when the AVR plus all components are on the board. Please program the bootloader and flash fuses (using the script in power_supply/bootloader/program.sh) prior to soldering the entire circuit. You can do this in one of two ways: either program the chip prior to placement (if you have some sort of removable TQFP socket), or solder the AVR + crystal + 8pF caps and then program it, and only once the bootloader is programmed do you finish soldering the rest of the circuit. UPDATE: In the latest iteration of the Rev 1 controller, I have decided to not solder the encoder pullups / caps / TVS directly to the board; rather, I will solder it to the encoders themselves (which can then be detached from the board using the jumper cables). This allows ISP to work properly when the encoders are unplugged. Rev 1.1 has been changed to have jumpers to disconnect the encoders, so the supporting hardware can just stay on the board.
    4. The current limiting LED indicator light does not turn on properly. Current limiting works, but the indicator light does not. To fix it, connect pin 6 of op amp U2 to a -3v source rather than GND. Two resistors (20k and 5.1k) in a voltage divider across the -15v supply works fine for this. See this log post for more details and a picture of how I did this.
  • 2
    Step 2

    Use PCB Rev 1.1 to fix all four of these problems.

  • 3
    Step 3

    When soldering up the negative channels, be sure to reverse the polarity of the following components:

    • All three diodes
    • Both electrolytic capacitors
    • Both status LEDs (the + side of the LED should go to the pin marked GND)

    You also need to populate the 0-ohm resistors in the NEG board areas (rather than the POS ones).

    Of course, you also need to ensure that V+ is connected to VB and V- is connected to VA when soldering the power inputs.

View all 3 instructions

Enjoy this project?

Share

Discussions

Mike wrote 06/16/2020 at 21:10 point

It is great to see that project is still alive - last GitHub change in 2019! Are you happy with your design? Do you still use it on your bench?

I am about to send PCB to production. Any last changes you'd suggest?

  Are you sure? yes | no

The Big One wrote 06/16/2020 at 23:08 point

Yep, I am still using this and it is working great.

If I were to do it over again, I would probably try harder to a) keep each channel isolated rather than the common ground design I have now, and b) use a two stage switching + linear regulator design, rather than the linear regulator I am using today, as that would allow for higher currents at low voltages over a longer period of time... that said, with the beefy heat sinks I am using, I have never run into a situation where I needed more current than I had.

I can't think of any tweaks to the PCB that are pending.  As long as you are fine with a linear regulator with common ground between channels, I think this one works fine.

Cheers

  Are you sure? yes | no

nexxo00 wrote 01/18/2018 at 19:55 point

I need this in my life. Although I already have a pretty good TTi bench power supply, it woud make a nice next project after my steampunk soldering station (all brass and aluminium)...

  Are you sure? yes | no

Tim Good wrote 08/04/2016 at 16:03 point

For anyone interested in building this project, I have some spare board sets available of the Rev 1.1 board (plus 4 additional of the channel board so you will have a total of 5 channel boards) from my purchase of boards. I have a few friends who are going to make one and since DirtyPCB will send you 10 copies of TBO's layout, I had spare controller boards I didn't need lying around. So we had spare channel boards made to use some of them up rather than send to the landfill. Write to me with your address for price (less than half of the $25 DirtyPCBs price) plus shipping if you are interested.

  Are you sure? yes | no

Jerry wrote 07/26/2016 at 15:56 point

Very impressive, even the fine woodwork, overall a really nice unit, I would be proud to own such a power supply. I had plans on building one, probably just the basic from an old PS, but last year we decided to abandon our sticks and bricks home in favor of a nomadic life.  Thus with space very limited for my electronics toys, I built three separate power units. All are based on the 18650 cells, two with 3 cells and a third higher power DC supply with 6 cells. One with a step up converter, the second with a step down, and the big one with step up for large LED lights from the 50 watt to 100 watt for outdoor lighting when needed. The amount that I use them is limited so they rarely need recharging.  The cells are harvested from rejected laptop batteries  that have served their lives and are said by the computers to be dead. I usually only find one dead cell in each battery so I have plenty of old 18650's around as I used to do computer repair.

  Are you sure? yes | no

The Big One wrote 07/26/2016 at 15:58 point

Sounds pretty neat (both the supplies themselves as well as the nomadic lifestyle).

Cheers

  Are you sure? yes | no

Oliver.D wrote 07/10/2016 at 10:12 point

Hi, I have been looking into getting myself a better power supply and this project looks great. As a mater of fact I just signed up to hackaday.io because of it.

Is it possible to connect the +12V and the -12V outputs in series so to have 24V? I don't see why not but I’m not sure.

Also I would like to replace the two switching power supplies by one toroidal transformer with two outputs. I've done some research as to what is available and found transformers with 2x15VAC and 2x18VAC outputs. Which one would be better suited for this project?

I also have a few nice and large VFD displays that were salvaged from cash registers and I  think one of them would look great on this power supply. They are driven serially at 9600b and only have 2x20 characters but I was thinking of using some LEDs to display the channel number. Would it be possible to use software serial to to display the information without running into any problems?

  Are you sure? yes | no

The Big One wrote 07/10/2016 at 14:20 point

Hi Oliver,

This power supply does not have isolated outputs, which means that you cannot chain the outputs for larger voltage ranges.  This is pretty much the biggest deficiency in this design IMHO.

You could definitely use a transformer for the output (that was what I was looking to use originally), but I found that transformers were a) more expensive, b) larger / heavier, and c) required more hardware to give a good clean output (you need some beefy diodes and caps for the rectifier, especially if you are drawing high current).

As for what voltage to use, it depends on what you want for the output.  I wanted to get from +/- 0 - 12V, so I used 15V supplies.  The max output is about 2.5V lower than the supply voltage.

You also need to keep in mind what voltage and current you most commonly use.  The power supply is linear (vs. switching), which means that a lot of power is wasted as heat, especially for high current loads.  For instance, if you want to draw 2A at 3V, the total power output is 2A x 3V = 6W, but the total power dissipated is 2A x (12.5V - 3V) = 2A x 9.5V = 19W.  If you use an 18V supply, it would be 2A x (15.5V - 3V) = 2A x 12.5V = 25W.  Either of these wattages is large enough that you would not likely be able to sustain that amount of current output at such a low voltage.  At higher voltages (say, 12V) you would be able to sustain such a load for much longer.  (This is IMHO the second largest deficiency in my design - it is purely a linear regulator, rather than a switching pre-regulator + linear post-regulator, which would be much more efficient and better suited to supplying large sustained currents at a low voltage.

As for the displays, I can't really comment on that... if you are asking about software serial I assume you are using the Arduino IDE / framework, which would mean you are planning on re-writing the software from scratch.  The software I wrote does not use the Arduino library.

Hope that helps

Cheers

  Are you sure? yes | no

Oliver.D wrote 07/10/2016 at 15:04 point

Thanks for the reply, it's appreciated. 

Concerning the display I was actually thinking of just modifying your software. My concern was only concerning the time-out caused by some form of software serial at slow speeds and whether that could interfere with any other part of the program.

I am not really looking for a power supply for heavy loads but more something that’s accurate and nice to use for experimentation. Maybe play around with op-amps a little.

But I still don't get why it shouldn’t be possible to tie a positive rail with a negative one to get added the voltage.

I am now considering a transformer with 2x18V at 6.25A, not much more expensive than two good quality Meanwell switching power supplies.

  Are you sure? yes | no

The Big One wrote 07/10/2016 at 16:58 point

The software does not do that much work, so you should be fine with software serial.  Basically, the software reads the ADC to update the actual value, and writes to the DACs to set the value, and the actual work to keep the actual value at the setpoint is done in hardware (op amp).

As for tying positive to negative, I am still not sure about that.  My original response was talking about tying two positive channels together (which is possible with an isolated supply): i.e. tie + from the first with - on the second, and then you can use the - from the first with + from the second for a larger value.  This is not possible on my design.  However tying the negative channel and the positive channel together may work alright, but I don't know if the LM317 is designed to do that.  Feel free to experiment of course, but do so at your own risk.  Personally, I have no need for 20+V supply.... in fact I normally use mine at 5V and below.  It is only seldomly that I use even 12V on mine.

Cheers

  Are you sure? yes | no

Tim Good wrote 06/14/2016 at 15:21 point

I'm going to try and make this project, thanks for sharing everything! Working on putting together a parts list from Mouser. I'm through the channel parts so far and each channel is going to run about $23. Probably save a few cents when I break some quantity barriers once I figure out how many channels I'm going to do.

I downloaded the v1.1 PCB files and ordered through DirtyPCBs.com. I tried a couple others like PCBGOGO and PCBWAY hoping to take advantage of the special they show on their home pages but they wound up charging extra for some reason, probably the slotting for the boards I guess. Anyway, when DirtyPCB showed the picture of the board, there is an extra board with USB and another ATMega microcontroller on it that's not on the picture on this project page. I see it is labeled as UBBB 32U4 v1.2 on the back of it.

I've browsed the project site but I must be missing the reference to it. I don't see it in any of your gallery photos.

What is this extra board for?

  Are you sure? yes | no

The Big One wrote 06/14/2016 at 15:34 point

I just panelized another of my projects to save costs - https://hackaday.io/project/3330-ubbb-32u4 .  It is basically an ATMega32u4 dev board.  I have used this board (or at least earlier iterations of it) in several one-off projects of mine, including https://hackaday.io/project/767-universal-controller (rev 2) and https://hackaday.io/project/3317-resource-monitor

Cheers

  Are you sure? yes | no

Michael Vowles wrote 03/18/2016 at 08:02 point

Hi mate, were you able to update the instructions with the steps regarding setting the addresses of the dacs? I've hit a bit of a snag where after programming the controller through flip for the first time it  no longer enumerates it. So I think I might have to revert to ISP. :/

  Are you sure? yes | no

The Big One wrote 03/18/2016 at 14:54 point

When you try to get it to re-enumerate as the bootloader, how are you doing it?  To tell the 32u4 to start in bootloader mode, you need to hold down the PROG button while pressing and releasing the RESET button.  (I.e. if the chip is reset while PROG pin is held low, it will start the internal DFU bootloader).

As for the DACs, it is a bit convoluted, and unfortunately I did not document it well when I was doing it.  From a high level, you need to connect PORTB0 (ENC1A on the PCB) to the I2C_PROG header next to the target DAC with a jumper, and then run the 'pscalib' python program.  You can read the datasheet for the DAC for more information.  Basically, by doing this you enable the DAC to respond to a specific I2C message that it would otherwise ignore.  The rationale for this is exactly what we are seeing here - there are multiple DACs with the same address on the same I2C bus.  Normally this would result in nobody being able to communicate.  However, by adding this special selector pin, you can pick the DAC which you want to respond (and in this case, the message you want it to respond to is the 'change my address' message).

If you are having problems with it, I would highly recommend reading the data sheet for the change address command, and using a logic probe to verify that the communication is happening correctly.  There are some timing considerations which must be met, and which I managed to fudge with delays, but which may be just close enough to outside of spec to only work intermittently.  Since I only programmed two DACs, I don't really have the experience to reliably say exactly what needs to be done.

Hope this helps!

Cheers

  Are you sure? yes | no

Michael Vowles wrote 03/19/2016 at 02:38 point

Thanks for the info mate! First I installed the python HID package using pip install hid but when trying to run pscalib, python seems to be trying to load windows dlls e.g.

Traceback (most recent call last):
  File "./pscalib", line 4, in
    import hid, re, struct, traceback, time
  File "/home/mika/.local/lib/python2.7/site-packages/hid/__init__.py", line 24, in
    hidapi = ctypes.windll.LoadLibrary('hidapi.dll')
AttributeError: 'module' object has no attribute 'windll'

Im using python 2.7, is there anything special to installing the hid package?

  Are you sure? yes | no

The Big One wrote 03/19/2016 at 14:01 point

err... I can't say much about Windows, as I have never even run Python on it. I do know it works on Python 2.7 on Mac and Linux though...

Sorry

  Are you sure? yes | no

Michael Vowles wrote 03/20/2016 at 03:55 point

yeah I am running on a ubuntu VM thats's why I thought it was strange. 

  Are you sure? yes | no

The Big One wrote 03/20/2016 at 03:58 point

Hmmm... can you try using the package from https://github.com/apmorton/pyhidapi instead?  That is what I am using... not sure if it is the same thing or not, but if nothing else, perhaps it is a newer version?

  Are you sure? yes | no

Michael Vowles wrote 03/27/2016 at 10:19 point

Alright so after a lot of messing around (turns our virtualbox doesn't play nice with windows 10) looks like the golden formula is pyhidapi with libhidapi-hidraw0 lets me at least run the python scripts but it is pretty flaky. I constantly get "unable to read data" exception under line 17 of the script which seems like the controller stops/does not respond back correctly. Did you have this behavior? 

Regardless after a couple of tries it let me set the address (i think) where it held the /LDAC line low for long enough or do you probe the i2c lines themselves to confirm? The way I set the address were for DAC 0 set current address as DAC 0 then new address as DAC 0 then so on for the other 2.

Also what is the calibration procedure for each of the channels?

p.s thanks for walking me through so much of this, its been a great learning experience. 

  Are you sure? yes | no

The Big One wrote 03/28/2016 at 00:06 point

A timeout on line 17 means that the AVR is not responding... without more data I can't say why that is happening.

It sounds like you have the DACs programmed properly, although the final proof will be in whether you can calibrate them :-)

Calibration is just mapping (in software) between the 0-5v output of the DAC to the 0-12.5 (or whatever you have decided on) output of the power supply.  It is pretty easy when just following the script.  Start with voltage calibration; the script will tell you a voltage (0, 3.3, 5, 8, 12, etc) and you try to match that to the measurement from a multimeter as closely as possible.  You specify the raw DAC value.  So, for instance, when it asks you to set output of 0v you can start with a DAC value of 0 (which will probably give you a negative voltage output).  Then try increasing the DAC value until the multimeter reads exactly 0.  Then proceed onto the next one.

If you don't have a dual supply you won't be able to get all the way down to zero; just either modify the code to not bother asking for it, or enter a bogus value (and remember that you can't get all the way down).

You should be able to get the voltage output calibrated to within +/- 0.01V of the multimeter; i.e. if you set the output to be 5V, the actual output measured by a multimeter will be between 4.99 and 5.01V.  (Unfortunately I don't have a separate voltage probe, so there may be some voltage drop across the cables if you are drawing high current).

After you have voltage calibrated, you can do the current calibration.  Current calibration is not quite as precise as voltage, but is still reasonably good.  Just follow the instructions in the script.

Sounds like you are getting very close!  :-)

Cheers

  Are you sure? yes | no

Michael Vowles wrote 02/24/2016 at 09:33 point

Hi mate, finally got around to spending some time on this but had the following problem. I have two laptop supplies connecting as you have on the schematic but one of them doesn't work (there is an indicator light when you apply mains power) when the outputs are connected in series. Disconnecting the outputs they both work however, I'm thinking I need to leave one floating and disconnect the earth on the AC side?

  Are you sure? yes | no

The Big One wrote 02/24/2016 at 15:42 point

Are the laptop supplies isolated?  The power supplies *must* be isolated if you are to connect them in this way.  I don't know if regular laptop supplies are isolated, but I would assume that they are not (generally you want the laptop ground to be connected to earth when it is plugged in).

  Are you sure? yes | no

Michael Vowles wrote 02/25/2016 at 07:22 point

So it looks like the output gnd is connected to AC gnd. Seeing as I am not using any negative channels at the moment I might go with the single supply. Also I am a bit confused as to how the encoders should be wired. Should there be 5V to the switch, so 5V-> SW-A->SW-B->SW Input on controller. Similar for the encoder 5V-> ENC_C ->ENCA->ENCA Input on controller. I'm using the EN11 with the switch http://www.farnell.com/datasheets/1912609.pdf 

  Are you sure? yes | no

The Big One wrote 02/25/2016 at 15:39 point

Single supply should be fine in theory, although I have never wired my final boards up like that.

As for the encoder, you can ignore the 5v pin - that was added by mistake.  The correct wiring is to connect encoder common pin plus one of the button pins to GND, and the other three pins (button, ENC A, ENC B) to their respective data lines.

  Are you sure? yes | no

Rue Mohr wrote 02/01/2016 at 04:57 point

I dont see any current ratings for the channel / supply, how much do you get?

  Are you sure? yes | no

The Big One wrote 02/01/2016 at 05:01 point

It depends on the components you select.  If you go for the beefier ones, you can get 5A (although again depending on the source voltage vs. output voltage you may not be able to supply 5A for very long... e.g. if you have a 15V source and you are dropping it down to a 3.3V output, don't expect a full 5A for a long time; if you have a 12.5V output you should be able to sustain it for a long time).  Keep in mind that the center of this build is a LM317 / LM337 / LM338 linear regulator.

If you need sustained high amps out there are better options; this is nice for a general purpose bench supply for microcontrollers and stuff.  

  Are you sure? yes | no

Steck638 wrote 12/05/2015 at 18:46 point

So I am still learning about, well, everything. I  ordered some boards and figured I could throw some parts at them to practice my soldering skills, and I have a feeling I already know the answer, but for general learning/tinkering purposes what sort of a watt volt combination am I looking for? I found a power supply that seems to look right, I hope, and it's 105w and 7v. I don't know if that's about right or what, but here is a link. Thank you for any help.

<link to the power supplies I found>

http://www.jameco.com/webapp/wcs/stores/servlet/Product_10001_10001_2257686_-1

  Are you sure? yes | no

The Big One wrote 12/05/2015 at 20:05 point

The supply you linked to is 15v / 7A output.  That is what I had used, and will give you +/- 12.5v output.  Remember that you need two of them.  If you don't need 12v out, you can go for a lower voltage.  Just remember that the maximum regulated voltage that you get out of the system is about 2.5v less than what you put in.  So, a 15v input will get you 12.5v output, a 10v input would give you 7.5v output, etc.

As far as what you need... well that is really hard to say.  In my system I made 2 positive 5A channels, 1 positive 1A channel, and 1 negative 1A channel.  If I were to do it again, I think that I would go for 2x 1A positive instead of 2x 5A positive; for the small stuff I do, I rarely pull more than an amp (rarely more than 250mA to be honest), and by using a lower amp output you can get more accuracy on the current measurement / limiting.

Hope this helps!

Cheers

  Are you sure? yes | no

Steck638 wrote 12/05/2015 at 20:17 point

thanks for the advice. I guess I should plan out what I'll be wiring up for a while or try to make it super versitile.

  Are you sure? yes | no

Michael Vowles wrote 11/24/2015 at 09:06 point

Soldered up the control board today, it was a bit of a disaster however I think I managed to resurrect all my solder bridges and tombstoned parts. Not bad for the first try if I must say. Next will be trying to program the thing.

  Are you sure? yes | no

The Big One wrote 11/24/2015 at 16:01 point

Yeah, the first try at SMD soldering can be... interesting... ;-)

Practice makes perfect!  The last board I soldered had no bridges at all (I think that was the first time in over a dozen boards that it was the case).

  Are you sure? yes | no

Malhar Deshmukh wrote 11/22/2015 at 09:27 point

You can find optical encoders in an old ps2 rolling mouse. You can get 3 in a mouse having scroll wheel.

  Are you sure? yes | no

The Big One wrote 11/23/2015 at 17:55 point

Cool, nice tip! Although mounting those guys with a nice knob is probably going to be more work than is worth it...

  Are you sure? yes | no

Malhar Deshmukh wrote 11/24/2015 at 04:09 point

Or, if you need a mechanical one, you can find it in optical mouse. I don't know if that one needs debouncing( maybe it doesn't need debouncing ).

  Are you sure? yes | no

K.C. Lee wrote 11/24/2015 at 04:23 point

Tons of "rotary encoder" (quadrature encoder) that you can mount the conventional knobs from the usual place in China.

$0.57 for this one:

http://www.aliexpress.com/item/Hot-Sale-Smart-Electronics-1pcs-KY-040-Rotary-Encoder-Module-Brick-Sensor-Development-Board-for-arduino/32388232415.html?spm=2114.01020208.3.1.wtWr3u&ws_ab_test=searchweb201556_9_79_78_77_80,searchweb201644_5,searchweb201560_...

Might not need debouncing as the sequence is always:
A-B-A-B  or B-A-B-A    So if you see multiple A-A-A-B then you can ignore the duplicates A's.

  Are you sure? yes | no

The Big One wrote 11/24/2015 at 04:25 point

Awesome, I hadn't thought to look for encoders on the various Chinese websites... I'll definite need to look around there for some bulk deals.  I find that I am using encoders in more and more of my projects.

Thanks!

  Are you sure? yes | no

Malhar Deshmukh wrote 11/22/2015 at 09:27 point

You can find optical encoders in an old ps2 rolling mouse. You can get 3 in a mouse having scroll wheel.

  Are you sure? yes | no

Michael Vowles wrote 10/15/2015 at 08:12 point

Pulled the trigger and bought your 1.1 pcbs!

  Are you sure? yes | no

The Big One wrote 10/15/2015 at 20:56 point

Sweet! Let me know how things turn out.

  Are you sure? yes | no

Michael Vowles wrote 10/15/2015 at 21:44 point

I see you recommend 15v supplies would 24v be Overkill? 

  Are you sure? yes | no

The Big One wrote 10/15/2015 at 21:48 point

Given the components which I have chosen (specifically the op amps for each channel's feedback loop), using 2x 24v supplies (48v rail to rail potential) would destroy the op amps.  The op amps I have picked are rated for 36v rail to rail IIRC.  If you can find op amps with a higher voltage tolerance, I think everything else should be fine, although I would still recommend going over the schematics to make sure.  Also finding op amps with 50v+ rail to rail spec is going to be hard... even 36v was difficult.

Cheers

  Are you sure? yes | no

Michael Vowles wrote 10/27/2015 at 02:17 point

Cant reply below but thanks for the info! Was there any preference to what rotary encoders are used?

  Are you sure? yes | no

The Big One wrote 10/27/2015 at 15:00 point

I used the cheapest I could find at the time.  They were mechanical, and thus required some decoupling capacitors (mechanical encoders are essentially like buttons, and must be debounced).  Apparently optical ones are simpler to use (no debouncing) but more expensive, and I have never tried them.

  Are you sure? yes | no

Michael Vowles wrote 10/27/2015 at 23:27 point

Fair enough, thanks again! I'm sure I will have more questions the further along I get.

EDIT: I see you have 4 x 1k (0.1%) resistors in the parts list but only see three used on the current sense diff amp, where is the 4th one used or should there only be 3?

  Are you sure? yes | no

Michael Vowles wrote 10/28/2015 at 11:37 point

I see you have 4 x 1k (0.1%) resistors in the parts list but only see three used on the current sense diff amp, where is the 4th one used or should there only be 3?

Also why is the lm338/337 "in" lead perpendicular to the "out" and "adjust" was this just because of space limitations? I'm assuming you just bend the leads to your will.

  Are you sure? yes | no

The Big One wrote 10/28/2015 at 14:55 point

Hmm, good question.  I think that may have been a mistake - I only remember 2x 1k 0.1% resistors (and another 2x 5.1k) per channel.  Looking at the schematic again, I can't see where else they would be, either.  These precision resistors are on the channel PCB near the right edge, and are labeled within the box that says 0.1%.  I am changing the components list now (of course I would suggest getting a couple extras anyway... I seem to always lose at least one or two resistors when soldering a board, and you want to be sure to have spares for these ones).

As for the LM338, the reason the legs are bent like that is for compatibility with the negative version LM337.  The pinout is different on these two chips, so if we had used the standard pinout it could only have worked for one of them.  By offsetting a pin, you can bend the pins in such a way that either regulator works.

Cheers

  Are you sure? yes | no

Michael Vowles wrote 10/29/2015 at 23:49 point

You have thought of everything! Nice touch, also I was looking at using these TVS diodes http://www.comchiptech.com/cms/UserFiles/CPDT-5V0-HF RevC341466.pdf but the capacitance pretty high. Just curious if there were any you recommended? 

  Are you sure? yes | no

The Big One wrote 10/30/2015 at 03:46 point

For the three TVS diodes in the bottom left corner of the control board, anything should be fine. They are for the encoders, and already have capacitors on the lines for debouncing. The TVS on the USB lines (right above the USB Micro board) should be rated for USB...

All that said, I don't think that I actually ended up using TVS diodes myself.  I figured it was better to have them on the board but not use them rather than not have them and want them.  Yeah, I know I should just populate it, but I got lazy.

  Are you sure? yes | no

The Big One wrote 10/30/2015 at 03:51 point

If I were to recommend a TVS diode for USB, it would probably be something like PESD5V0X1BT,215 (http://ca.mouser.com/Search/ProductDetail.aspx?R=PESD5V0X1BT,215virtualkey66800000virtualkey771-PESD5V0X1BT-T/R).  It is specifically applicable for USB according to the datasheet.  Only caveat is that I have not tried it on the board myself, so YMMV.

  Are you sure? yes | no

Michael Vowles wrote 10/30/2015 at 04:05 point

Thanks so much for the info, I found something similar to what you recommended. Sorry to keep bugging you with questions.
 I am just about to pull the trigger on my parts order!

  Are you sure? yes | no

Alex Rich wrote 09/22/2015 at 14:59 point
You're pretty handy it looks like - check out this example of metal jaws made for Stickvise. https://hackaday.io/project/6931-full-metal-stickvise Will come in handy for really hot stuff. Also you can hang your board off the side, the nylon doesn't melt as easily as you would think as long as you don't hit it directly.

  Are you sure? yes | no

The Big One wrote 09/22/2015 at 15:04 point

Oooh, I like it... I'll have to give it a try when I find some time.  Thanks for the link!

  Are you sure? yes | no

Alex Rich wrote 09/22/2015 at 00:25 point

Great power supply, really impressive design. Thanks for using Stickvise in many of your pictures!  Great to see it in action!

  Are you sure? yes | no

The Big One wrote 09/22/2015 at 01:49 point

Hey thanks, and thanks for the awesome Stickvice design... I was lucky enough to win a couple in the HaD Prize contests, and am finding them to be great!  The only time I break out my Panavise now is when I need to do hot air reflow... I am a bit nervous that the plastic jaws on the Stickvice would melt (my reflow process uses an el cheapo heat gun normally used for stripping paint, so it gets a bit hotter than your normal soldering reflow stations)

  Are you sure? yes | no

Michael Vowles wrote 09/17/2015 at 05:58 point

I forgot to ask previously but how are you doing the smd reflowing? Hacked toaster oven or something more professional? 

Also fluxes, I have read some pretty contradictory advice on what to use, what has worked for you?

  Are you sure? yes | no

The Big One wrote 09/17/2015 at 14:46 point

Hah, a hacked toaster oven is *far* too professional for me! ;-)

I use $3 eBay solder paste, a toothpick, and a $25 heat gun.  See the video below for me demonstrating how I do things.

(This video was one of my earlier attempts and I have refined some aspects of how I do things... specifically, I have added flux to the solder paste to make it a bit more runny, and I now use much less paste on the components and have pretty much eliminated bridging from TQFP parts.  However the general principles are the same)

As for flux, I am just using the cheapest 'flux pen' style thing that I found on Digikey a few years back.  It is supposed to be expired long ago but it seems to be working fine for me.

My approach would be a nightmare for any sort of mass production system (where 'mass production' means 'more than 2 or 3', but for my needs it works just fine.

Cheers

  Are you sure? yes | no

zakqwy wrote 09/17/2015 at 15:57 point

Having scaled the 'toothpick solder paste application technique' up to 100 boards, I can tell you that it's worth getting a stencil :-/

I should really get on the 'heat gun' train though, that seems like a great way to do it. Great video!

  Are you sure? yes | no

The Big One wrote 09/17/2015 at 16:03 point

Yeah, if I was doing 100 boards I would definitely use a stencil.  Or, more likely, I would start pricing out small-run assembly houses.

  Are you sure? yes | no

hackyMan wrote 08/16/2015 at 02:50 point

Very nice finish, i would like to make the step past ATX's some day soon! Did you consider using a old microwave transformer? I have one and i'm tempted, imagine a jacobs ladder sticking out the top of your power supply, that would be cool. :P   

  Are you sure? yes | no

The Big One wrote 08/16/2015 at 03:43 point

I thought about microwave transformers, but I would have had to re-wind it to get the proper voltages, plus throw some huge caps after the rectifier to get smooth output at the amperage I wanted.  Just using SMPS's made more sense in this case (I also didn't have a microwave transformer, so I would have had to source one anyway).

A jacob's ladder would be sweet... maybe someday!

  Are you sure? yes | no

all objects wrote 07/16/2015 at 18:32 point

nice point under 'All Components': 

10000 hrs spare time x 1

;-)

  Are you sure? yes | no

The Big One wrote 07/16/2015 at 19:30 point

Heh, absolutely :-)

But at the end of the day, that *is* the point of Hackaday (and any DIY project).   Plus, the knowledge that I have gained from this project is worth at least a couple of EE courses, so I guess it all works out in the end.  The joy is in the journey, not just the destination!

  Are you sure? yes | no

all objects wrote 07/16/2015 at 18:28 point

really cool... no clutter with displays... So far the display is purely digital. How would you see a complementary analogue indication for the current?

For example, 100% ia line width, reversing the line up to the % of currently consumed? (For higher accuracy, display may then have to be switched/changed from character to graphical/pixel display).

  Are you sure? yes | no

The Big One wrote 07/16/2015 at 19:35 point

Hmm, very good question... personally, I would think that if you want an analog display, you would be better off using an actual analog dial (you can get them from eBay for not much).  Don't try showing an analog value on a digital display - to me, that just makes for the worst of both worlds.

Digital's strengths is precision (you can see a readout of 2.34A vs 2.35A); analog's strengths are immediate feedback (you can see the needle jittering if the current is changing more quickly than the digital display could update).

All that said, adding an analog readout to this design would be difficult.  The setpoints would be easy - just add a pot between 0 and 5V and connect the wiper to the voltage / current setpoint pins.  The voltage / current outputs are more difficult, mostly due to calibration concerns.  The digital controller includes the calibration logic, but you would not get that on an eBay analog gauge.

Hope this helps a bit... feel free to ask if you have other questions.

  Are you sure? yes | no

all objects wrote 07/17/2015 at 00:02 point

'Don't try showing an analog value on a digital display - to me, that just makes for the worst of both worlds.' - spot on... as well as the point about accuracy... My though was only in grasping quicker the state of the current in regard to the set point in form of a bar going from left to right.  I'd keep the the digital display for accuracy, and add only bar-like-thing for the current, 100% being the current set point.  The closer look at the displa showed me that it is obviously a character display and not suitable. So I thought about a simplified solution: Each character slot is 5%. Therefore, 40% current consuming would show the first 8 characters inversed display. --- Next level would be using something like a 240x320 Color TFT LCD (with resistive/capacitive Touch), like I used in some of my Espruno endevours shown at http://forum.espruino.com/conversations/257540 and http://forum.espruino.com/conversations/256122 and http://forum.espruino.com/comments/11860145/ (display speed is slow because 'painted' font is used and display is driven over SPI). With a graphical display a graph over (recent time) could be displayed as well. (my ideas start to carry me away...)....

  Are you sure? yes | no

Similar Projects

Does this project spark your interest?

Become a member to follow this project and never miss any updates