Christoph
-
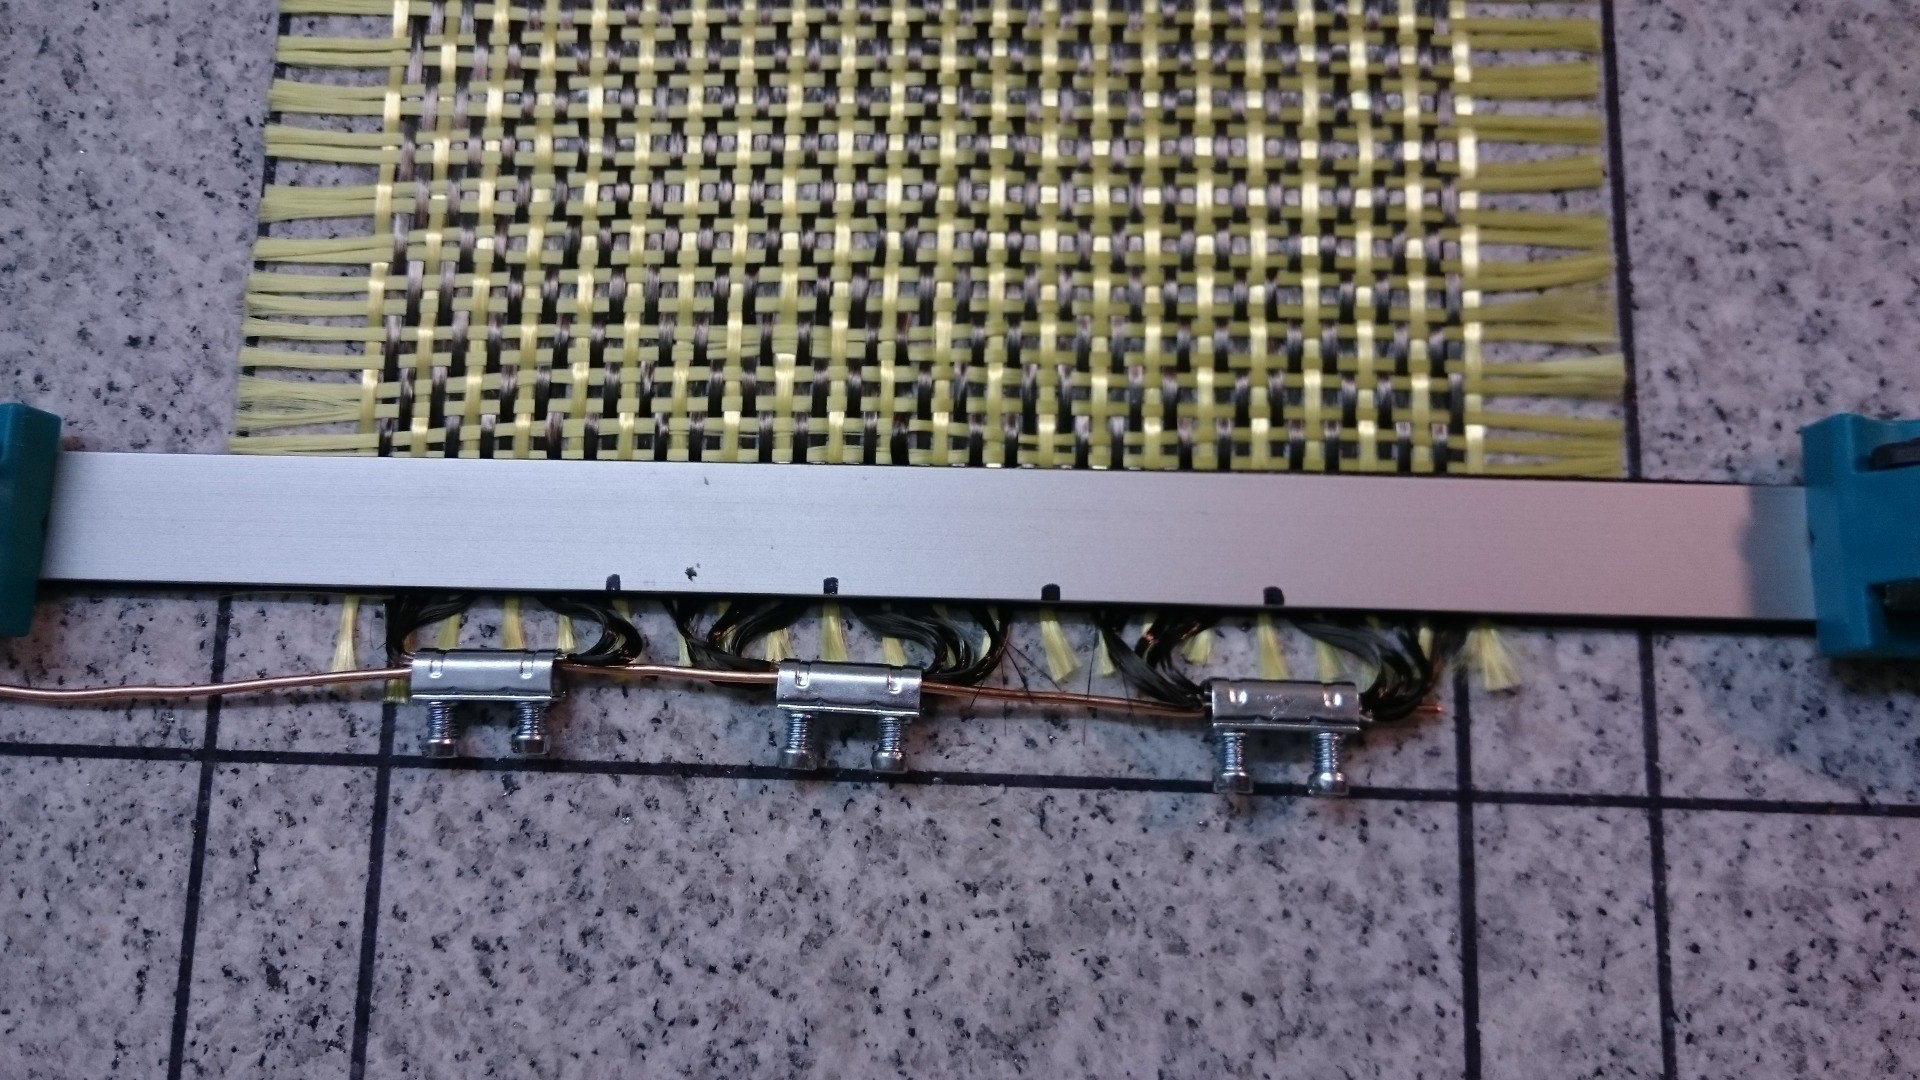
First side of connections is done
02/17/2015 at 10:06 • 0 commentsI tried brazing, but that didn't work out too well. All the surroundings simply ge too hot, and the joint didn't look as neat as desired. I might give this another try later, with different materials or technique maybe, but I decided to connect everything using screw terminals.
A lot of patience later:
![]()
Some carbon fibres broke, but I think that won't hurt too much. When the other side is done I'll power it up to see how much current actually flows.
-
Connections
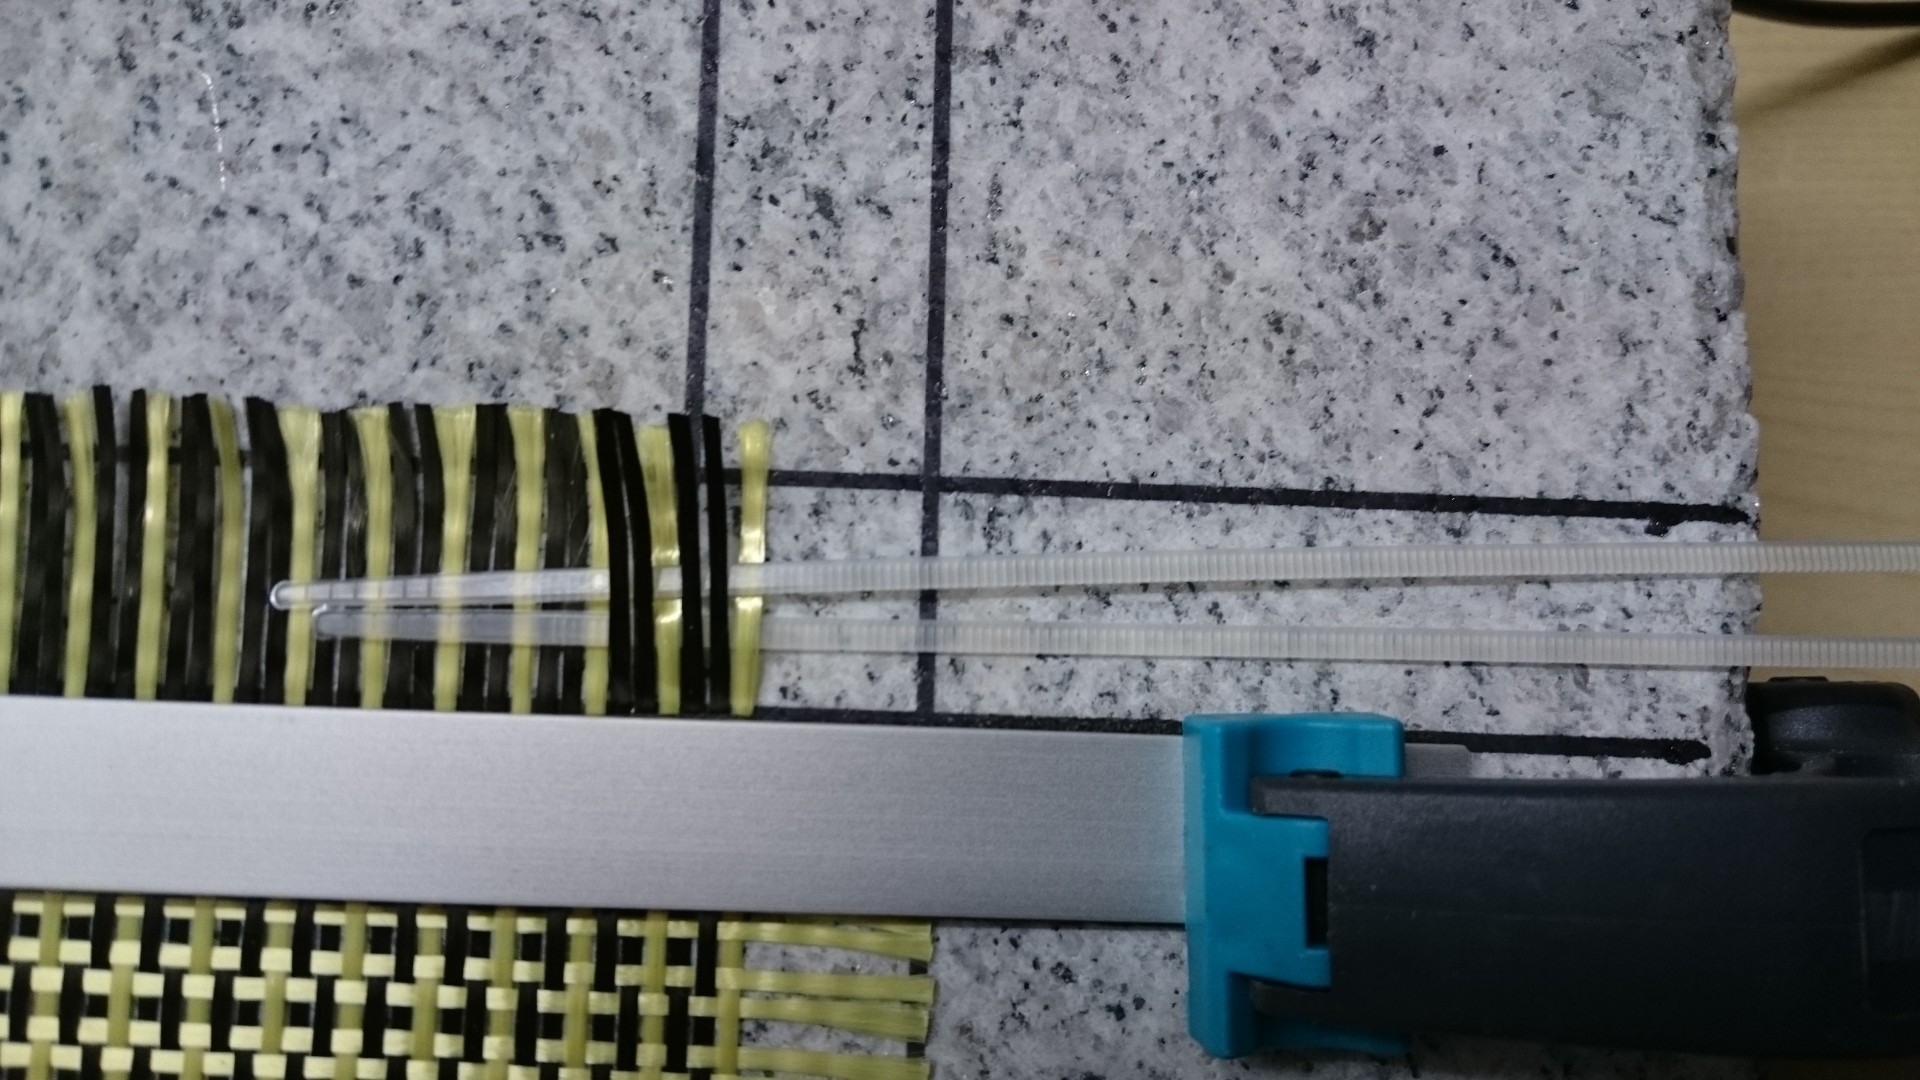
02/15/2015 at 22:50 • 0 commentsTaking four filaments (2 pairs of two) and putting a sleeve around wasn't as hard as expected. First, using two cable straps, I separated the filaments I wanted to use. They were easy to push underneath the fabric, and have rounded ends:
![]()
Then I fiddled them into a sleeve and gently squeezed it:
![]()
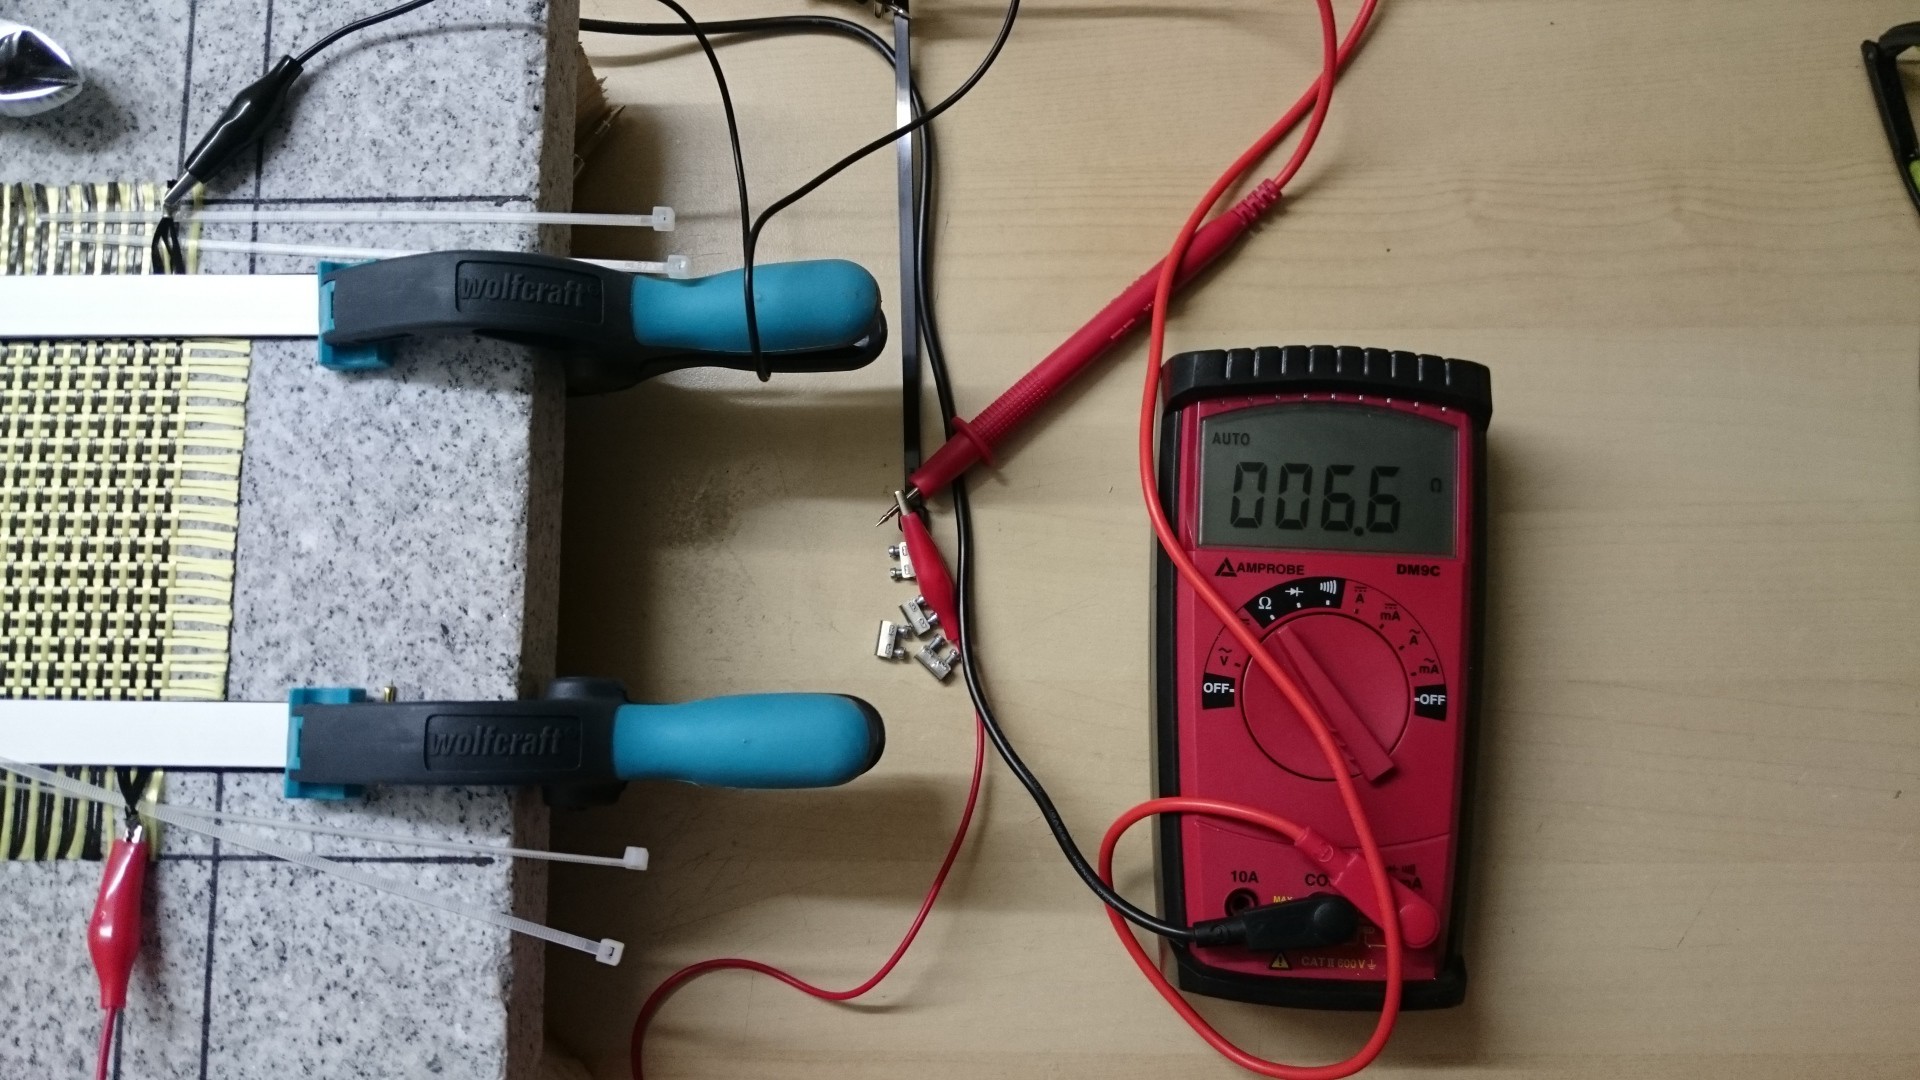
The resistance is a bit too high (I expected about 5 Ohm), but not that bad:
![]()
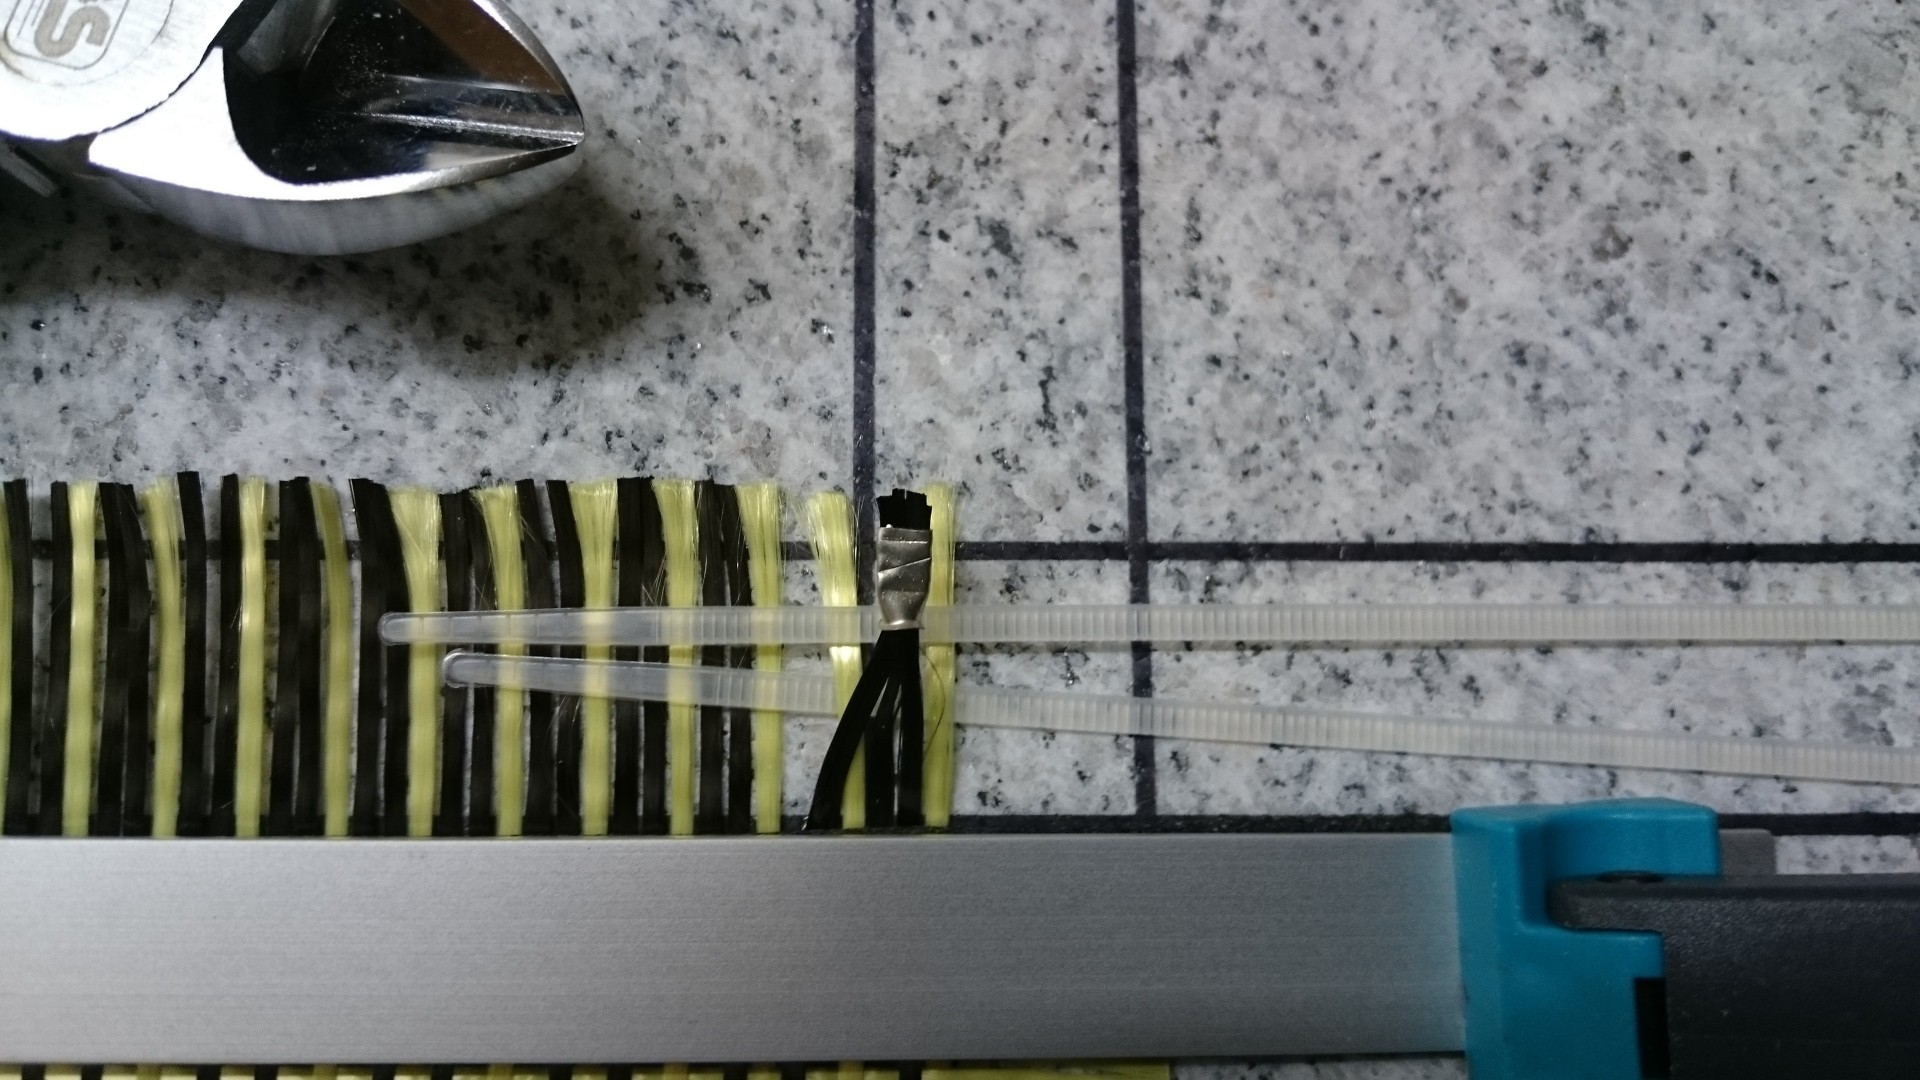
It turned out that I should have shortened the aramid filaments before adding the sleeves, like for the next sleeve in this picture:
![]()
I thought about putting more or less than fours filaments into one sleeve, but with two it might get too crowded, and more than 4 is probably just too hard to do. Also, four will be fine for either brazing or clamping, so I'll stick with that.
-
Started with the fabric
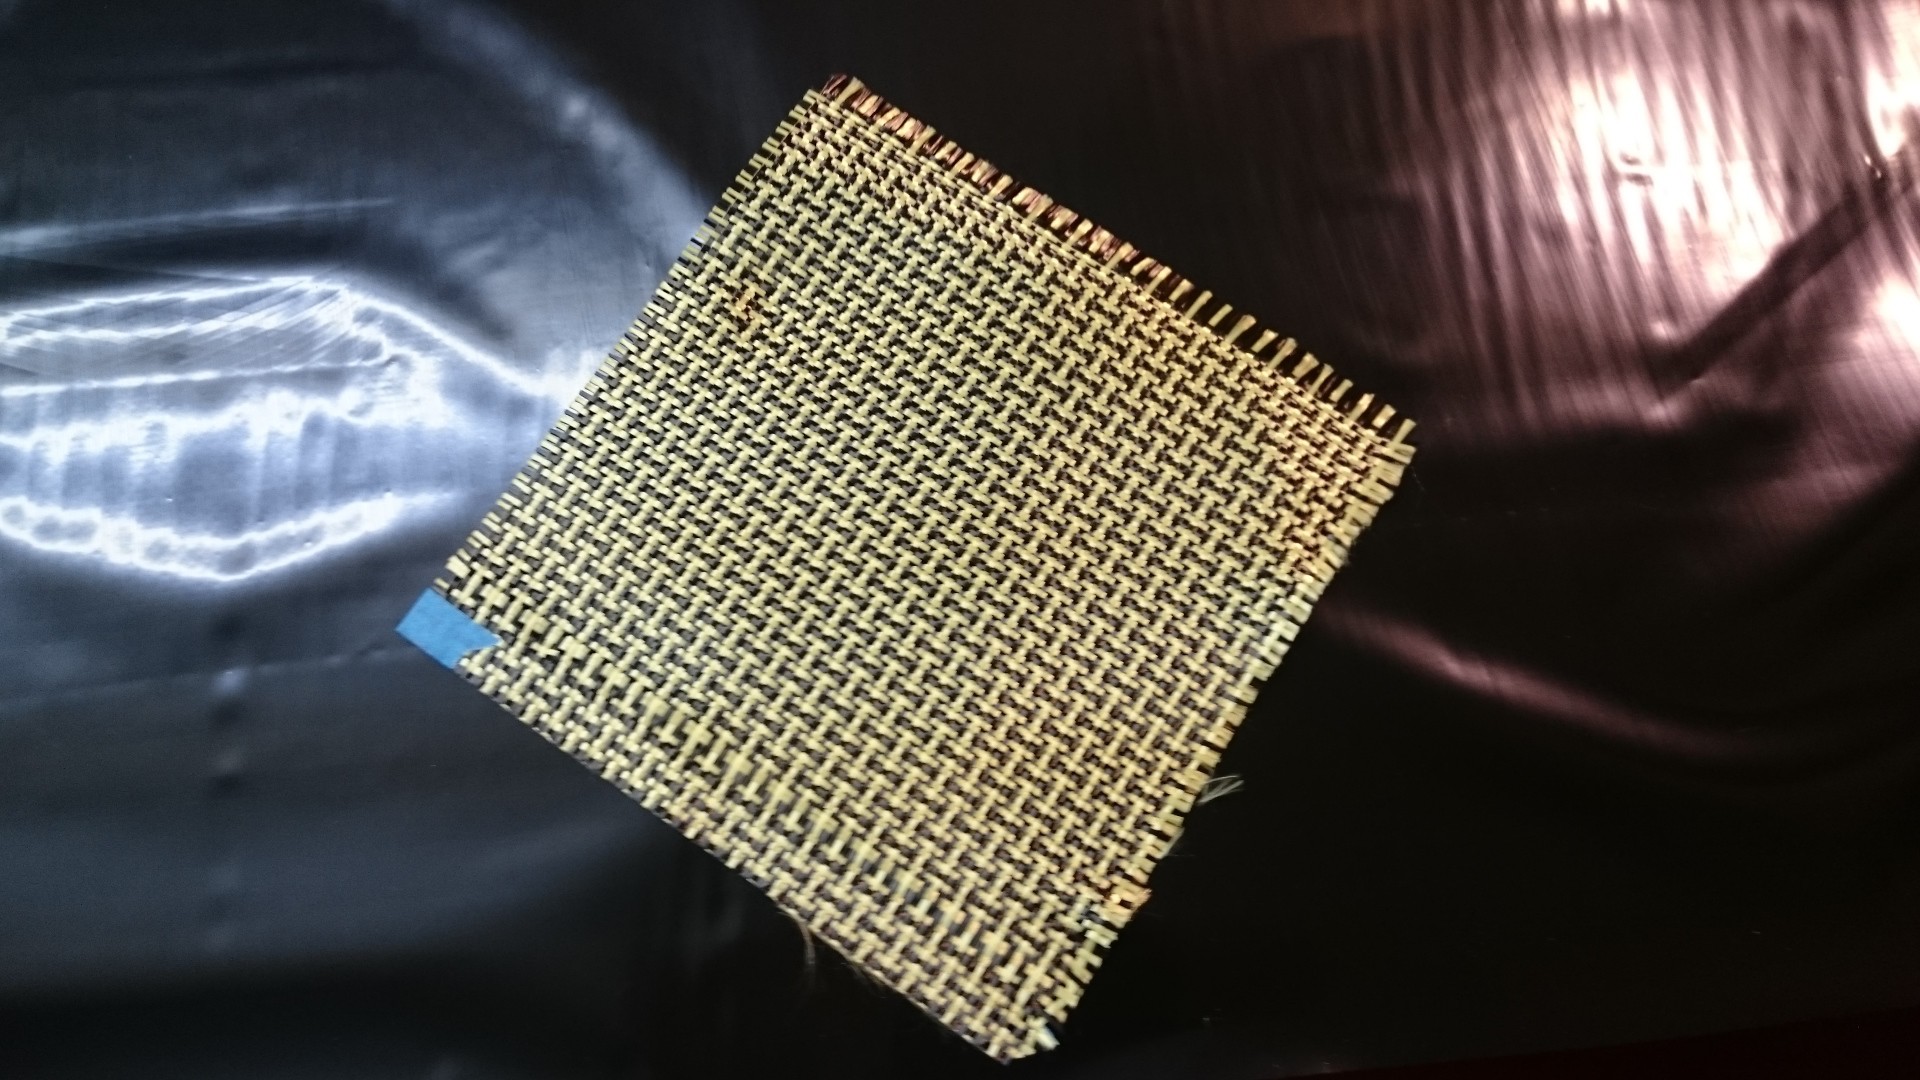
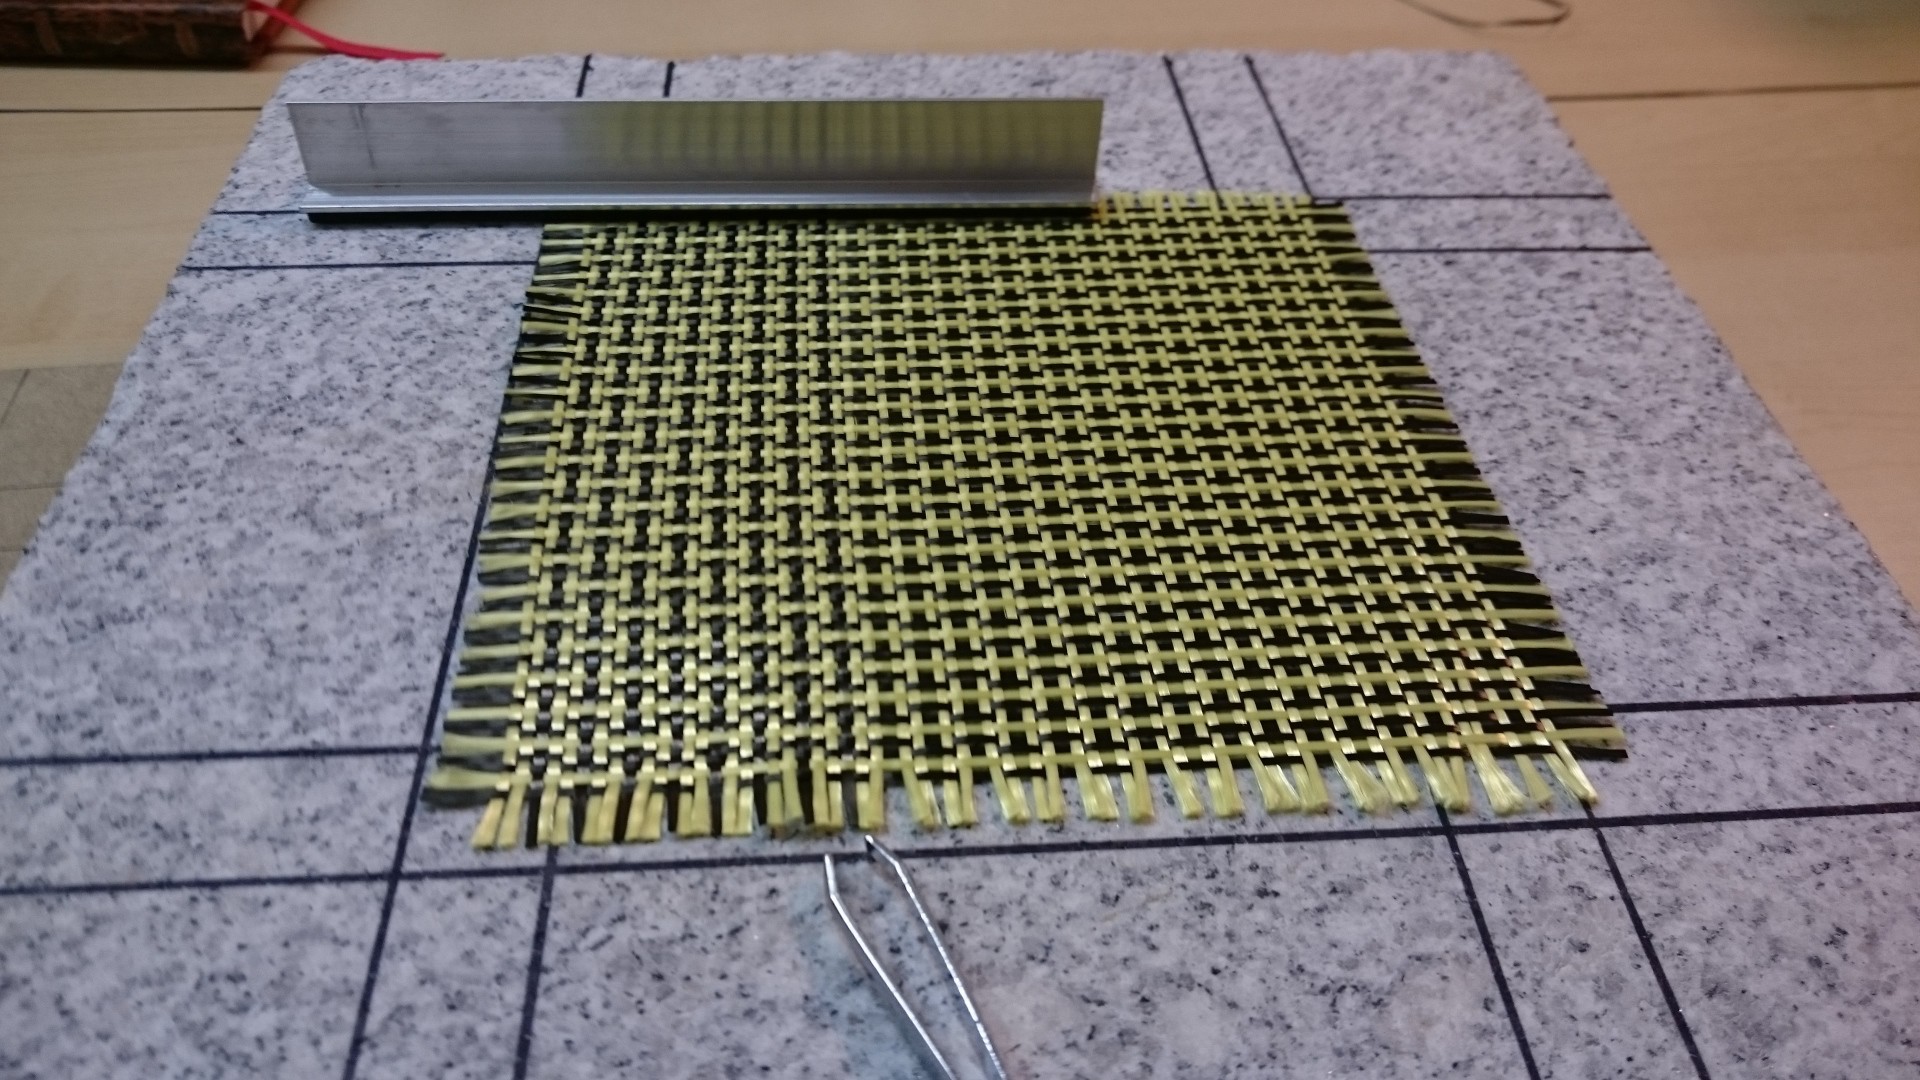
02/15/2015 at 17:53 • 0 commentsThis carbon/aramid fabric is nasty. After about 30 minutes of cutting, fixing, taping, pushing single filaments around with tweezers I ended up with this (quite nice) piece of fabric:
![]()
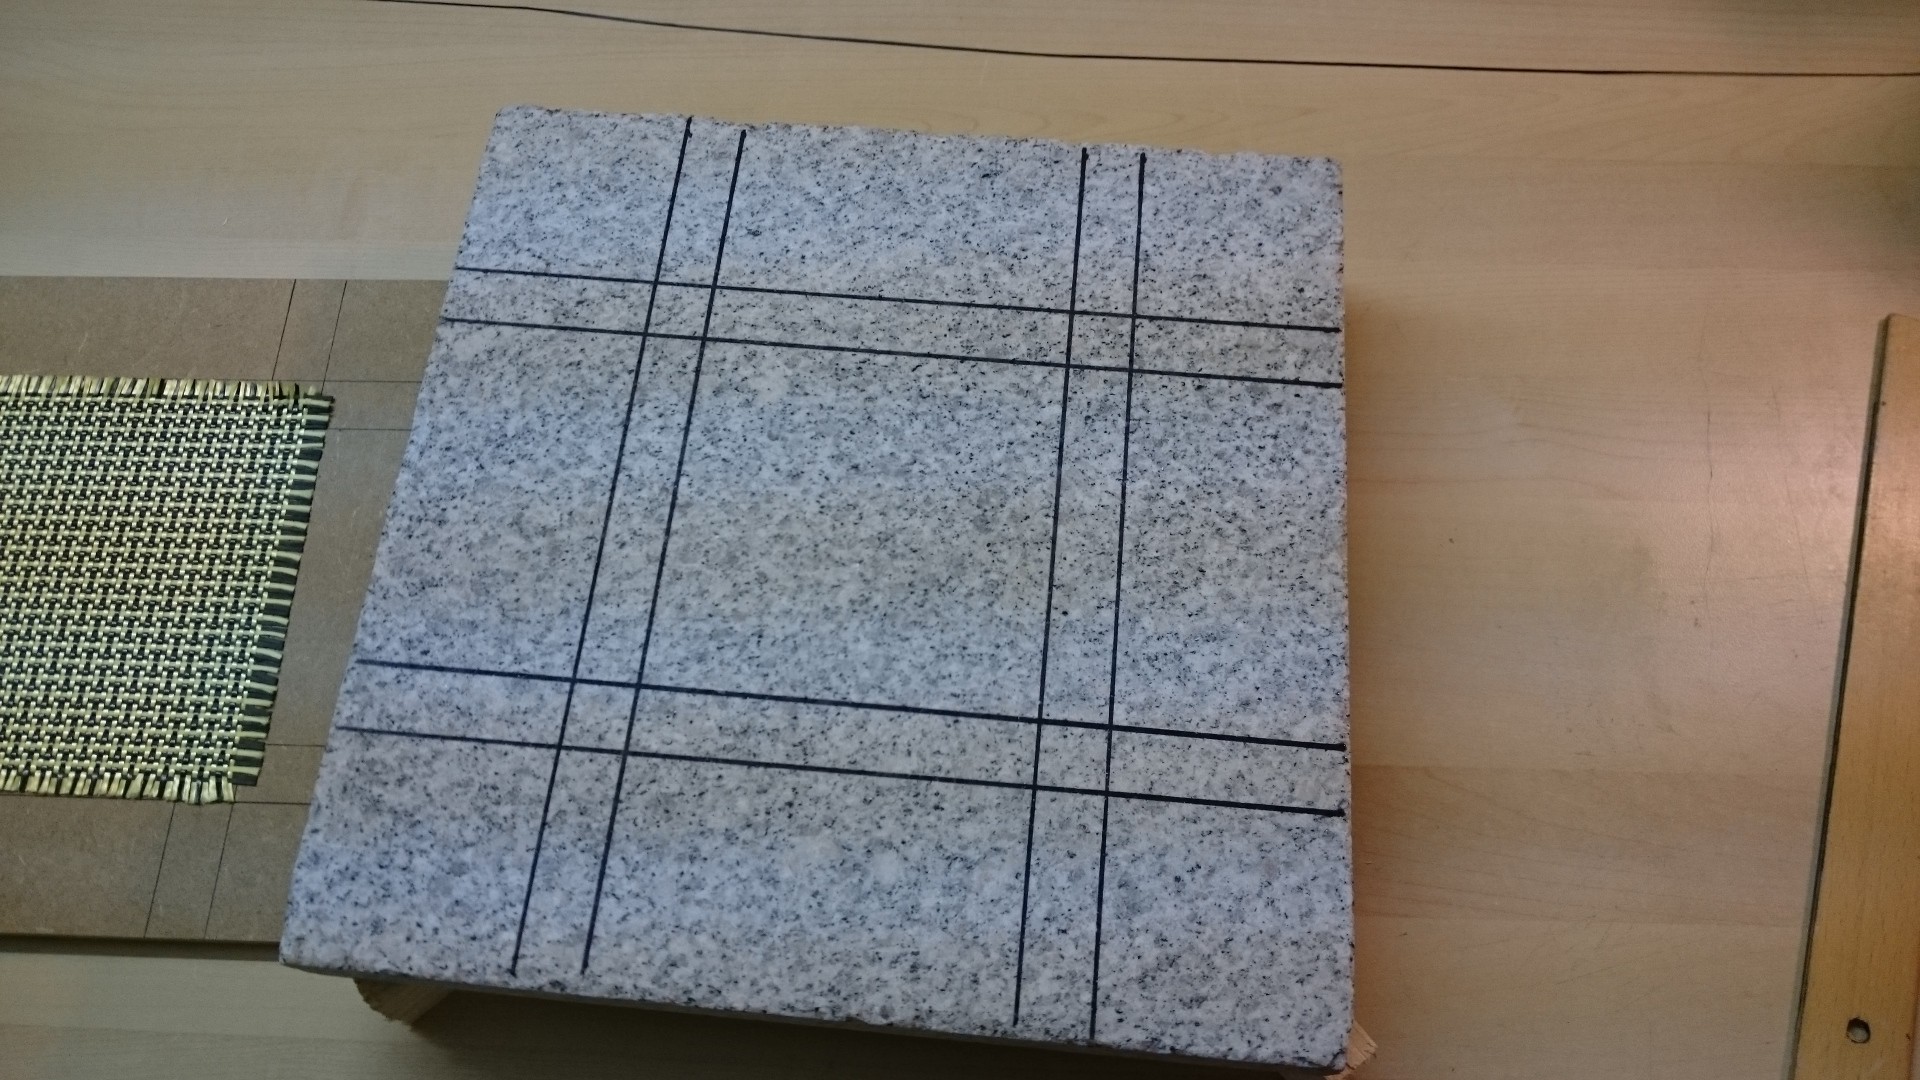
This needs some more trimming until it gets its final shape, and some of the filaments must be removed. This should be done in a fixture where it will remain until the internal connections have been tested, so the fixture must withstand the heat dissipated by the carbon when current flows through it. I wanted to use a tile first, but I could only find this granite plate:
![]()
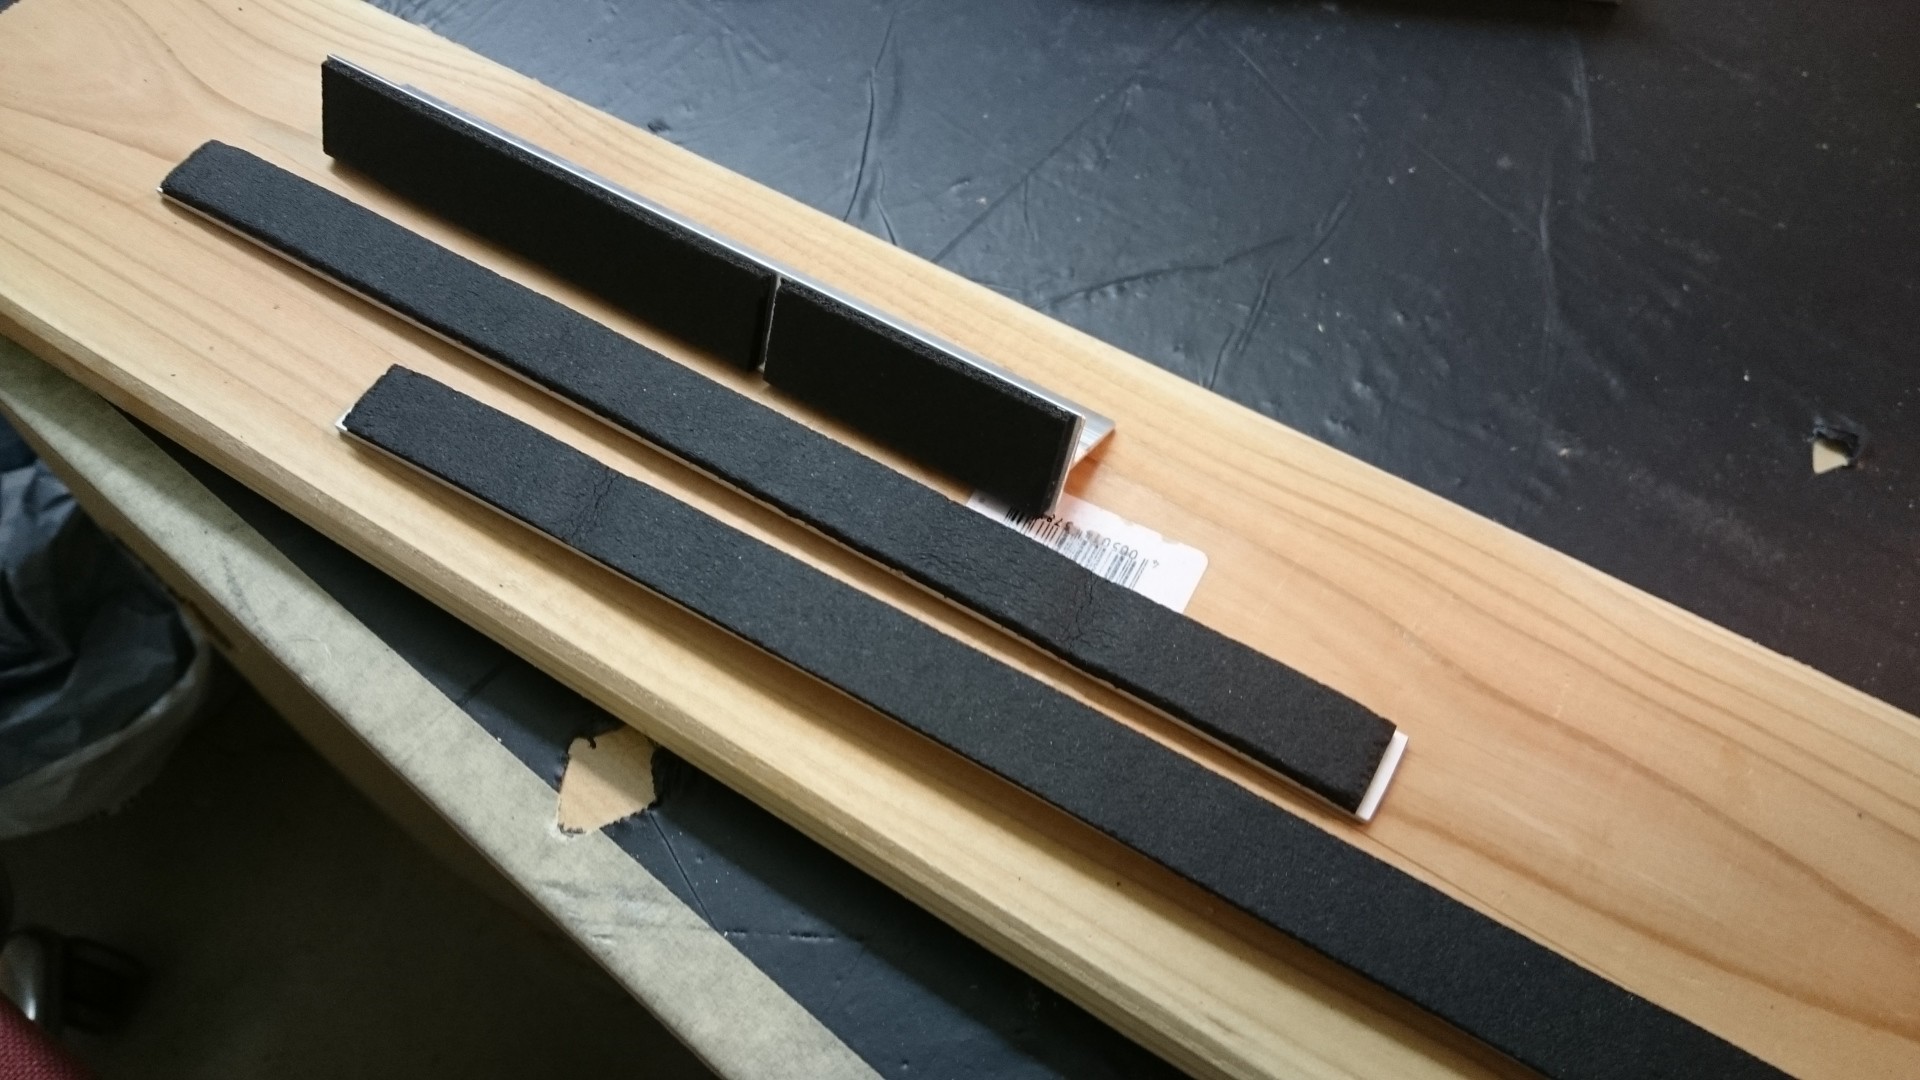
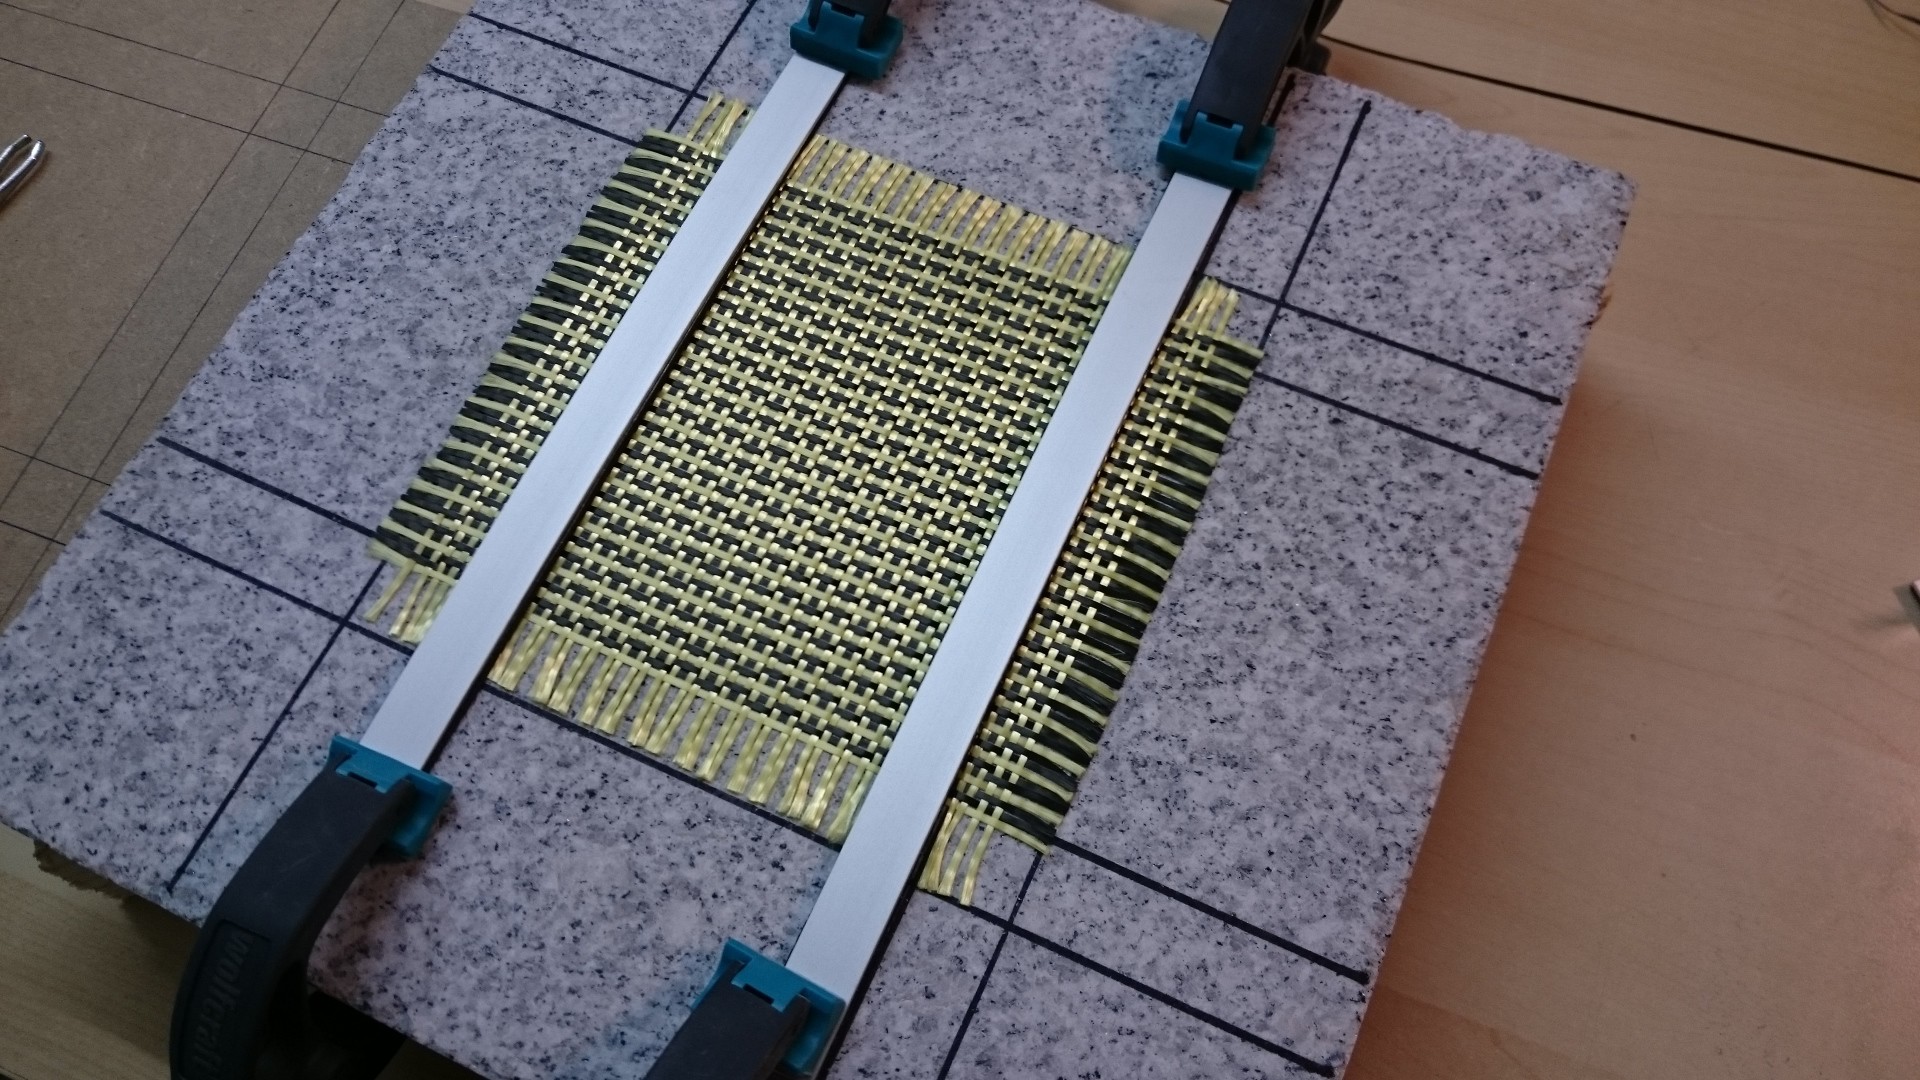
The inner marked area is 120 mm x 120 mm, just like the aluminium plate. The 20 mm border around it allows for some connections. Now in order to pull out single filaments the fabric must be tied down to the plate, but that one filament should be free to move. For that purpose I used a piece of aluminium T-bar with soft foam sticked to it (I also prepared two flat strips with foam for later):
![]()
The small gap in the T-bar foam is where the "moving" filament is:
![]()
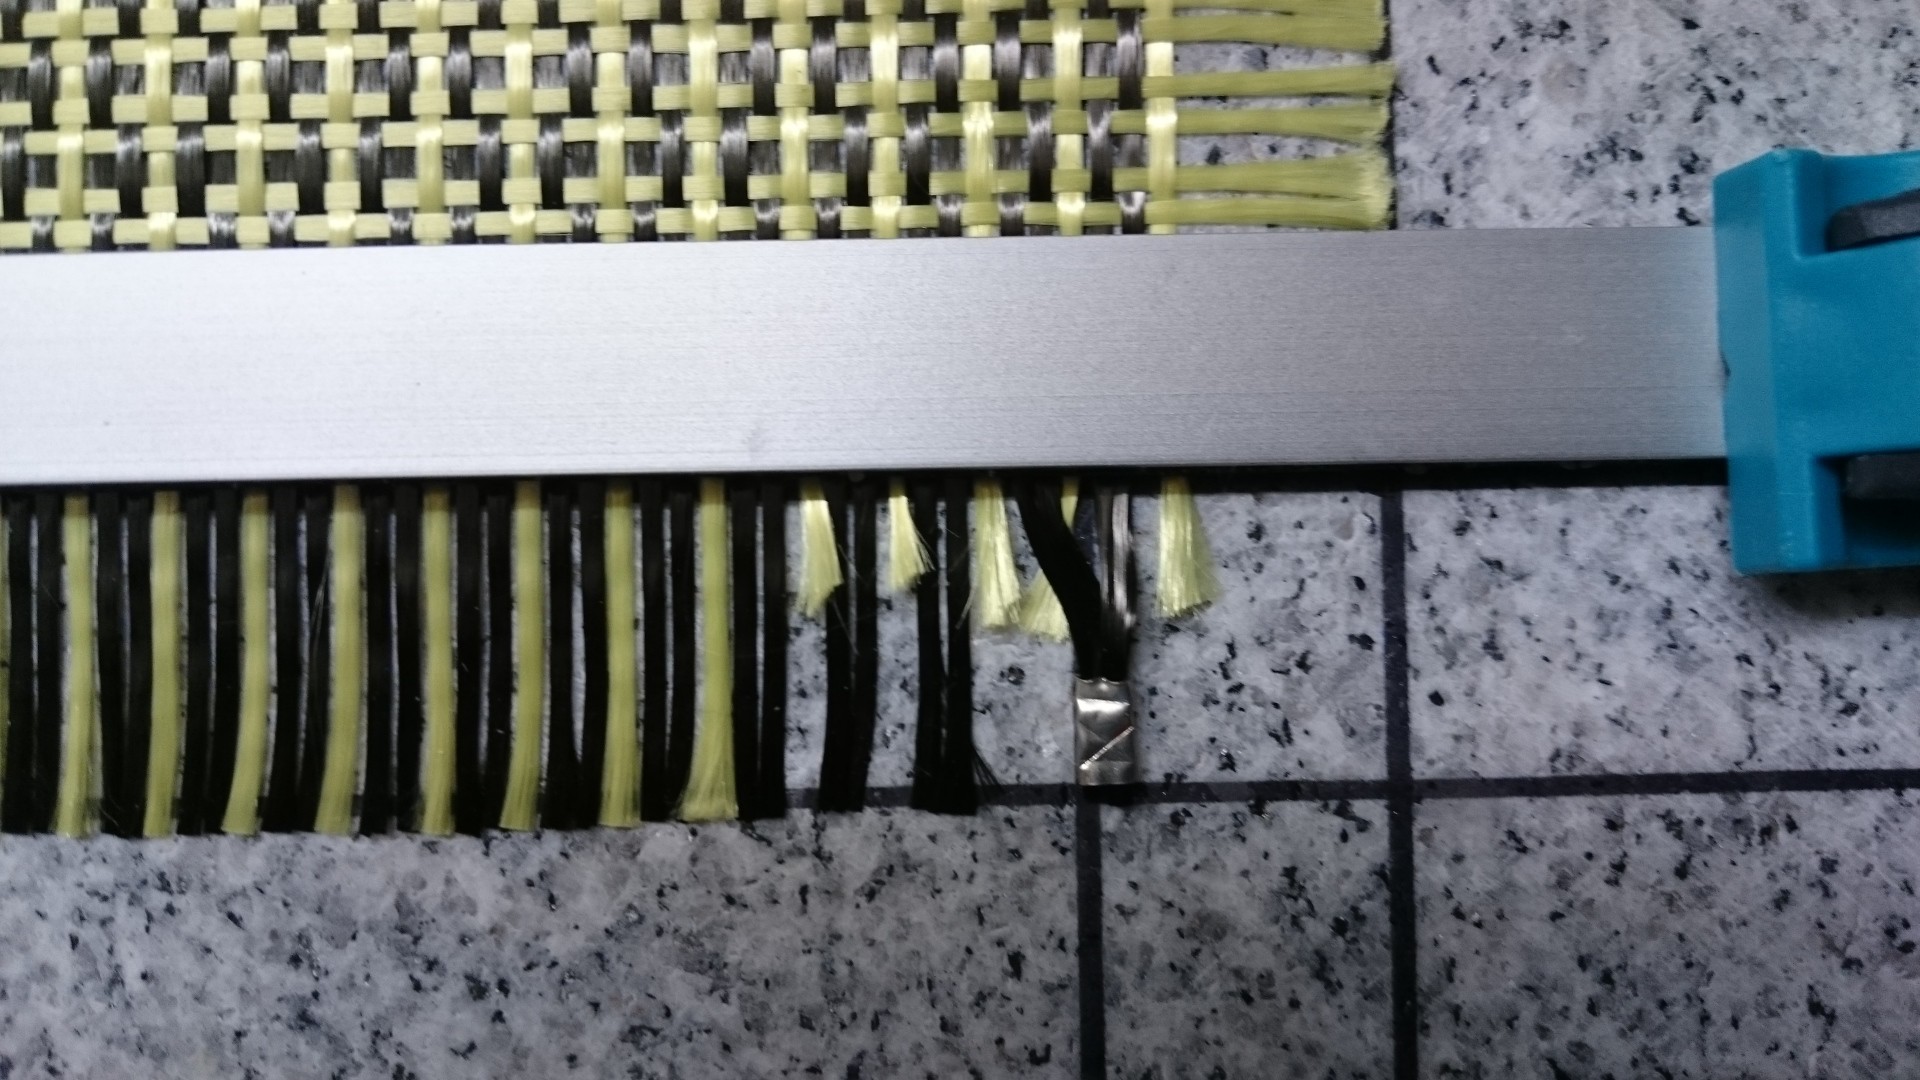
As you can see I started pulling out all the carbon in the one direction where the fabric has 2 aramid filaments per carbon filament. The aramid is left in pairs of two. Then I clamped the fabric with the two flat strips:
![]()
This is not going to move any more. Unless I do something very stupid.
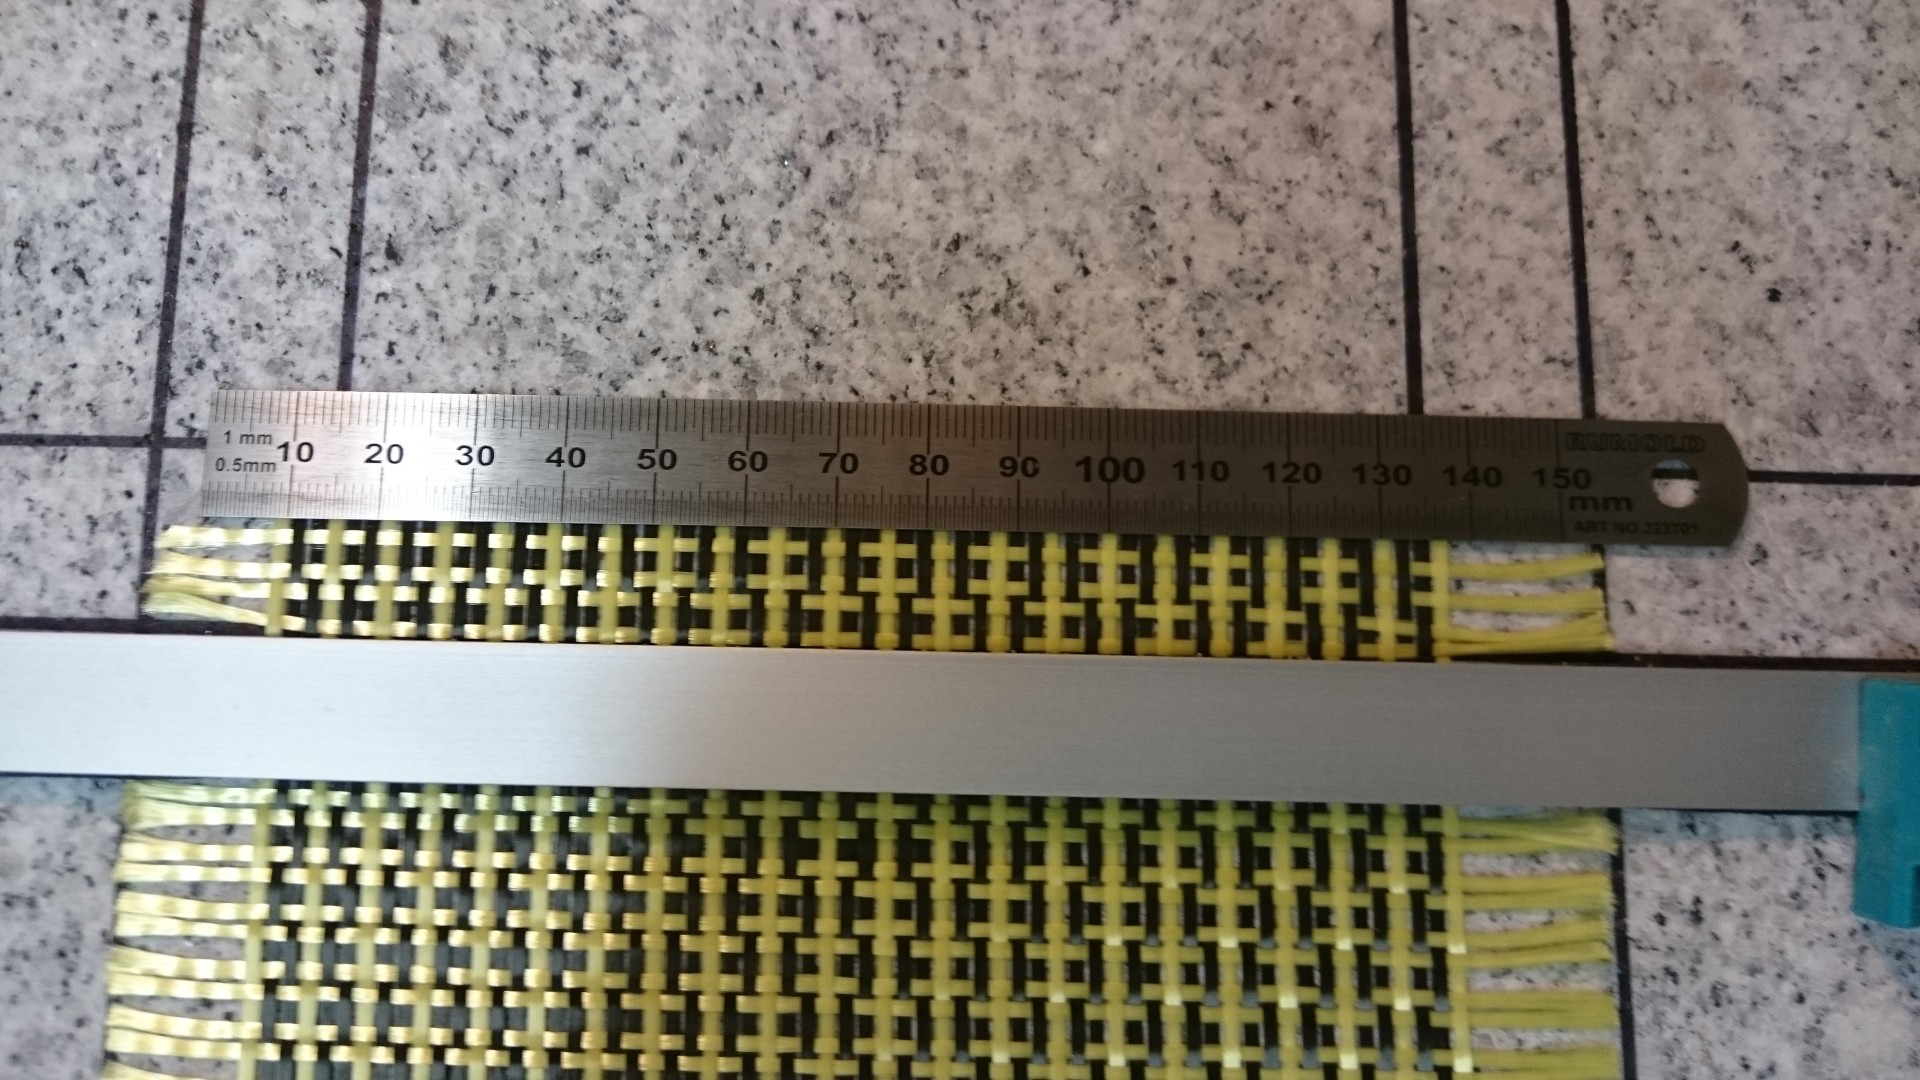
Now I need to figure out how I want to connect the carbon filaments. Here's a closeup of the edge:
![]()
42 filaments, about 130 mm in length (120 plus a bit) in pairs of two, each pair separated by one aramid filament. I measured the resistance of one meter of filament, and it was about
Connecting filaments in series is probably very tedious, so I'll want to go for a low resistance. The lowest (all filaments parallel) and highest (all pairs in series) resistance I can create are
With a 12V supply and minimum resistance I'd get a maximum power of about 320 W. A decent ATX power supply can handle that without problems. So from now on we don't need to worry about isolation from an "is-that-a-threat-to-health!?" perspective.
The next step is to dress up the filaments with cable end sleeves (those without plastic!) and somehow connect them. I guess I can't solder the sleeves to anything, because the solder joints might melt if the whole thing gets too hot unless I can braze them (never did that before) without burning the carbon.
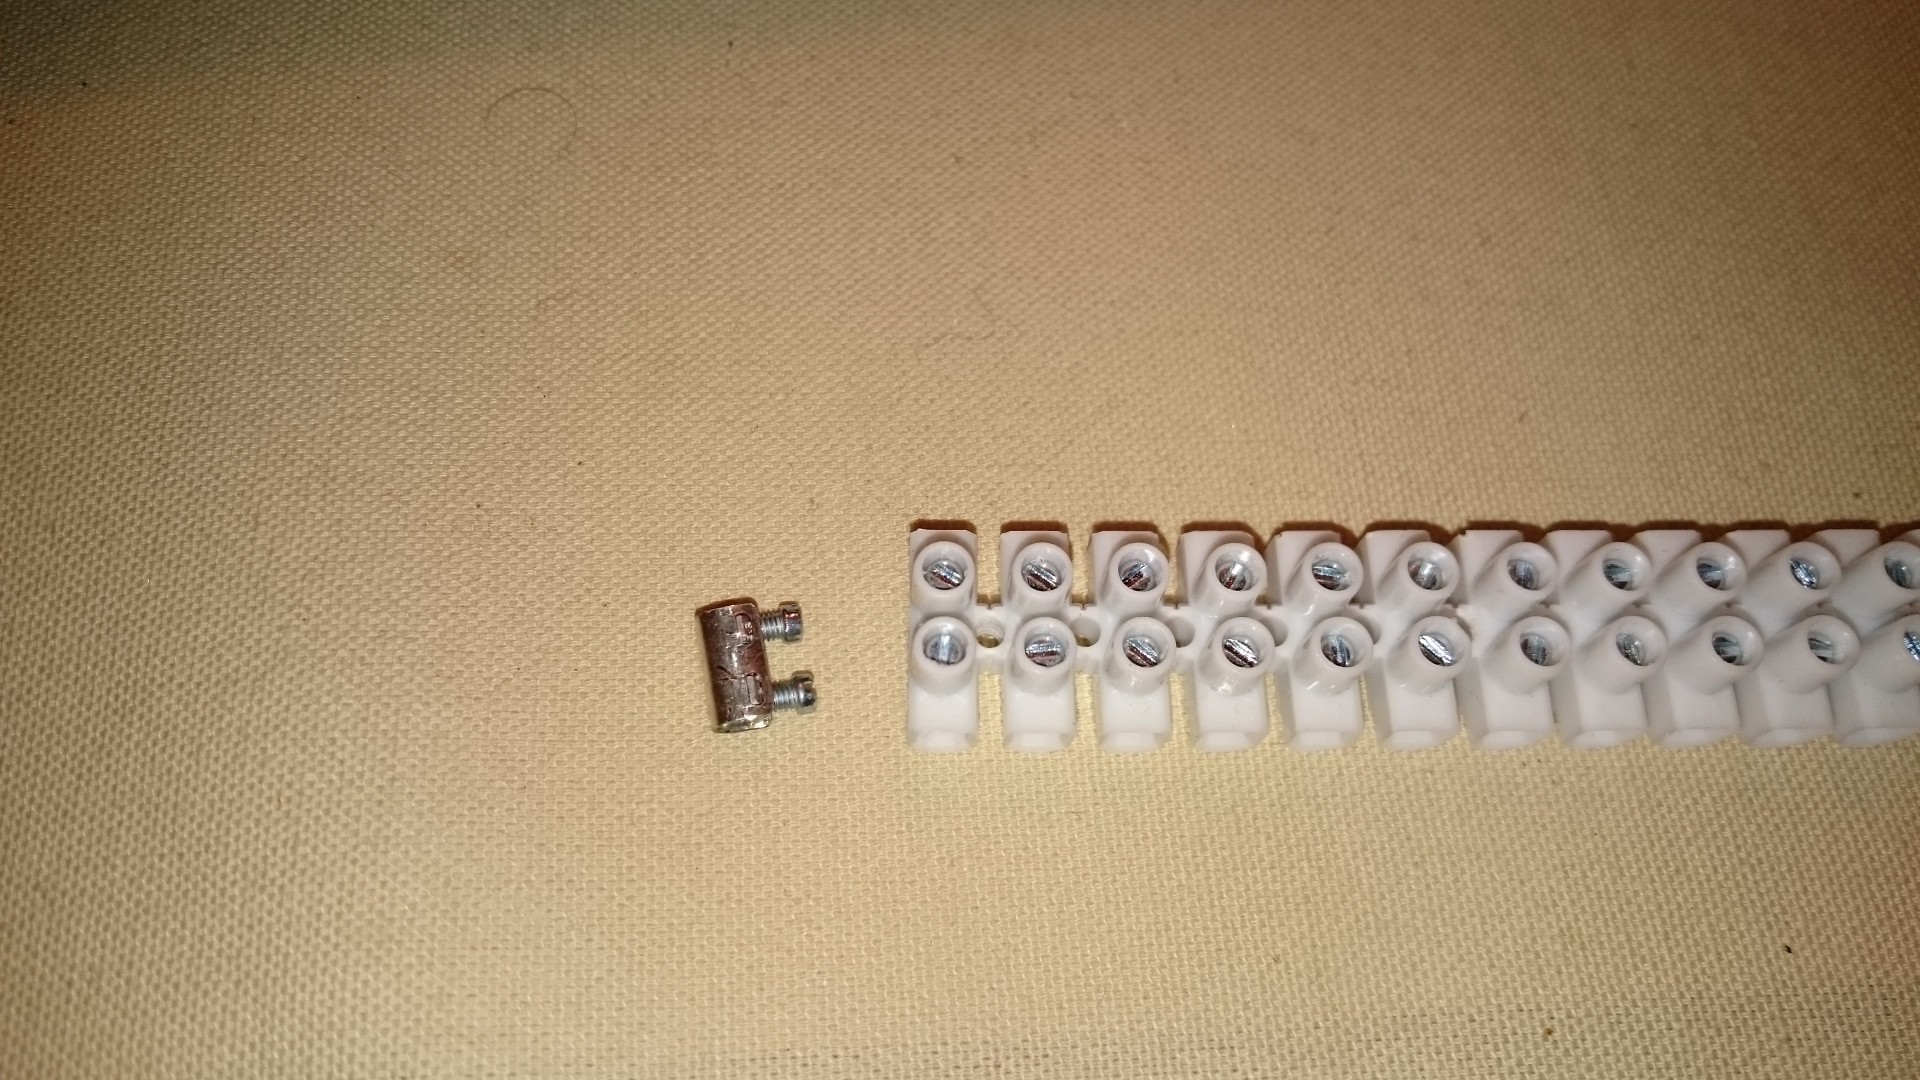
I might also try screw terminals from terminal strips:
![]()
I'll try brazing before I start to pry out another 41 of those screw terminals...
-
Materials for the first try
02/13/2015 at 14:26 • 0 commentsSo far I've got these leftovers:
- A piece of aluminium, 2 mm x 120 mm x 120 mm,
- Carbon/aramid fabric, 188 g/mm², plain weave,
- Two-component silicone,
- Braiding from some old cable for connecting individual carbon filaments.
All of the above can handle temperatures of at least 300 °C (limited by the silicone). Aramid will loose its strength at high temperatures, but the design will not rely on that parameter. The first things to do now:
- Get a bag of expanded glass spheres. I'll use these with silicone to create a spreadable, flexible and thermally insulating filler;
- Measure the resistance of a single carbon filament and figure out how I want to/have to connect them to create a decent heating resistor.
- Sand that piece of aluminium until it's sufficiently flat;
- Create fixtures to prepare the top surface (aluminium with a silicone border) and the fabric. I'll have to pull out all unwanted carbon filaments that would create shortcuts, without messing up the overall structure. This step will be close to a nightmare so the fixture will have to facilitate this step.
Carbon/silicone hotplate
Because simply screwing or soldering resistors to a plate is boring.