-
1Step 1
Creating the Fish Tank / Water Reservoir.
Decide if you're going to have a view window. Depending on the plants grown - short term herbs, sprouting or likewise, it may not be necessary. If you're going to try to do a longer-term plant (w/wo fish), like I want to do tomatoes, I heartily recommend doing a window. If no window - skip the rest of this step and just GET A BUCKET, step done! The nice black 5g buckets from hydro stores would work the same/better as what I got here.
Creating a View Window
I used a lexan/polycarbonate clear sheet for the window. You can find these at r/c hobby stores generally (Parma lexan sheet) and of course on amazon. I'm sure other things could work, but I'm not going to test that. I work at a store that has the lexan.
Cut the 5g bucket using whatever method you have available, the main thing to keep in mind is that you want the inside of the bucket to be smooth, and not hurt yourself. I used a dremel, but I did not cut all the way through, as it melts and warps the plastic. I touched it lightly to the outside where I'd drawn lines, enough to get it warm and make it easy to cut through with a sturdy knife.
Make sure you're cutting the window *smaller* than your window-material! I used the whole lexan sheet, and made the window-hole about 1" smaller on all sides than it. You could do a more tall-skinny window, it would be as effective at monitoring. I wanted to try a full size window for more fish-viewing and easier inspection.
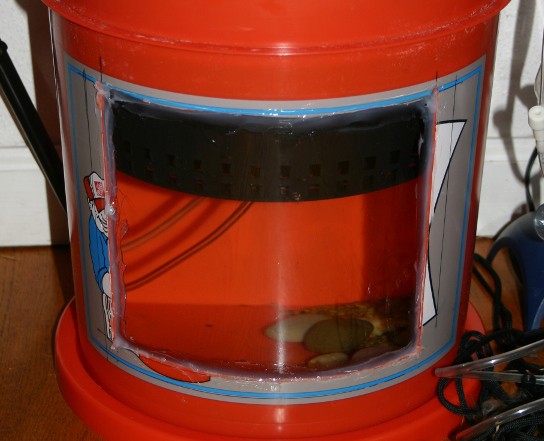
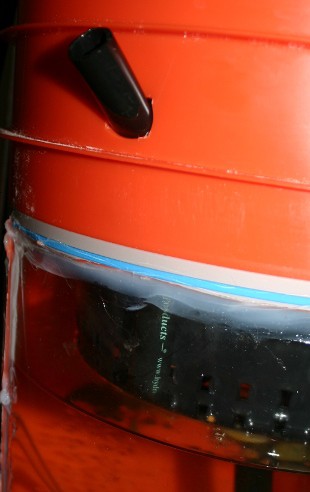
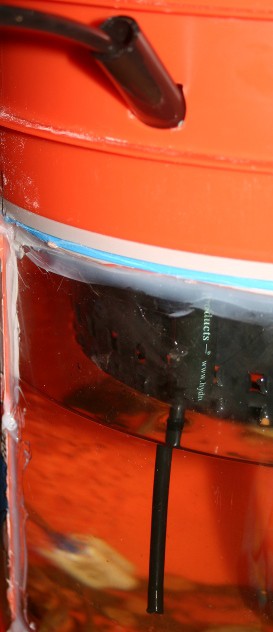
Silicone that window in (on the inside)! (picture below has water, netpot, etc in)
I used GE "100% Silicone Sealant, for plastics", clear, but *not* mold/mildew resistant stuff (additives). It says its not "FDA compliant", if that would bother you get the stuff branded for aquarium use. I strung a bead of silicone all around the outside 1/2" of the sheet, and then pushed it onto the window-hole (from the inside). The bucket is curved, and sheet likes to be flat - problem!
I filled my bucket with some cat litter (well, chicken feed) and rested it at an angle (window down) so that it'd cure and stay tightly bonded to the bucket. Since I'd only done a bead of silicone that didn't smoosh-out from under the lexan, this was fine. Otherwise the feed/litter would stick to the silicone. However, once filled partway with water, it leaked at one corner from water pressure pushing water up between the lexan and bucket.
So after you have the window on with that initial attachment, run/smear a bead of silicone around the outside edge of the window-sheet/lexan, inside the bucket. Run/smear another bead on the outside of the bucket, along the window edge. Leaks solved. I have it resting in its lid, just in case!
-
2
-
3Step 3
Creating the Dual-Root Zone Growing Bed. (to be filled in)
Acquire a netpot meant for a 5g bucket (link), or any ledge-top (nursery no. 2 worked for me) pot + the bucket's lid w/a hole cut smaller than the top diameter of the pot.
Add water to the bucket. (I'll have a fill line, but *just* under the netpot/pot works)
Dechlorinate the water, if it has chlorine. Well water is fine, city water not so much. San Diego has chloramines in addition to chlorine, and it doesn't "offgass" by just sitting outside, so I have to buy dechlorinating stuffs (apparently Vit C tablets work? check)
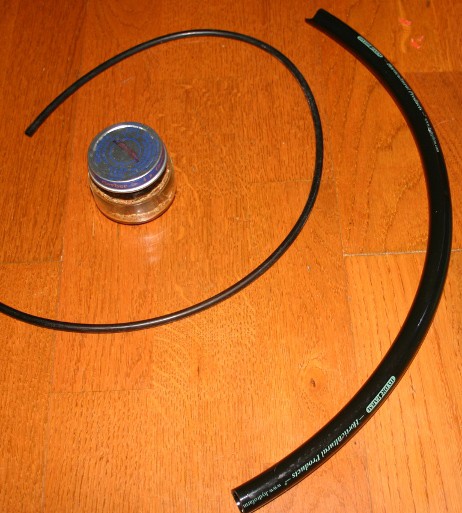
Netpot: It is very useful to use a drill, or something that will make circular holes into plastic. I used a "body reamer" used in radio control car hobby'ing myself. You'll want to make a hole in the bottom, center, of the pot. If it already has one, you will need to check its size versus the diameter of the black tubing. It should be snug, you should have to smoosh the tubing to get it to fit, otherwise it might slide out of place.
Cut a length of the black tubing so that it touches the bottom of the bucket, and reaches about 3-4" short of the top rim of the bucket (while threaded through the netpot).
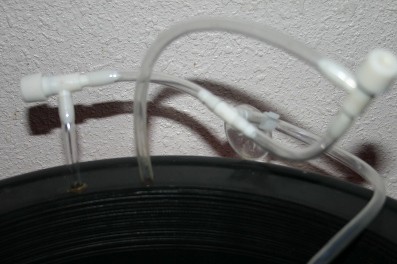
Create two small airline-sized holes in the 'rim' of the netpot, these don't have to be 'snug' like the larger tubing, but doesn't hurt if they are. Thread the two open ends of the airline harness though the holes.
One airline gets an airstone, and can sit on the bottom of the bucket.
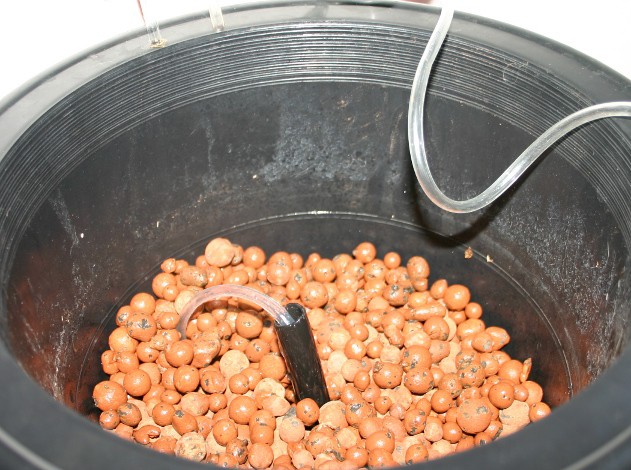
The other airline is the 'power' for the air-lift water pump. I pulled it through a hole in the net-pot, and then threaded it down the larger black tubing. You want to push it through all the way, so that you see air bubbles coming *out* of the black tubing. Then, you pull it back just a little, so that the air bubbles stop. At this point, water should start gurgling/burbling/bubbling up out of the top of the black tubing. Its doing so in this photo, but it might be hard to tell.
Some tweaking of the amount of air going to each thing (airstone and air-pump) with the valves is required. I'll post a video when I'm setting one up to ship out, of what I think works well. It also depends on what lives in the tank. Some fish will require a higher dissolved oxygen level than others. Always err on the side of more air!
Nursery Pot:
Basically the same thing, however the air-pump line can run "from the top" (not through the pot) and you'll set its final location after you add growing medium/soil.
Add Growing Medium:
Really. Nothing fancy. Add it till its just covering the air-lift tube from sight.
-
4Step 4
Plant Fertilizer/Nutrient Planning
Decide if you're going to use fish, or not.
Amazingly, you can see both fish! Also, airstone, some gravel/rocks and the pump-tube. I have the water level just touching the bottom of the netpot (this was w/o growing medium/hydroton, that will 'wick' some water and lower the level a smidge)
If you do plan to use fish (or other living things) then you will want to make a feeding tube, door, slot or likewise. If you're not, you could easily add a hole in a later step (setting up the air pump and air-lift water pump) to dropper in nutrients or whatnot.
I had many crazy and complicated plans for a feeding tube while pondering it. What I have however, is uber simple.
I cut a short (prolly 5") length of the same tubing as the air-pump, and made a hole big enough in the bucket, well above the water line and low enough from the lid to not run directly into the pot. Keep the bottom of the tube above the waterline. I'm using 'pellet' type food, flake food would be harder but I'm sure I could figure out something.
This will also serve the function of adding/removing water.
A section of airline tubing can be used to siphon water out. Water removal will be necessary to test the water condition. Its especially important for the first couple weeks to keep an eye on ammonia. You can use it siphon-style, or just push the tube in far enough so there's water in it, kink the end you're holding, and pull it out. Put the water-having end into something that can hold the water, and unkink!
-
5Step 5
Water Circulation and Aeration. (to be filled in)
Airline tubing (flex), T connector, check/flow valves x2, airstone, larger diameter tubing.
-
6Step 6
Lighting and Timing. (to be filled in)
Timer! LED or CFL or higher-end grow lights, or a good window.
-
7Step 7
Living Creatures - Tank Cycling
Chlorine. PH.
Ammonia. Nitrite -> Nitrate.
 Em
Em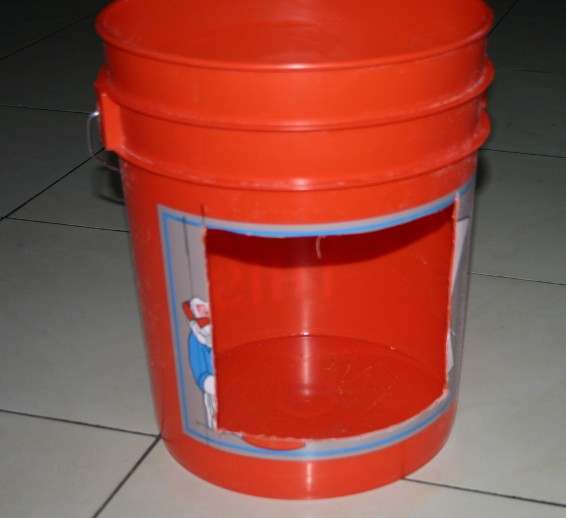


Discussions
Become a Hackaday.io Member
Create an account to leave a comment. Already have an account? Log In.