conradcn
-
Laundry Tracker
02/27/2015 at 03:43 • 0 commentsAfter I accidentally left my laundry to rot in the washing machine one too many times, I decided to permanently fix the problem with a Spark Core. I rigged it to cheap door sensors (http://www.amazon.com/Wireless-Doors-Windows-Security-System/dp/B00CDCIP00) on the washer and dryer doors, and used some simple code to figure out which one is being loaded at any given time.
The code for the core is at the end of this post (it's so short, I'm not even sure I'm adding it to the GitHub). I'm not sharing the server-side code because practically the entire thing is access tokens, and I don't want to bother sanitizing it. Spark provides a pretty dead-simple JSON api though, so it shouldn't be hard to work out how the thing translates the variables into something usable as an email.
Things to note:
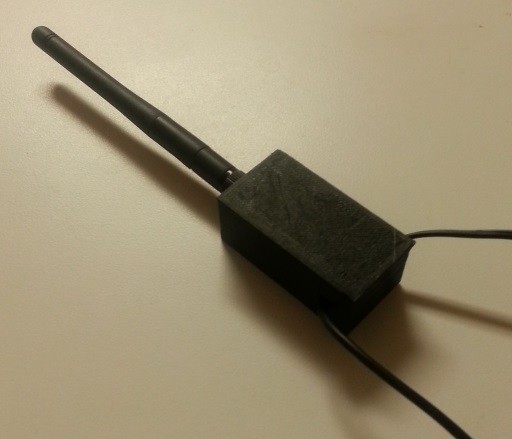
Those sensors are incredibly delicate. They're essentially just two almost-touching wires and a magnet to pull them together. If you touch them, prepare to spend the next half-hour or so re-calibrating them. That's also why the code has different conditions for the two sensors (they give completely different readings, almost like completely distinct models of sensors). I recommend polling each sensor a few dozen times in each state to figure out what its readings will be.
The sensors are compatible with the 5V output of the core, which stops you from having to worry about the internal batteries. I de-soldered the speaker and replaced it with a wire between the signal pin (the one going to the blob IC in the center of the board) and the core. I removed the can-looking thing (oscillator?) that was between the PCB and the speaker, as it made the signal harder to read from the core.
Code:
int washerDoor = 0; int dryerDoor = 0; int washerFull = 0; int dryerFull = 0; int washerLastClosed = 0; int dryerLastClosed = 0; int washerLastOpen = 0; int dryerLastOpen = 0; int washerOpenTime = 0; int dryerOpenTime = 0; //This is for the washer sensor, which isn't as reliable int consecutive2k = 0; void setup() { Serial.begin(9600); Spark.variable("washerDoor", &washerDoor, INT); Spark.variable("dryerDoor", &dryerDoor, INT); Spark.variable("washerFull", &washerFull, INT); Spark.variable("dryerFull", &dryerFull, INT); Spark.variable("washerLast", &washerLastOpen, INT); Spark.variable("dryerLast", &dryerLastOpen, INT); pinMode(A1, INPUT_PULLUP); pinMode(A2, INPUT_PULLUP); } void loop() { int t = Time.now(); //Update open/close variables //This sensor seems to report a high incidence of zeroes if and only if it is closed, so that's what this checks for if(analogRead(A1) > 2000) { consecutive2k++; if(consecutive2k > 5) { washerLastClosed = t; washerDoor = analogRead(A1); } } //This sensor reports a value of 2500(ish) if closed, and 3500(ish) if open, so that's what this checks for. Your calibrations may (and likely will) vary significantly if(analogRead(A0) < 3000) { dryerLastClosed = t; dryerDoor = 0; } if(washerLastClosed < (t-2)) { washerDoor = 1; washerOpenTime = (t-washerLastClosed); } else { washerDoor = 0; washerOpenTime = 0; } if(dryerLastClosed < (t-2)) { dryerDoor = 1; dryerOpenTime = (t-dryerLastClosed); } else { dryerDoor = 0; dryerOpenTime = 0; } //Do some logic on the results //The time requirement means that momentary opening and closing won't change anything, and the time between opening the machines for transfer is negated //If the washer door and dryer door are both open, that means that the washer is being loaded into the dryer if(washerOpenTime > 10 && dryerOpenTime > 10) { dryerLastOpen = t; dryerFull = 1; washerFull = 0; } //If only the washer door is open, that means that it's being loaded if(washerOpenTime > 30 && dryerDoor == 0) { washerFull = 1; washerLastOpen = t; } //If only the dryer door is open, that means it's being unloaded if(dryerOpenTime > 30 && washerDoor == 0) { dryerFull = 0; } } -
Echo and Pebble connected
02/11/2015 at 17:30 • 4 commentsI added a bunch of new features, and finally got around to writing an update:
Voice recognition moved from SAPI to Amazon Echo. This was done with a Chrome extension that attaches to the Echo management page's WebSockets connection and forwards all relevant commands on to the home automation server. The code for that should be up on Github soon. The only drawback of this is that the voice says "I didn't understand that" as the lights are turning off. It does require an instance of Chrome that is constantly running, but that's fine to have on the server.
Echo is easily the best voice recognition platform I've ever seen. It's reliable at 20 ft (assuming you don't put it on top of something that's vibrating), and really quick. Much better than SAPI, which makes a lot of sense given the age difference and compute power being thrown at the problem.
I also mounted old Androids to two of the walls in the apartment, which allows easier control with the app. Between Pebble and Echo though, I'm using them less and less. I think that, with another Echo, the voice commands could replace the rest of the interface except for relatively rare circumstances.
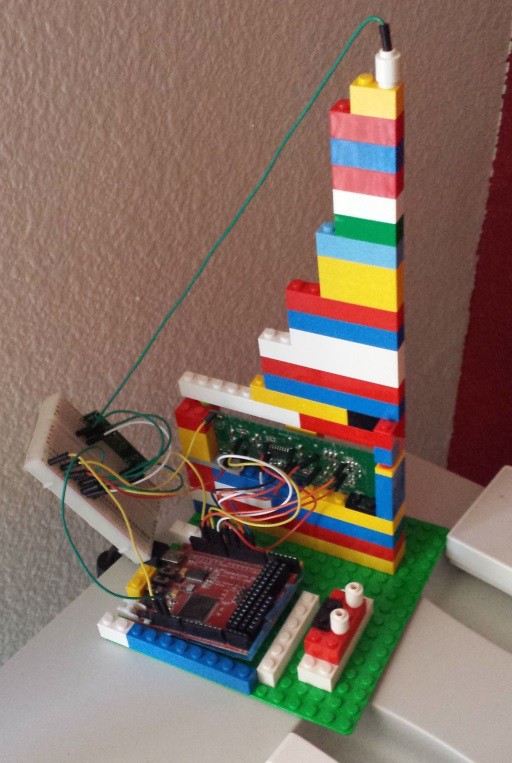
Finally, I've started work on a device that will tell me if there's laundry waiting in the washer (I often forget and have to re-run the load a few times to get rid of the smell). I'm using some off-the-shelf magnetic door sensors hooked up to a spark core, but I'm running into trouble interpreting the alarm audio. I'll have more info on how do do that once my new scope probes come in. The code is more or less done though, so once that's fixed I should start getting push notifications on my phone (maybe even played through the Echo).
As a bonus, I added Pebble integration with the Pebble Tasker app. This is pretty straightforward, it just has tasks set up to CURL the relevant API endpoints mapped to the Pebble's buttons. I plan to link my old Pebble (with the infamous screen sync problem) to one of the panels in the apartment to get a non-backlit control surface for the bedroom, but I haven't gotten around to that yet. The goal with that is to replace the hard buttons with touch switches built into the bedside table.
All in all, the system is becoming much more usable, and I'm starting to think about ways of integrating sensors into the mix. Currently, everything is driven off of user input, but that's obviously not ideal.
-
Finishing up
08/19/2014 at 20:33 • 0 commentsIn preparation for the final submission deadline tonight, I wanted to talk about some of the most recent changes I've made to the platform:
First: I have re-factored the database to pass results back either as a simple string or as JSON, instead of as javascript. This made the code across the board much more legible, and let me make the daemon a lot more sophisticated without a ton of text parsing
Second: I added TCP bulbs and the blind minder into the final build. The TCP integration is described in the GitHub repository, and the blind minder is in the build log.
Third: I created an AutoHotkey script to run a proper good morning and good evening routine (along with some new dashboards to go with them). That should also be in the repo.
Fourth: I cleaned up the interface look and feel to fit more with the modern aesthetic of the rest of the apartment. The Tron nods are more subtle now (except for in the mobile app), but I think the system looks better for it.
As far as future development goes, I have a bunch of ideas for things to do:
First and foremost: more control surfaces are a must. I have some old droids to re-purpose into light switches using the app, and another spark core is on the way for an outlet switch in the bedroom
Second, I would like to clean up the 3-D printed parts with some sanding and re-forging so they look a bit more solid. Right now they look very printed, mostly because they were all done on a mostly-stock Printrbot Simple with lousy calibration, and barely touched up afterwards.
Third, I would like to look into more systems to talk to. The Phillips Hue seems like a good candidate, and maybe some more traditional (X10, etc) systems would be good fits as well.
Finally, I want to experiment with more information sources than Reddit and Fitbit. Taking some leaves out of the "A Day Made Of Glass" playbook, calendars, messaging, and other more social data streams could be integrated smoothly to add an extra personal touch.
-
Hackaday Prize Entry
08/02/2014 at 02:01 • 0 commentsI've been quiet on this for a while, but I have decided to enter this into the Hackaday Prize pool, with some significant refinements. My new goals are:
Replace the laggy light-switch with a touch-panel powered by a Spark Core
Add more dashboards
Tie in with some Wi-Fi bulbs to automate the lights I couldn't touch last time
Add more context sensitivity
Make the blinds open and close from the system
Finally make a freaking video
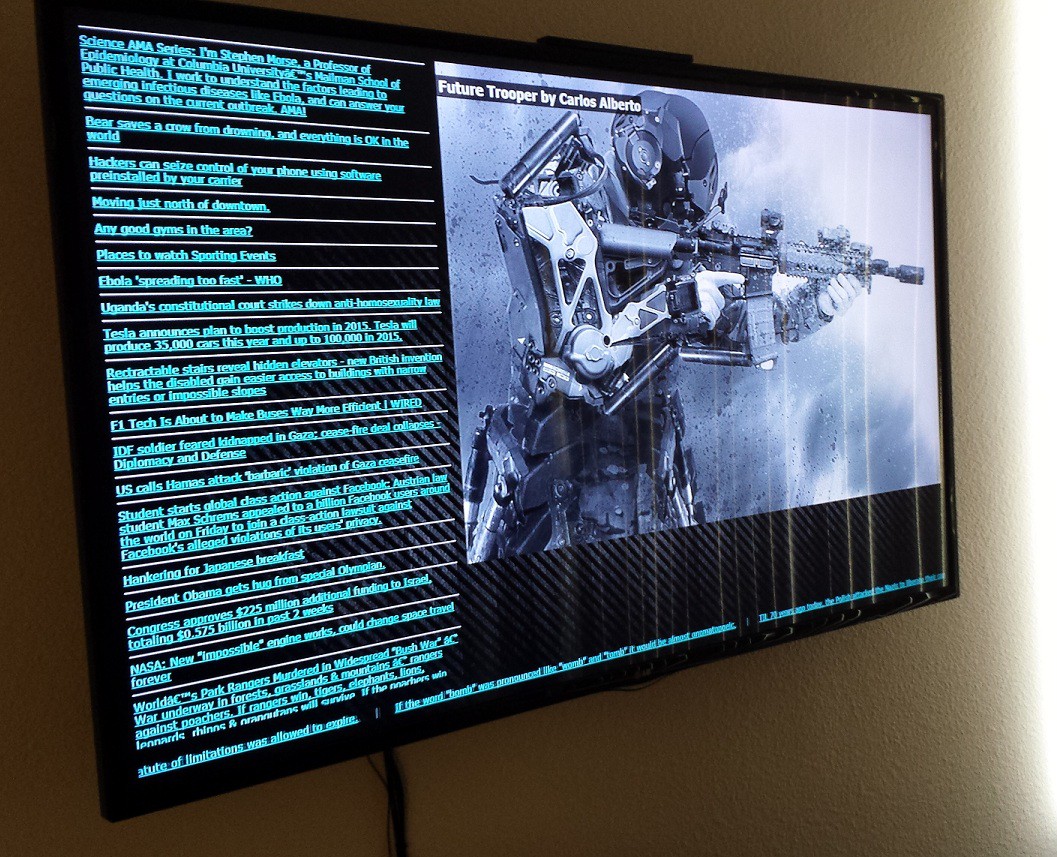
So far, I have made one major improvement, and that is to create a page that grabs data from reddit and posts it on my tv for a morning briefing (still have a minor character encoding bug in the news feed, but whatever):
![]()
-
Post-Mortem
04/27/2014 at 20:00 • 0 commentsThe system works, and just in time. I'm sure I will continue to expand this at a later date, and there are definitely a couple areas that need some work. That said, I think the core concept is good, and is useful as a design philosophy for systems like this.
The basic idea that drove the entire project was that the integration of many systems could create something useful, and I think that has been shown to be true. The wake-up routine is useful, and shows important sleep data. The light switches allow the system to be accessed in an intuitive way, but also allow the living room lights to be turned off from bed if forgotten.
The interface was deigned from the ground up to look like something out of Tron, and I think I succeeded in that respect. The voice commands are more Iron-Man, but I'll let that slide for convenience's sake.
Notes:
It wasn't specified in the project logs anywhere, but the sonic screwdriver worked as expected with the replacement switch. The only tricky part was that I needed to configure another Arduino to blast the signals to train the thing because, although it has a USB input, you can't actually program over that, it's just for power. Just keep that in mind if you want to do that.
A 3D printer isn't strictly necessary for this project, but it helped to make the enclosures look more like I wanted them (Tron-like). If I did it again, I would likely try to use natural PLA in a second extruder to get the trademark circuit lines in the parts, but, alas, I didn't have one.
It's unfortunate that configuring the Android app is so difficult, but that's how it had to be for the look I was going for. Procedurally drawing that based on a line drawing was going to be too much work, so I took the shortcut of just drawing it out in Inkscape/Filter Forge by hand.
In this entire project, the hardest part was getting those SparkFun RF transponders to work properly. I ordered antennae specifically designed for 315 MHz, but they didn't make too much of a difference. The packets eventually get through, but the packet loss rate is crazy (easily 75%). That is a good argument for upping the cost of the system by a bit and going with standard Wi-Fi or Bluetooth, but that has its own set of problems. Suggestions on this point are more than welcome.
Future improvements
Opening the blinds as part of the wake-up routine (The machinery for this is more or less in place, but needs a bit of extra logic to make it work)
Making coffee in the mornings (I would have put this in for release 1, but if I broke the coffee machine I would whither and die, and nobody wants to clean that up)
Bugs:
There is a 1-5 second delay between flipping a light switch and seeing the result.
The integrated switches rely on detecting power from a wall socket through a wall wart, which, when combined with the packet loss from the cheap RF kit, causes an unacceptable delay (especially when turning the light off, as you have to wait for the wall wart to turn off completely). The solutions I see are increasing the power of the transmitter and switching to a faster way of detecting outlet current.
Also, I haven't forgotten about the bonus hacks (though neither of them are as cool as the 6-monitor mount). I'll put those up later today (Can't get good pictures of the lights when it's light out).
Special thanks to my girlfriend. Her suggestion on how to improve the system, as well as her keen eye for deign, made this system look a thousand times better than it would have (she would be listed as a contributor, but she doesn't have an account here). Also, she should be nominated for sainthood for not killing me after the fiftieth time I broke the lights.
Also, thank you Colabot. Without your collaboration, I could not submit this project without roping in my already-swamped girlfriend.
-
GitHub Repo is here!
04/19/2014 at 18:47 • 0 commentsAfter much laziness, here is all of the code for this project in one easy GitHub Repository. it's likely that I missed some things, but I'll be going back and checking that soon. Right now, I'm working on the system that opens the blinds in the morning.
-
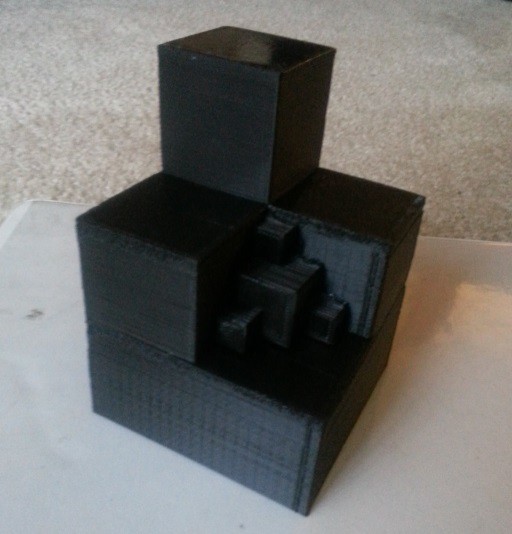
Enclosures Pt 1
04/18/2014 at 17:05 • 0 commentsGot the printer set up and made some enclosures. I'll let the pictures speak for themselves:
Base Station:
![]()
![]()
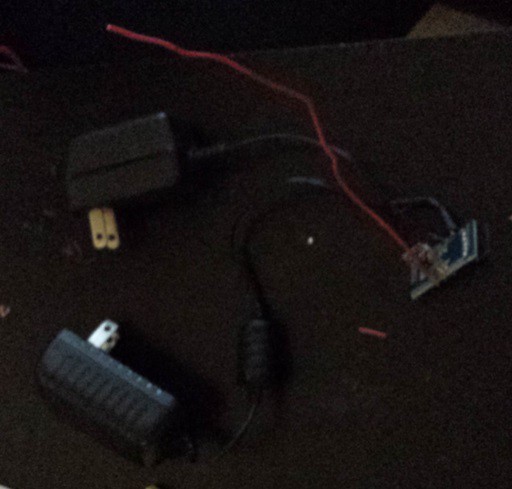
Outlet sensor:
![]()
![]()
-
Delays and the timed RF blaster
04/11/2014 at 18:08 • 0 commentsThe sonic screwdriver is on backorder, and I am still designing the enclosures for the various electrical bits (and putting the finishing touches on my new PrinrBot so I can fab them), but I'd like to take the time to talk about the timed RF blaster I'm using to turn the TV on and off for the FitBit display:
It uses the PWM output of the Arduino for relatively close measurement of time, and the IRRemote library for communication with the RF I/O. It has a simple interface. When it sees an IR input at the input, it keeps it in memory and plays it back every day at the same time. It's very simple, but produces exactly the effect it needs to, and without any significant time commitment. As with everything else, code will be put in the GitHub repo as soon as I get around to it.
-
FitBit API Part 2: Display
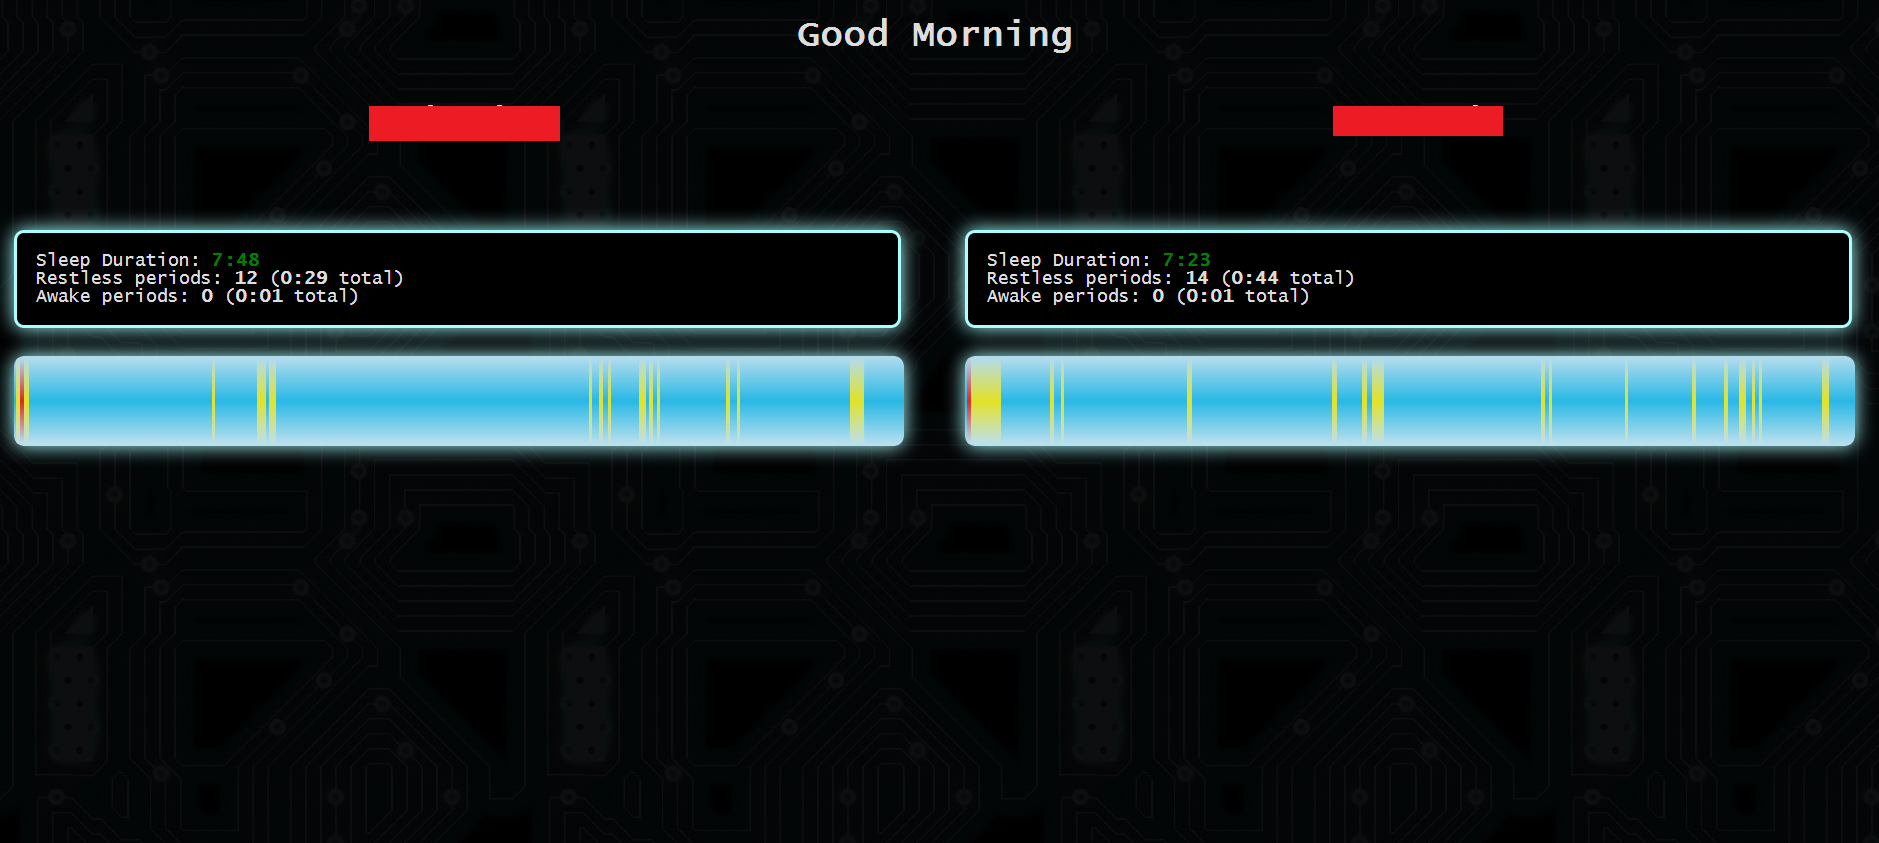
03/16/2014 at 19:29 • 0 commentsAfter some CSS hackery, I came up with the following display for the FitBit data (Names obscured with red boxes for anonymity). The page is built with ASP.NET, and uses no special plugins (though it has not been tested on anything but chrome, as I am planning on sending it to the TV with Google Cast).
The data is pulled using the method I detailed in the last box, and displayed using basic HTML/CSS. The source code will be uploaded to the GitHub repo when I'm done removing our usernames and passwords from it.
This layout is designed for two people with FitBits sleeping on the same bed and sharing a screen. For alternative situations, additional columns can be added or removed relatively easily.
![]()
-
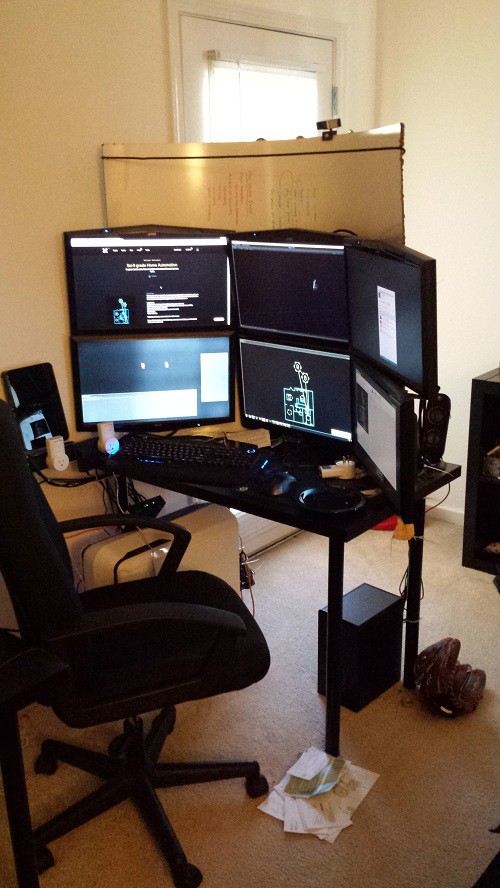
As promised, Bonus hack 1: Cheap 6-monitor mount
03/15/2014 at 04:35 • 0 commentsA while ago, I wanted a way to mount 6 monitors, and, being a college student, wanted to do it with scraps. Below is what I came up with. The cable holds the whiteboard in a curved shape at the top, while angle brackets do the same at the bottom. The monitors themselves are attached with screws in the back. The final result is not unlike a certain $700 one on Amazon, but cost me half of a $6 sheet of whiteboard and some scraps.
![]()
Sci-fi grade Home Automation
A system that ties some home automation with various APIs and hardware hacks.