Close
0%
0%

Repairing a tool wall organiser

In time, more and more hooks broke. I decided to print some improved hooks, that will last longer

Similar projects worth following
Because I am a student, I want to be considered at the student section of the "Repairs you can print", because i'd love to have my own 3D printer
The original hooks were easy to broke because they were made out of pvc. So i took one hook, i started to measure it with a digital calliper and model one half of it in Creo 4.0 student edition from scratch.
Then I thought, why not improve it? So i took the model, and made a channel in the middle of the hook, in order to fit a thin steel wire. After many errors and failed models, I finally printed one half of a hook with a channel wide enough to fit the wire. Once completed, it wil last much longer than normal ones.

Possible further modifications:

   1. More types of hooks, to replicate the wide range available (done).

  2. Make the channel longer, in order to have a longer piece of steel wire that will reinforce it even better(done).

Things I learned modeling this hook:

- You can glue 2 parts together with acetone, if they are printed with ABS plastic

- You can print two halves of a part if you want to make a steel/metal insertion

- Complicated parts with many features are easier to design if you make a mental plan before starting to work.

Here are the pieces you can print:

Note: I decided to keep the "pegboard hook" name, even if some say they are slatwall hooks, because in the Hackaday.com project page they mentioned them as "pegboard hooks".

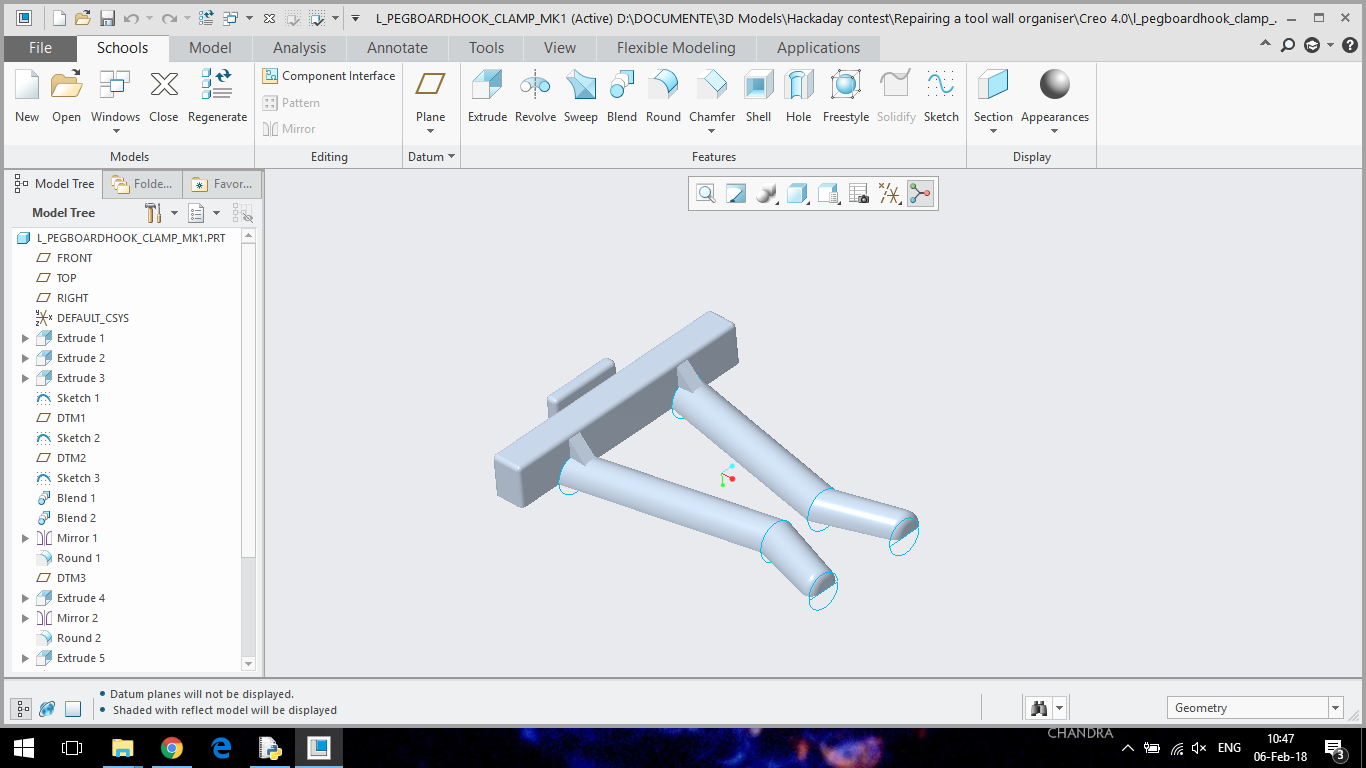
1. Pegboard Clamp (named pegboardhook_clamp_mk1):
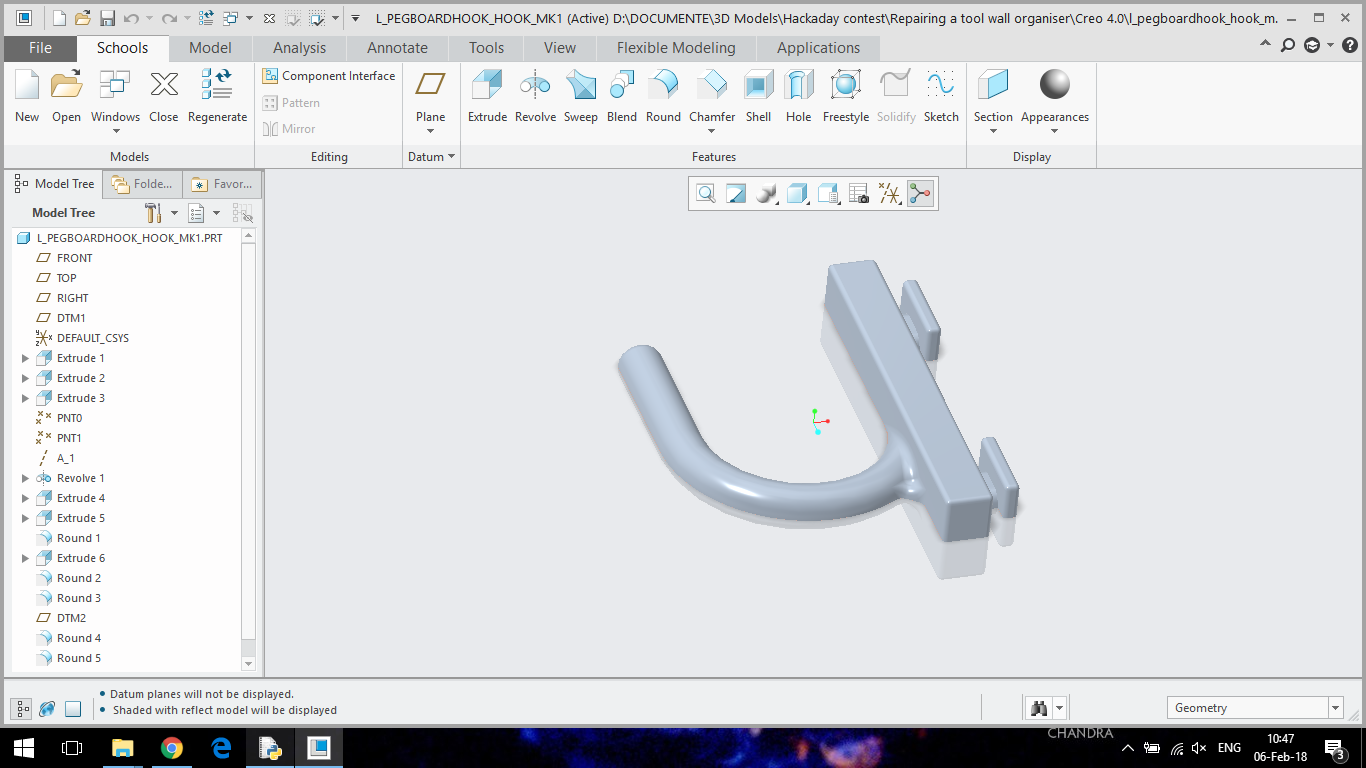
2.Pegboard hook (named pegboardhook_hook_mk1):
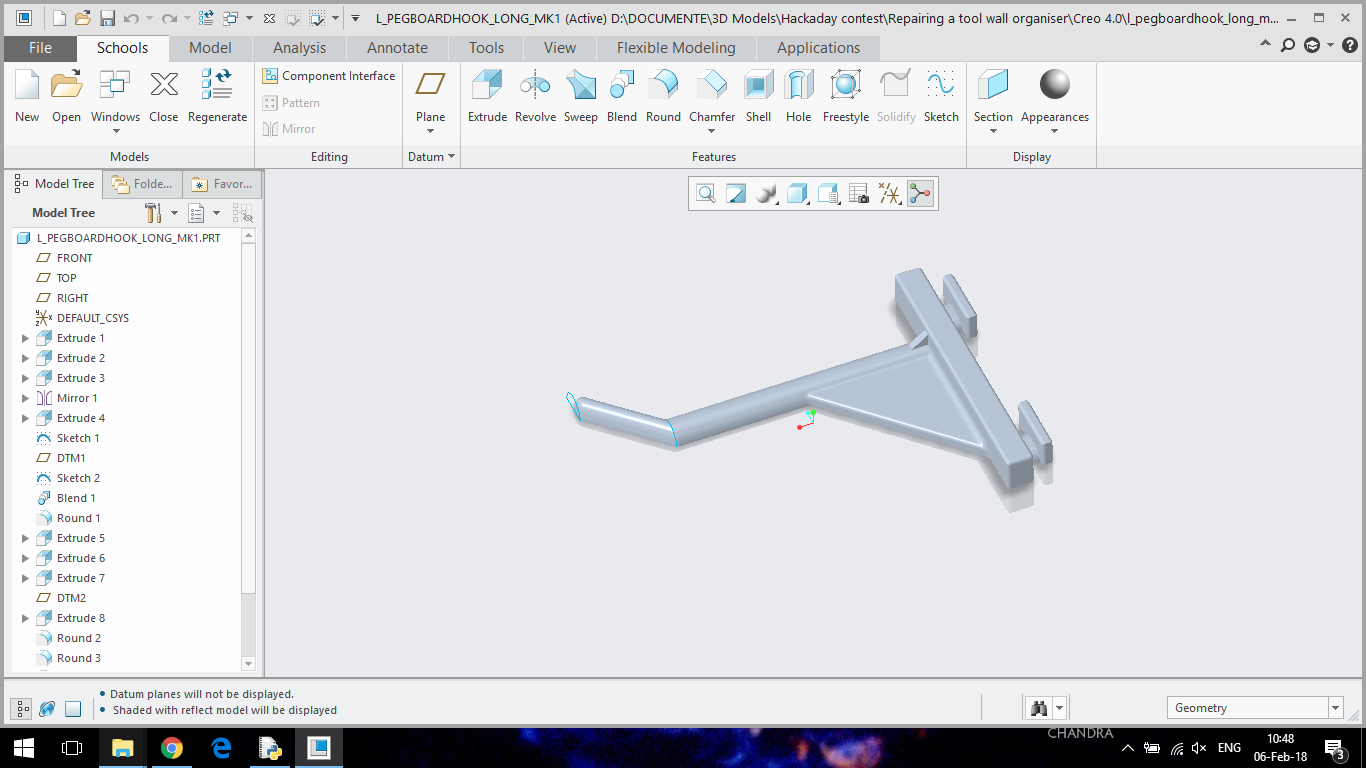
3. Pegboard hanger long (named pegboardhook_long_mk1):
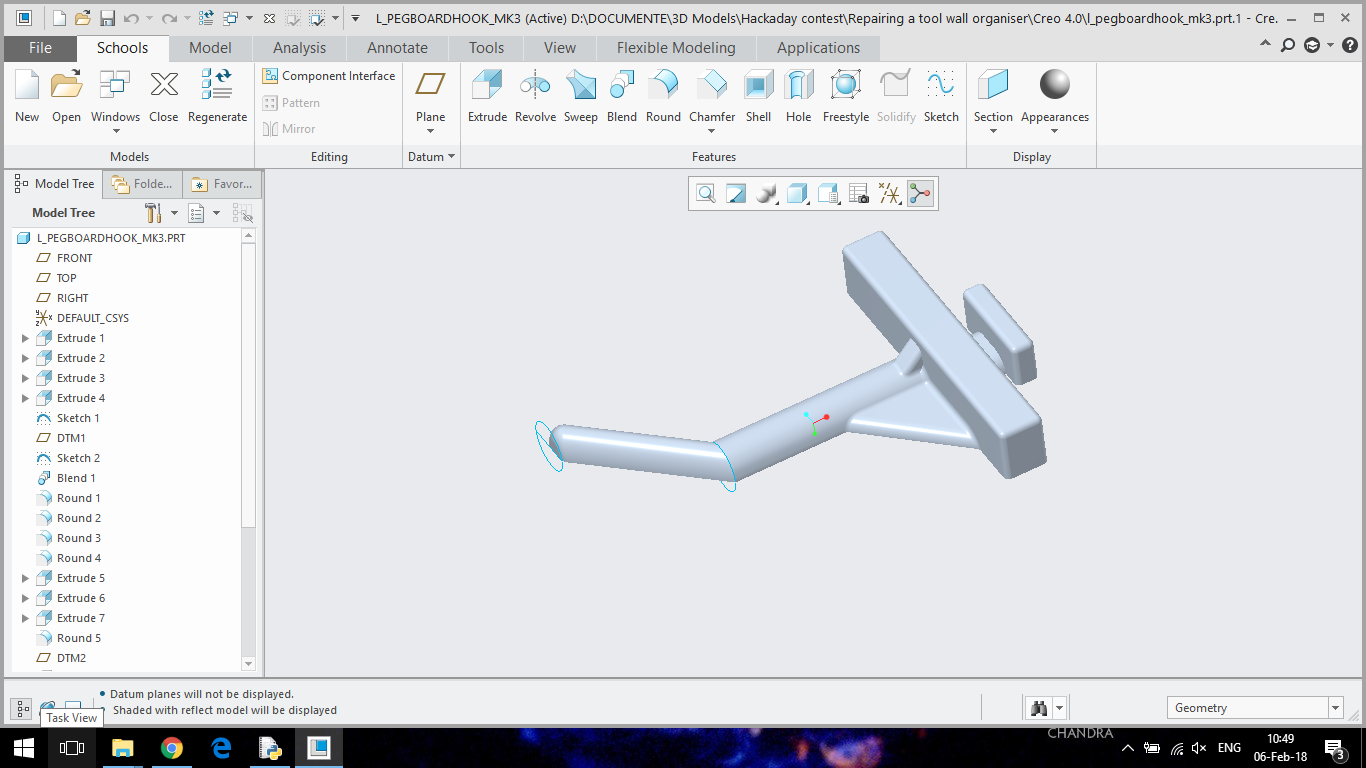
4. Pegboard hanger shor(named pegboardhook_mk3):
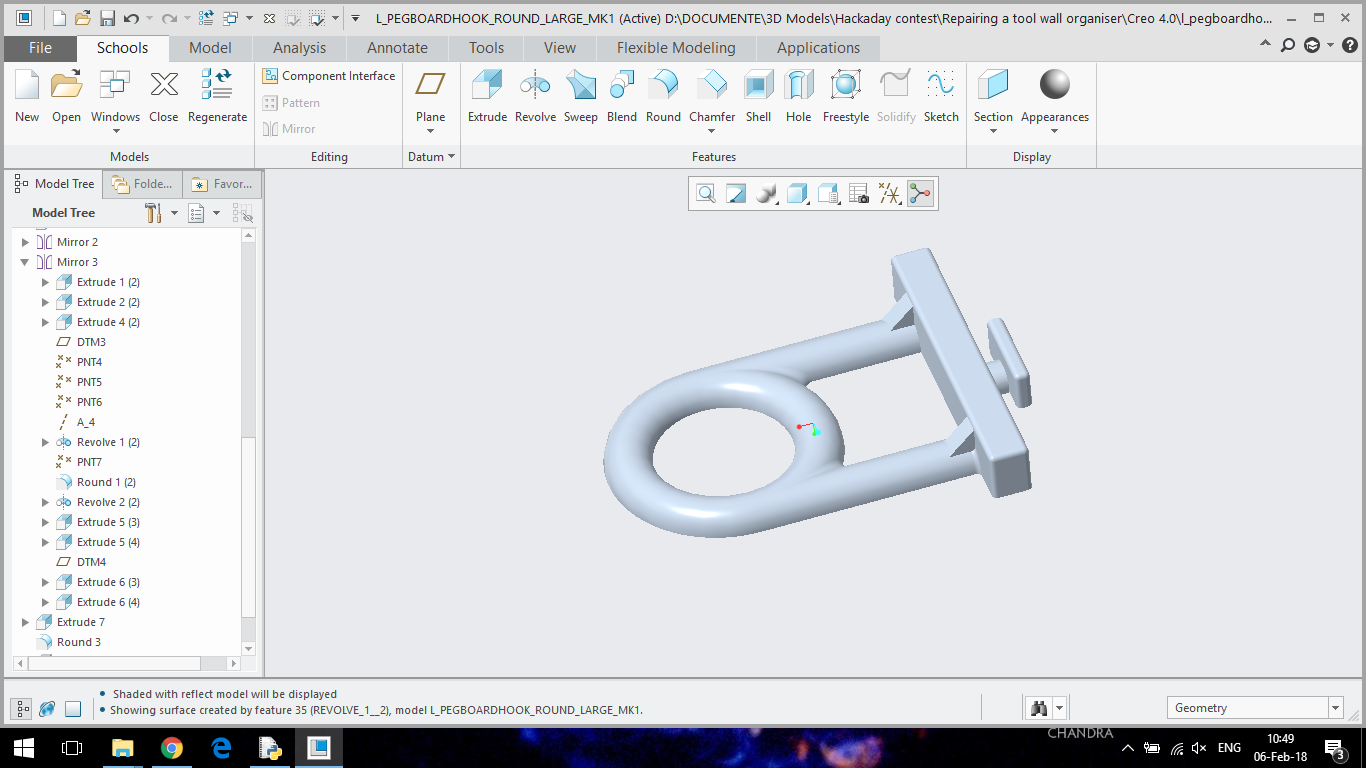
5. Pegboard circle large (named pegboardhook_round_large_mk1):
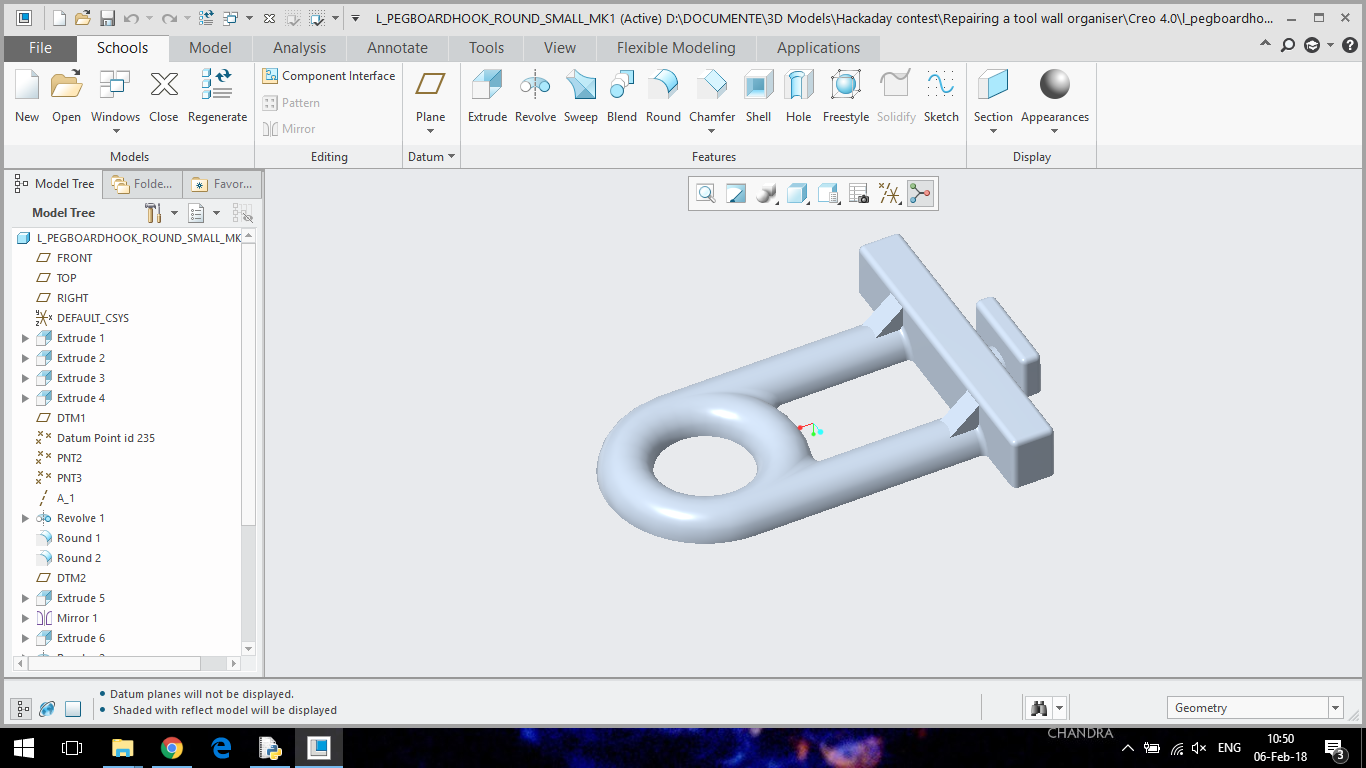
6. Pegboard circle small(named pegboardhook_round_small_mk1):
How I designed those parts:

Even if those parts are different, the designing process was pretty simple and easy to do. I used 3 main tools, and 2 secondary tools:

  • Main tools:
    • The "Extrude" tool: used to extrude a 3D from a 2D drawing, liniary(used mainly for making cuboids, cubes, prisms).
    • The "Revolve" tool: used to extrude a 3D shape by revolving a 2D drawing around an axis(used for toroides, speres, cones).
    • The "Blend" tool: used to extrude a 3D shape by "blending" some sketches toghether.
  • Secondary tools:
    • The "Round" tool: used to round sharp corners.
    • The "Sketch" tool: used to draw the sketches(2D drawings simillar to those from "Extrude" or  "Revolve") used by the "Blend" tool.

To exemplify, i will explain how I made one half of a hook (named pegboard hook in my project).

All those steps took me 30 minutes for the initial part, and another 10 minutes for the "upgrade". So, let's begin making the part:

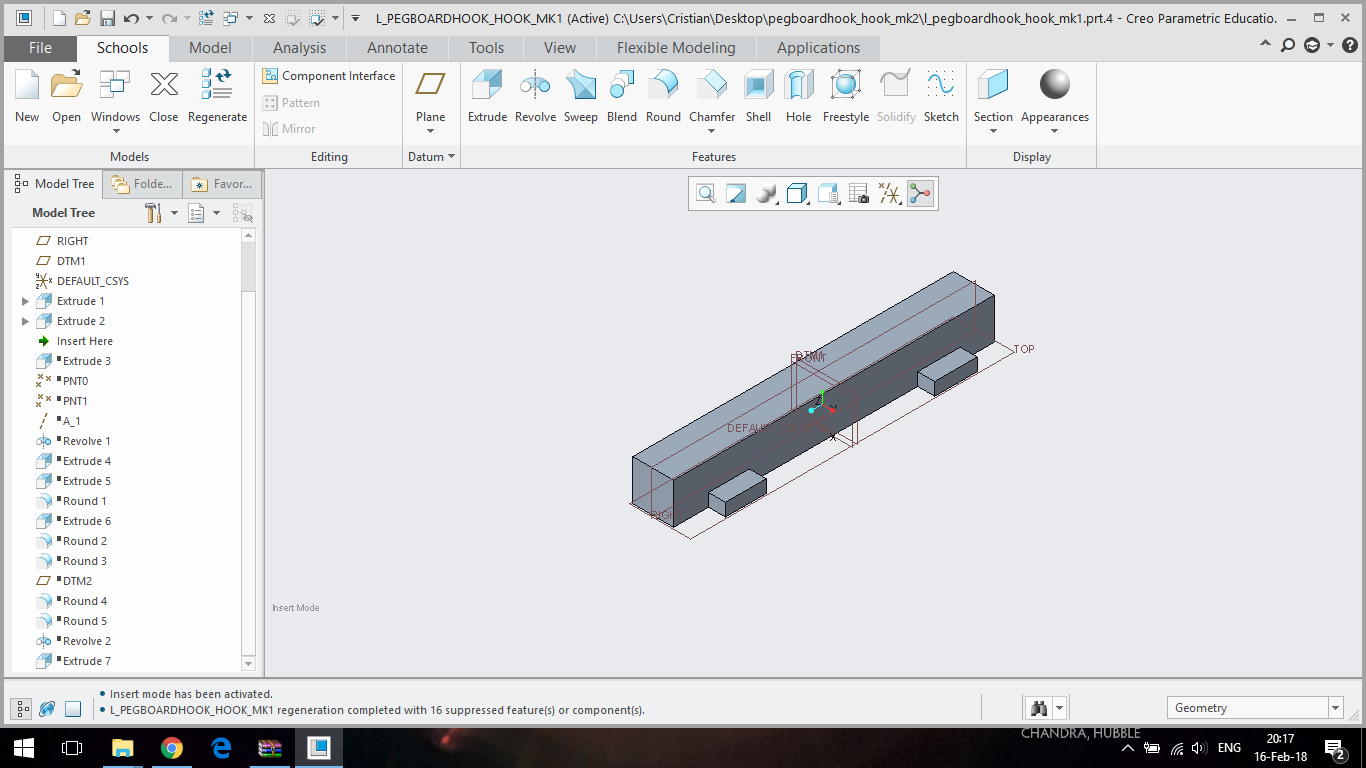
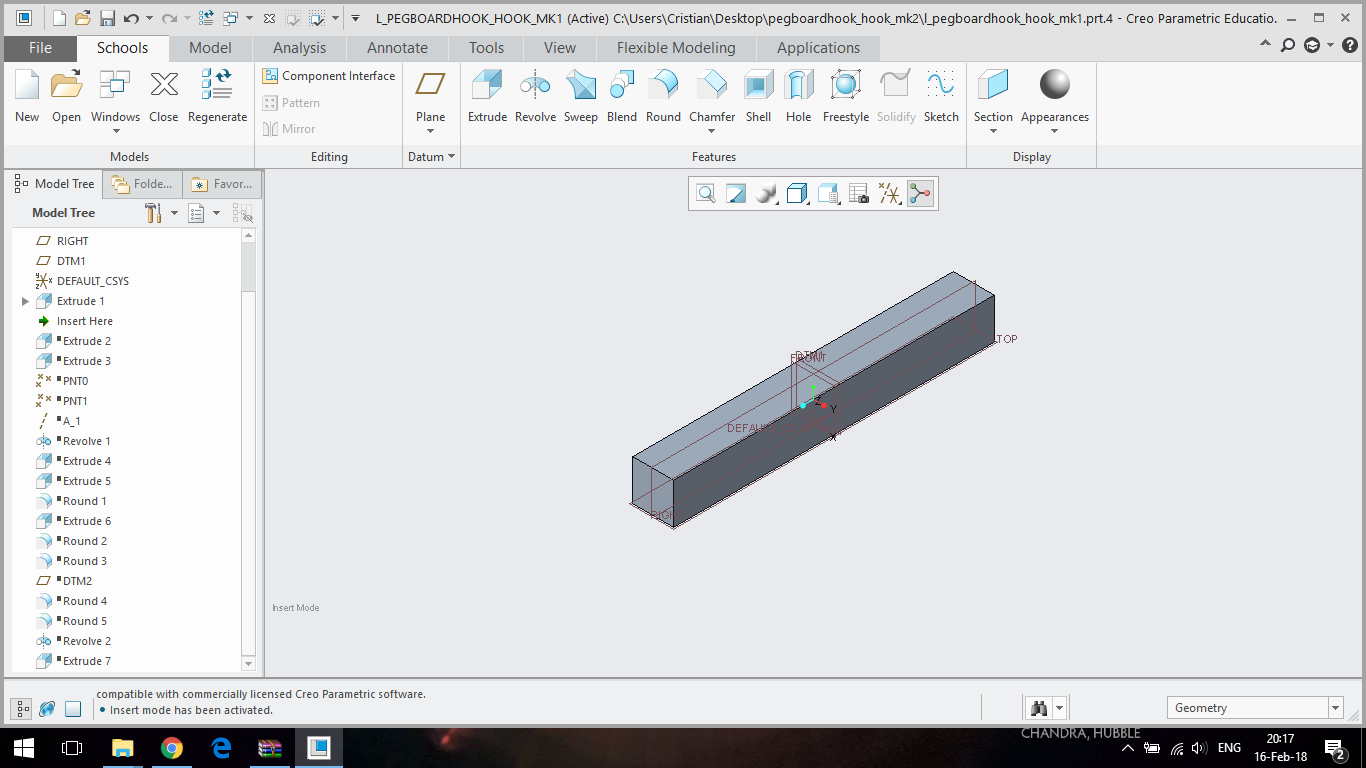
  1. I extruded a cuboid with the exact dimensions (I used the calliper many times in this project) on the "TOP" plane:
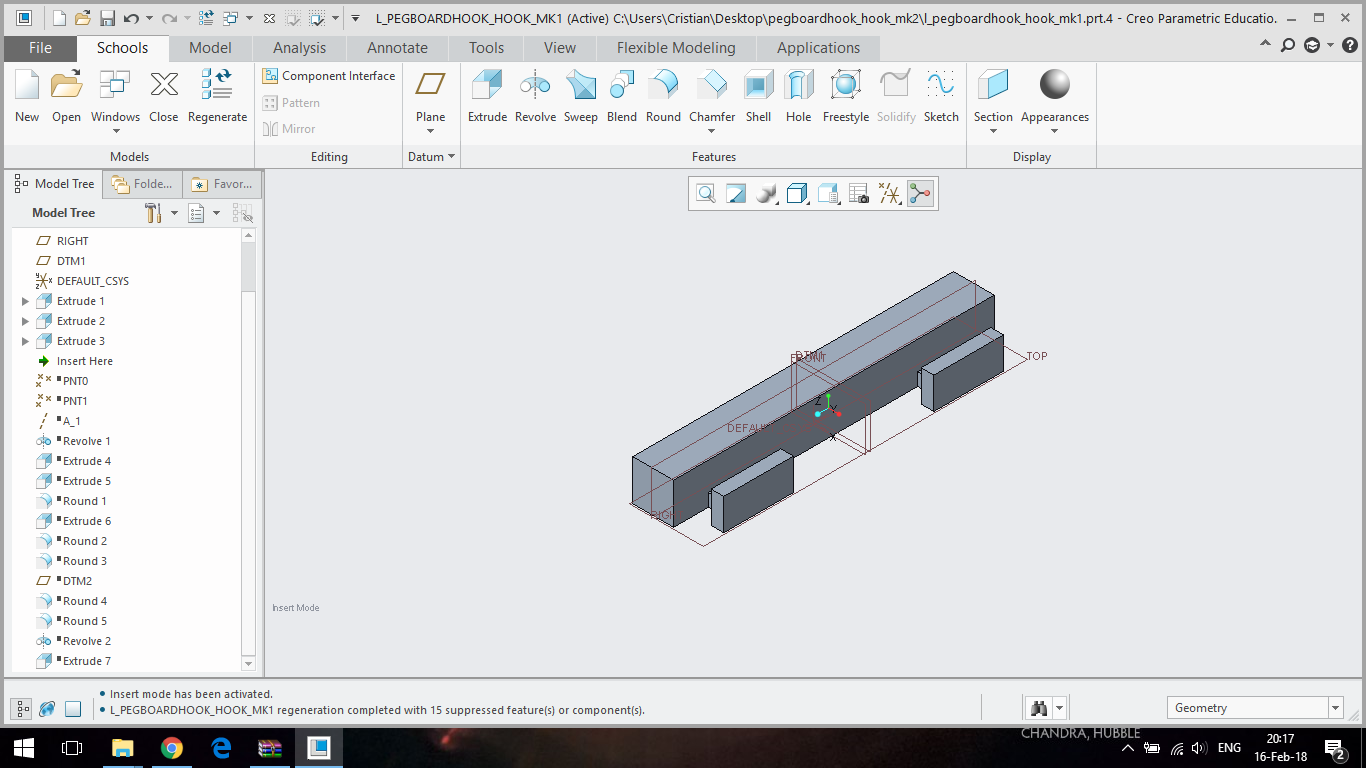
  2. I extruded 2 small "feet" (another 2 cuboids) on the side of the first extrude:

  3. I extruded 2 stoppers on the second extrude:

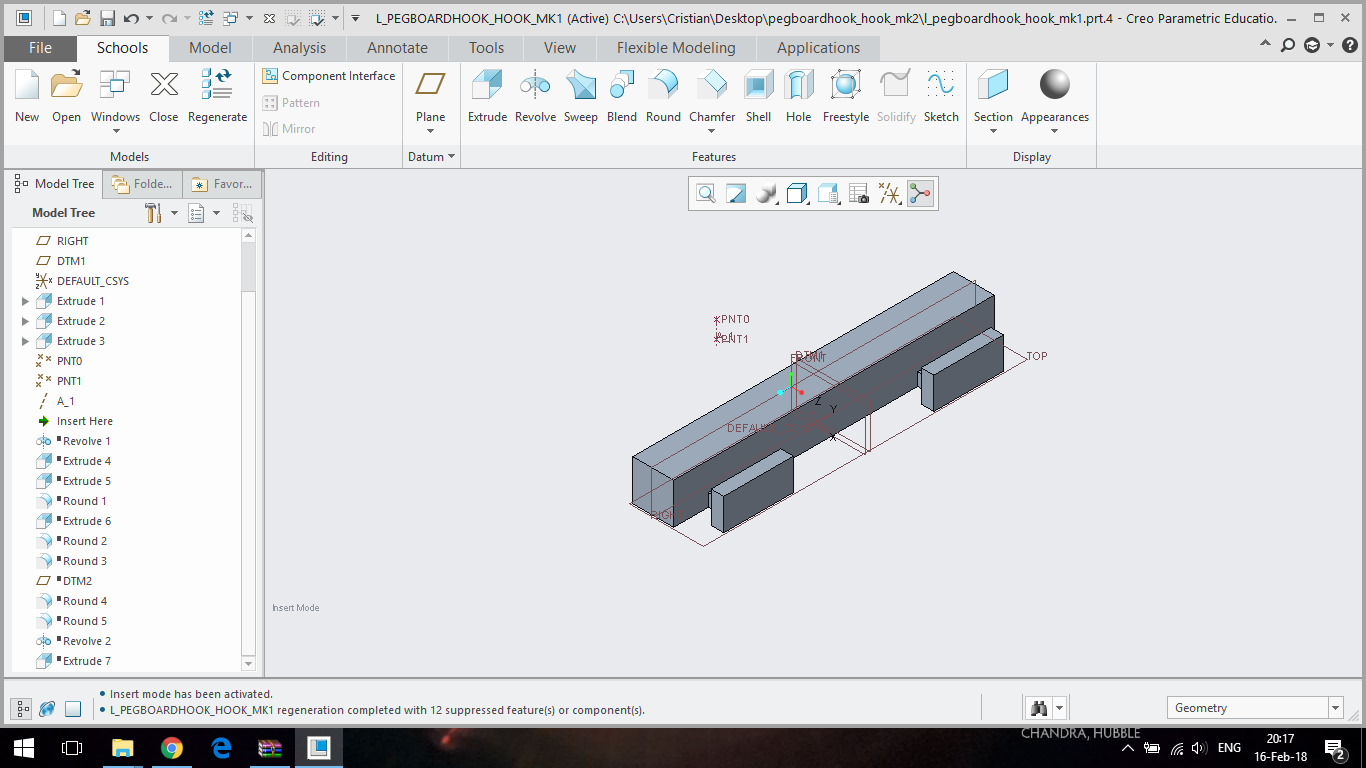
  4. I defined 2 points and an axis between those 2 points (this will be the axis for my "revolves"):

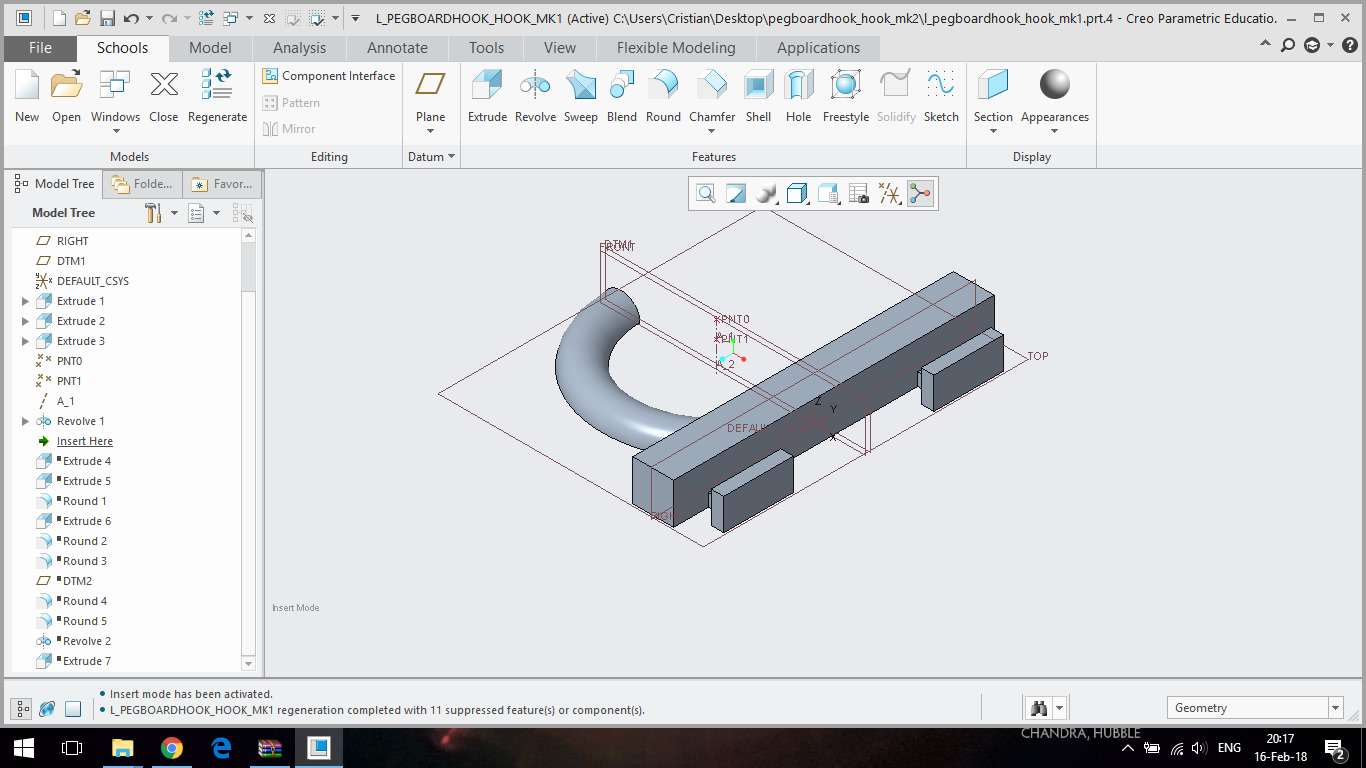
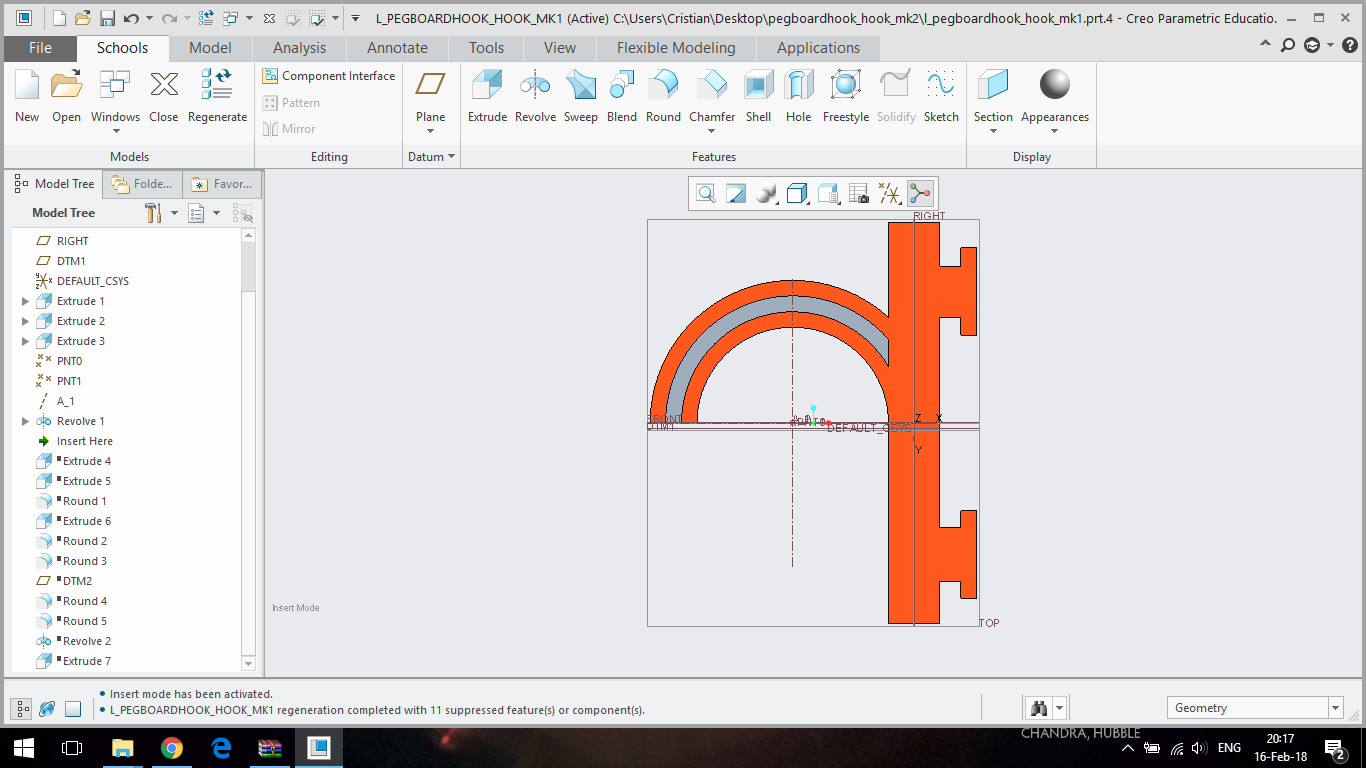
  5. I made the first "Revolve", used for the round part of the hook:

    I switched to the bottom side of the part for better understanding of the 3D model (the channel was made in the same revolve also):
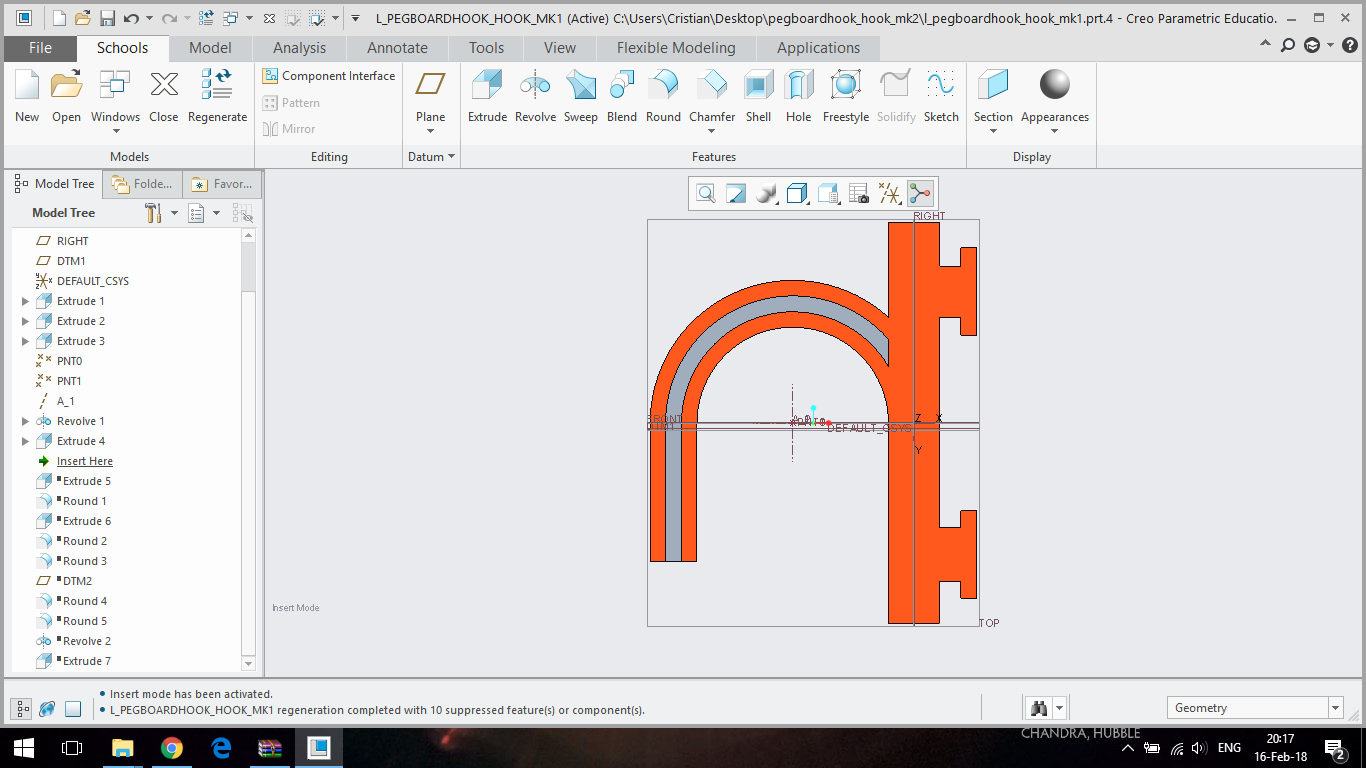
  6. I extruded an extension to the "Revolve", using the same shape:

  7. I extruded a tiny little cap (I will use it for rounding the end of the hook):

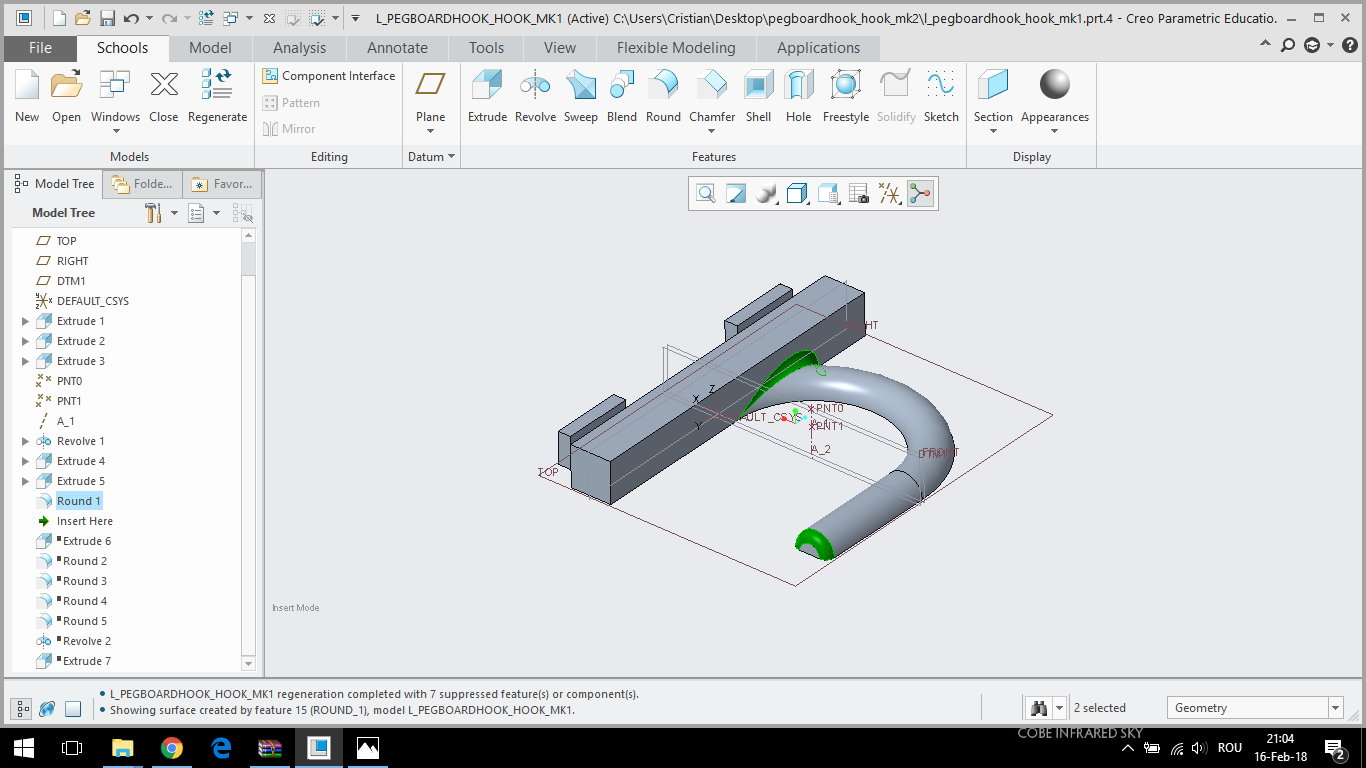
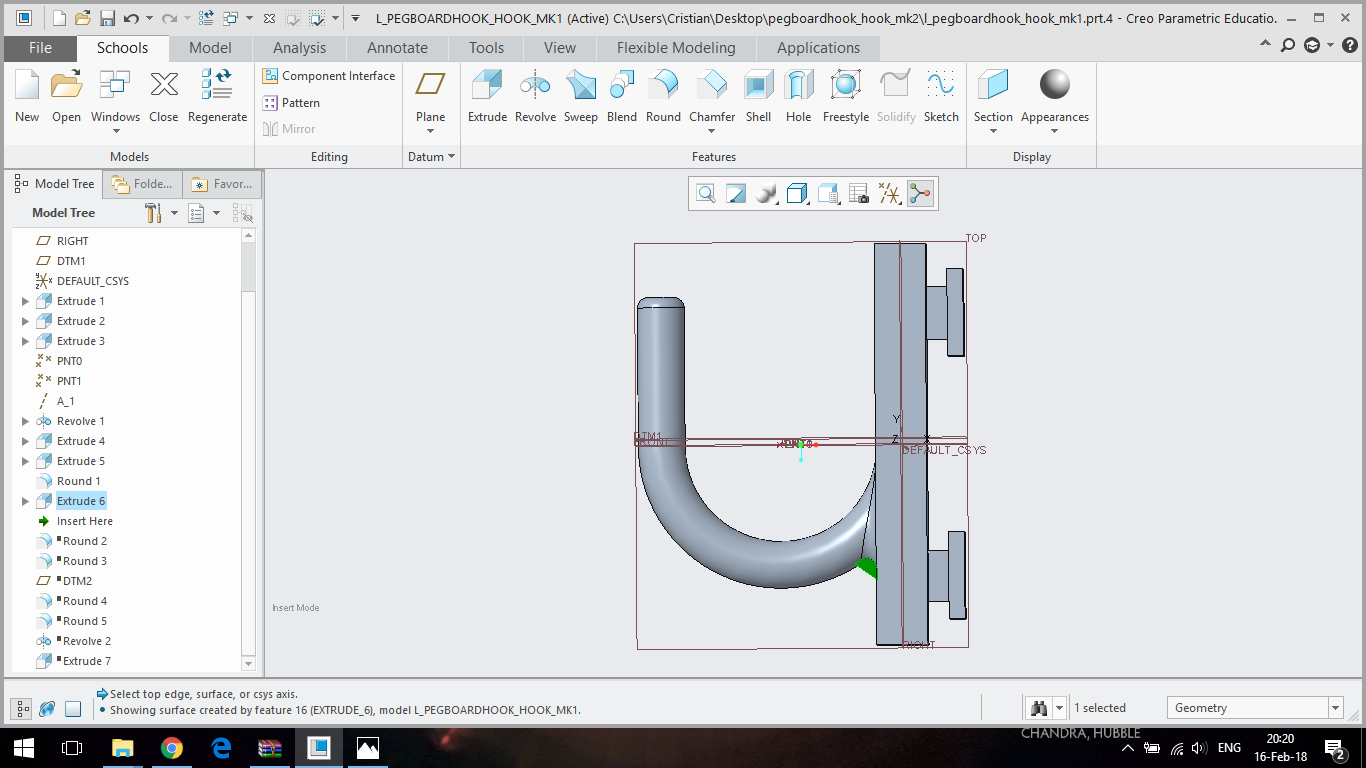
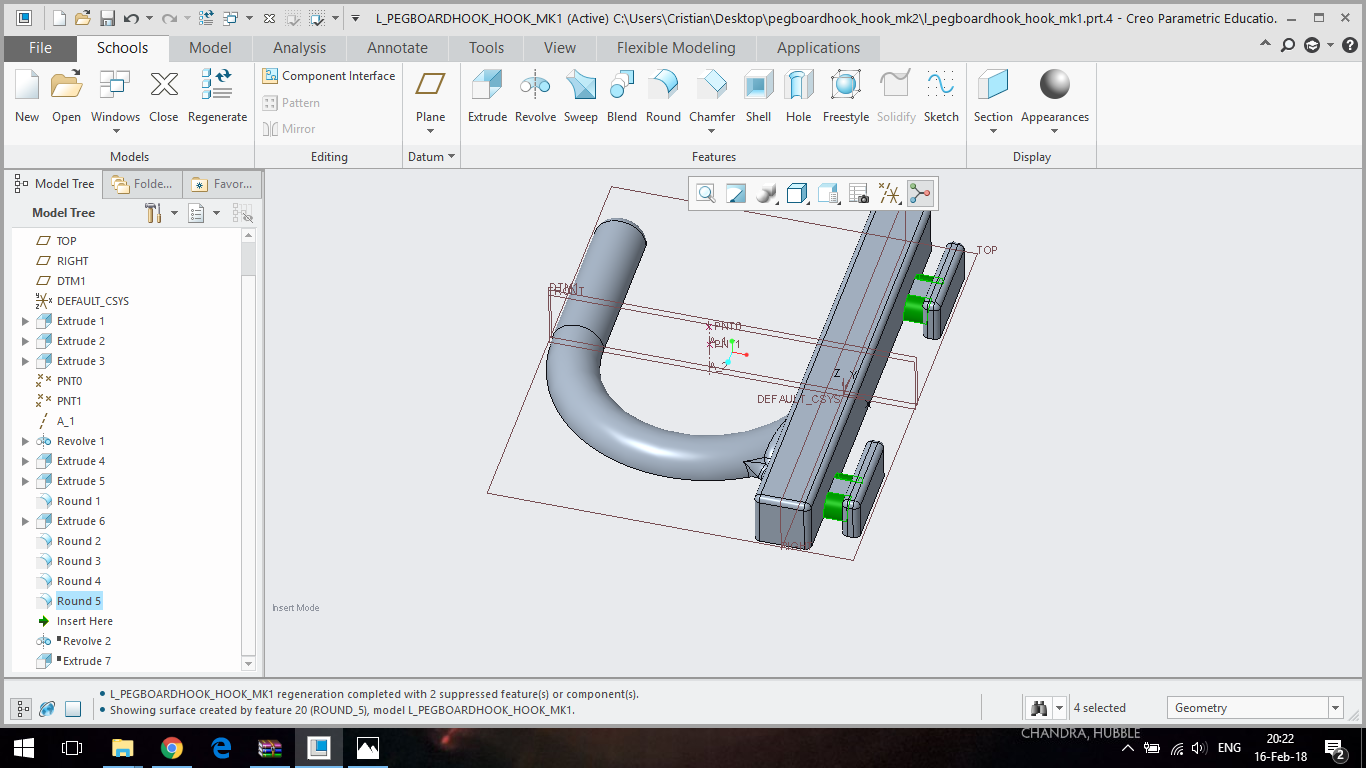
  8. I rounded the end of the hook, and also rounded the edge between the body of the hook and the hook (highlighted in the next screenshot):

  9. I extruded a small support (also highlighted):

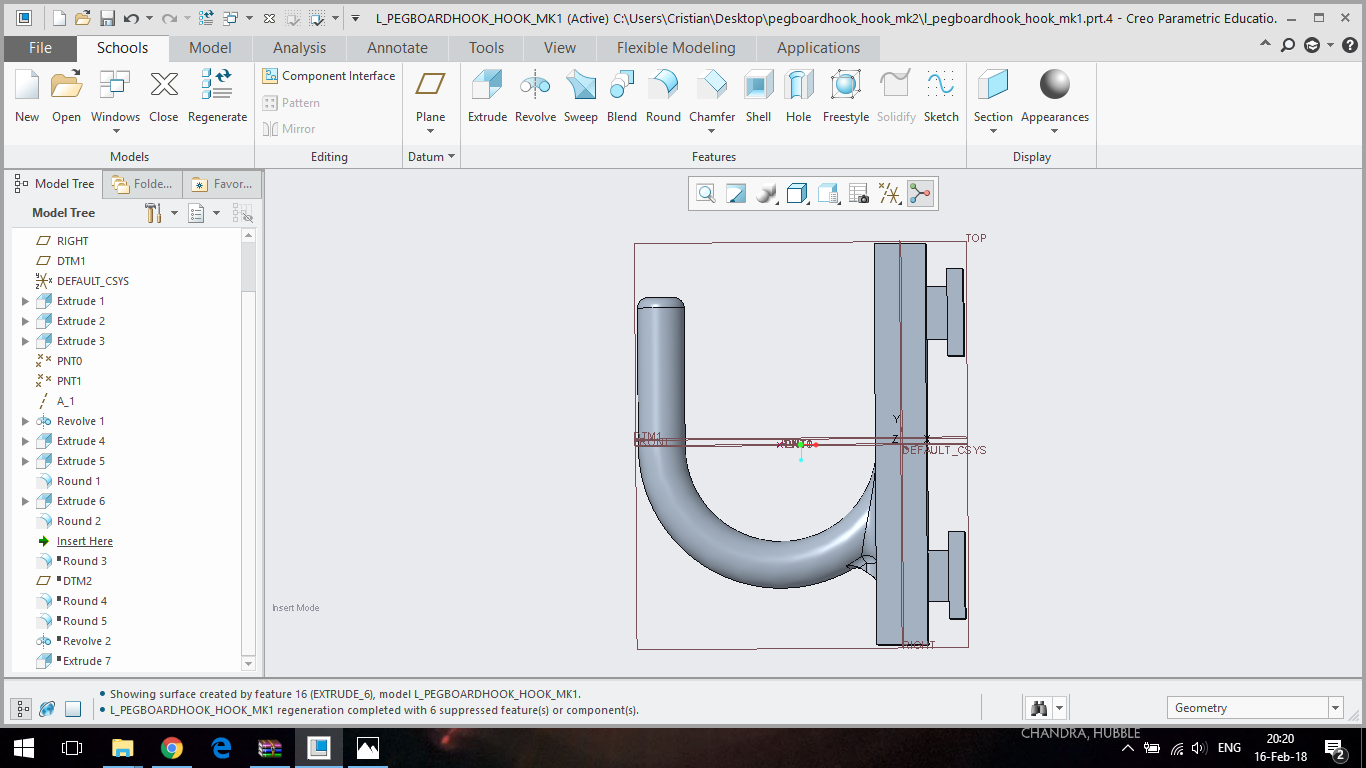
  10. I rounded the support:

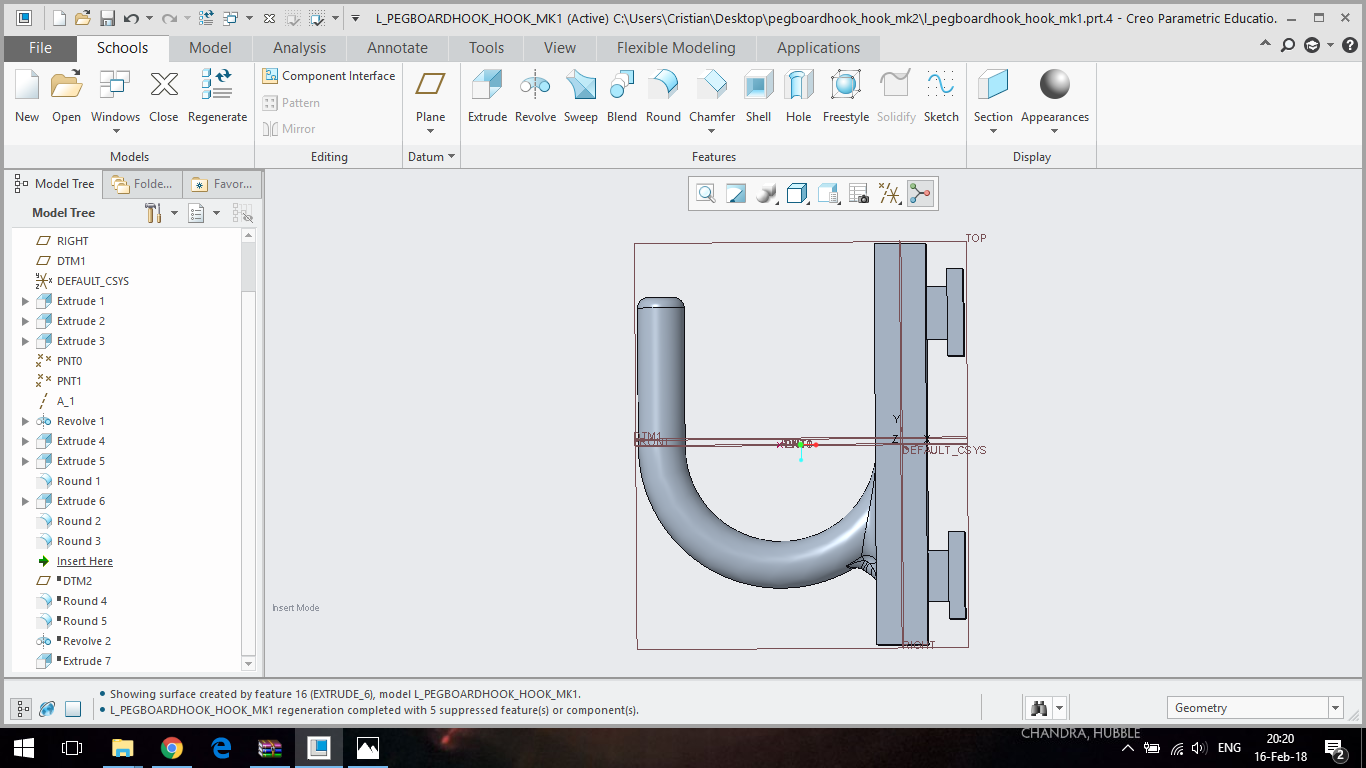
  11. I rounded the support even more:

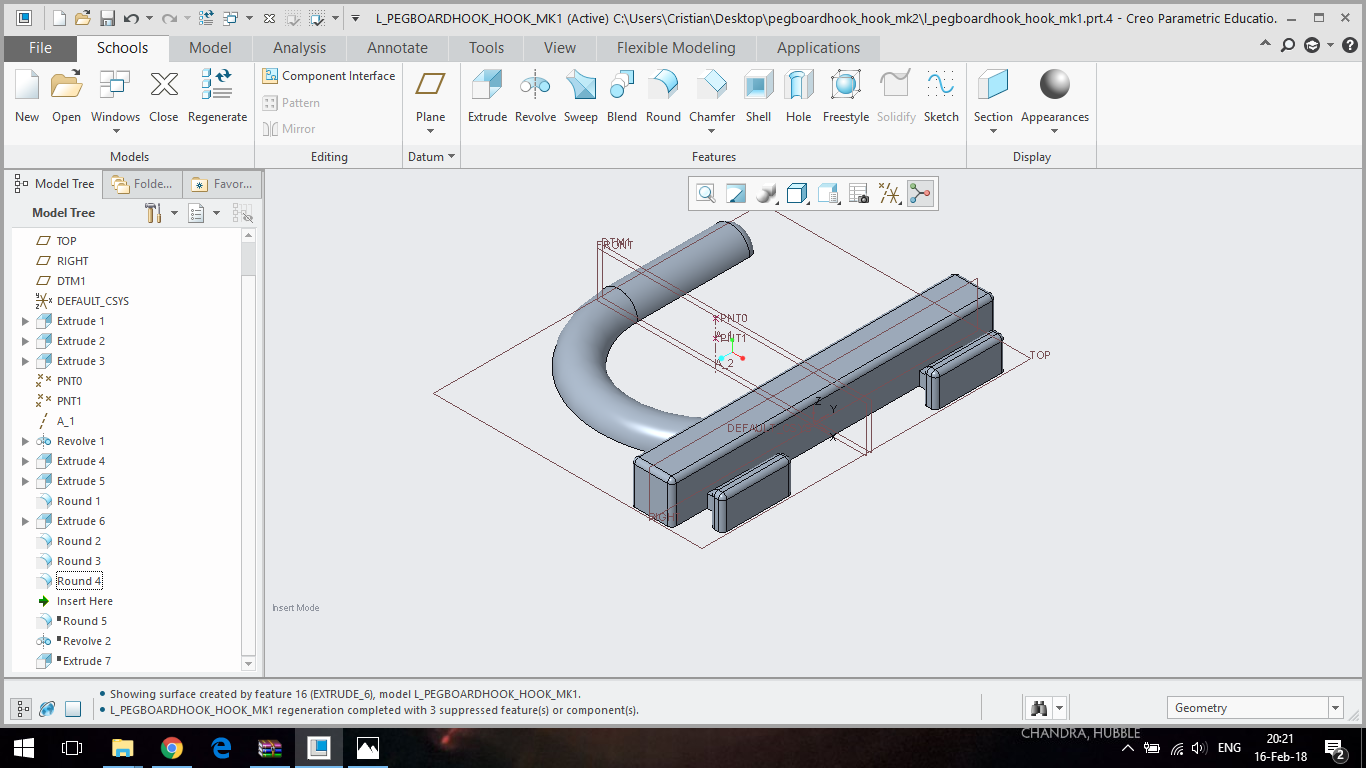
  12. I rounded all the part edges and vertices:

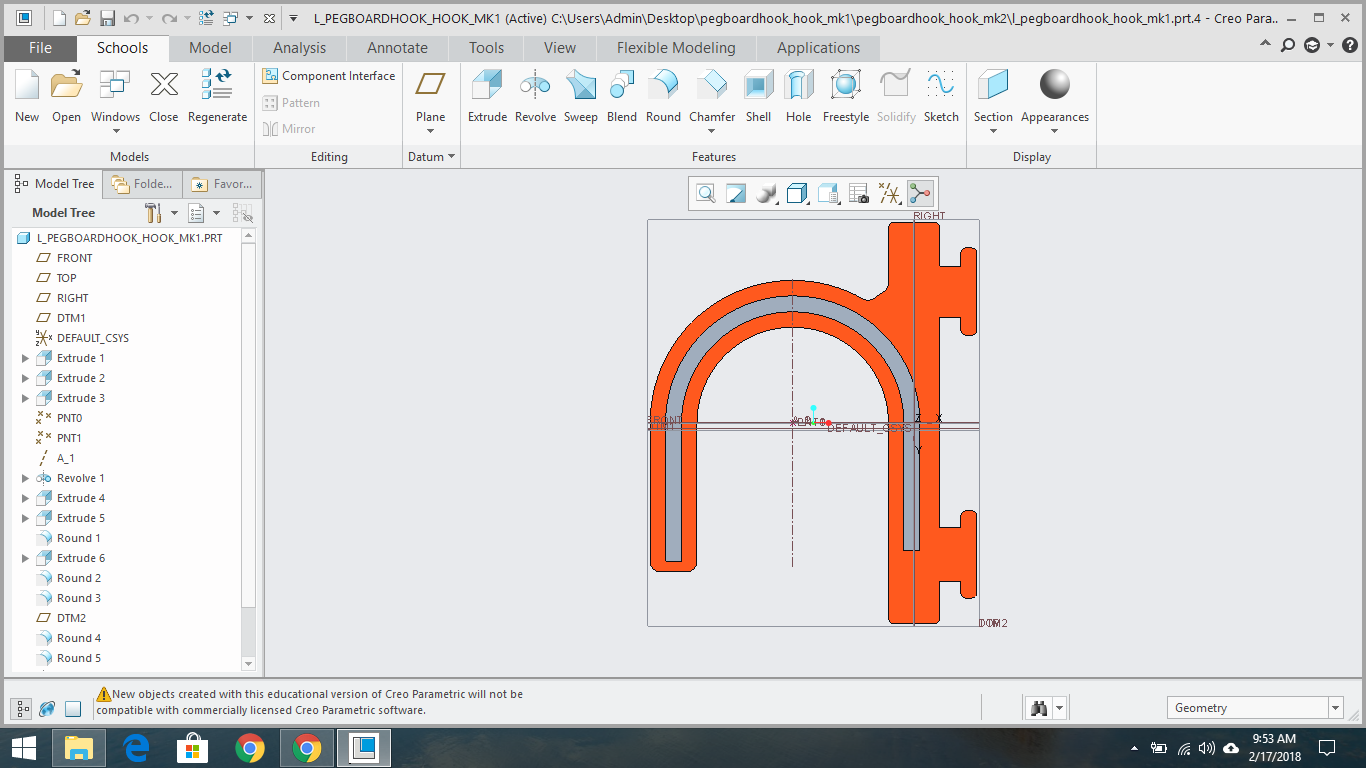
  13. I rounded the part's "feet" in order to fit better in the slatwall (highlighted):

    Note: this is the finished mk1 part. The mk2 part upgrades are presented below.
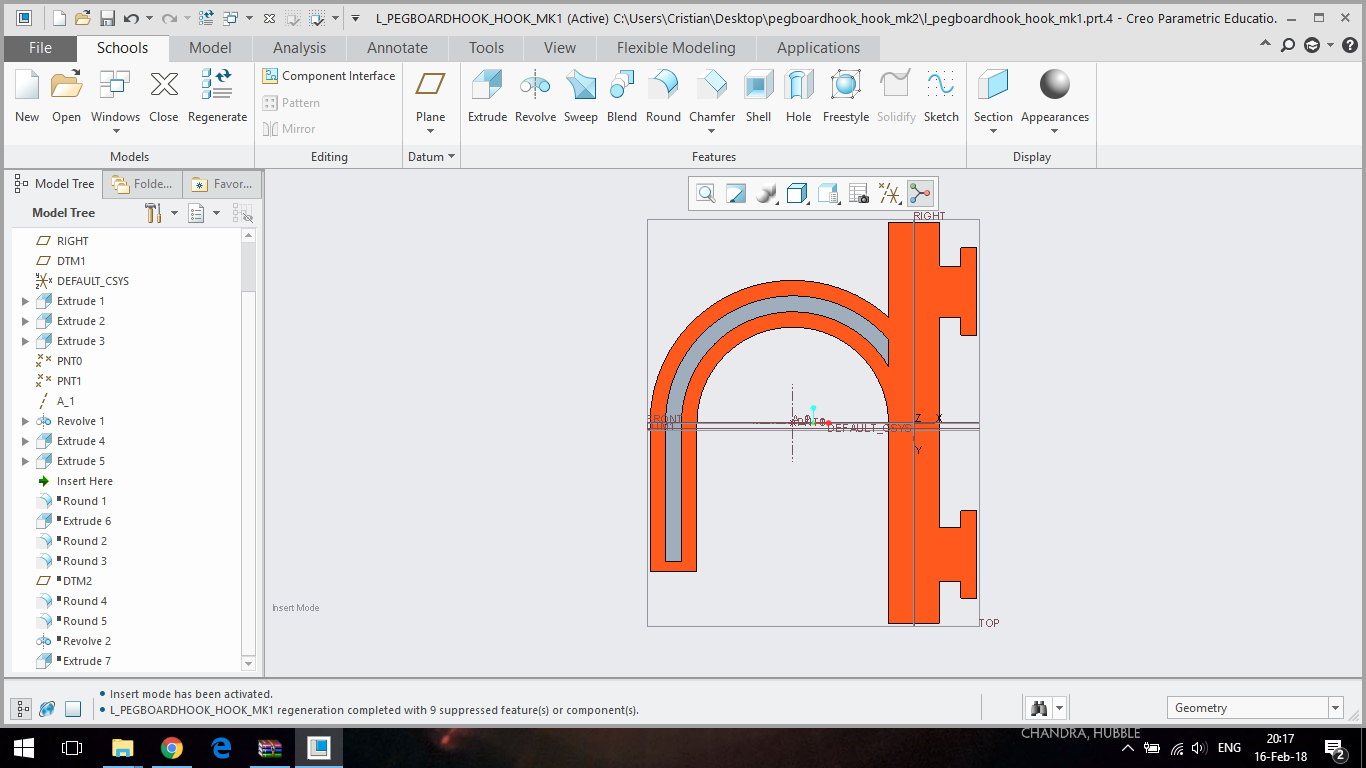
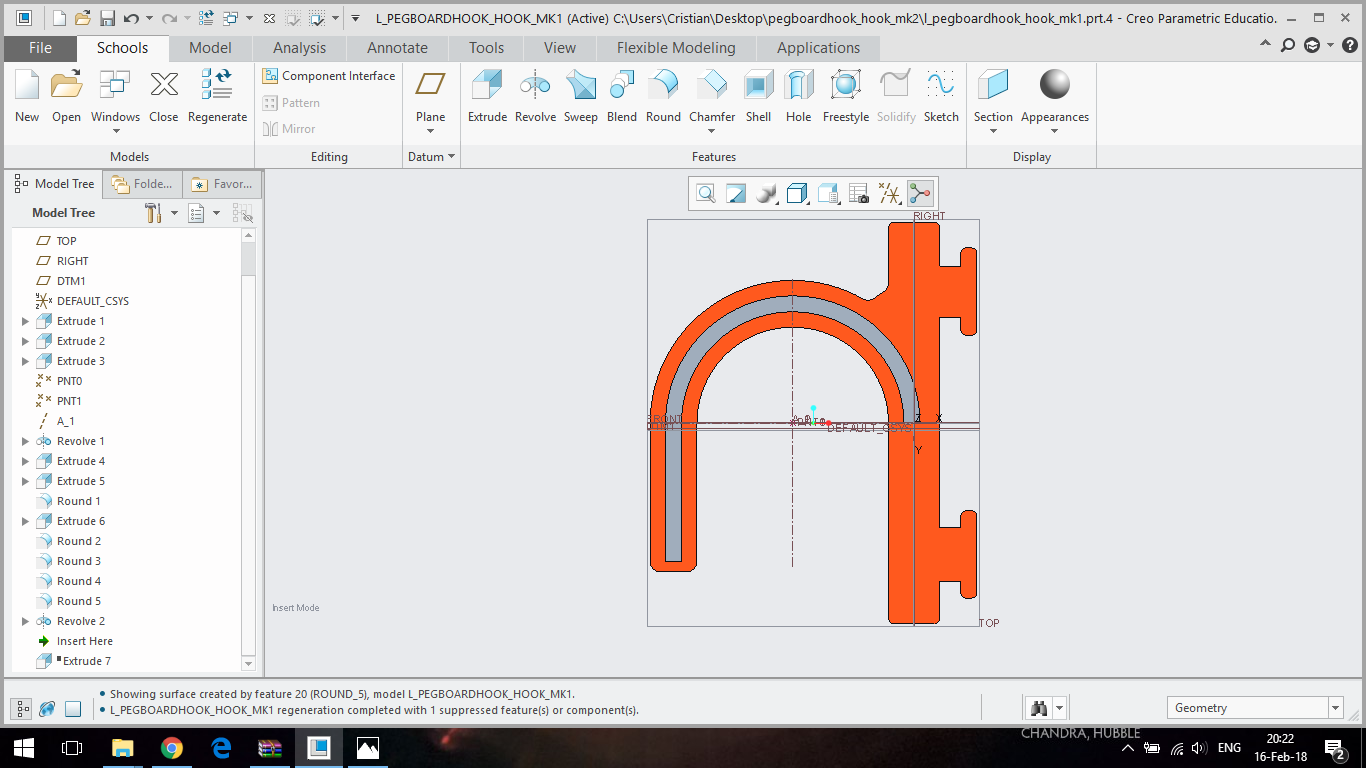
  14. I made the channel longer with another "revolve" around the same axis from step 4:

  15. I made the channel longer with another extrude:

    The finished parts looks the same as the part from step 13, but it has even more strength.
pegboardhook_round_small_mk2.zip

Includes Creo models and STLs for both sides. MK2 includes longer channel that will improve the strenght of the hook, at the cost of a few more centimeters of steel wire.

Zip Archive - 1.97 MB - 02/16/2018 at 08:01

Download

pegboardhook_round_large_mk2.zip

Includes Creo models and STLs for both sides. MK2 includes longer channel that will improve the strenght of the hook, at the cost of a few more centimeters of steel wire.

Zip Archive - 2.25 MB - 02/16/2018 at 08:01

Download

pegboardhook_clamp_mk2.zip

Includes Creo models and STLs for both sides. MK2 includes longer channel that will improve the strenght of the hook, at the cost of a few more centimeters of steel wire.

Zip Archive - 1.88 MB - 02/16/2018 at 08:01

Download

pegboardhook_mk4.zip

Includes Creo models and STLs for both sides. MK4 includes longer channel that will improve the strenght of the hook, at the cost of a few more centimeters of steel wire. (this was my first model, and mk3 was the first working model)

Zip Archive - 1.43 MB - 02/16/2018 at 08:01

Download

pegboardhook_hook_mk2.zip

Includes Creo models and STLs for both sides. MK2 includes longer channel that will improve the strenght of the hook, at the cost of a few more centimeters of steel wire.

Zip Archive - 2.02 MB - 02/16/2018 at 08:01

Download

View all 6 files

  • 2 × Half of a pegboard hook(any version, but both halves MUST be from the same type)
  • 1 × Acetone (for gluing them together)
  • 1 × A few centimeters of steel (or other metal) wire with very small diameter (1mm or smaller). I found that steel paper clips are t
  • 1 × Wire cutter (for cutting the wire to the required length)

  • 1
    Printing

    Print 2 halves of the same model at a 3D printer with ABS filament. High infill recommended (over 50%)

  • 2
    The wire

    Cut and bend the steel wire to fit in the channel

  • 3
    Gluing together

    Put a bit of acetone on both halves, then stick them toghether, and apply pressure for one minute. I found out that if you clamp the pieces with a quick clamp (photo) they stick very well.

View all 3 instructions

Enjoy this project?

Share

Discussions

riyakar609 wrote 7 days ago point

  Are you sure? yes | no

riyakar609 wrote 7 days ago point

[url=https://www.daraz.pk/shop/rising-star/]fan for gree[/url]

  Are you sure? yes | no

riyakar609 wrote 7 days ago point

<a href="https://www.daraz.pk/shop/rising-star/">Fan for gree</a>

  Are you sure? yes | no

Alex Rich wrote 02/26/2018 at 13:50 point

Totally missed this project because the title / picture is mundane.  Showcase the steel reinforcement idea in your title, that's the interesting part of this hack!

I want to try this now, does just sandwiching those thin hooks around a paperclip really work, or are they still pretty fragile?  I could see making like a grid of tracks in many directions to lay stainless steel wire in to create a mini "rebar" structure for a print.  Would be a cool way to print something thin that would be deceptively strong / stiff.

  Are you sure? yes | no

Budiul Cristian Carol wrote 02/26/2018 at 22:02 point

I tested the original hook and the improved one, and the improved one could withstand almost 2 kg, while the normal ones were able to support only 0.5 kg / hook. 

  Are you sure? yes | no

Alex Rich wrote 02/27/2018 at 01:08 point

Nice, that's pretty decent.  Since paper clips are ~free you could try a hook with 2 or 3 parallel tracks inside the hook for multiple paper clips.  Almost like making your own stranded wire minus the twisting.

  Are you sure? yes | no

Mike Szczys wrote 02/14/2018 at 20:30 point

Hi @Budiul Cristian Carol , great job on this one! We really liked your method of reinforcing these hooks. Jordon made a demo video and Brian wrote an article about your work, both of which were just published. Hopefully this will help others learn to use similar techniques in their designs:

https://hackaday.com/2018/02/14/repairs-you-can-print-fixing-pegboard-clips-that-break-too-easily/

Great job!

  Are you sure? yes | no

davedarko wrote 02/14/2018 at 23:17 point

finally, someone writes a comment when there's an article on the blog about the project :p

Also, great work :)

  Are you sure? yes | no

Budiul Cristian Carol wrote 02/15/2018 at 06:34 point

Thank you very much for publishing my project on Hackaday, I am so excited about this!! Being my first project, I didn't thought that it will be published on Hackaday. I hope my project will help other people to use similar techniques in their designs. However, the project is still ongoing, because i want to upgrade all pieces to an MK II model with a longer channel, that will reinforce the piece even better. Also, I want to publish some project logs and the methods I used to design the 3D model of those parts.

  Are you sure? yes | no

mircea.fizitec wrote 02/03/2018 at 18:11 point

Great idea to reinforce ABS with metal wire!

  Are you sure? yes | no

Similar Projects

Does this project spark your interest?

Become a member to follow this project and never miss any updates