pastcompute
-
Some planning
03/21/2015 at 13:38 • 0 commentsJust over four months until entries close, so things will change a lot, but thinking ahead will help if parts need to be ordered, PCBs fabbed, etc.
Ground sensor activities:
- Electronics / software lab prototype
- Sensor physical prototype : 3d printed parts? Repurpose existing items?
- Sensor electronics prototype: Use a PCB or just point to point?
- Measure wifi-range in real conditions
- Weather resistance testing
- Measure power usage / charge longevity
Local master activites:
- Similar to ground sensor
- Choose controller - will everything fit into another esp8266? maybe Linux embedded, for greater expansion capability
- Investigate adding other sensors, but not the initial focus
Farm base:
- Receiver design
- Server integration / remote access
Other considerations:
- Farm base - database / logging ; user interfaces?
Possible phases:
- Sensor to Fence Post, with drive by collection (USB stick to collect logging) - not primary goal but important early activity
- Fence Post to base: using wifi to my house nearby
- Fence Post to base: using the 3g phone network
- Fence Post to base: using wireless telemetry of some kind <- ideal
-
Native ESP8266, need to upgrade to ESP-12
03/20/2015 at 08:23 • 0 commentsI have a very successful run managing to program and use the ESP-01 module standalone.
(I actually completed all this by yesterday, then today this article about natively programming the ESP-8266 came out on the main hackaday feed! As it turns out I took a slightly different approach, which I think long term will work better for me anyway)
I started with the frankenstein firmware by necromnt, which uses the Antares kconfig-based build system to build a uboot-like environment for the esp8266. I was quite easily able to add a DHT11 module, the results are now in the latest git for that project. I was actually quite impressed at how quickly I could get everything going, compared to other frameworks I have used.
The next step I did then was to strip down frankenstein to a bare hello world program, essentially ending up with just a user_init() function with a few extra bits, but now with a nice build system that just seems to work: the deployment cycle is now simplified to two commands:
make
make esp8266-deployThe only thing that didn't work was deep sleep mode (documented here by Matt Callow). Turns out to make it work on an ESP-01 you need to hack of an LED and do some other hardware mods. Not that I'm averse to doing that, but I want to design the sensor to be easily constructed...
Functional deep sleep mode will be required to ensure I can run the sensor on a small solar cell and AA rechargable. In the meantime, I'll code up a version that just uses a timer. It will be interesting to try and empirically determine the power usage differences.
So now on my shopping list is an ESP-12, a breakout with all I/O pins exposed...
-
Small steps - native ESP8266
03/17/2015 at 13:10 • 0 commentsI think my next step will be to try just the ERP8266 for the sensor. It will use less power with only one module. Although I may try one last debug of the digispark to find out what went wrong...
I think I'll start with the frankenstein firmware ; I didnt have much time tonight so I just knocked up a module for the DHT-11 but I'll have to test it later this week or on the weekend.
The firmware build was really quite straightfoward and quite fast which is good.
-
Early lessons
03/16/2015 at 12:47 • 0 commentsThe digispark only has 8kb of flash, of which 6kb is available to sketch code. I should have realised, but it turns out I could only just fit serial debugging, DHT-11 and turning on the ESP8266 in AP mode. This might still be fine for a sensor with serial debugging disabled, but I also struck various electrical issues.
For 7 times out of 10 after flashing, even making sure I isolated the digispark to flash and then reset everything, I noticed that even though I could see the LED indicating the esp8266 was receiving the commands, the SSID was not showing up on my wifi scanner. When I enabled serial debug the code reported no response bytes received from the esp8266 when that happened. I think it is a reset order / powering up problem or even some kind of ground looping issue, perhaps the pins in the digispark send junk down the serial line. I noticed for example that if I left the digispark tx pin connected to the esp, flashing would fail.
To dig deeper I might have to drag out my storage cro and see whats happening, and/or put a jumbo sleep at boot so I can turn on the esp8266 manually after the digispark boots, with time to space.
But what all this really means, apart from being a learning exercise, is perhaps I need to consider some other processor even for the sensor. Perhaps its time to dive direct into bare metal code on the esp8266...
Options:
- use something other than the digispark for sensor processor. Pro: more flash; Con: maybe larger footprint, although an Arduino mini wouldn't be too bad
- go direct to ATtiny85 bare C (or assembler!). Pro: fit more into flash; con: no nice arduino IDE or quick flashing
- use something other than the ESP8266 for sensor telemetry. Con: need to find & purchase more things, also maybe larger footprint, also, if not wifi, adds complexity
- Avoid electrical issues by using bare metal C on the esp8266. Pro: reduces footprint even further; Con: no nice arduino IDE or quick flashing, and only two GPIO, so would need an I/O expander, which complicates things. This may be a downstream iteration anyway; having the Arduino IDE makes it easy to prototype connections to all all the sensors & confirm they are working
First though I'll try and control the ESP reset from the digispark, and I'll probably spend a little more time cleaning up my wiring and checking the various lines are properly pulled up, power isolated and buffered and enough current supplied, etc. before deciding what to do. Maybe it is just something like a capacitor is needed or a common supply.
I don't want to waste too much time on this basic stuff, my available time will be limited as I have other things to do...
-
Early efforts
03/15/2015 at 12:28 • 0 commentsA bit of background
Possibly some of what I'm talking about here may be a bit basic for many hackaday regulars. I am an experienced software engineer & hacker but have not had as much time as I would like to have played with the micro end of embedded, so I am documenting experiences that are either new to me, or I am very rusty in. Recording my experiments may also help other new users.
Early Prototyping Efforts (hardware Hello World)
I will be building various prototypes using the digisparks even if a more evolved sensor design requires something else eventually.
The only arduino I had previously used to any extent was the leostick. I had purchased a comple of digispark last year (and a lot of other unfotunately sitll unused gear) so today I finally had a chance to find my feet with them.
Any competent software engineer will tell you that a very important task in any new software project is to build a hello world, to exercise the toolchain and the source code management systems, and sometimes overlooked, keep it maintained. I figure this is probably just as important even for something relatively trivial like an arduino based project. So I have started a github for my efforts already.
Running on older PC hardware
Rather than dragging around laptops I have an older desktop configured, a SFF case with a now-venerable VIA EPIA-5000 fanless motherboard. I built this up running Debian Squeeze 486 from a compact flash card, so it is a noiseless computer, which is great, because my lab is out the back and is a bit closer to nature than my office, I can hear the wind and birds and wildlife, etc. Anyway I got the digispark IDE which is essentially the Arduino IDE with digispark hardware running, and after fixing the usual permissions issues still had a problem, an Illegal Instruction error. This had be stuck for a bit then it clicked that my hardware is actually not even capable of running all 686 code... so after rebuilding the micronucleus driver and digispark avrdude things finally worked and I had a flashing LED / hello world.
One quirk with the digispark is you need to keep un/re-plugging it before re-flashing or the upload fails.
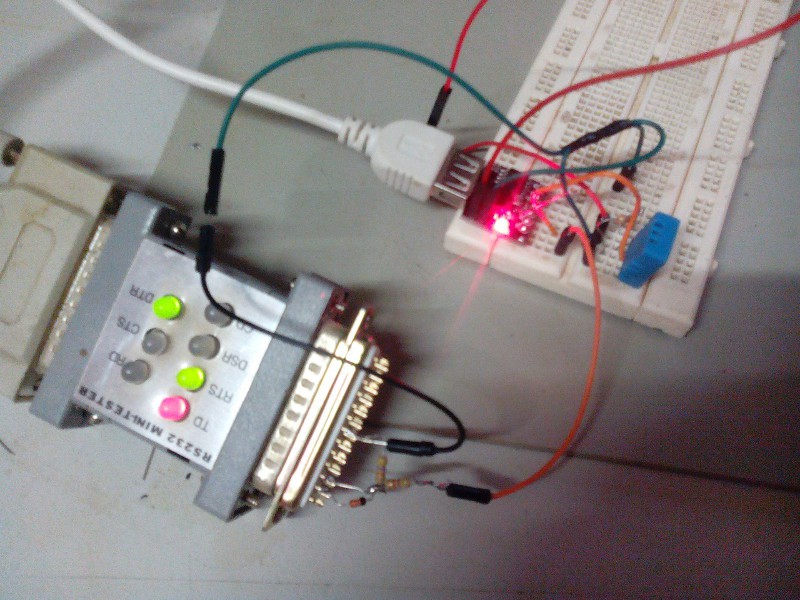
I then had to add in serial debugging by lashing together a couple of resistors and a diode, this worked quite well. (One reason I still have the old PC in the lab is it has two proper RS232 ports...)
Finally I hooked up a DHT-11 temperature and humidity sensor, using a low-memory no-frills DHT library. I verified this was working with a very brief blast frmo the heatshrink gun. So far, so good...
![]()
-
Finding first stage proof of concept components
03/14/2015 at 14:06 • 0 commentsProof of Concept / Prototype
At the moment I am preparing to build a prototype for the sensor and receiver stations.
Although later builds may change based on power consumption, etc., to start with the system will be built with the following (mostly because I have them on hand and they are small)
The first prototype will have minimal sensors, etc., so we can experiment with wireless range and battery life
Ground Sensor
- Digispark
- ESP8266 (later, may look at using just this using the gcc kit. But I want to get a working overall system first)
- Power control circuitry, to turn on/off the ESP8266 when not needed to conserve power
- 1.5V to 5V converter
- Small solar cell scavenged from a garden light
- Charging circuitry
- An LDR, used for scheduling attempts to send data to Repeater
- DS18B20 waterproof temperature sensor
- Various scavenged plastic / metal structure (look into 3D printing / fabrication of better design later)
Repeater Station
- Arduino (Micro/etc)
- ESP8266
- DHT-11 (humidity & temperature)
- Larger solar cell, battery & charging circuitry
- A serial connection to a wireless router to connect to my home network, to simulate the long shot back to the farm
Home Base
- A PC running Linux with a database to log everything
SentriFarm
Solving a key farming problem: is it safe to harvest / spray / sow today? (+experiments with 'big' data in agriculture)