Robbie
-
Razbot Security
11/18/2015 at 18:47 • 0 commentsCheck out Razbot with a Kinect2 stopping criminals at the Princeton Hackathon.
http://devpost.com/software/icubot -
Simulate it!
04/27/2015 at 02:04 • 0 commentsOur friend Paul B has created a simulation model of the Razbot. You can take it for a test drive before you build one.
To run the simulation, install ROS, Gazebo and the Gazebo ROS packages on your Ubuntu system.Clone the following repository into your catkin workspace and build the workspace
https://github.com/Waterfox/razbot_tutorials
There may be a few more dependencies to install. When finished, you can launch the simulation with:
roslaunch gazebo_razbot simulator.launch
To control the robot, run rosrun rqt_robot_steering rqt_robot_steering in a separate terminal. Set the output topic
to /razbot_diff_drive_controller/cmd_vel, and use the sliders to drive the robot. If you have a joystick, you can also use the teleop_twist_joy package. Just be sure to remap the cmd_vel topic to /razbot_diff_drive_controller/cmd_vel
![]()
The simulator software is actually ahead of the software being run on the Razbot itself. One of the next steps is to re-write a razbot control node to subscribe to cmd_vel and output the motor control topic that the MCU is listening for.
I'll add some detailed instructions into the manual on running the simulator the next time it is updated. -
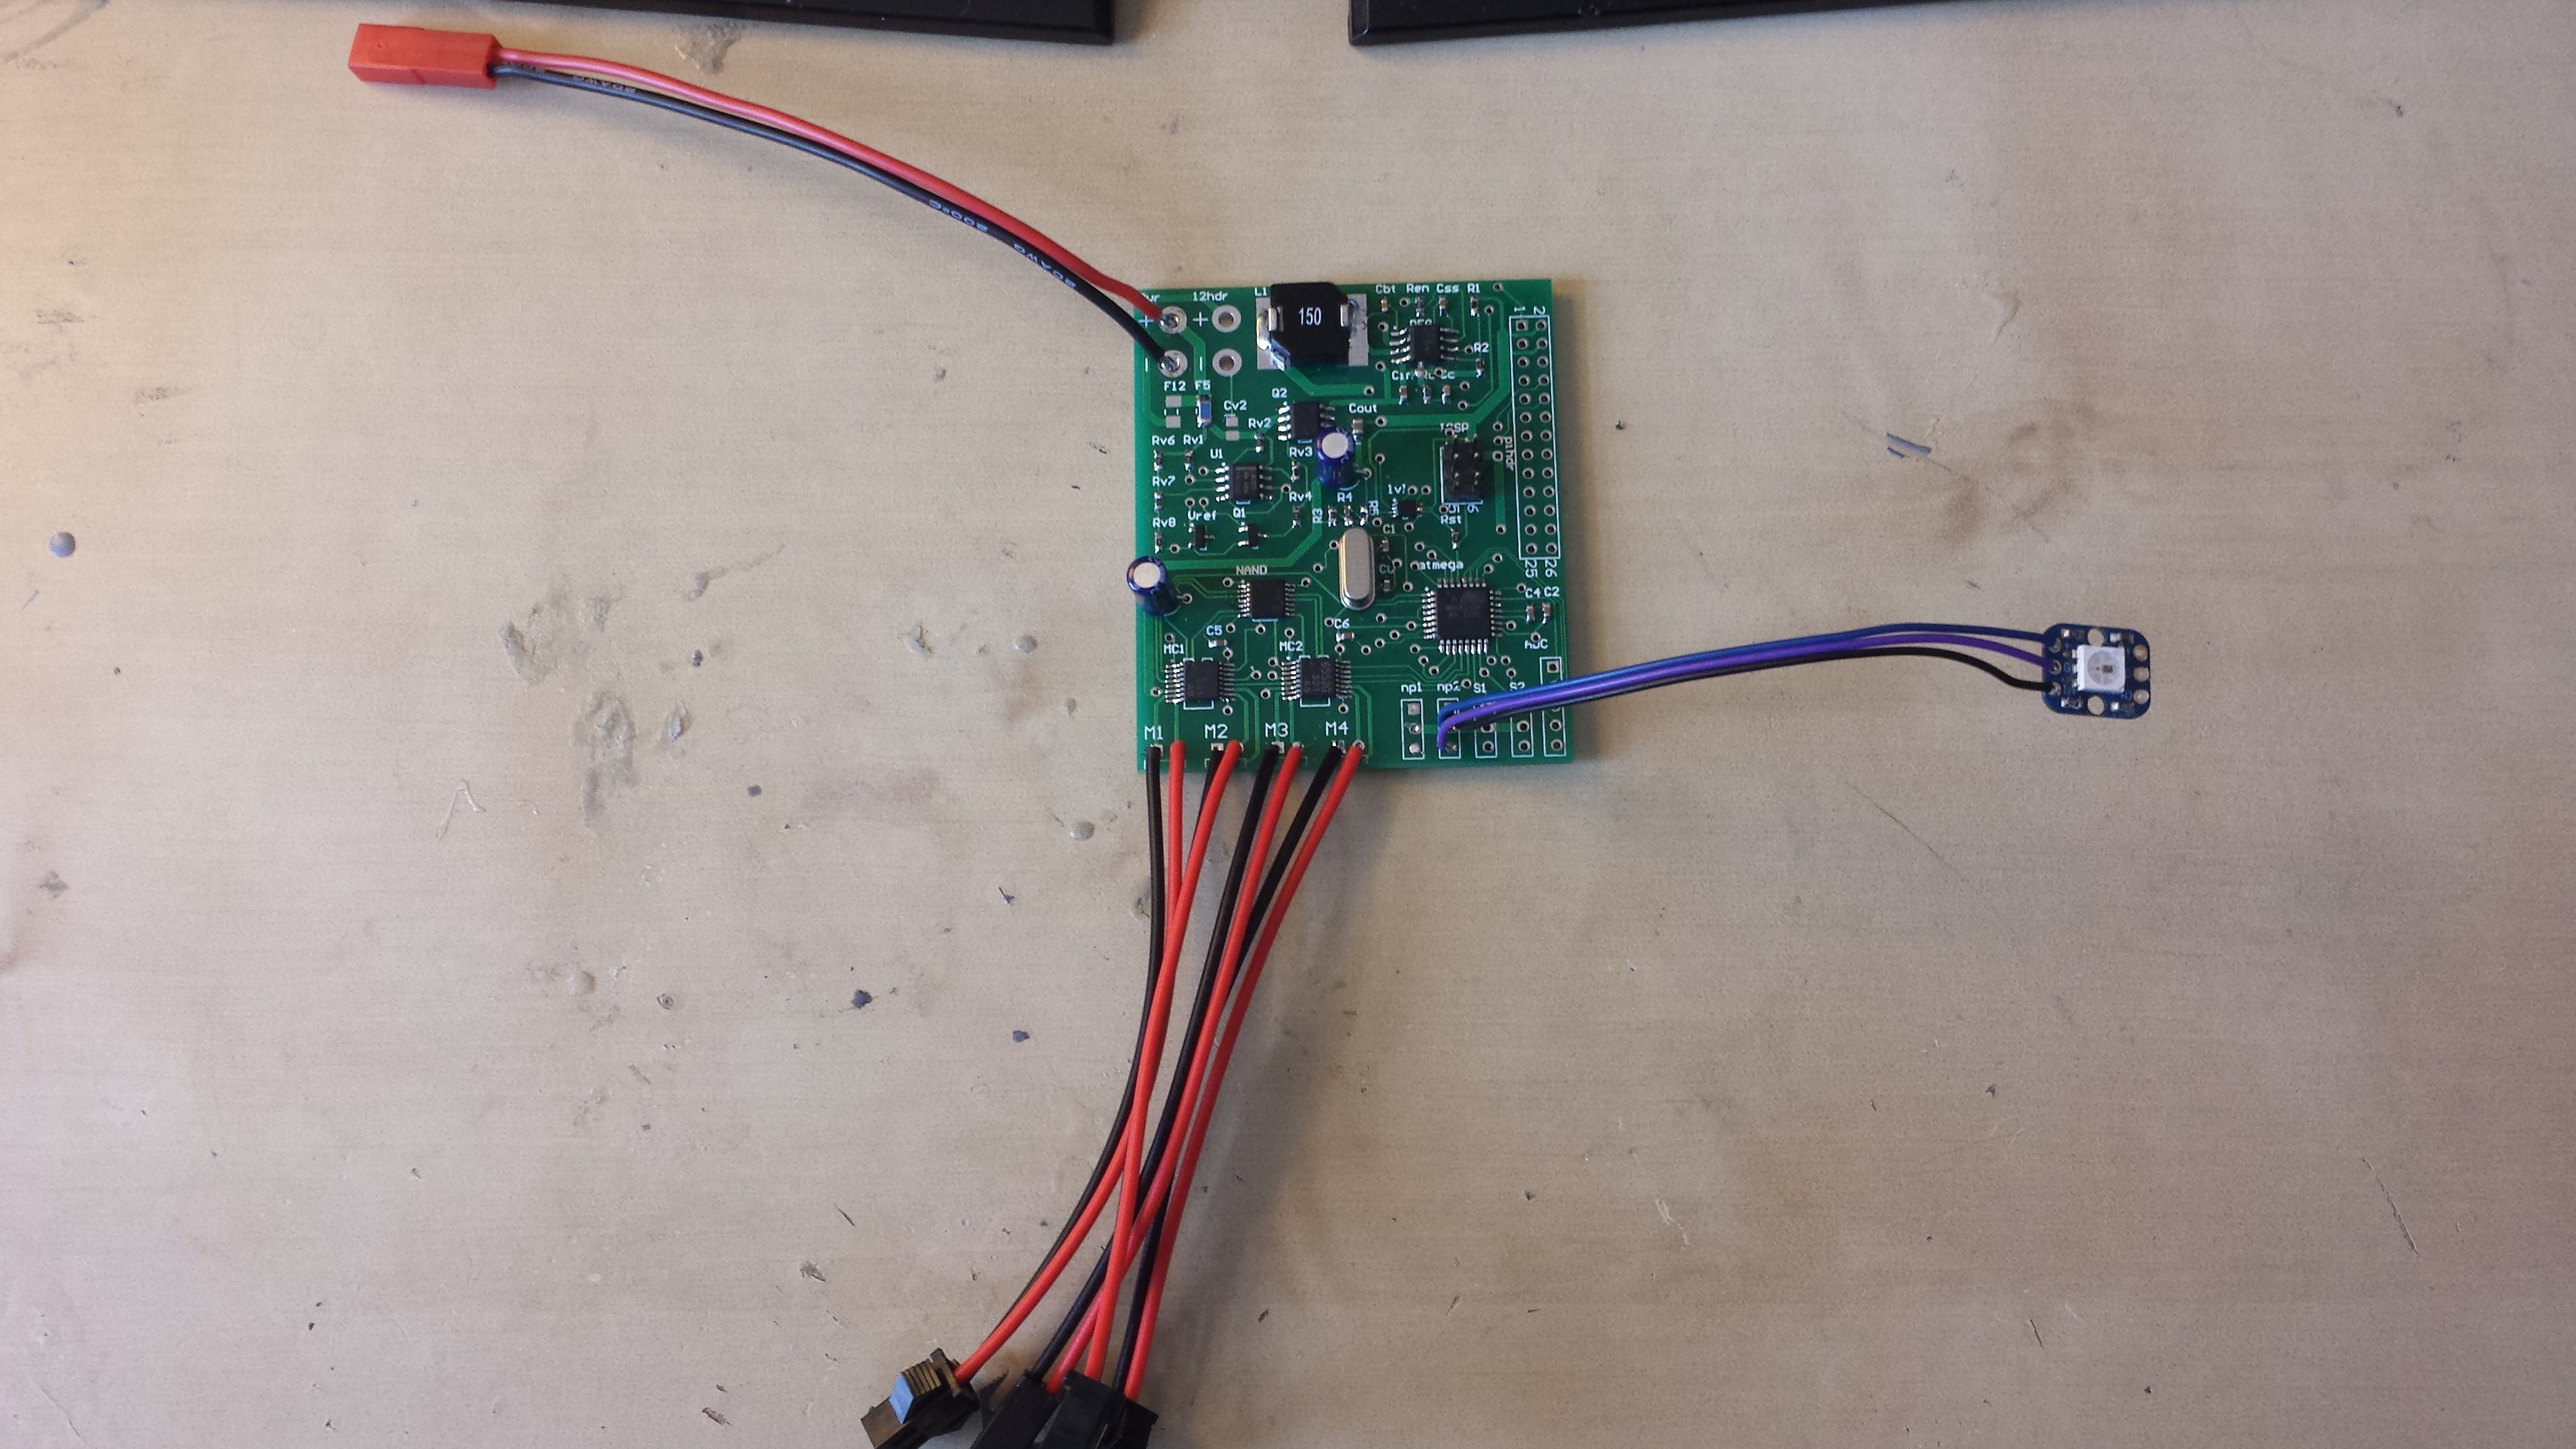
MCU board update
04/20/2015 at 00:24 • 0 commentsThe robot first MCU boards are assembled, flashed and working nicely. Now a comparator circuit detects low voltage and shuts off power to the robot before the battery is drained and damaged.
![]()
-
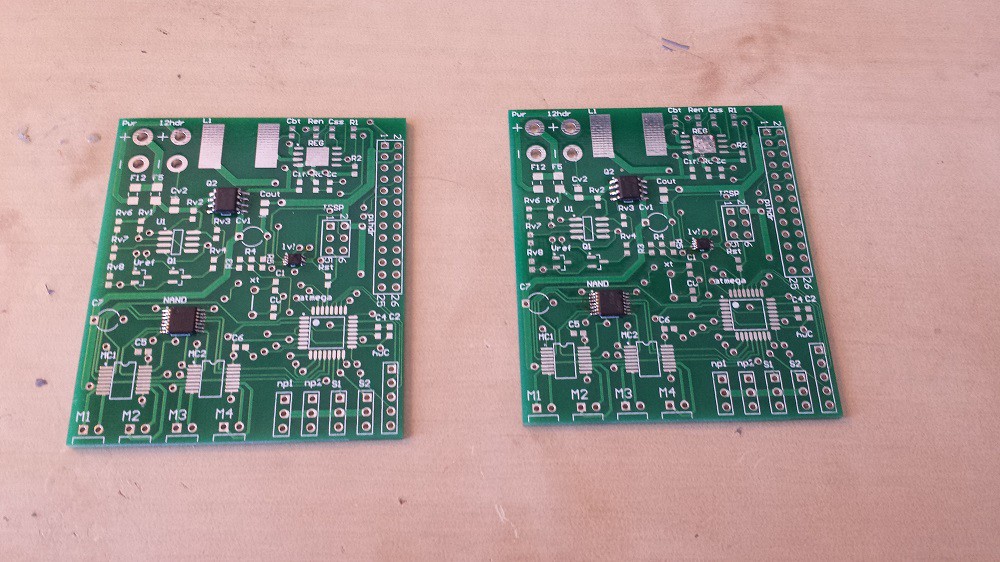
New MCU boards are in!
04/11/2015 at 19:24 • 0 commentsTime to start populating
![]()
-
First Video
04/11/2015 at 17:15 • 0 commentsHere is a quick video of the green Razbot parking with his friends. Control is with a F710 gamepad joystick.
-
Bringing up the RPi2 with Razbot
04/07/2015 at 01:22 • 1 commentThe Green Razbot now has an RPi 2B installed inside with one of the original MCU boards.
I updated the Razbot image to support the RP2 2 according to the following:
http://thepihut.com/blogs/raspberry-pi-tutorials/16982376-updating-raspbian-on-your-microsd-for-the-raspberry-pi-2https://www.raspberrypi.org/documentation/raspbian/updating.md
On the first shot it worked great. The robot started the MJPG-Streamer for the camera as well as the ROSCORE and required packages. The robot drove around and streamed video as normal. Using Putty to ssh into the Pi was much faster on the Pi2.
The catch: the Pi 2 appears to be much more sensitive to SD card corruption when interrupting the power supply. (Powering off the Razbot by hitting the switch). This makes sense, if you kill the power while writing to the SD card, goodbye SD card. SSH-ing into the robot everytime you want to shut down sort of sucks
For now I'll have to lock down the boot partition as read only to ensure it doesn't corrupt.
In the long run it looks like we might wanted a larger capacitor on the MCU board (which has the 5V power supply). Using a GPIO pin to detect primary power loss, issue a sync command before losing secondary power (thanks Greg J for the suggestion) .
Hammering out all the minor details related to mech / elec / software and getting things to run smoothly and reliably is has got to be one of the biggest challenges in robotics. Before you can go implementing the latest sensors and SLAM algorithms you need a platform that works reliably and finding / building one is not always an easy task. -
first log post
03/29/2015 at 18:08 • 0 commentsI've been working on variations of this for just over a year now slowly in my spare time. Although the project is labelled complete, there are still lots of improvements and upgrades to carry out to make the Razbot more capable and reliable.
The 2nd generation of the printed circuit board has been designed and is currently being assembled and tested. This is the version is found in the documentation. It has a few corrections and a few more features than the initial 4 working prototypes.Now that there is a reliable working hardware platform, we can begin adding features to both the hardware and software. A list of 'to-do' items is found at the end of the Build a Raspberry Robot.pdf document. Some examples include:
Mecanum wheels for omni-directional driving.
A web interface using ROSlibjs
Publishing the instructions and files to use the GAZEBO physics simulator and a virtual Razbot
RAZBOT
RAZBOT is a 3D printable Rasberry Pi Rover running the Robot Operating System