-
1Step 1
Remove The Back:
Remove SIM Tray First!!! then unclip your way round with pointy plasitc object
![]()
-
2Step 2
Unscrew the Speaker enclosure:
There are six screws covering the micro-usb connector that you need to solder to, two have caps which pop out with the help of pointy plasic object there are also different screws so keep track. pull up from micro-usb end to lift off cover
-
3Step 3
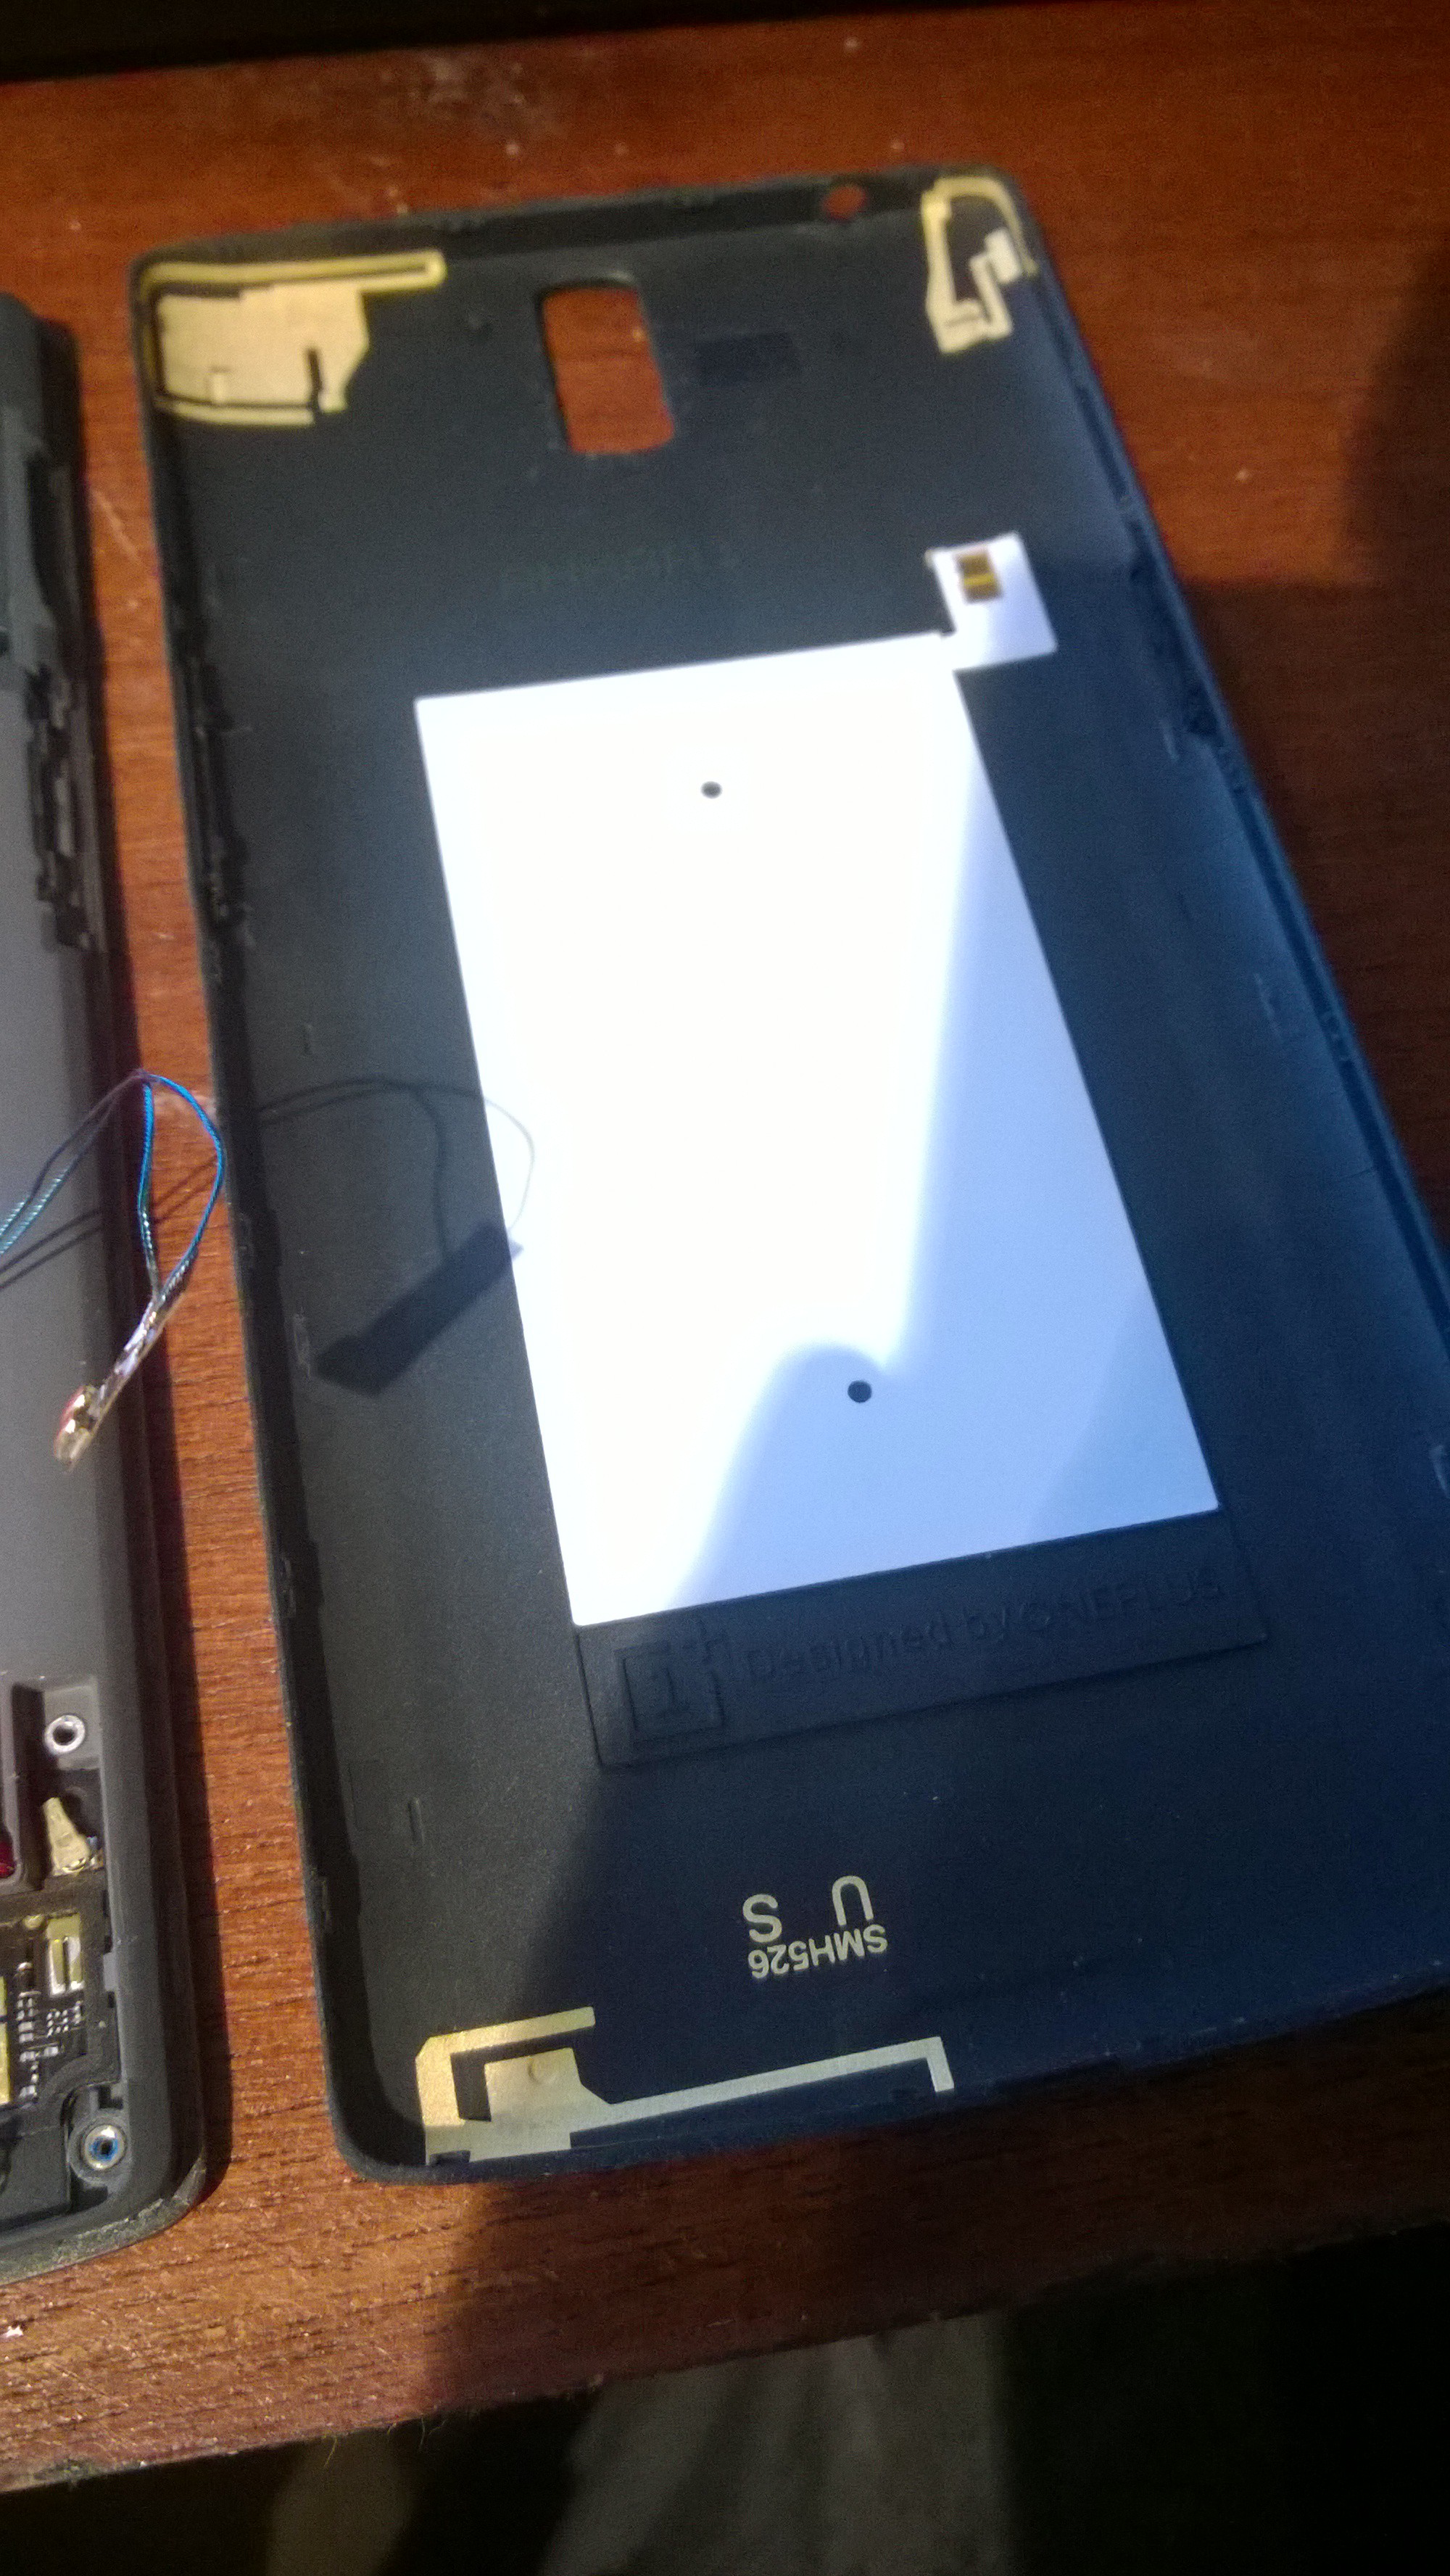
Peel Off The NFC Coil:
Luckily i have a hot air rework gun, using a low temperature and medium air i managed to pull the nfc coil off carefuly. You could probably do without the hot air/hairdryer. it comes off cleanly
-
4Step 4
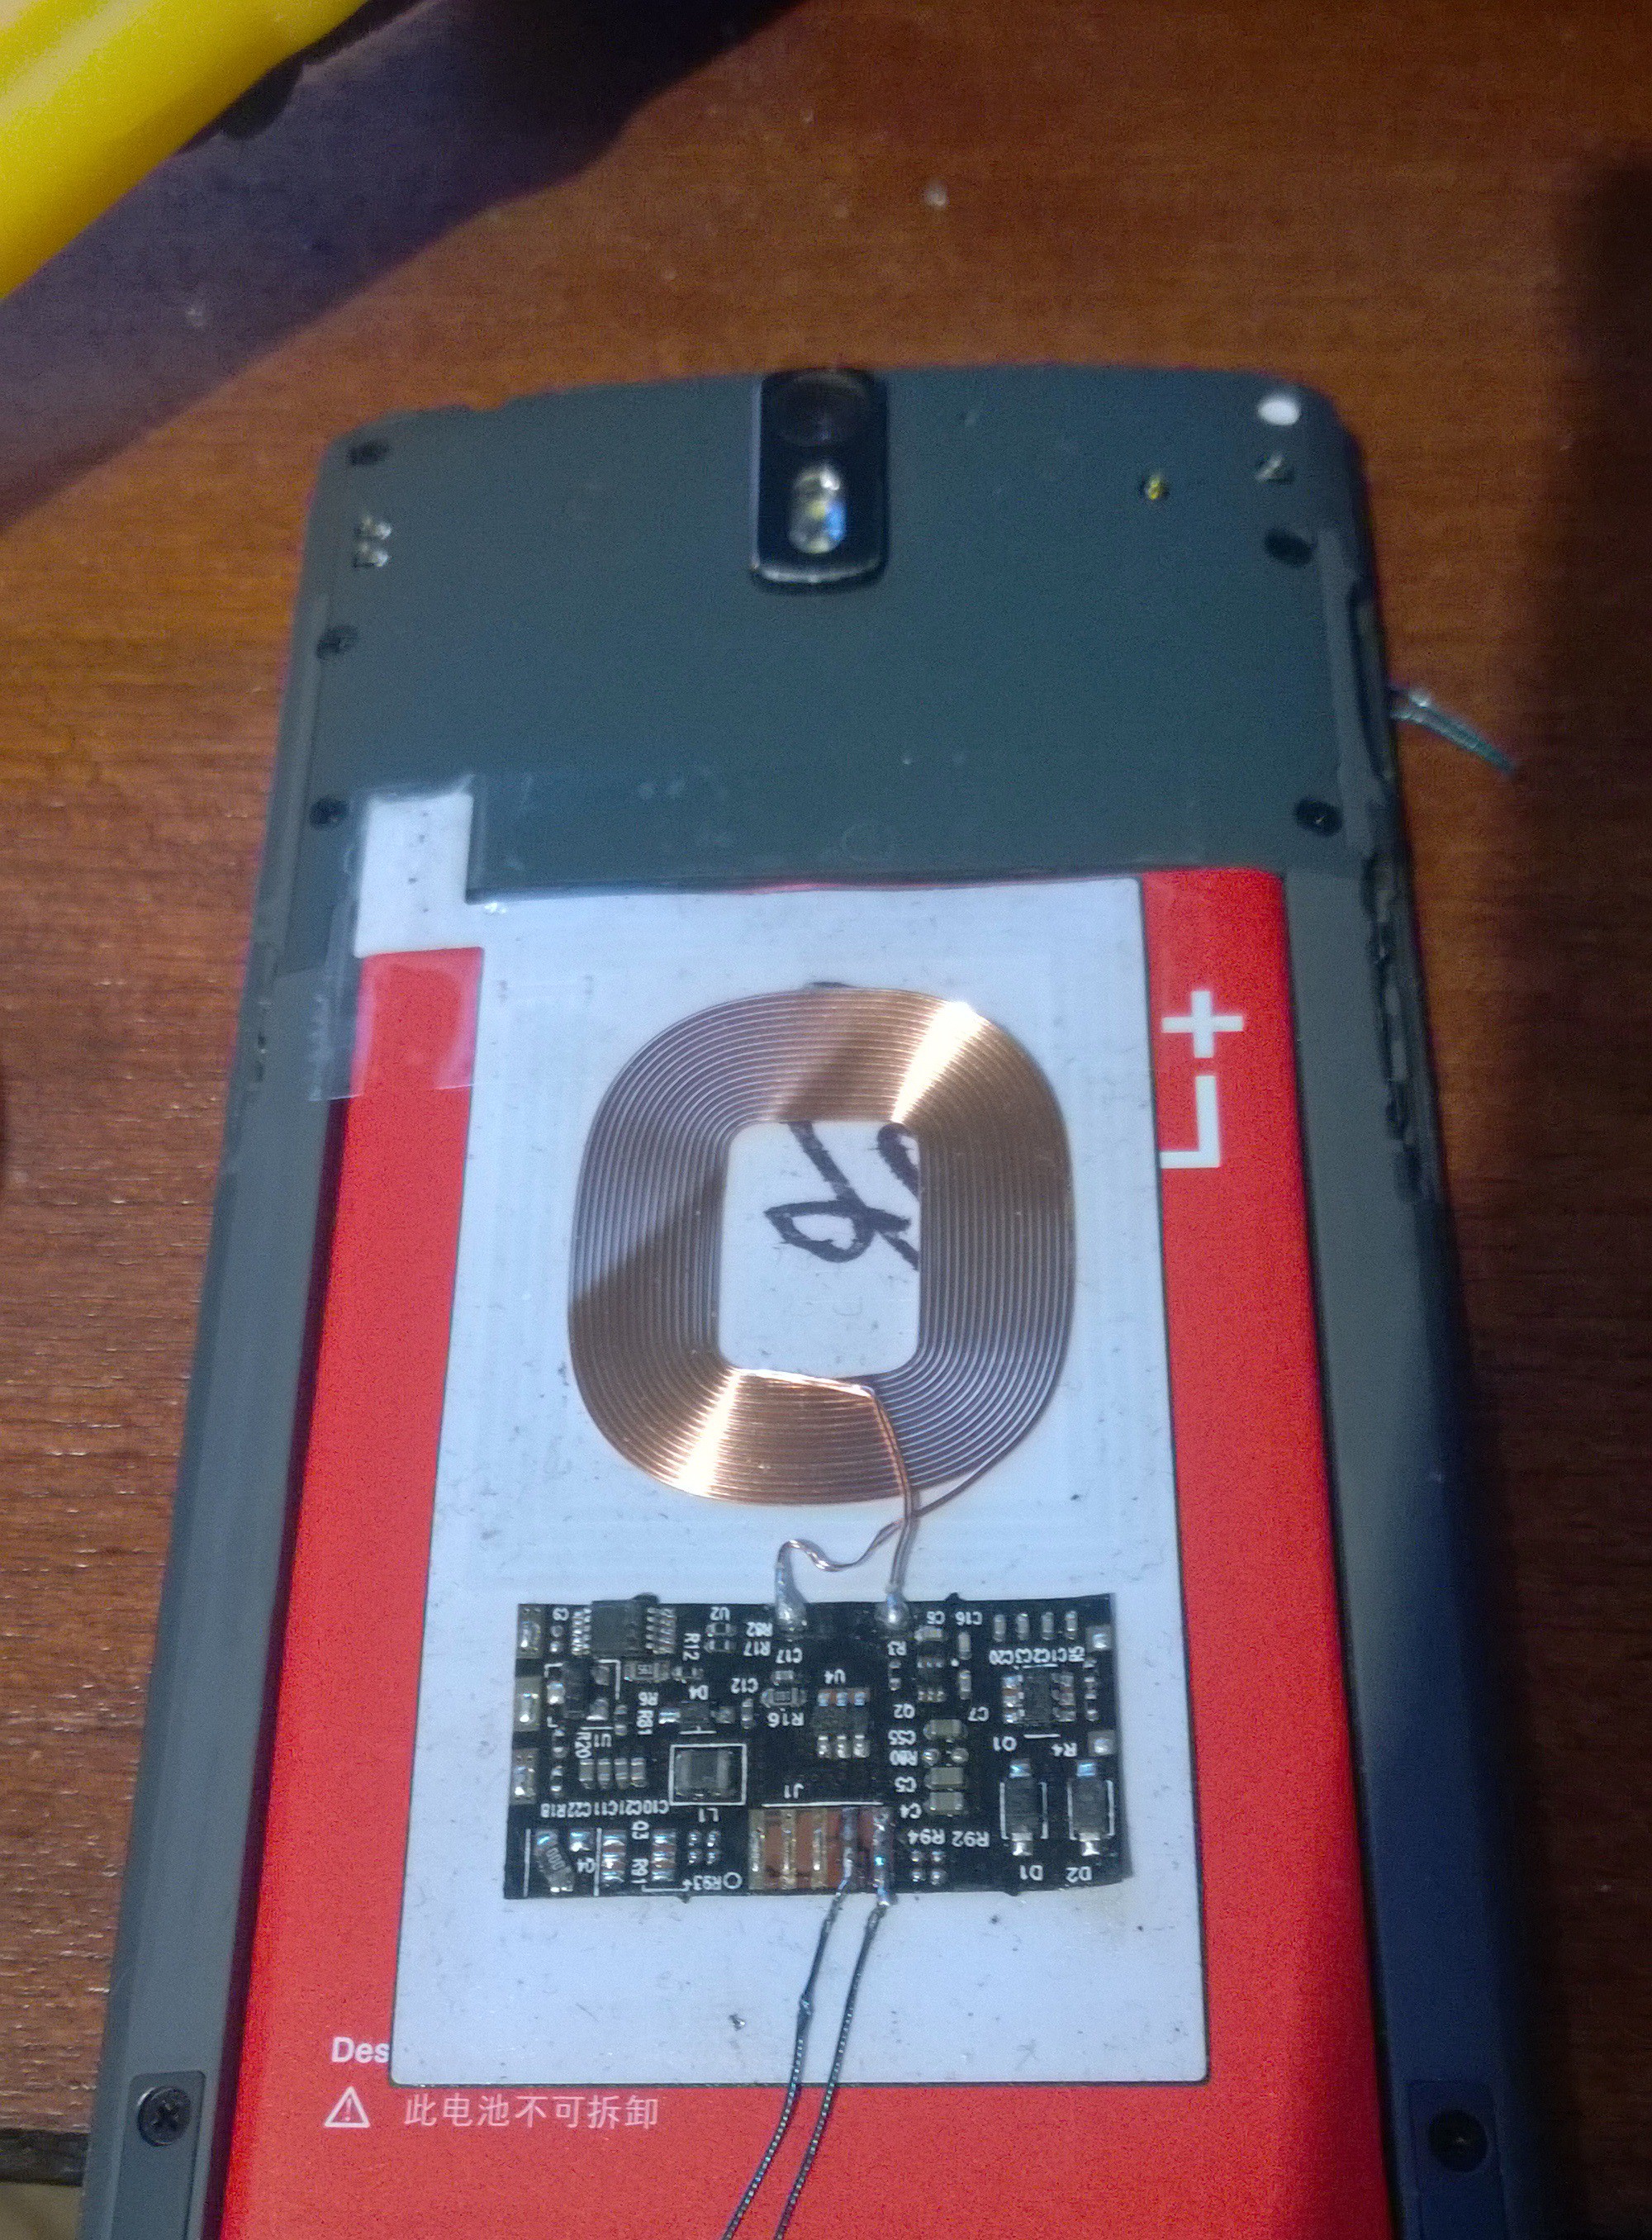
Place The NFC Coil:
Place the nfc coil in the correct position directly ontop of the battery, making sure the contacts on the phone touch the pads. i used sellotape to keep it in the correct place
-
5Step 5
Place the Qi Coil:
The Qi coil should not obstruct the square nfc coil. i managed to place the qi coil just inside the square of the nfc coil overlappig slightly. i tested a tag to ensure it still works ok.
![]()
-
6Step 6
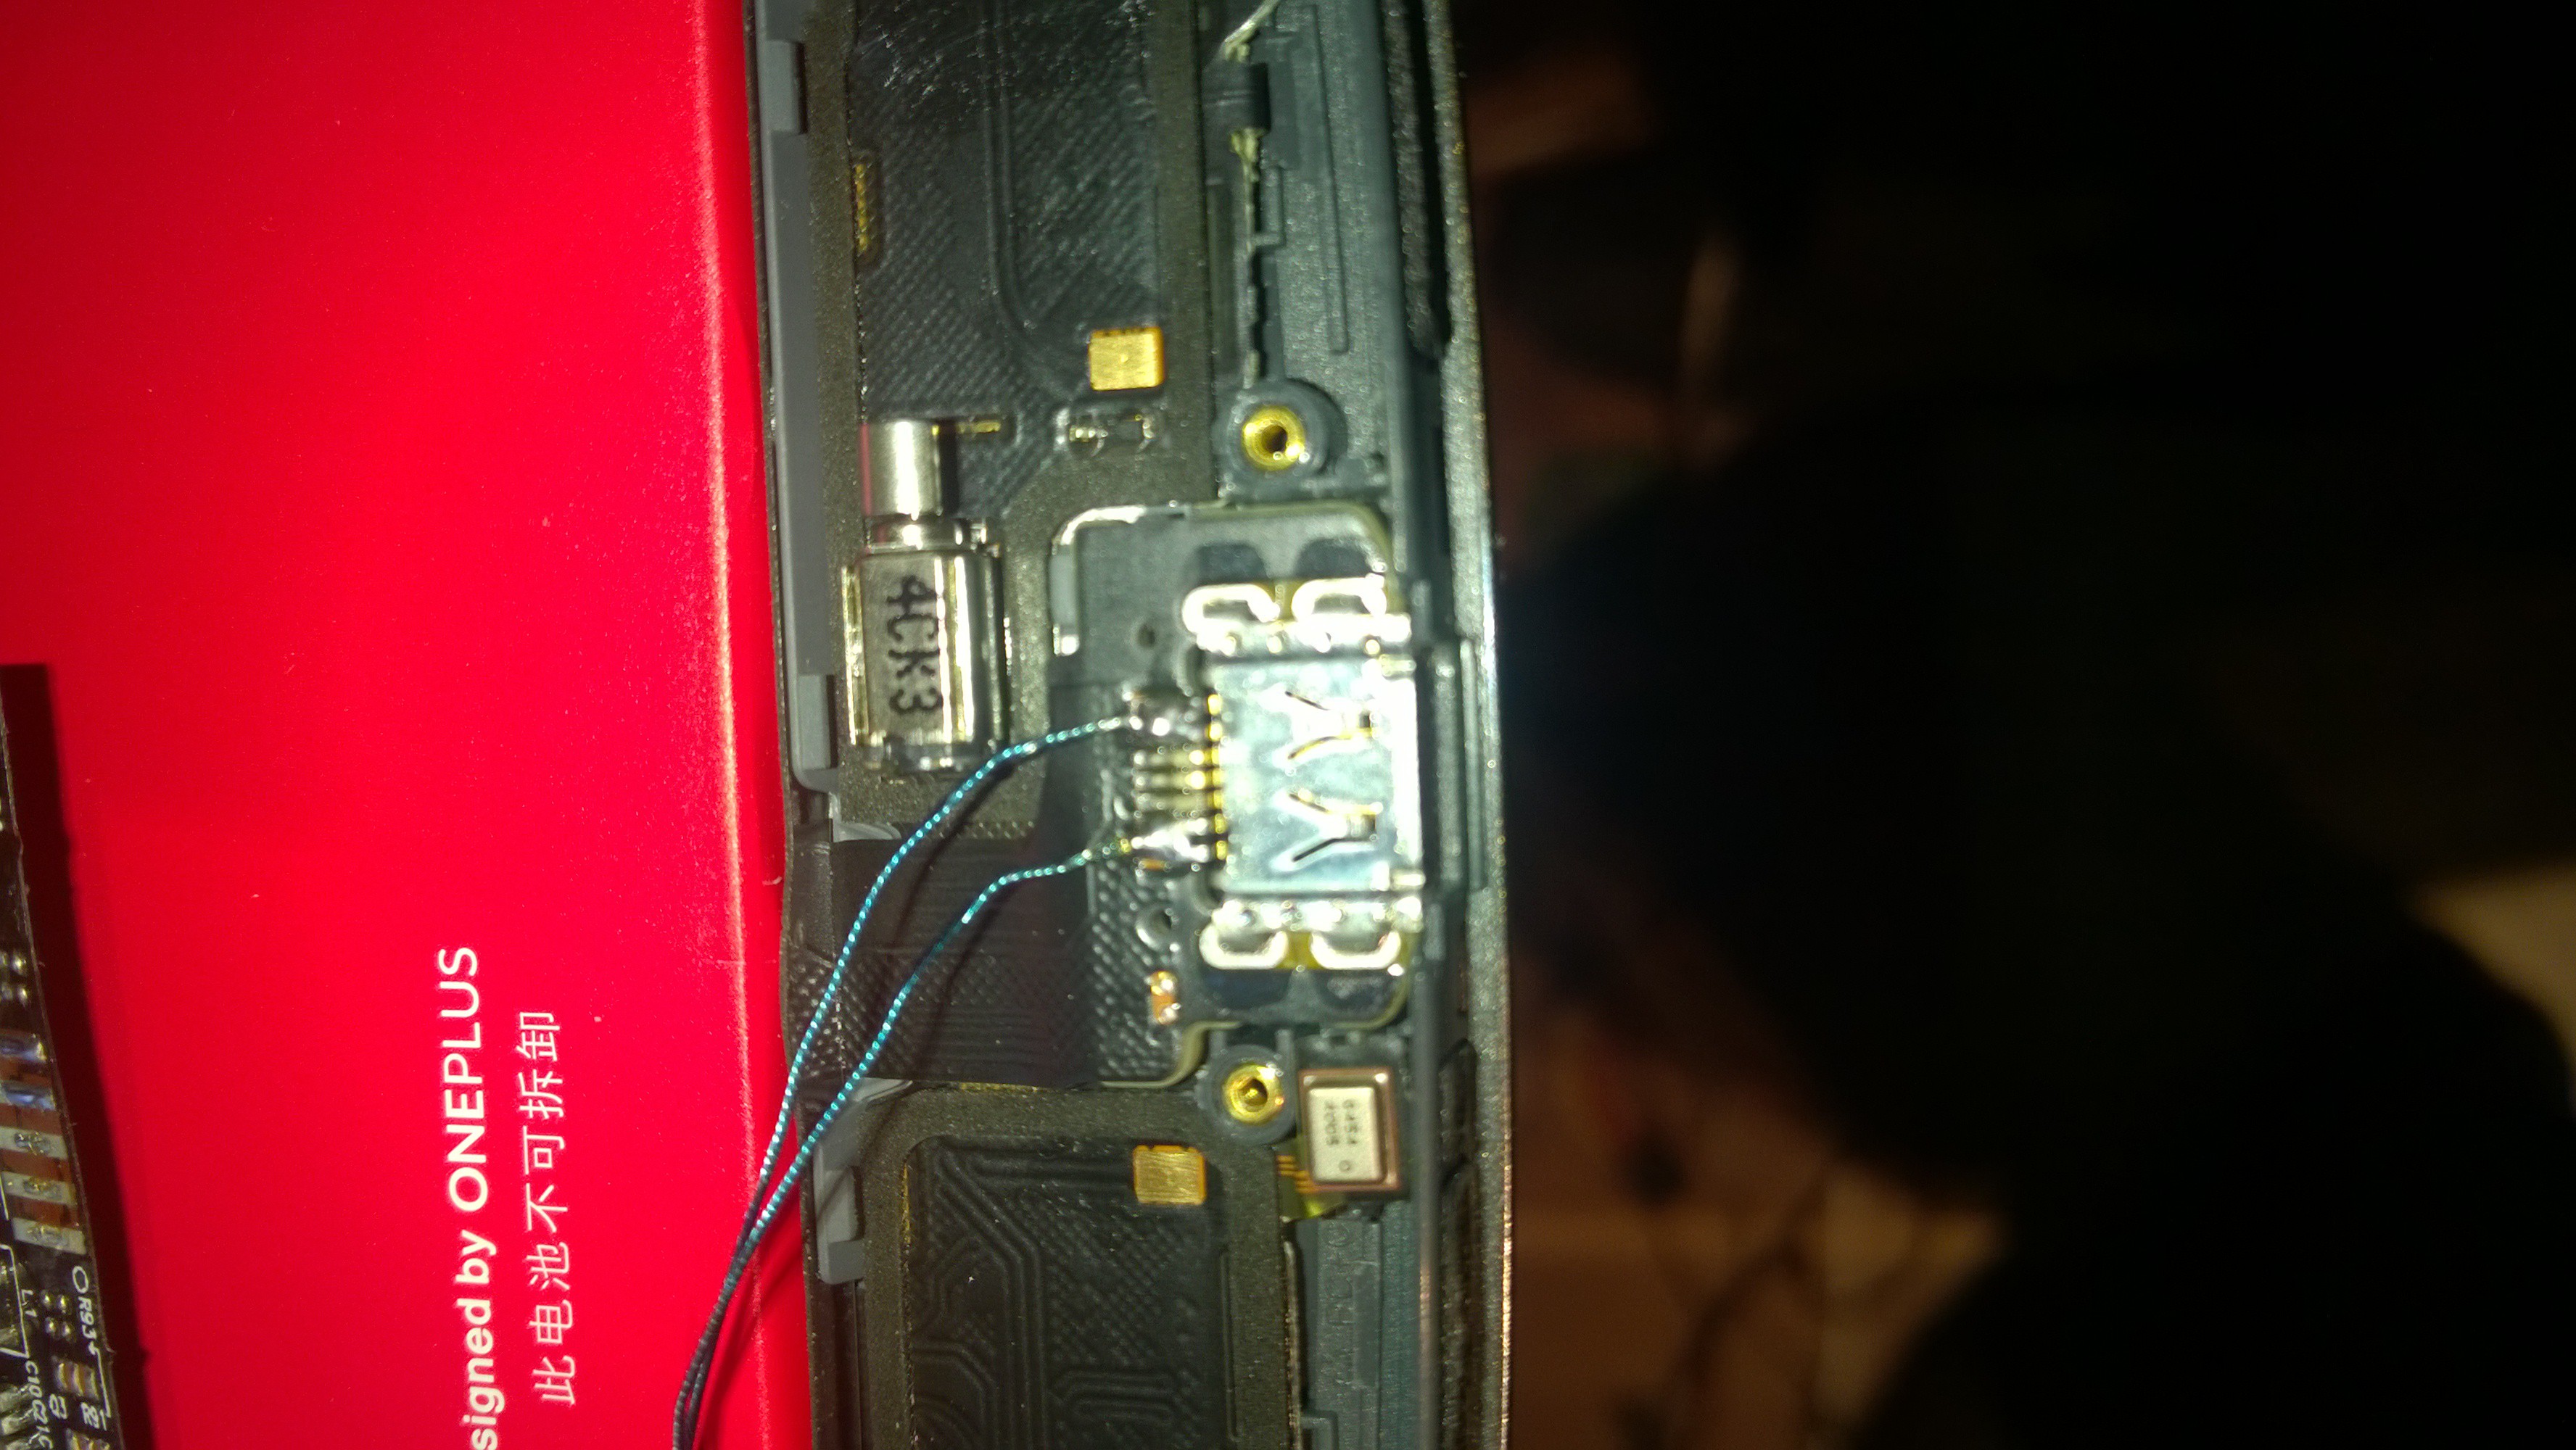
Soldering Time:
Make Sure the soldering iron is tinned and clean. the micro-usb connector has 7 pins. the last two on each side are joined toghther these are +5V and GND (There are two pins because of the larger current). I bridged these in the image and tinned the kynar wire before actually connecting. get the pinout right! look at my pictures
![]()
-
7Step 7
Testing Time:
The Qi and NFC should now work Hopefully, test before screwing back together
-
8Step 8
Humpty Dumpty:
Time to put it back together again. make sure the wires lie ontop of the micro-usb ribbon to prevent sheering the wire. The cover shoud fit back, it may take a bit of force. lever it in from the bottom end
-
9Step 9
Report:
Tell us how it went, any alterations? too risky?
 Ollie Smith


Discussions
Become a Hackaday.io Member
Create an account to leave a comment. Already have an account? Log In.