-
1Disassemble the electric scooter.
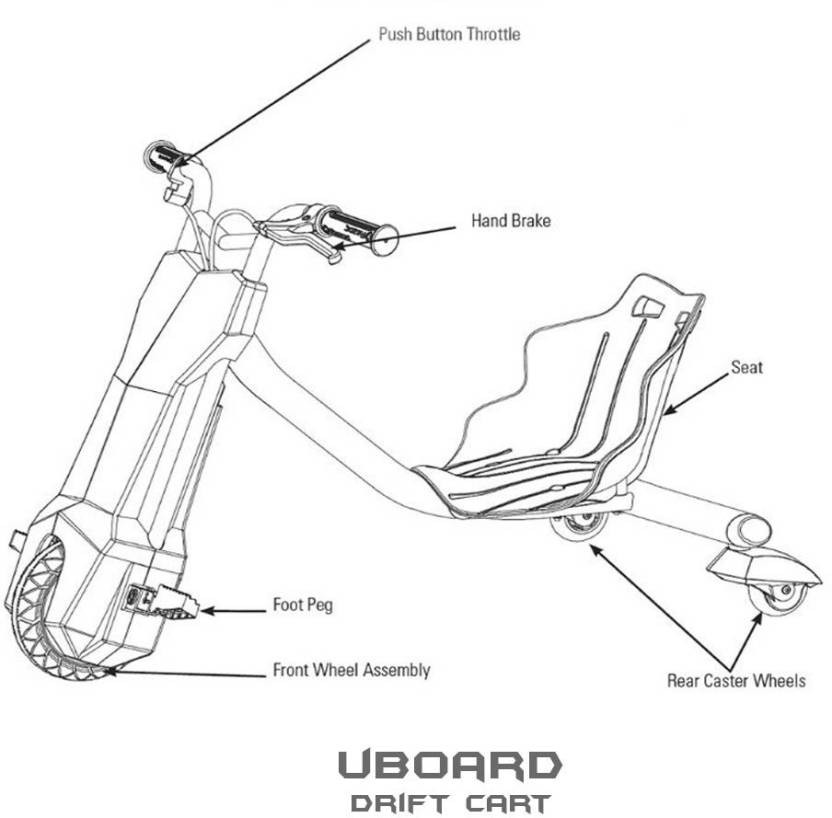
We need the front portion handle frame area only., along with the components attached to it (wheel, motor, transmission, handlebar, brakes).
Image of the scooter before disasembling the parts:
![]()
![]()
Source image : http://urlz.fr/6Nao
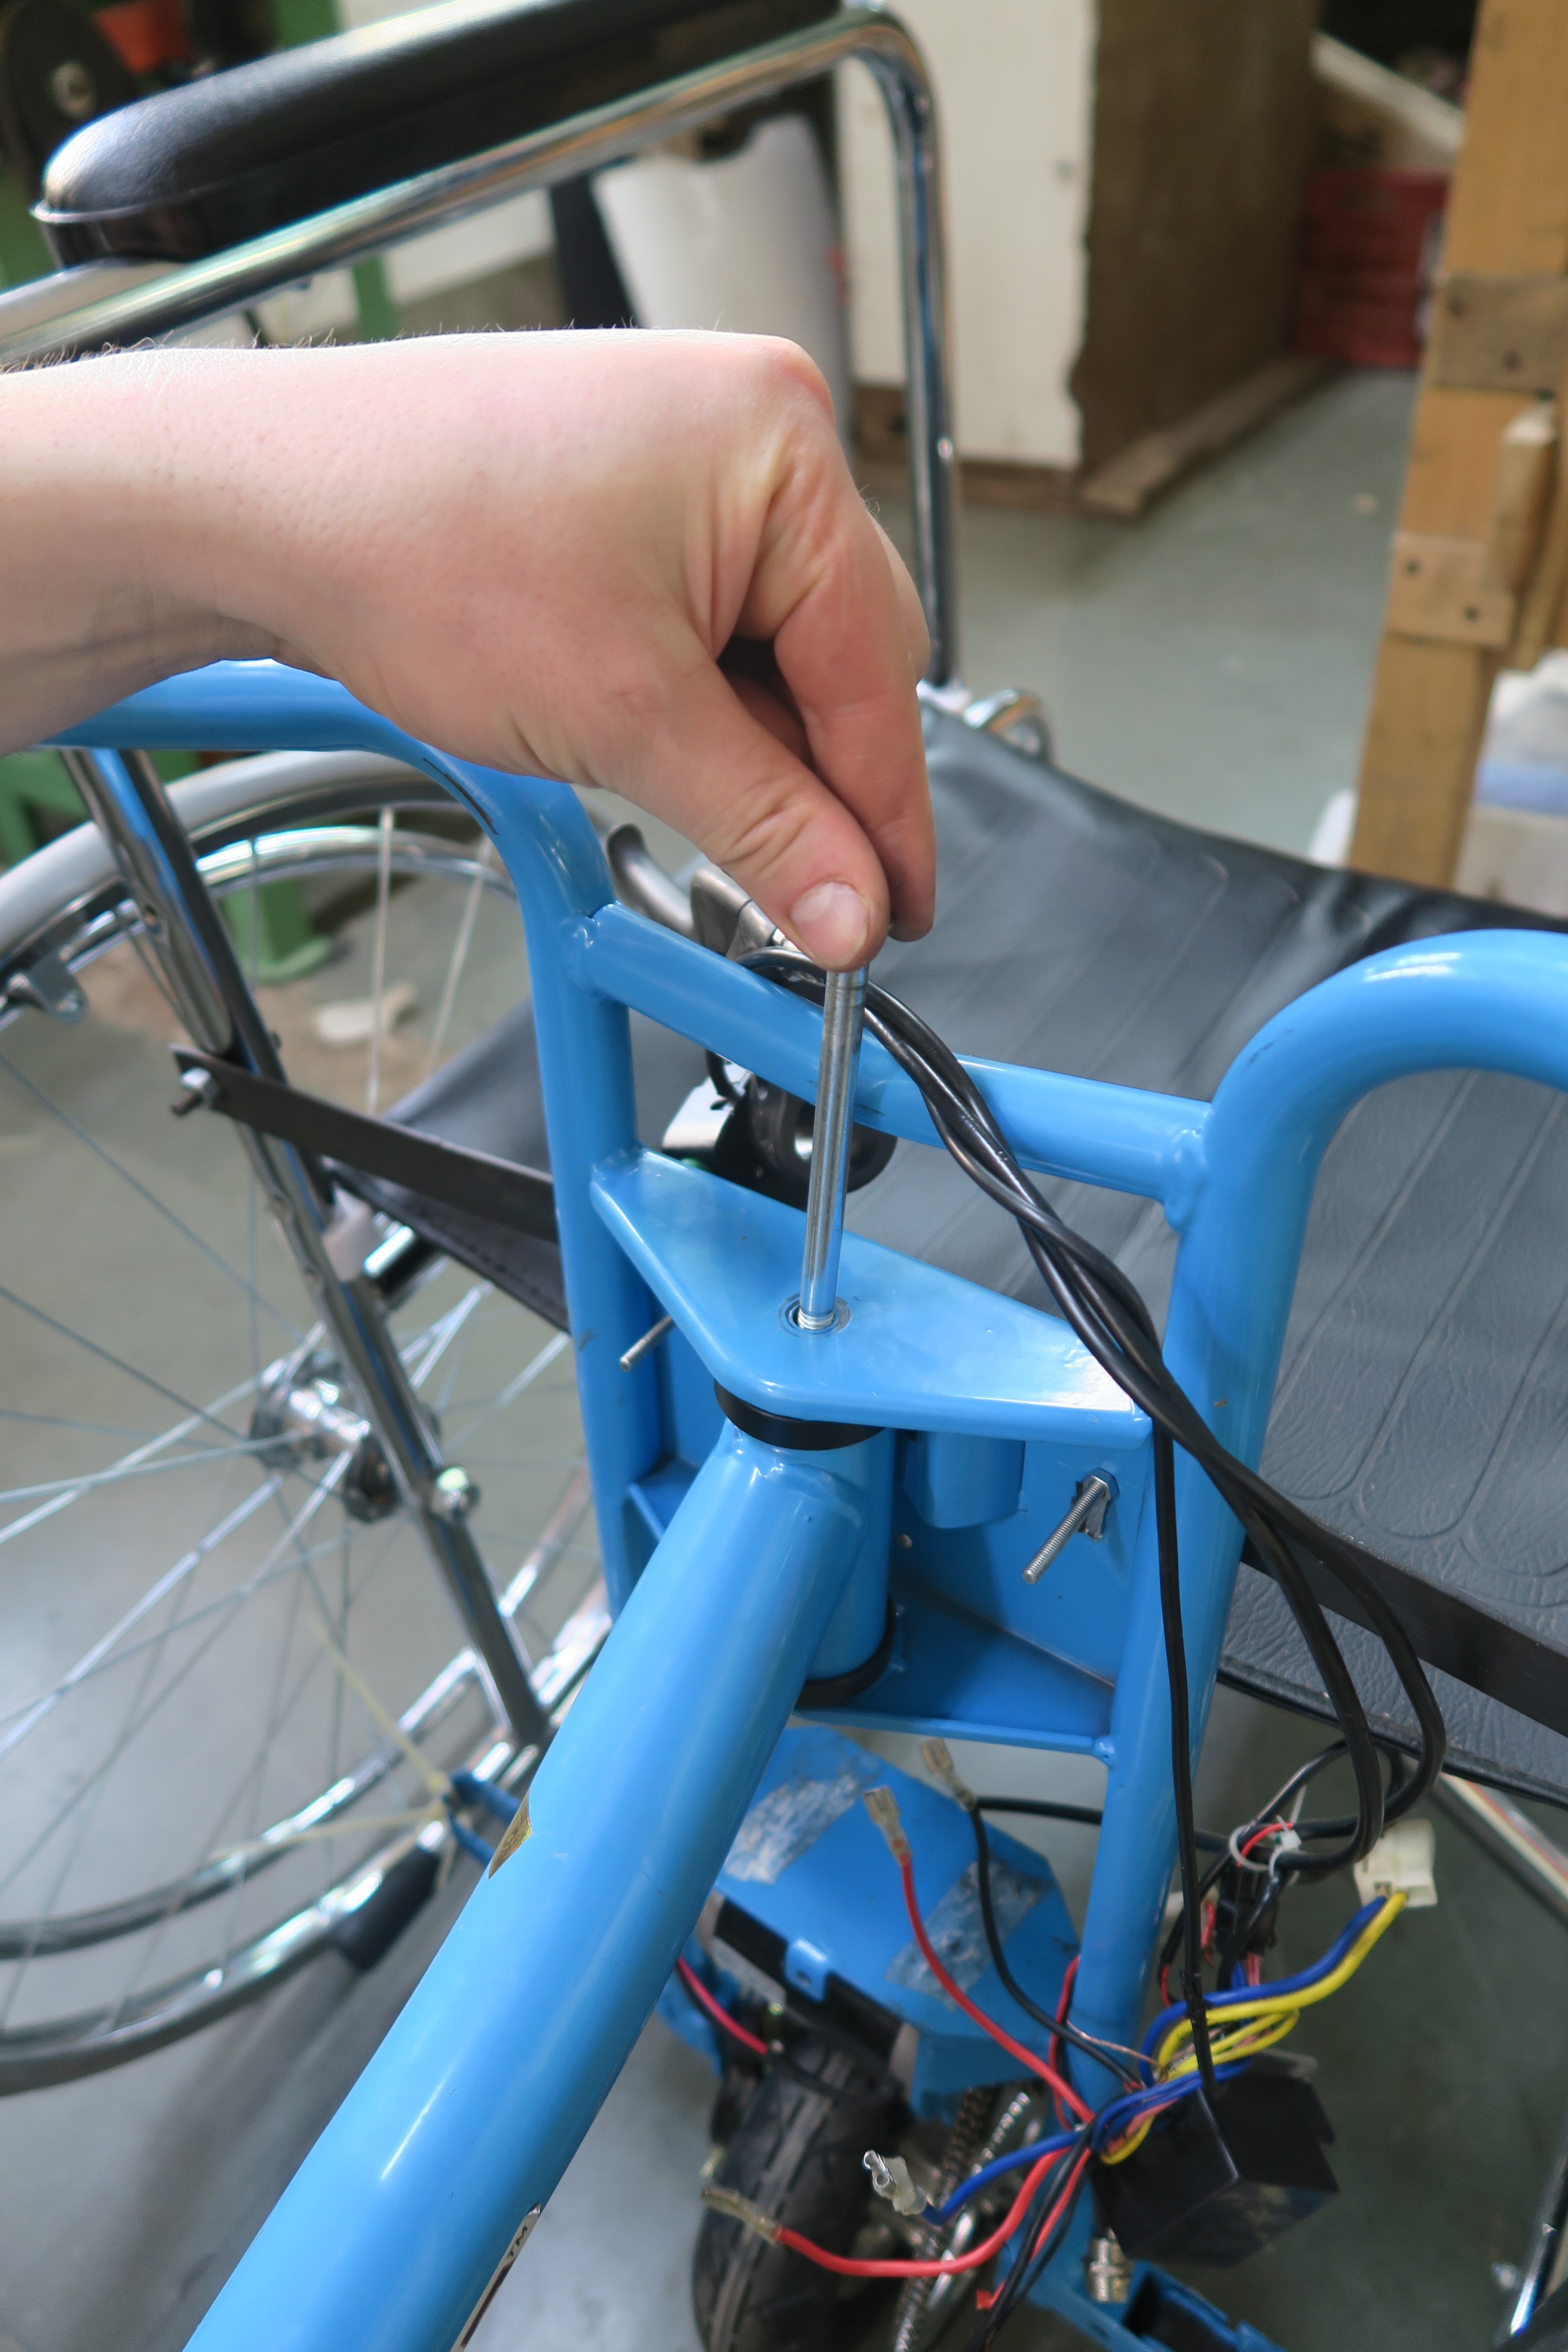
For this scooter model, use a 6mm pipe wrench to unscrew the part we want to remove. On this image the system was mounted before disassembling :)
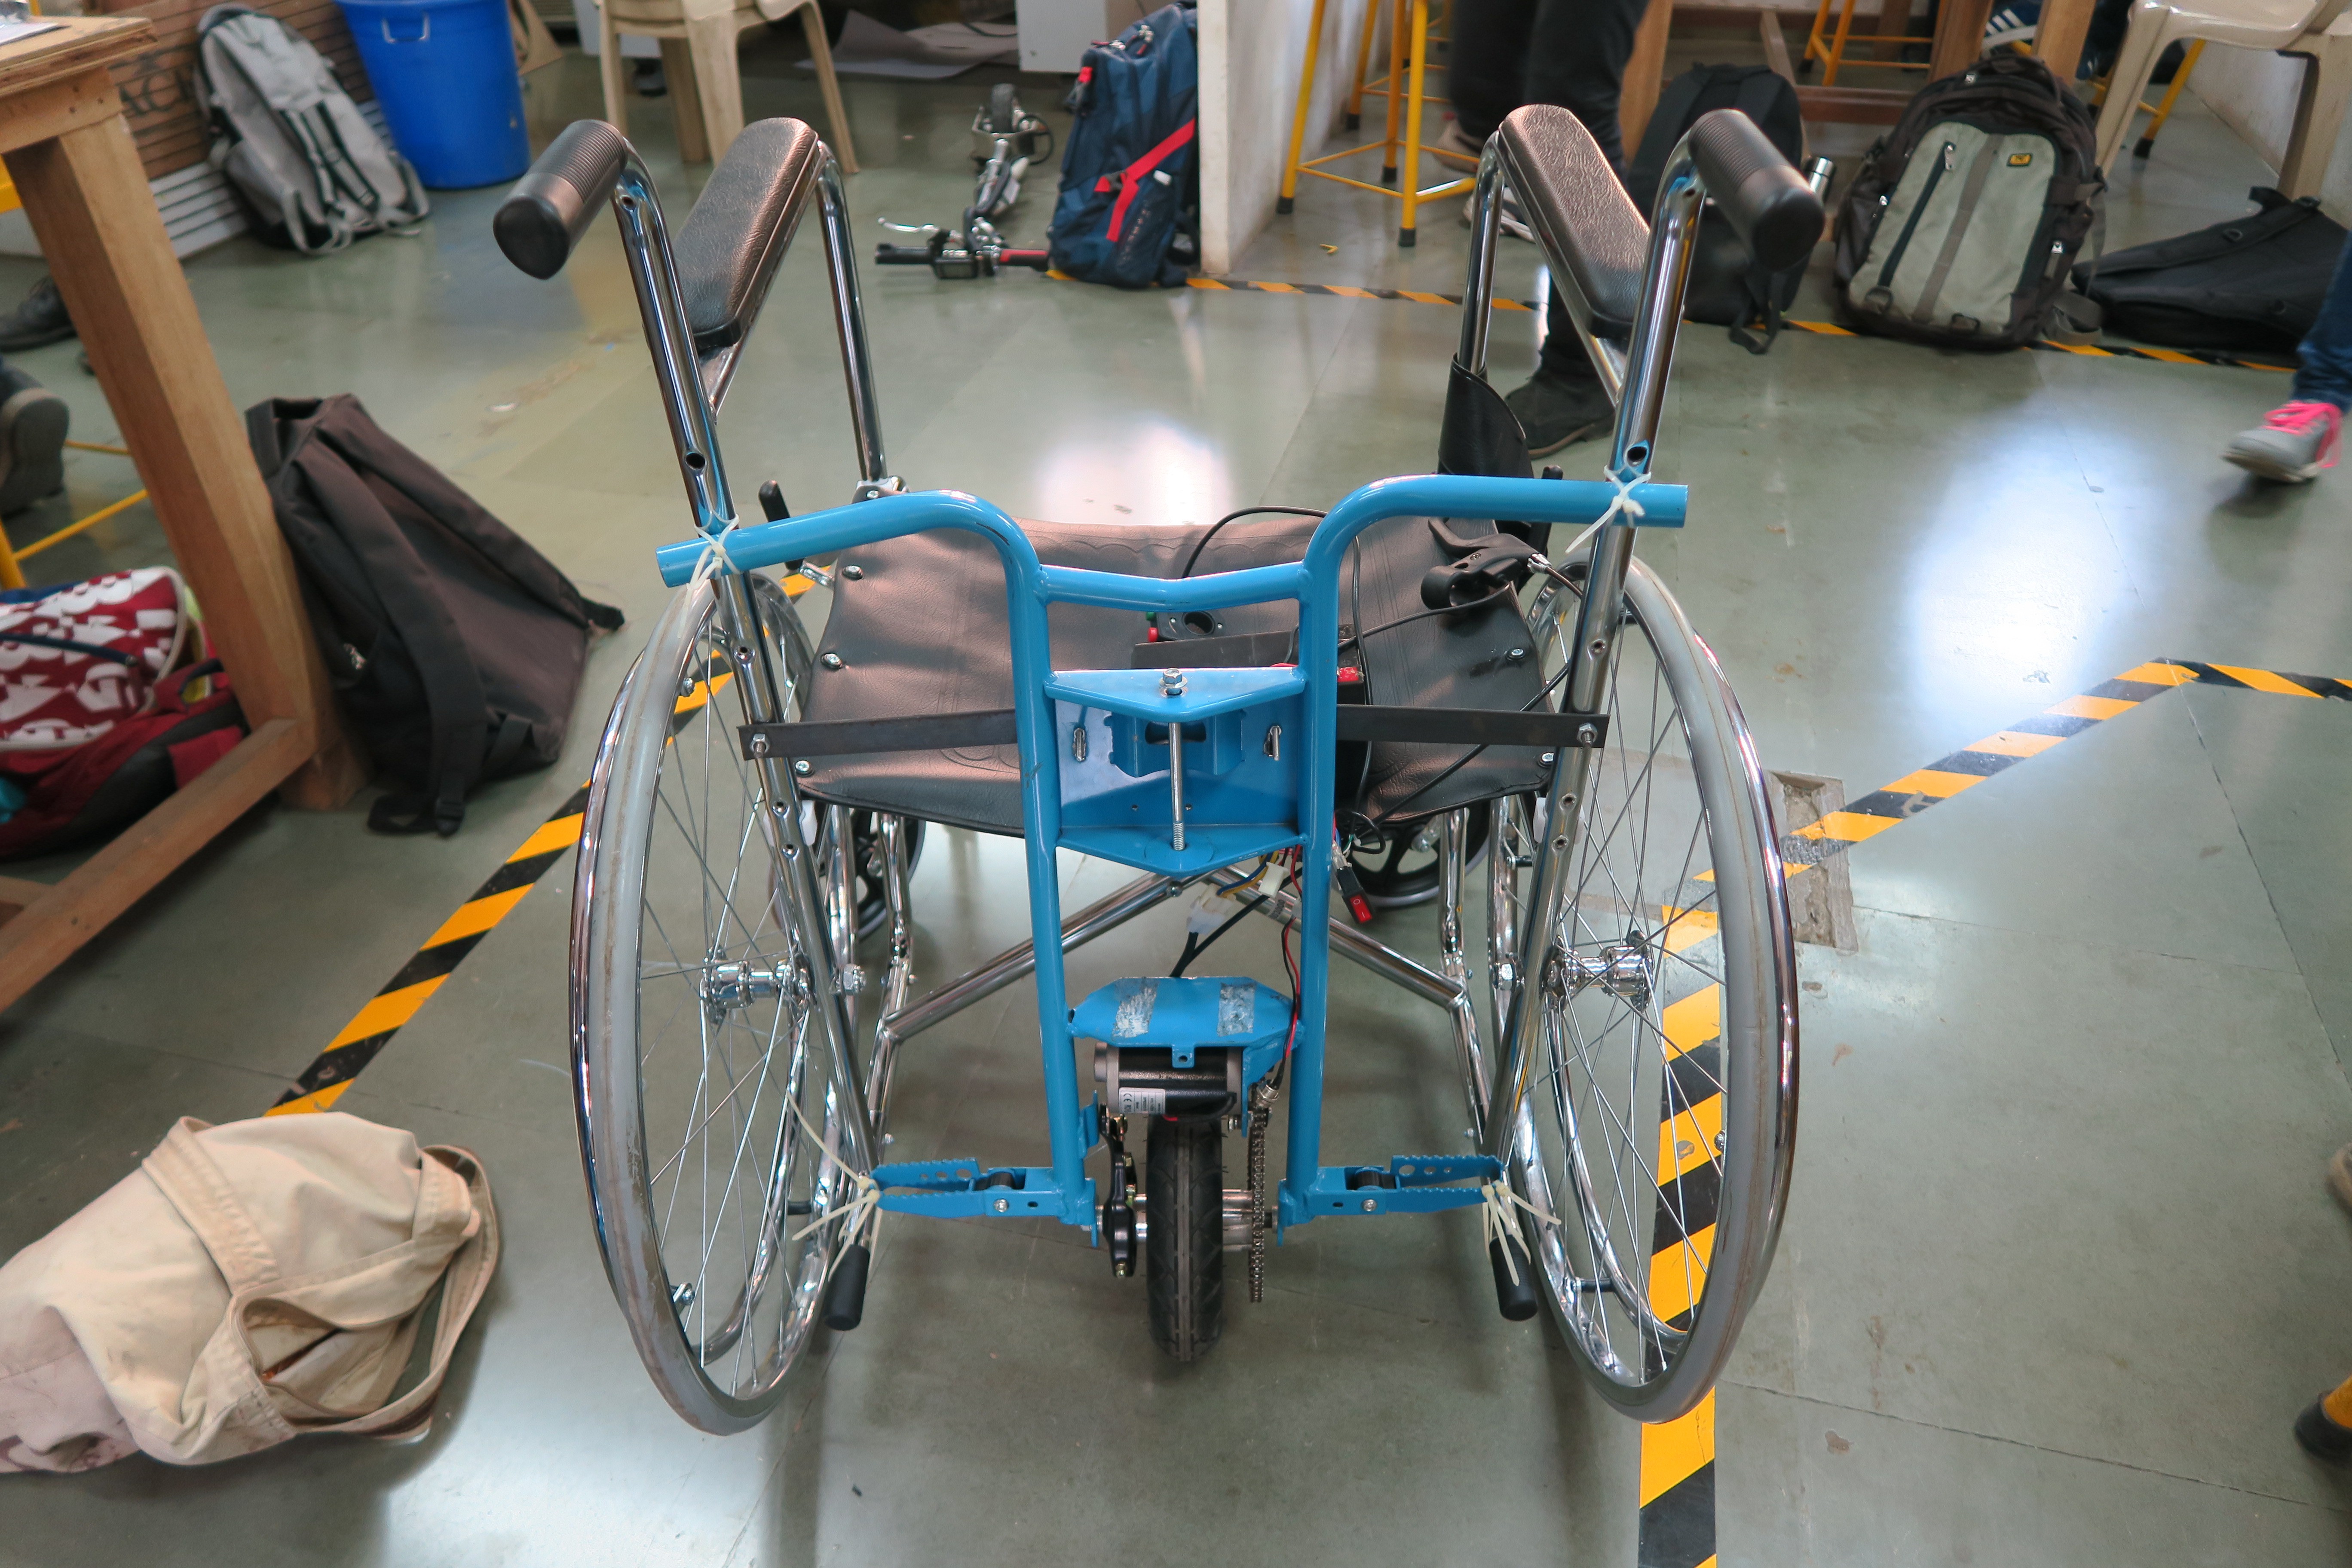
Once disassembled, you should get the system (in blue on the next picture) not yet mounted on the wheeelchair (not like this picture then ;)
View of the selected part mounted on the wheelchair. To get this result let's follow the next steps.
-
2Prepare a flat steel plate for the wheelchair
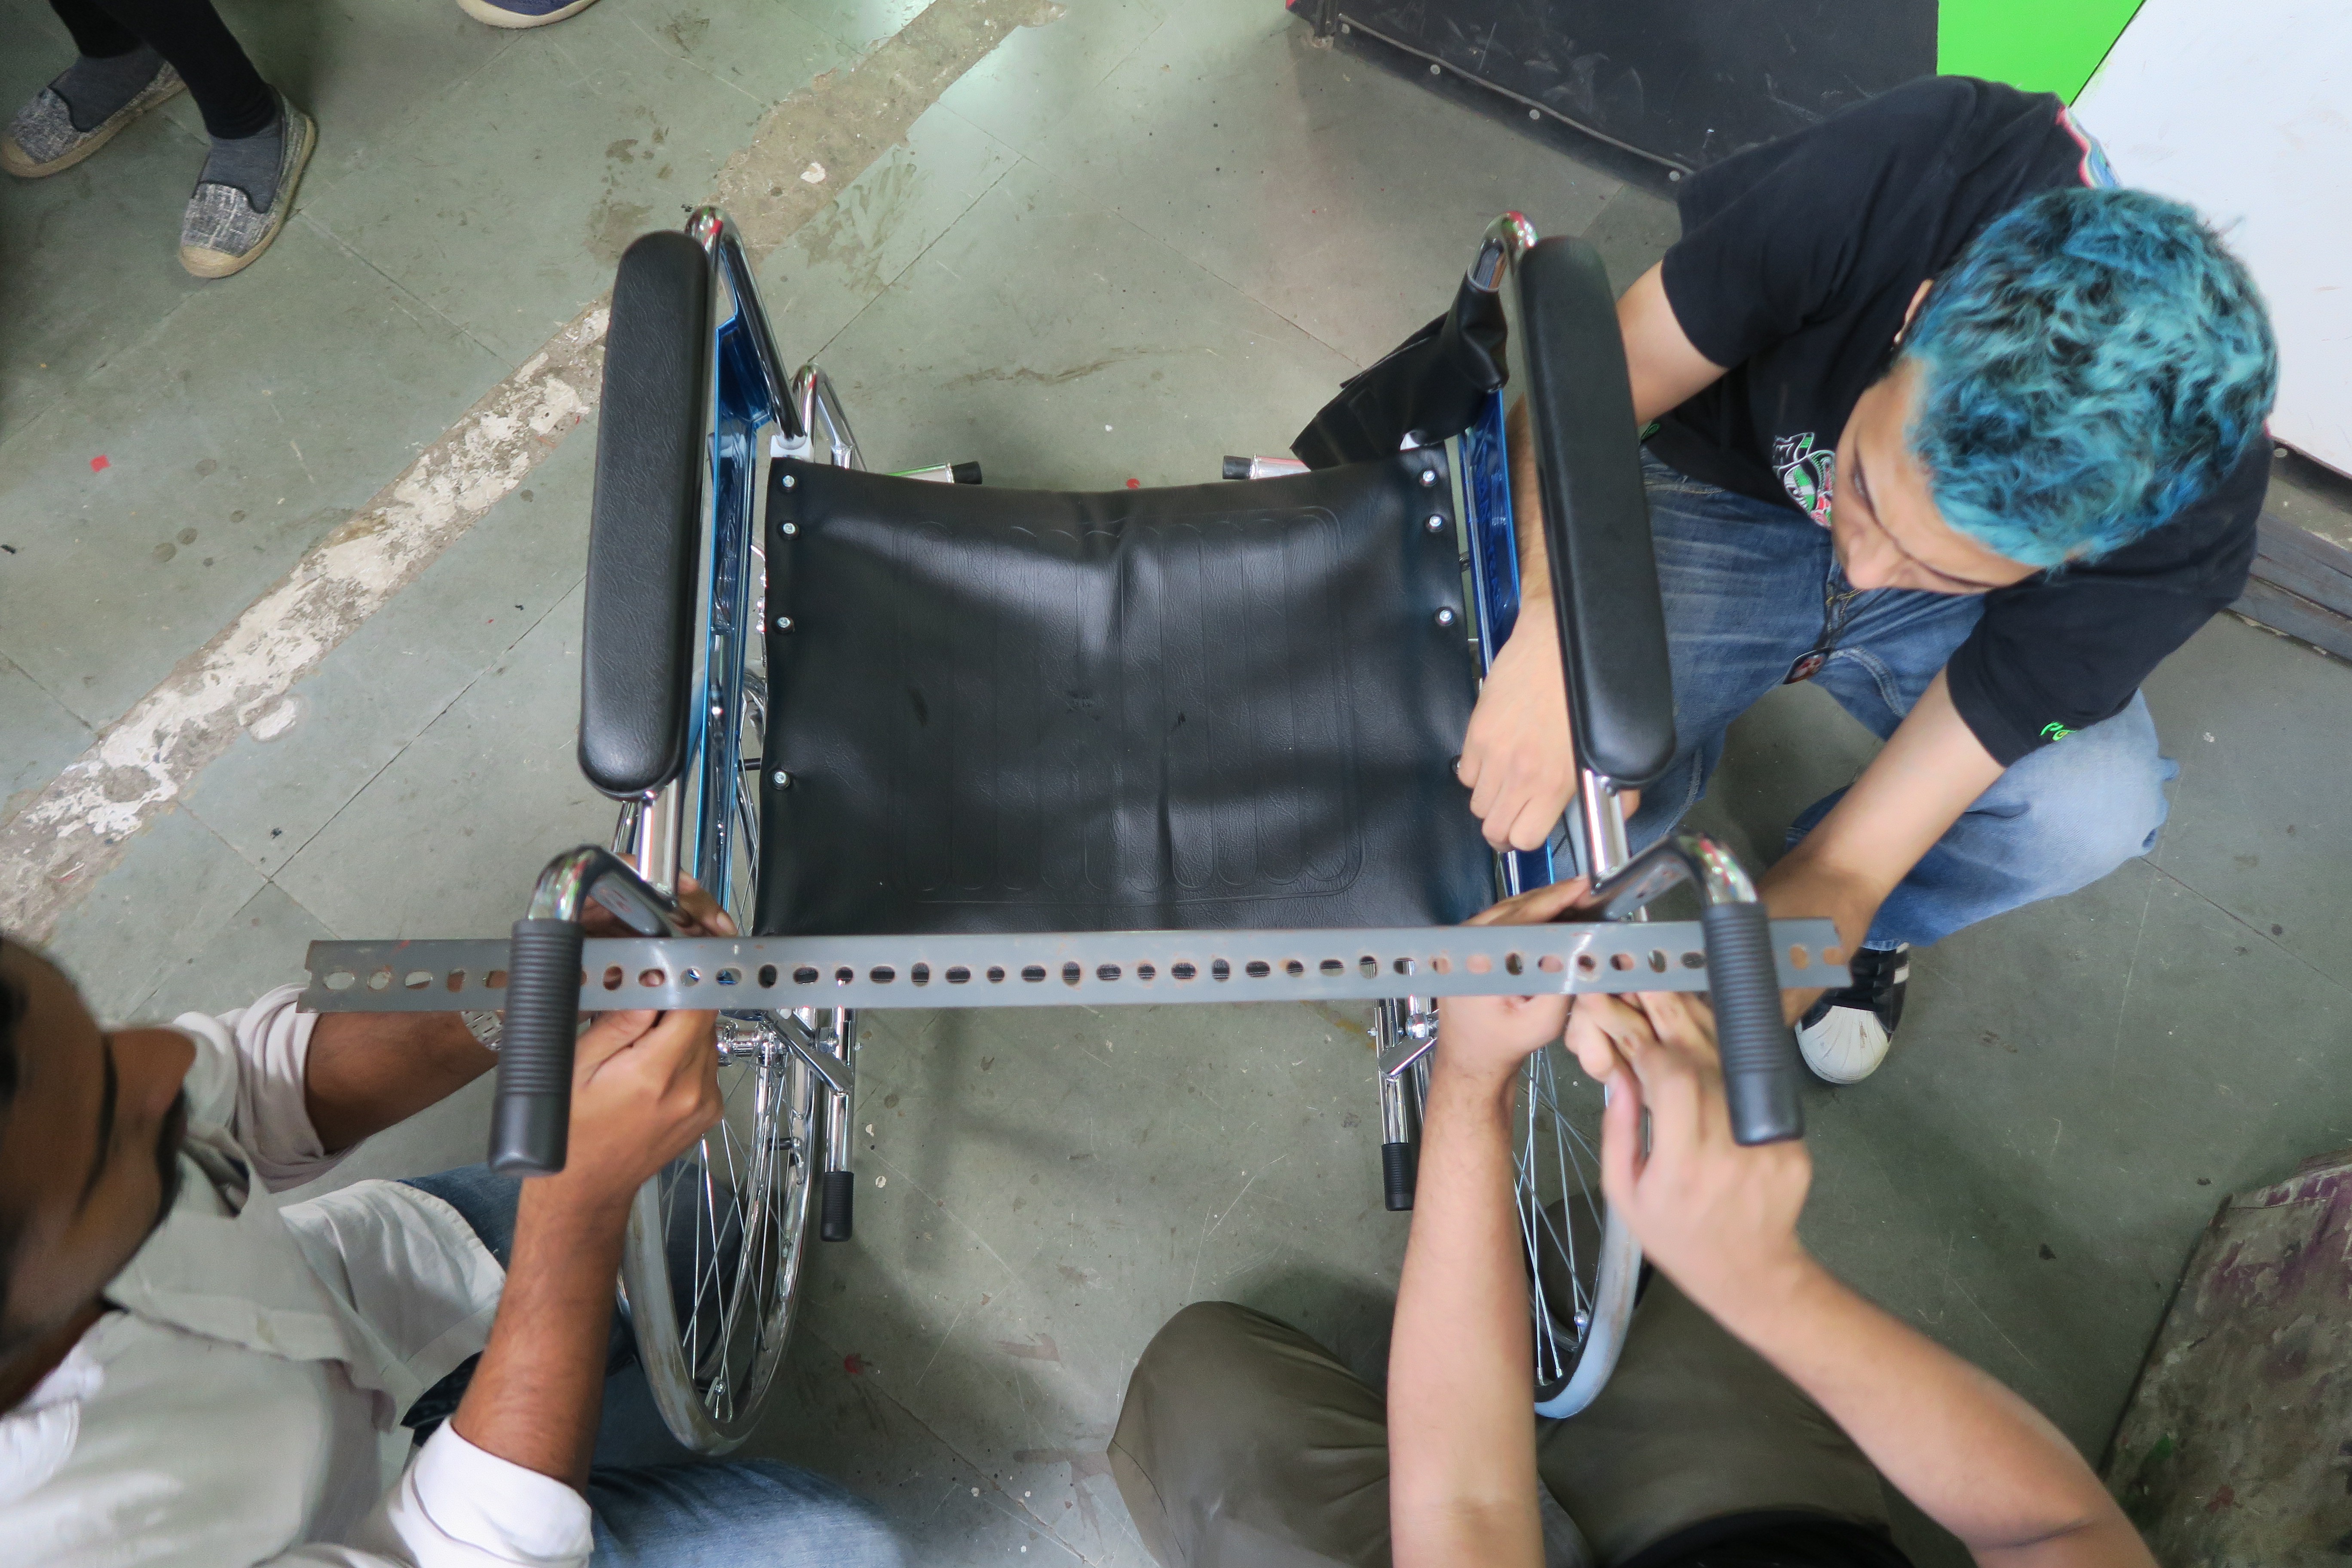
The scooter frame needs a support to be attached to the back of the wheelchair.
First you need to measure the width of the wheelchair to cut the appropriate lengthof the steel plate, keeping in mind that you will have to fasten it on the wheelchair. In our case the width of the steel plate was about 2cm and length was 43cm, thickness was 5mm.
Use a metal cutter to cut the steel plate to size.
![]()
Take some 8mm screws to attach the steel plate and use the holes from the wheelchair to set it up.
Fix it on the wheelchair before mounting the scooter part (not like this picture !).
-
3Attach the scooter system to the wheelchair via this steel plate
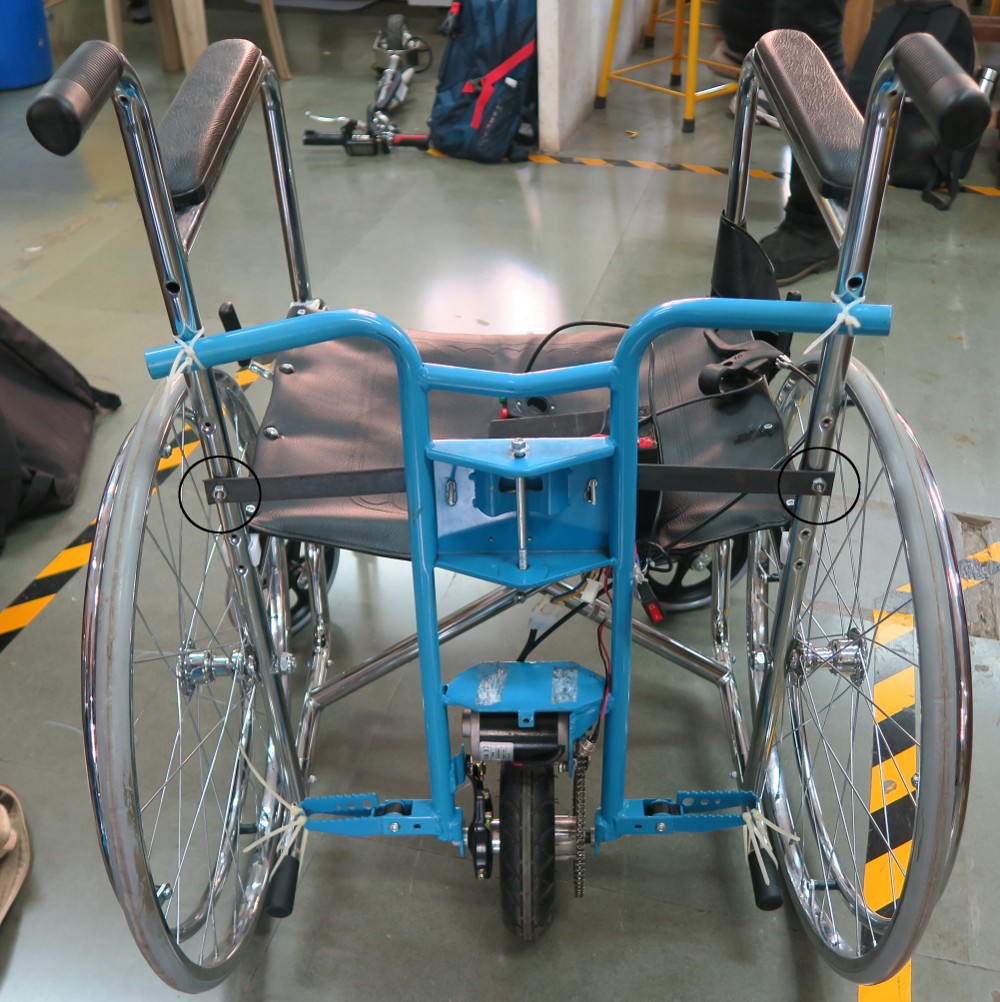
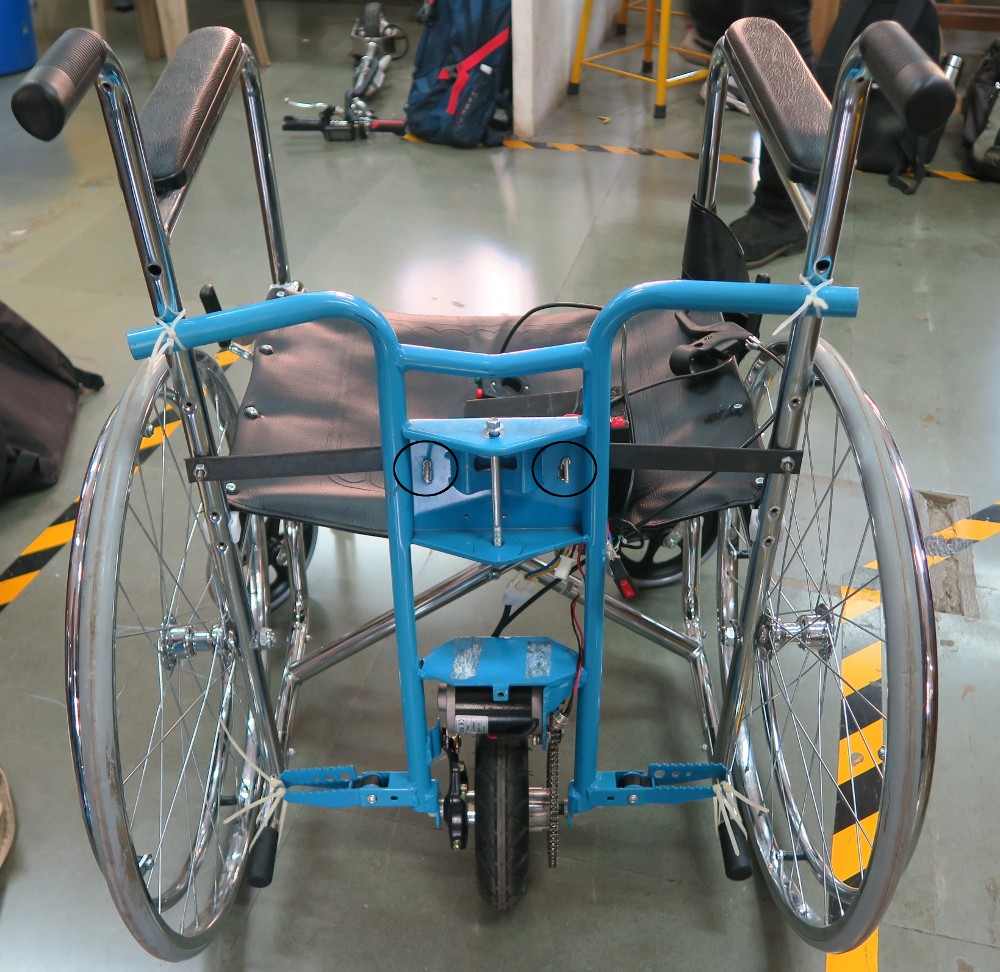
To help positioning and mounting the system, you can use plastic clamps (see picture). It should be updated for the next prototype with something stronger.
Get two bolts 6mm diameters, 30mm length, and attach the system from the scooter to the wheelchair as shown in the circles in the middle of the picture.
-
4The mechanism
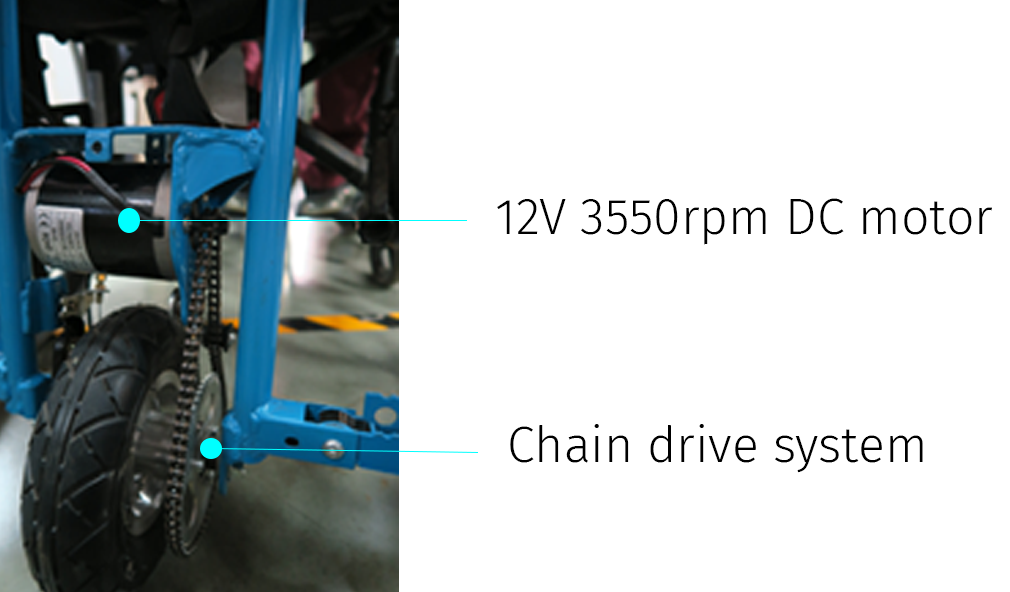
Details of electric scooter parts to be used :
- 12 V 3550rpm Dc motor
- Chain drive system Handle frame
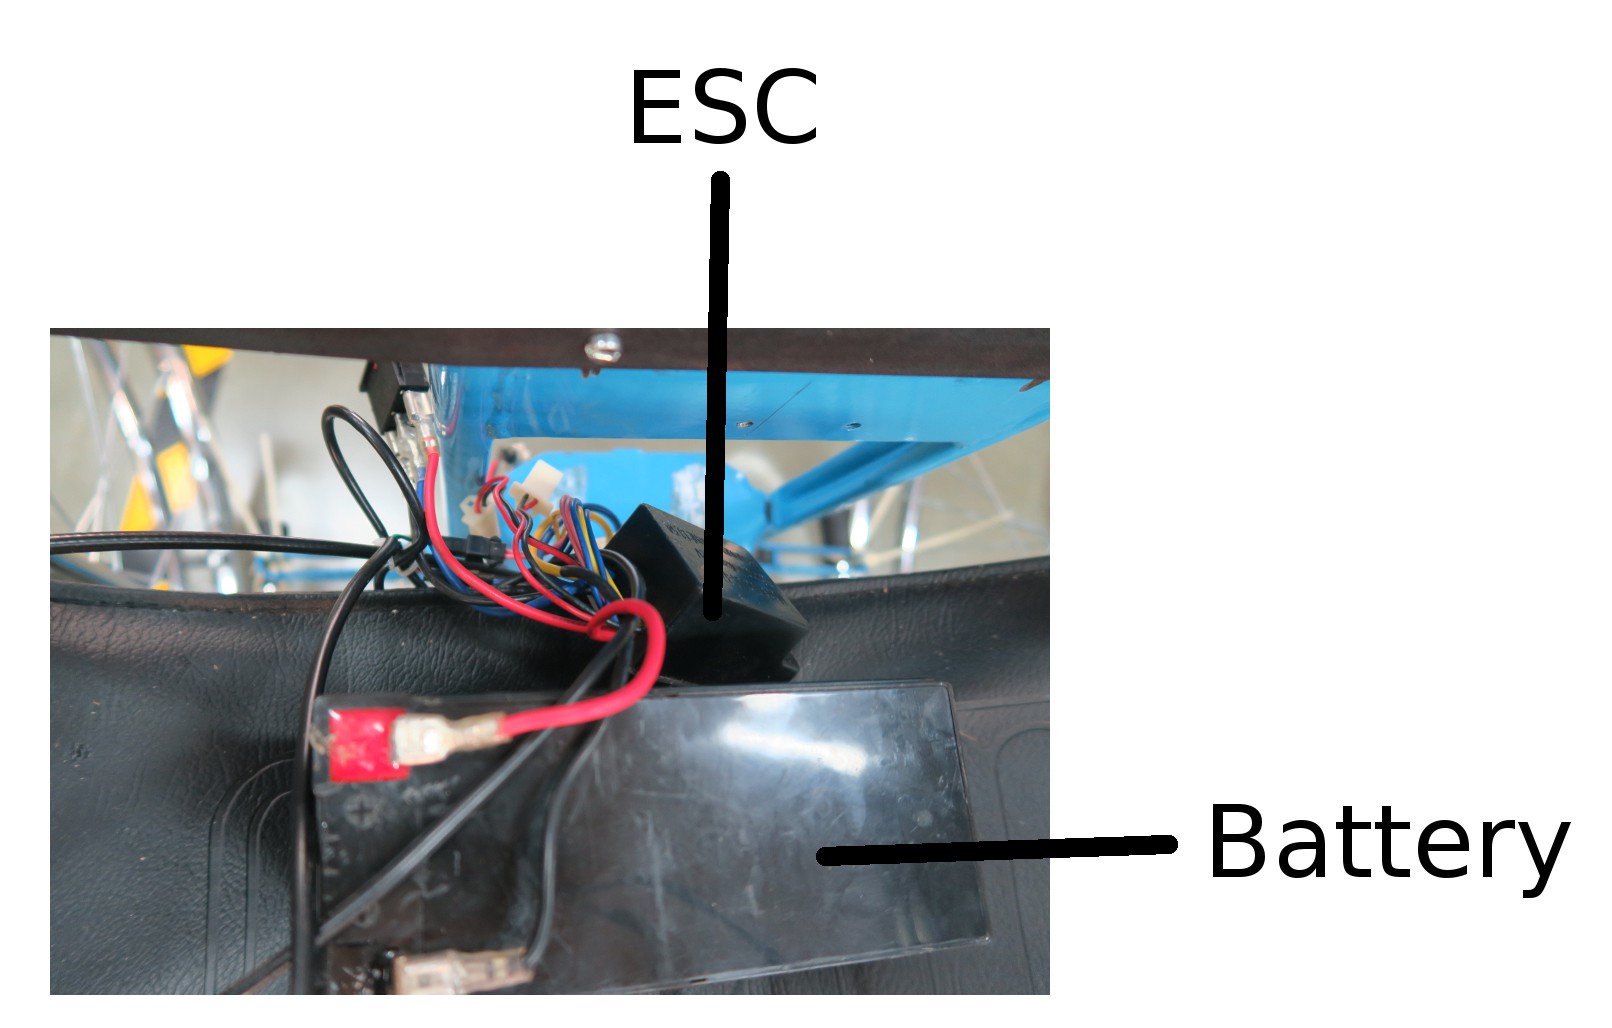
- 12 V Dc battery-8 Ah
- ESC (Electronic Speed Control)
- 1 switch to turn the whole system ON/OFF
- 1 switch to turn the motor ON/OFF
The two switches are next to the brake handle (not seen on pictures)
![]()
As the system is already assembled, we don't need further work to make it functional.
The only thing to do is to attach the battery and ESC on the wheelchair. We did not have time to make a proper box, but it could be done for the next prototype. We just used a bag for the proof of concept.
-
5Cost-effective alternative of the electric scooter
As the scooter is quiet expensive, almost 300 dollars, we investigated to find a low cost alternative and found the following solution.
Required material:
- Arduino Uno (for controlling speed of motor)
- Female to male wires
- L239N motor driver (for controlling motor current)
- SPDT switch (for motion control : forward/backward)
- 1xPotentiometer (10k ohm)for speed control
- Battery (24v,9AH)
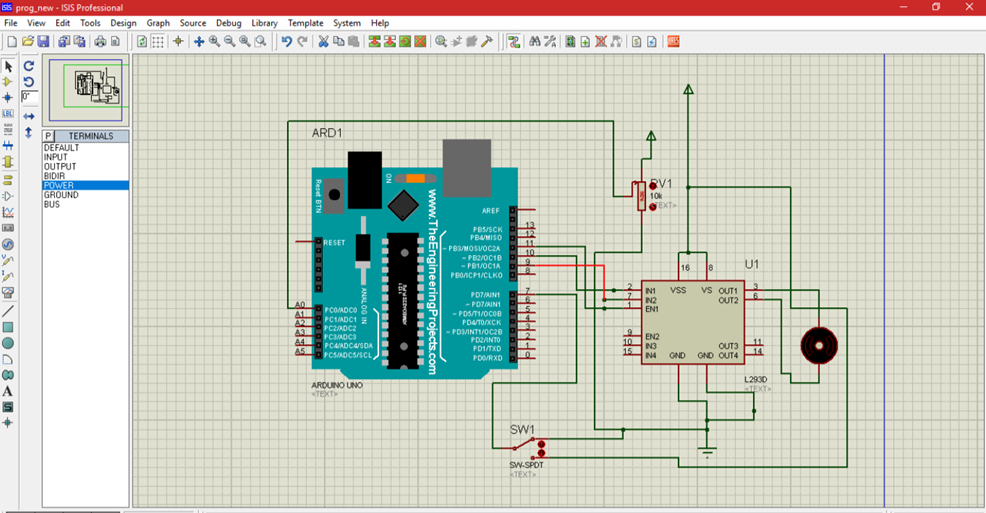
Schematic of the circuit:
![]()
Arduino code
int enablePin = 11;

int in1Pin = 10;

int in2Pin = 9;

int switchPin = 7;

int potPin = 0;

int statusPin= 13;

void setup()

{
pinMode(12,OUTPUT);   pinMode(in1Pin, OUTPUT);

pinMode(in2Pin, OUTPUT);

pinMode(enablePin, OUTPUT);

pinMode(switchPin, INPUT_PULLUP);

pinMode(statusPin,OUTPUT);

}

void loop()

{

digitalWrite(12,HIGH);

int speed = analogRead(potPin) / 4;

boolean reverse = digitalRead(switchPin);

setMotor(speed, reverse);

}

void setMotor(int speed, boolean reverse)

{

analogWrite(enablePin, speed);

digitalWrite(in1Pin, ! reverse);

digitalWrite(in2Pin, reverse);

}
Test of this circuit :
Difficulties:
- Attach the wheel on the motor
- Attach the motor on the wheelchair
As time was missing during the Fabrikarium, this alternative was not mounted on the wheelchair. It should be done for the next prototype.
-
6O-Trotti is ready : demonstration with the scooter system
-
7Conclusion
The scooter version is a proof of concept to demonstrate that adding a 5th wheel at the back works.
-
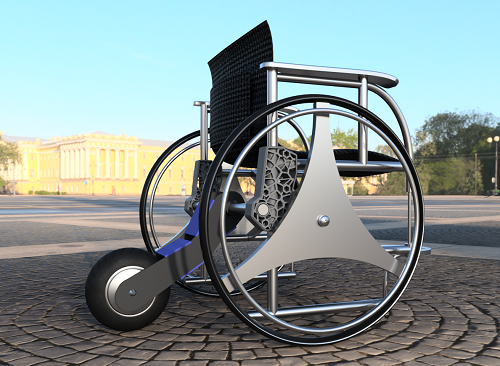
8Render by Varun Heta, with Fusion360 software
Varun designed another prototype based on three wheels that could be test for further development.
"It is detachable, lightweight, and comes with a specialised joinery that can be altered depending on your wheelchair."
Render of joinery used to attach the o-trotti to any wheelchair. -
![]()
 rsramyasatish3

Discussions
Become a Hackaday.io Member
Create an account to leave a comment. Already have an account? Log In.