Richard Deininger
-
Ready for testing
03/09/2016 at 13:29 • 0 commentsFinally got an update for the project. I managed to make the state machine and all the activity diagrams ready to run the python code and added a buzzer to alert me when some user interaction has to be done.
![]()
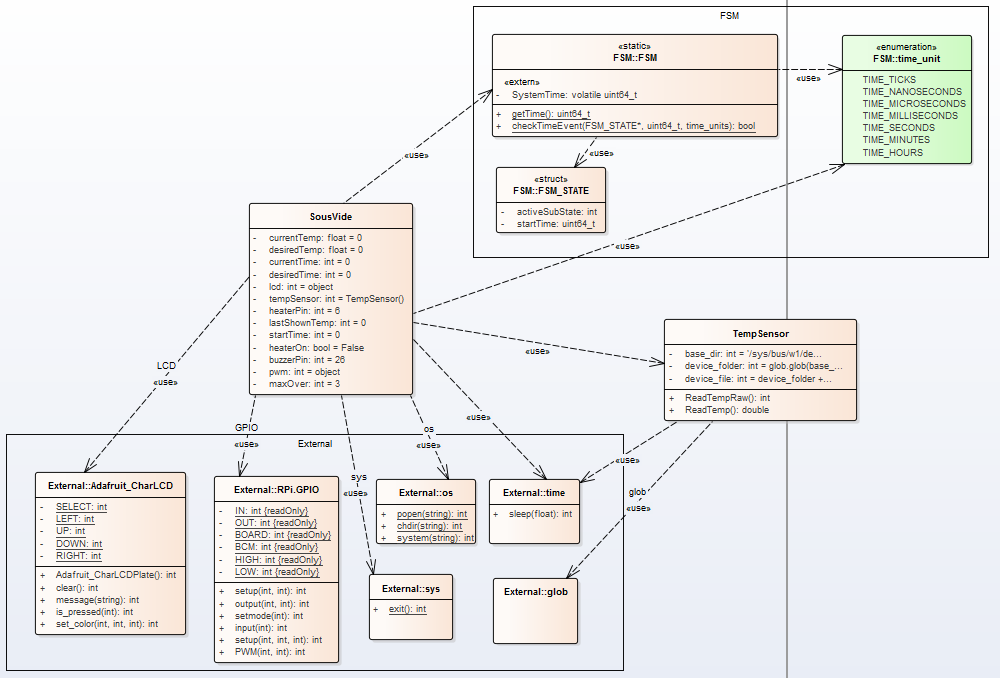
Here you see the dependencies of the SousVide class to "external" "state machine" and "internal" classes.
![]()
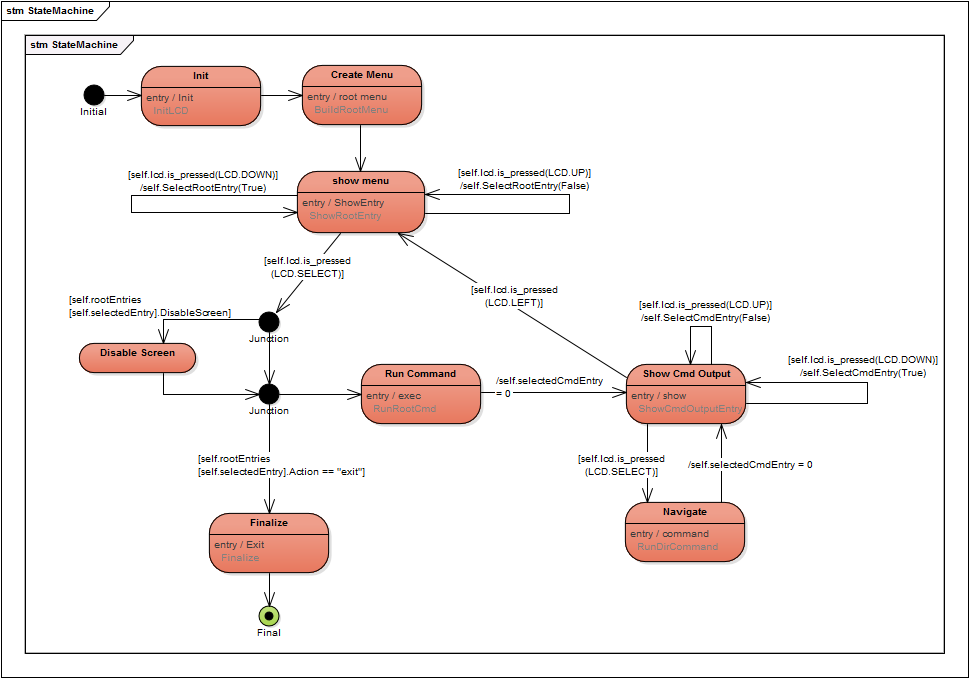
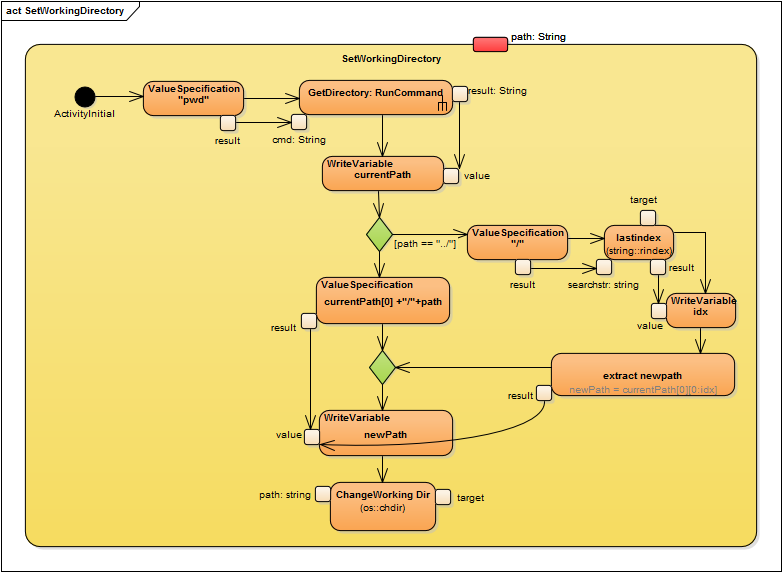
One big state machine,... coming up:
![]()
and finally for all interested the XMI-Export from my Enterprise Architect model and some example code (generated from the model)
""" # Model File: file:///C:/Projects/Python/SousVide/SousVide.eap # Model Path: Model.LCD Menu.SousVide.SousVide # # Montag, 7. März 2016 - 09:43:43 """ from enum import Enum import time # Include for relation to classifier Adafruit_CharLCD import Adafruit_CharLCD as LCD # Include for relation to classifier FSM from FSM import * # Include for relation to classifier time from time import * # Include for relation to classifier RPi.GPIO import RPi.GPIO as GPIO # Include for relation to classifier os import os as os # Include for relation to classifier TempSensor from TempSensor import * # Include for relation to classifier sys import sys as sys # Include for relation to classifier time_unit from time_unit import * # Include for signals from Signals import * ... ... """ # Activity CheckSingleClick of class SousVide """ def CheckSingleClick(self, button): return_1 = False # start of activity code if(self.lcd.is_pressed(button)): while(True): self.ButtonWaitTime() if not (self.lcd.is_pressed(button)): break return_1 = True else: return_1 = False return return_1 ... ... ... """ # Handles the state machine """ def StateMachineFnc(self, stm, msg): evConsumed = False if (stm.mainState.activeSubState == SousVide_StateMachine_States.SousVide_StateMachine_StateMachine_FINAL_1): """ empty block """ elif (stm.mainState.activeSubState == SousVide_StateMachine_States.SousVide_StateMachine_Running): if (stm.Running.activeSubState == SousVide_StateMachine_States.SousVide_StateMachine_alert_user_end): if(FSM.checkTimeEvent(stm.alert_user_end, 500, time_unit.TIME_MILLISECONDS) != False): evConsumed = True # transition effect for transition alert user end -> alert user end self.BuzzerAlert() # end of transition effect for transition alert user end -> alert user end # alert user end -> alert user end stm.Running.activeSubState = SousVide_StateMachine_States.SousVide_StateMachine_alert_user_end stm.alert_user_end.startTime = FSM.getTime() elif( self.CheckSingleClick(LCD.SELECT)): evConsumed = True # alert user end -> wait for user stm.Running.activeSubState = SousVide_StateMachine_States.SousVide_StateMachine_wait_for_user # entry actions for state wait for user self.EndMessage() # end of entry actions for state wait for user elif (stm.Running.activeSubState... ... ... -
Modelling the basics
06/02/2015 at 13:55 • 0 commentsAs mentioned before, I want this project to be as modular and reusable as possible.
Because of this I made a quick detour to get more out of this.
I made a simple navigation program that uses the LCD and the buttons on the LCD plate.
Implemented functionality:
- Show the IP of the raspberry (no need for an external display,.. besides the LCD)
- A crude file explorer (only functions enter/exit folder and start another python script)
- Reboot system
- Shutdown system
- Exit program
All this was done with the help of a state machine and a python script code generator (lucky me,.. I work in a company that produces such software).
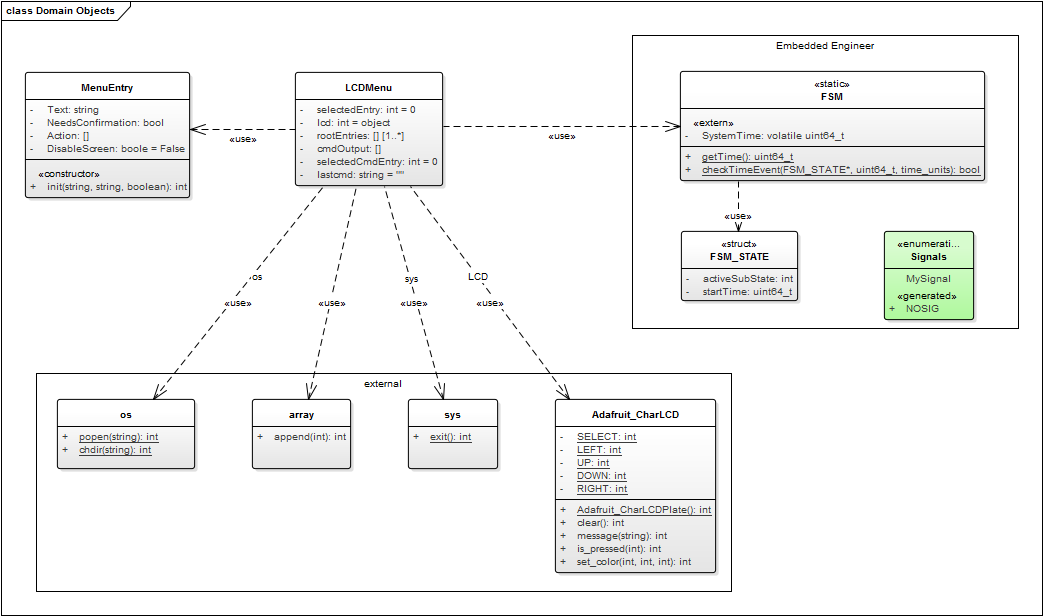
![domain model with all classes]()
![main state machine]()
Here you see the domain model with all classes needed and the main state machine.
The state machine consists of two "main" states the first is the "show menu" and the second "show cmd output".
The "root menu" has the above listed functions hard coded. Every command (besides "exit") is a simple shell command that gets executed and the return value will be stored inside a "cmdOutput" list.
This Output list will then be show inside the "show cmd output", this enables the state machine to show me the Raspberries IP (hostname -I) or give me the ability to scroll across a file list (ls -p -a).
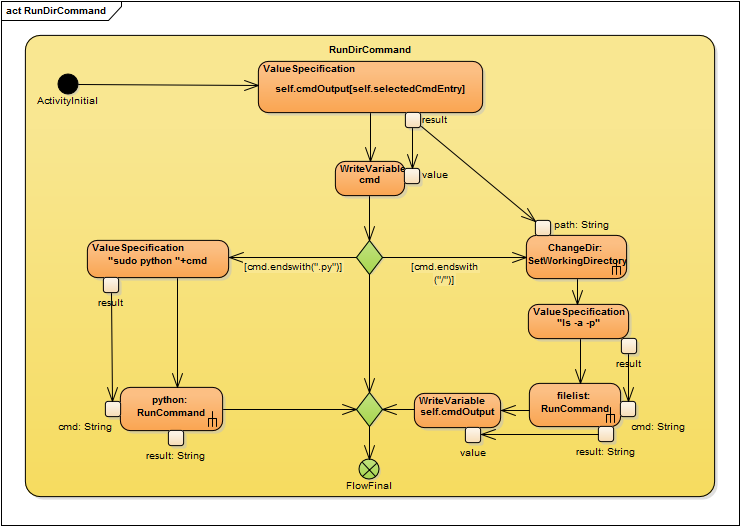
With the help of the "Navigate" node I then can enter/exit folders and execute python scripts.
![Navigating through the file list]()
![entering or exiting a folder]()
The last thing needed to run the state machine is a bit of code (hand written):
from LCDMenu import *
lcd = LCDMenu()
lcd.runStateMachines()
And here you can see it in action (the putty output shows the trace information from the state machine and the activies)
-
Encasing
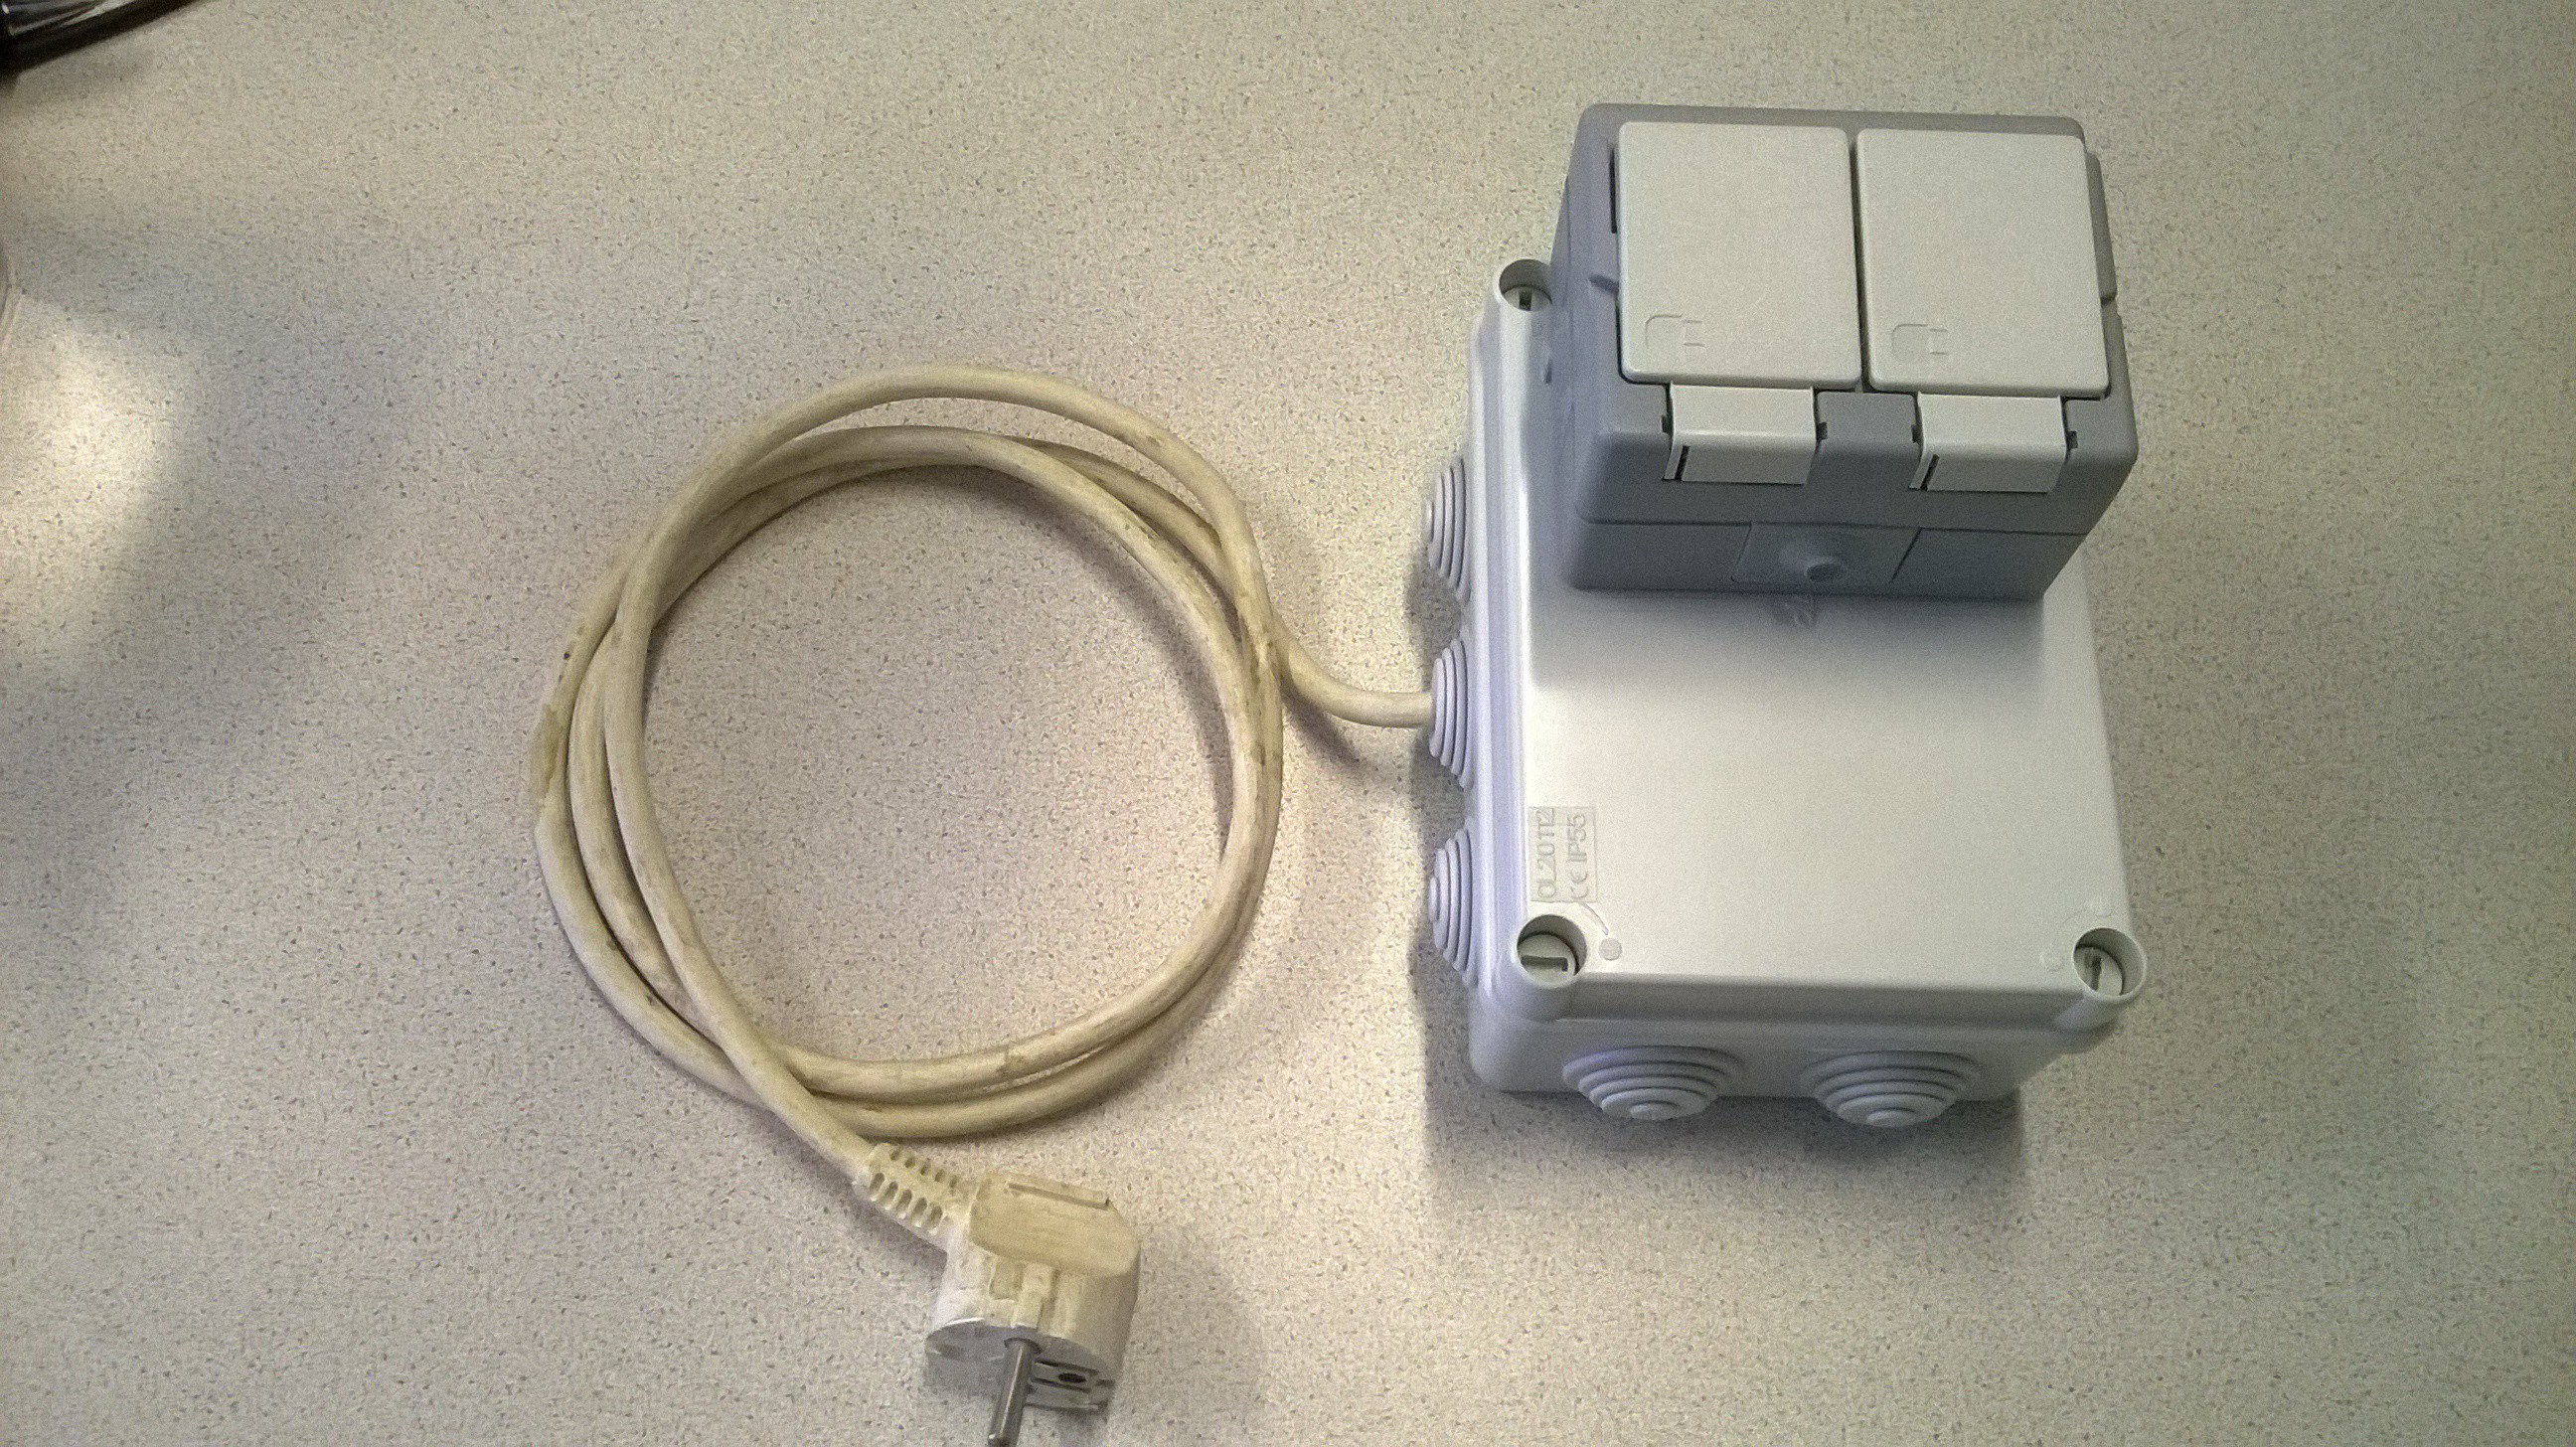
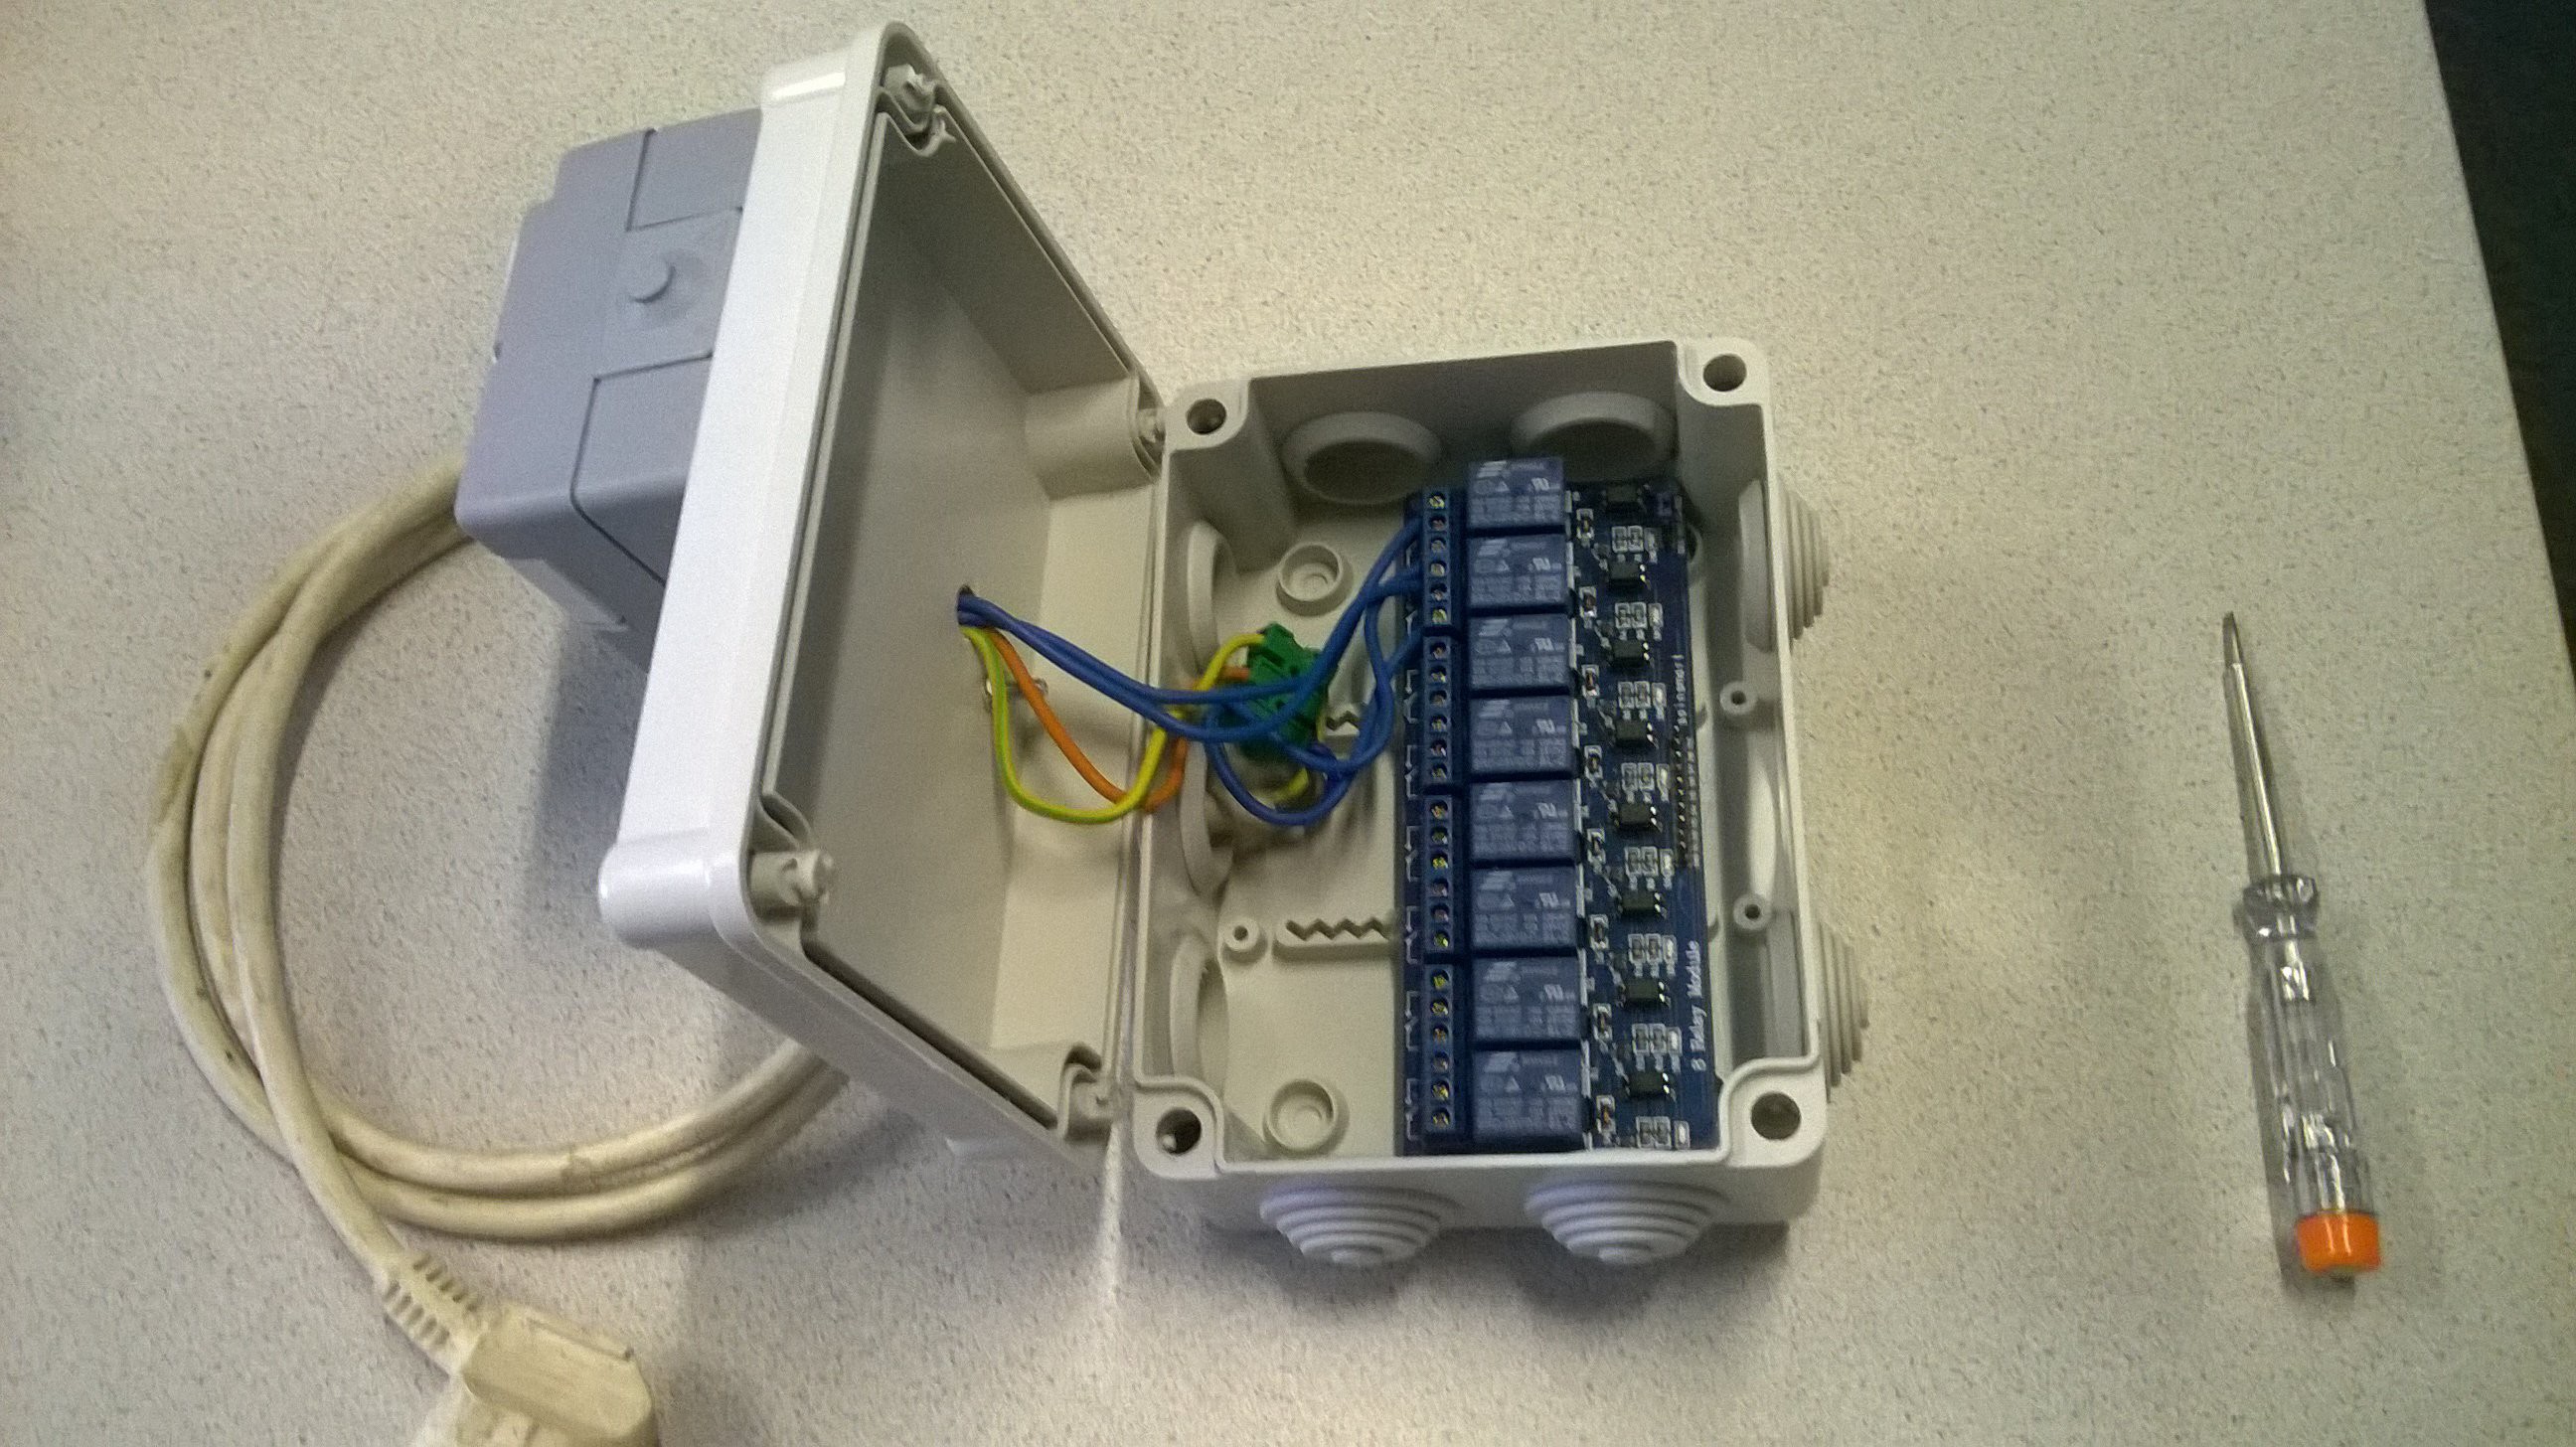
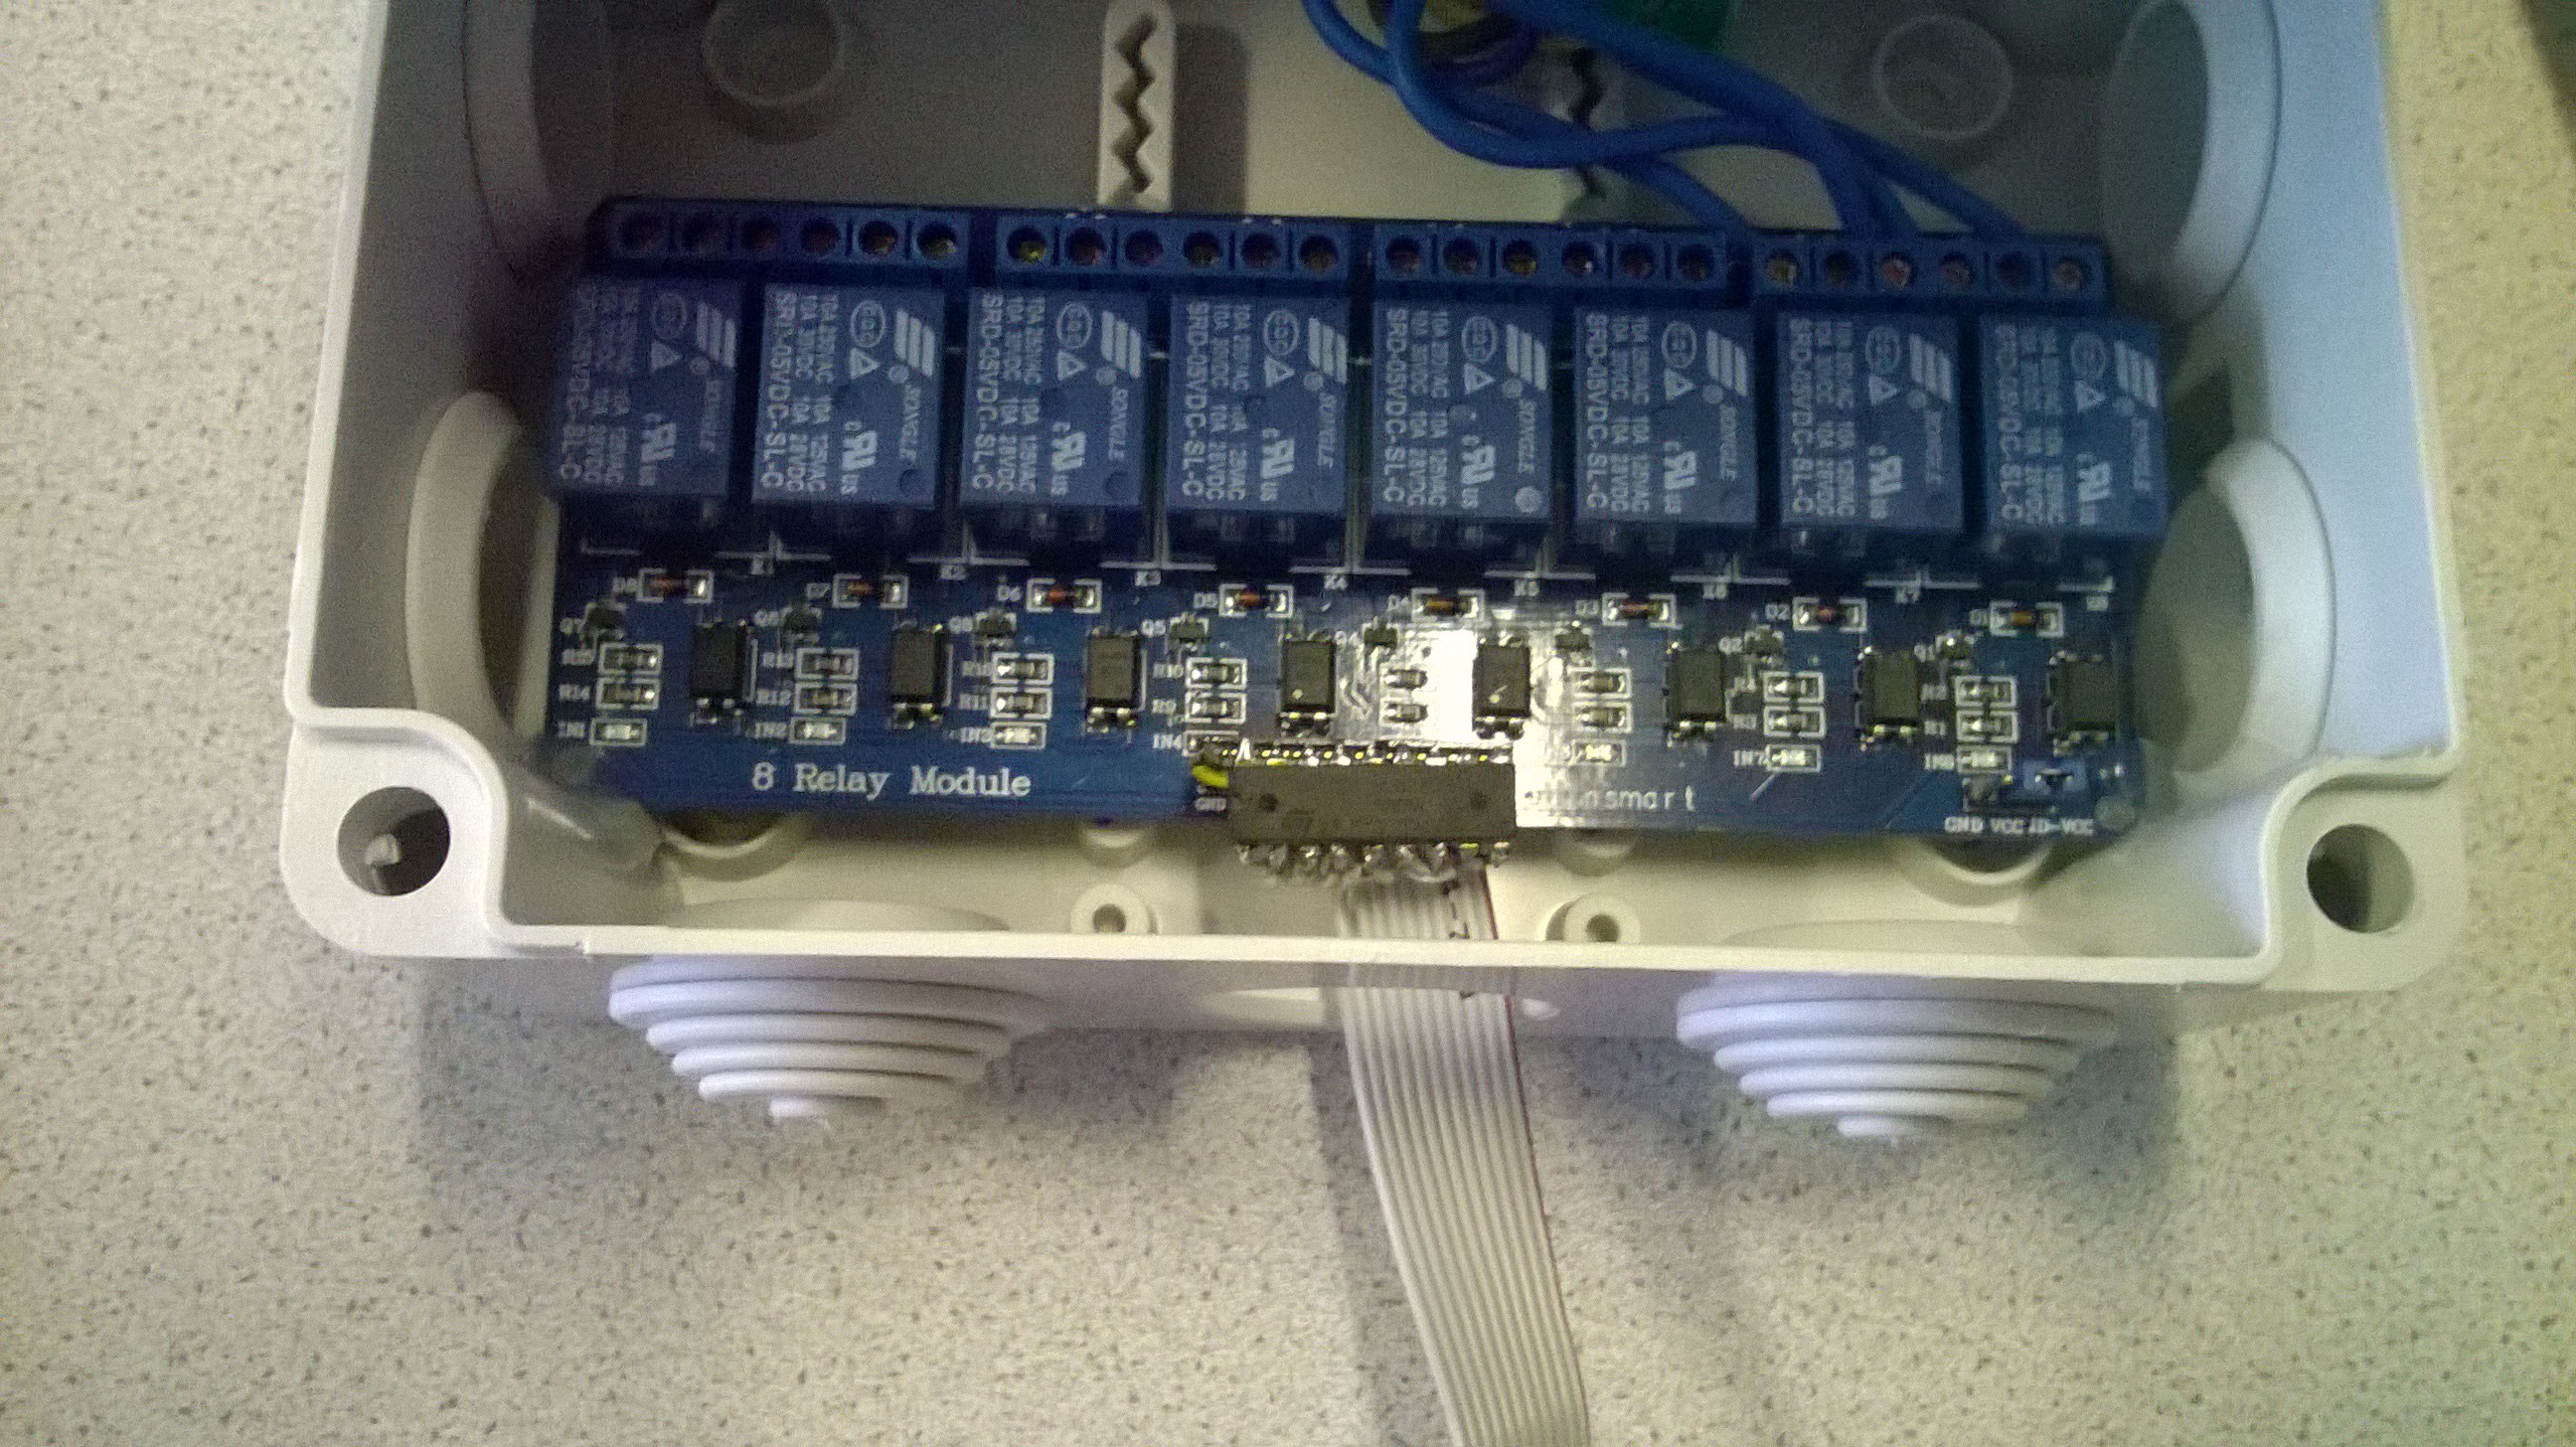
05/13/2015 at 07:36 • 0 commentsSince I want the project to be as modular and reusable as possible, I built some encasing for each component and custom wiring to plug everything together.
At first I bought a distribution box large enough to fit the relay inside and at least 4 power outlets on top.
![]()
![]()
Currently I only mounted two power outlets and had to do some adaptations to be able to switch each socket individually.
![]()
![]()
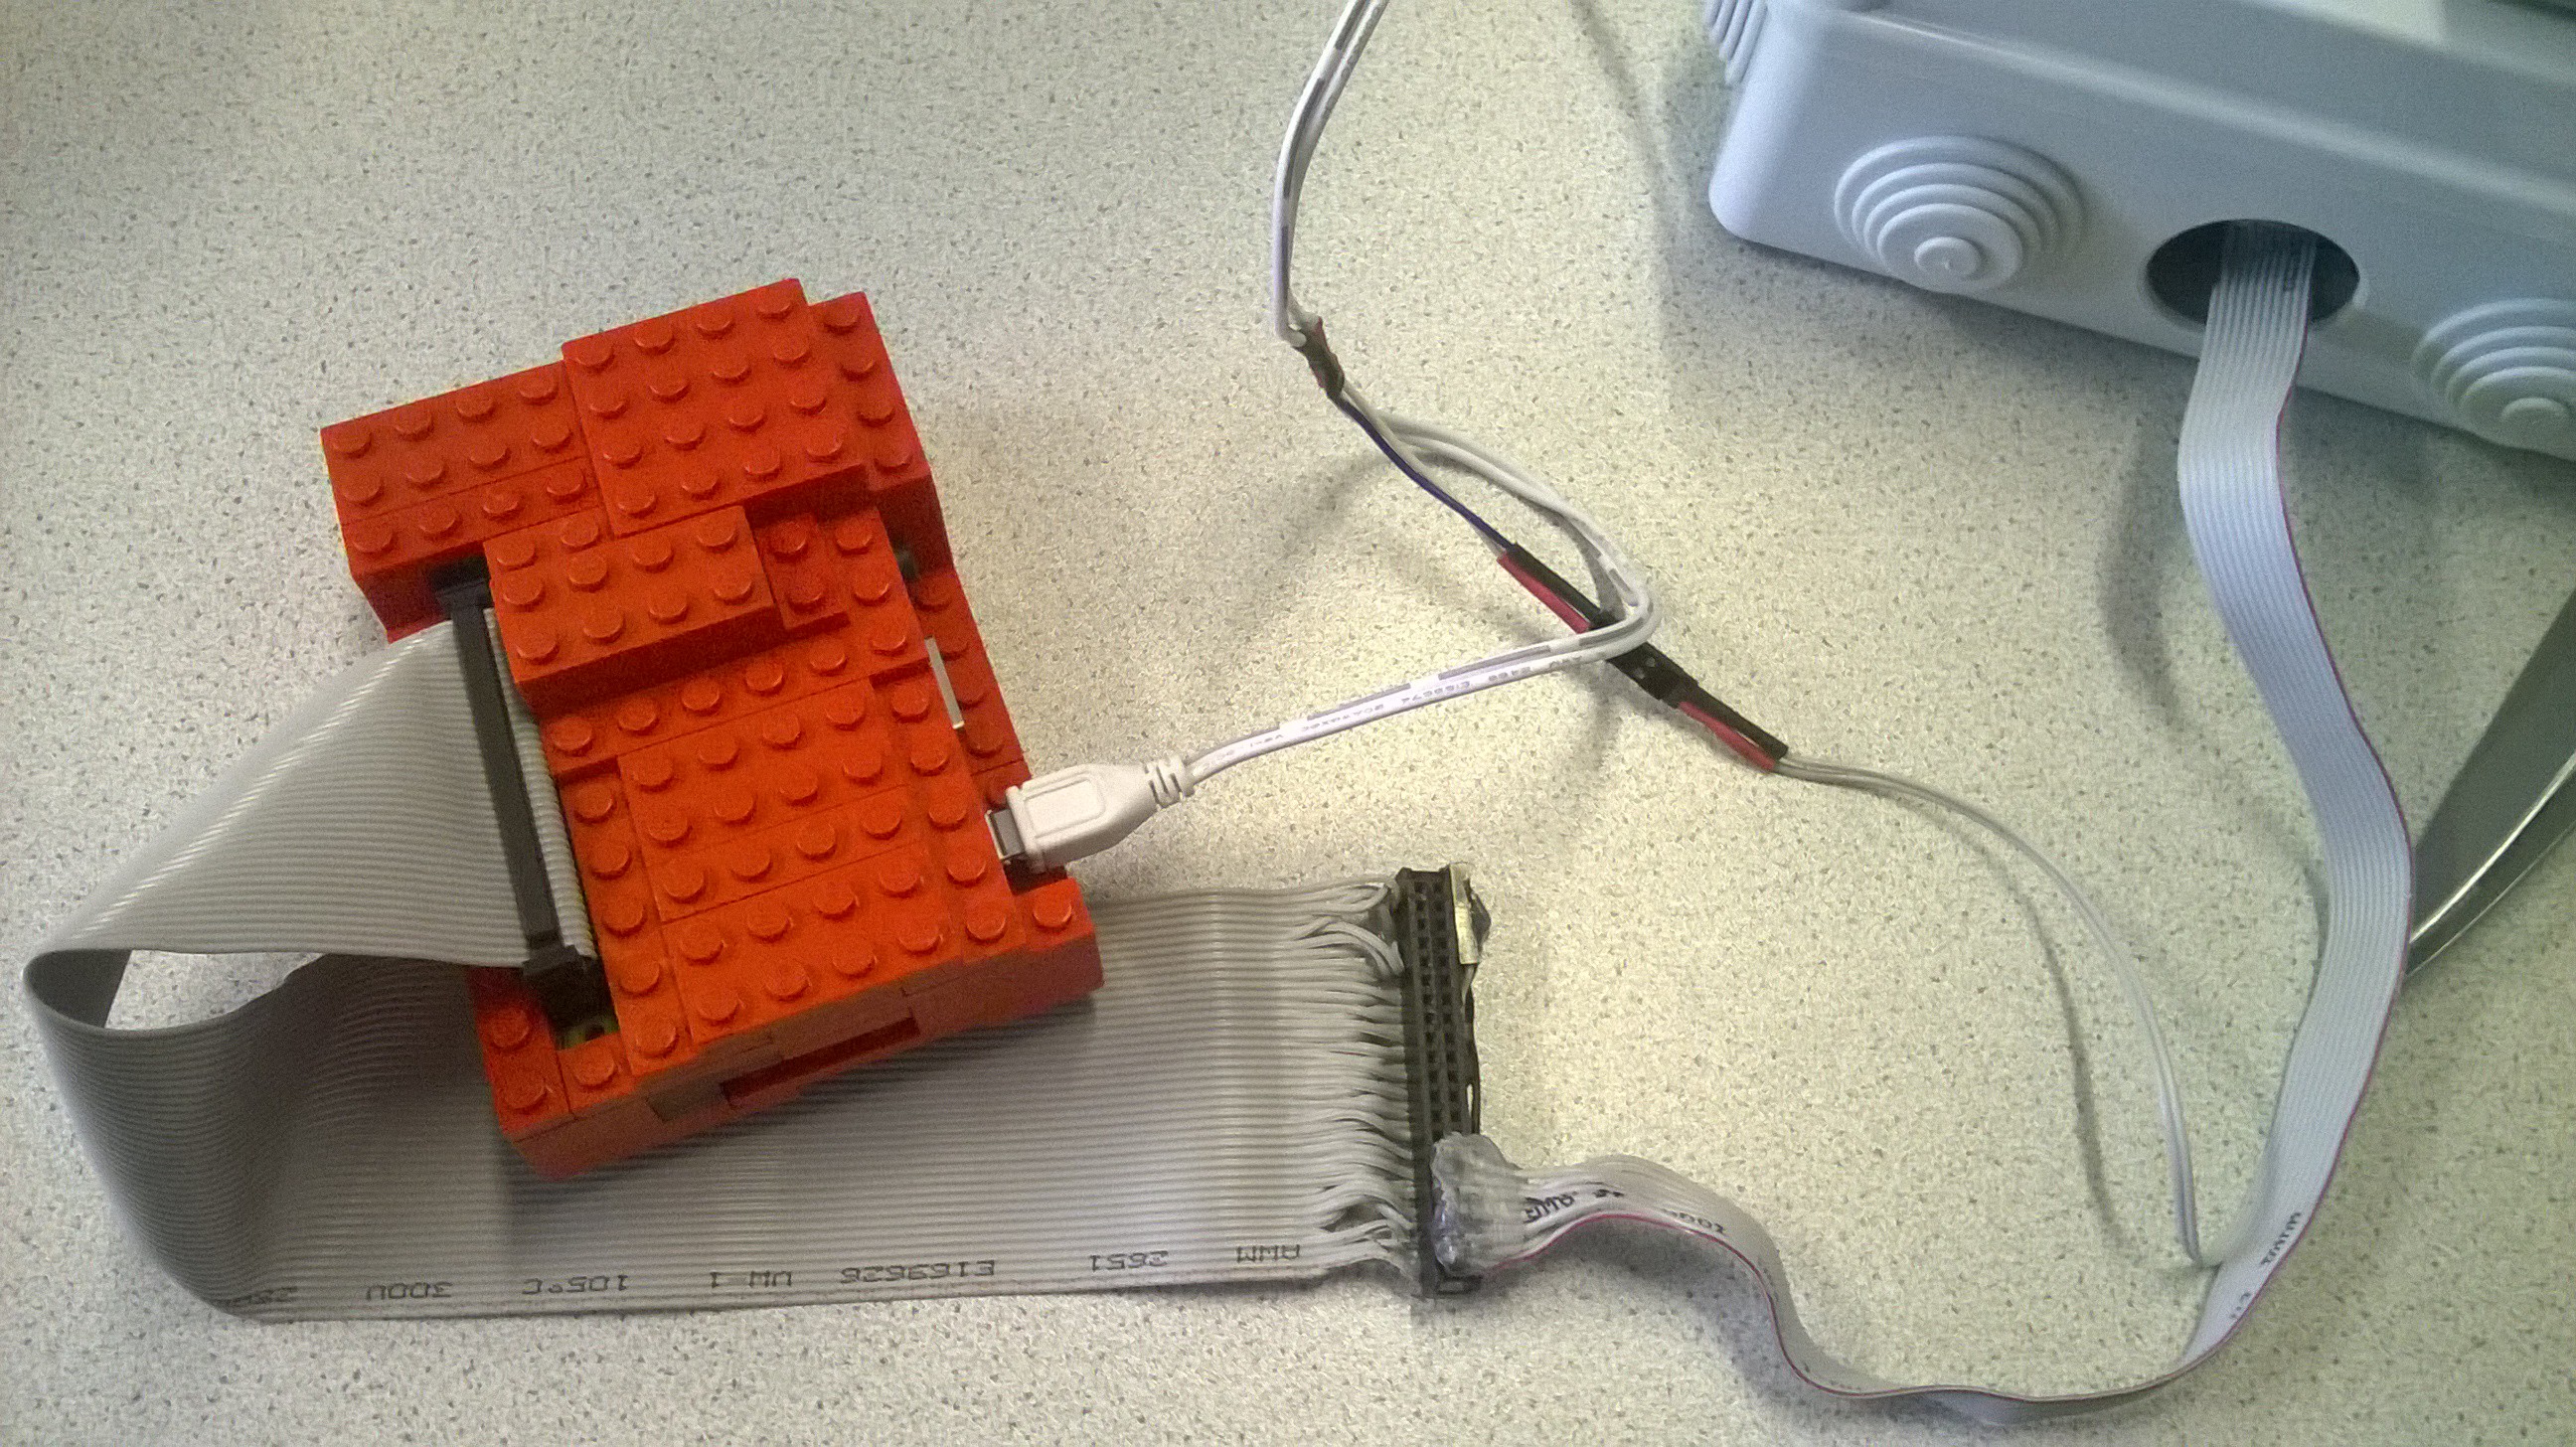
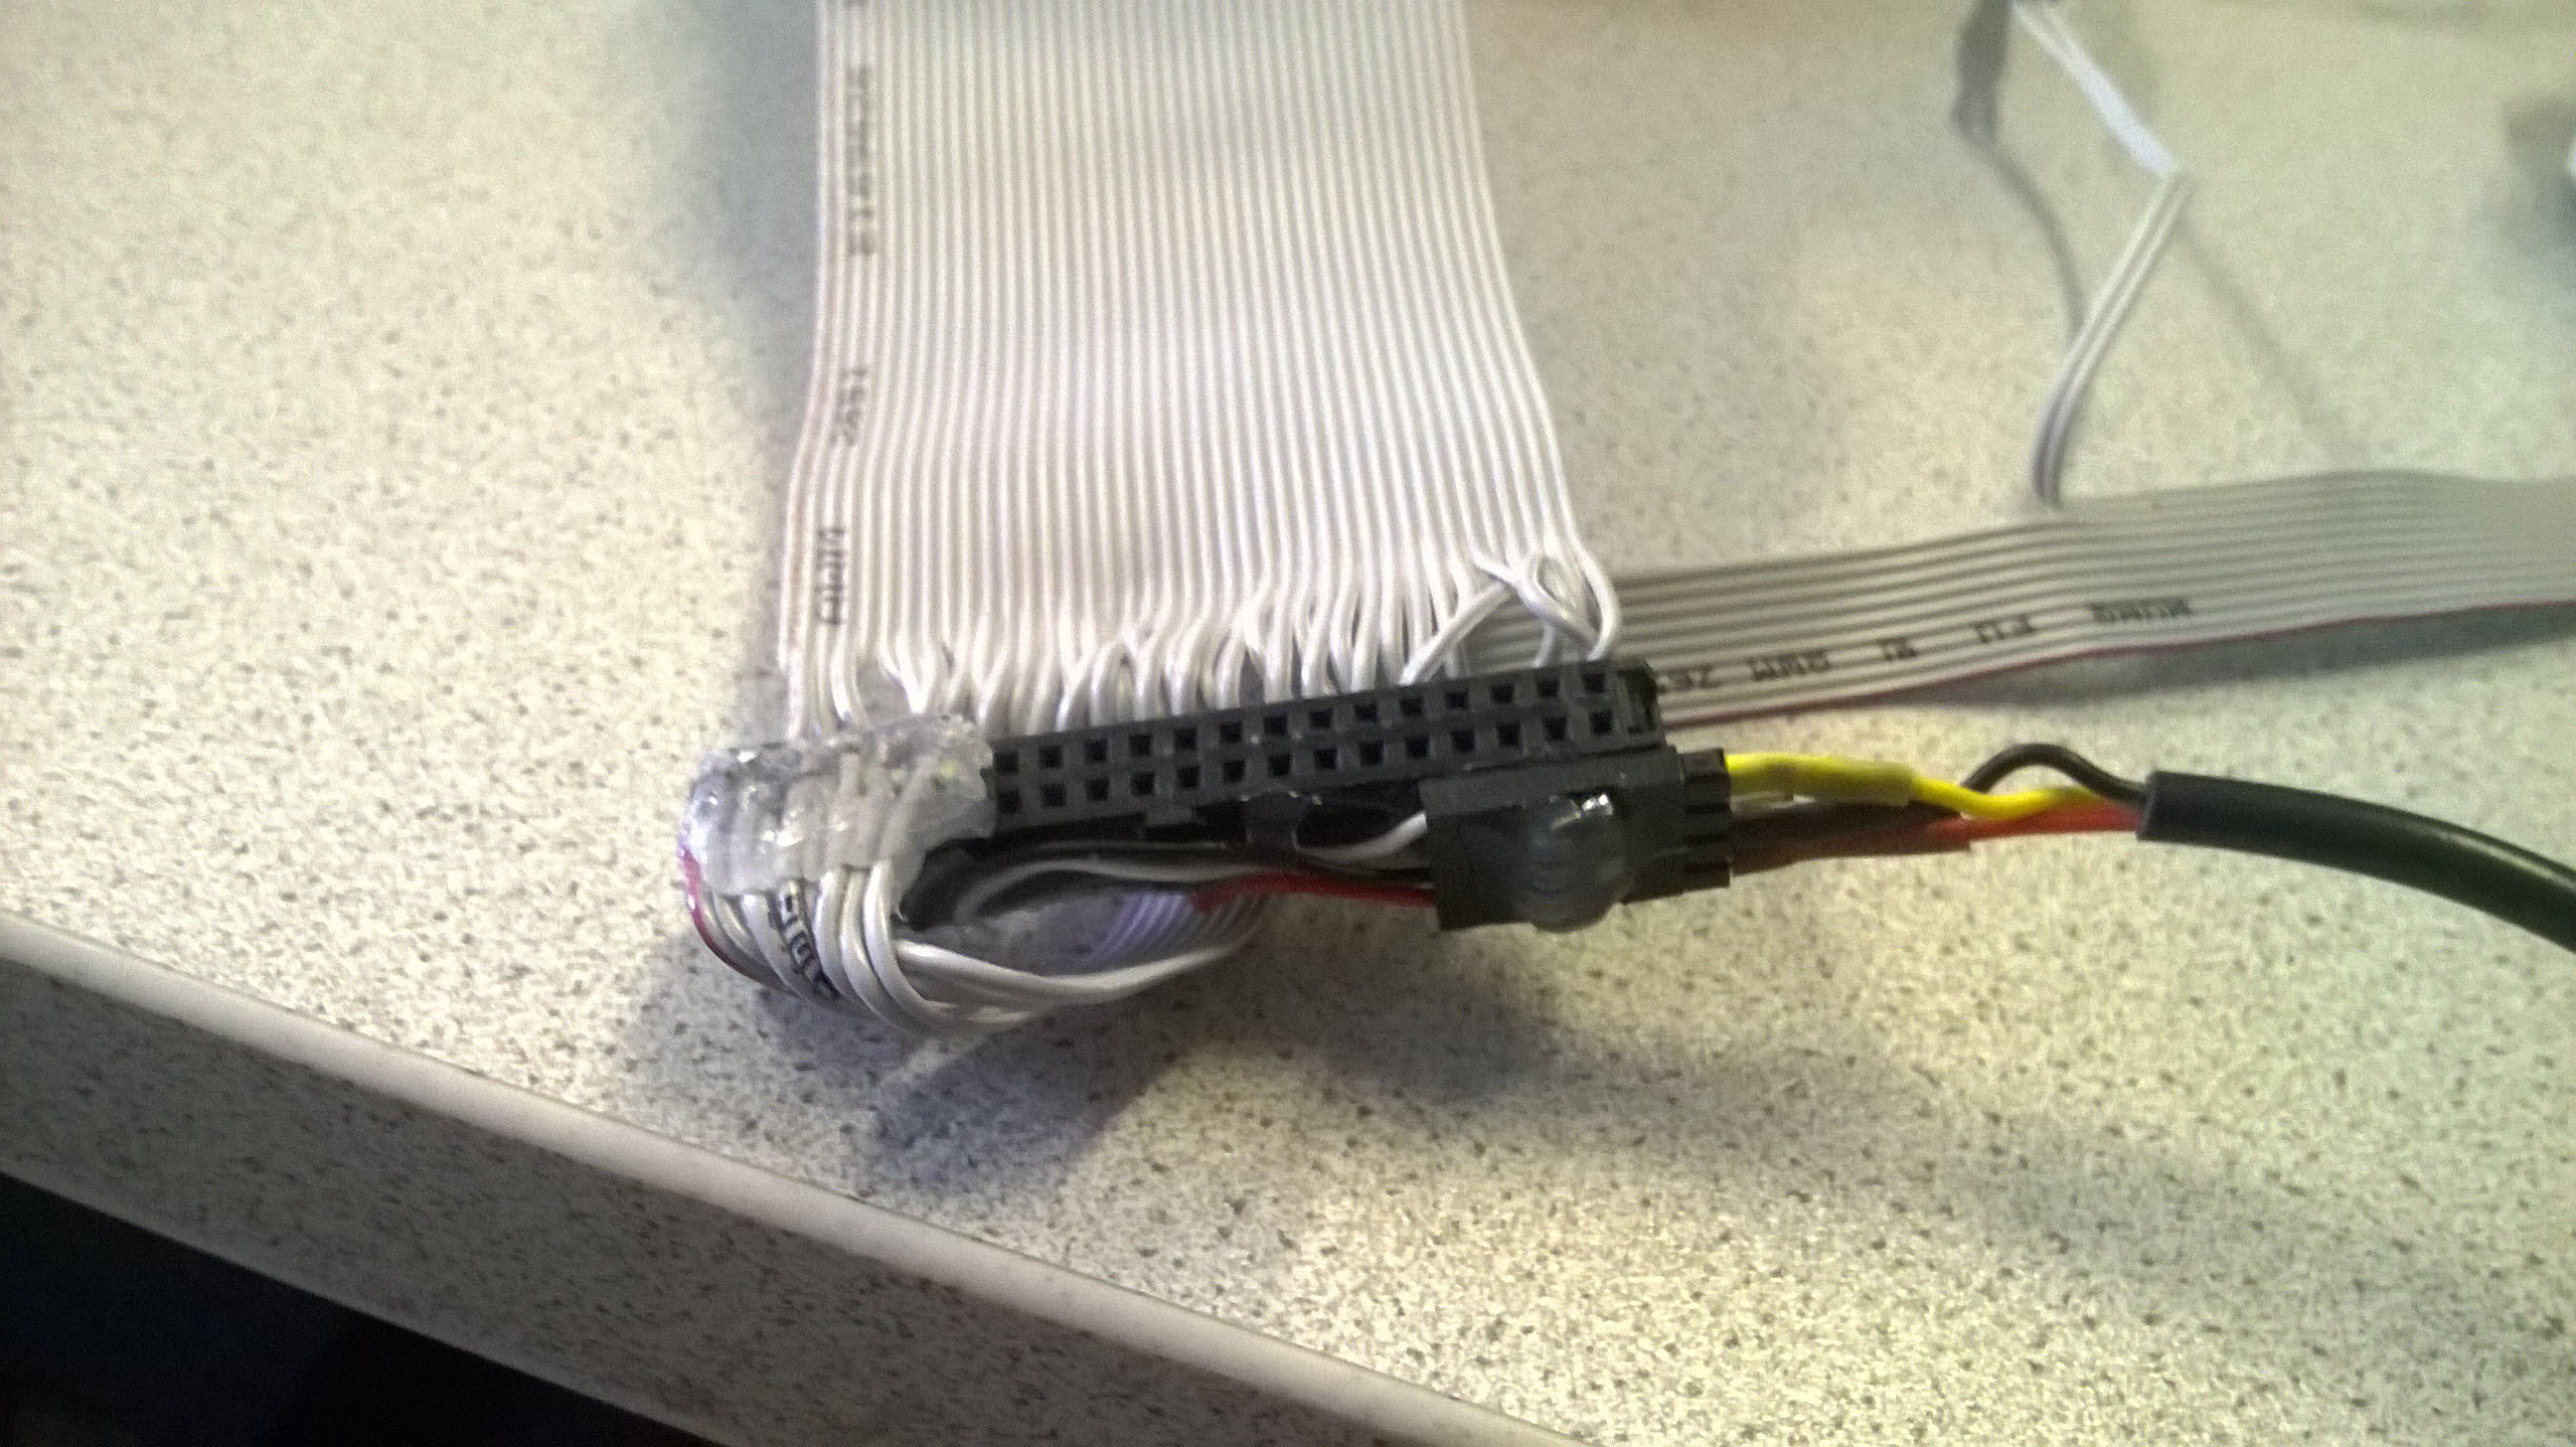
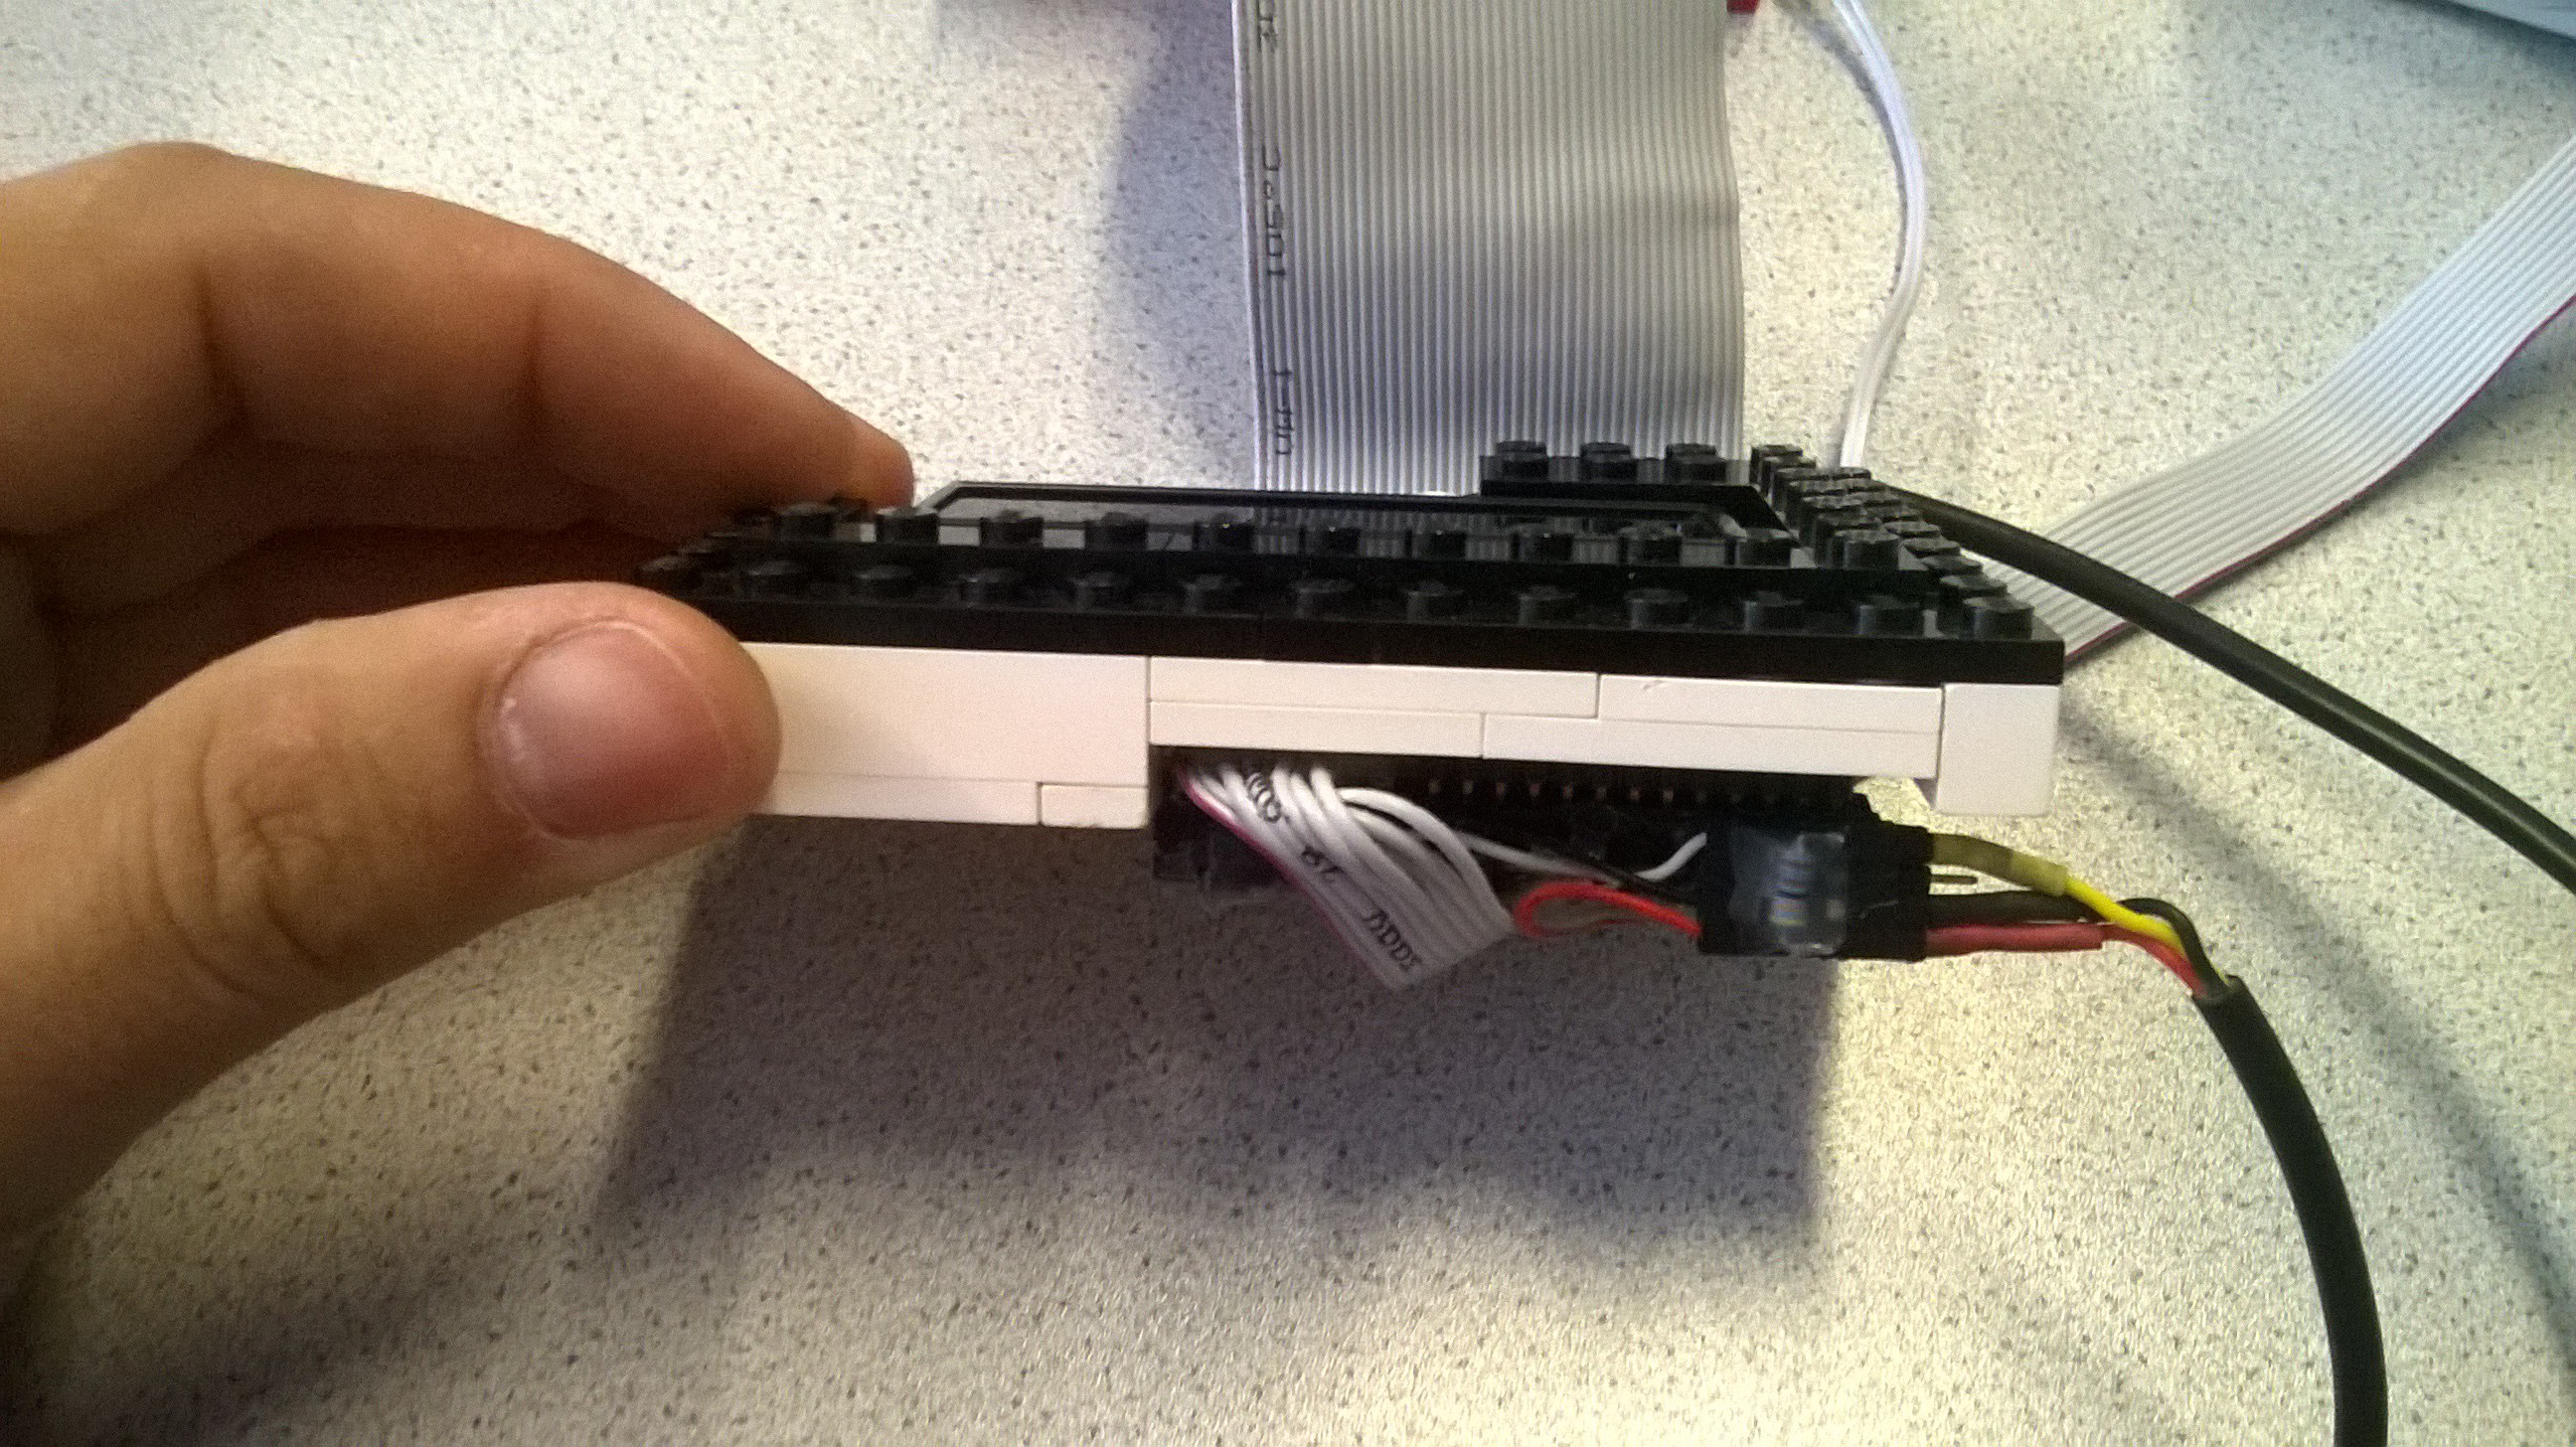
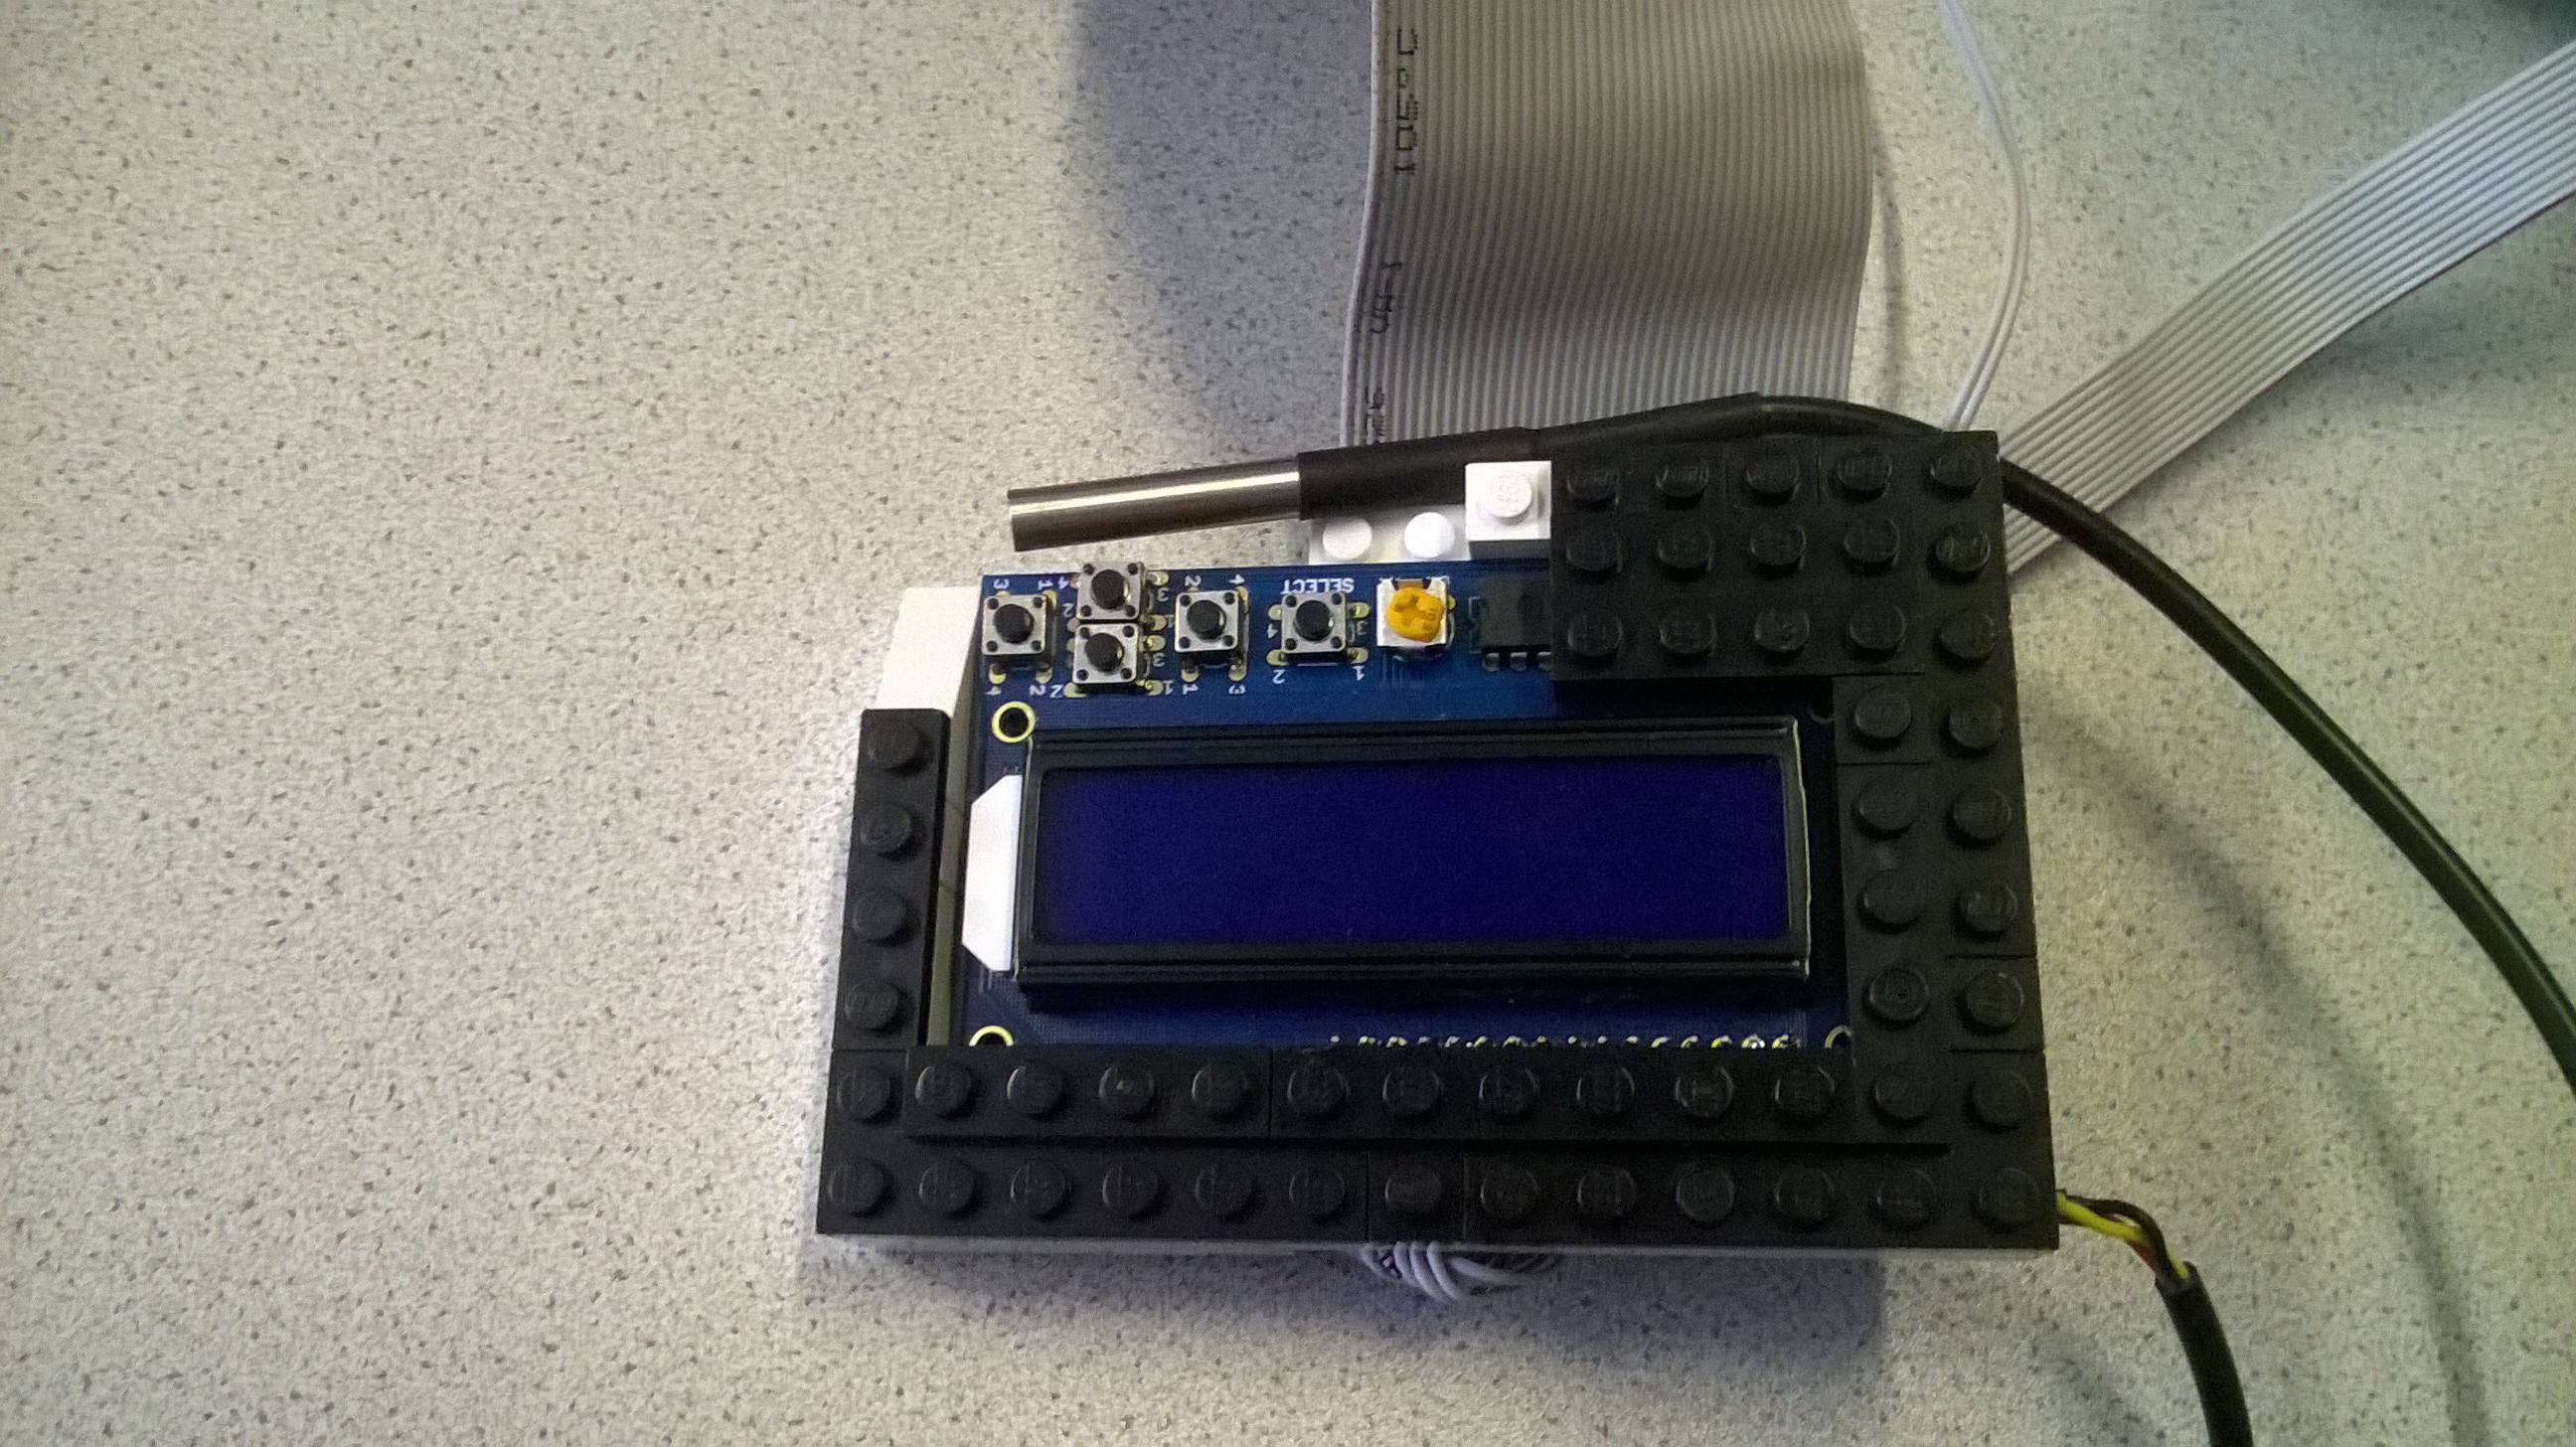
A Lego case (in red) for the Raspberry was obvious. For more flexibility I made an extension cord for the GPIO Pins with enough room to plug in the relay, the temperature sensor and the LCD Display (also in a Lego case). The power supply for the Raspberry proofed to be sufficient to also power the relay.
![]()
![]()
![]()
![]()
Next thing on the agenda, will be the modeling of the state machine to run the LCD Display.
-
Raspberry talking to the relay
04/30/2015 at 10:48 • 0 commentsSince the Raspberry GPIO only support 3.3V and the Sainsmart relay module need 5V to switch the relay I used a ULN2803A and an external power supply (the same I use to power the Raspberry PI, since it supports more then enough amps) to operate the optical switches and protect the Raspberries GPIO.
![]()
To run a test on the whole thing I put together a small Python script.
Python Script:
import RPi.GPIO as gpio
import time
# peter ports = [6,12,13,19,16,26,20,21]

# port list
"""
#	GPIO-6  ==> relay 1
#	GPIO-12 ==> relay 2
#	GPIO-13 ==> relay 3
#	GPIO-19 ==> relay 4
#	GPIO-16 ==> relay 5
#	GPIO-26 ==> relay 6
#	GPIO-20 ==> relay 7
#	GPIO-21 ==> relay 8
"""
ports = [6,12,13,19,16,26,20,21]

#set pins to BCM mode
gpio.setmode(gpio.BCM)

#setup all pins for output
for port in ports:
 gpio.setup(port, gpio.OUT)


#set all pins to high (relay close NO, open NC)
print("high")
for port in ports:
 gpio.output(port, gpio.HIGH)


time.sleep(3)

#set alls pins to low (relay open NO, close NC)
print("low")
for port in ports:
	gpio.output(port, gpio.LOW)


# free gpio pins
gpio.cleanup()
Sous Vide cooker and more
A sous vide cooker built from a Raspberry Pi with Adafruit LCD and code generated from a state machine.