Paul Kocyla
-
Interferometer working
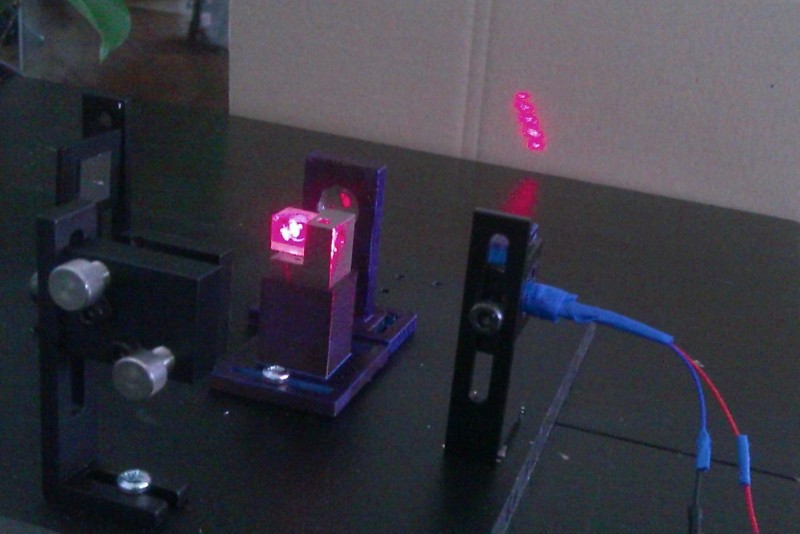
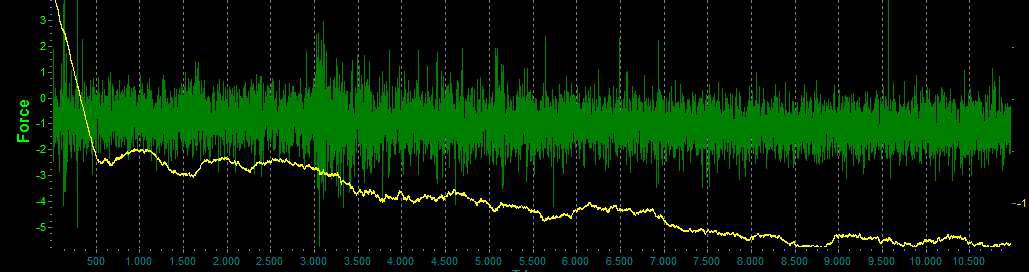
09/05/2015 at 17:00 • 9 commentsThe interferometer setup to measure the forces of our Baby EMdrive is working.
Now I will write some image processing code to get the displacement data into the PC.Update: Software is finished. In the evening, the interferometer shows a very stable and calm behaviour (I assume because there is no traffic outside). The accuracy seems to be in the order of a few nanometers. I use image processing of the interference pattern with openCV to increase the resolution which results in about 30x higher accuracy than just counting the maxima crossings.
![]()
-
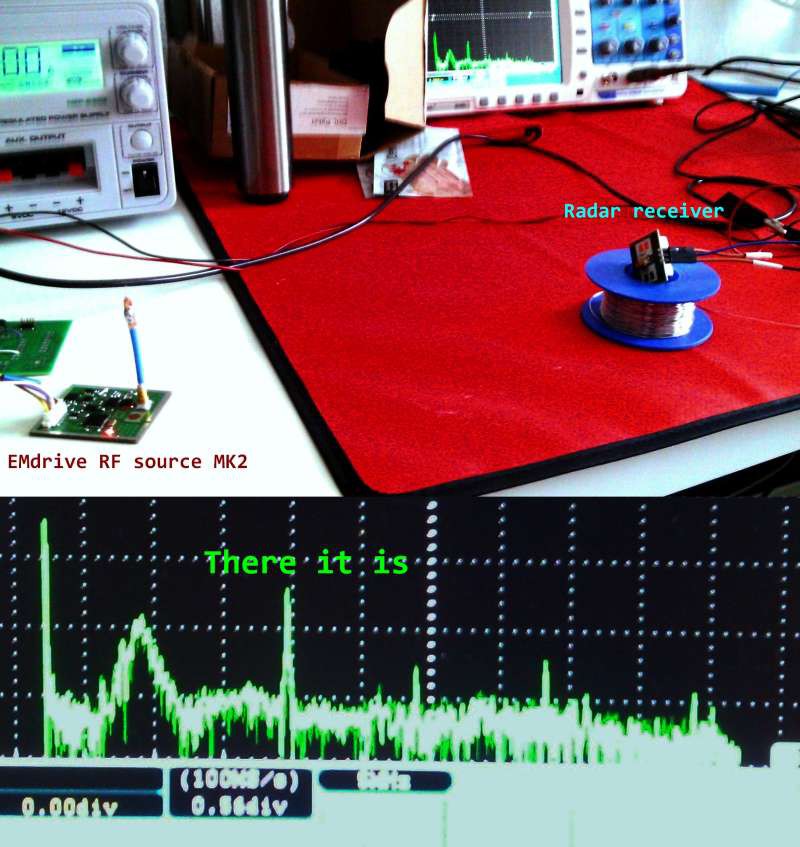
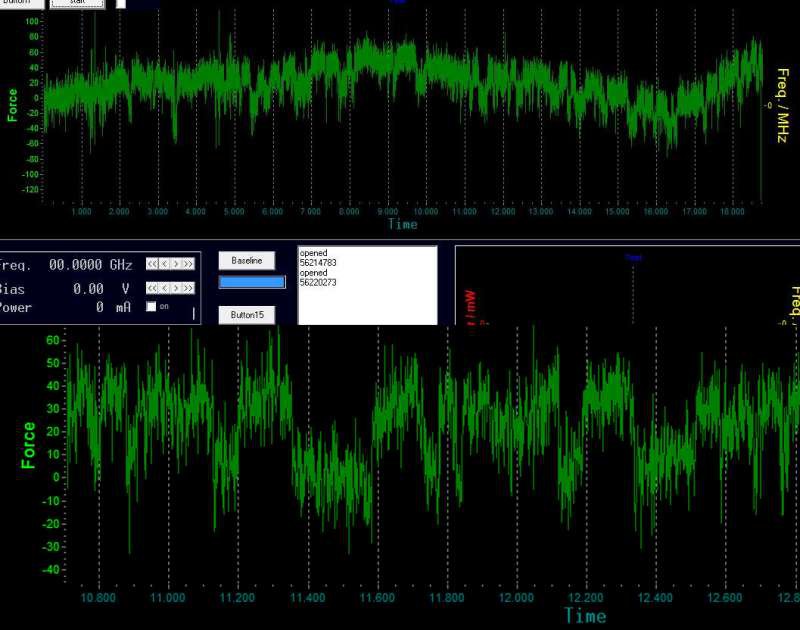
RF-Source MK2 working
09/03/2015 at 16:52 • 0 commentsProud to announce that our new RF source for the Baby EMdrive is working.
I was able to display the frequency on the oscilloscope by using a radar module (which served as our previous RF source before). It has a mixer output, so it´s possible to catch frequencies around 24.125 GHz on the screen with a bandwidth of more than 20 MHz by using FFT.![]()
-
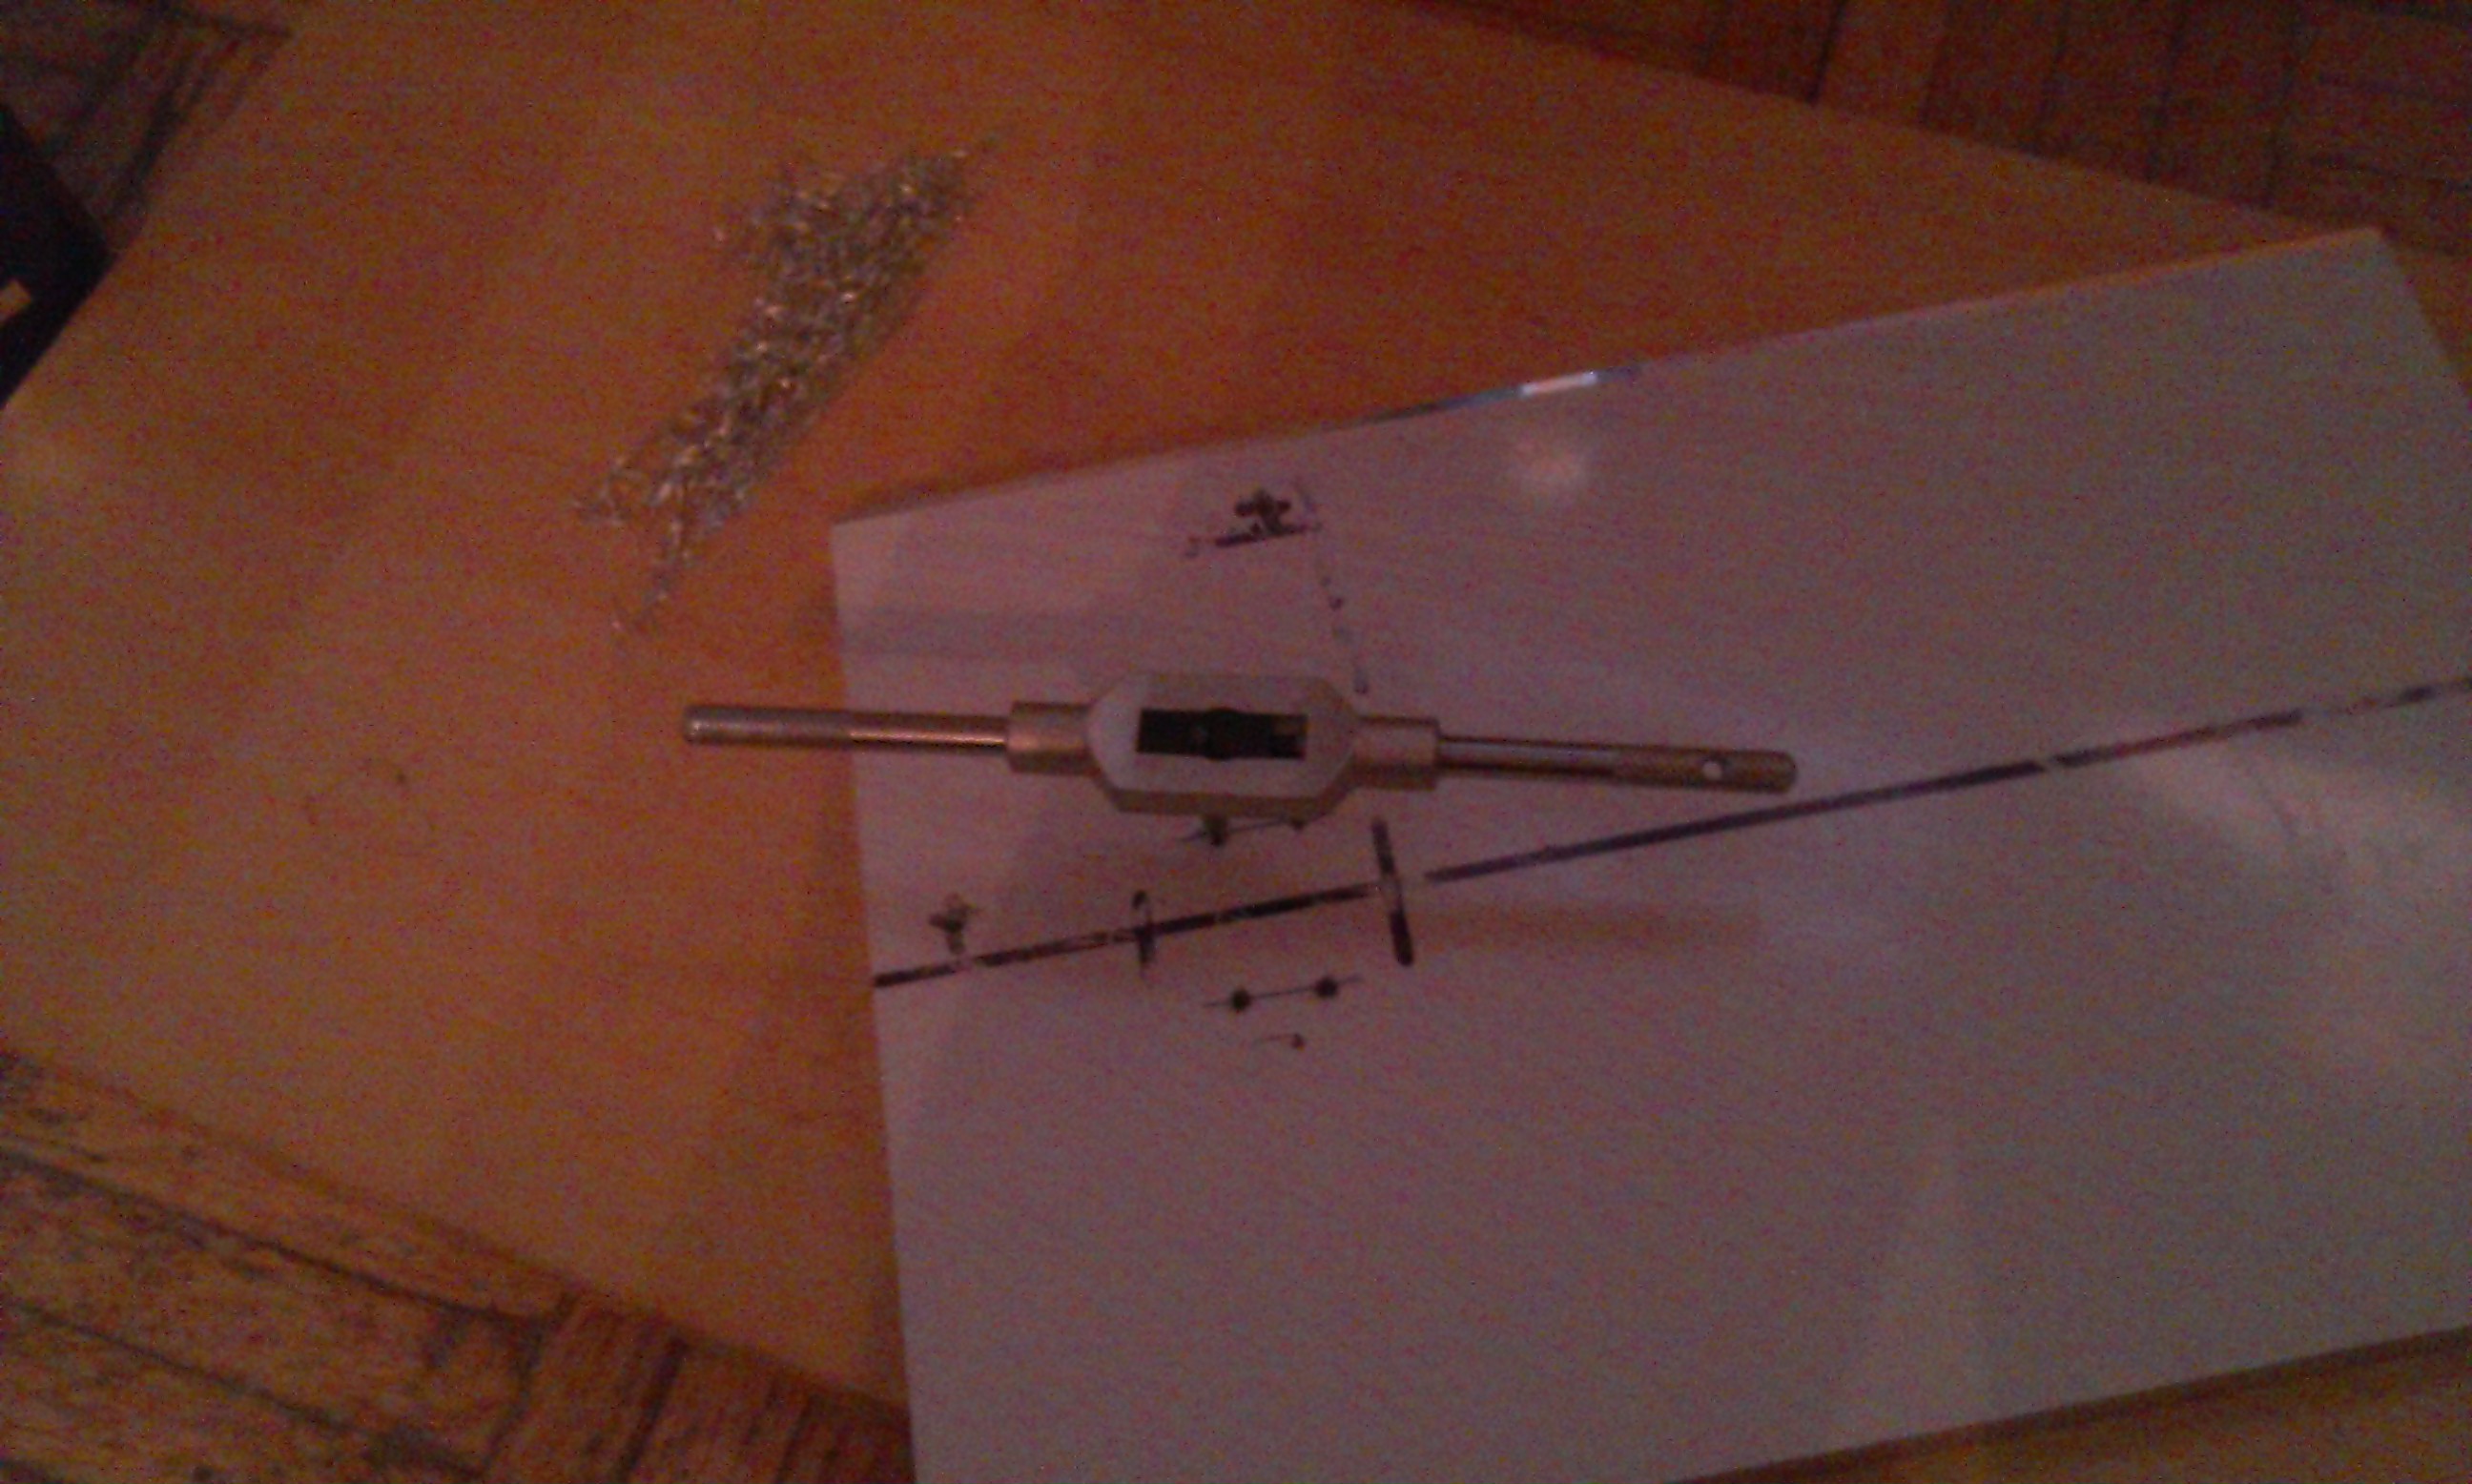
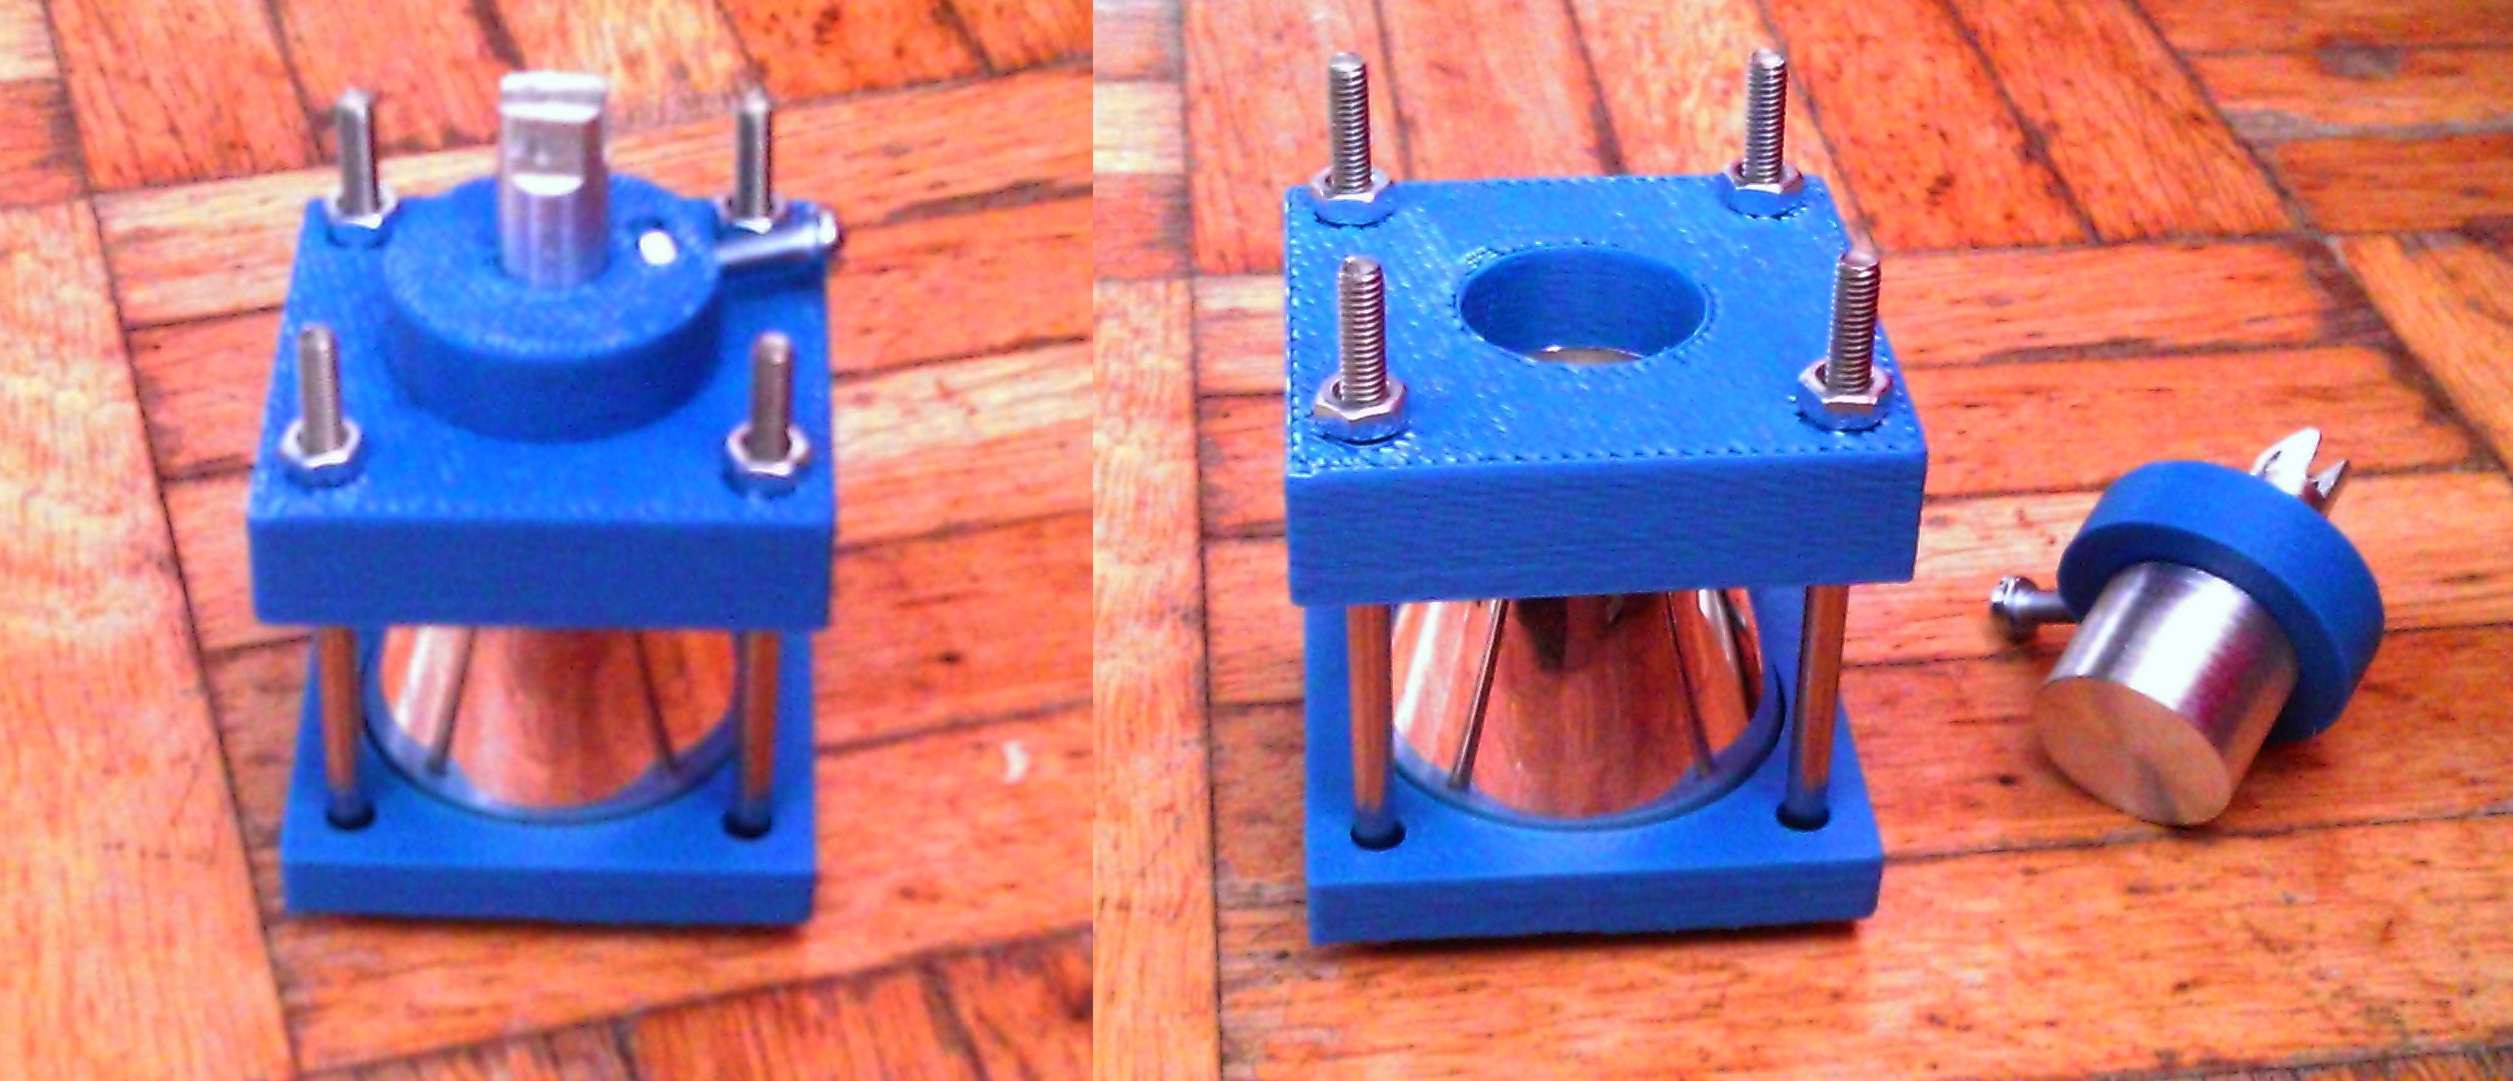
Interferometer Build
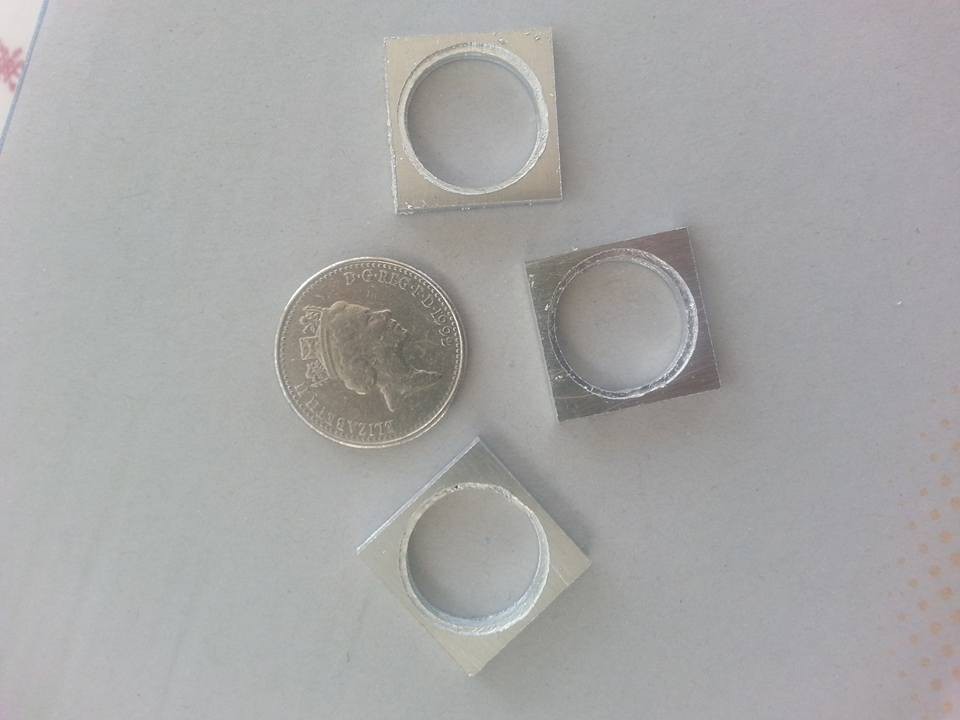
09/01/2015 at 18:55 • 1 commentCutting threads for the laserbench of the Michelson-Interferometer which we will use to measure the (hopefully existing) forces of our Baby EMdrive.
I am using a 12mm ALU plate as base. A laser will be splitted into two beams which will be mixed together later. Interference occurs which can show displacements of a few nanometers.
More explanation follows in a video as soon as the bench is ready.![]()
-
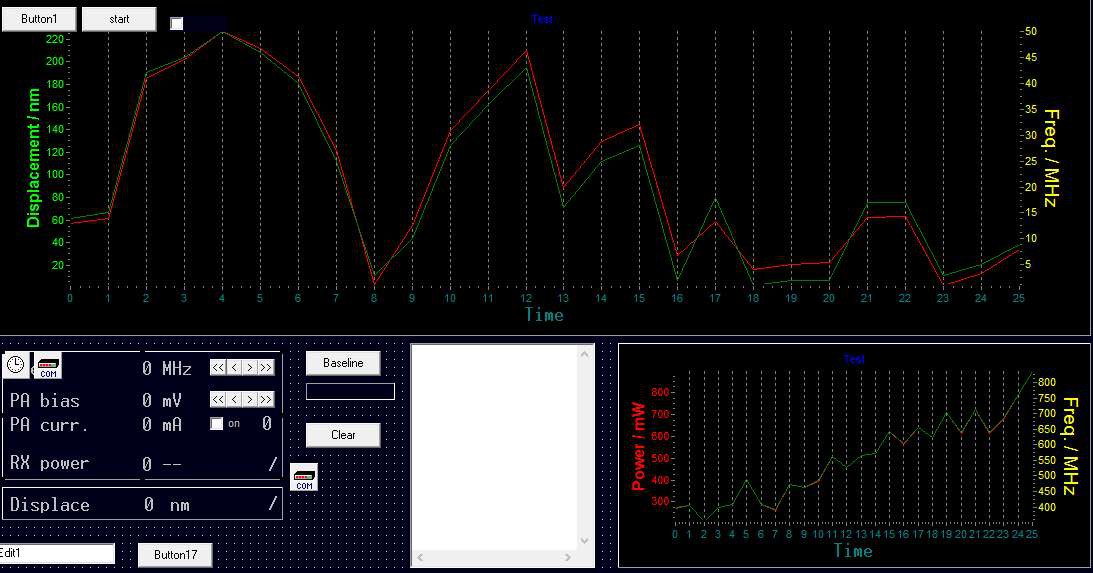
Firmware/Software
08/29/2015 at 19:08 • 0 commentsWorking on the firmware for the RF source and the PC control software.
The software will have charts showing the actual measurement in realtime.
The RF souce (and so the whole EMdrive) will be connected to the software via a wireless UART bridge.Firmware will be probably finished tomorrow.
It´s a lot of work, so I want to give you a short update - we are still motivated and progressing :) We are heading towards first test results before the semifinals deadline.
![]()
Meanwhile, Jo machined new endplates for the tuneable cavity.
![]()
-
New Cavity Assembled
08/24/2015 at 17:13 • 2 commentsGot the endplate piston from Jo today. Here´s the assembled cavity.
I got a question for the microwave professionals: There is a small gap between the endplate piston and the cavity walls. What will this mean for the wave propagation?
The piston might touch the cavity on one side. Should I better isolate the cavity wall from the piston, or should it somehow contact the cavity on all sides?![]()
-
Load cell direct ADC
08/23/2015 at 05:25 • 0 commentsLoad cell connected directly to the ADC. There´s NO EMdrive on it now, it´s just the load cell test.
The graph is an over-night recording (every 2 seconds). The yellow graph shows a moving average with a window of 512 values. There is a continuous drop (80mg), I assume due to temperature change over night.
This should come into the milligram range now, but there´s still room for improvement.
![]()
-
Load cell first run
08/22/2015 at 17:26 • 0 commentsThe load cell for direct thrust measurement is undergoing the first test.
The graph shows the voltage noise without changing loads.
A 100g calibration mass results in a value of about 35000.
The ADC integer number is 1000x that value, so 100g result in a value of 35.000.000 - but the noise peek-to-peak is about 60000, so it´s not satisfying.
That discrete jumps in the lower picture are annoying. A pure noise whch keeps a certain mean value would be great, but these jumps will make it more difficult distinguising on/off phases.
The actual signal/noise ratio is too low for detecting EMdrive forces, so I´ll try to reduce the noise further.
Currently, a differential amplifier feeds the ADC. I´ll try to connect the load cell directly to the ADC. WIth the high oversampling resolution I can maybe get rid of the preamp and its noise.
For test purposes, the time value divided by 5 gives the seconds of measurement.
![]()
-
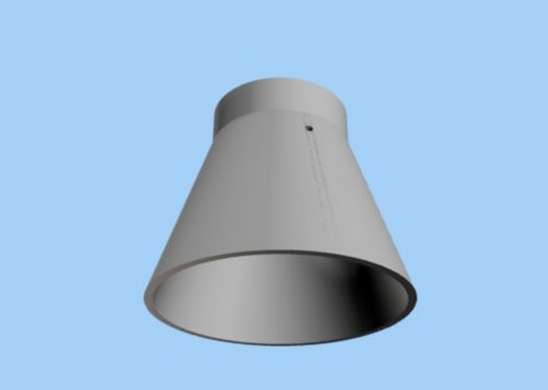
Silver Cavity arrived
08/18/2015 at 15:01 • 4 commentsThe cavity arrived from Shapeways.
The resolution is great. I will polish it from inside to make it smoother, although it´s already incredibly smooth for a print.
The big endplate is just a PCB - no work at all, just a circle in dimension+top layer.
![]()
-
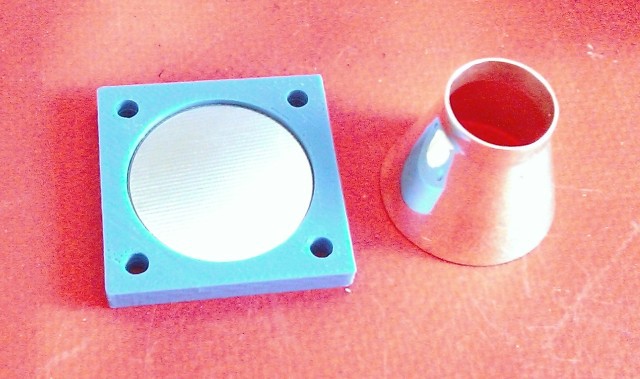
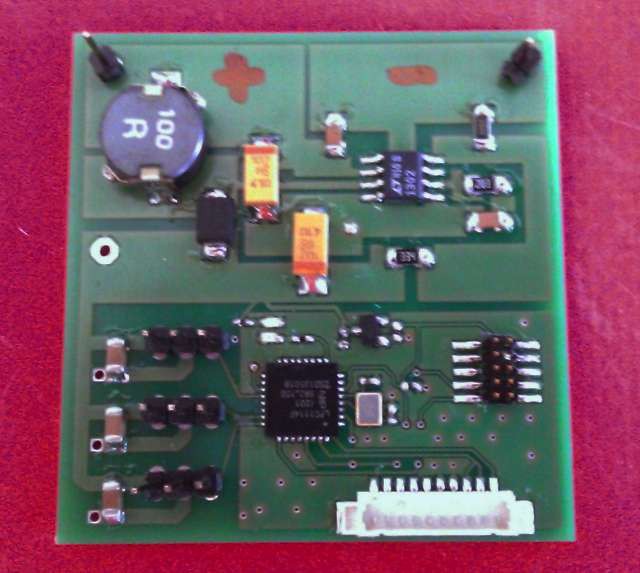
Power/Servo board finished
08/12/2015 at 19:13 • 0 commentsThere´s a lot of work to do to build up a new test rig.
This board generates 5V/600mA from a 3.7V Li-Ion battery to drive the RF generator and the endplate servo.
It has a microcontroller to drive up to three servos - of which we need one for the endplate and optionally one for the antenna position. It allows an analog servo to be driven with a 32bit timer accuracy.
![]()
-
Silver Hires Print
08/05/2015 at 20:19 • 10 commentsDesigned a second print for experimenting with 3D printed materials.
It´s just the raw cavity made of polished stirling silver, printed in high resolution.It´s a good material for waveguides.
I´ll make the outer frame of 3D printed ABS plastic with a local printer - I should have got this idea before using the vouchers (price is the same after reducing the material volume), but hey that´s life. Let´s see what results we can get.
![]()