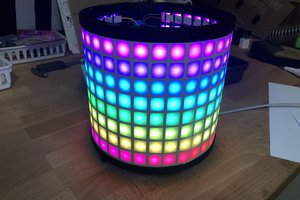
Back in 2012 I built a couple of LED paintings for the kids by gluing a number of cut strips of ws2801 from eBay to a piece of cardboard that I mounted in a picture frame. Colours has a calming effect on autistic children, and if you also have ADHD it can really help you to calm down - hence why I have a few of these painting hanging around the house and my kids love them!
Solder the interconnecting wires before gluing the strips down.
One of them I also added a piece of paper behind a canvas in order to make it diffuse, and both variants are interesting in their own ways.
I quickly wrote my own proprietary protocol to make animations and such, and I spent quite a lot of time doing this - which is fun - but when I wanted to make more and more complex effects it quickly got out of hands and I eventually decided enough is enough and they went up on the walls.
They have both run since then without crashing or having any hardware failures, so the WS2812b LEDs are pretty good!
Last month I saw the Glediator project by the guys in http://www.solderlab.de/ and I thought I'd make an upgrade for my now quite old LED paintings, so after downloading their java applet and writing a sketch for an Arduino UNO they started talking with each other - and it looked fabulous, although my paintings only consists of 10x8 WS2812b LEDs...
I don't want to add a Raspberry PI to each paintings and I certainly don't want to add WiFi or similar so I decided to save the effect stream to file and just replay the recorded data in the sketch instead but after a Google session I found no implementations on the web so I had to do it myself - which is more fun to be honest ;)
Here is how you can do this yourselves:
Pick your favourite Arduino, it won't matter which you're using. You also need a sd card. (either via shield or jury-rigged to GPIO)
Download Glediator from http://www.solderlab.de/ and install. Configure Glediator with the size of your display and go wild and make some cool animations.
When you have something you like then go to Extras -> Recorder and record your animation to file, and then transfer the file(s) to the sd card you intend to use in the project.
The Arduino code is simple and can easily be extended to add a button that switches files etc.
// Glediator Arduino UNO sketch by Jens Andrée
// 500k bauds with 80 pixels no problem
// sdcard stream for stand-alone operation.

#include <FastLED.h>
#include <SPI.h>
#include <SD.h>

#define NUM_LEDS 80
#define DATA_PIN 2
#define CLOCK_PIN 3
#define CMD_NEW_DATA 1
#define BAUD_RATE 500000  //if using Glediator via serial

File fxdata;
CRGB leds[NUM_LEDS];

void setup()
{
  FastLED.addLeds<WS2801, DATA_PIN, CLOCK_PIN, RGB>(leds, NUM_LEDS); //se doc for different LED strips
//  Serial.begin(BAUD_RATE); // when using Glediator via usb
  Serial.begin(115200);

  for(int y = 0 ; y < NUM_LEDS ; y++)
  {
    leds[y] = CRGB::Black; // set all leds to black during setup
  }
  FastLED.show();

  pinMode(10, OUTPUT); // CS/SS pin as output for SD library to work.
  digitalWrite(10, HIGH); // workaround for sdcard failed error...

  if (!SD.begin(4))
  {
    Serial.println("sdcard initialization failed!");
    return;
  }
  Serial.println("sdcard initialization done.");

  // test file open
  fxdata = SD.open("myanim.dat");  // read only
  if (fxdata)
  {
    Serial.println("file open ok");
    fxdata.close();
  }
}

int serialGlediator ()
{
  while (!Serial.available()) {}
  return Serial.read();
}

void loop()
{

// uncomment for Glediator
//  while (fileGlediator () != CMD_NEW_DATA) {}
//  Serial.readBytes((char*)leds, NUM_LEDS*3);

  fxdata = SD.open("myanim.dat");  // read only
  if (fxdata)
    {
      Serial.println("file open ok");
    }

  while (fxdata.available())
  {
    fxdata.readBytes((char*)leds, NUM_LEDS*3);
    FastLED.show();
    delay(50); // set the speed of the animation. 20 is appx ~ 500k bauds
  }

  // close the file in order to prevent hanging IO or similar throughout time
  fxdata.close();
}
And Bob's your uncle!
Here is a potato-cam of the diffused painting...
Read more » jens.andree


 Circle Electronic
 kmatch98
 Sagar 001
Any tips on how to add the button push to change files? All works great with one file, thanks for posting!