-
11Step 11
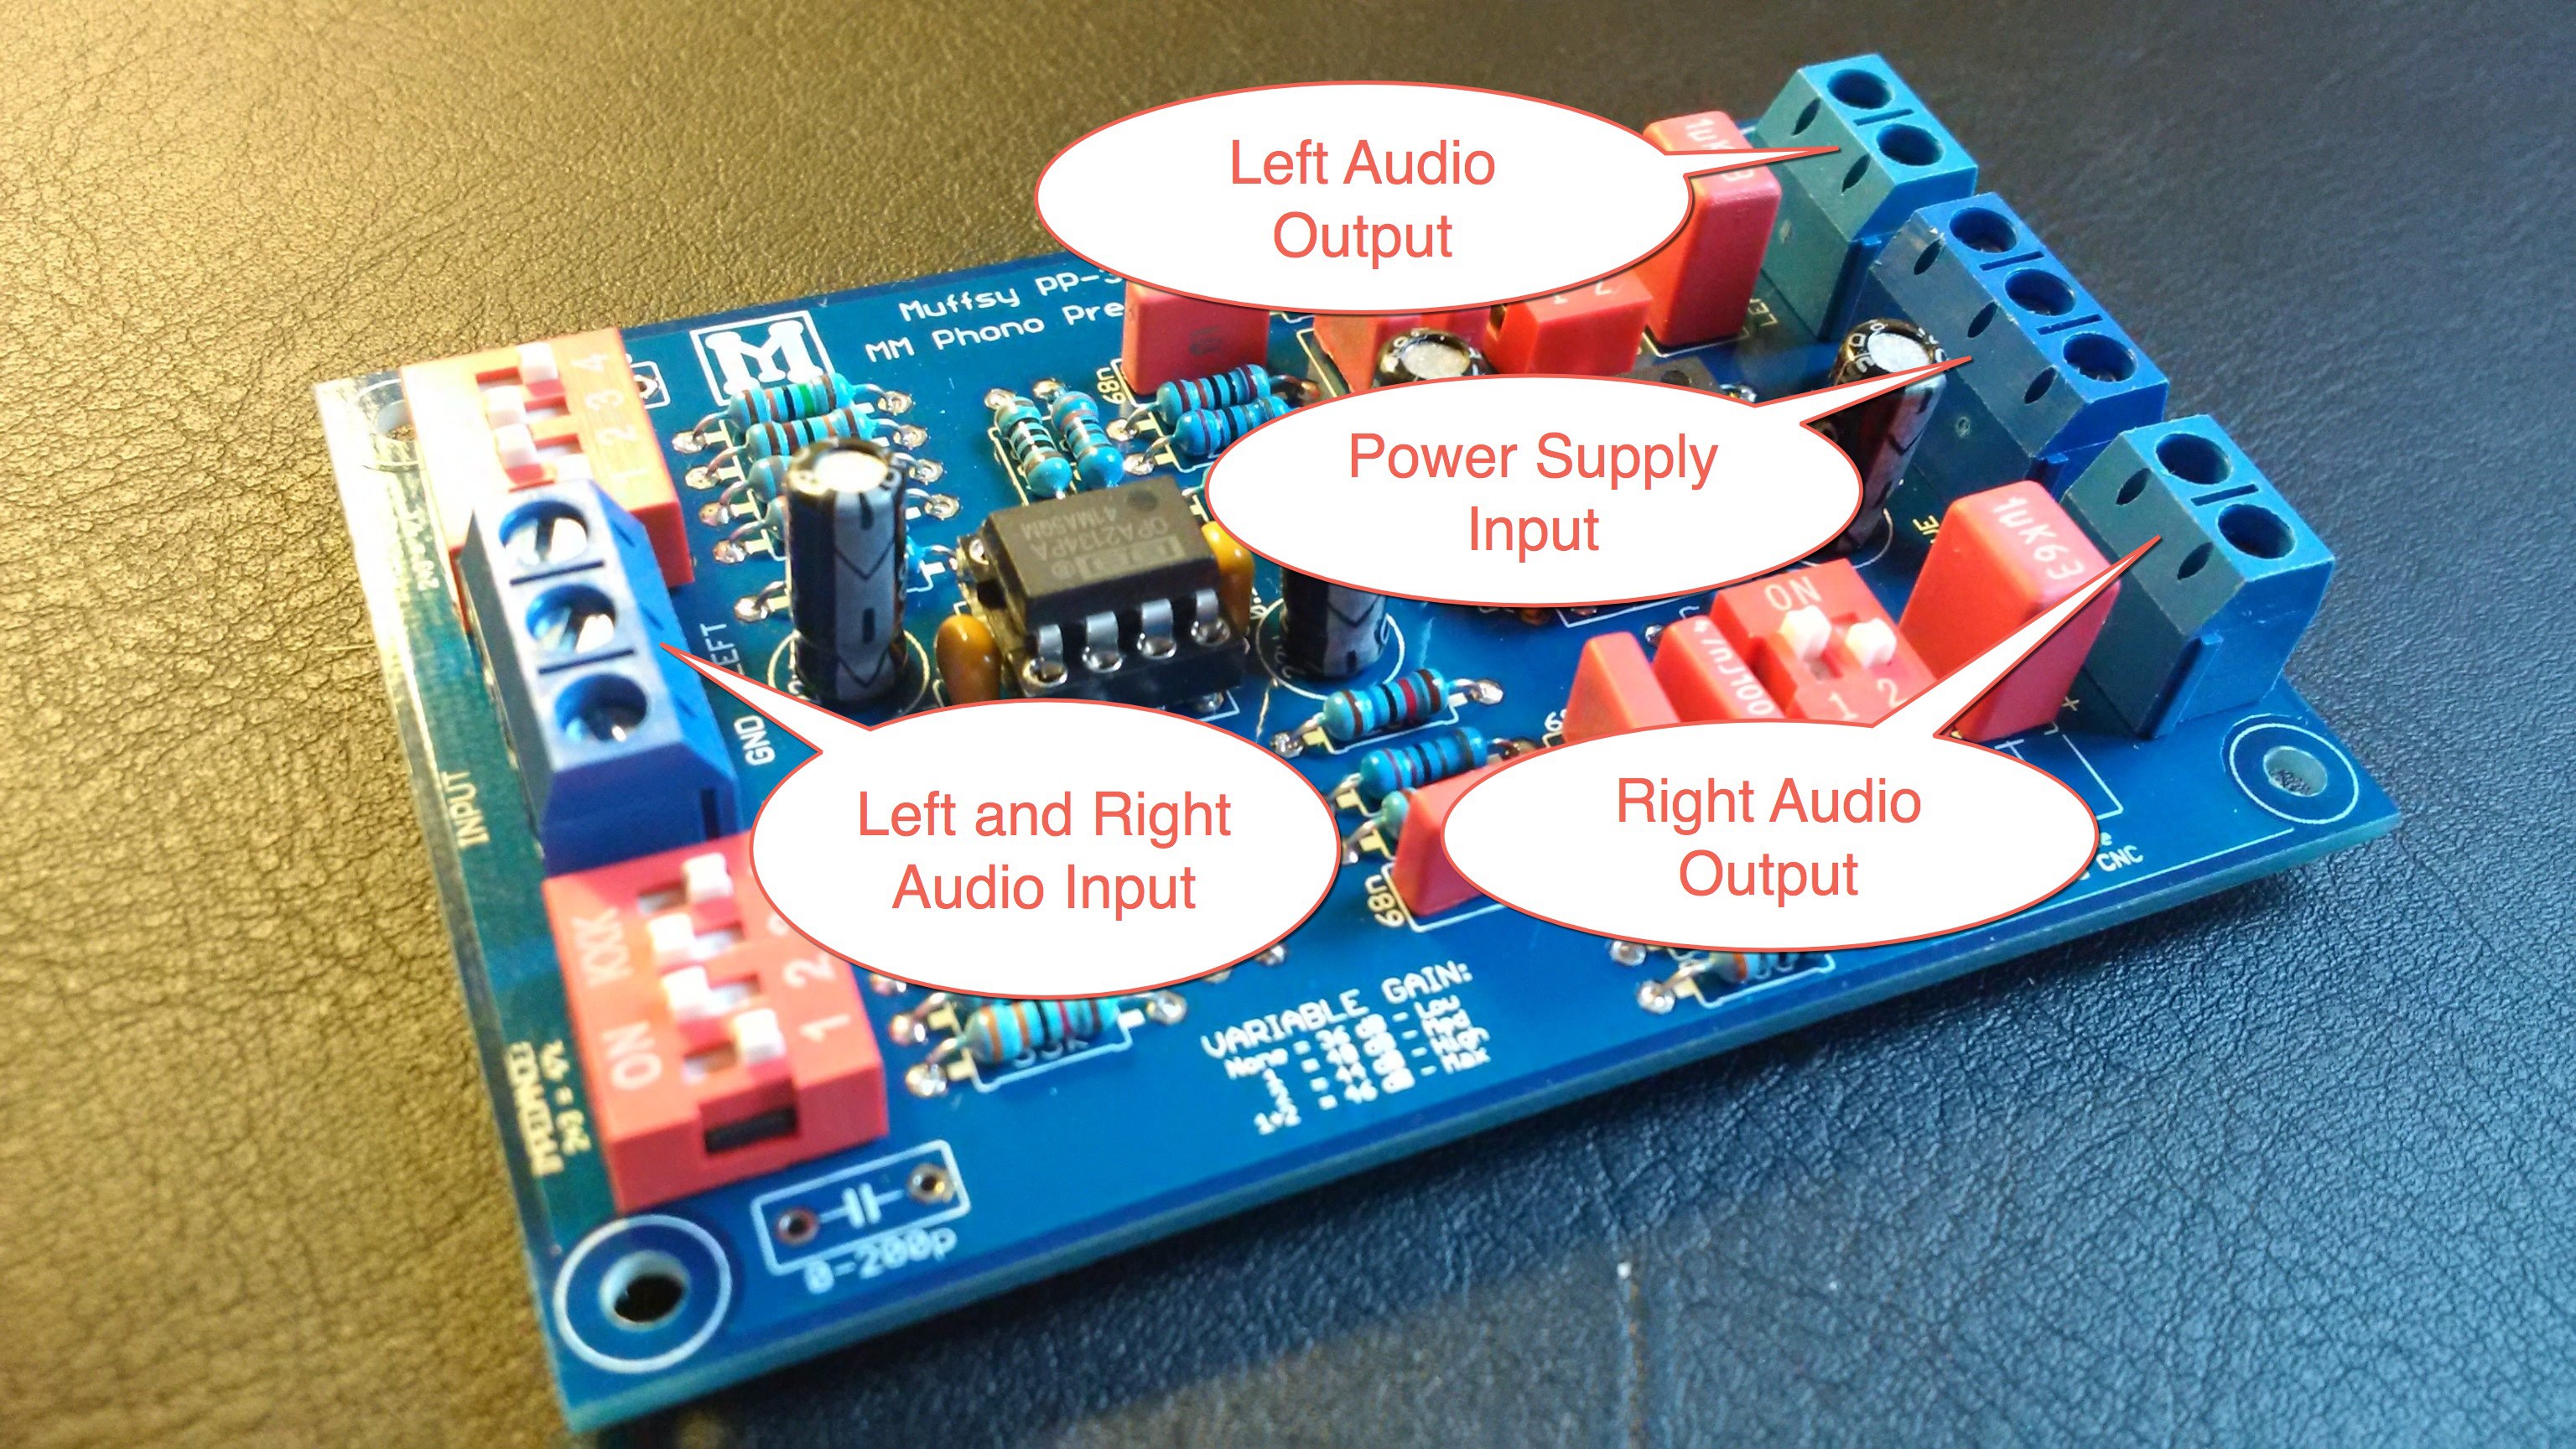
Solder the Screw Terminals
These screw terminals let you connect input, output and power without having to solder the cables in place.
![]()
Click on the picture for a high resolution version.
Take a moment and think about which way you want the holes facing. If your enclosure has lots of space, have the holes facing outwards. If your space is constrained, it might be wise to have the holes facing inwards.
-
12Step 12
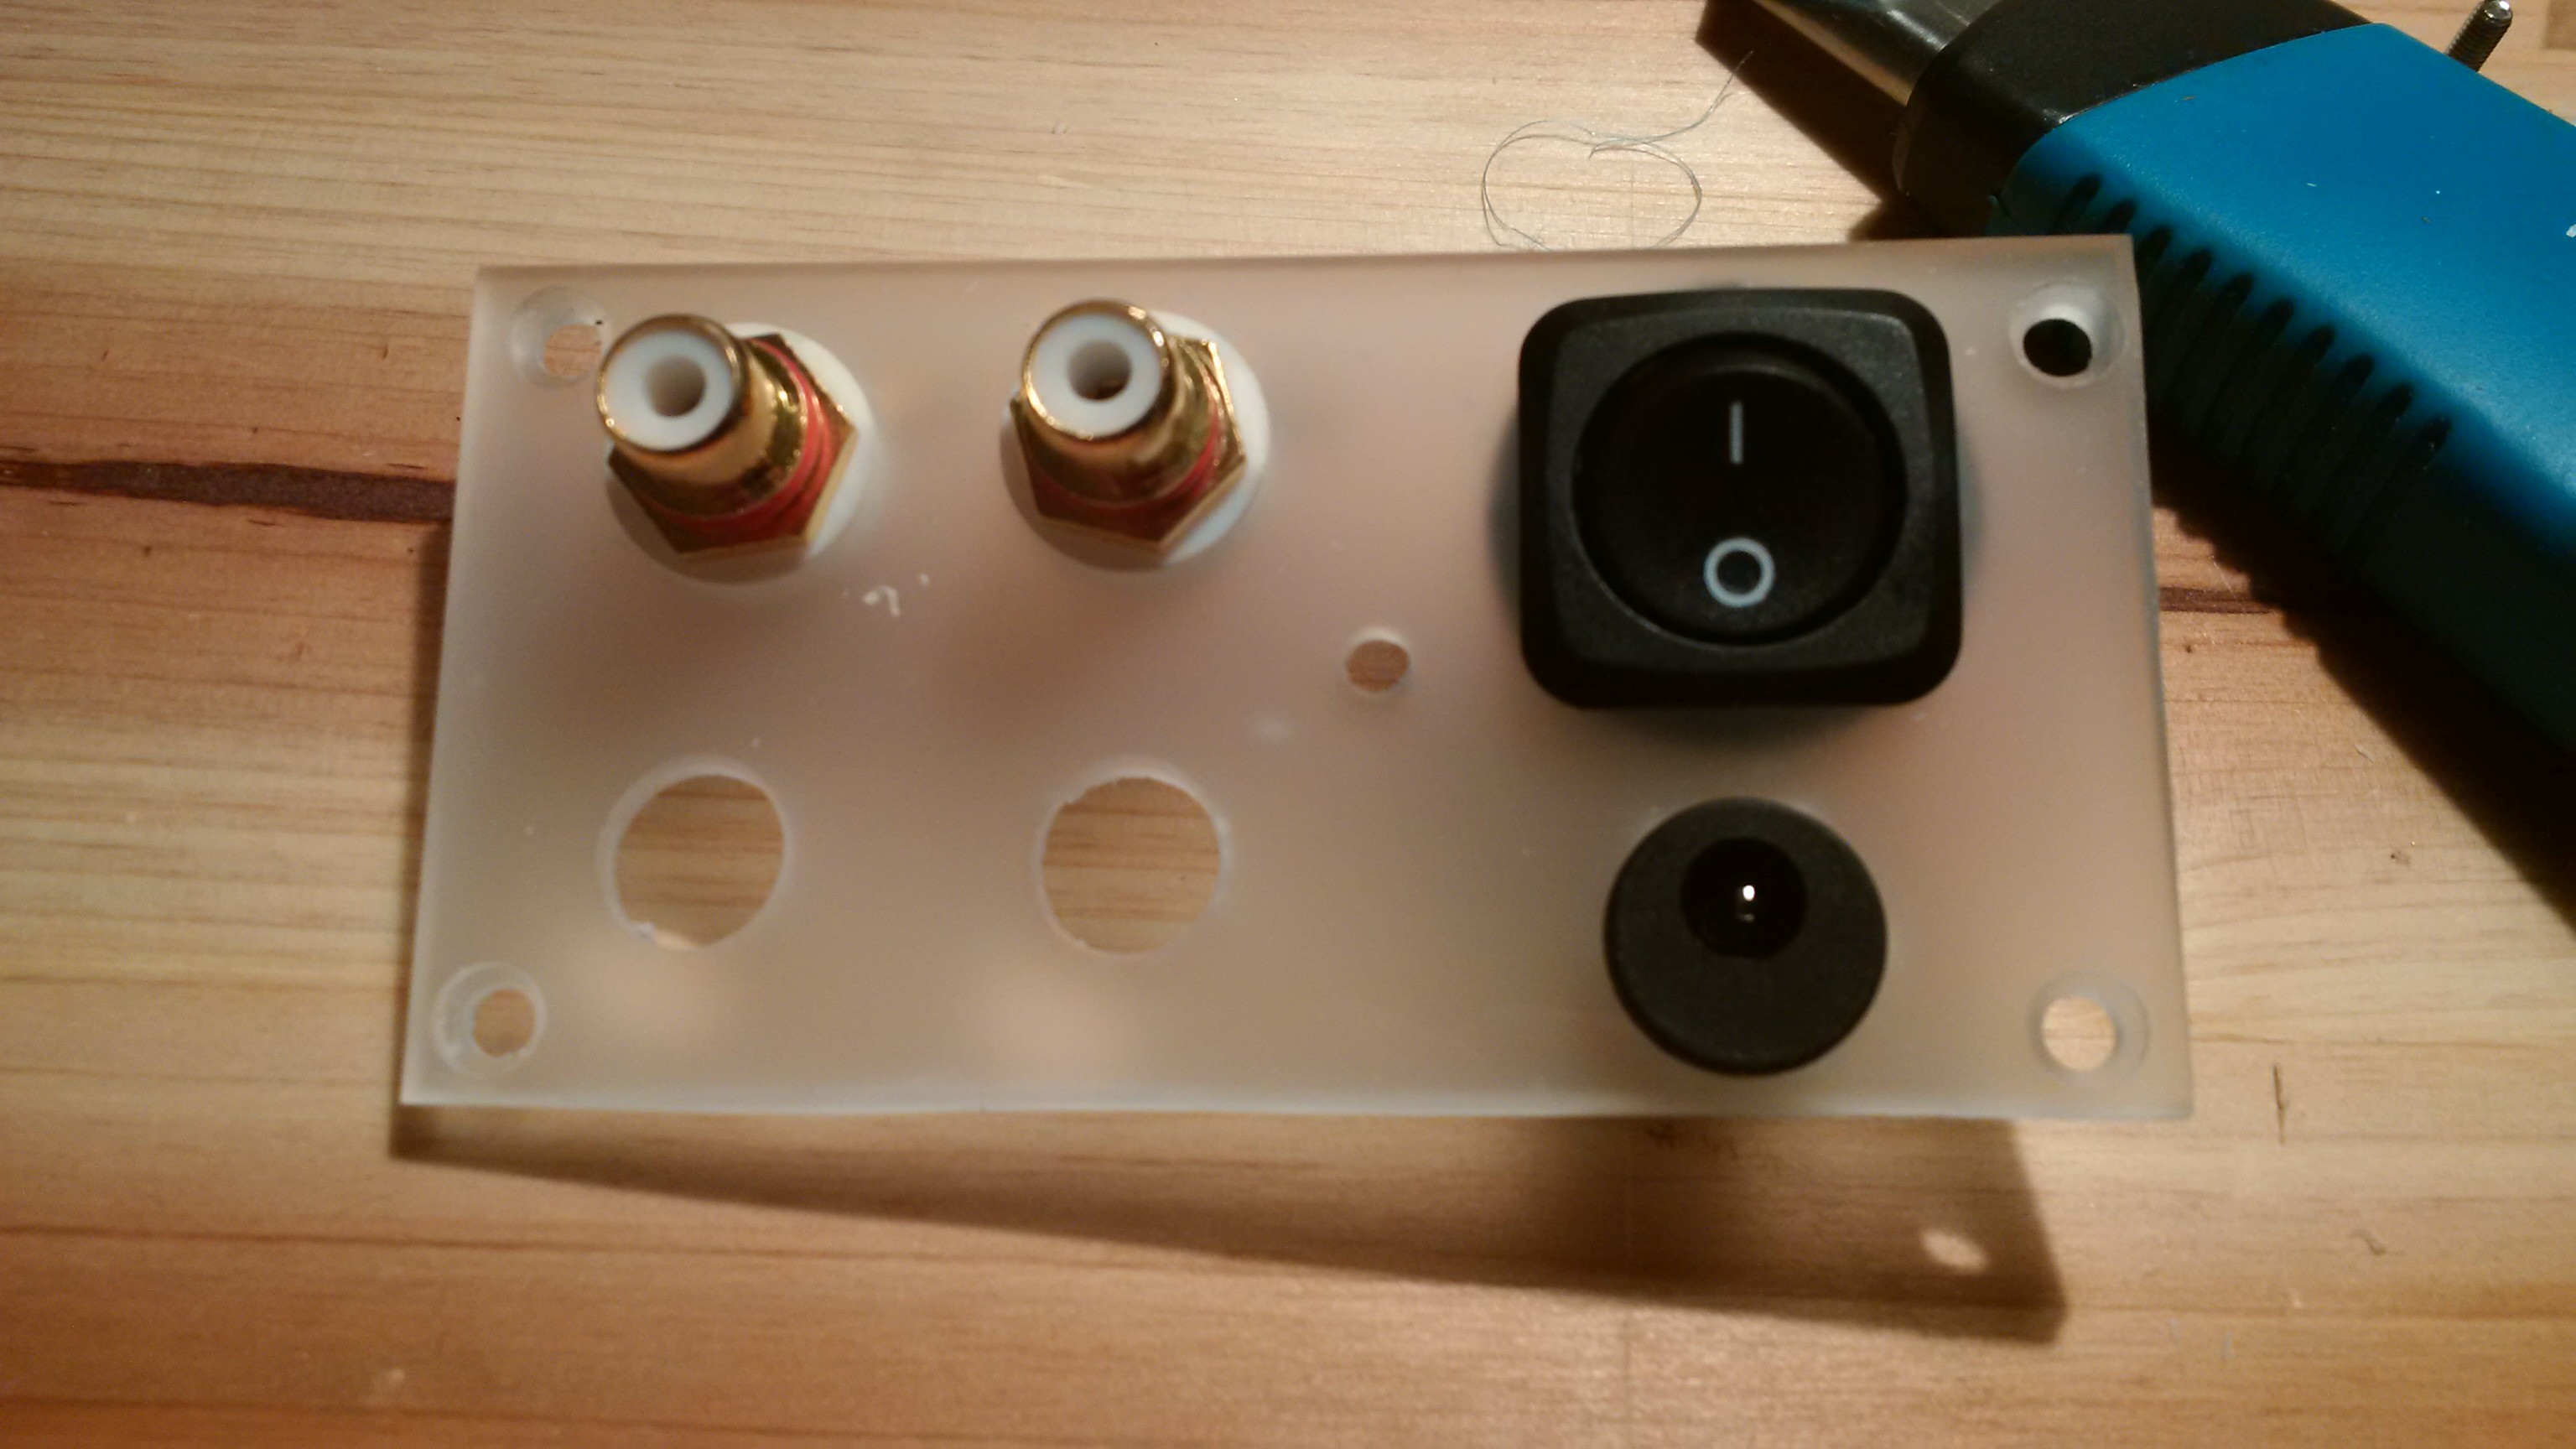
Back Panel
This project log will show you an example on how to do the back panel:
![]()
Click on the image for a high resolution version.
-
13Step 13
Audio and Power Supply Wiring
There are several ways of powering the Muffsy Phono Preamp, as shown in the project note below.
The best option is using the Muffsy Hifi Dual Power Supply, which lets you power the phono stage using a wall adapter so you don't have to take the risk of connecting mains power.
Have a look at these project logs for audio and power wiring:
![]()
![]()
Click on the images for high resolution versions.
-
14Step 14
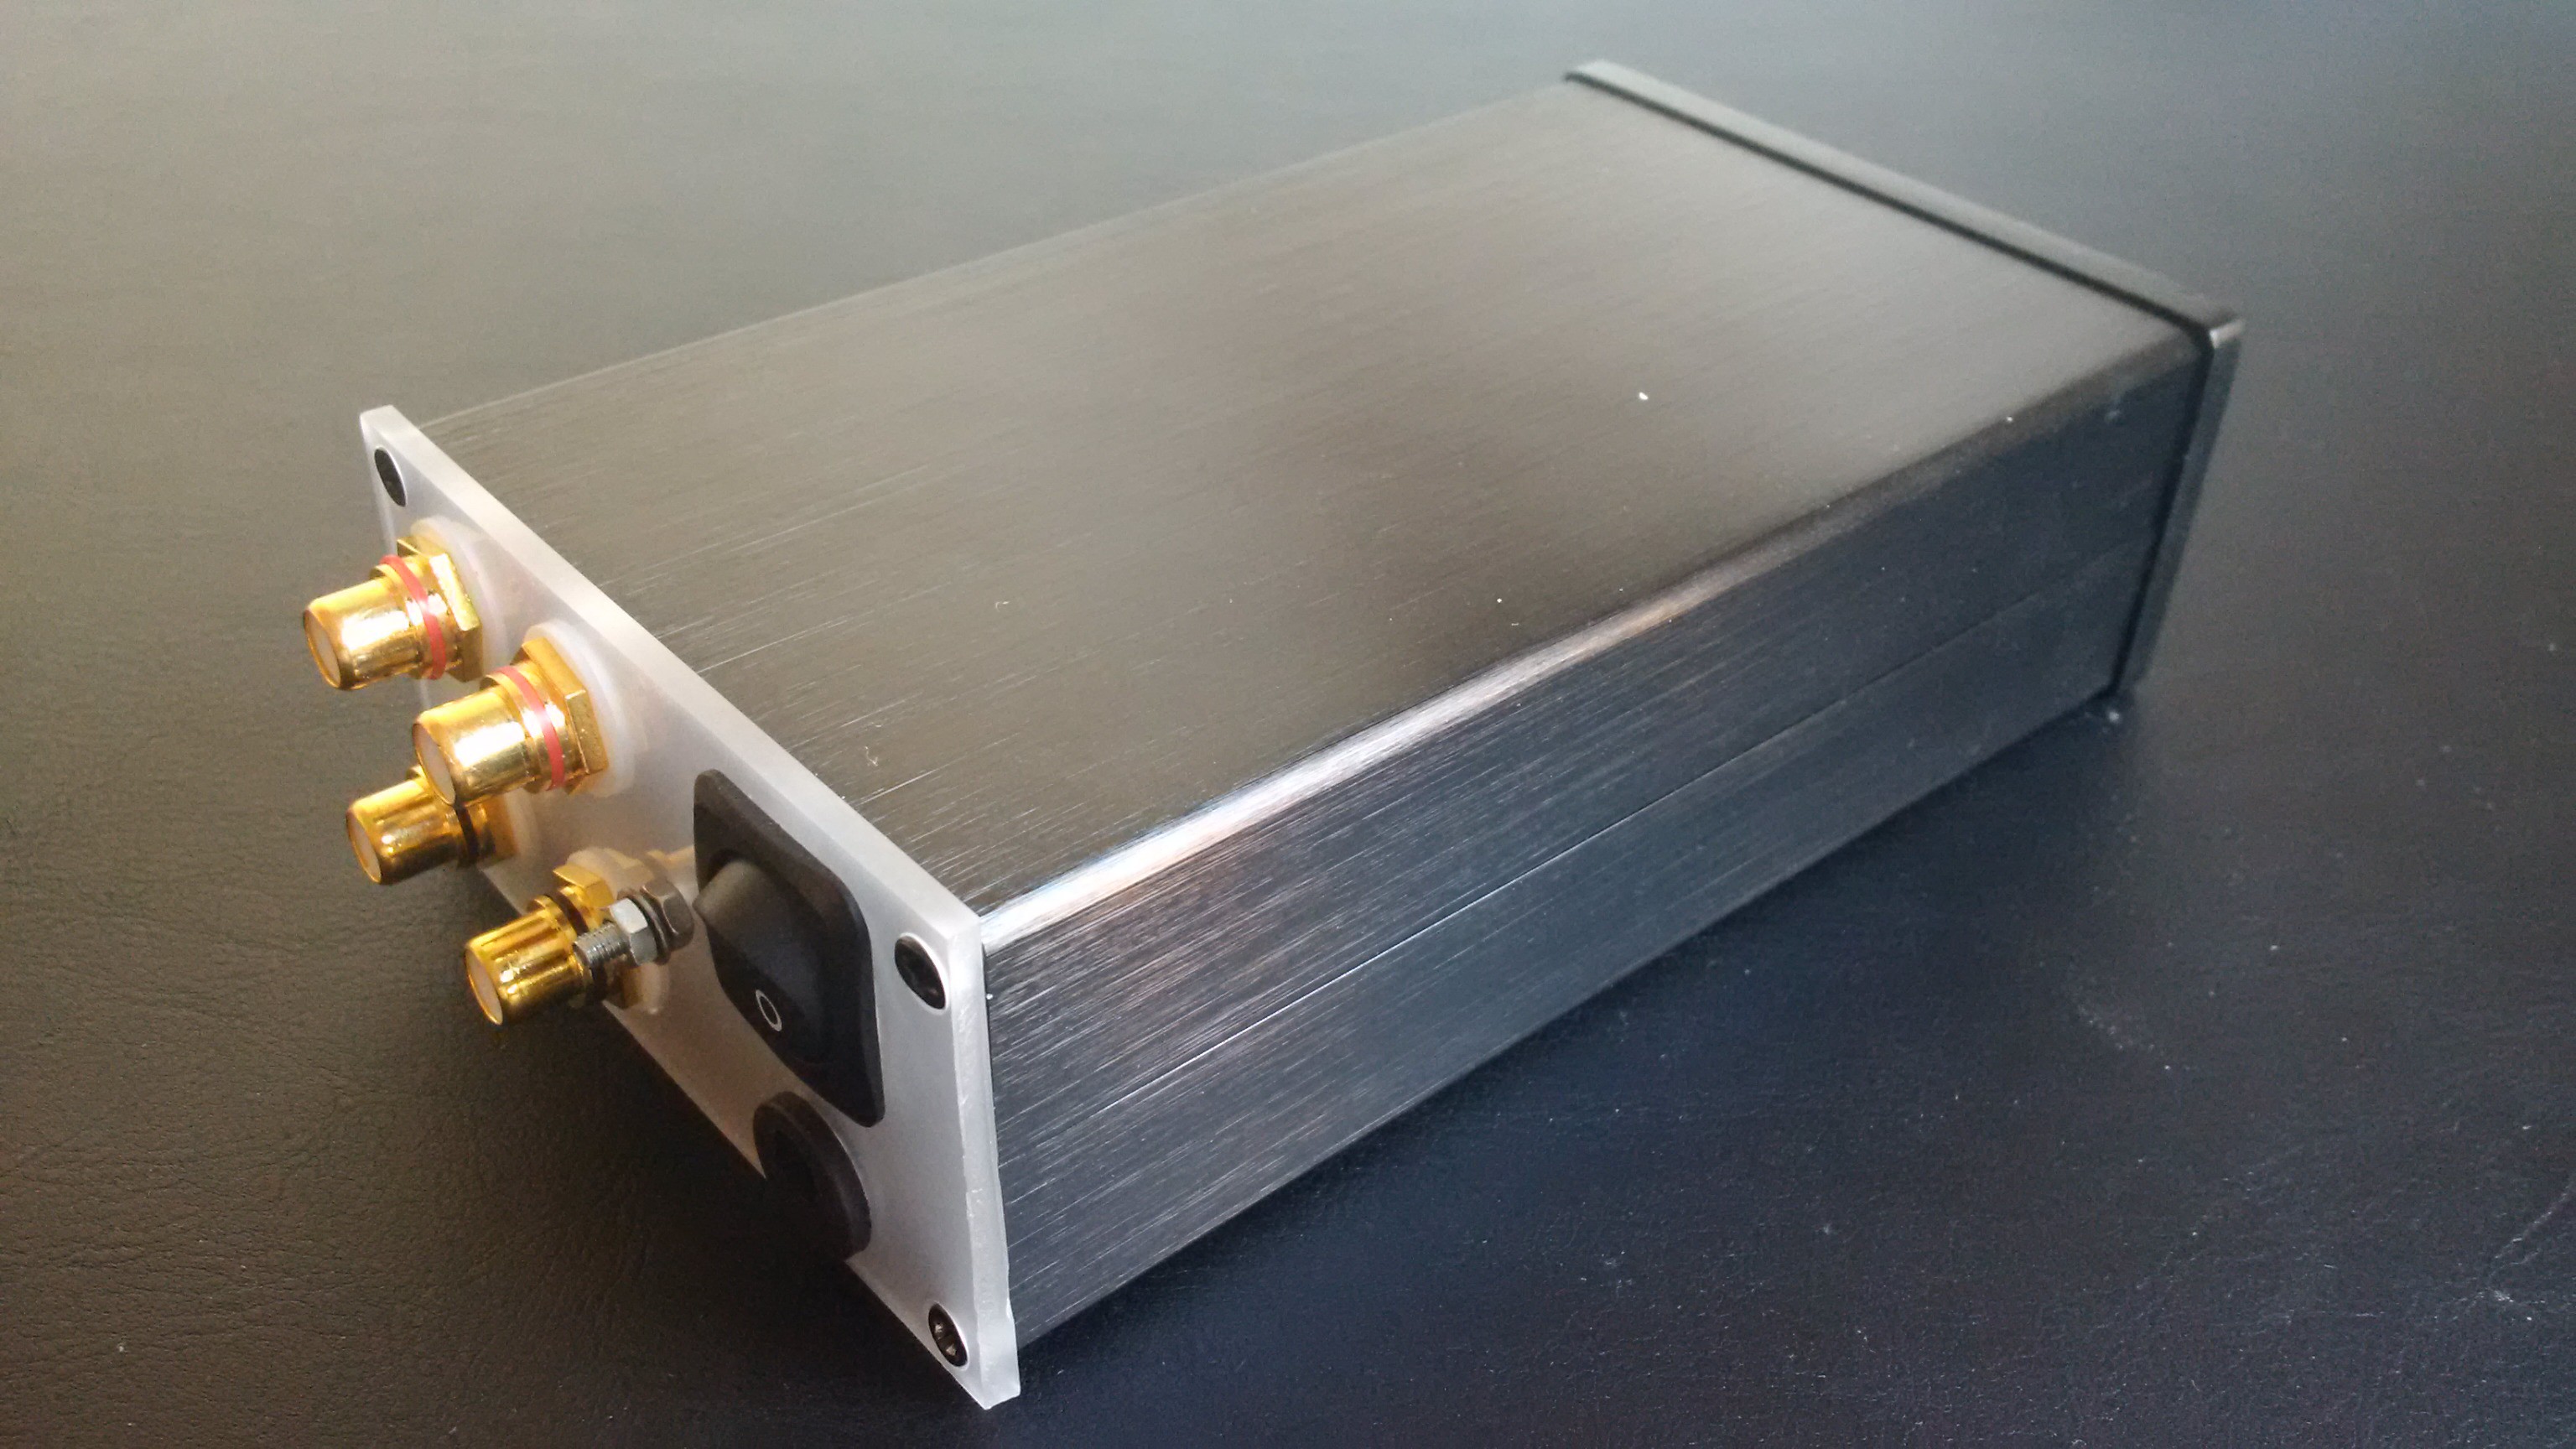
Enclosure
A nice enclosure is the key to a decent looking project. This project log shows one of the endless possibilities.
![]()
-
15Step 15
Adjust the Input Impedance and Gain
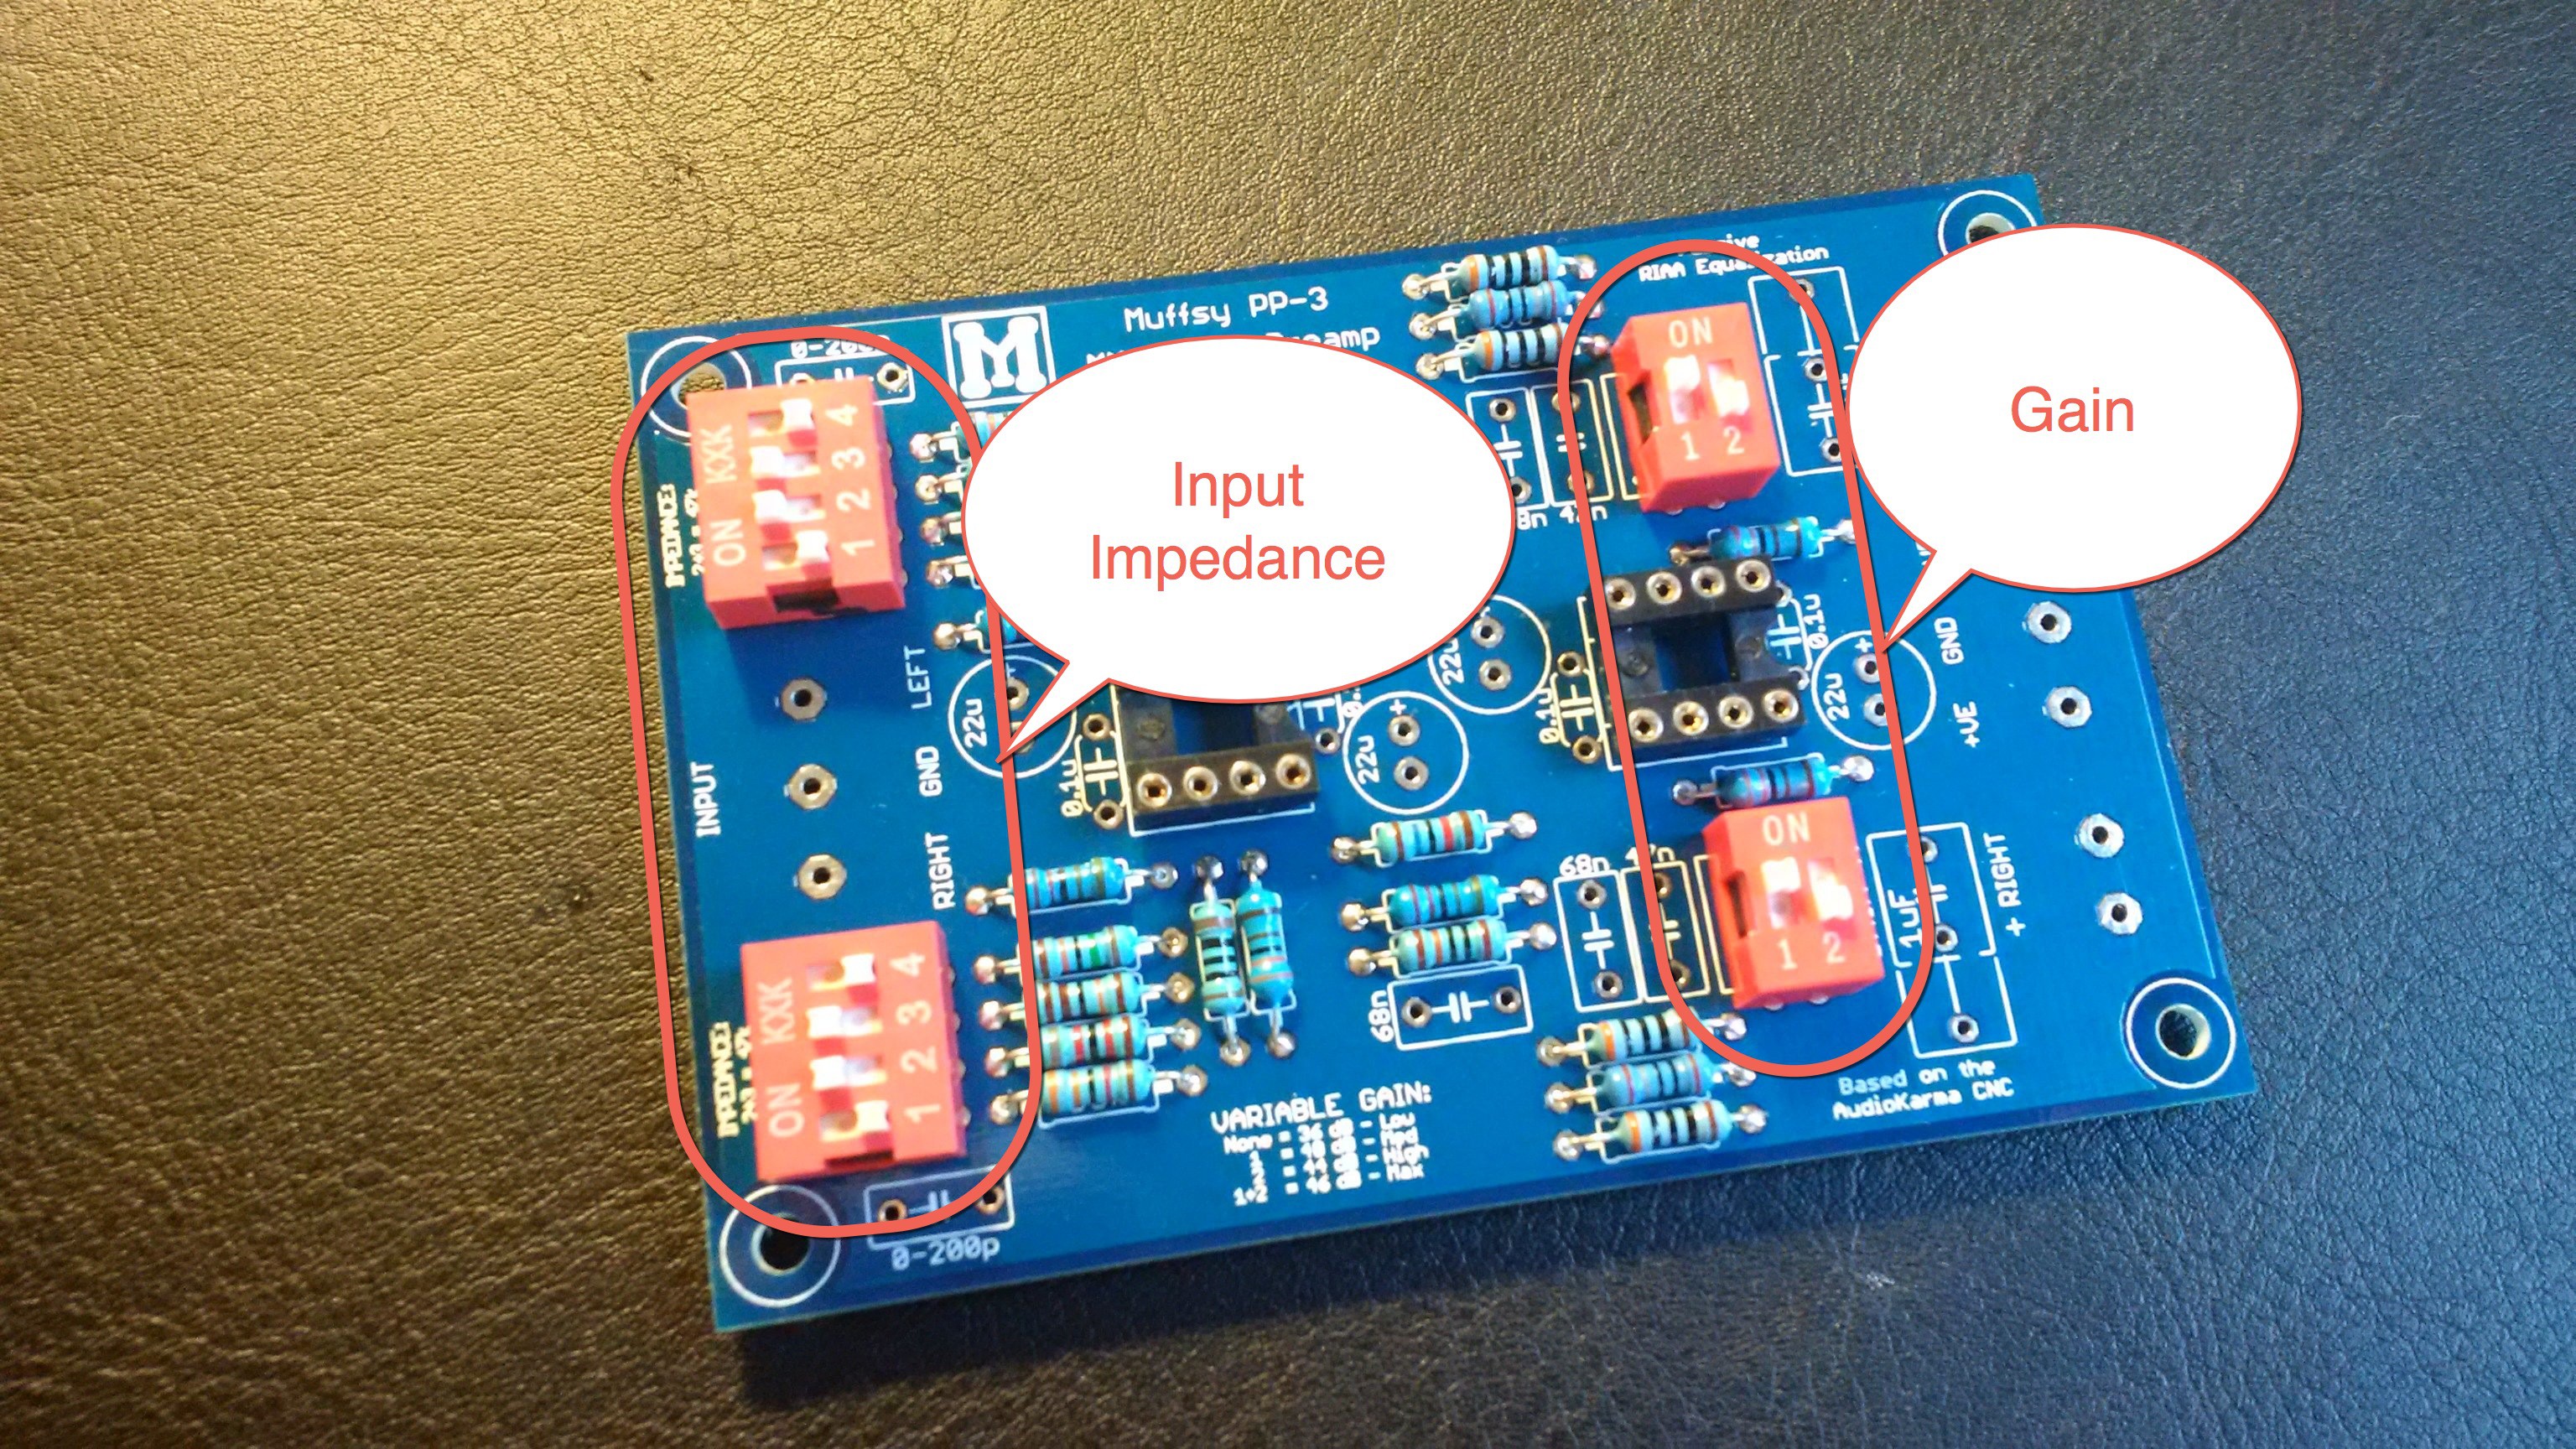
One of the great advantages of the Muffsy Phono Preamp PP-3 is the ability to change the input impedance and the gain. Most phono stages come with fixed settings for both of these parameters, while the Muffsy PP-3 gives you full control.
We did configure the default settings back in step 5. Now that you have a working phono stage, these can be tweaked.
Input impedance and gain are set using the on-board DIP-switches:
![]()
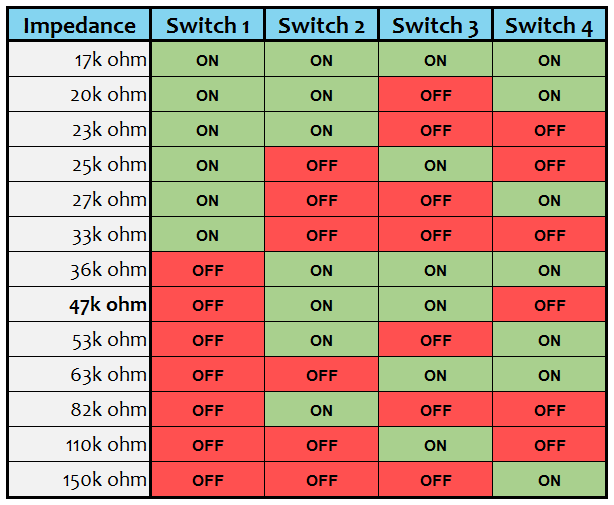
Input Impedance
The switches to the left (with four settings each) will set the input impedance according to this table:
![]()
The industry default input impedance for MM cartridges is 47k ohm. There are many cartridges that will sound better at other input impedances, and the Muffsy PP-3 gives you a whole range to choose from.
You are encouraged to play around with the input impedance settings to find one that suits your setup. Keep in mind:
- Turn off (or mute) your amplifier when changing the settings
- Don't play anything on your record player
- Never set all four switches to the "OFF" position
- Use the same settings for both switches
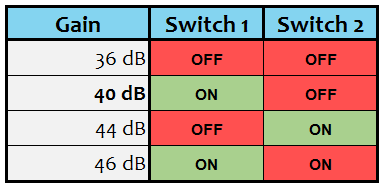
Gain
The gain is set using the switches to the right of the board, the ones with two settings, according to this table:
![]()
Think of it as a fixed volume control for your phono stage. It will be useful to change this value, depending on the output level of your phono cartridge and the sensitivity of your amplifier.
Experiment with the gain settings to find the right one for your setup, but remember:
- Turn off (or mute) your amplifier when changing the settings
- Use the same settings for both switches


Discussions
Become a Hackaday.io Member
Create an account to leave a comment. Already have an account? Log In.