-
1Setup Project
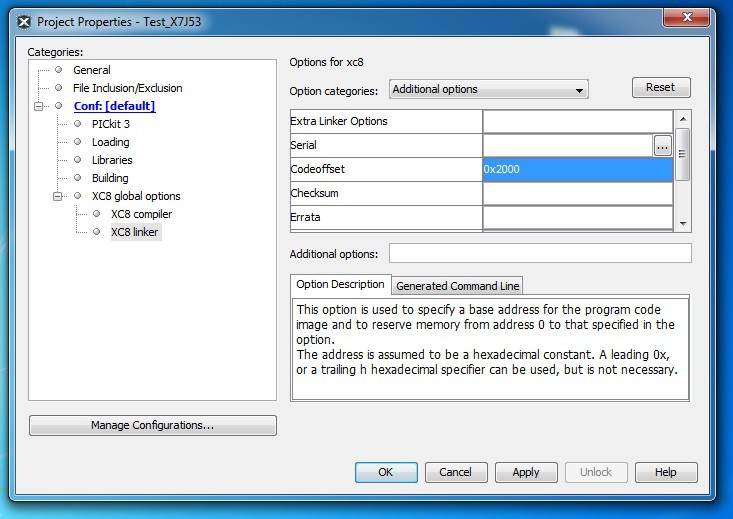
Right click on your MPLABX project, and select Properties. Under XC8 global options, click XC8 linker. In the Option categories dropdown, select Additional options. In the Codeoffset input, you need to put an offset of 0x2000. (For PIC16F145X offset is in words, therefore 0x1000).
Note: for PIC16F145X assembly version, use 0x800.
![]()
If you are using the a J Series bootloader:
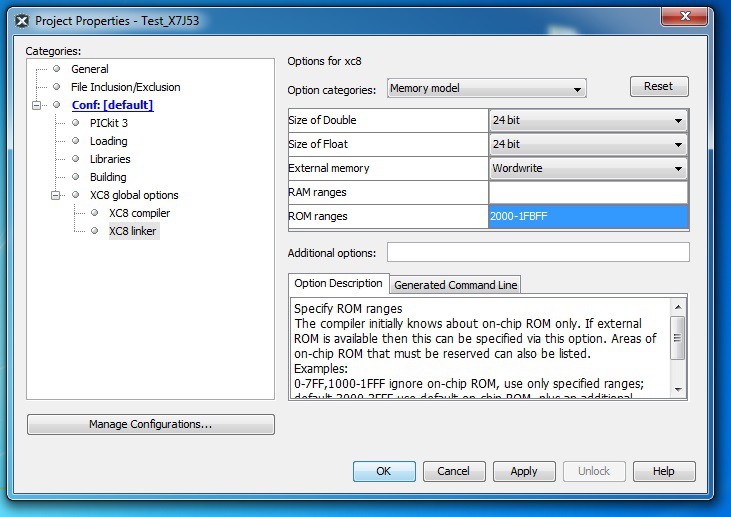
In the Option categories dropdown, select Memory Model. In the ROM ranges input, you need to put a range starting from the Codeoffset to 1KB from last byte in flash. e.g. For X7J53, 2000-1FBFF is used. This makes sure your code isn't placed in the same Flash Page as the Config Words. That area is write protected.
PIC18FX6J53: 2000-FBFF.
PIC18FX7J53: 2000-1FBFF.
![]()
-
2Download From MPLABX
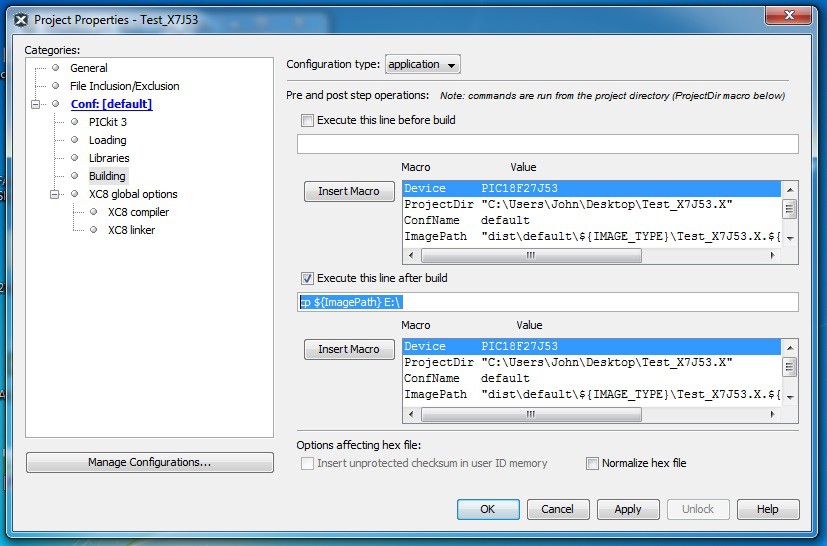
You can get MPLABX to download your code every time you press build. To set this up, right click on your MPLABX project, and select Properties. Under Conf: [Default], click Building. Check the Execute this line after build box and place in this line of code (use the drive letter or name of your device depending on OS):
Windows Example:
cp ${ImagePath} E:\Needs a space following "\".
OSX Example:
cp ${ImagePath} /Volumes/PIC18FX7J53Linux Example:
cp ${ImagePath} /media/PIC18FX7J53![]()
-
3Start Bootloader
If you have previously loaded a program, reset your device or insert the USB cable whilst holding down the bootloader button. The bootloader LED (if used) will turn on indicating "bootloader mode" is active. If no program is present, just insert the USB cable. Your PIC will now appear in My Computer as a thumb drive.
![]()
-
4Read/Erase
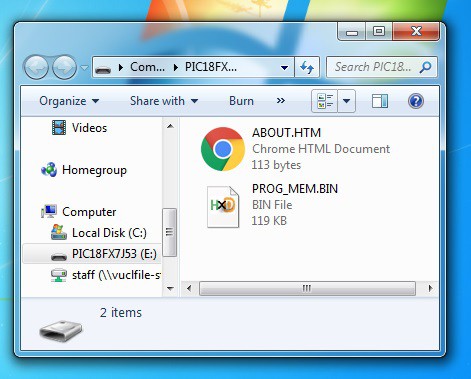
If you've previously loaded a program, PROG_MEM.BIN file will exist on the drive. You can use this file to view the raw binary of your program using a hex editor. If you wish to erase your program, just delete this file. After the erase completes, the bootloader will restart and you can load new user firmware.
![]()
-
5EEPROM Read/Write/Erase
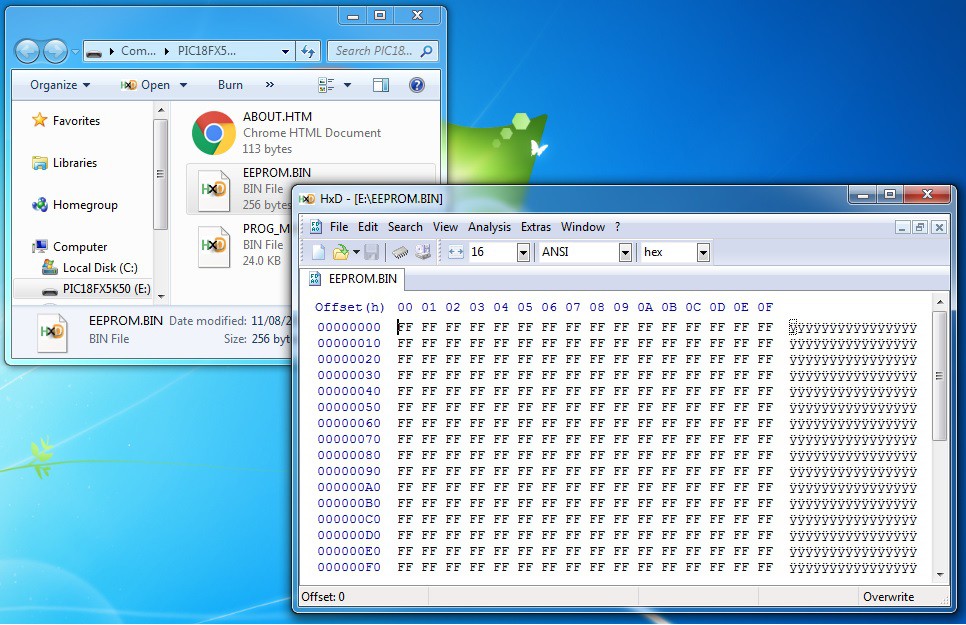
For PICs that have EEPROM, a EEPROM.BIN file will also exist on the drive. This file can be used to view your EEPROM and modify it's values. Open the file in a hex editor, and modify any values and save the file. You can also erase all the EEPROM values by deleting this file (the bootloader will restart, and the file will reappear with blank EEPROM).
![]()
-
6Download
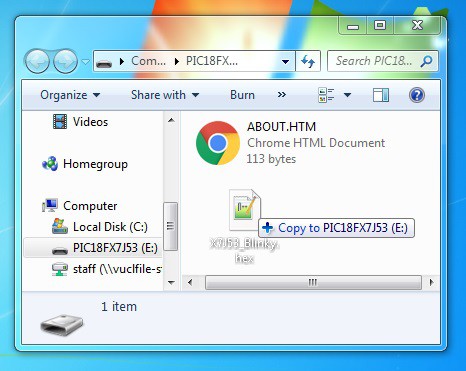
To program, simply drag and drop your hex file or right click your hex file and select send to PICXXXXXXXX. The bootloader will close and instantly start running your code. Alternatively, as seen in step two, you can get MPLABX to download the file automatically after a build.
![]()
 Johnny

Discussions
Become a Hackaday.io Member
Create an account to leave a comment. Already have an account? Log In.