DeepSOIC
-
Documentation
08/23/2015 at 20:11 • 0 commentsI have written some documentation. Click here to take a look =)
Hopefully, SplineTravel has just become usable.
EDIT: I have stopped intensely working on the project, so I mark it as completed, although there's quite a lot more I can do.
-
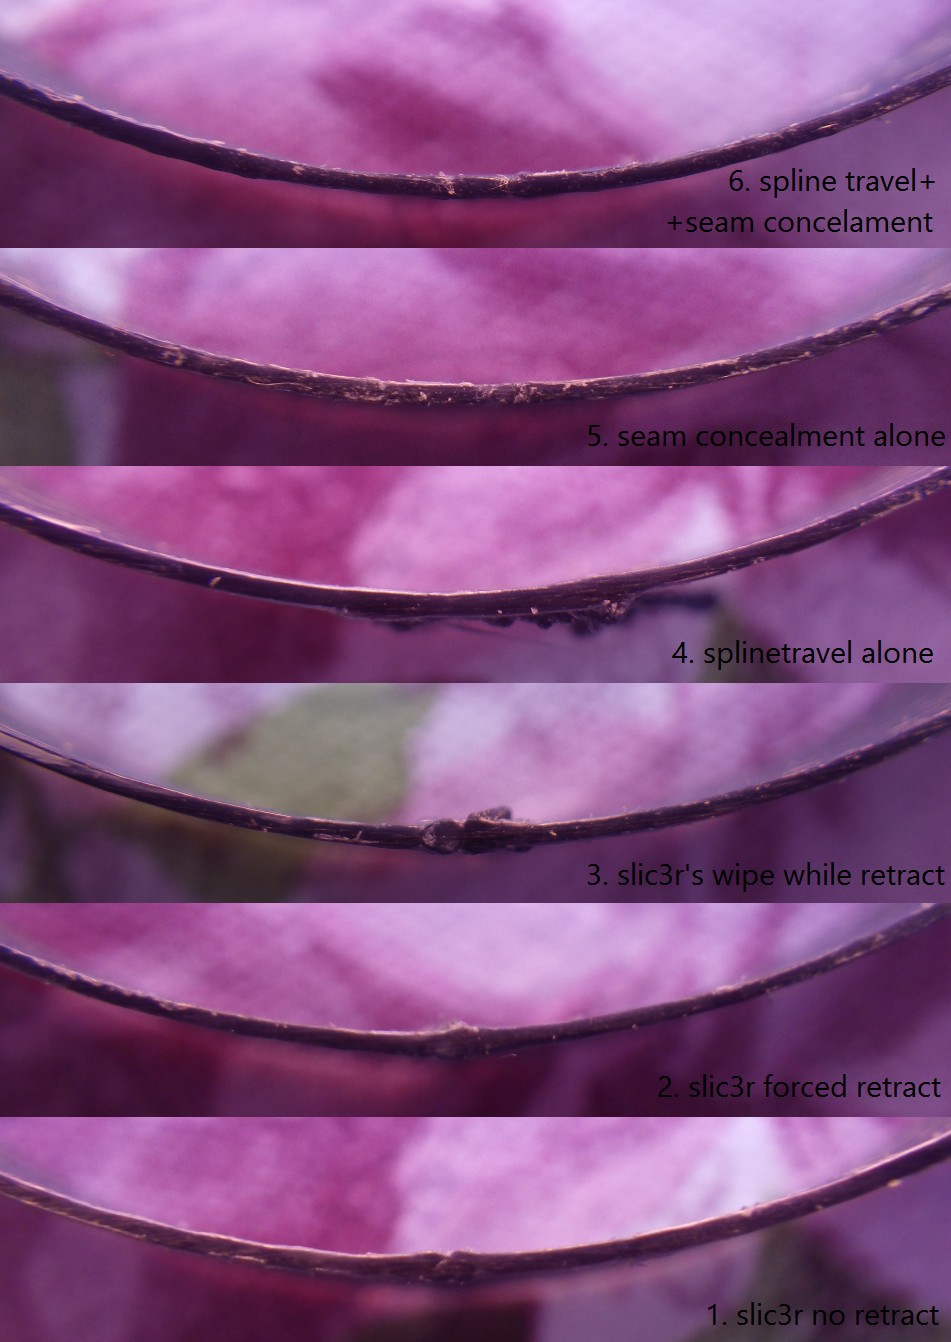
Seam cross-section closeup
08/22/2015 at 15:05 • 0 comments![]()
-
Mechanical test results
08/22/2015 at 14:17 • 0 commentsThis is how I did it.
First, I subjected all the ribbons to tension test. The measurement was done quite roughly, by observing weigh scale. Anything close to 12 kg means that the seam isn't really weaker than the bulk of the ribbon.
Next, I subjected all the ribbons with the seam intact to a "belt test": I rubbed a 6 mm diameter metallic rod with the ribbons. When I say "very robust", I mean it didn't break after about 50 times the seam was against the rod; very fragile means it snapped after three or four rubs.
The precious results follow:
6. SplineTravel+SeamConcealment. snapped at 14 kg, close to the seam (~20mm to the right of the melted-like zone). Belt test: couldn't test it well because it broke near the seam, but it is very robust.
5. SeamConcealment alone. snapped at 9kg, at the false seam. Belt test impossible...
4. SplineTravel alone. snapped at 12.5 kg, away from the seam. In belt test it proved durable, but weaker than 6.
3. Slic3r's wipe while retracting. snapped at 11.5 kg, at the seam. Belt test impossible.
2. Slic3r with forced retract. snapped at 11.5 kg away from the seam. Belt test - very fragile.
1. Slic3r plain. snapped at 12.5 kg away from the seam. Belt test - slightly more durable than 2, but still quite fragile.
-
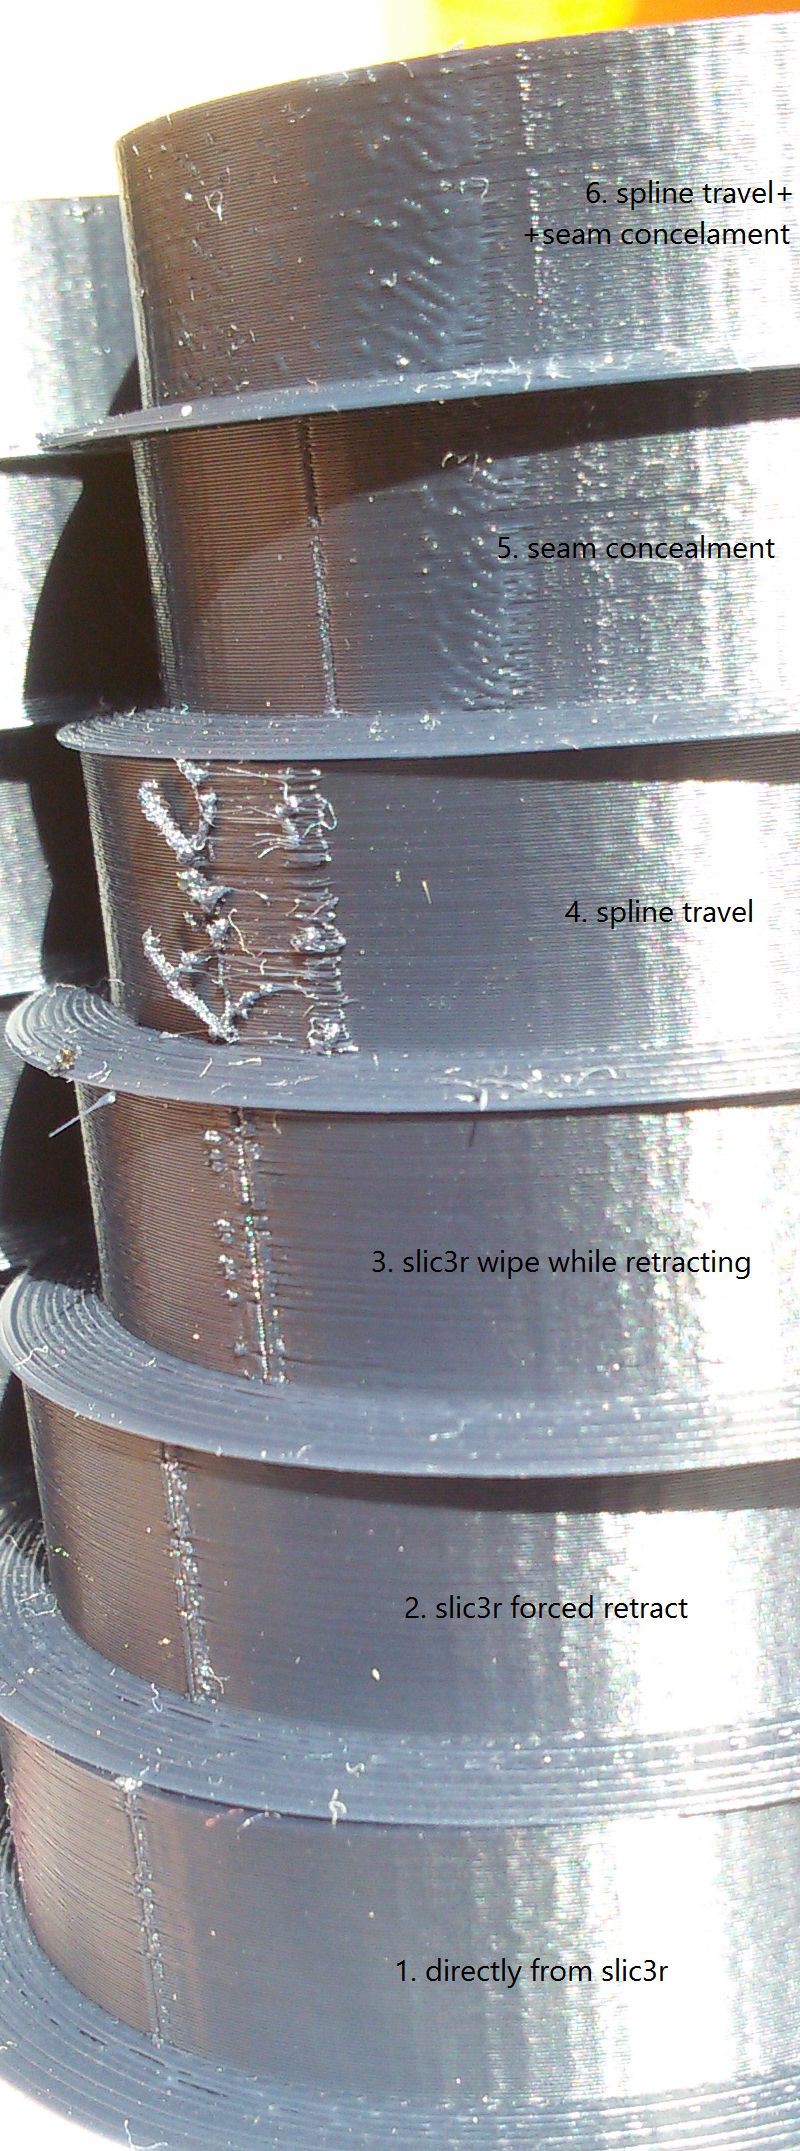
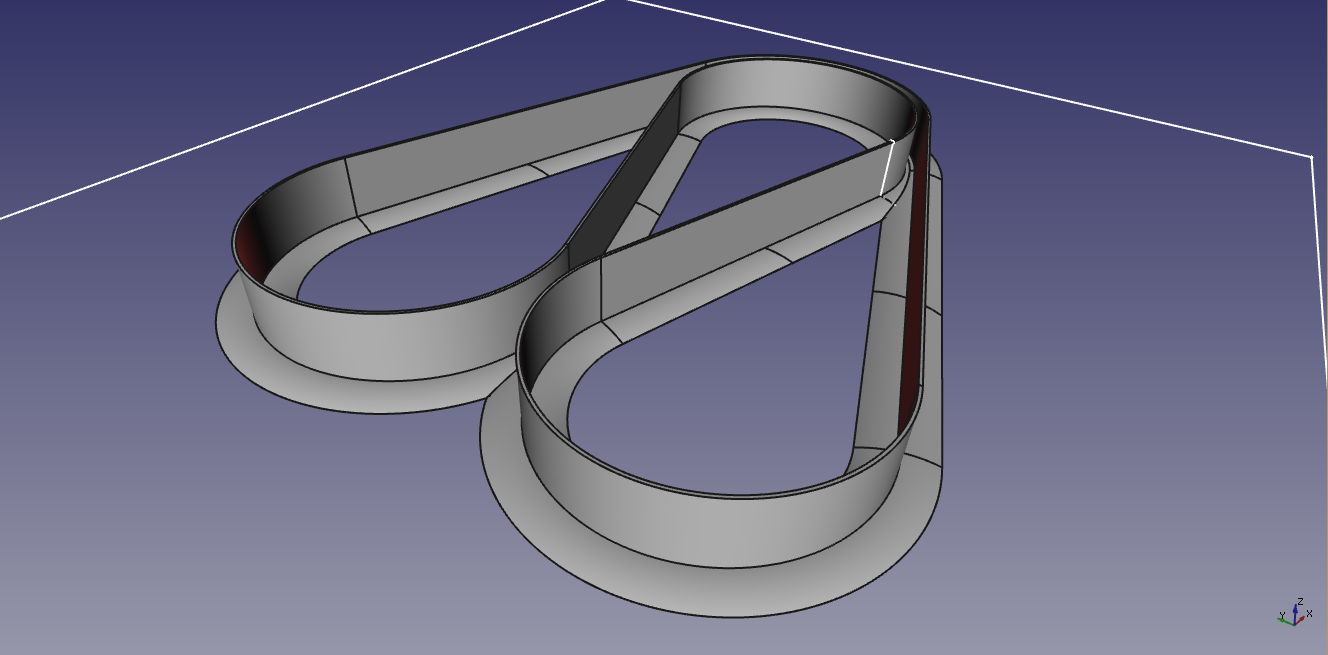
Test prints
08/22/2015 at 10:36 • 0 commentsTest model:
![]() It is a 0.4 mm thick ribbon, on a support shape to keep it from detaching from print bed. Modeled in FreeCAD.
It is a 0.4 mm thick ribbon, on a support shape to keep it from detaching from print bed. Modeled in FreeCAD.![]()
6. SplineTravel+SeamConcealment. On this photo, it looks best; however, there is a lot of ooze on the internal side, which is reasonably easy to clean up.
5. SeamConcealment alone. There is a false seam (the visible stuff). It is the place where extruder lands onto the perimeter, but the actual extrusion starts later, in the melted-looking zone on the right, which is the true seam.
The false seam is actually very bad thing: it is an almost complete gap. It is caused by an ooze bump blocking the flow of plastic when the perimeter is completed later.
Overall, this is the best looking print, with no ooze at all, and a not very noticeable seam.
4. SplineTravel alone is also quite good actually, but it looks terrible on this picture. It is very clean on the inside. I is very much similar to 6, except good and bad sides are reversed.
3. Slic3r's wipe while retracting. I'm disappointed, it doesn't look like an improvement over 1 and 2
1 and 2. reference prints.
Update:
Print speed = 80 mm/s
Extrusion width = 0.4 mm (setting; actual ribbon thickness is 0.38 mm)
Ribbon width = 9.1 mm
Material = ABS
Extruder temperature = 240 °C
nozzle: 0.3 mm
Mechanical test results coming soon.
-
big update
08/20/2015 at 16:58 • 0 commentsI've recently pushed a number of commits to github. Here's a brief list of what changed:
- UI layout
- Option to switch off SplineTravel, to use seam concealment alone. Separate retract speed setting for within seam-concealment.
- tessellation logic fix
- add notes field to presets; allow inclusion of filenames into presets
Also, I've added a UI screenshot to the gallery, so that you can take a look of what are the options.
-
Updated
08/19/2015 at 13:44 • 0 commentsI've just pushed some changes to github. The main update is the preset manager.
-
updated
08/10/2015 at 19:50 • 0 commentsI've pushed a few changes to GitHub recently, the most major of them being the refactoring of spline tessellation logic (better match to the jerk limit; no more large steps; added some logic to avoid ridiculously small step at the end of travel).
-
Preparing comparison
08/06/2015 at 18:58 • 0 commentsI'm slowly doing a few prints to showcase my seam concealment. It's not looking too impressive so far, to be honest.
-
Updated
08/01/2015 at 15:33 • 0 commentsI've just pushed the latest state of the project to github. Previous one was with buggy seam concealment
 It is a 0.4 mm thick ribbon, on a support shape to keep it from detaching from print bed. Modeled in FreeCAD.