Michael O'Toole
-
Status Nov 2023
11/14/2023 at 06:28 • 0 commentsI don't have much time these days so suggestions and update are welcome.
Please forgive me for not responding to comments or requests as I have lots of projects on the go and being old, doesn't help.
Feel free to clone Git and update at your leisure, I can assist if needed...
Mike
-
Dec 2017
12/02/2017 at 16:43 • 0 commentsI've been playing around with updating this project to better support IOT by adding some hardware such as the ESP32 modules and possibly a Raspberry Pi or similar device to host the local server.
I also want to incorporate Node-Red, Mongoose, MQTT and Mosquitto but to be honest, at this stage I am definitely suffering for information overload.
Just to reiterate, this project uses a local server which requires a little more effort but in turn give you total control over every aspect of the project.
This approach may involve a steep learning curve for some aspects but in the end, it's the best solution... besides, you don't have to know everything, that's my job and it's proving difficult enough as there's so much information to discern.
If all goes well, you will have an image to write to you Raspberry Pi containing everything to get you up and running thereby reducing the steep learning curve considerably.
As usual the hardware end is up to you but I will supply some of the basic components including inertia sensor design to the security section of the project.
In the mean time if you have any links to appropriate information please post back...
Mike
-
Web Server Update
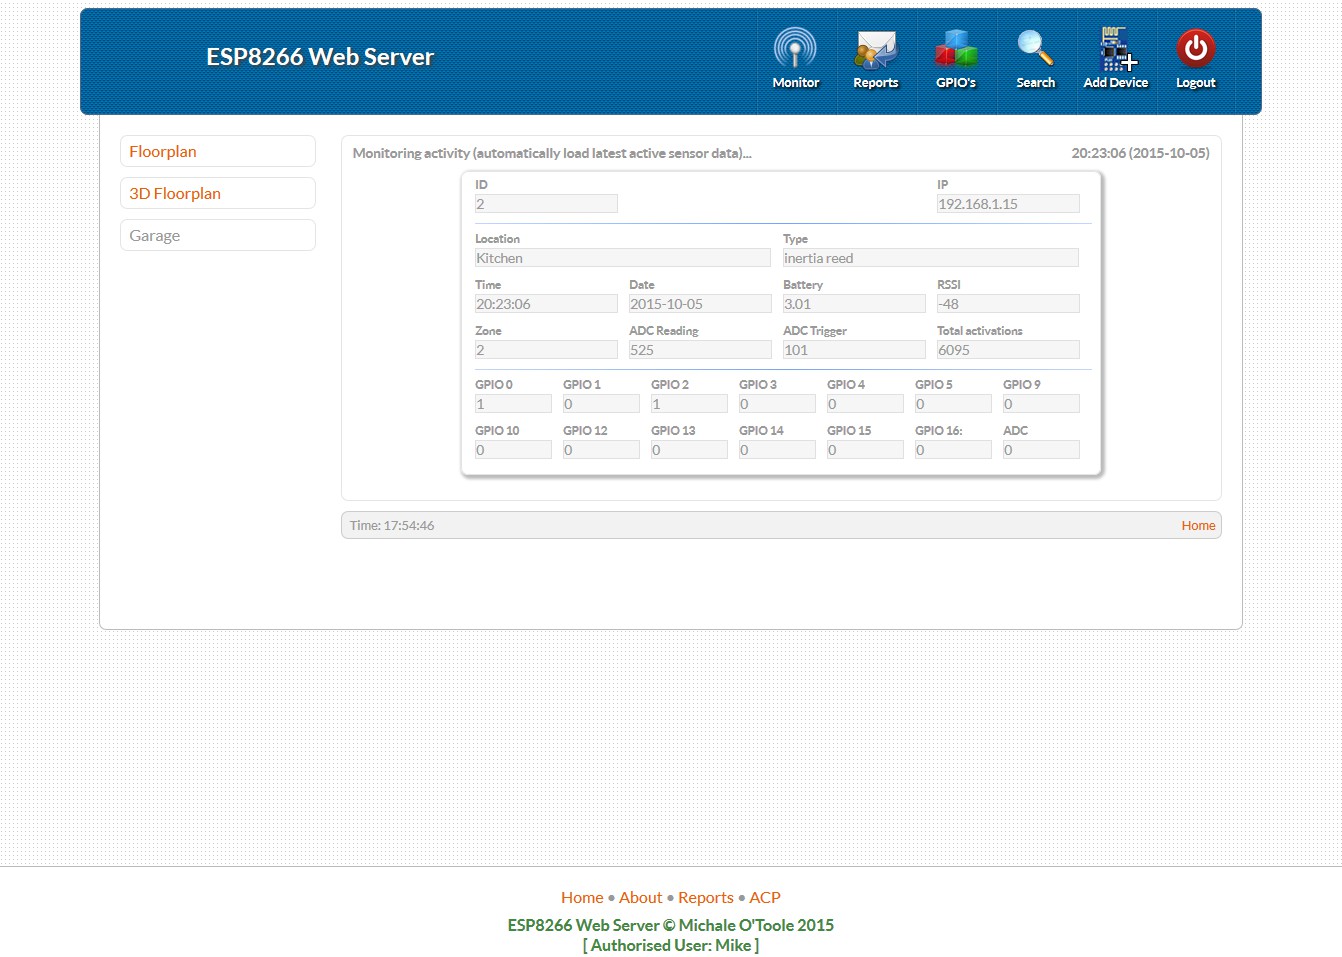
08/21/2016 at 08:01 • 0 commentsThe web server code at the github repo has been updated to include login, sessions, search feature and more...
![]()
![]()
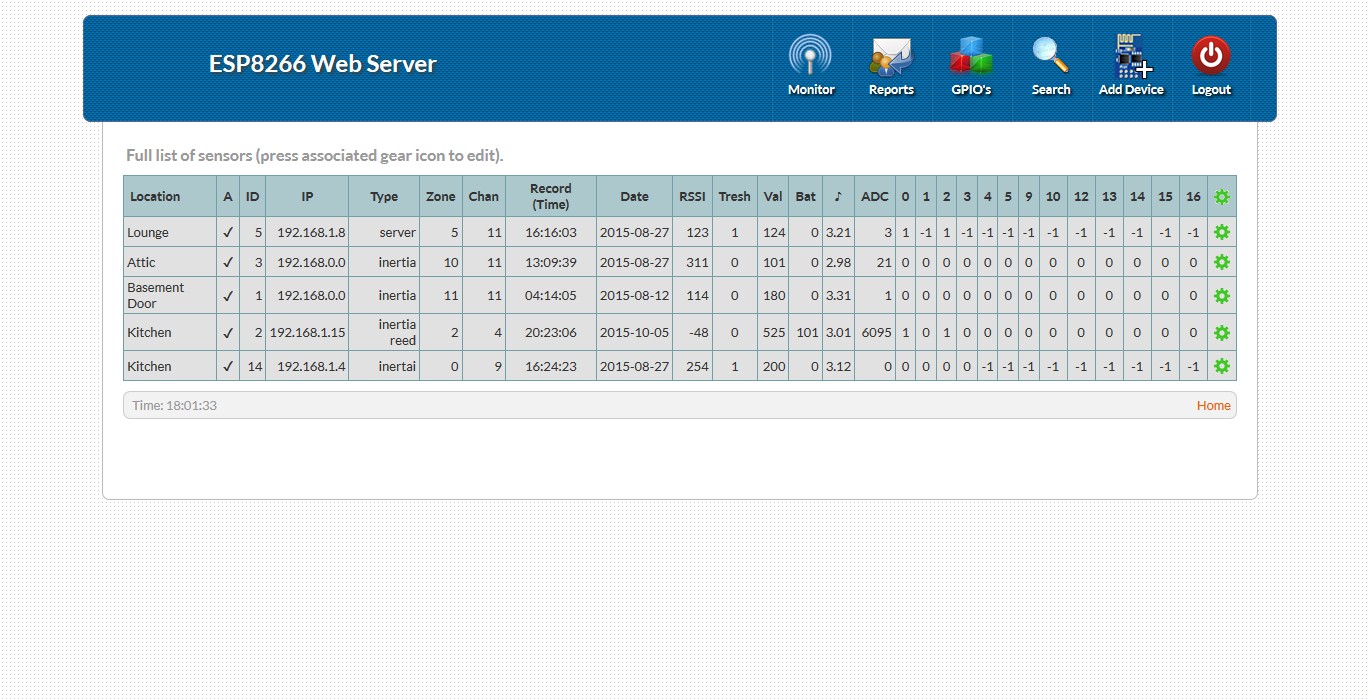
Individual status in now show in form view and includes all possible GPIO's...
![]()
Sensor logs can be edited individually...
![]()
-
Making Things Easier
11/18/2015 at 08:43 • 0 commentsI'm looking into using Mongoose to run the server making things considerably easier for anyone not familiar with installing and running a fully fledged server... besides, Mongoose is tiny and does not require complex configuration...
I will need to switch from a database, to a file based record system, as no database support is included in mongoose by default...
I would ask anyone familiar with MQTT to post comments and suggestions as I have never used it and am somewhat lost as to how to implement it....
Updates:
I have tested Mosquitto (an MQTT broker/server ) using mqtt-spy and it works a treat. Mongoose (small server with php included and support for MQTT) and a replacement for the fully fledged WAMP server appears to works well too but I should note the version I downloaded costs $5...
The next stage is building a web page to take advantage MQTT...
Mike
-
The Web Server
08/26/2015 at 20:05 • 0 commentsUpdate (Nov 2015)
I am looking to change from a fully fledged WAMP server to a much simpler server requiring little or no configuration. Currently I'm looking at Mongoose as it supports MQTT but am as yet undecided...
Changing the server will probably result in loss of database support, so to overcome this, I will be switching to a file based storage mechanism...
...
Here's some more info on the Web Server.
Our database contains a record for each ESP8266 device including, mode (client or server), which GPIO pins it uses (and their current state), whether it uses ADC and if so, its trigger level. We also record relevant dates and times, battery condition, device IP etc...
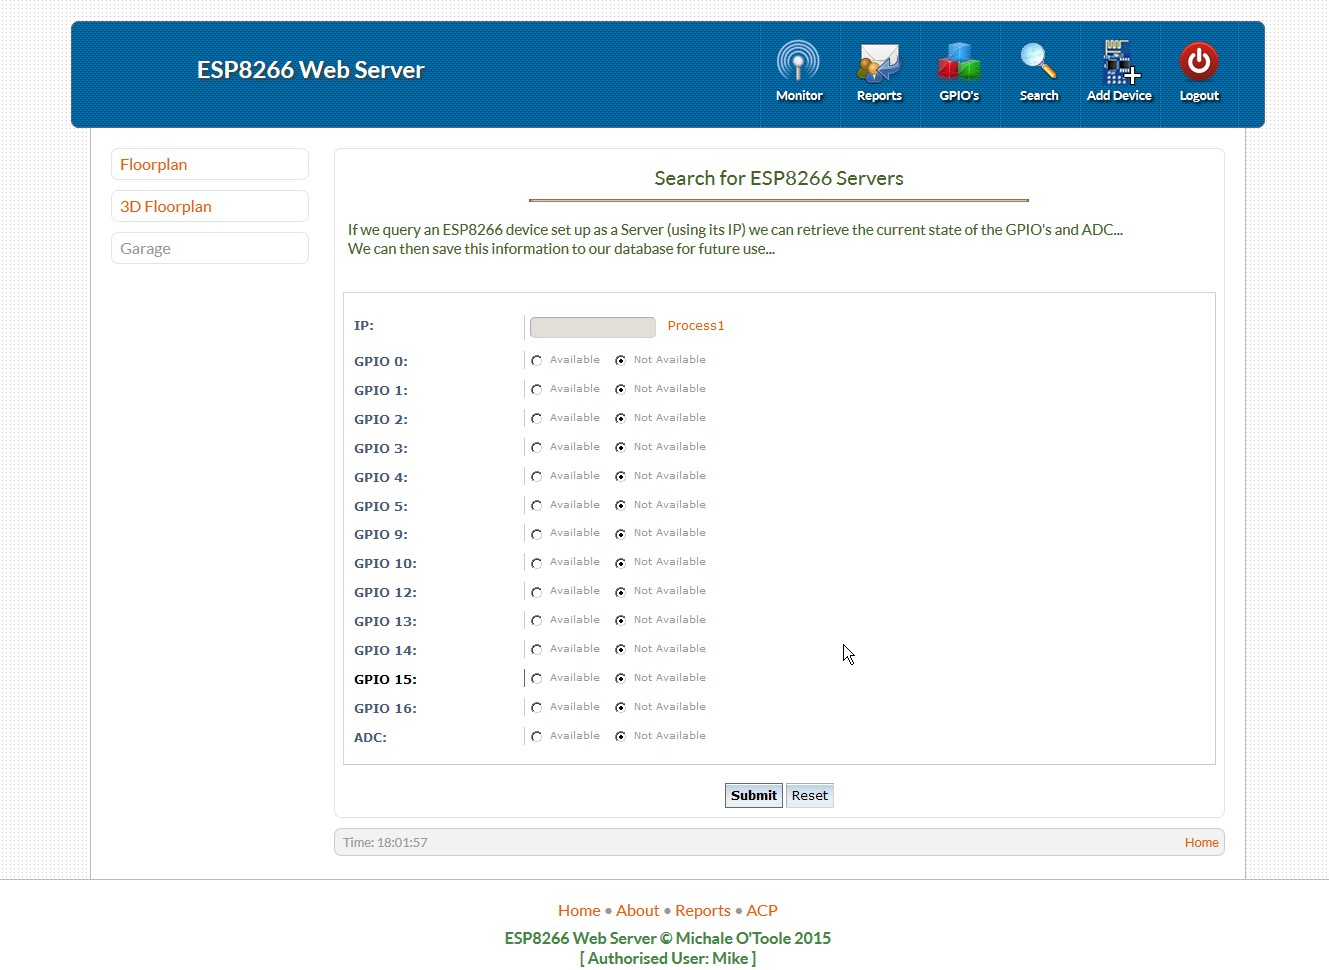
All database records are editable and we can add as many as we require. We can even query a device using it's IP and obtain some information to make adding some devices easier. For example, we can request information for a server at 192.168.1.5 and it will returns a list of GPIO pins it uses and their current state... this makes adding servers much easier...
Clients can be programmed to send the same information on a button push and again this information can be displayed to assist in adding a device. I believe ESP8266 devices can be programmed as both client and server, if so, I will add the option to retrieve a given devices configuration information during the adding new device process...
From out point of view, Clients send data to the server and Servers receive data from the server although two way communication is possible...
When programming ESP8266 devices whether they be client or server we add code to facilitate retrieving their configuration and status...
-
Adding GPIO Control
08/15/2015 at 04:50 • 0 commentsIf you configure an ESP8266's in server mode you can then use your phone of browser to set, or unset, individual GPIO pins to control Leds, Lights, Doors etc...
The test code provided allows you to control any available GPIO pin from the browser address bar.. here are a few examples....
- 192.168.1.1?gpio=0&state=1 (sets GPIO 0 output to 1)
- 192.168.1.1?gpio=5&state=0 (sets GPIO 5 output to 0) etc...
Of course you don't have to enter this manually each time, we simply add a link to our html file...
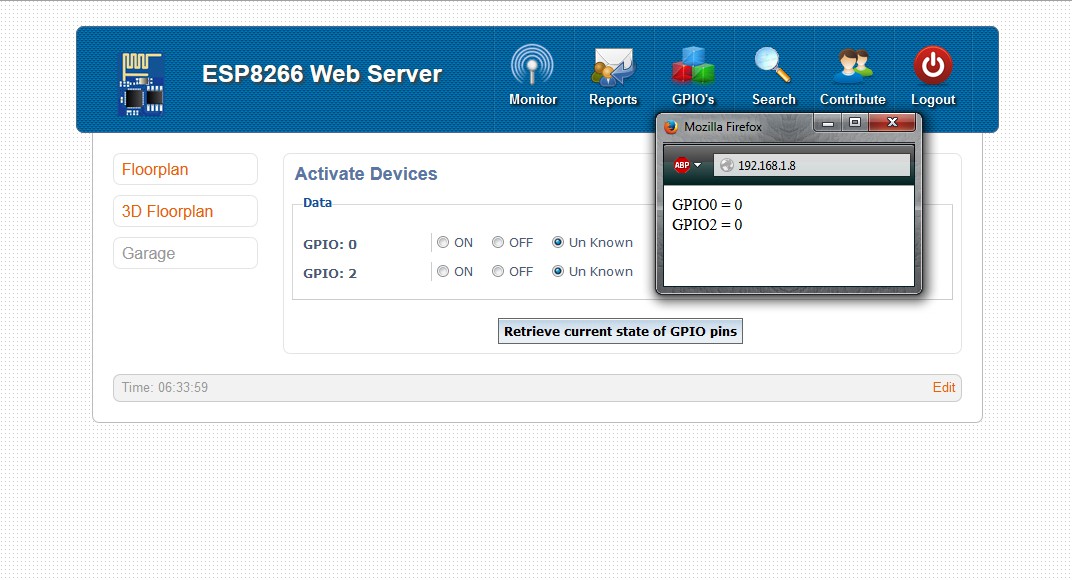
You can also retrieve the current state of all GPIO pins by browsing to 192.168.1.1
![]()
As I'm using the version 1 of the ESP8266 I have only added code for GPIO0 and GPIO2 but of course adding more would only take a few seconds...
The image above shows a popup detailing the current status of GPIO's on my device and as I'm using version 1, I only have two IO's available...
To set or unset a GPIO I only need click on the ON/OFF form element, no need for buttons as I use an on change event to do the work... again any change will popup a small window showing the action as reported by the remote device... the popup closes automatically after two seconds...
Will add changes and server sketch to git soon... Mike
-
Setting up a Local Server:
08/14/2015 at 13:24 • 0 commentsBasic Setup:
Setting up a local server can be a bit tricky but normally installs without issues. You can install all the software (php,Apache,MySql) separately or use one of the main stream installers such as WampServer, Easyphp (Windows) or Lamp (Linux/OSX).
For most, a main stream installer package is the preferred method as it makes the job considerably easier...
One you have it installed and working you should have a www folder (the folder name is depends on the software installer chosen and may differ depending on the package... for example Easyphp names the folder localweb)...
To test you install, browse to 127.0.0.1, you should see an example page.
Adding a basic database:Open phpmyadmin (it's part of the installed package) and create a database called esp... Open that database and choose import... browse to the downloaded folder (one form my git) and choose the devices.sql file and import.
Setting up your first test site:My git contains all the necessary code to build and test your first project... Simply download the repository and copy the esp folder to your www folder. Load the sketch into an ESP8266 test board...
In your browser, browse to 192.168.1.1... Click on the monitor icon and power up your ESP...
The ESP8266 will send a signal every couple of seconds with preprogrammed data and a random ADC level (you can connect some device here to mimic input). The monitor.php web page will display the information every two seconds using ajax...
ESP 8266 / ESP32 Web Server
A web server to display data from ESP8266/ESP32 WiFi devices