-
1Step 1
This machine was built, although not finished, before I started writing this. The following instructions are details of the build in no particular order - just when I think of them.
Couplings
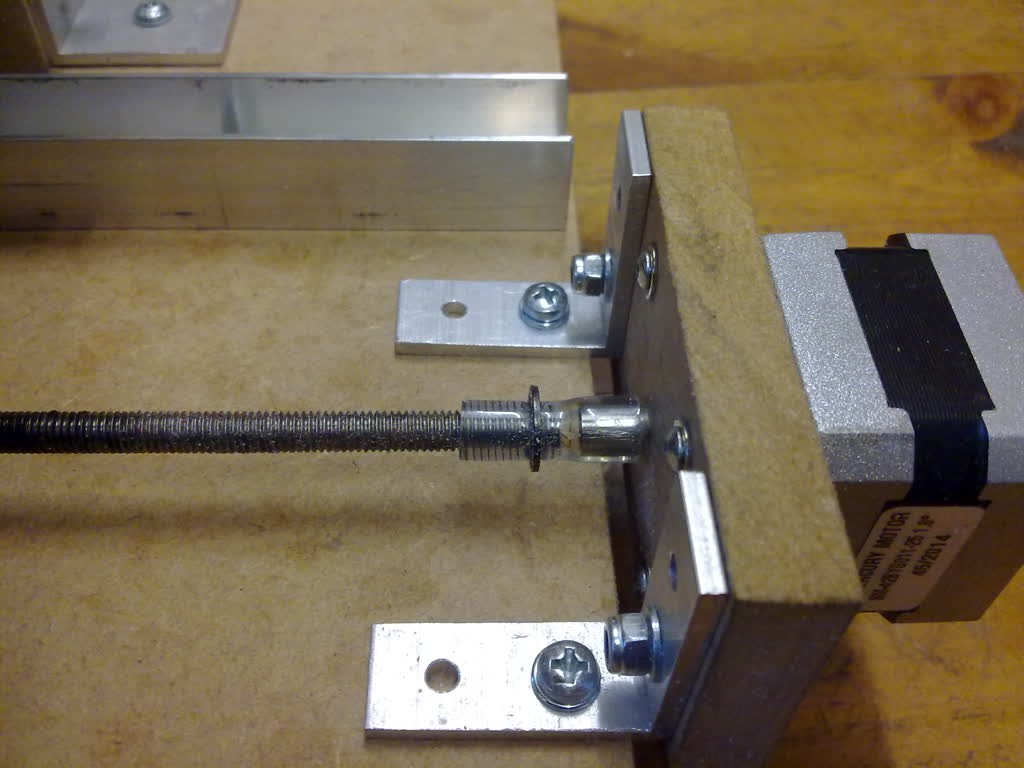
One of my design goals was to use as much as possible from the local hardware shop. The couplings between the stepper motors and the drive screws are just short lengths of plastic tubing.
The stepper motor shafts are 5mm diameter and the drives screws are 6mm diameter. Initially I used just a single length of tubing that I pushed on to each after first heating in boiling water. This seemed fine at first and the flexible connection meant I didn't have to worry too much about aligning the motor and drive screw. I only had the X and Y platforms built at this stage.
Some time later when I had the Z platform completed and the machine actually working I found the motors getting quite hot, softening the plastic tubing and allowing the Z platform to slip downwards on the motor shaft. To solve this I found some smaller diameter tubing and pushed this (with some difficulty) onto just the motor shafts. The motor shafts were now effectively 6.5mm diameter. I then pushed the original coupling over the top of that (again with some difficulty).
The next problem that arose was one of the drive screws would occasionally start to screw itself out of the tubing. This seemed to be a problem with just the X platform drive. Perhaps a little grease had got into that bit of tubing. To cure this I cut a small groove near the end of the drive screw, roughly the depth of the thread. Then, after pushing the tubing back on, I used a small e-clip as a retainer. I did this on all three couplings.
Here is a photo of the current set up:![X-axis coupling]()
I've since found that the next size of e-clip fits snugly over the tubing on the now slightly larger motor shaft and I have one installed on the Z axis motor. It is still there, not because I needed it, but once I had pushed it on there didn't seem any point in removing it.
These couplings haven't been as straightforward as I had imagined. I am quite pleased with what I have now though. I'm sure they will come apart if I push the cutting forces too high but actually that might be a good thing – a mechanical fuse.
Desktop CNC Mill
A small CNC mill using a Dremel and as much stuff as possible from the local hardware store.
Discussions
Become a Hackaday.io Member
Create an account to leave a comment. Already have an account? Log In.