-
1Step 1
Hardware
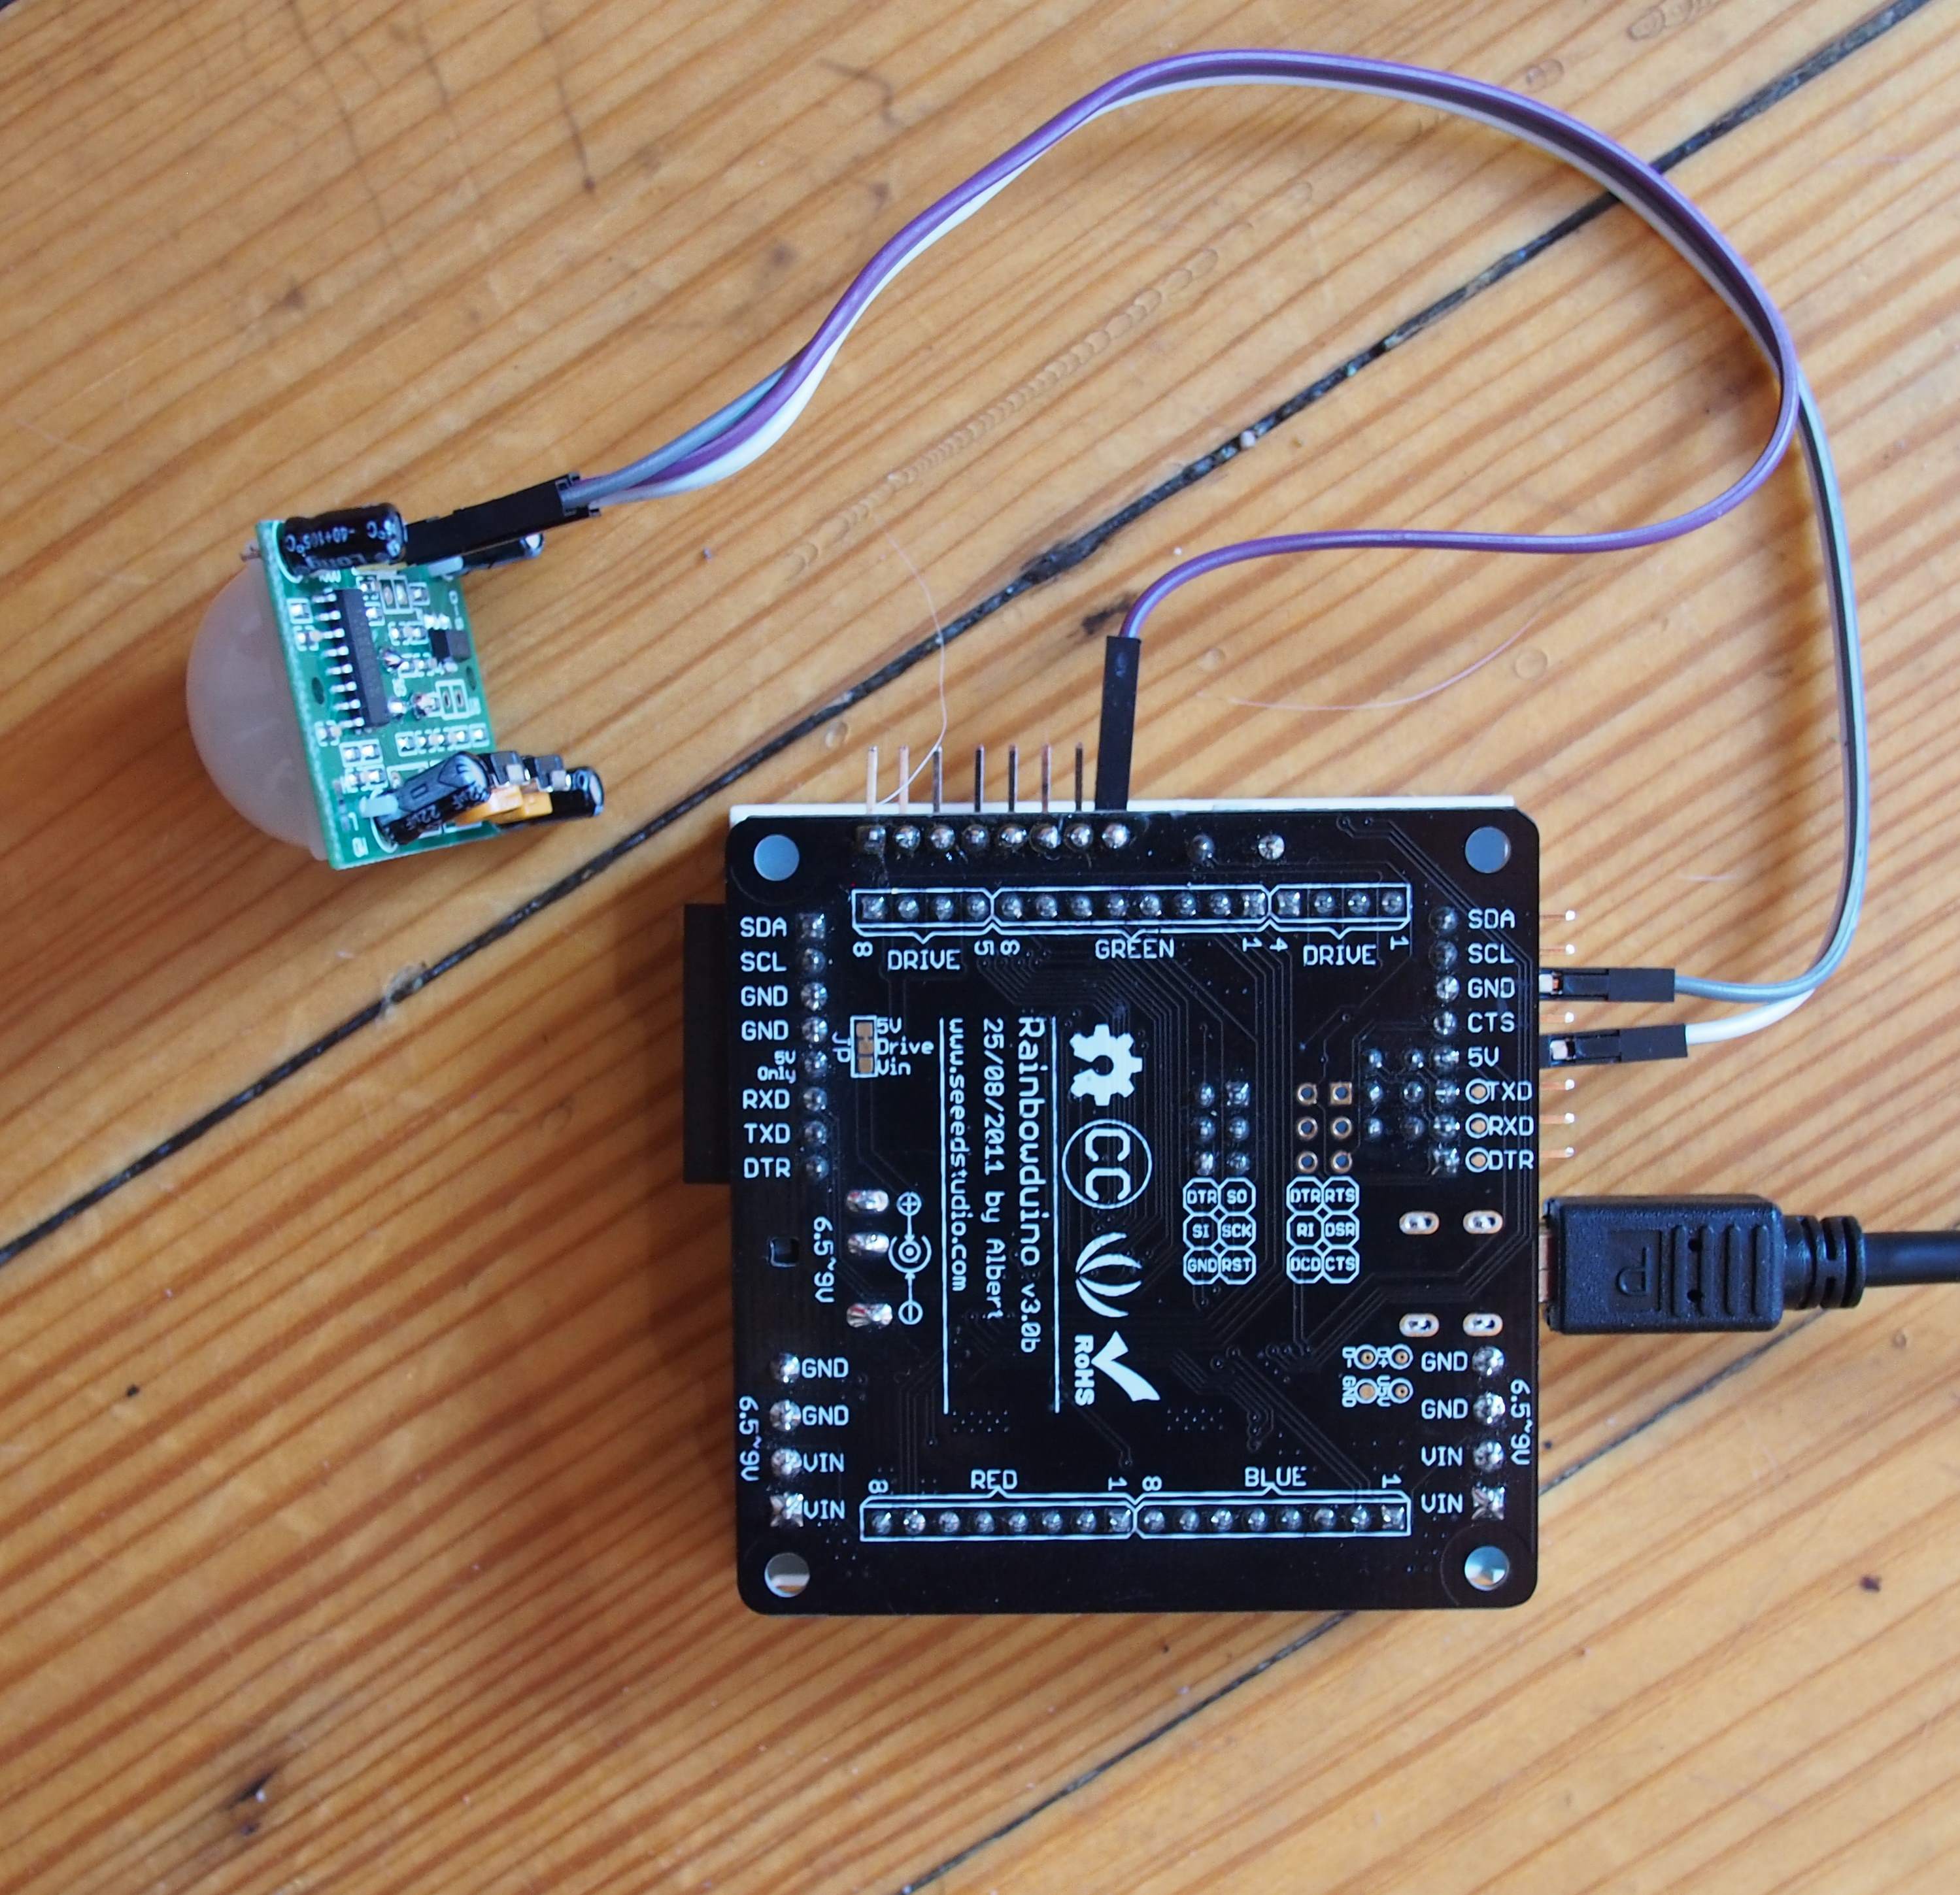
All of this is pretty straightforward. No soldering was required and I just used stuff I had lying around. It takes only a few minutes to assemble.- Plug the 8x8 array into the rainbowduino (paying attention to polarity)
- attach the PIR sensor- +5V to Vcc, Gnd to Gnd and Out to D3 (see photo)
- Upload code to rainbowduino (link at left of project page)
![]()
-
2Step 2
Upload Code
Now you can upload the code (available here - https://github.com/alphacharlie/chuckolantern)
- Download the chuckolantern sketch from Github
- open Arduino IDE
- plug in your Rainbowduino
- in tools, select 'Arduino Duemilanove or Diecimila'
- in tools select the com port of your Rainbowduino
- in preferences, change the sketch directory to wherever you downloaded the source
- restart the Arduino IDE
- open the sketch, compile and upload
Possible encahncements - adding more sensors, sound FX, changing the light patterns, connecting multiple 8x8 together to make animated faces??? (Lots o' fun to be had!)
-
3Step 3
Testing
Now you can plug the USB battery into the unit and see how it works. You'll also want to adjust the sensitivity and reset time on the PIR sensor at this point. With the PIR sensor facing downward, the left potentiometer is sensitivity and the right one is reset time. Clockwise on sensitivity is more sensitive. Clockwise on the reset time increases the time that the sensor remains triggered(on) before resetting.
![]()
Once it's powered up, you should see the colors rapidly change when there is motion, alternating red. While there is no motion it should flicker like a candle (or smoothly change colors like a mood lamp depending on compile options).
-
4Step 4
Install
Now it's time to carve your Jack-O-Lantern and install the lights (i put my rainbowduino and battery pack into ziplock bags to keep the pumpkin off.) I put the PIR sensor on my lantern's 'nose' but you can put it anywhere that it faces forward. So you could easily put two in the eyes instead or one facing forward from the lid.
You may want to place a bit of plastic wrap behind the PIR sensor to keep the moisture from messing with it as well.
![]()
Motion Sensing LED Jack-O-Lantern
An Electronic, LED, Motion Sensing Jack-O-Lantern for Halloween
 Alpha Charlie


Discussions
Become a Hackaday.io Member
Create an account to leave a comment. Already have an account? Log In.