blinktronicator
Sixteen different LED colors on a teeny tiny board.
Sixteen different LED colors on a teeny tiny board.
To make the experience fit your profile, pick a username and tell us what interests you.
We found and based on your interests.
Joe and I recently wrapped up our #NeuroBytes grant so I got my hands on a spool of 34 AWG magnet wire and spent yesterday building a deconstructed blinktronicator:
This exploration into the world of novelty soldering is without question the most tedious tangent I've ever embarked upon. I bumped the shift register package up one size since the 0.5mm-spaced DHVQFNs from the original were insanely hard to free-hand solder, but... to be honest, the 0.65mm-spaced TSSOPs shown above aren't any better, since one has to tack onto a teeny pin hanging out in space rather than a slightly teenier metal pad on the bottom of a chip. I also used a hilariously massive DIP ATtiny45 since I ran of the TSSOP models and thought it would look neat.
Electrically, this version is pretty much identical to the standard PCB other than the resistors; I decided to skip the bussed units for "ease of assembly". This also helps thermal performance a bit as the original 8-resistor networks dissipate around half a watt each when all the LEDs are on at full brightness, which is a tad over the per-element limit of 0.05 W. All the LEDs are rarely on at full brightness, but it's still something I should fix if I do another PCB iteration. Hence the graveyard of tombstones along the back of the rear of the board:
The bypass capacitors for the two shift registers were fairly easy to add after dealing with the LEDs (at least 0402 ceramic capacitors aren't flat!), but I'm especially happy with how I decided to mount them:
This creation will likely meet its untimely demise as soon as I accidentally crush it with a stray piece of paper (as the free-air portions are insanely delicate). Until then it stands as my best personal example of furthering the impracticality of an impractical project.
I took a ~6-month hiatus from this project, partially because #NeuroBytes has taken up all of my time but mostly because I have trouble getting excited about firmware development. This weekend I spent a day to finalize the firmware and run the boards through their paces, and I'm ready to change the "ongoing" tag to "completed". Yay!
First, a teaser picture designed to pander to our editorial overlords:
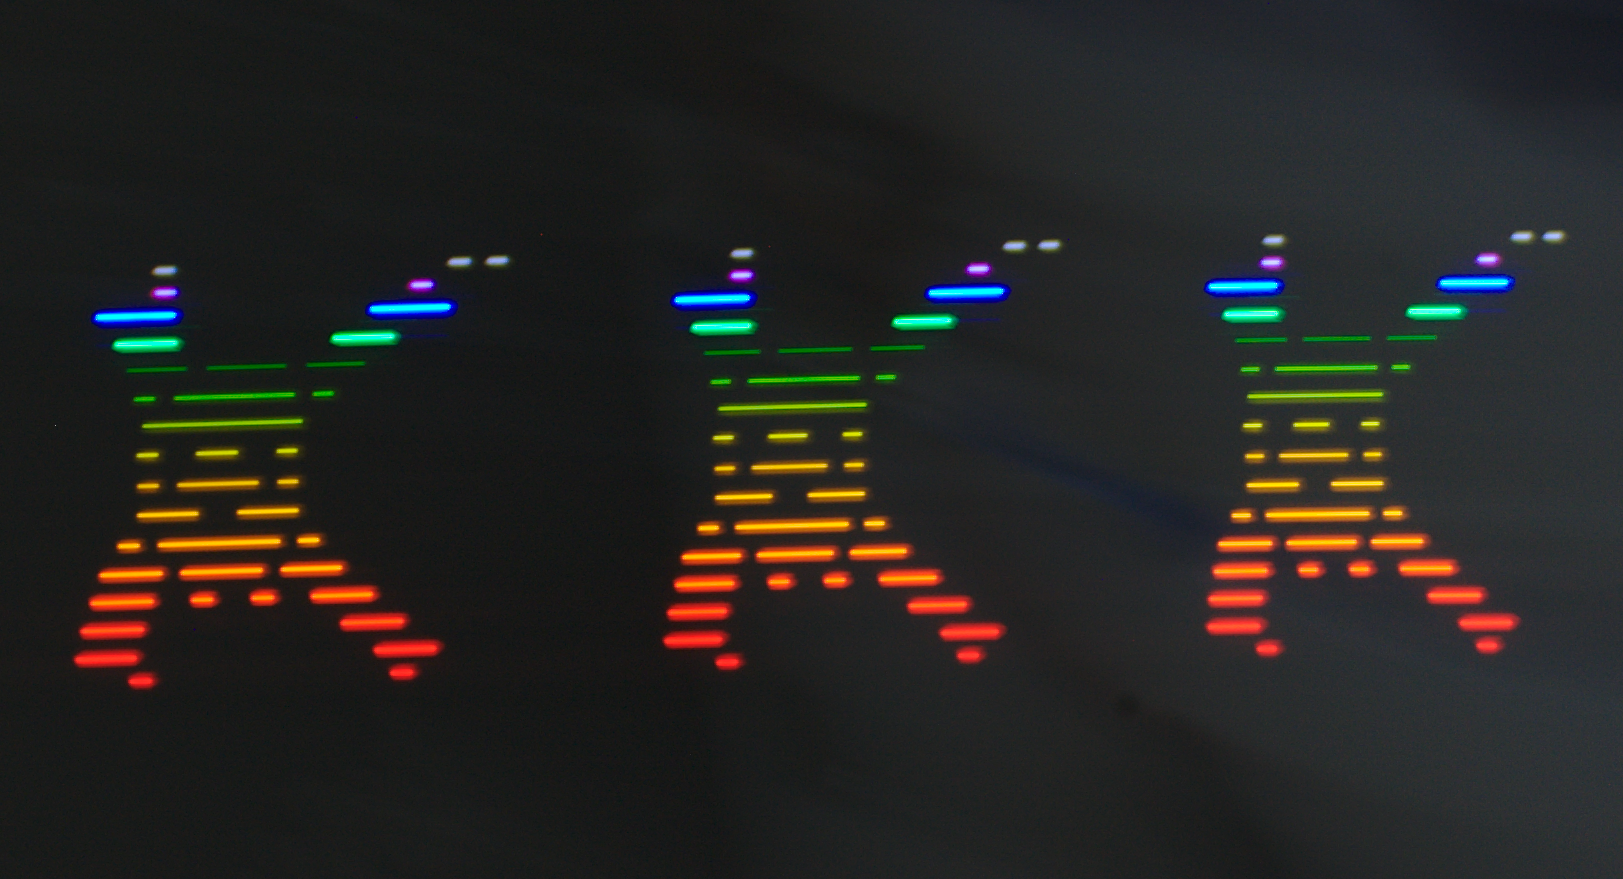
above: 1/8s, f/11.0, 35mm lens, iso200, swinging the camera around like a madman.
I also put together a < 3min video describing the four operating modes:
Mode Zero is pretty simple: the left and right buttons cause the selected LED to move back and forth, recycling at the end of the row. The buttons have a rollover function so you can hold 'em down to move between several elements. Everything is displayed at 25% brightness, which seems to be a good balance between blinding the user and not being useful. This is the default mode the blinktronicator reverts to whenever power is cycled.
Mode One is novelty mode, designed to look cool and demonstrate the fading capabilities of the firmware. I've implemented a 6-bit PWM fading routine, which breaks down nicely into a few discrete brightness levels separated by multiples of 4--enough to be obvious to the eye but also compact enough to leave a few LEDs off. This mode pretty much scrolls an array of brightness values, {1,4,16,64,16,4,1} (where 64 represents 100% brightness) through the sixteen elements at a rate controlled by the two buttons. Brightness values could be calculated on the fly using some simple bitwise math, but using a preset array means I can easily tweak individual brightness as needed.
Mode Two (which I confusingly called "Mode Three" in the video) is color mixing/design/utility mode. The right button works as it does in Mode Zero--pressing it once moves the 'cursor' one LED to the right, while holding it down rolls over. The left button allows the user to select four different brightness levels (1, 4, 16, or 64) along with "off" for each LED. This button also rolls over, which serves as a handy reminder of what the mode does as the user's first instinct is often to hold down buttons willy-nilly. I love this mode: you can project the LEDs onto a piece of diffusing paper to see how relative brightness LEDs mix, or just get a feel for how a selection of wavelengths look next to each other. Four discrete brightness levels helps compensate for the relative brightness differences of the elements; for example, the 527nm ("true green") LED is substantially brighter than the adjacent 560nm LED, to the point that comparing them side-to-side is best done with the 560nm LED at brightness level 64 and the 527nm LED at brightness level 4.
Mode Three is persistence-of-vision display mode. To make the refresh rate work right I had to dramatically speed up the program loop for this mode, so to avoid rolling over the mode change I added a separate delay function on the mode select statement to compensate (otherwise it was really hard to get the board to stay in this mode). POV mode just scans through a 2 byte wide array representing an "on" or "off" value for each LED, and sets them to full brightness as needed. Fading doesn't work here as the PWM code isn't nearly fast enough, but it works well enough to display simple images and text. I found experimentally that if I make the array longer than 48 bytes I start to run into memory overflow issues; too bad the 't85 doesn't come in a TSSOP package like the 't45. Now that I think about it, it might be worth redesigning the board to use the 't85 QFN, maybe with a big via on the bottom so you can still hit the ground pad with an iron. I like that blinktronicators are 100% hand-solderable without a reflow setup!
One interesting note: the POV display distortion is caused by the curvature of the LED array. I thought about fixing this in software (by pre-distorting the Jolly Wrencher in the opposite direction) but got lazy. Also, if you build one of these...
Read more »One thing I liked about the 2015 Hackaday Prize (specifically the Best Product competition) was that entrants had to make three identical working copies of a device. It's a good exercise, and it helps that OSHpark sells boards in multiples of three. Here they are, nestled together on my shelf-mounted USB hub:
The slots didn't work, which isn't entirely surprising. The browser preview showed off-center holes, so I wasn't shocked when I opened the package to find the same. A few minutes with a razor blade opened the holes up enough to stuff in the structural tabs from the USB plugs.
above and below: old (left) and new (right) board comparison, showing the "slots", lack of USB data pins, "no data" text on the front copper, revised programming pad locations, and a variety of other minor changes.
After assembling the first board, I used a few scraps of FR4 I had lying around along with a quartet of finicky surface-mount pogo pins to build a nifty little programming rig. The USB socket, salvaged from a still-in-use mini fan, is used for power/gnd and physical support; the entire structure is flexible enough that one can push down lightly on the board to engage the four pins.
Not a terrific in-use picture, but you get the idea:
This was fun enough to build (and super convenient once complete) that I'm going to keep doing pogo rigs for my projects from here on out. However, the SMD spring pins can be a bit of a pain to properly align, so I'll likely start using traditional insertion devices instead.
One last thought: Dave Jones was right about soldering tips, folks. Get the damn chisel tip if your iron didn't come with it and throw out the conical garbage. I snapped a picture of my trusty WES51 posing with a finished board so you can see how much bigger the tip is compared to the 0.5mm pitch 16-DHVQFN shift registers; it's wide enough to span four pads:
My process: 750 degree iron, Chip Quik 96.5Sn/3Ag/0.5Cu RoHS solder, and gobs of no-clean (hah!) gel flux. Tin the iron and drag it across the pins:

Super simple once the chips are properly aligned...
I put together a simple PWM-based fading routine for the LEDs; it's pretty much a pair of functions that run as fast as possible:
updateLEDs(unsigned char ledOutput1, unsigned char ledOutput2)...updates the current LED state (i.e., on or off), and...displayFader()....iterates through a counter to decide whether to turn the LEDs on or off at a given time.
I'm guessing the code could probably be significantly more efficient; I'm still learning a lot about how bitwise operations work and so forth, so comments are absolutely welcome and encouraged. I also added a slower loop to gradually change the LED brightness values sequentially.

When I used the full 8-bit brightness value for each LED, I was able to maintain a ~40 Hz refresh rate according to the 'scope; this produced noticeable flicker, so I reduced the threshold for faderCount to 100. I'd like more rangeability as brightness level 1 still isn't super dim, but it's a start.
Firmware update has been pushed to the repo.
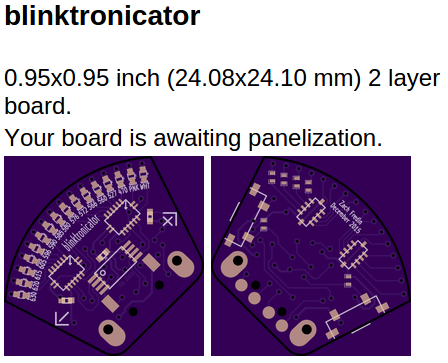
above, OSHpark rendering; below, KiCad GerbView.
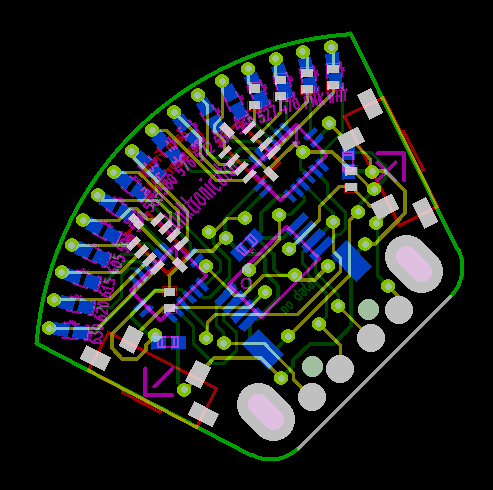
As mentioned in the last update, this order reflects a few changes:
Any way to embed gfycat animated HTML5 images? They're wicked fast. Anyhoo, the Blinktronicator seems to be working.
https://gfycat.com/ShorttermAnimatedBeetle
I also uploaded the test program onto the second prototype. This is before I remembered to reset the ATtiny45 fuse to 8 MHz.
https://gfycat.com/HonoredCorruptBubblefish
The latest firmware/hardware has been pushed to the repo, including a 2-LED-wide test chaser and a new PCB design:
Changes: (1) correctly oriented shift registers (no longer mirror image footprints); (2) slot-shaped USB plug structural pads (rather than 2.5mm plated holes); (3) better programming pads (or, at least, easier to access); (4) wavelength silkscreen rather than "color"; (5) full title instead of just "blinktronicator", which I may or may not update.
I ended up flipping a few shift register connections (and as such, the currently published firmware functions won't work perfectly--I'll fix this when I order the new boards); in the process I also de-cluttered the schematic a bit by separating the resistor networks from the LEDs:
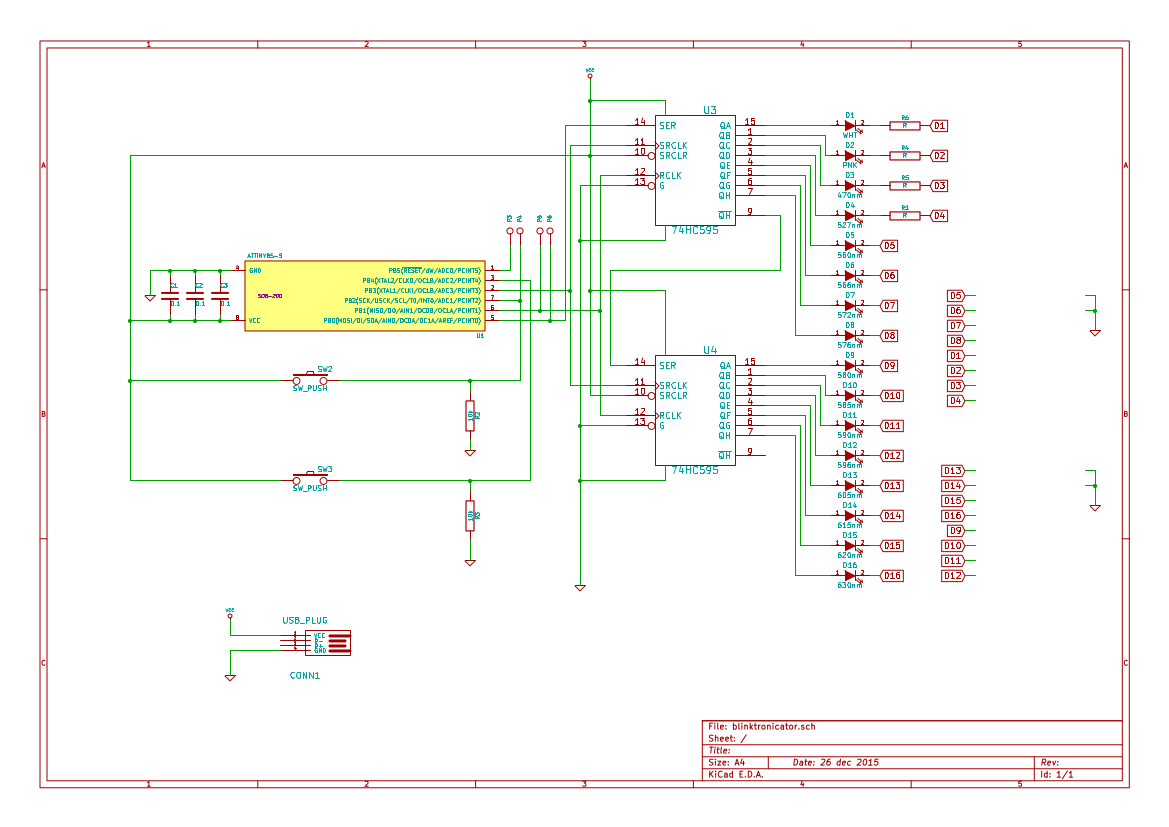
Imagine I didn't accidentally disassociate a library that included the resistor network symbols--they'd be on the right side of the above image. I will fix this at some point, but it is late and I need to go to bed.
I also changed the project name to "blinktronicator". I kept forgetting "Rs" or "Os" and got the files confused a few times. Also, "Bg" should really be "Gb"; 527nm really isn't very blue. It's up-to-date on GitHub and here, but I may have missed a few spots (such as the PCB silkscreen).
So yeah. #blinktronicator.
As suggested in the video from the last log, I finished soldering together one of the bad boards. Today, I took a bit of @K.C. Lee's advice and tried standing the shift registers up on one edge:
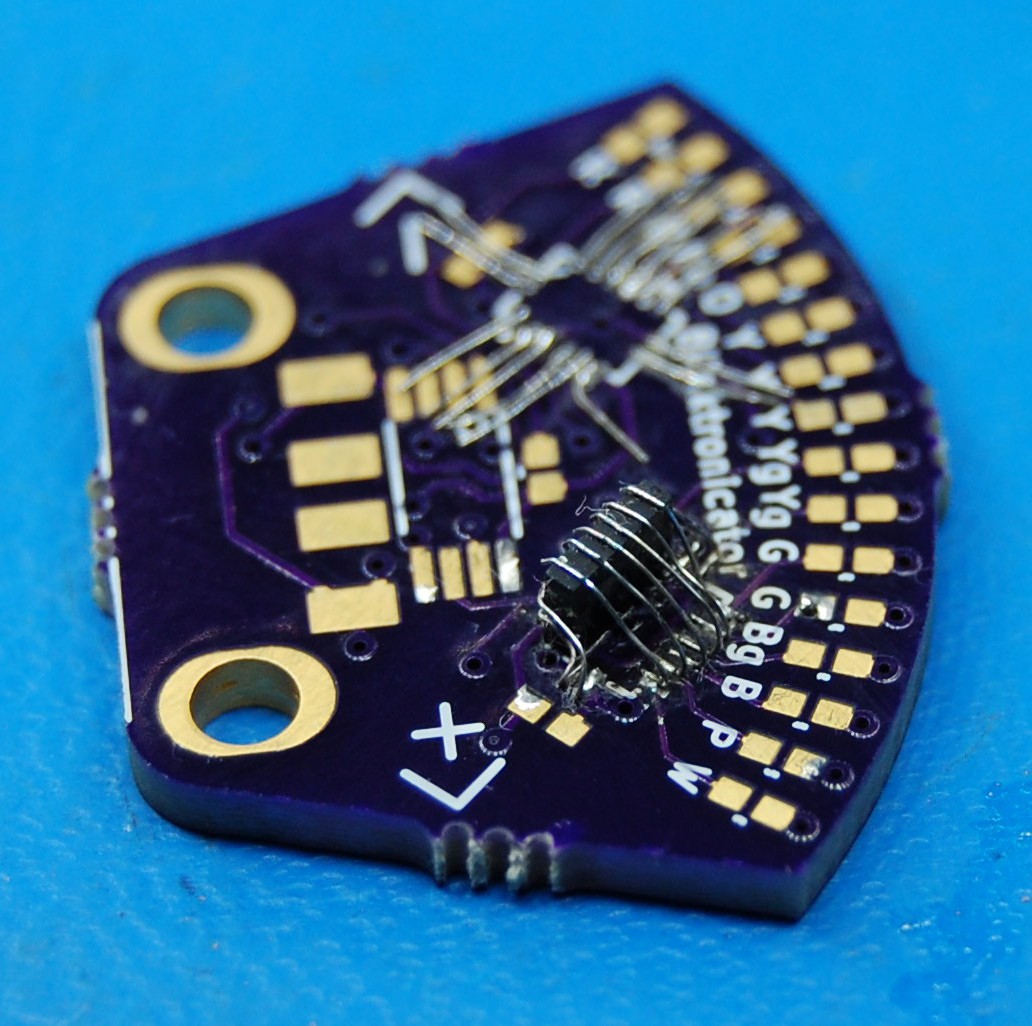
After some de-fluxing, this is what the two boards look like side-by-side:
I also temporarily soldered wires onto the six programming pads of the first board and tapped the board a few times to re-check the LEDs (the newer board was checked in a USB hub):
So why the '-ish' in the post title? Well... I haven't actually tested the functionality of the boards. As in, I haven't sent the shift register a specific series of pulses and observed the correct result.
The second '(-ish)' in the title is because this hardware iteration is destined for the wastebasket: it requires the user to install 67% of the ICs upside-down. Not a good design! I did update the schematic and board layout but haven't double-checked the work yet; I want to be sure I include some of the other complaints I'd recognized previously. And I want to make sure the circuit works, so that means the next step is [finally] working on firmware using the two existing prototypes.
The board needs a thorough de-fluxing, and it's late and I need to go to bed. But I soldered up the other shift register, along with the other components, and plugged the whole works into a USB port that I've got mounted to the underside of my shelving (hence the odd perspective):
This was unexpected behavior. I plugged the Blinkronicator in just to make sure it didn't release the Magic Blue Smoke (tm). When I touched the back of the board (specifically, a few of the programming pads), it started doing weird things as you can see in the video.
What's going on? I'm guessing I'm picking up 60hz from my house's wiring, and that's running through the MOSI pad to SRCLK on the first shift register. Then ... the ATtiny is doing something too? Keep in mind, I just soldered everything together--no code has been uploaded at this point (or written, for that matter).
Anyhoo, it looks like the shift registers are doing something right, and the LEDs are all lighting up (and appear to be different wavelengths), and nothing caught fire. We'll see what happens when I try to control the display...
One shift register down, one to go. No electrical tests yet, but all sixteen leads move with the chip when I give it a nudge. Wire is from a 28 AWG stranded bundle, which turns out to be 7x36.
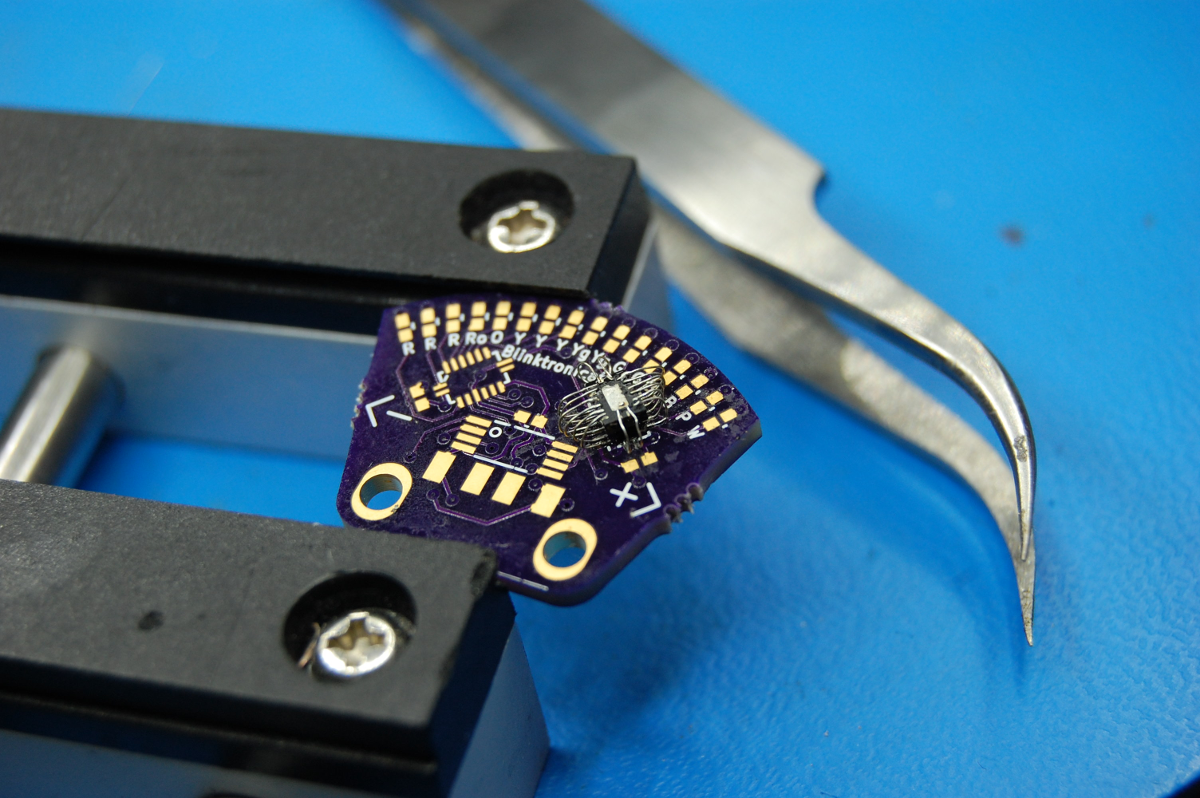
More to come..
The boards arrived yesterday. They are, as expected, tiny.
They also have a number of issues, one of which is unfortunately fatal with respect to the #The Square Inch Project deadline: this generation will never work. But first, some pictures of a partially assembled and inadequately cleaned board:
I'm particularly happy that the shift registers and the resistor networks appear to be successfully soldered to the board. Actually, that's one of the reasons I mostly finished this board after discovering the big problem--I wanted to make sure I'd be able to hand-solder the next generation if I used the same chip packages. These images are via 10x loupe (and thus have a hilariously bad depth of field), but the joints appear to be sound and un-bridged:
Above: 74HC595, DHVQFN16; below: 8-element 150-ohm resistor array, 1206. I lucked out in that the shift register doesn't require its bottom pad to be connected (or even grounded), so I skipped it entirely and didn't have to get out any reflow equipment. We'll see if that decision yields negative thermal consequences.
So what are the problems?
First: the USB connector footprint. The large (2.5mm!!) diameter holes used for the mounting tabs in place of slots mean only the corners of the tab are touching the plating, so I'm a bit concerned about the joint's mechanical strength. Worse, I completely forgot to include a pair of unplated holes for the plastic mounting bosses that protrude from the bottom of the plug, as shown in the center top image of the part drawing. Skipping these pins made initial alignment a bit more cumbersome, and I'm guessing they also add a bit of mechanical strength to the connection as well.
Second: the pogo pads for programming. I learned today while working on a concurrent project that these pads aren't large enough to use as bases for a pogo jig, and the 1.5mm diameter pad is tough to align with manually placed posts on blank FR-4. Might be worth skipping this entirely and just including a standard header.
Third, and most severe: the shift register footprints are flipped. As in, no matter how many times I rotate the chips, they're still mirror images of what I thought they would be. I even tried soldering one on upside down using tiny scraps of wire but I almost died of tedium. It just won't work.
What happened?
Well... I made my own footprints based on the datasheet. Er, that is to day, my erroneous interpretation of the datasheet. In the DHVQFN16 pinout drawing on page 20, I ignored the top image and based my pad design on the second image, which shows a view of the chip from the bottom. By copying this directly into copper instead of its mirror image, I doomed this generation before it ever hit the fab. Or at least, doomed it to a mediocre life of soldering practice.
What now?
I'll never make the 12/22/2015 deadline for an image of the working boards, so I'm going to accept a DQ in the contest. My missing (/forgot-to-order-last-week-so-I-ordered-them-Thursday) #NeuroBytes parts just showed up (as in, Saturday delivery, 20 minutes ago) and I want to see some blinky neurons on my desk before leaving for vacation on Tuesday. My hope is to have updated #RRRRoOYYYYgYgGGBgBPW Blinktronicator board designs off to fab before the holiday, in which case I'll get back to this project in early January.
Create an account to leave a comment. Already have an account? Log In.
ah that is awesome! yeah, color mixing with different wavelength LEDs and a sheet of paper can be pretty cool. especially with shadows.
Very nice, big respect. Use PWM and Charlieplexing you may be very brave and use no buffer or resistors at all...?
Thanks! I'm using current limiting resistors on all of the LEDs; my understanding is that one can skip these if you keep the duty cycle really low, but I've already borked the code up enough times that I need to make sure they don't self-destruct if they all stay on simultaneously.
I still haven't taken the plunge on Charlieplexing--it's a cool technique and the 595s are tri-state-able, but this seemed like a good starting point. One could also drop one of the shift registers and put the sixteen LEDs in a 4x4 matrix to save parts, but that would require isolated (or discrete) current limiting resistors.
Updates soon! The new boards arrived yesterday but I haven't had a chance to do much with 'em yet. I'll hopefully have a new log up this weekend.
Why do you need the 595? With 5 Lines you get 20 LEDs on/off and guess Attiny85 can handle them without buffer (+Reset free)
Yeah, but the pair of QFN shift registers look like little eyes which is kinda fun. Also, I wanted to do a shift register project because they are nifty. Also, buttons. Two buttons. Need I/O lines for them.
Charlieplexing! zek, You can drive 12 LED's on 4 IO pins, or (with transistors) up to 20 on 4 io pins. No driver chips. Multiplexed. Just make sure the code never hangs.
Yeah, I've danced around charlieplexing for a number of years but haven't taken the plunge yet. Definitely a cool technique, I've never built a circuit (or written a microcontroller program, for that matter) that takes advantage of tri-state outputs. Maybe for the next version... for now, blinktronicator is teaching me about shift registers :-)
Just going to point out that this calls for a version with only white LEDs and different color temperatures :P
_excellent_ idea. I actually have a collection of various color temp LEDs, but they're all a bit bigger than 0402. Actually, they're all weird sizes--might need to make one that shows off different packaging types along with color temperatures. :-)
Great project! Id love to fork this an make a CPU indicator, would look sweet on the side of a monitor/laptop. It would be good to flatten the PCB against the computer, but i guess that would violate one square inch. Good work with the deadbugging, i never have the patience for that :P .
thanks! Forking sounds like an excellent call--at this point, I'm going to keep the project isolated from the USB data bus (hence the "no data" label on the latest PCB version, along with the lack of pads). However, let me know if I can do anything to help--if nothing else, I'll try to make sure any firmware I develop leaves enough room in the ATtiny for V-USB. I also think you could flatten this against the PC without violating the contest rules--maybe 0.4" x 2.5" or something?
Ah i didn't even think about that, yeah the idea would be to keep it nice and thin so it could maybe stay on the laptop when its in your bag. Ill get going on the schematics tonight and let you know how it goes. The firmware will be very simple, and a script to monitor Linux cpu and send the info to serial is only a few lines. Are we sure no one has already done it :P
Also I noticed you dont have license on git. Its not a huge deal but it would be cool. I would recommend using CERN OHL v1.2.
The contest rule actually specify the length and width and not just the area. On the other hand, there shouldn't be a limit on a variant based on the design. The contest is done anyway.
Good call, @K.C. Lee. No reason to constrain a fork of the design, IMHO. @julien, the project is covered under the MIT license; I mention that in the description above but never got around to updating the Github repo. Thanks for the reminder--just added :-)
I just saw your latest project log.
You don't have to be disqualified! There's no rule against deadbugging ;)
Hey there,
your design files are complete EXCEPT FOR your BOM. Could you add it to the project components here?
This is your one-week reminder to upload design documents: https://hackaday.io/project/7813-the-square-inch-project/log/28566-design-deadline
Neat project, if you didn't order the PCB yet you can have a look at Charlieplexing (wiki: https://en.wikipedia.org/wiki/Charlieplexing) instead of using shift register there are a lot of projects on HaD. Good luck in the contest :)
Thanks @Vlad Conut! I've looked into Charlieplexing a few times but decided not to take the leap on this project--I'm trying enough new (to me, that is) things as-is. But it's definitely an intriguing concept, and the 74HC595 is tri-state-able so it should be a good fit for that technique..
Not sure how well it would work with the attiny (and bitbanging might need to much program space) but an I²C interface for this project would be amazing.
Oh my, was about to run out the door, but saw tons of mentions regarding the boost converter... sorry to put you through that!
Oh man. It has been monumentally helpful. This site is amazing.
Glad you figured it out, that's a handy-looking boost-converter. Never heard of that brand, throwing it in the ol' bag-o-tools :)
Hello again! Sorry, reading the sheet more closely, I see they do a fixed o/p version with internal resistors. Huh, not seen one of those before, learn something new every day... carry on....
We'll see how it all shakes out.. I'm new to boost circuits, so I'll probably make some silly mistakes along the way. Definitely appreciate the sharp eye either way.
They are usually pretty straight forward, follow the example circuit, shove all the highspeed components as close as you can and you are usually ok. Apart from the #@$&£ one I am trying to use at the moment, but that's a different story...
Hello! Nice project, just looked at your boost circuit, looks like there's a error on the schematic, you need the fb pin to be connected to a resistor divider, this is so the chip can regulate the output correctly. Bit odd they've missed it out of that example, all the other ones on the schematic have it.
Cheers
Badger
Good point--however, the datasheet actually calls out this situation for fixed output voltage operation:
"The AAT1217 has two fixed output voltage options: 3.3V and 5V. An internal resistor divider is connected to the FB pin inside the package which eliminates the need for
external feedback resistors. When designing with the fixed output voltage option, remember to leave the FB pin open; otherwise the output voltage will be affected. However, a feed-forward capacitor can still be added between the FB and VOUT pins to enhance the control loop performance."
Based on that I think I'm in good shape--see page 8 on this *.pdf:
http://www.skyworksinc.com/uploads/documents/AAT1217_202050B.pdf
Great catch though--I'm guessing you're correct for other regs that don't have internal resistors.
Yeah, I've used loads, never seen one with internal ones! Interesting!
I'd say we all dabble here and there. Any questions in particular?
Hey @randomguyoop, if you'd like to ask the hackaday.io community a question, I'd like to recommend the stack (https://hackaday.io/stack).
Mostly because I couldn't find anything in 0402, and I kinda liked the idea of keeping all the LEDs consistent with respect to mfr. Something below 470nm, even if not quite UV, would be quite nice..
Oh well. Are there any LEDs with pink filters? that might look nice on your board :P
Hmmm.. I'll take a look, I think there was an 0402 pink LED somewhere online. I'm guessing it's just a red and blue element in the same pkg though.
Looks like the pink ones do exist. These are the only ones in 0402 on digikey: https://www.digikey.com/product-detail/en/SMLP12HBC7W1/846-1109-1-ND/3587027
Ah excellent! Okay, I'm convinced. Maybe I'll add white too to make it an even 16?
Just FYI, you don't have to get the PCB design ready to enter in #The Square Inch Project... so if you want, you can enter now and (if this doesn't work) drop out later :)
Become a member to follow this project and never miss any updates
You somehow inspired this : Testing the Rainbow LED extension board
https://hackaday.io/project/16542-electronics-workshops-resources/log/53631-raspberry-pi-educational-boards