The World's Tiniest 4x4x4 RGB LED Cube
Eventually, someone will make one even smaller. Please let me know when this is no longer the World's Tiniest 4x4x4 RGB LED Cube :-(
Eventually, someone will make one even smaller. Please let me know when this is no longer the World's Tiniest 4x4x4 RGB LED Cube :-(
To make the experience fit your profile, pick a username and tell us what interests you.
We found and based on your interests.
If you've survived building an LED cube before and would like to try your soldering iron on this project, I'm sharing the PCB file at OSH Park. This was my first custom PCB, so please excuse the giant mess. There is one mistake on it. The holes for the headers are too small, so I had to use remnant component leads instead of an actual header block. If you make one and willing to share, please post reply to this thread or on my YouTube video. It'll be awesome to see many tiny cubes!!!
Although I've played with EagleCAD before, this is my first serious attempt to master it. After many days, it no longer feels like I'm holding a paintbrush with boxing gloves. But I'm far from having a direct connection between my brain and the canvas. If you have tips for me, I'm all ears.
The cube is connected to the Arduino via 16 I/O pins. Although I would like to design ONE multi layer PCB, the free version of EagleCAD only allows for two copper layers (top and bottom). Furthermore, because everything is so small, I only have room for one via or two traces between the LED pillar leads.
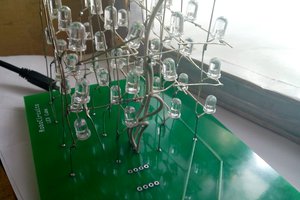
I was able to put the first eight wires on one PCB:
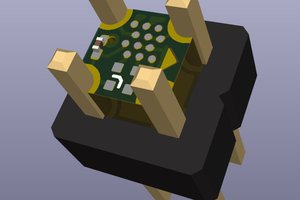
The next four wires on a second PCB:
And finally the last four wires are on a third PCB:
Create an account to leave a comment. Already have an account? Log In.
01110111 01101000 01100001 01110100 00111111 00100000 00111010 00101101 00101000
hi.
Anybody have the stensil to hold the LED's in place for soldering
is the code for your tiny cube,the same as the charlieplex code thats given for the bigger cube? if i buy a pcb board and build this will the code go straight on a 328p?
I had to add bit inverts to the original code because my LEDs are common Anode instead of common Cathode. And I created some new effects, but code works pretty much as is. This is the code I use to shoot the video.
Hi,so if i build the cube,and upload this code will it work as is with common annode,is everything changed to work with the leds u used inverts added etc as i cant code,ime learning and will not be able to do the updated invert bit parts if this code needs sorting could you be so kind as to do it for me and repost,ime going to try get the same leds from where you got yours.aliexpess was is i did see a link some where,i realy want to build this,i love led stuf ive allsorts of led gadgets.
This is a reply to you asking if I would help you with the code if you run into problem building a cube...
This is a complex project, there are a LOT of things that could go wrong.
We know the original code works. We know the modified code works.
if you build it and it does not work, it's because the wiring does not match the code. Adjusting the code to fit the wiring is NOT easy. Adjusting the wiring to fit the code is also NOT easy.
I think it would be cool to see you and others build tiny cubes.
However, I can assure you that I will NOT be able to help you if something went wrong. Sorry... :-(
Hi thats fine just wanted to know if the code matches the pcb board as is,ive both codes so one should work on the pcb,? oh ile post pics when its done,wont be for a few weeks as ive to get the board made and that takes a few weeks or months i beleve,build wont be a problem,i can solder a grain of split salt lol cheers
That's not in the same category.
It is only 3x3x3 and single color.
Mine is 4x4x4 and RGB muahahaha! lol
yes i know,i did realise after i put it on lol i was just thinking of size,then thought not fair realy why not try rgb smd ha ha
Hi some one made a cube from smd leds the tiny ones,thought ide let you know as you asked us to tell you if we found a smaller one but i defo saw a smaller one than that it fitted on ones thumb if i can remembr made by the people the make sd chips,they have the machinery but you can claim hand made,ime sure ive pics ile dig it out ;-)
Thank you Michael!
I saw that you've built a Charliecube as well. I'm still amazed how a it's all done without shift registers!
Cool enough to make me get off my butt and get on hackaday . Seriously small solder work there man . Looks like you laser cut the solder jig too . Nice.
Thanks Scott. It is crazy small. I've gone through several iterations of laser cut jigs. I'll share more when I make a video. I've proven that I can make the LED pillars. The next challenge is how to wire the charlieplexing under the PCB. It was a nightmare at normal scale... After brainstorming at my local makerspace, we came up with two possible solutions: 1. Custom multi-layer PCB. 2. multiple layers of lasercut "plates" with holes to thread the wires.
Hah, very nice! Did you source your LEDs from eBay? I have some similar PLCC-4 ones that I got for next to nothing... way cheaper than similar from Digikey or Mouser.
I recently discovered AliExpress. Same slow boat from China as ebay, but often even cheaper than ebay!?
I've added link to these LEDs under Components if you're interested.
Nice, I'll have to try them out some time.
Yeah the LEDs look to be about the same as the ones I have... the pinouts are slightly off, but that's it. http://www.ebay.ca/itm/100pcs-POWER-TOP-SMD-SMT-PLCC-2-1210-3528-RGB-LED-Red-Green-Blue-/330833693803?hash=item4d07398c6b&_uhb=1
Become a member to follow this project and never miss any updates

 Brian Lough
 RoboCircuits
 Alex
Alex
01000010 01101001 01110100 01110011 00100000 01100001 01101110 01100100 00100000 01110000 01101001 01100101 01100011 01100101 01110011 00100000