Close
0%
0%

Tecedi SmartZap: Adblock for TV

Control a HDMI switch with your Raspberry Pi and watch something interesting during TV ads.

Similar projects worth following
Tecedi Box help you to cope with those annoying TV ads by allowing you to easily play another content while they're being displayed.
The goal is to allow you to easily/automatically switch between a main video input, like your set top box, and some other content of your choice, played by a Raspberry Pi.

Why the name Tecedi?
It comes from "TEmps de CErveau DIsponible" aka "available brain time" it was an expression used by a Fench TV mogul to describe his job, he said his job was to sell Coca Cola and the other advertisers the "available brain time" of the audience.
So with Tecedi Box, you can just reclaim your "available brain time" and use it for something else!

What is it?

Tecedi Smartzap help you to cope with those annoying TV ads by allowing you to easily play another content while they're being displayed.
The goal is to allow you to easily switch between a main video input, like your set top box, and some other content of your choice, played by a Raspberry Pi.

Why the name Tecedi?
It comes from "TEmps de CErveau DIsponible" aka "available brain time" it was an expression used by a Fench TV mogul to describe his job, he said his job was to sell Coca Cola and the other advertisers the "available brain time" of the audience.

So with Tecedi SmartZap, you can just reclaim your "available brain time" and use it for something else!


How is it going to work?
Strap the mini remote (provided with the HDMI switch) under your TV remote, as soon as the ads start to show on TV, press this mini remote, it will:

  • change the HDMI switch input to the Raspberry pi,
  • play a short video clip (educative, music video clip, podcast, news flash, quizz, etc.)
  • when the video clip ends, the HDMI switch back to your Set Top Box input so that you can continue watching your program

This currently works, I can watch a single video clip instead of ads. As I will quickly get bored of this video clip, Tecedi Smartzap needs further improvements :

  • build a database with length and approximate time of ads for a given TV channel. In France at least, ad length should be predictable based on the day of the week and the current time
  • based on user habbits and probability, try to guess the channel the user is watching. once the software knows which channel the user is watching, it can guess the length of the ads and choose video clips with an appropriate length
  • use Kodi to play video clips instead of omxplayer.

switchdemo.py

Proof of concept script that switch HDMI input, plays a video clip, and switch back to your STB input.

x-python - 2.58 kB - 02/21/2016 at 07:20

Download

  • 1 × Raspberry Pi B+ in this case, but any model should work.
  • 1 × 3 ports HDMI switch with IR remote Lindy brand, but any should do, it's pretty generic
  • 2 × 7k resistors well, I used the ones laying around
  • 3 × HDMI cable

  • Turning the volume down

    PixJuan01/04/2023 at 03:27 0 comments

    I haven't resumed work on this project, but I found 2 other related projects which try to lower the volume when ads are playing :

    This one requires an expensive Sonos speaker system and seems to rely on meta data to detect ads.

    This one is much more DIY and relies on the  ads being louder than the TV show you're watching. Not sure how reliable this is or if it is still working as the project is 10 years old!

    Video ad blocking may become a topic a gain as Netflix seems to offer a plan with ads : https://help.netflix.com/en/node/126831

    Not sure if it reached Europe yet.

  • Projects for 2019 - Smartzap

    PixJuan01/10/2019 at 22:40 0 comments

    Hello Followers and project members!

    As a bright new year is starting, I thought I would write a log for each of my project.

    I don't watch much "live" TV nowadays so I lack some motivation to develop further this project but I will probably improve/add a feature this year to leave this project in a more finished state.
    Meanwhile, if you are interested in adblocking you should definitively check what this fellow french guy has done for radio : https://www.adblockradio.com/blog/2018/11/15/designing-audio-ad-block-radio-podcast/

    All the ideas I was only considering(and even more!), he has actually implemented them. I think that the method he uses for radio could easily be used for TV, the audio of TV ads can be fingerprinted the same way it is done for audio only radio ads, so I will probably test his project with TV streams.

    I'll keep you updated, meanwhile I wish you a happy new year and a happy hacking!

  • HDMI PIP switch needs some reverse engineering

    PixJuan05/30/2016 at 08:57 0 comments

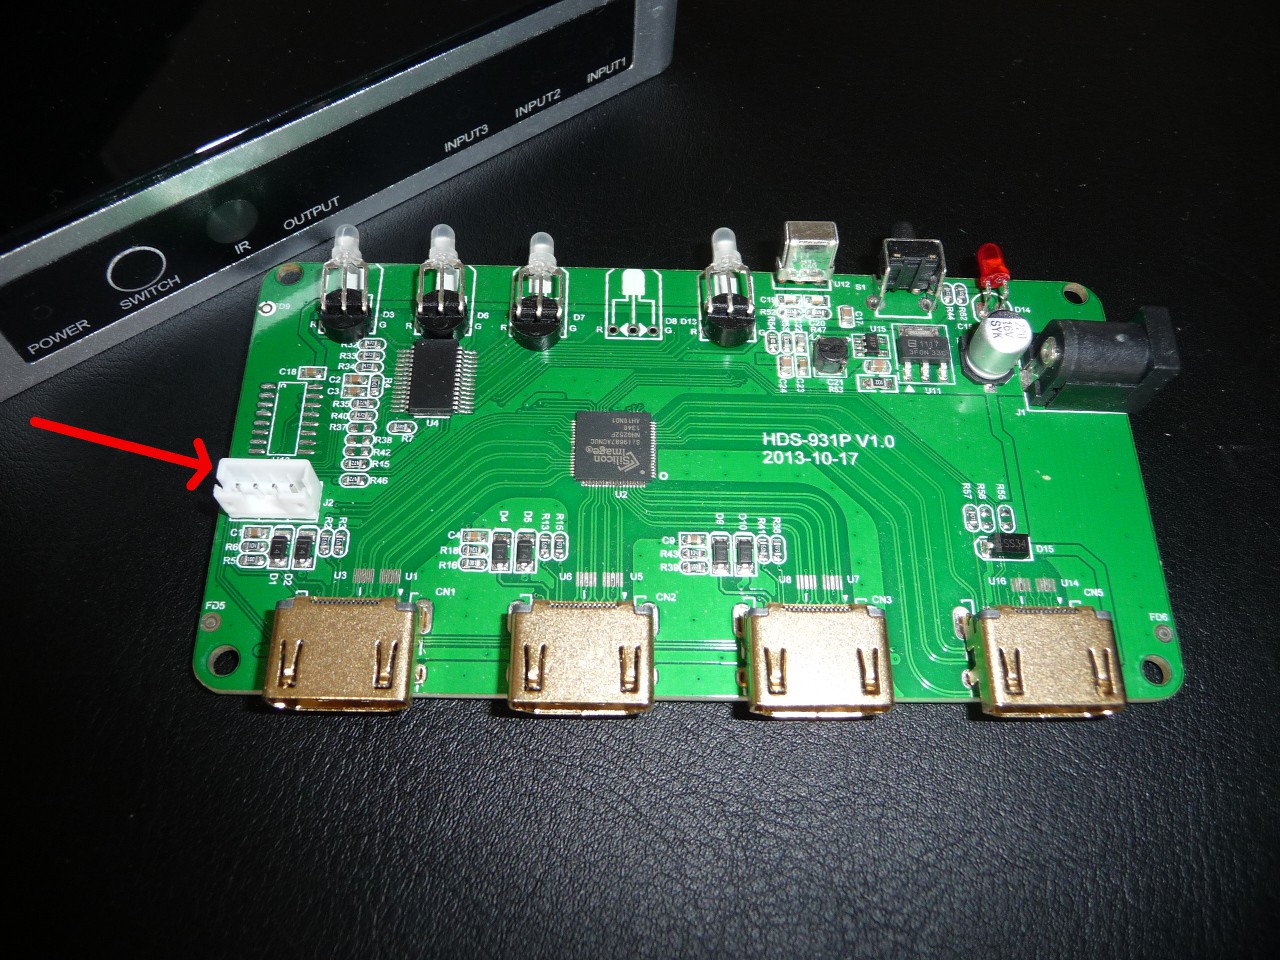
    I have a HDMI switch with a PIP feature that would be very interesting for my project. Unfortunately it seems a bit more complicated to get it working with a single button. I could use an IR blaster to control the switch (it will probably end this way), but as there is a big nice unused 4 pin connector on the PCB, I would like to find out what protocol it is and see if I can control the switch this way.

    My guess is either SPI or I²C. I will investigate with my BusPirate as soon as I have some time


  • Modular code

    PixJuan03/26/2016 at 19:21 0 comments

    I just pushed a more modular version of the code on GitHub.

    This paves the way for support of different HDMI switches and video players.

    I don't know if anybody else has tried to reproduce this project but it should be easier now.

  • Kodi support

    PixJuan02/28/2016 at 09:23 0 comments

    I just managed to get Tecedi-Smartzap working with Kodi.

    As a proper integration with Kodi will take some time, for now, I'm just giving basic information in this work log, I will provide the full working code and instructions later.

    Linux distribution

    I first tried OpenElec because I already knew this distribution, but it is not very hacker friendly, the maintainers chose to remove apt-get from it!

    So I switched to OSMC instead. It is based on Raspbian but on Jessie, not on wheezy.

    I couldn't find the python-rpi.gpio package so I had to install several packages to be able to install python-rpi.gpio with pip.

    This should be enough to install it :

    apt-get install gcc make python-dev python-pip
    pip install RPi.GPIO

    Kodi

    I added the following script in /usr/local/bin/kodi-play-clip

    #! /bin/sh
    
    # we play the video clip with a JSON request 
    CMD="/usr/bin/curl --header 'Content-Type: application/json' --data-binary '{ \"id\": 1, \"jsonrpc\": \"2.0\", \"method\": \"Player.Open\", \"params\": {\"item\": { \"file\": \""$1"\" } } }' 'http://127.0.0.1/jsonrpc'"
    sh -c "$CMD"
    echo
    
    # we make a request to get the video clip length
    LENGTH=$(/usr/bin/curl --header 'Content-Type: application/json' --data-binary '{"jsonrpc":"2.0","method":"Player.GetProperties","id":1,"params":{"playerid":1,"properties":["playlistid","totaltime"]}}' 'http://127.0.0.1/jsonrpc')
    HOURS=$(echo $LENGTH | sed -r 's/.*hours..([0-9]*).*/\1/g') 
    MINUTES=$(echo $LENGTH | sed -r 's/.*minutes..([0-9]*).*/\1/g')
    SECONDS=$(echo $LENGTH | sed -r 's/.*seconds..([0-9]*).*/\1/g')
    
    # and we sleep for this amount of time so the script will exit only when the video is finished
    TOTAL_SEC=$(( HOURS*3600 + MINUTES*60 + SECONDS ))
    echo "sleeping for $TOTAL_SEC seconds"
    sleep $TOTAL_SEC
    So in switchdemo.py you just have to replace :
    VIDEO_PLAYER = '/usr/bin/omxplayer'
    with :
    VIDEO_PLAYER = '/usr/local/bin/kodi-play-clip'

    This is still very much a hack, there is no error checking. The final implementation will use Kodi Python API or the JSON one with PyCurl.

  • Using the Pi power

    PixJuan02/25/2016 at 16:12 0 comments

    This not on my short term TODO list, but I think it could be interesting to use the Rapberry Pi power to identify the ads with audio fingerprinting using this lib

    Audio fingerprinting

    The concept behind audio fingerprinting is that the lib analyze a sound/song and extract some unique characteristics about it. Later it can quickly recognize it. The most famous example is Shazam.

    So by fingerprinting the TV jingle announcing ads, you could detect ads automatically and switch to your video clip instead. And since each channel has its own TV jingle you can know which channel the user is watching and the probable length of the ads.

    Audio source

    And how would I get the TV audio you ask? Well, luckily some TV have a TV audio out plug in case you want to get your TV audio on an amp instead of the TV speakers. If you are lucky, your TV has this audio out and it's analogic. In this case you just have to get a 5€ USB audio card and you can capture audio with your Pi.

    If your TV doesn't have such an output, you may try a HDMI splitter with audio like this one.

    Well, don't expect to find the code for this feature in the repo this week, but it's definitively something I'll try.

  • Working python demo script

    PixJuan02/21/2016 at 07:36 0 comments

    Here is a proof of concept python script

    First, you need to have the python-rpi.gpio and omxplayer packages installed

    sudo apt-get install python-rpi.gpio omxplayer
    • check that your configuration match the script settings and edit accordingly,
      select a short video clip (like this one) and edit the line
      VIDEO_FILE = '/home/pi/video/better-than-tv-ads.mp4' 
    • start the script :
      sudo ./switchdemo.py
    • this should select the STB output
    • press button 1 on your switch remote
    • your video clip should start playing
    • at the end of your video clip, the script will switch back to your STB input

    The next step should be to integrate this script with Kodi to have a nicer user experience.

  • IRBlaster control attempt

    PixJuan02/17/2016 at 07:51 0 comments

    Another way to control the HDMI switch would be to have an IR transmitter LED sending the same signals as the TV remote and switching the to channel 1 or 2.

    IR blaster won't work on my Raspbian...

    I followed several tutorials like this one and that other one but it failed every time.

    The I found this post explaining there is a bug on some Raspbian kernels. My Raspberry run a 3.18.7 kernel and it is affected. I tried to boot on an OpenElec with a 3.17.16 kernel, and then my test code was working.

    So I'm postponing the IR blaster part since apparently there is also a performance problem when using this method


View all 8 project logs

  • 1
    Step 1

    Connecting the HDMI Switch

    I found 2 kinds of hdmi switches :
    -mechanic ones which consist of a strictly mechanical switching process
    -digital ones where all the inputs go to a chip that will pick one for output. Some of them come with a remote.


    I went for a digital one with a remote. This way I don't even have to get a remote for my raspberry pi.
    The switch has both a remote and a button, it also has leds that indicate which HDMI input is selected.
    It doesn't require any external power source as it is supposed to be powered by the HDMI devices it is connected to.
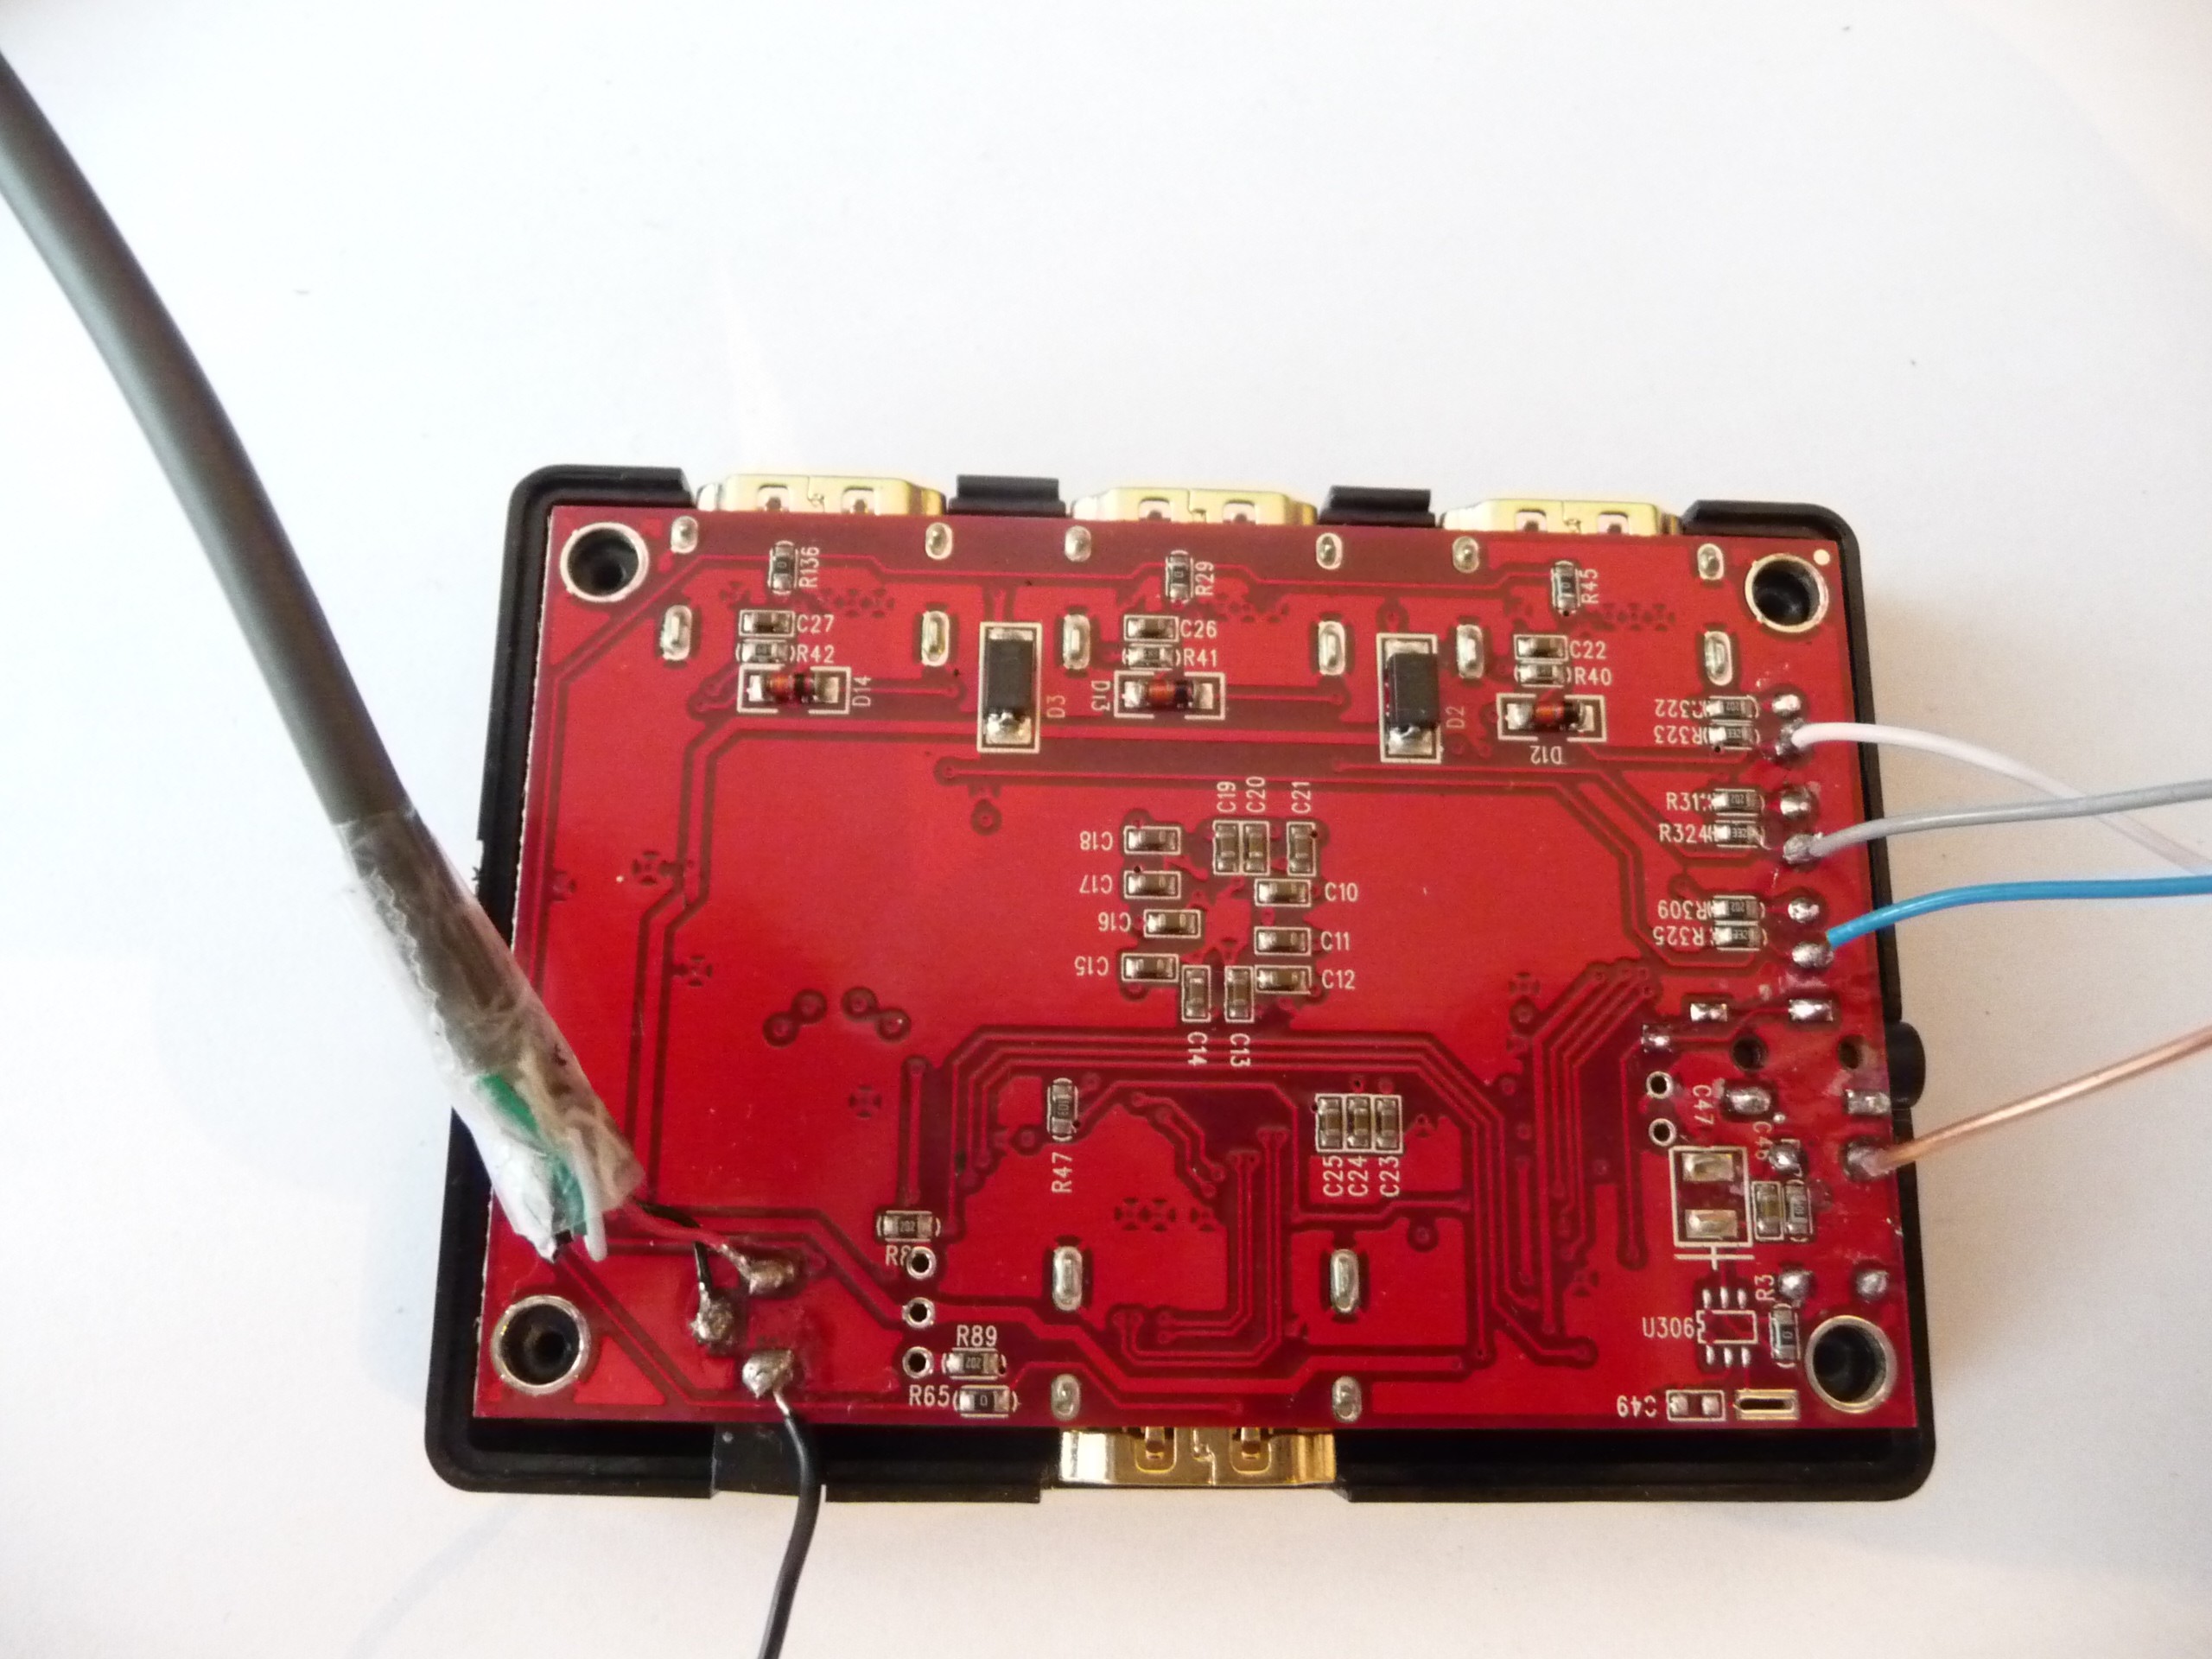
    I tried to make as few modifications as possible to keep the HDMI switch orginal behaviour but I soldered a USB plug so I can make my tests without any HDMI devices connected.


    Otherwise I just soldered wires to read the LED values and to simulate a the "next HDMI input" button being pressed

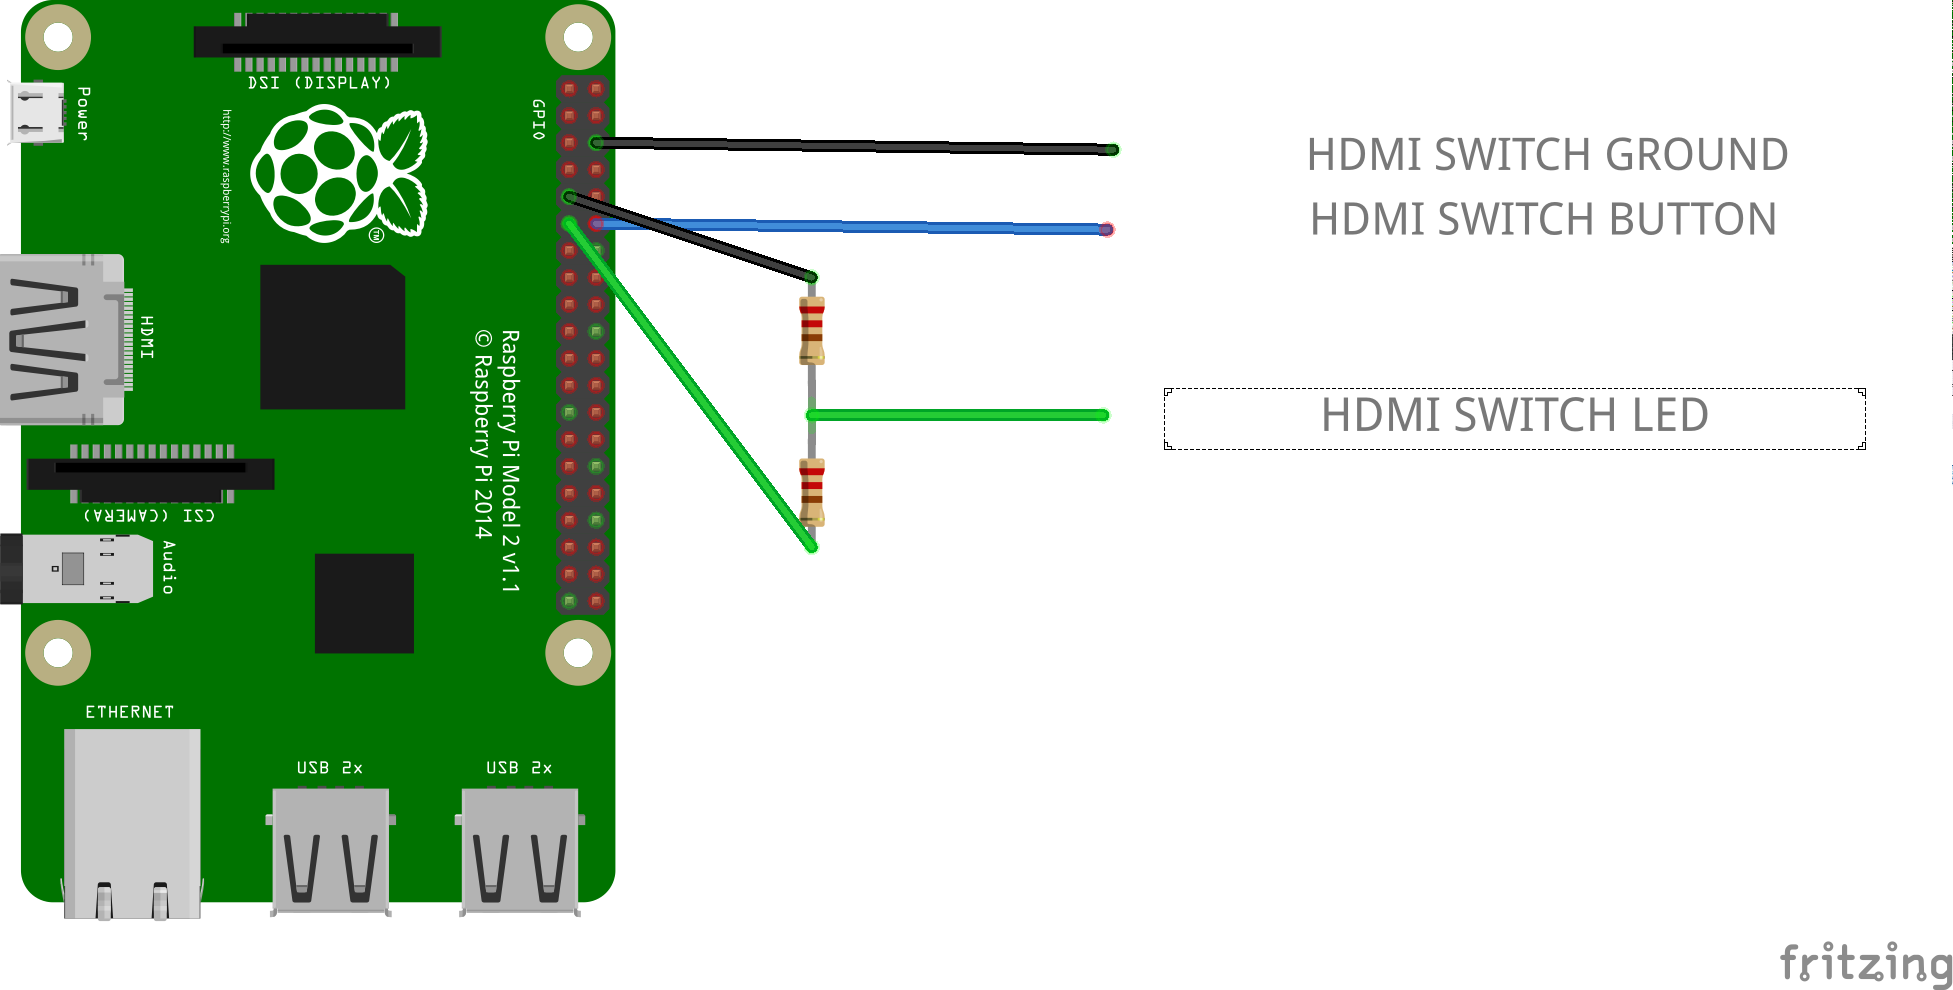
    • GPIO 17, PIN 11, is connected to the HDMI switch led ( and a resistor bridge to lower the voltage to 3.3v)
    • GPIO 18, PIN 12 is connected to the HDMI switch button

    So let's say we have the following setup :
    - HDMI switch input port 1 : RPi
    - HDMI switch input port 2 : STB
    - HDMI Led output pin connected to GPIO : 1
    - Button to use on the remote : 1

    The system should be started with HDMI port 2 active

  • 2
    Step 2

    Software for controlling the HDMI switch

    First you need to install WiringPi

    if your distribution has a package for it just do a

    sudo apt-get install wiringpi
    otherwise you'll have to follow the instructions here.

    we can control the GPIO from the shell with /usr/local/bin/gpio. Here are 3 scripts you can use:

    init_hdmi_switch.sh

    #! /bin/sh
    gpio mode 0 in
    gpio mode 1 out
    gpio write 1 1

    get_hdmi_port.sh

    #! /bin/sh
    gpio read 0

    switch_hdmi.sh

    #! /bin/sh
    gpio write 1 0
    sleep 0.2
    gpio write 1 1

    This is a bit confusing because by default it uses the WiringPi pin numbering, so 0 is pin 17 and 1 is pin 18. Also to simulate a button press, we have to set the pin to low for 0.2 seconds and then to high again. 0.2 scond is an empirical value that works reliably for me, it probably depend on your switch model.

    Usage:

    • first launch init_hdmi_switch.sh to configure the GPIO
    • launch hdmi_switch.sh to switch to another hdmi port
    • launch get_hdmi_port.sh, it will return 1 if the hdmi port 1 is active ( port 1 or any port you soldered the GPIO to) and 0 otherwise
  • 3
    Step 3

    Floppy up!

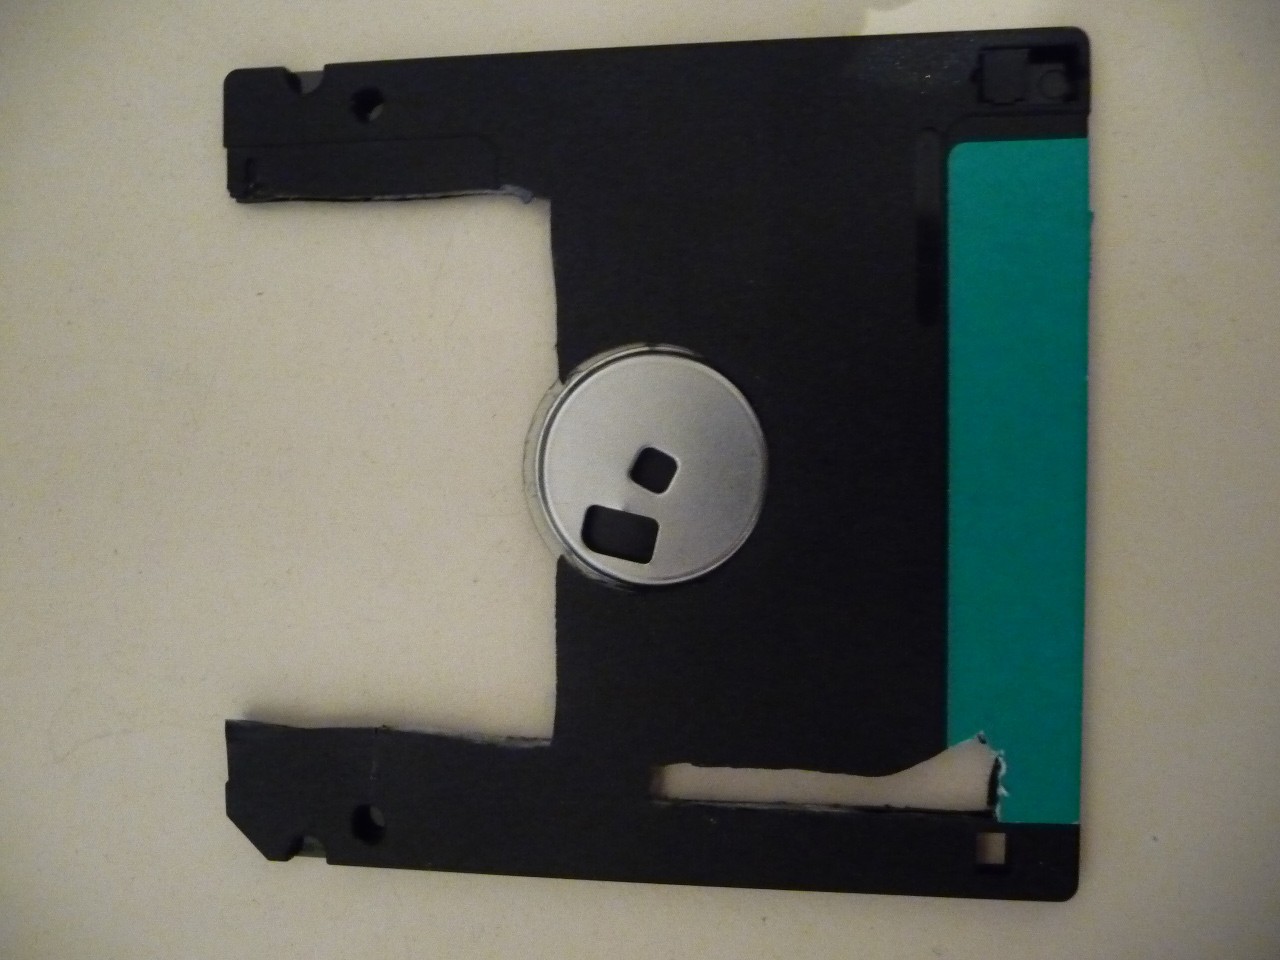
    As a temporary solution and to make good use of 3"5 floppies laying around, I carved floppy disks with a Dremel and used a glue pistol to assemble all of it into a case for my raspberry pi and my HDMI switch.

    Cutting the floppies was not very fun, there was a strong smell of molten plastic. I'm not sure it is very healthy.

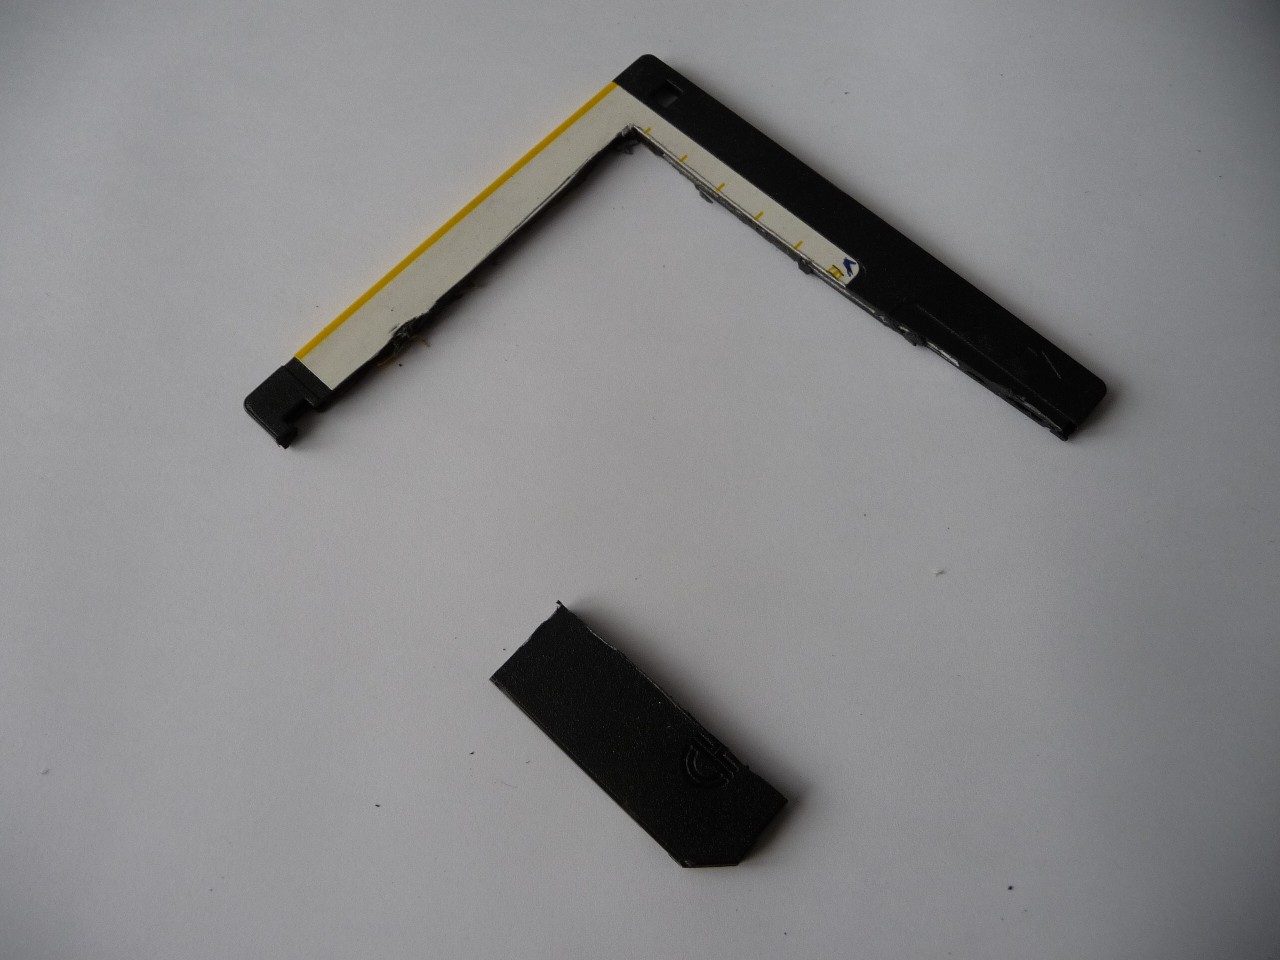
    Bottom part for the HDMI switch, with a room for the HDMI cables an a thin line for the ledsan the button on the switch

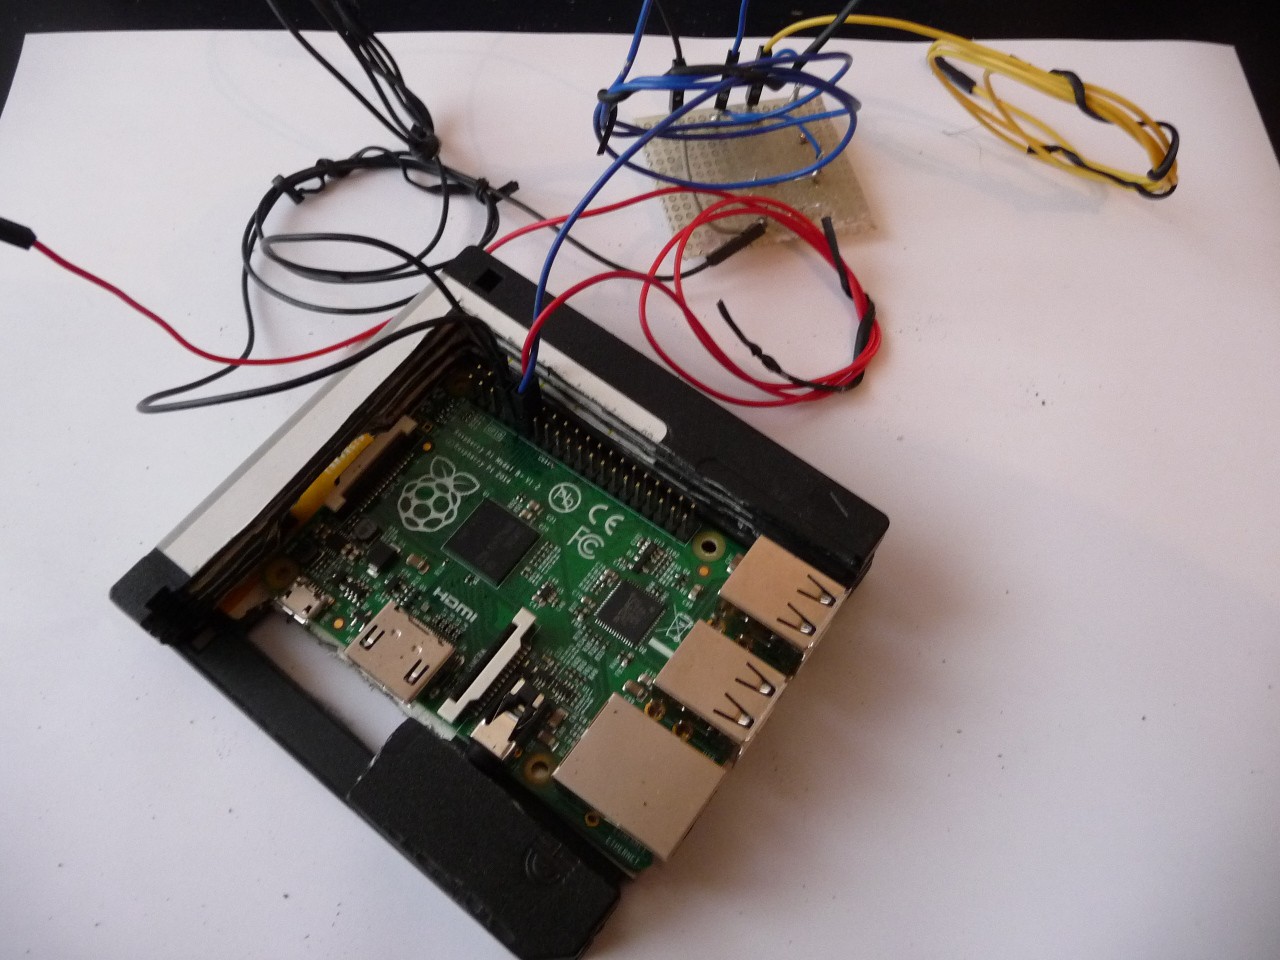
    The Raspberry Pi B+ has ports on nearly every sides, not much of the floppy left...

    The Raspberry Pi B+ has ports on nearly every sides, not much of the floppy is left...

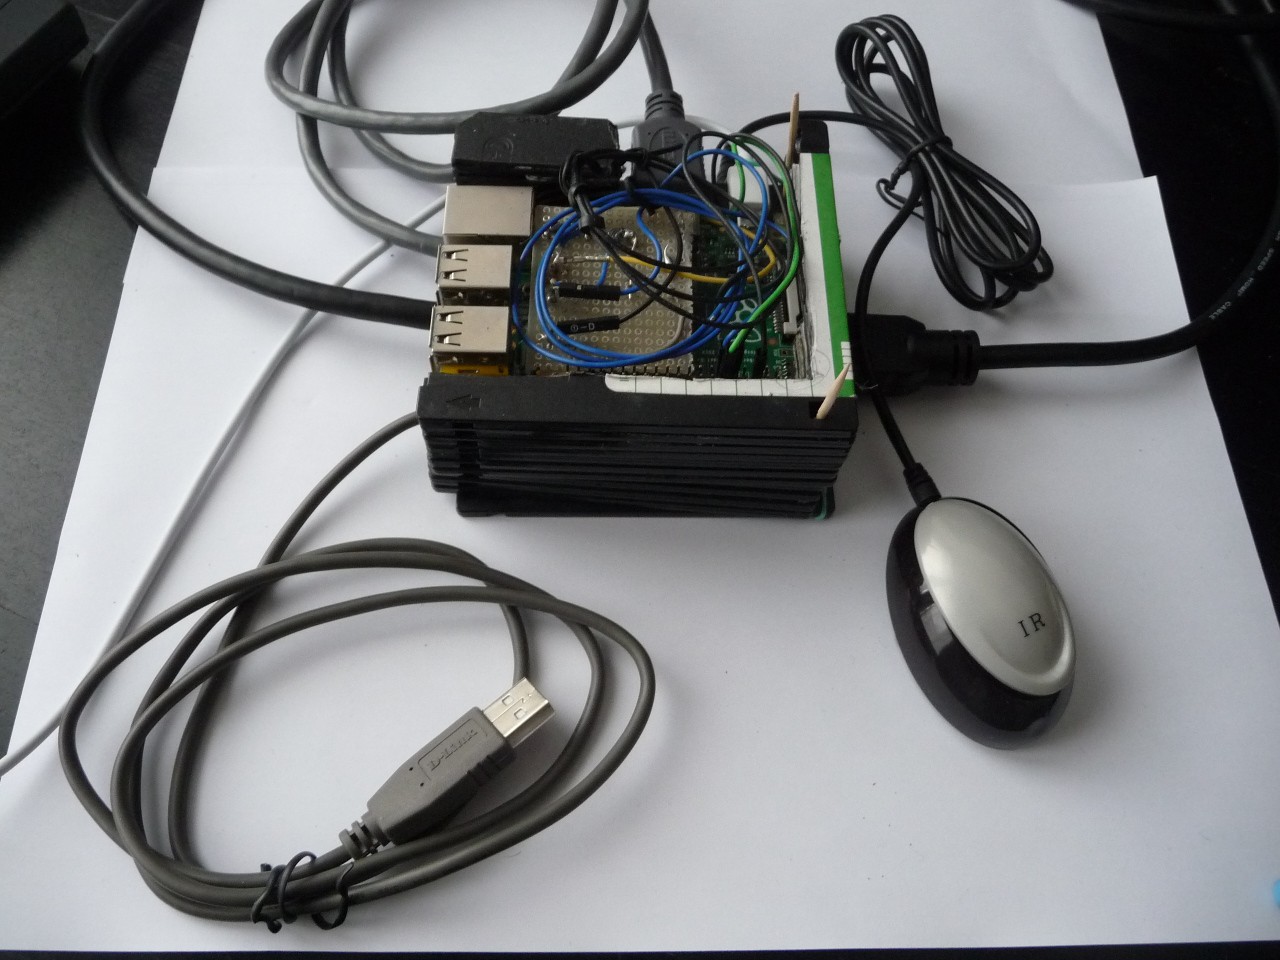
    A stack with the HDMI switch, the Raspberry pi and the resistor bridge.
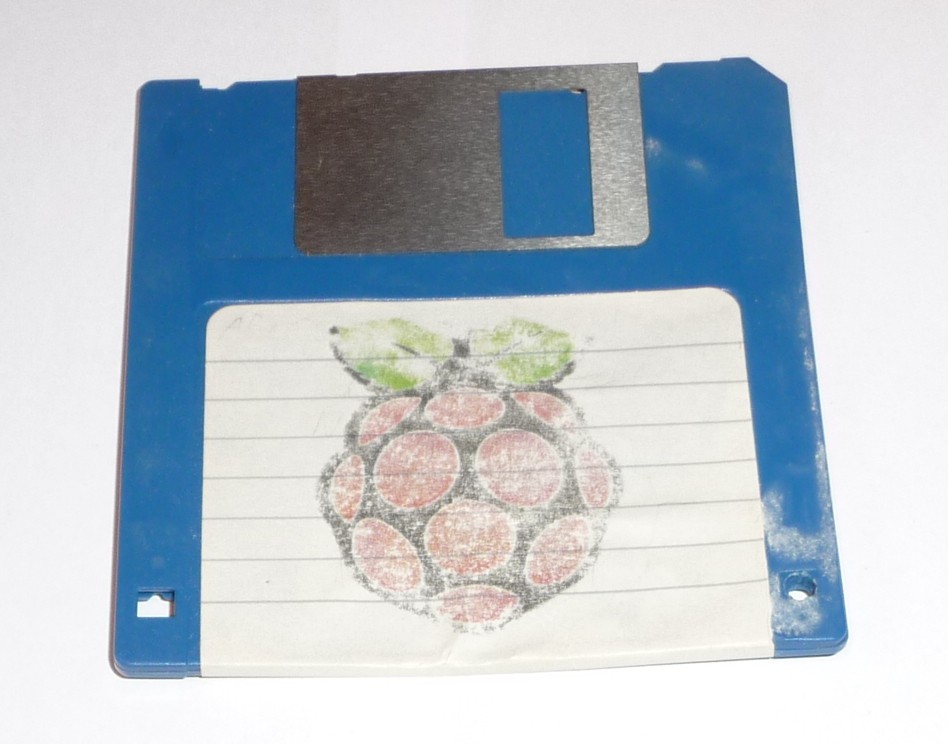
    The Raspberry Pi logo was printed with a laser printer on a standard A4 sheet and then I took a regular iron (for clothes, not for soldering!) to print it on the top floppy lid.

View all 3 instructions

Enjoy this project?

Share

Discussions

Aleksander wrote 09/08/2016 at 07:15 point
You mentioned that if you have some time you will discover the HDMI switch with a PIP. I recognized the chipset on the photo and it is SiI9587-3 (from Silicon Image). This chip is contolled by I2C (as you mentioned). But I have found PDF with detailed desctiption under Lattice logo (url for this PDF: www.latticesemi.com/~/media/latticesemi/documents/datasheets/assp/sii-ds-1098_public.pdf). It can be useful.

  Are you sure? yes | no

PixJuan wrote 09/08/2016 at 08:00 point

Thanks for the tip. Unfortunately, the programmer's reference manual is under NDA. But may be I can still try to snoop on the I2C bus, when I switch HDMI channels.

  Are you sure? yes | no

Alain Mauer wrote 09/07/2016 at 09:19 point

Love you're enclosure :). Great idea

  Are you sure? yes | no

PixJuan wrote 09/08/2016 at 07:31 point

Thanks :)

  Are you sure? yes | no

dotslash wrote 09/07/2016 at 08:16 point

hey, you still have problems with lirc?

since 27.05.2015 lirc don't load it's modules over /etc/modules anymore but instead on /boot/config.txt. Most Tutorials are not up to date.

$ sudo vi /boot/config.txt
dtoverlay=lirc-rpi,gpio_out_pin=18,gpio_in_pin=17

  Are you sure? yes | no

PixJuan wrote 09/07/2016 at 09:06 point

I haven't retried to get lirc working. I will probably transfer some of the logic to an Arduino board, this way it will also work on a regular PC or on other HDMI boards.

  Are you sure? yes | no

Matt wrote 09/07/2016 at 07:25 point

Wonderful concept! Something to keep in mind, most content that is provided to the provider (Like Comcast, Timewarner/Charter, hulu, etc.) has points in it which are designed to have ads inserted. These typically occur in shows between scene changes and black screens. Ads can be only so long for national ads, and there are spaces for local ads too. Once you know, you can start to see patterns, and with something like computer vision assisting you, you may be able to get the prediction down pretty well.

Good Luck!

  Are you sure? yes | no

Similar Projects

Does this project spark your interest?

Become a member to follow this project and never miss any updates