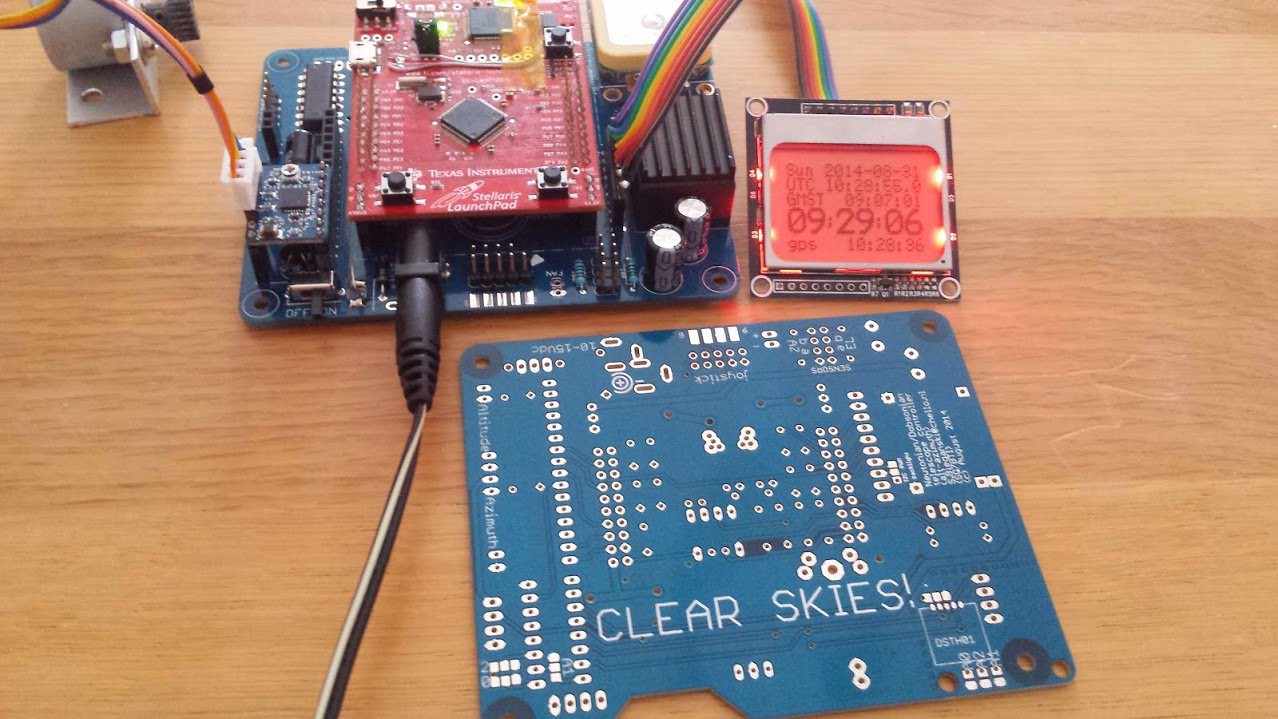
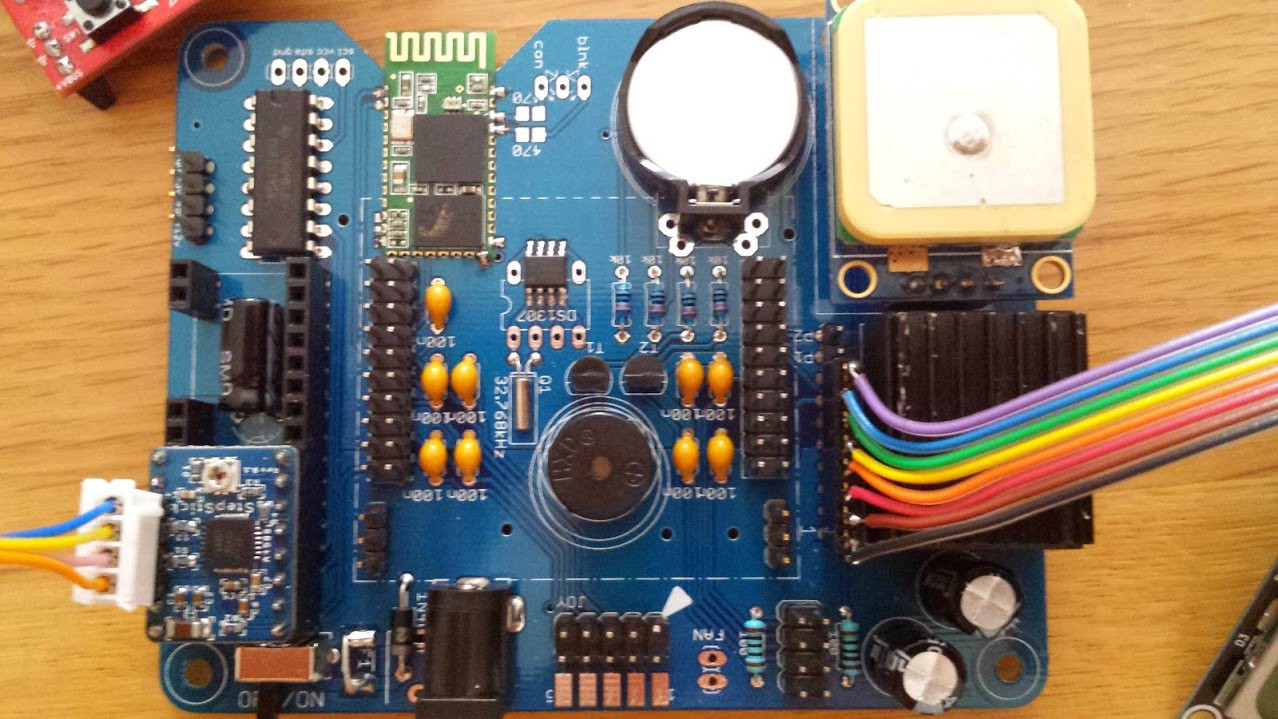
The role of motorized telescope mount is to provide automated motion control of optical tube assembly around. Regardless of the mount type it needs two axis control, either:
- equatorial, with one motor running in right ascension plane, and other in declination
- or alt-azimuth mount, with one motor for altitude (up and down) and azimuth (right and left).
Former are preferred for observational astronomy and astrophotography, but the latter is more common among amateur astronomers due their simplicity and price, and popularized by John Dobson. The GoTo technology (automation of tracking and tracing process) is identical in both cases with an addition of necessary recalculation of astronomical coordinates both systems operates in. Equatorial mount drives the mount directly in equatorial coordinates, while alt-azimuth (Newtonian/Dobsonian) mount still needs to recalculate into appropriate coordinates. When astrophotography is involved, a further motor has to be used to rotate the camera to match the field of view for long exposure photographs (https://en.wikipedia.org/wiki/GoTo_(telescopes)).
I decided to build my own controller to fit my needs and to reach my goal of $100 total component price tag:
- Tiva-c $13
- GPS $11 (pcb footprint U-blox NEO-6m)
- 2 * motor 28BYJ-48: 2 * $1.5
- 2 * DRV8825: 2 * $2
- Bluetooth module HC-05 Master: $5
- graphic LCD Nokia 5110: $2.5 (virtually all modules with white back-light)
- digital joystick
- battery: several Ah capacity $20
- DC/DC converter KIM-055l
- misc (resistors, caps, transistors, buzzer)
- time ;)
In total it would make up approx $60 (for accountable items).
Hardware components
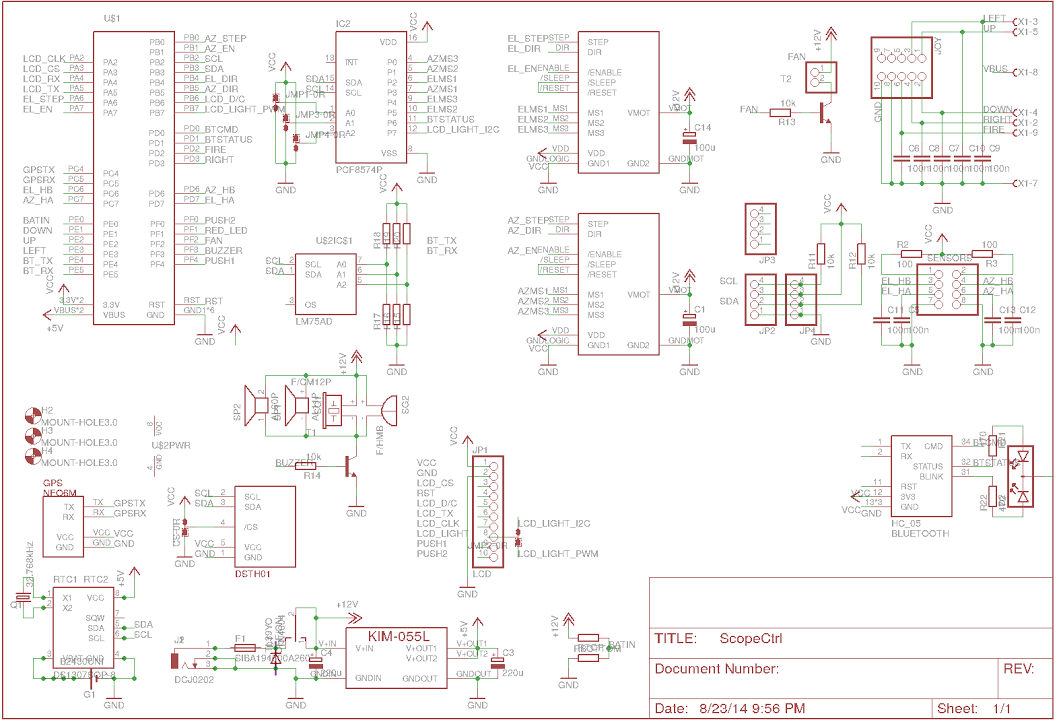
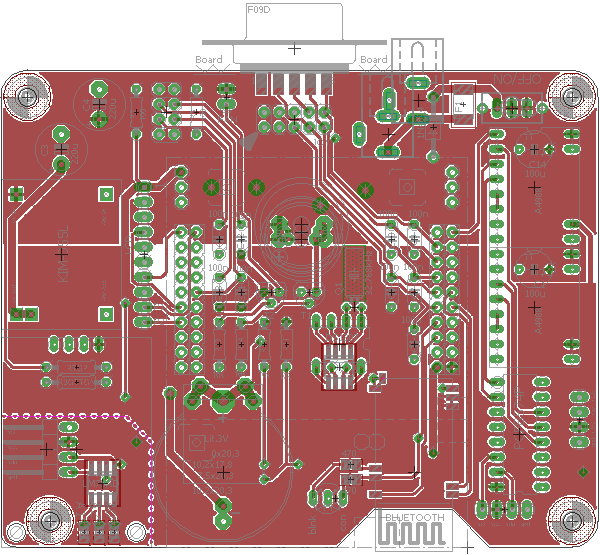
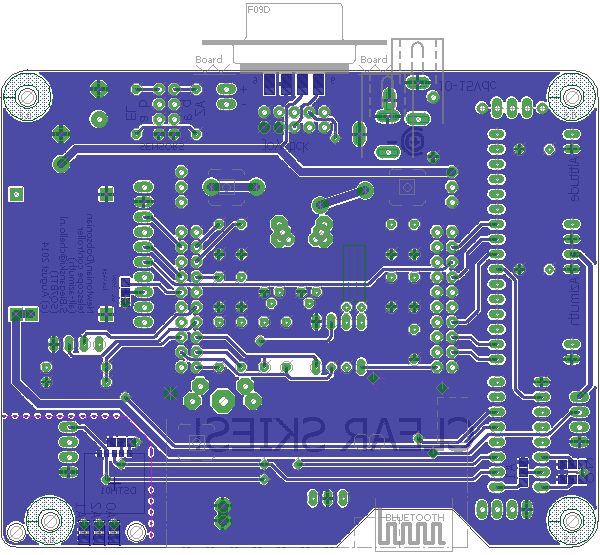
Controller comprises of the following modules:
- MPU
- stepper motor drivers (TI's DRV8825, Allegro's A4988, or any other drop-in replacement used among 3D printer community:
- sensors (inputs) and actuators (outputs)
- position (homing)
- temperature (CPU and I2C sensors)
- DSTH01 humidity sensor
- PWM output for main mirror fan (PWM frequency set to 25kHz to avoid fan buzzing)
- PWM output for LCD back-light
- GPS (NMEA)
- communication (Bluetooth HC-05 and USB in Tiva-C for debugging)
- user interface
- display (SPI)
- buttons (digital joystick)
- buzzer
- RTC with NV-RAM (battery backed)
The role of MPU is to take care of controlling everything from start, to step both stepper motors smooth enough, communicate with Stellarium software via Bluetooth link, and to allow user control via button interface. The main "brain" is provided by 80MHz 32-bit ARM Cortex-M4F CPU with 256KB of FLASH ROM and 32KB of RAM and 2KB of EEPROM (not used at the time of writing this document).
Software modules
Time reference
Sidereal clock gives the earth-bound location independent clock, that is calculated as relative to the fixed stars rather than to the Sun, as traditional (sundial) clock. It allows easy recalculation of right ascension for any given location on earth, as the virtually all star maps uses declination and right ascension as coordinates. Very fast fixed-point arithmetic routine was used in A Low Cost Sidereal Clock, but due to a FPU, the floating point math is just as fast.
Location
GPS module provides longitude and latitude of observer location with NMEA protocol and is parsed with help of TinyGPS++/GIT library. The accuracy and resolution is slightly improved by means of averaging series of acquired positions. As fall-back option an RTC chip with NV-RAM was added to provide time and location reference in case of GPS cold start, or problems with long acquisition - which should be actually impossible for an open field operation.
LX200 protocol
Today's GoTo telescopes support either of two most popular serial communication protocols:
- Meade LX200, or
- NexStar of Celestron.
I implemented most of the LX200 commands necessary to operate with Stellarium software:...
Read more » sq7bti

 Alvaro Villoslada
 Paul Gould
I appreciate your comment. It would be great if you could recreate it yourself, and as far as I can I will provide assistance to get it up and running. If you face any problems while reproducing design, I would be grateful to hear your comments so I can improve and enhance it. As of burning the firmware, the controller is based on Energia project (http://energia.nu/) - it is pretty easy to develop, debug and modify embedded software once you get familiar with basic C programming. "Burning the firmware" is just a matter of pressing one button.
Szymon