Close
0%
0%

ESP-12F Raspberry Pi GPIO SDIO Wifi

Get fast Wifi via the Raspberry Pi GPIO header using the SDIO bus of the ESP8266. Also with audio jack for the zero.

Similar projects worth following
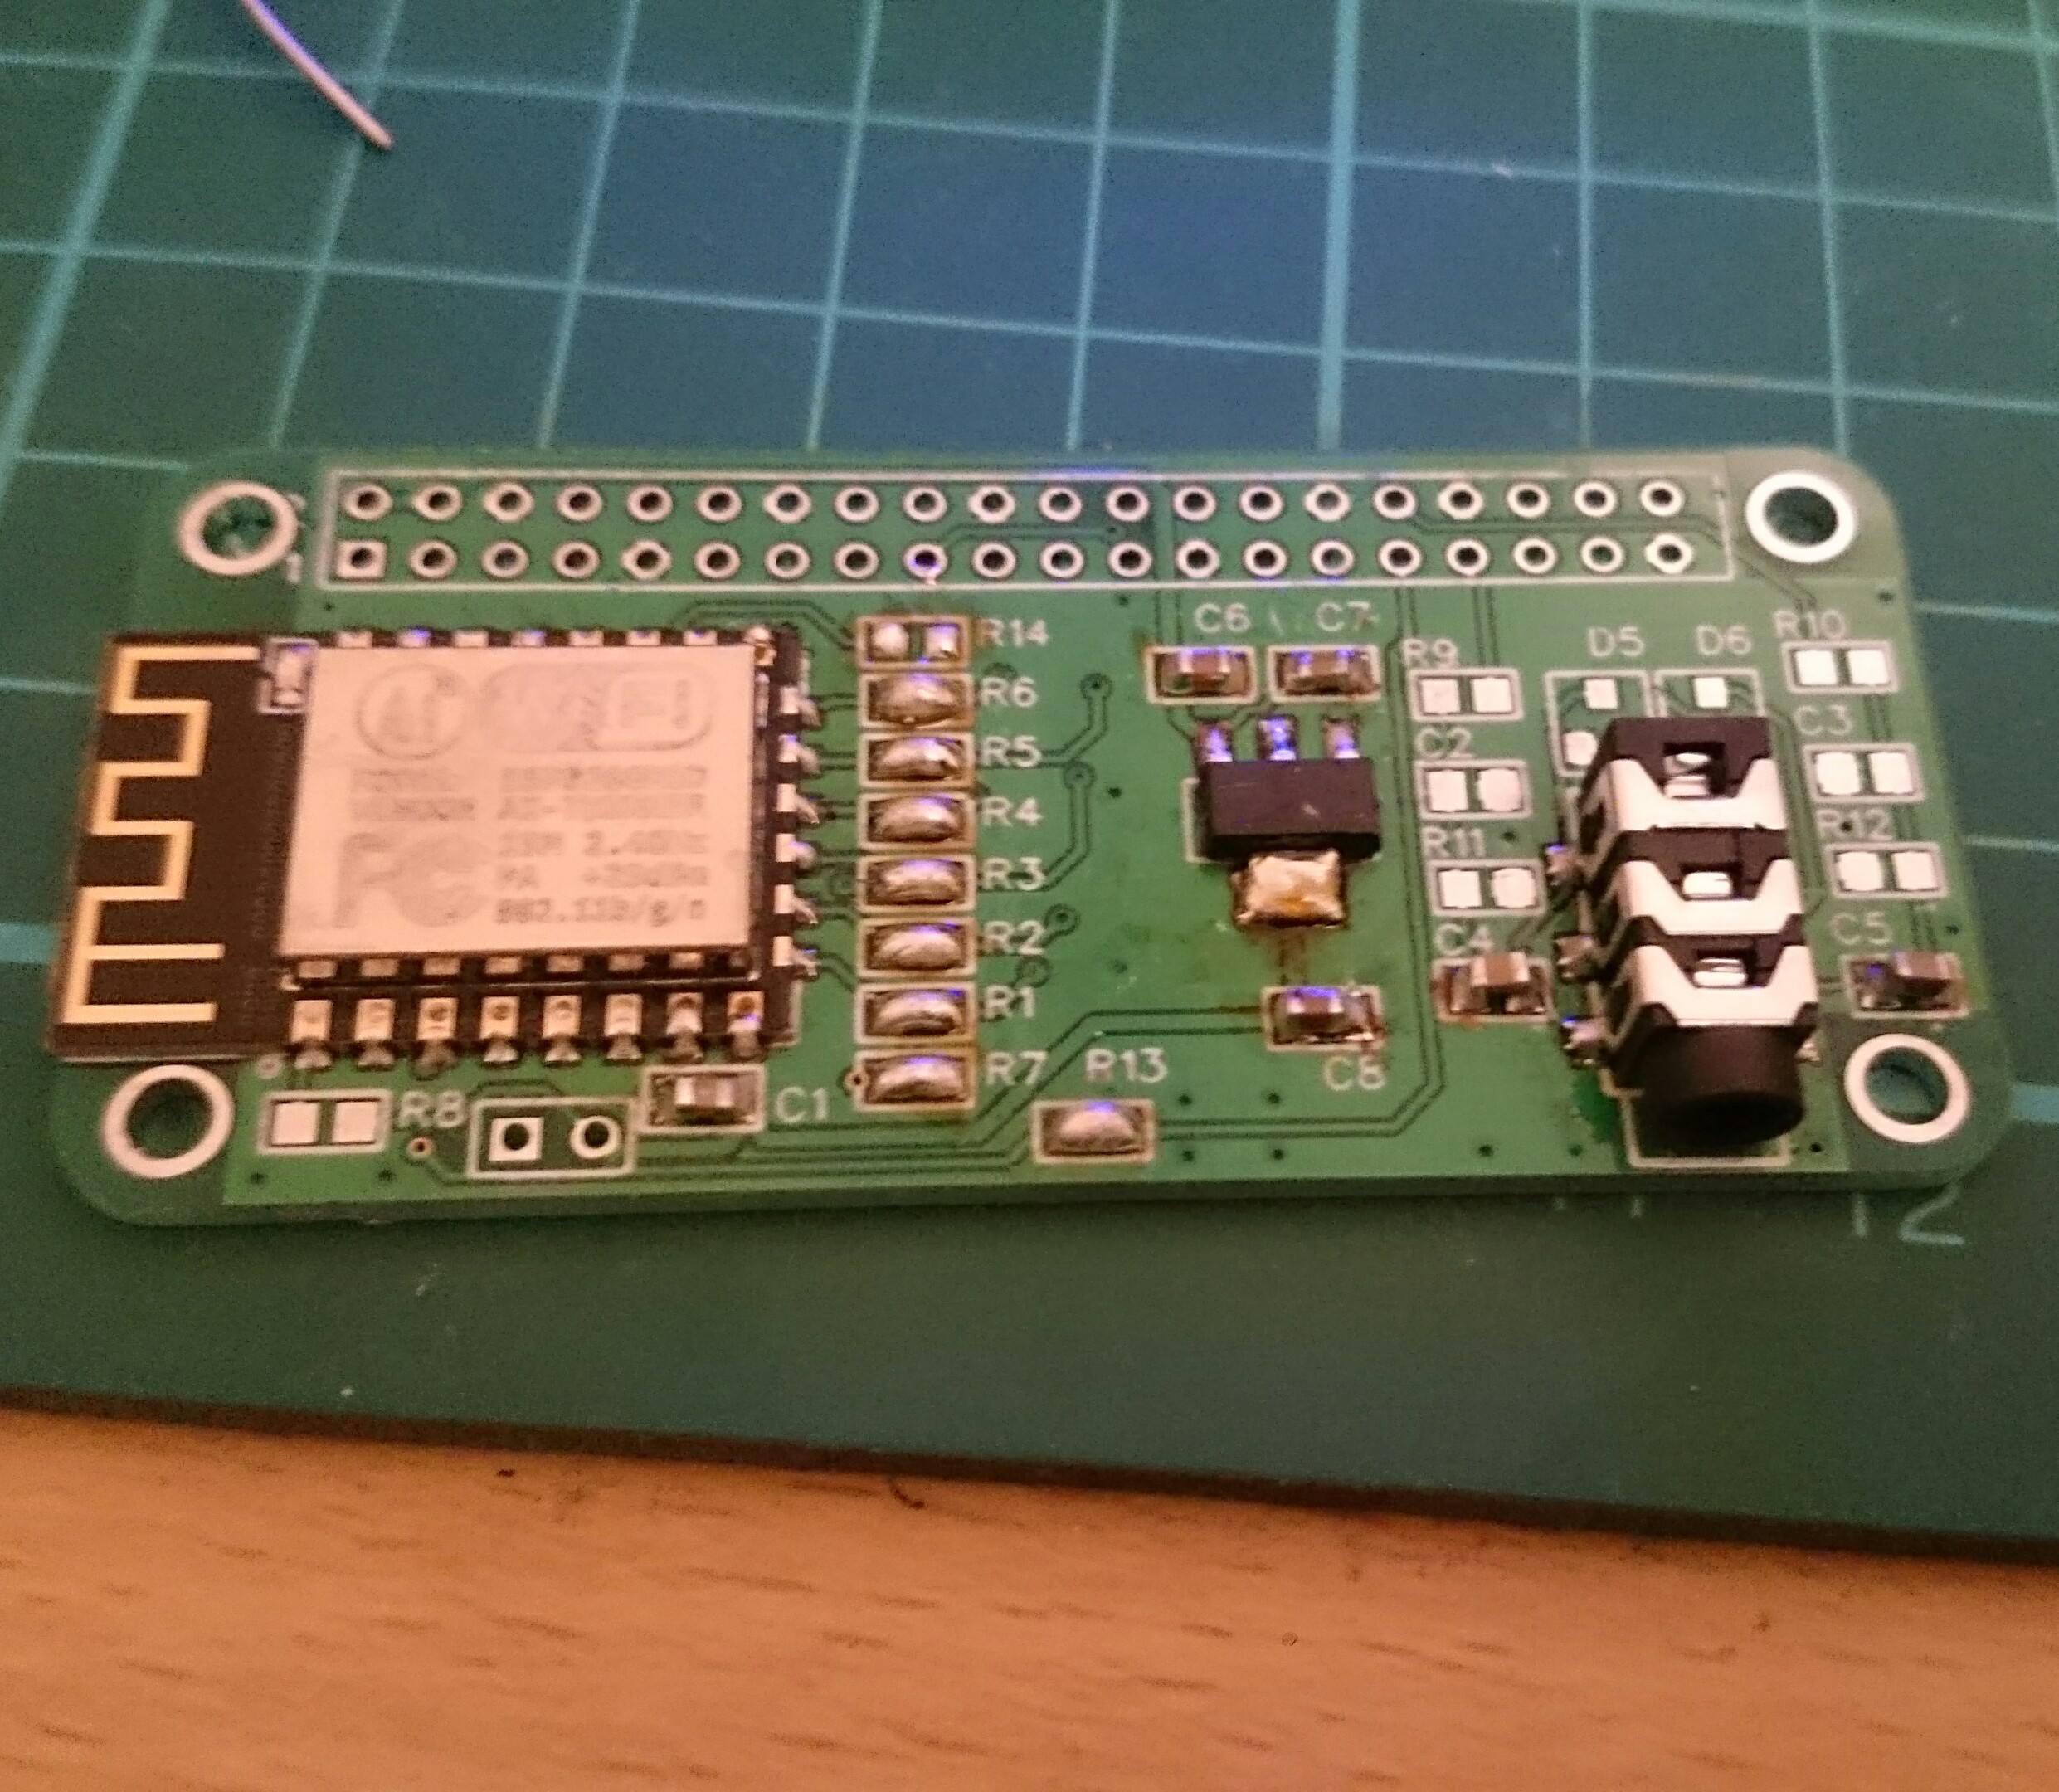
This is a Raspberry Pi Zero sized board which enables fast enough WiFi via the GPIO header (Benchmarked at ~28Mb/s) using a low cost ESP2866 module, the ESP-12F.

It also has footprints for the PJ313D SMD 3.5mm audio jack and the simple filter as seen on the first Raspberry Pi A/B models. An optional 5v to 3v3 regulator and of course the ESP-12F footprint.

This is all based on the brilliant work by [ajlitt] in https://hackaday.io/project/8678-rpi-wifi who has a similar board.

Designed in EasyEDA, you can fork it to make modifications, download gerbers or order the board at pretty good prices from them directly:
https://easyeda.com/sonyvaioman/ESP12_RPi_Board-Zb5nEyQ8q

The audio jack requires software remapping of the PWM0/PWM1 signals to GPIO12 and GPIO13 and uses simple filters as seen on the Raspberry Pi A/B models. If you want to use this with an A+ you don't need to populate these components.

The regulator in the centre of the borard is optional, you can bridge the 2-pin header below the ESP-12F if you want to use the Pi's 3v3 supply. Otherwise you can populate a SOT223 regulator where the tab is VOUT (e.g. with AMS1117 or LD1117S33).

The ESP-12F has an SPI flash sitting on the SDIO pins of the ESP8266. It used to be believed that this would cause issues and that workarounds, such as running SDIO in a reduced bandwith 1-bit mode were needed. But now it's better understood that due to the differences between SPI and SDIO the flash being on the pins shouldn't be a problem.

BOM

+----+---------------------+-----+-------------+-------------------+
| ID |       Value         | Qty |   Package   |    Components     |
+----+---------------------+-----+-------------+-------------------+
|  1 | Raspberry Pi Header |   1 | HDR2X20     | HDR               |
|  2 | ESP8266-12E/ESP-12E |   1 | LGA22-24x16 | U1                |
|  3 | 0.1u                |   2 | C0805       | C1,C7             |
|  4 | 200R                |   6 | R0805       | R1,R2,R3,R4,R5,R6 |
|  5 | 0R                  |   2 | R0805       | R7,R13            |
|  6 | 10k                 |   1 | R0805       | R8                |
|  7 | Stereo_TS           |   1 | 3.5_PJ313D  | U2                |
|  8 | 270R                |   2 | R0805       | R9,R10            |
|  9 | 33n                 |   2 | C0805       | C2,C3             |
| 10 | 150R                |   2 | R0805       | R11,R12           |
| 11 | 10u                 |   4 | C0805       | C4,C5,C6,C8       |
| 12 | BAV99               |   2 | SOT23       | D5,D6             |
| 13 | AMS1117_SOT223      |   1 | SOT223      | U3                |
| 14 | 0R/NC               |   1 | R0805       | R14               |
| 15 | SIP2                |   1 | HDR1X2      | P1                |
+----+---------------------+-----+-------------+-------------------+

  • Audio noise

    jacksonliam02/18/2016 at 18:50 1 comment

    I've got the headphone jack and audio in place. I'll update the instructions to make it simpler to setup.

    Theres an intermittent high pitched whine and some faint clicking/crackling when nothing is playing, if you play something from one channel the other has lots of white noise.

    WiFi (and possibly SD) access causes extra electonical noise.

    Its good enough for playing sounds through a crappy speaker in a project, or for simple radio streaming (you don't hear the noise over the audio) but not for any kind of serious listening or for headphones.

    I have filters the same as on the Pi 1, and I think my routing is OK. So the only thing I can think of is that the routing of GPIO12/GPIO13 on the Pi zero itself causes it to pick up noise. Or perhaps I need better filtering on GND?

    I've tried it on a board with the 5v regulator populated too.

    (I did populate all the audio filter passives)

    On the positive side I routed the right and left channels the right way around, which I'm happy about as I was worried I'd mixed them up!

  • A few spares on eBay

    jacksonliam02/15/2016 at 13:24 2 comments

    I have a few spare pcb kits up on eBay. I'll include the other smt parts but you'll need your own ESP module.

    Not sure if it'll be good value for those not in the UK, As I'm not sure what eBays international parcel forwarding service costs. But it's the only way I'll sell abroad.

    http://pages.ebay.com/link/?nav=item.view&id=262291855253&alt=web

  • Full Speed Ahead!

    jacksonliam02/03/2016 at 19:25 9 comments

    As suggested by @haddyhad I've put the flash into sleep mode with the sleepflash.py utility I've added here https://github.com/jacksonliam/rpi-bitbang-spiflash. The flash seems to stay asleep through power cycles (at least short ones). And I enabled 4 bit SDIO mode.

    Its possible that the driver could send the flash wake up command which would break comms with the module, but I'm not sure how likely it is that would happen.

    453MB 5.8MB/s 00:42 ETA

    Thats 46.4Mbit/s - The ESP8266 supposidly supports MCS7 / HT20 so in theroy you should be able to get near 72.2Mbit/s but according to iwconfig mines only connecting to my router at 54Mb.

    Has anyone seen it sync higher than 54Mb?

    Overclock to 62.5Mhz

    I tried the overclock 'sdio_overclock=62' as suggested by @ajlitt but unfortunately the card doesn't start.

    [    3.587837] mmc1: Got command interrupt 0x00030000 even though no command ope                                                                                                             ration was in progress.
    [    3.587893] mmc1: Got command interrupt 0x00030000 even though no command ope                                                                                                             ration was in progress.
    [    3.598324] mmc1: Controller never released inhibit bit(s).
    [    3.648352] mmc-bcm2835 3f300000.mmc: no support for card's volts
    [    3.648371] mmc1: Got command interrupt 0x00030000 even though no command ope                                                                                                             ration was in progress.
    [    3.648414] mmc1: error -22 whilst initialising SDIO card
    [    3.658962] mmc1: Controller never released inhibit bit(s).
    and
    [   46.476820] mmc-bcm2835 3f300000.mmc: no support for card's volts
    [   46.476830] mmc1: error -22 whilst initialising MMC card
    [   46.526554] mmc1: Controller never released inhibit bit(s).

  • It's alive!

    jacksonliam02/02/2016 at 21:46 3 comments

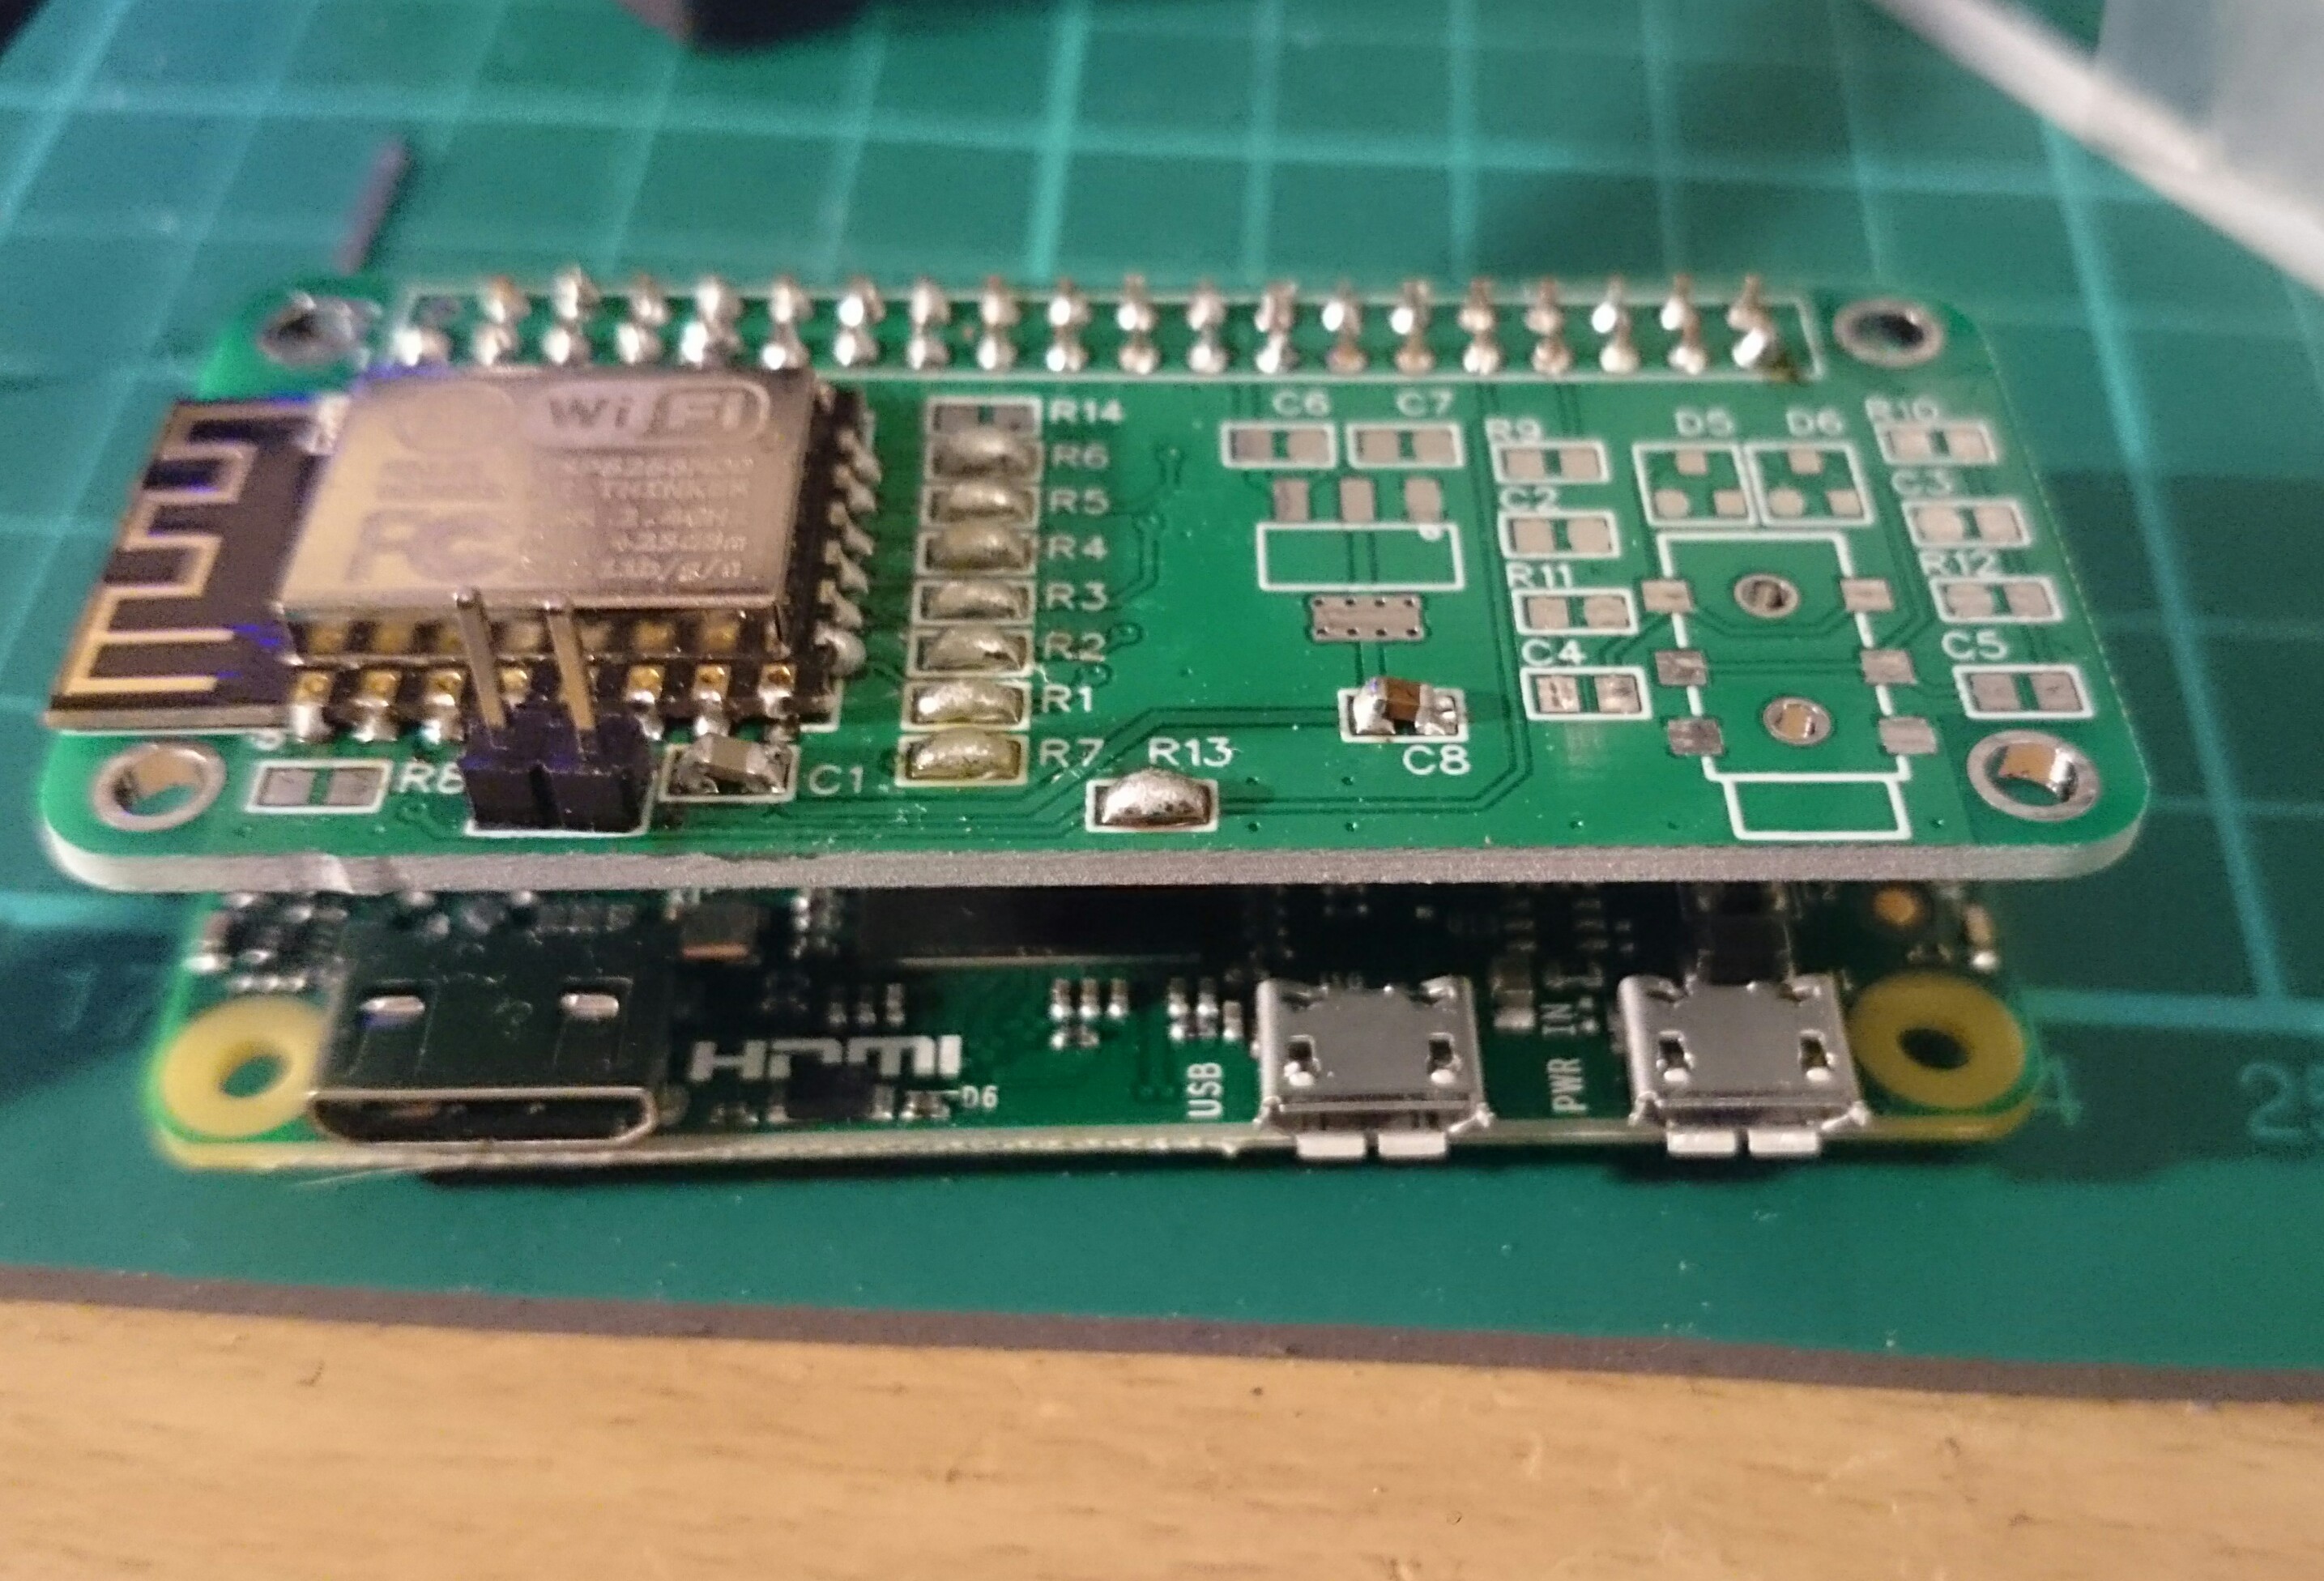
    Here's the money shot!

    Ignore the poor 0603 soldering, I've only done QFP smd before!

    Didn't bother with the resistors just did solder bridges. Getting 28Mbit/s pulling a file from my server.

    I got the header placement wrong, so the Pi and board are offset by about 1mm, I'll fix it in easyeda but am not bothered enough to order more boards!

    Next I'll try putting the flash to sleep with 4 bit SDIO.

    I want to try the audio but the pack of smd resistors I bought doesn't have any value below 600 ohm for some reason!

View all 4 project logs

  • 1
    Step 1

    For ESP8266
    Populate R1, R2, R3, R4, R5 and R6. DON'T populate R7 or R14.

    Populate R13 to use GPIO6 for CH_EN.

    R8 is an optional 10K pullup for RST, as only using the internal pullup can lead to stability issues.

    For Power, C1 0.1uf and C8 10uf should always be populated. If using the RPi's 3V3 supply put a wire / jumper across the two pin header at the bottom. If using a regulator populate the SOT223 (e.g. with AMS1117 or LD1117S33) and populate C6 10uf and C7 0.1uf.

    For Audio
    The audio uses GPIO12 and GPIO13 to which you need to remap PWM0/PWM1 (see below).
    You probably want to use components with good tolerances here unless you don't care about audio quality. Although it might not matter as not much care was taken with the routing, its just an easy 'add on'.

    Populate R9,R10 with 270R. C2,C3 with 33nf. R11, R12 with 150R. C4, C5 with 10uf. Then populate the PJ313D audio jack.
    The two BAV99 SOT23 dual diodes are protection for the RPi's GPIO and are optional but very strongly recommended as its a few cheap diodes vs a potentially dead Pi.

  • 2
    Step 2

    Software

    Place this at the end of your /boot/config.txt
    dtoverlay=sdio,poll_once=off

    Reboot.

  • 3
    Step 3

    Building the Driver

    Install prerequisite packages on Raspbian to build the kernel.

    #make sure everything is up to date
    sudo apt-get update && sudo apt-get -y upgrade
    #install tools
    sudo apt-get -y install bc rpi-update git libncurses5-dev
    

    Get the kernel headers

    cd ~
    sudo wget https://raw.githubusercontent.com/notro/rpi-source/master/rpi-source -O /usr/bin/rpi-source && sudo chmod +x /usr/bin/rpi-source && /usr/bin/rpi-source -q --tag-update
    rpi-source --skip-gcc

    If this bug isn't fixed https://github.com/notro/rpi-source/issues/17 then modify ./linux/Makefile and remove the line that reads EXTRAVERSION = + (line 4). Then create a new file in the ./linux directory called .scmversion with just a + character in it.

    Clone and install the ESP8089 driver.

    cd ~
    git clone https://github.com/al177/esp8089.git
    cd esp8089
    make
    sudo make install

    Then reboot. The module should come up and give you a wlan0 interface!

View all 7 instructions

Enjoy this project?

Share

Discussions

hackintoshlover12 wrote 02/06/2021 at 07:26 point

Hey Guys,

I am getting the following error while trying to compile fro raspberry pi kernel 5.10.11-v7+

Listed below is my error:

pi@raspberrypi:~/esp8089 $ sudo make

make -C /usr/src/linux-headers-5.10.11-v7+ M=/home/pi/esp8089
make[1]: Entering directory '/usr/src/linux-headers-5.10.11-v7+'
  CC [M]  /home/pi/esp8089/esp_debug.o
/home/pi/esp8089/esp_debug.c: In function ‘esp_dump_var’:
/home/pi/esp8089/esp_debug.c:90:20: error: void value not ignored as it ought to be
                 rc = debugfs_create_u8(name, mode, parent, (u8*)value);
                    ^
/home/pi/esp8089/esp_debug.c:93:20: error: void value not ignored as it ought to be
                 rc = debugfs_create_u16(name, mode, parent, (u16*)value);
                    ^
/home/pi/esp8089/esp_debug.c:96:20: error: void value not ignored as it ought to be
                 rc = debugfs_create_u32(name, mode, parent, (u32*)value);
                    ^
/home/pi/esp8089/esp_debug.c:99:20: error: void value not ignored as it ought to be
                 rc = debugfs_create_u64(name, mode, parent, (u64*)value);
                    ^
/home/pi/esp8089/esp_debug.c:109:20: error: void value not ignored as it ought to be
                 rc = debugfs_create_u32(name, mode, parent, (u32*)value);
                    ^
make[2]: *** [scripts/Makefile.build:279: /home/pi/esp8089/esp_debug.o] Error 1
make[1]: *** [Makefile:1808: /home/pi/esp8089] Error 2
make[1]: Leaving directory '/usr/src/linux-headers-5.10.11-v7+'
make: *** [Makefile:126: modules] Error 2

Please Help

  Are you sure? yes | no

helge wrote 09/13/2016 at 16:47 point

Hi, seems I'm a bit late to the party - any chance you'd have two boards for my Borg Drive project?

  Are you sure? yes | no

jacksonliam wrote 09/13/2016 at 21:13 point

I have some spare bare PCBs but last time it took me nearly 30mins to sort and label all the passives for a few boards. It takes me about 30 mins each to assemble. I don't really have time to do either :-\

What were you looking for? 

  Are you sure? yes | no

helge wrote 09/14/2016 at 08:09 point

Sorry, I should have mentioned I'm good with the bare boards. I've ordered a pack of five ESP 12F modules, headers and passives should be around here somewhere and I'll get that LDO. I'd like to drop you a private message with the details if you don't mind.

  Are you sure? yes | no

haddyhad wrote 02/03/2016 at 00:33 point

Cool, you already are talking to the flash with spi bitbang.  Have you tried sending a powerdown command to the flash and leaving the sdio bus in 4 bit mode?

Edit: I see you will do that next.  Can't wait.

  Are you sure? yes | no

Similar Projects

Does this project spark your interest?

Become a member to follow this project and never miss any updates