-
1PCB Assembly
Tools
Hot Plate
JBC CD1-BB Soldering Station
JBC C245-030 Conical Soldering Tip
JBC C245-768 Chisel Soldering Tip
ChipQuik SMD4300TF Tack Flux
ChipQuik SMD4300SNL10 Solder Paste
Senju ESC-M705-0.3 Solder Wire
Fluke VT04 Thermal IR Camera
Nikon SMZ StereomicroscopeParts
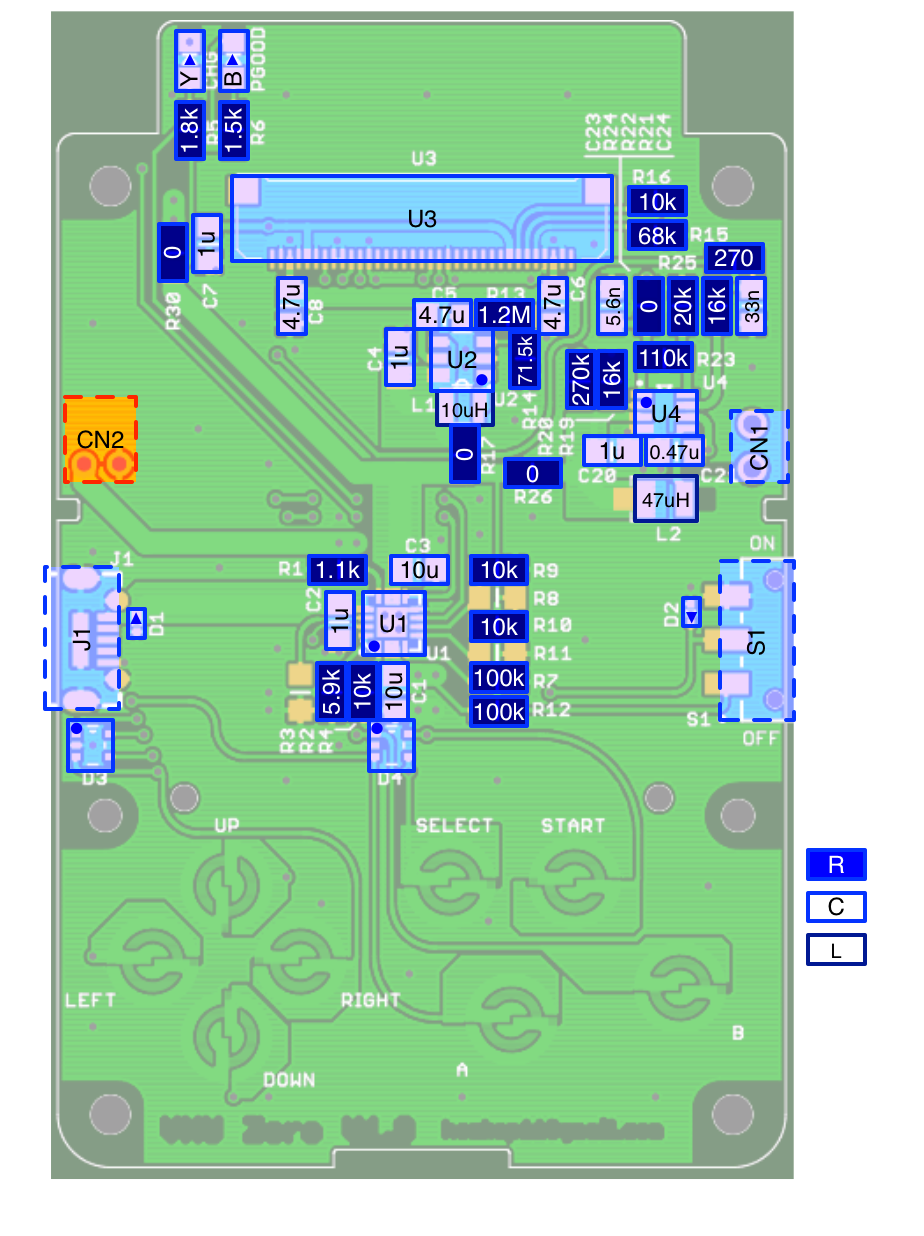
BOM File is available on GitHub
All of the parts but LT3469 Piezo Driver are available from DigiKey at the time of this writing. You can buy samples of LT3469 directly from Linear Technology.Reflow
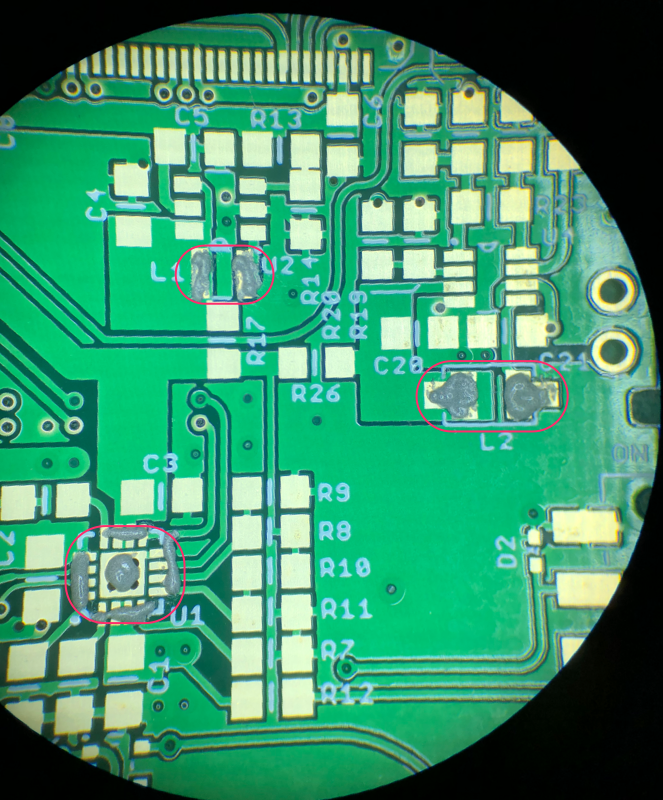
Apply a bit of solder paste on the pads of U1, L1, L2, D3 and D4. Optionally for D1, D2, U2, U4 and CN2.
![]()
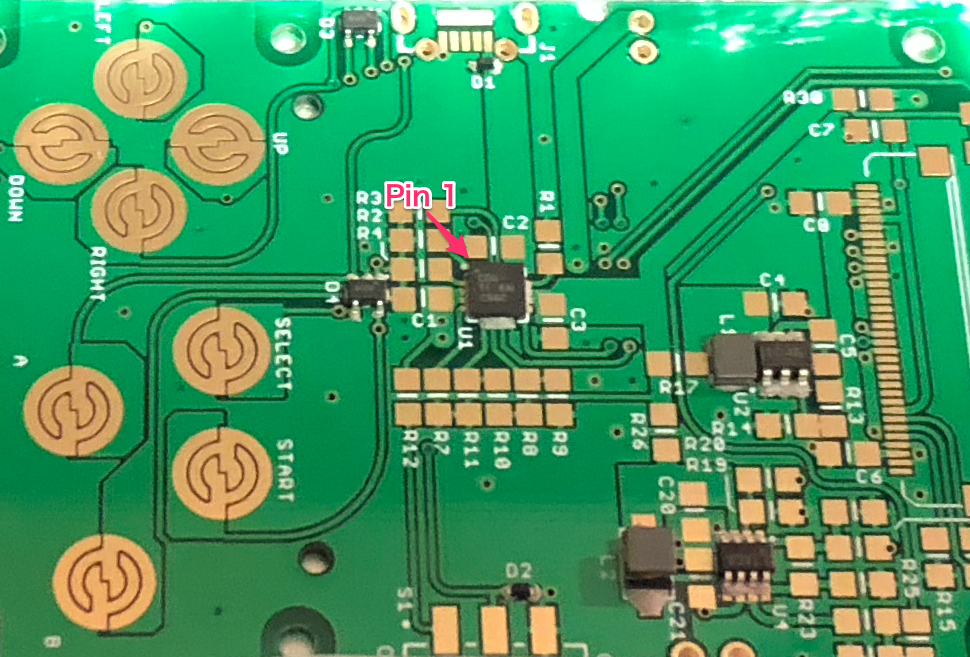
Grab components with a tweezer and place them onto the PCB. Make sure to orient the U1 properly.
![]()
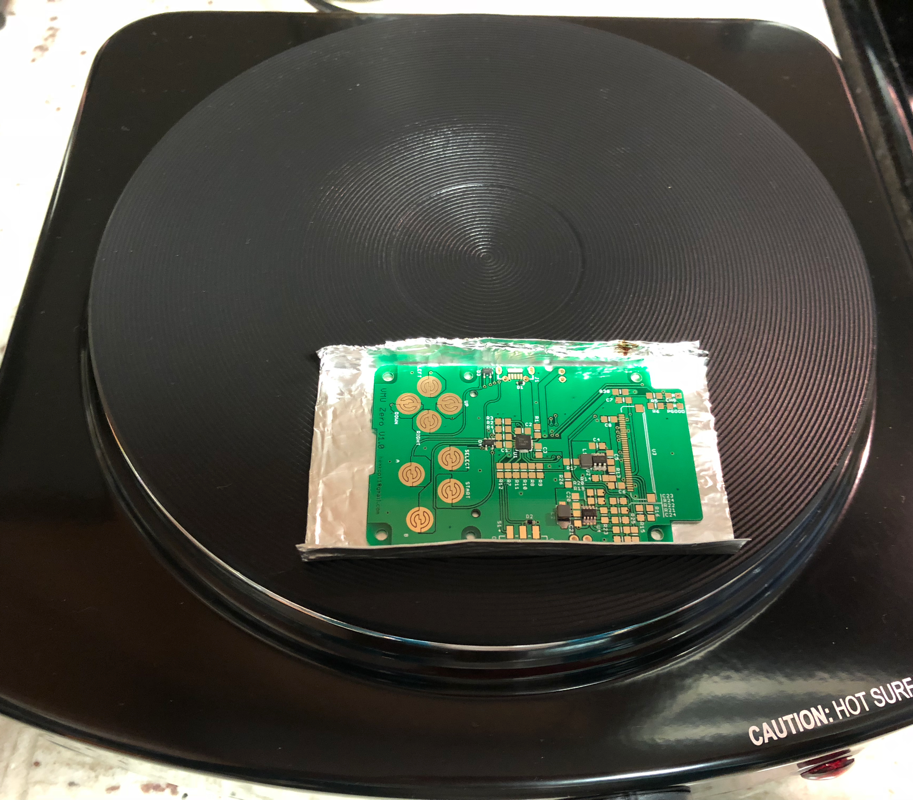
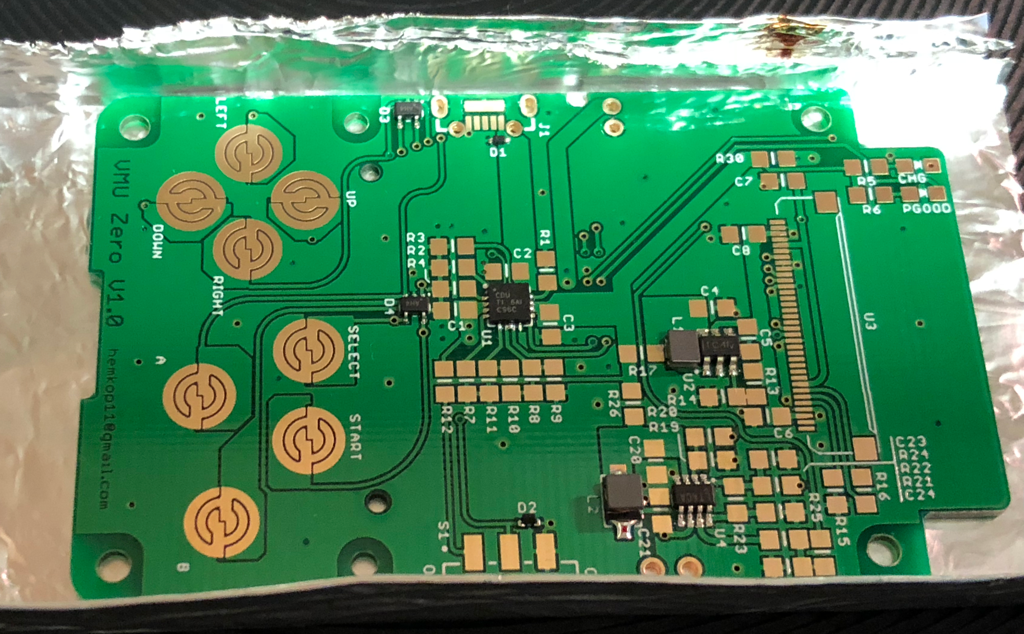
Position the PCB on the hot plate over the thick tinfoil as a heat spreader.
![]()
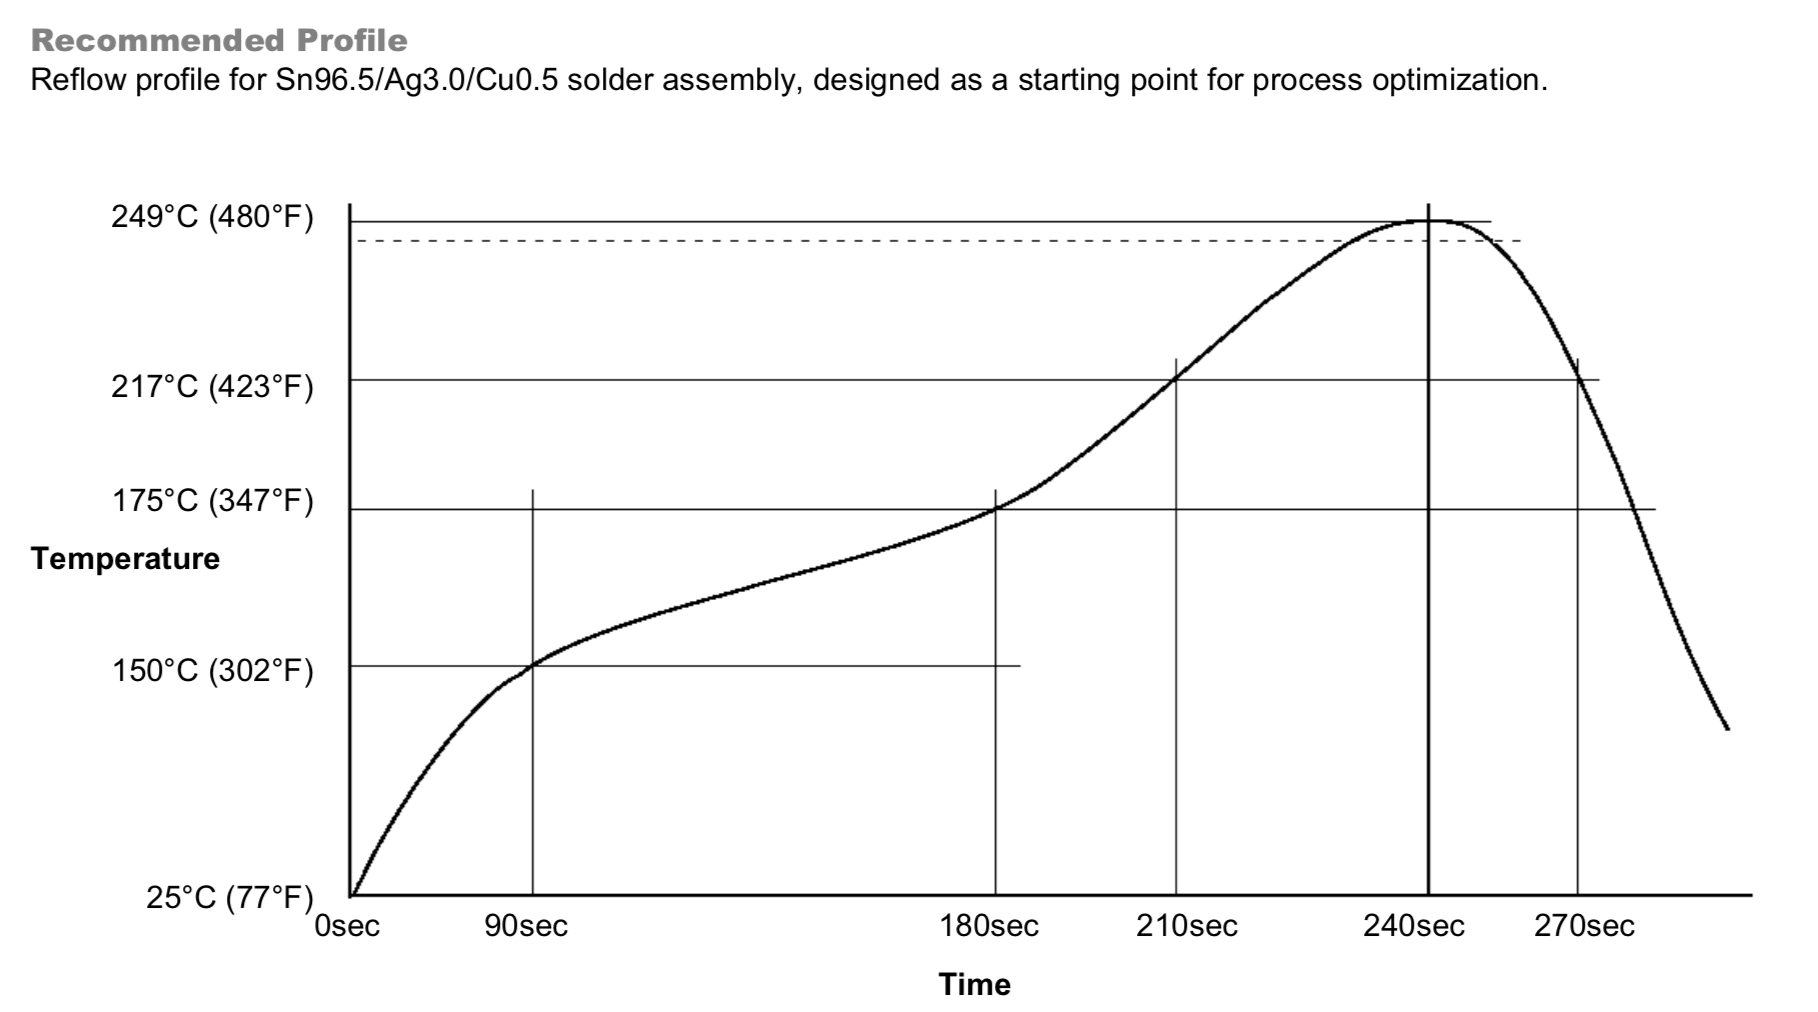
Cooking time! Turn on the hot plate and try to follow the recommended temperature profile of your solder paste.
![]()
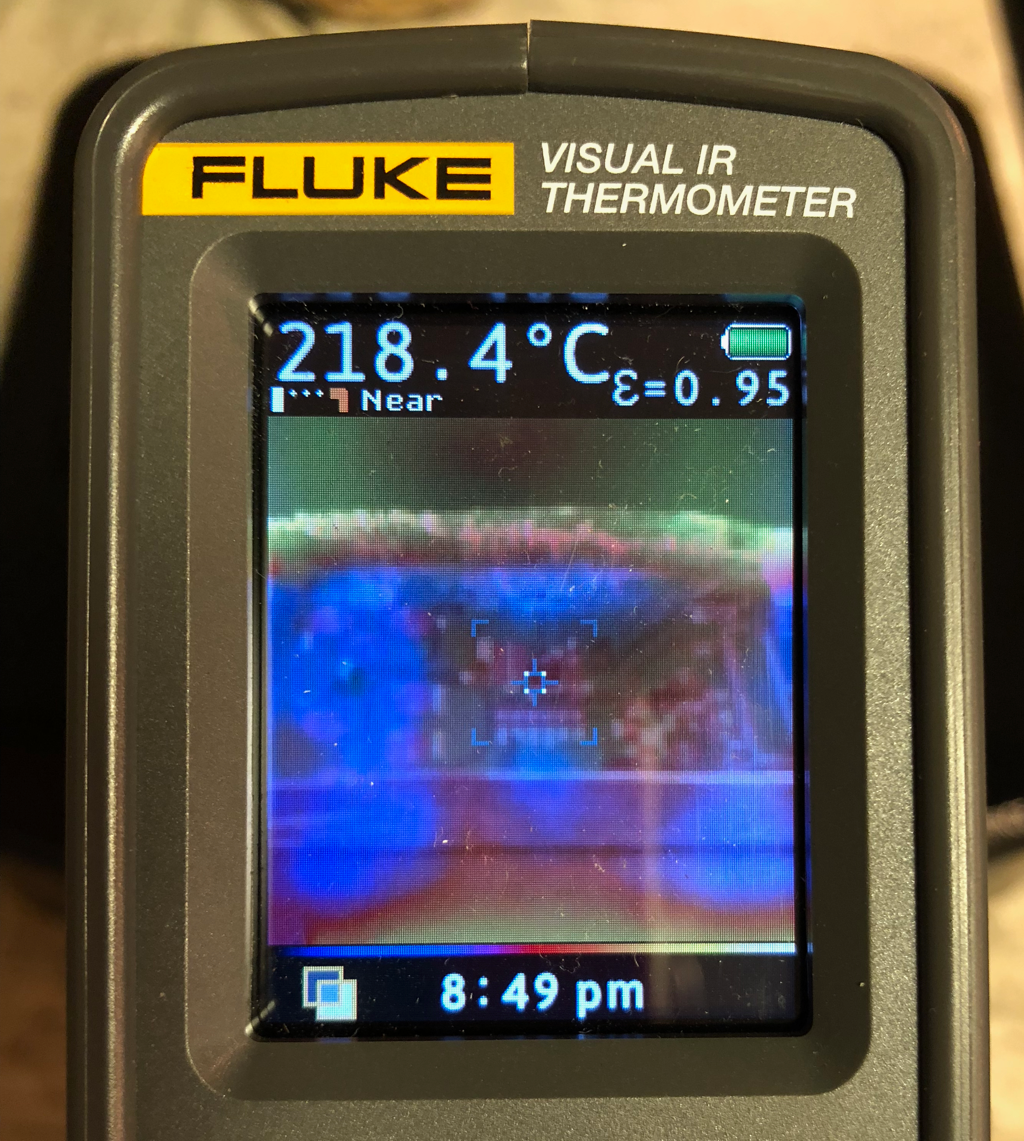
I heated it up to 180C in 3 minutes then 220C for the next 60s and hold for seconds. Thermal camera helped a lot to control the temperature. You should see solder paste turn shining silver when it starts melting. Do not heat too rapidly or parts would bounce up.
![]()
Cool it down. Be careful, PCB is extremely hot.
![]()
Assemble
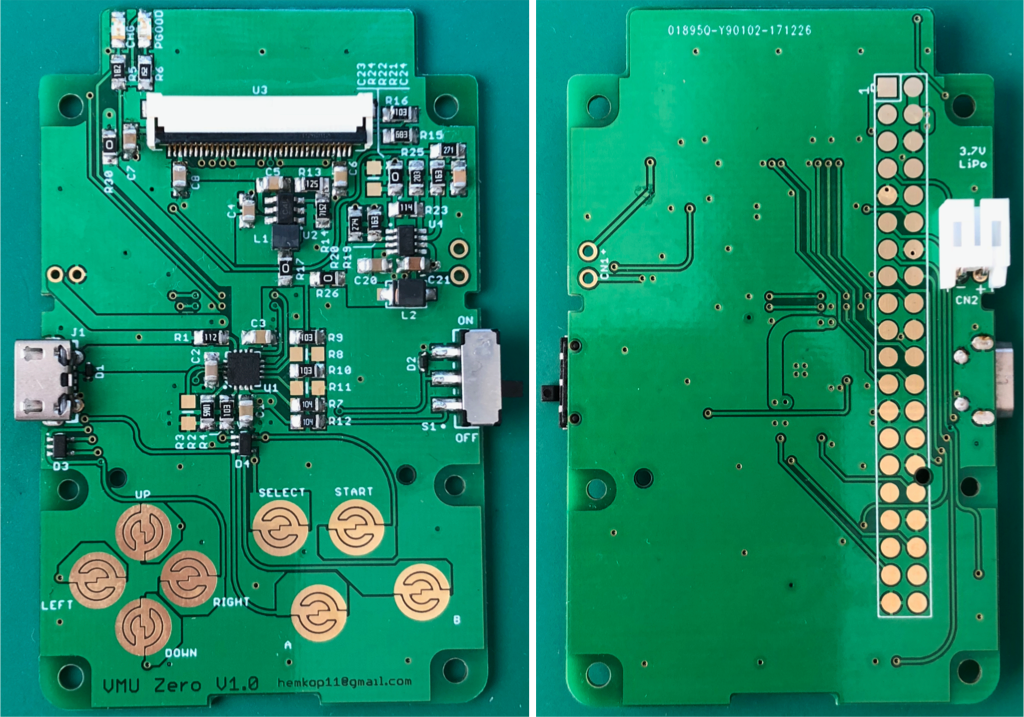
Install the rest of the SMT parts. Start with the U3 FPC connector then solder other parts on the top in order of increasing size.
![]()
Finally install the CN2 battery connector on the bottom side. We will solder the piezo speaker from the VMU to CN1 later.
![]()
-
2Software
Install RetroPie
Download RetroPie.
curl -O -L https://github.com/RetroPie/RetroPie-Setup/releases/download/4.3/retropie-4.3-rpi1_zero.img.gz
Unzip image.
gunzip retropie-4.3-rpi1_zero.img.gz
Insert an SD card and find the disk number. /dev/disk2 is assigned to my SD card but result would vary on the environment.
diskutil list
:
/dev/disk2 (internal, physical):
Burn the SD card. Hit Ctrl-T to see the progress
diskutil unmountDisk /dev/disk2
sudo dd bs=1m if=./retropie-4.3-rpi1_zero.img of=/dev/rdisk2
Create WiFi configuration file. Change the SSID and Password to match with your network
tee /Volumes/boot/wpa_supplicant.conf << EOF
network={
    ssid="SSID"
    psk="password"
    key_mgmt=WPA-PSK
}
EOF
Enable SSH.
touch /Volumes/boot/sshBoot the Pi Zero with the SD card then log on to it. The default password is raspberry.
ssh pi@retropie.localConfigure Pi
The rest of the instructions would be performed on the Pi.
Enable SPI.
sudo raspi-config nonint do_spi 0Disable Overscan.
sudo raspi-config nonint do_overscan 1Install FBCP.
sudo apt-get install cmake
git clone https://github.com/tasanakorn/rpi-fbcp
cd rpi-fbcp/
mkdir build
cd build/
cmake ..
make
sudo install fbcp /usr/local/bin/fbcp
Register FBCP as a service. # DO THIS STEP ONLY ONCE #
sudo sed -i "s/^exit 0/\/usr\/local\/bin\/fbcp \&\\nexit 0/g" /etc/rc.localInstall FBTFT.
sudo tee /etc/modules-load.d/fbtft.conf << EOF
spi-bcm2835
fbtft_device
EOF
Install SEPS525 driver.
curl -O https://raw.githubusercontent.com/satri360/vmuzero_seps525/master/fb_seps525.ko
sudo cp fb_seps525.ko /lib/modules/$(uname -r)/kernel/drivers/staging/fbtft/
Configure FBTFT.
sudo tee /etc/modprobe.d/fbtft.conf << EOF
options fbtft_device custom name=fb_seps525 gpios=reset:24,dc:25 speed=8000000 rotate=180
EOF
Update module dependency.
sudo depmod
Install Retrogame.
curl -O https://raw.githubusercontent.com/adafruit/Raspberry-Pi-Installer-Scripts/master/retrogame.sh
sudo bash retrogame.sh
Select 3. PiGRRL Zero and reboot.
SELECT 1-8: 3
Downloading, installing retrogame...OK
Downloading, installing retrogame.cfg...OK
Performing other system configuration...OK

REBOOT NOW? [y/N]y
Configure Retrogame.
sudo tee /boot/retrogame.cfg << EOF
LEFT      17
RIGHT     22
DOWN      27
UP        23
Z          4  # 'A' button
X         12  # 'B' button
LEFTCTRL  16  # 'Select' button
ENTER     26  # 'Start' button
EOF
Enable PWM Audio.
sudo tee -a /boot/config.txt << EOF
dtoverlay=pwm,pin=18,func=2
EOF
Set Maximum Volume.
amixer cset numid=1 -- 100% -
3Modifying VMU Case
Tools
Screw Driver
Side Plier
7mm Flat File
XACT Knife
Air DusterDisassemble VMU
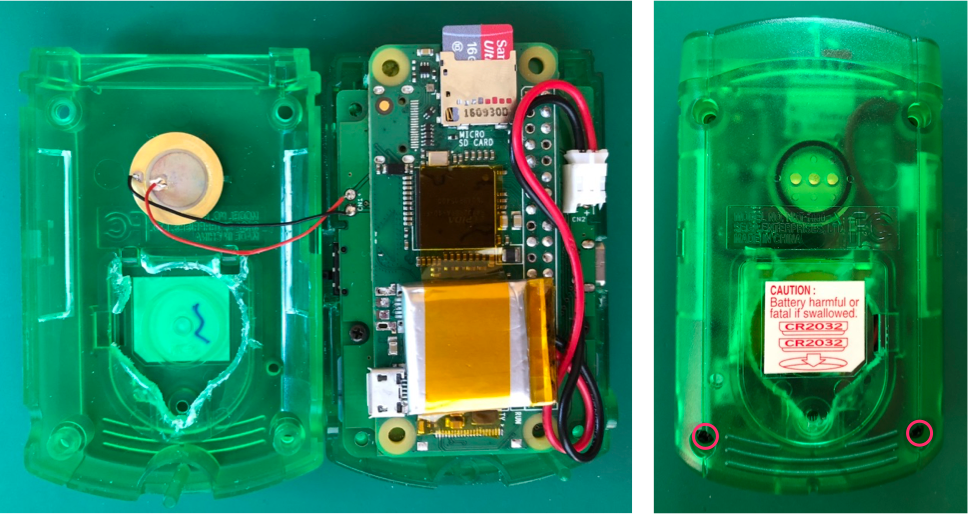
Strip down the VMU and keep everything but the PCB, coin cell and display.
Try not to touch the piezo speaker to prevent fingerprints on the disc.![]()
Modify Case
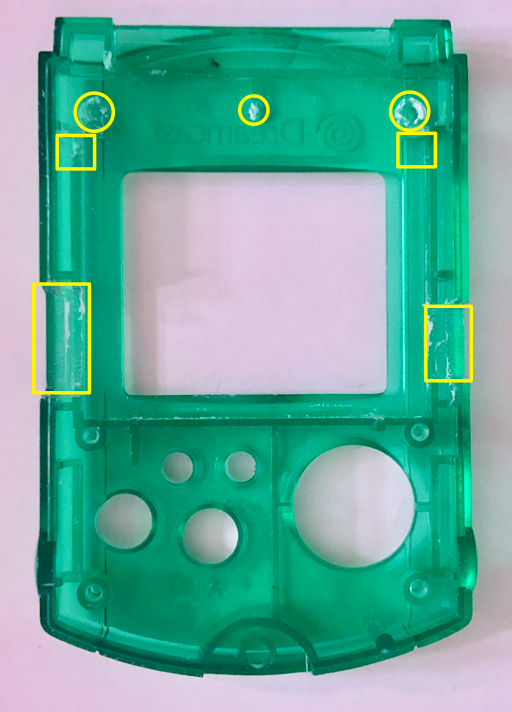
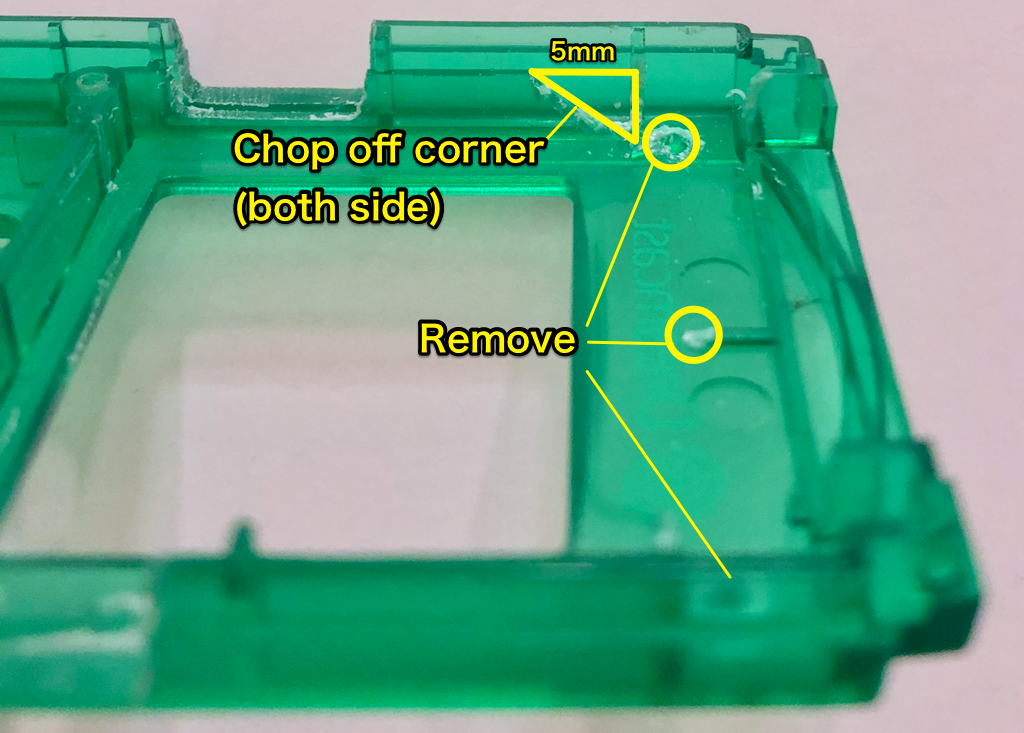
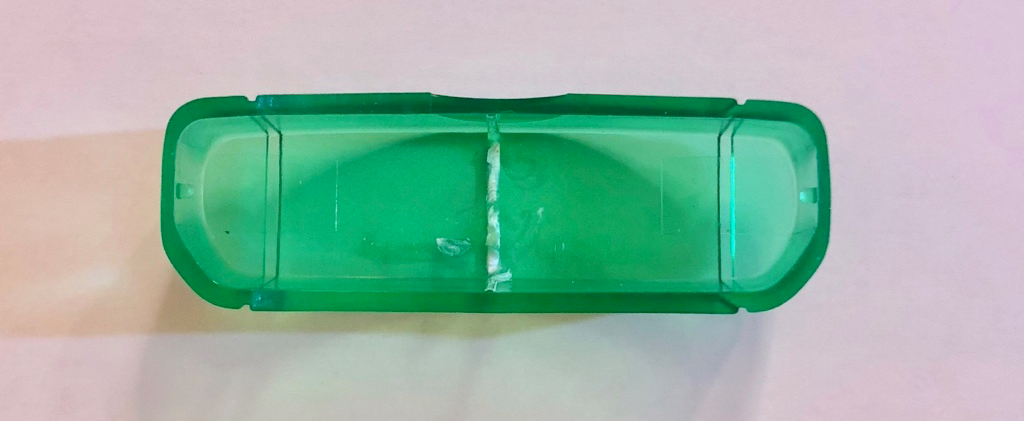
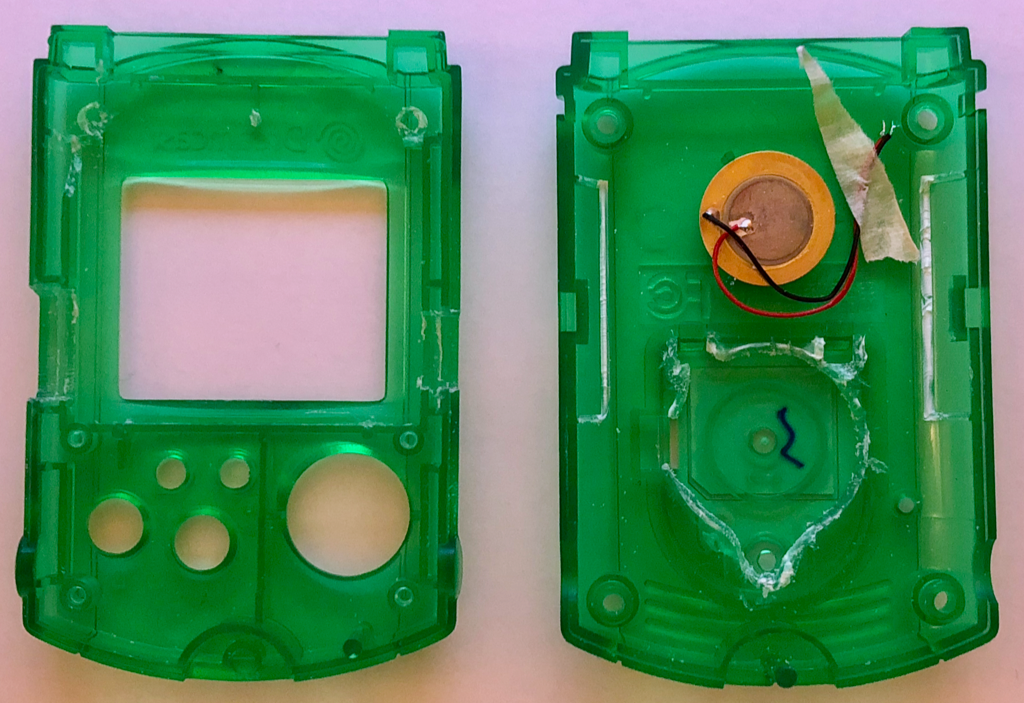
Use plier and flat file to make some changes to the case.
Case Top
![]()
Case Top Left
![]()
Case Top Right
![]()
Case Top Upper
![]()
Case Bottom
![]()
Case Lid
![]()
Complete
![]()
-
4Final Assembly
Tools
JBC CD1-BB Soldering Station
JBC C245-768 Chisel Soldering Tip
Senju ESC-M705-0.3 Solder Wire
Desoldering Wick
Desoldering PumpParts
Assembled PCB (See Instruction #1)
Raspberry Pi Zero W (See Instruction #2)
Modified VMU Case (See Instruction #3)
160 x 128 OLED Display
150mAh - 350mAh Li-Pp Battery
AWG34 Enameled Wire
AWG28 Stranded WireReworks
Tape Display Controller (optional)
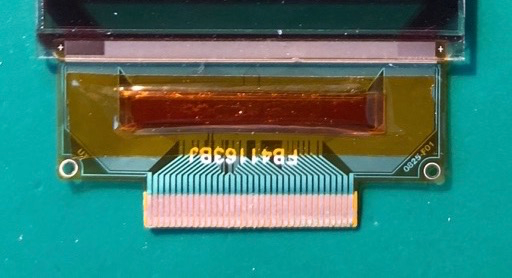
The display controller occasionally failed to perform an analog reset under very bright circumstances. I have reduced the reset period to overcome this problem but you may still observe the black screen if this happens. Shade the controller in hopes of resolving this issue or you can cover it by hand during boot.![]()
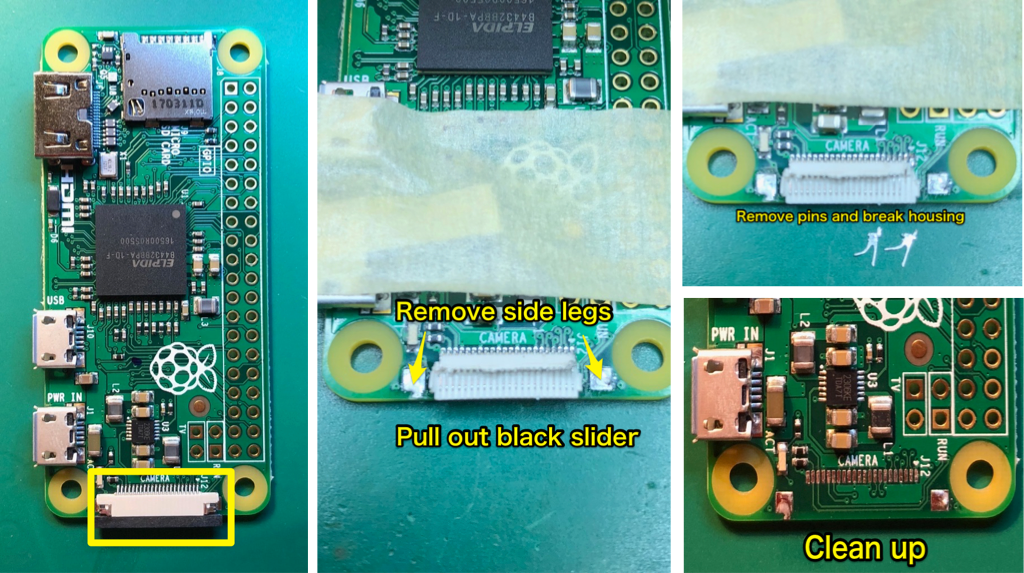
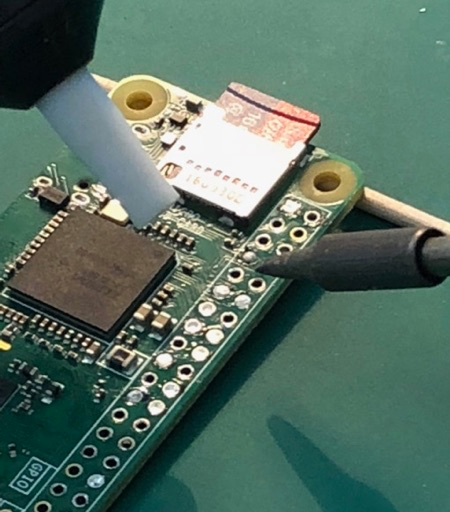
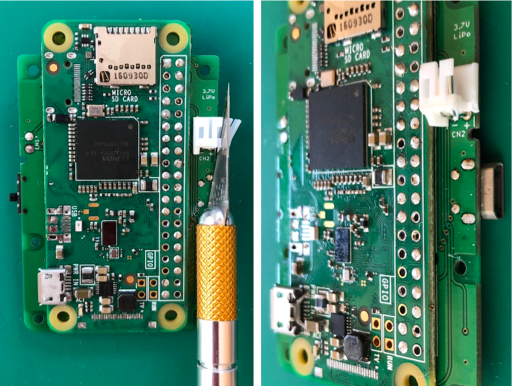
Remove Pi Camera Connector
Desolder the camera connector using solder iron and plier.![]()
Pre-assembly Test
Semi assemble the PCB and check the basic functions.
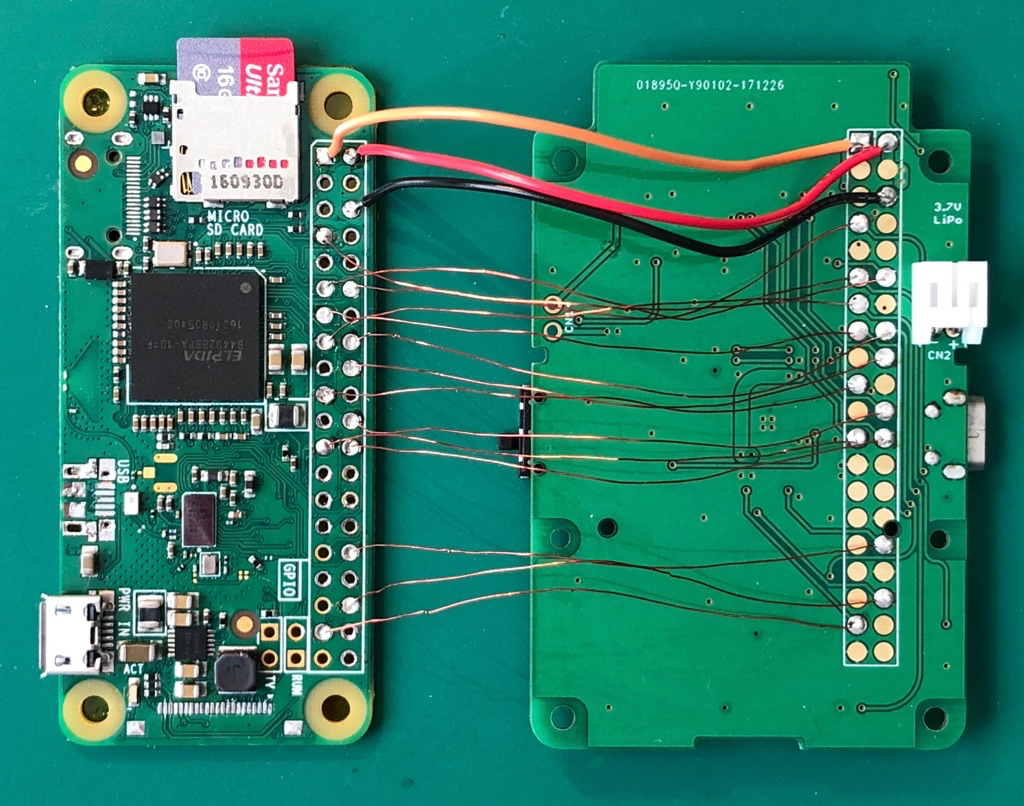
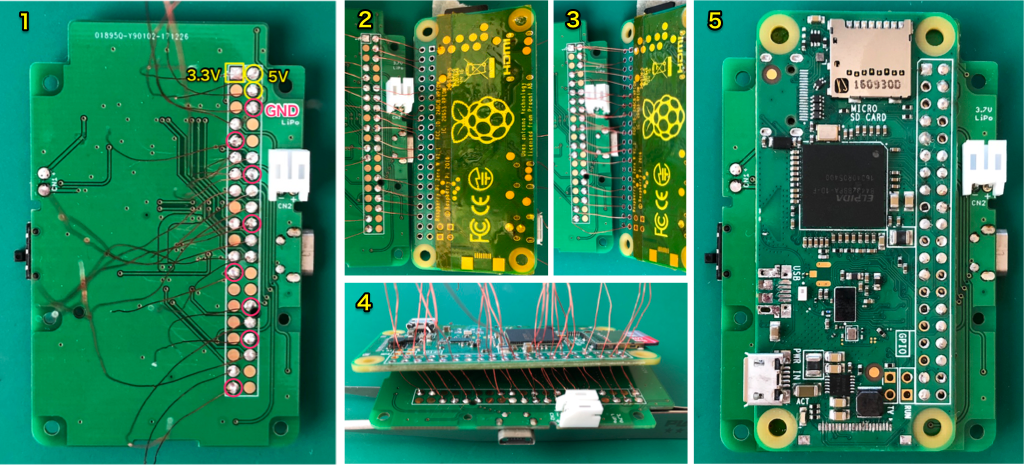
Wiring PCB and Pi
Prepare 5cm of 3x AWG28 stranded wires and 14x AWG34 enamel coated wires. Solder wires to connect the pads of Pi and the PCB. Leave some ground pads at this time to save some time.#1 Power 3.3V (AWG28 orange)
#2 Power 5V (AWG28 red)
#6 Power GND (AWG28 black)
#7 Key_A
#11 Key_LEFT
#12 PWM0
#13 Key_Down
#15 Key_Right
#16 Key_Up
#18 OLED_Reset
#19 OLED_MOSI
#22 OLED_DC
#23 OLED_SCK
#24 OLED_CS
#32 Key_B
#36 Key_Select
#37 Key_Start![]()
(Note: HDMI and OTG connectors are removed in this image but it is not required for this project)
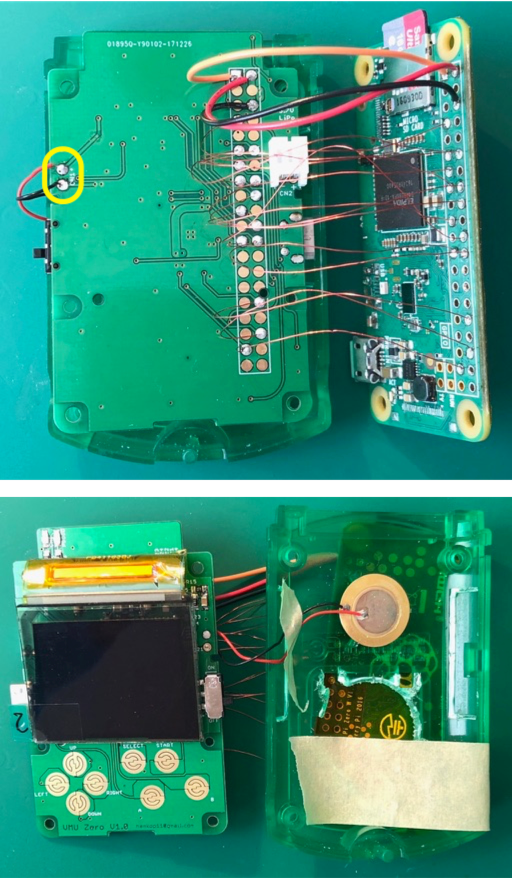
Attach Speaker and Display
Solder the speaker wires to the PCB. Flip the PCB and insert the OLED FPC.
Double check all the wire connections before powering up the unit.![]()
Power On ⚡
Attach 1A or higher USB power cable to the PCB. It will power up the unit regardless of the position of the slide switch as it only controls the battery. First, check the green LED flashing on the Pi.
You should see the RetroPie splash screen if everything goes well. Place the rubber pad on the PCB and press any key to start the configurations. Press UP, DOWN, LEFT, RIGHT, START, SELECT, A, B then hold A to skip the rest. Copy your favorite ROMs to the Pi and play some games to check the audio.![]()
Unwiring PCB and Pi
Use desoldering wick and pump to unsolder the pads on the Pi.![]()
Assembly
Solder the Pi to the PCB and fit everything in the VMU. You are almost there.
Remove the speaker and display. Unsolder the 3 power wires from the PCB and replace with AWG34. Wire all GND pads #9, #25, #39, #6, #14, #20, #30, #34 with the same AWG34. These wires will work as a core when soldered the PCB down to the Pi.
Thread wires to the header of the Pi. Start from the of row closer to the edge then finish the other. Slowly pull up the wires through the Pi all the way till the Pi touches the PCB. Cut the wires right above the Pi and solder them down.
Again HDMI and OTG connectors are removed in this image but it is not required for this project.![]()
Rework JST
Cut the side wall of the CN2 battery connector to avoid it hitting the VMU.![]()
Fixing Display and PCB
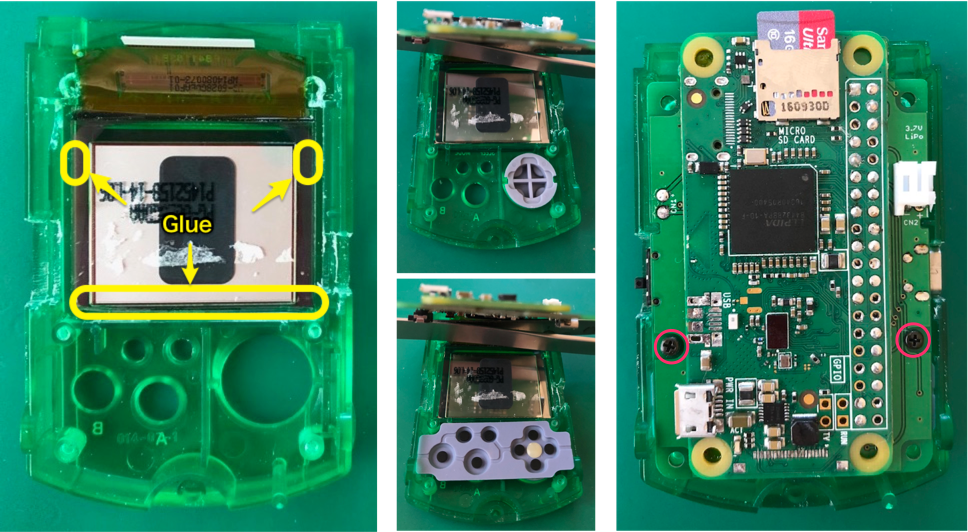
Glue the OLED to the case. Place the directional key support and rubber pads. Carefully insert the Display FPC to the PCB. Align the PCB to the VMU by matching the 2 notches on the PCB to the protrusions of the VMU case. Screw down the PCB to the case.![]()
Complete
Wire the speaker to CN1 and attach the battery to CN2. Try to find a place for the battery wires and close the case. Screw the case at the lower holes. Close the lid.![]()
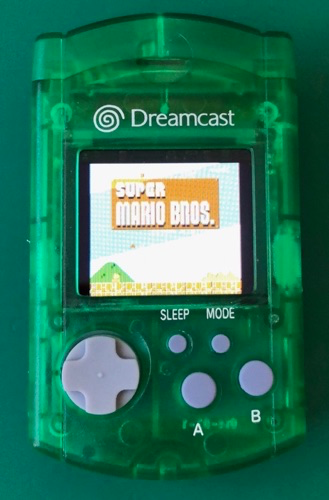
Slide the side switch to On position and enjoy the game 🎮
![]()
Limitations
- No power status LED
Check the green LED on the Pi as a power indicator. Blue LED will light only when USB power cable is connected. - No background changing
One needs to attach the USB power cable and shift the slide switch to On position in order to start charging the battery.
- No power status LED
 satri360





Discussions
Become a Hackaday.io Member
Create an account to leave a comment. Already have an account? Log In.
Where can I get this PCB? I guess I could upload the files and get a third party to create it?
Are you sure? yes | no