-
1Step 1
What will we need?
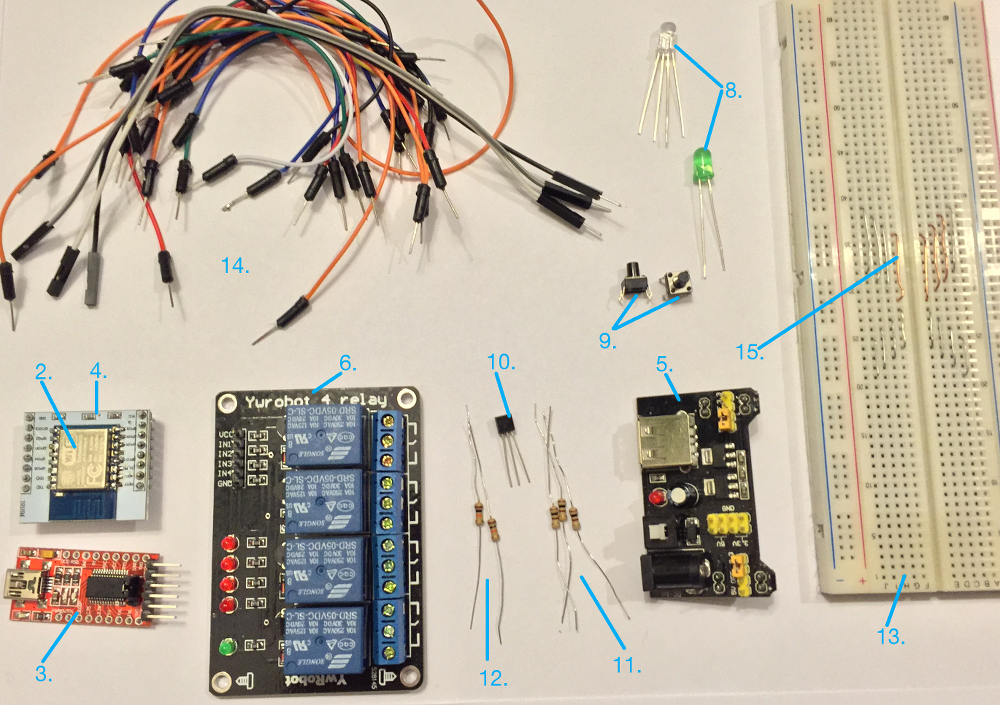
- A smartphone, Android (3.1.x Version or higher) or iPhone iOS 6.1 (or higher).
- An ESP8266 module version 512KB flash (or higher). This article will cover the ESP8266-12 version
- A USB-Serial converter to program ESP. I have used the “FT232RL FTDI 3.3V 5.5V USB to TTL Serial Adapter”
- PCB adapter for ESP
- 3.3/5V powering unit. I have used the YwRobot module
- A relay module. For this article I have used version I had close at hand i.e. YwRobot 4 relay.
- 12V charger.
- Two (2) LED diodes, one of which must be RGB
- Two (2) micro-switches
- One (1) transistor. I have used BC547.
- Three (3) 100R resistors.
- Two (2) 10K resistors.
- One (1) breadboard.
- Connecting wiring.
- Piece of a thin wire.
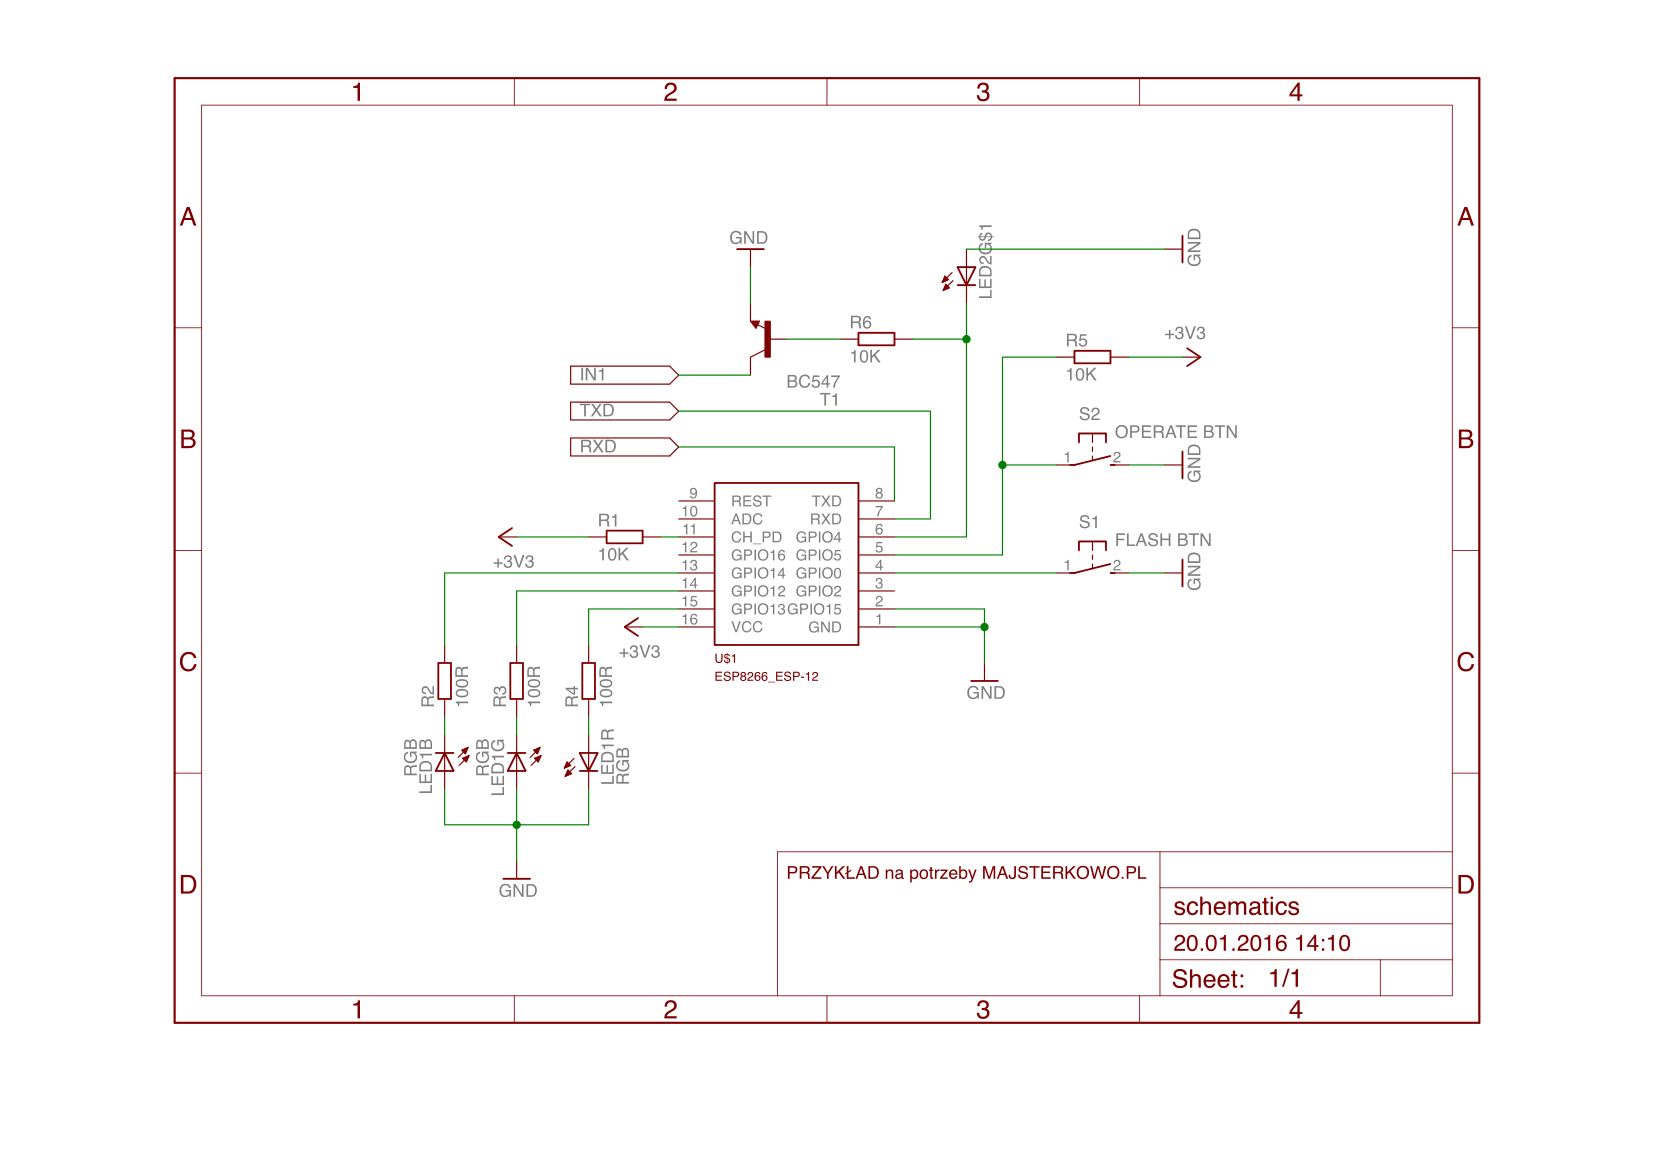
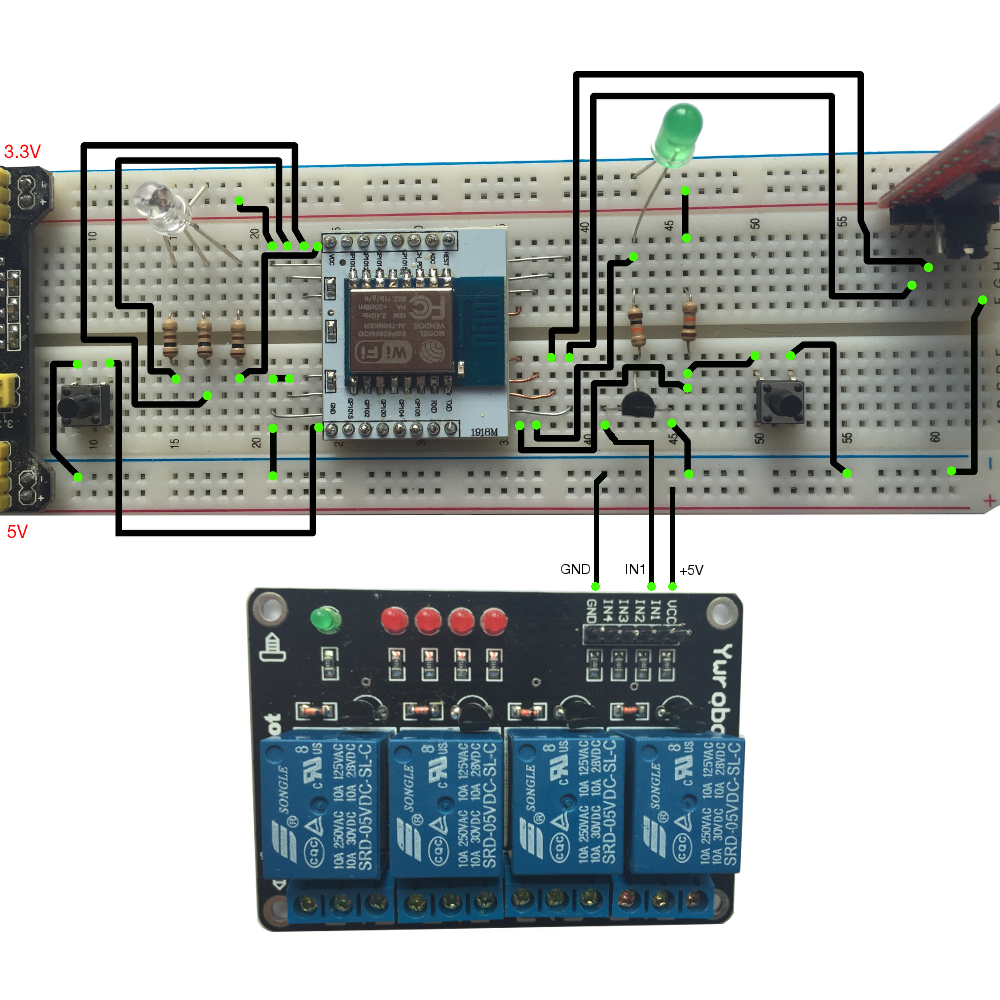
Do not forget to connect the ESP module TXD pin to the USB-Serial converter RXD pin, and the ESP module RXD pin to the USB-Serial converter TXD pin. “IN1” must be connected to the relay module.
![]()
![]()
-
2Step 2
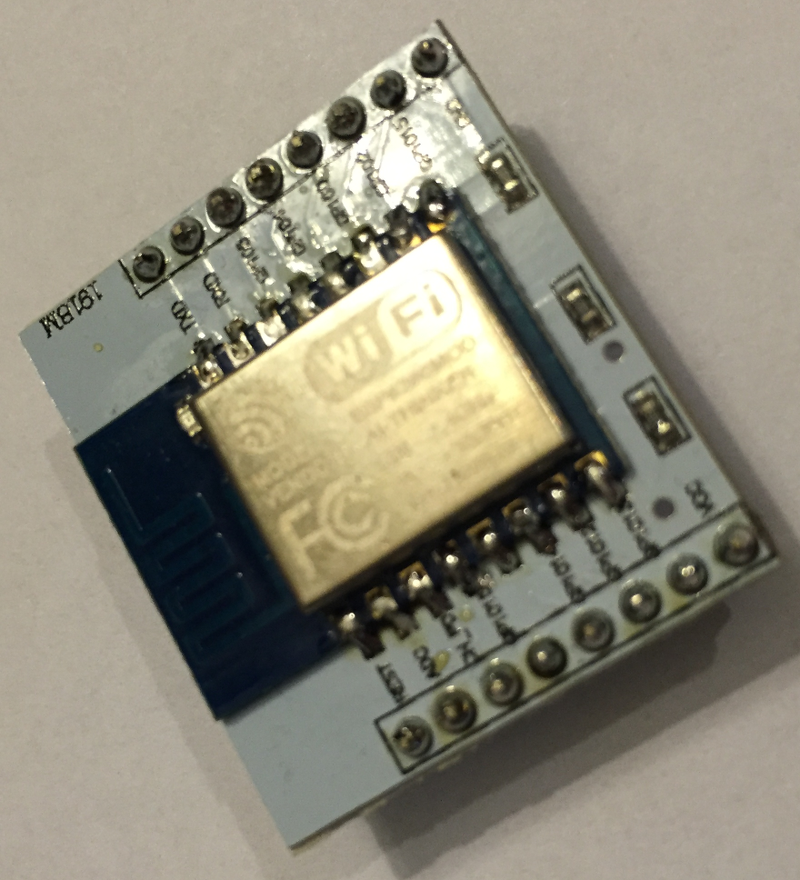
Solder the ESP8266-12 module to the PCB adapter
![]()
-
3Step 3
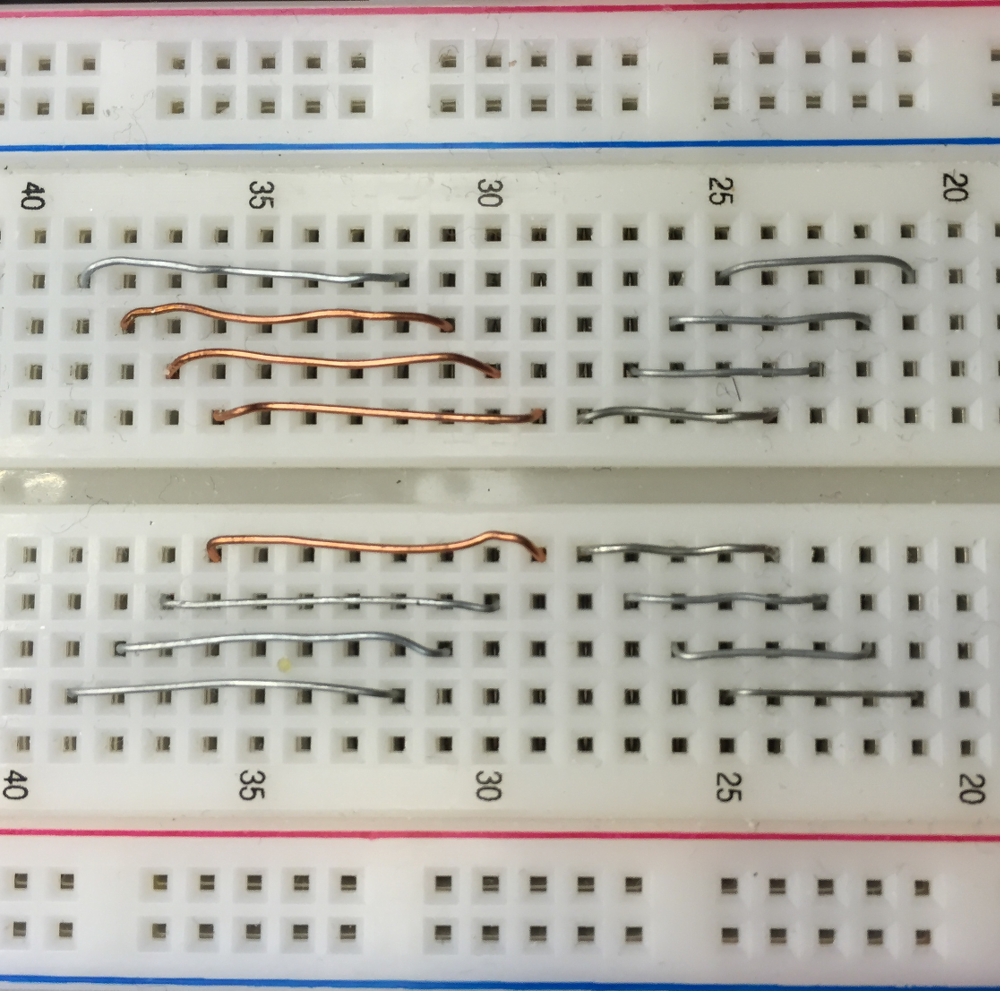
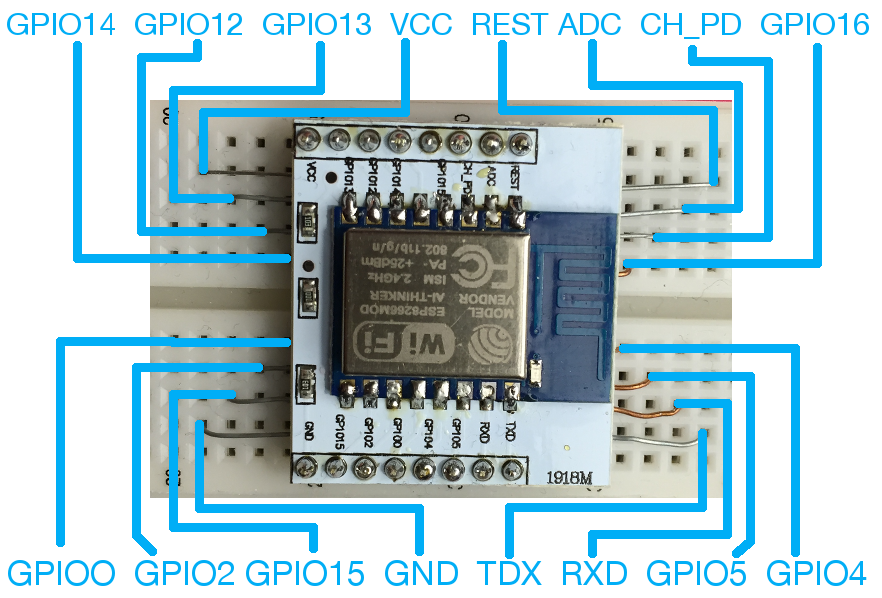
With a thin wire make hookups for easier module pin connections.
![]()
-
4Step 4
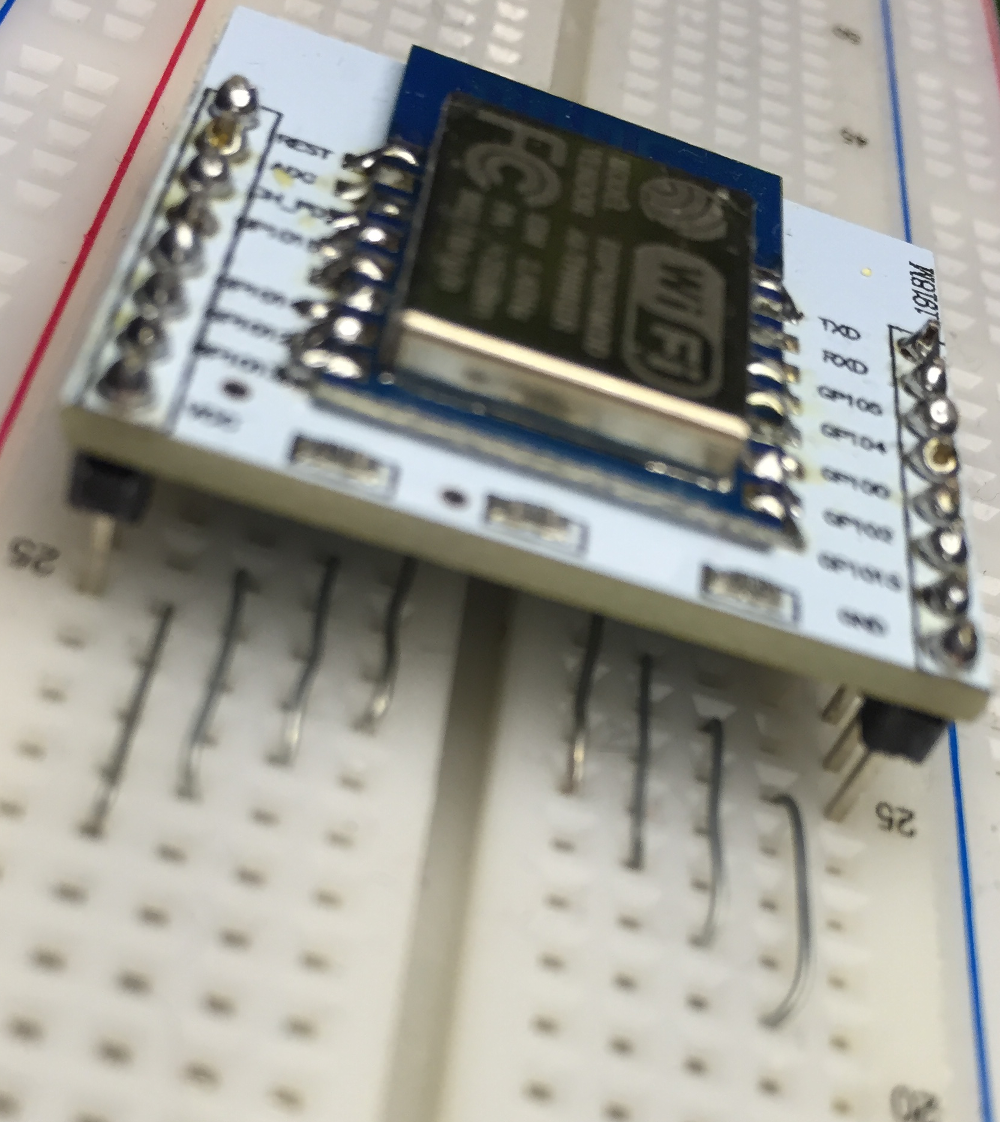
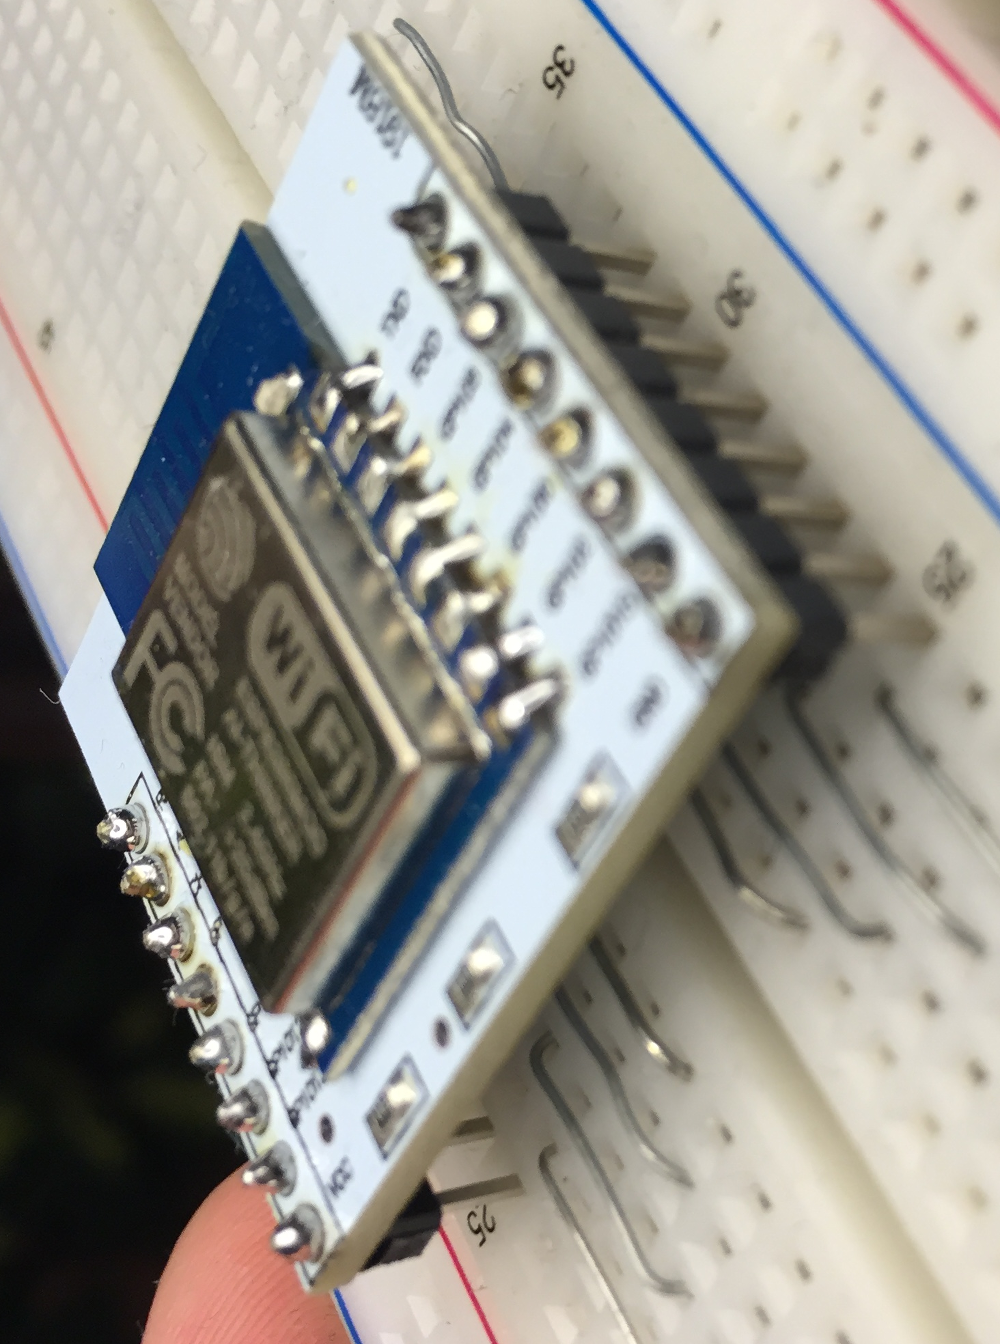
Mount the ESP module on the breadboard, make sure “GND” and “VCC” pins end up in the 25th row
![]()
![]()
![]()
-
5Step 5
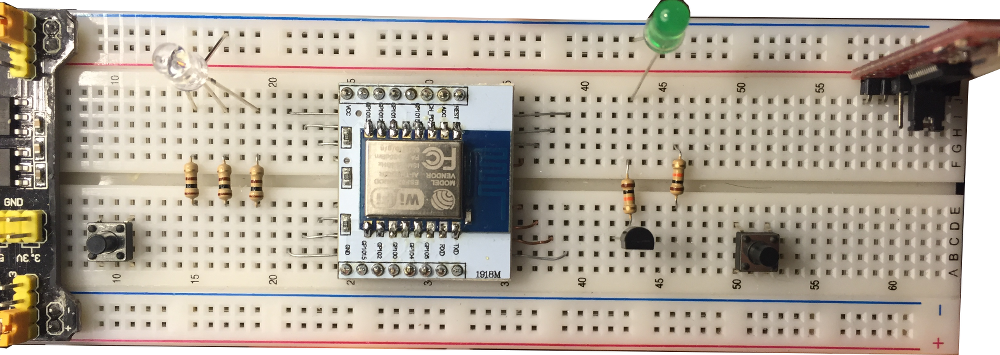
Mount all the remaining parts
![]()
-
6Step 6
Connect all the elements with connecting wiring according to the scheme.
NOTE! In this particular case, we skip the R1 resistor and 3.3V plug in as the PCB adapter already has both. Moreover, GND of the USB-Serial converter must be connected to the GND of the powering module.
![]()
-
7Step 7
Software for the microcontroller. Appropriate firmware is required in order to have the microcontroller working. In this case, we will use firmware to be downloaded from GITHUB: https://github.com/SUPLA/ESP8266/tree/master/socket-firmware
NOTICE! Some versions of the ESP8266-12 have the 4th and 5th GPIO ports inverted. If this is the case, you need to use firmware which will be compatible. Such a solution is available at: https://github.com/SUPLA/ESP8266/tree/master/socket-firmware-gpio54
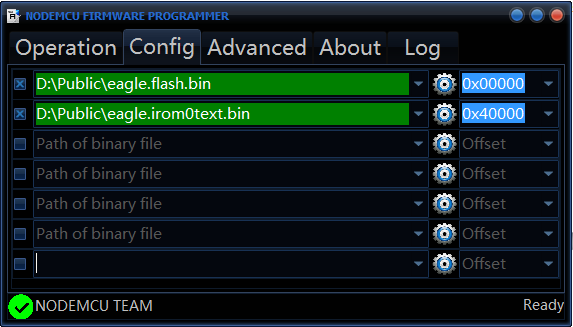
Firmware must be implemented in the following flash memory area:
eagle.flash.bin——–>0x00000
eagle.irom0text.bin—->0x40000
You must use appropriate software to have firmware loaded onto the microcontroller. I have used „NODEMCU FIRMWARE PROGRAMMER” https://github.com/nodemcu/nodemcu-flasher
32bit Version: https://github.com/nodemcu/nodemcu-flasher/tree/master/Win32/Release
64bit Version: https://github.com/nodemcu/nodemcu-flasher/tree/master/Win64/Release
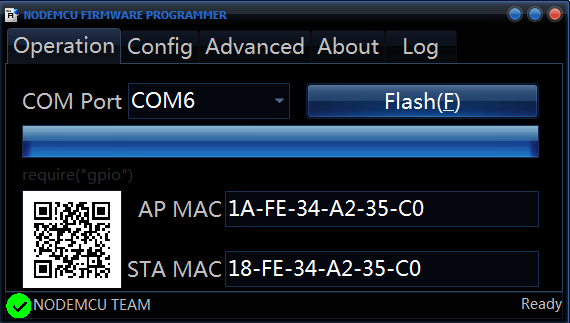
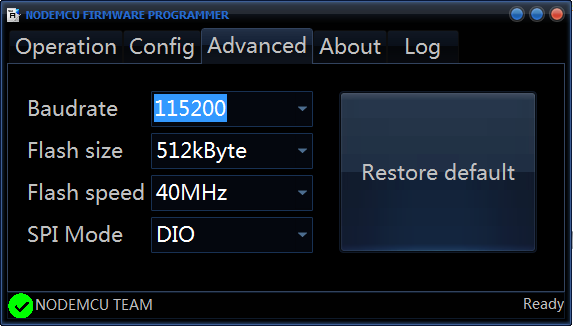
You must select proper serial port where the USB-Serial converter has been plugged in and enter the other settings which can be seen on the screenshots below:
![]()
![]()
![]()
If the ESP module is connected via the USB-Serial converter to the computer, and all the above steps have been performed, we can upload the software.
- Provide 12V power supply.
- Press and hold the micro-switch connected to the GPIO0 port (the nearest to the powering unit), and turn the power on – keep pressing the micro-switch the whole time.
- Release the micro-switch when power is on.
The RGB diode should now gently flash three colors.
We can now load firmware. Using NODEMCU click „Flash” and wait until progress bar reaches 100% for each of the two files.
NOTICE! ESP8266 module is very interference-sensitive. When it is connected to breadboard temporarily, firmware load may not be successful at the first time. Therefore, sometimes the attempt must be made few times. If the firmware was loaded successfully, we can disconnect power supply and remove the USB-Serial converter and move to the next step.
NOTICE! ESP will not start, if the converter remains on the breadboard not connected to a powered-up computer.
-
8Step 8
ESP configuration. Before any steps are taken you need to subscribe to the Polish OpenSource service project called SUPLA at https://cloud.supla.org/account/create.
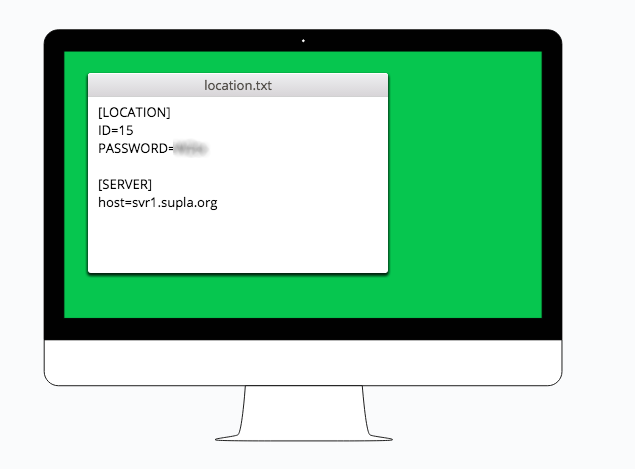
You need to read location settings and password as well as server address after you log on cloud.supla.org.
![]()
Now, we can start the proper ESP configuration.
- Turn the power supply on.
- RGB diode should flash in blue indicating the module is in configuration mode. If the diode flash in red, you need to press and hold for at least 5 sec. the second switch (the furthest to the powering unit). Such action should put the unit in the configuration mode manually, and the diode should start flashing blue automatically.
- You need to connect to SUPLA-ESP8266 WiFi network from any computer with WiFi card.
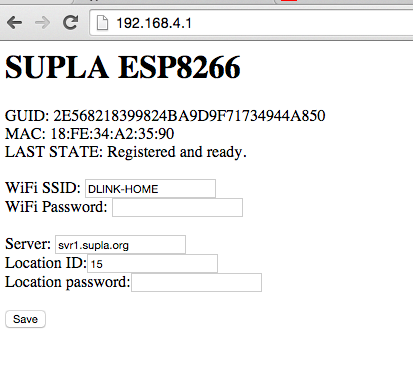
- Go to http://192.168.4.1 and enter access data of your home WiFi having Internet access, password and location identifier obtained from cloud.supla.org into the form.
![]()
Click „Save” and restart the module - turn the power off and on back again or press switch No. 2 (the furthest to the powering unit).
* Module does not display password, which does not mean they are not saved.
**Properly saved data will be confirmed with the “Data Saved” alert.
***LAST STATE: defines status of the most recent svr1.supla.org. server connection. If the entered location data was incorrect, you can return to the configuration to read the last alert.
RDG diode will indicate module status, after restart:
- red light – No WiFi connection or IP address from DHCP has not been obtained
- blue light – steady burn: WiFi connection has been obtained. IP address has been obtained, but no connection to server (svr1.supla.org) has been set.
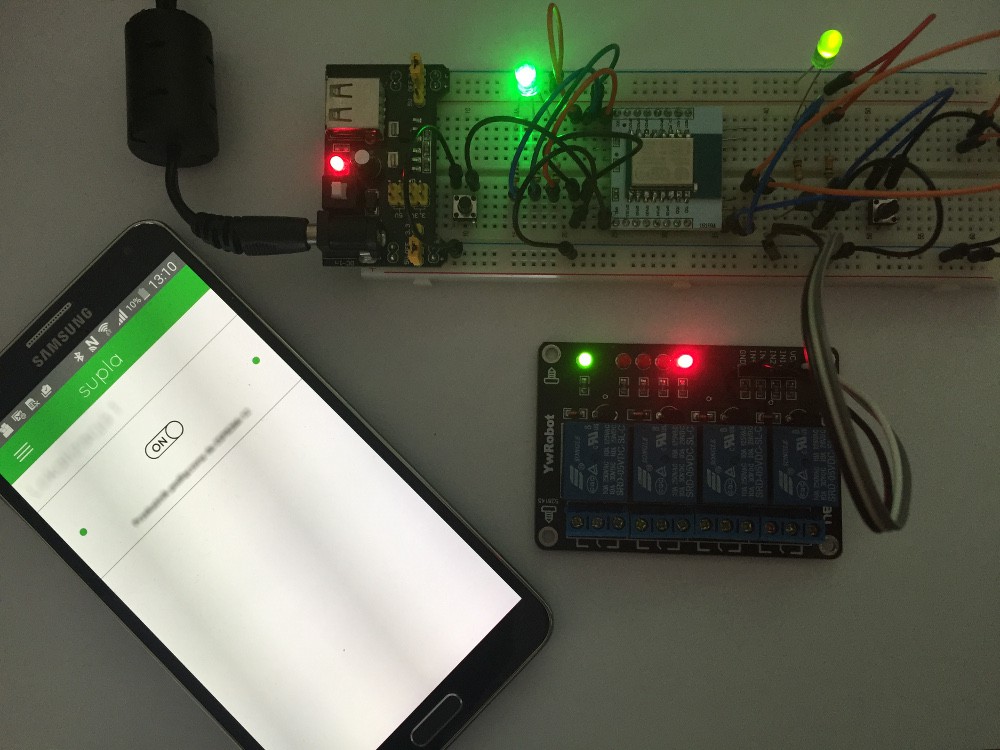
- green light – Server connection has been set. Unit is ready to work. It is worth pointing out that the relay can also be operated manually when pressing switch No. 2.
-
9Step 9
Smartphone configuration.
First of all, you need to download the application on your phone from AppStore or Google Play. Application is free of charge.
iOS: https://itunes.apple.com/us/app/supla/id996384706?l=en&ls=1&mt=8
Android: https://play.google.com/store/apps/details?id=org.supla.android
Install and start the application.
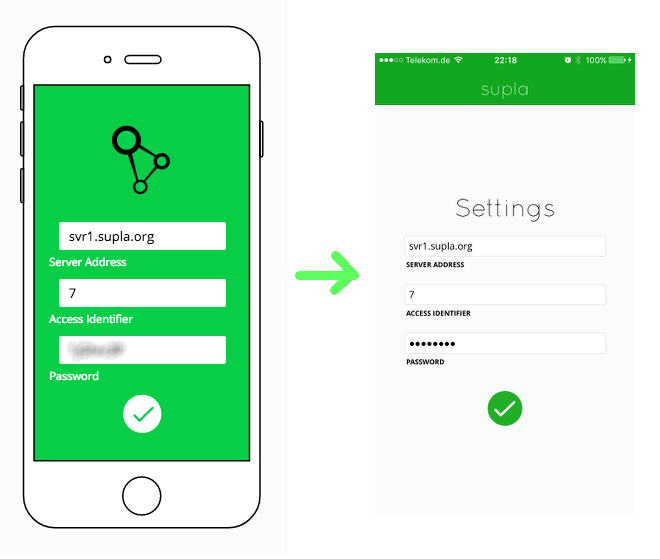
Right after you start it, a window will appear, where all the settings from cloud.supla.org must be entered.
![]()
Save the settings and the relay connected to the ESP can be operated via your Smartphone.
Discussions
Become a Hackaday.io Member
Create an account to leave a comment. Already have an account? Log In.