JackRC
-
Robotic gripper/hand R&D
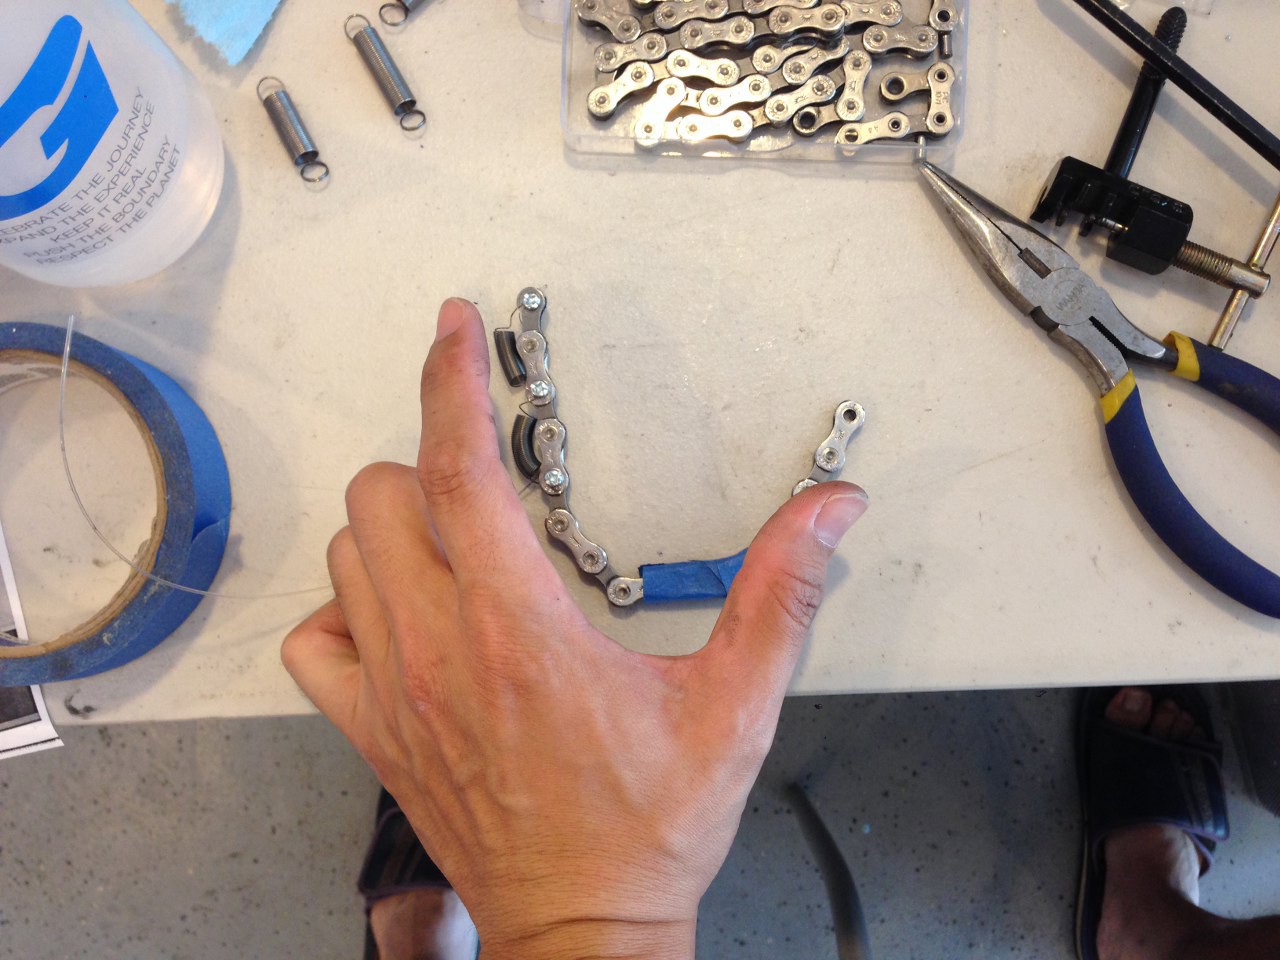
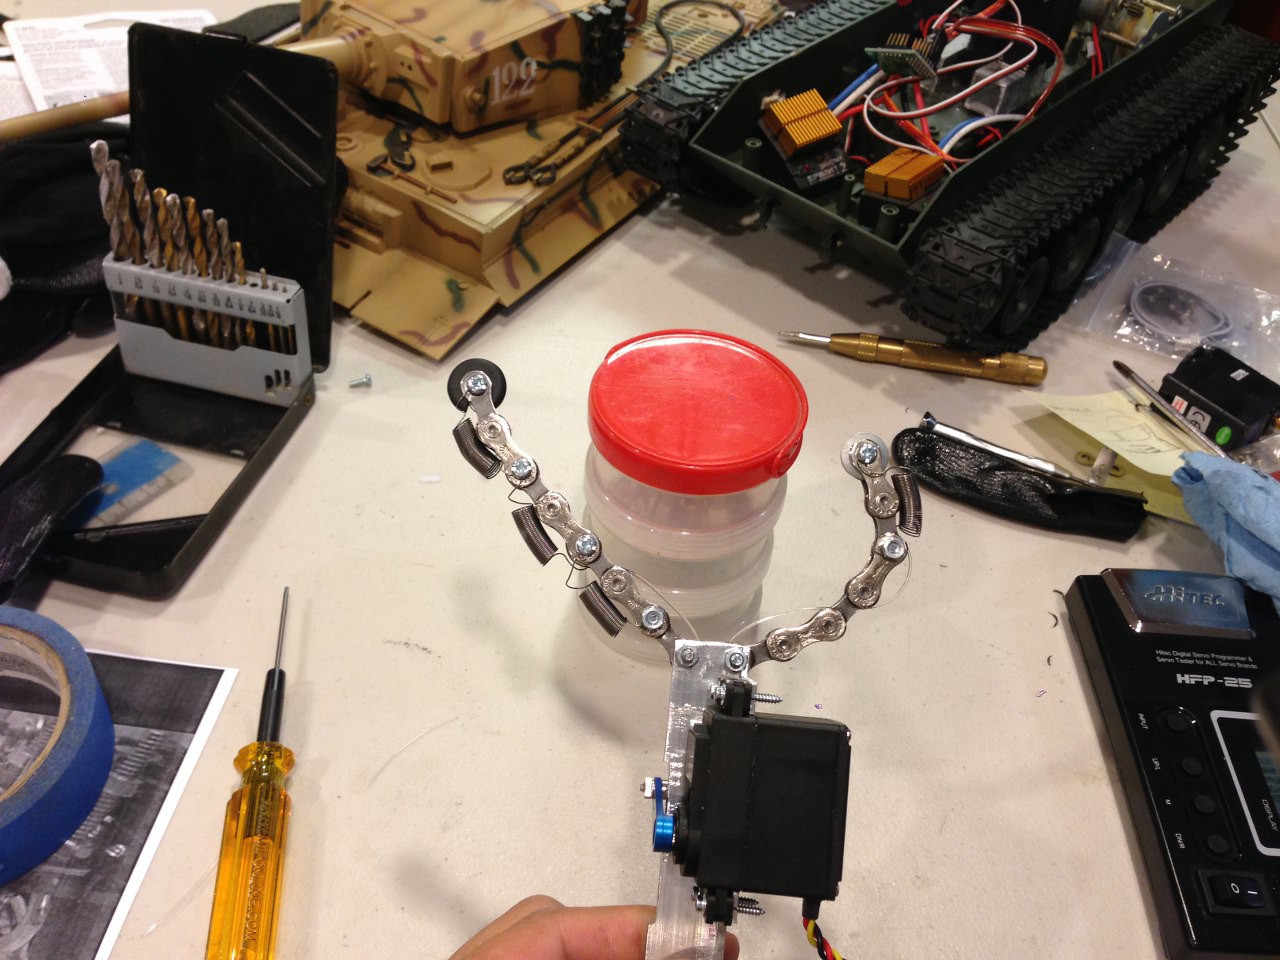
06/30/2014 at 00:40 • 0 commentsI was in search for the best robotic gripper/hand for weeks and finally came across a brilliant solution from Aaron Thomen ( detail here ). Basically it utilize bicycle chain to mimic human finger movement. Each node of the chain represents one knuckle joint, and the combination of many knuckles represent the entire finger.
I was able to prototype my index finger and thumb out of bicycle chain with very similar geometry:
![]()
The best thing about bicycle chain design is that it has very little side movement, just like the human finger can only bend in one direction. Also this design only require one servo to operate the "grip movement" thanks to the spring at each joint to help relaxing the finger.
![]()
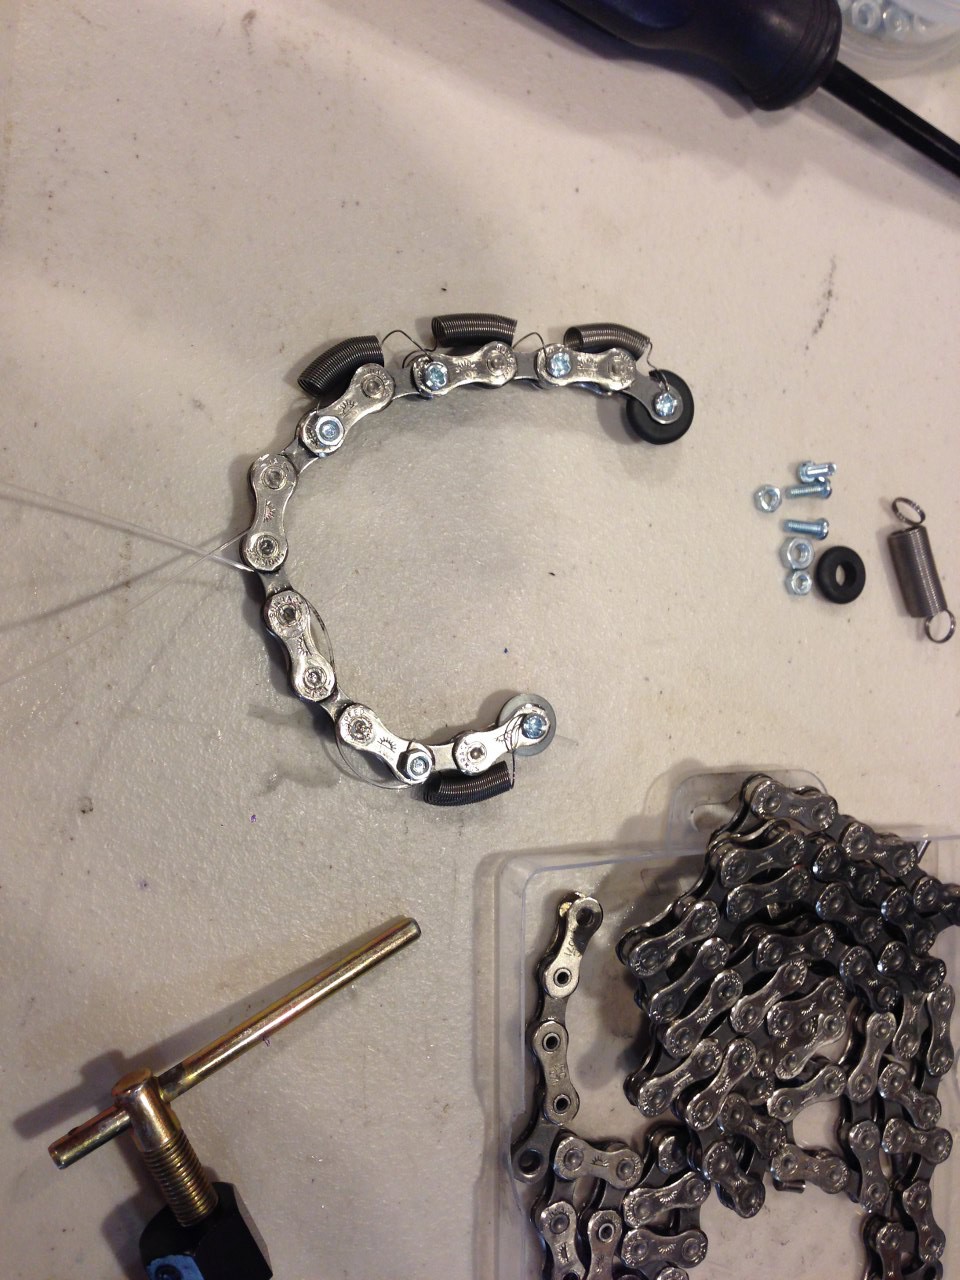
All the material for this robotic hand can be found local easily.
1. bicycle chain (Walmart or get it from your old bike)
2. heavy duty fish wire (Walmart or anything with similar strength)
3. spring assortment kits (Home Depot)
4. nuts and bolts (Home Depot)
5. aluminum angle bar (Home Depot)
6. Servo, servo arm and servo joint (hobby store)
![]()
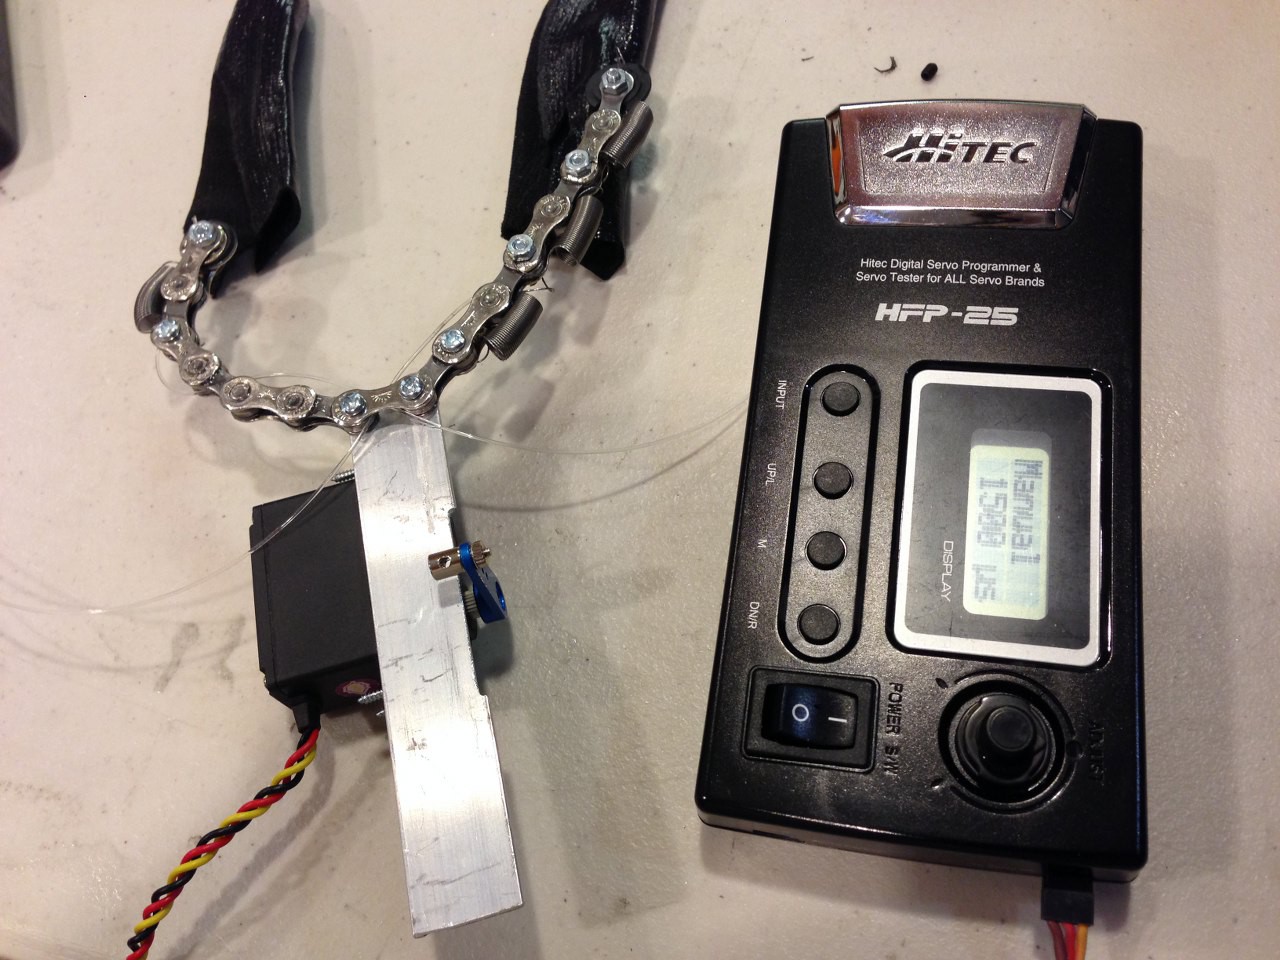
Final touch will be a layer of fake skin (glove) to give it more grip and be more kids friendly.
![]()
The result???
The chain is able to cover almost any object in contact because of it's flexibility. That make it works just like a human hand and hold on to the object tight.
![]()
One video win thousand words therefore I give you 2!!!
Prototyping:
Final Testing:
![]()
![]()
![]()
oh wait a minute.......tomorrow is Monday again? NOooooooo :(
-
Mark II - Test run
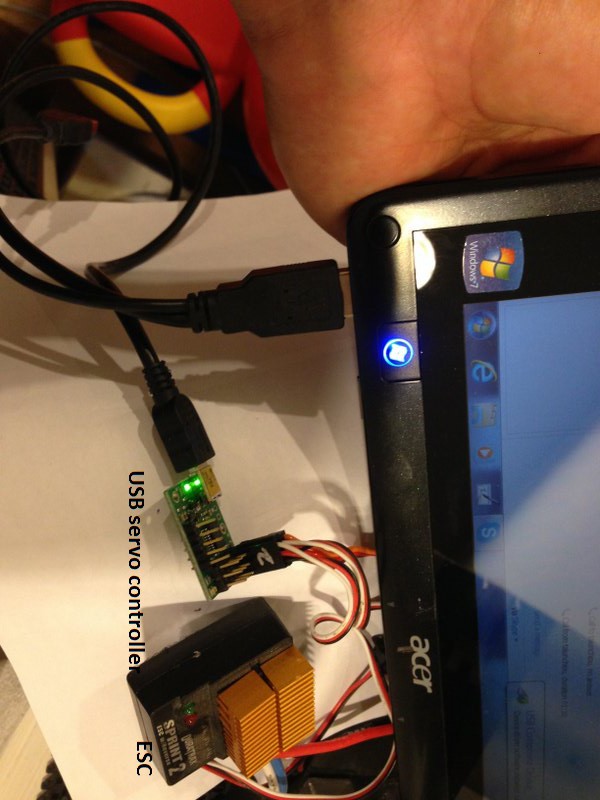
06/24/2014 at 06:54 • 0 commentsI squeeze a little bit of time today to install all the remaining components (ESCs, USB servo controller, battery, switch) and tidy up the wiring. Did a little bit of test run and holy cat it's alive!! Can't wait to take it out for a spin ;)
Mark II test run:
-
Mark II - The fabrication
06/23/2014 at 06:59 • 0 commentsSo, in case you are bored and want to do something different in the weekend, this is the exact step by step to help you burn 20 hours.
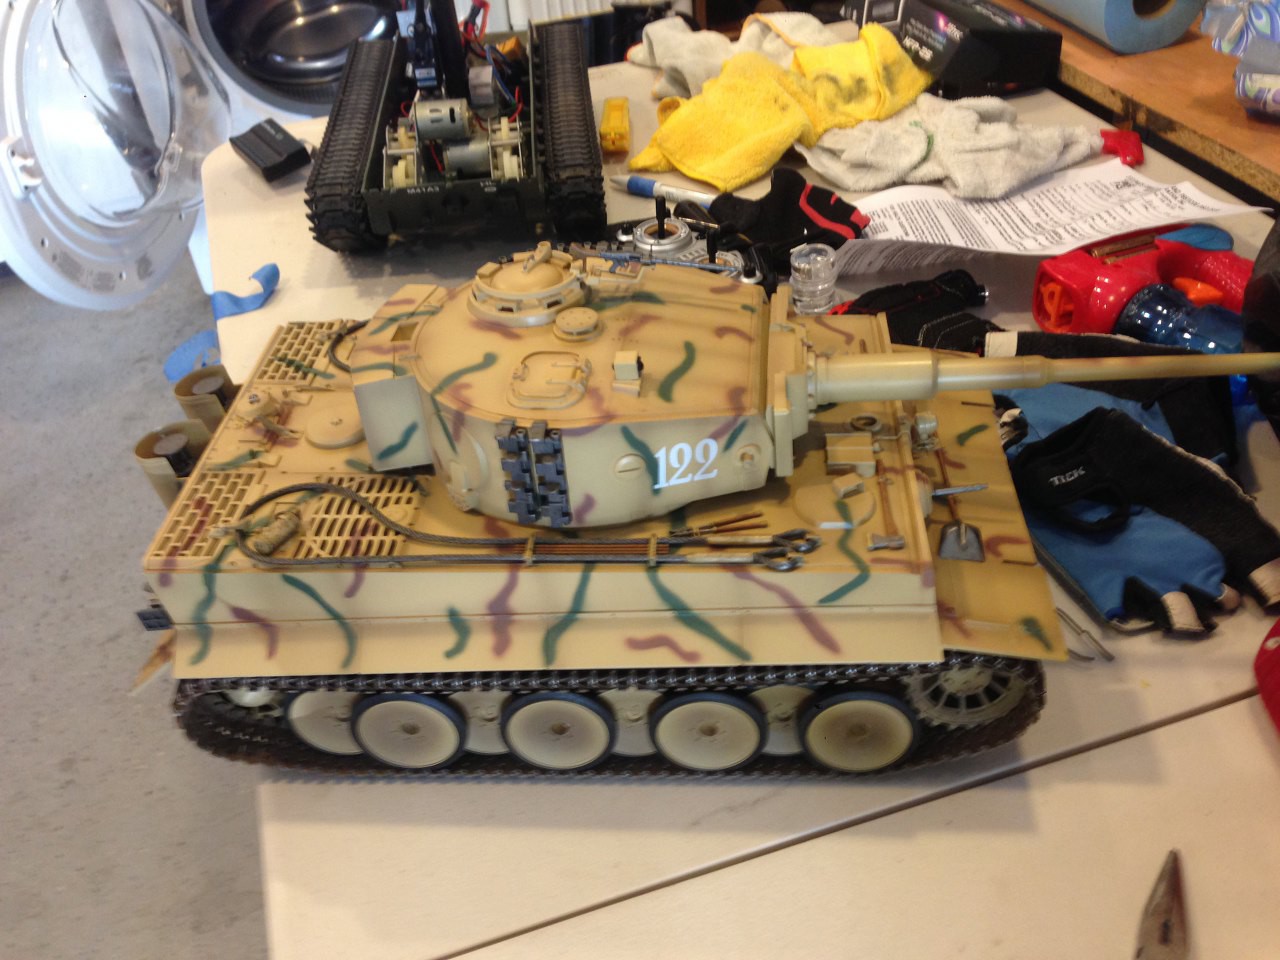
1. Buy a perfectly good 1:16 or bigger RC tank from RC store or Amazon for 99 bucks, mine is a Tiger 1 tank.
![]()
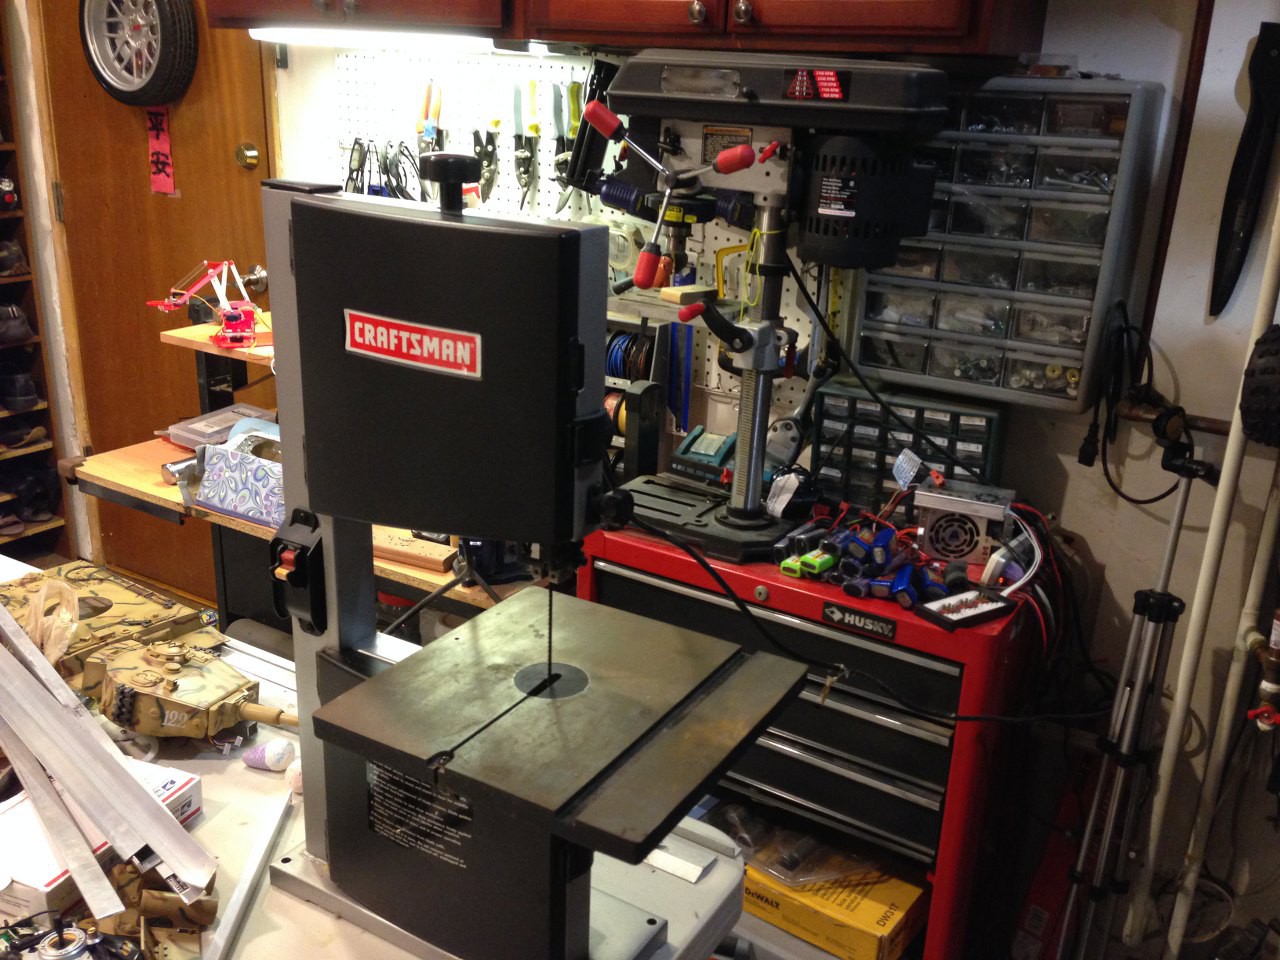
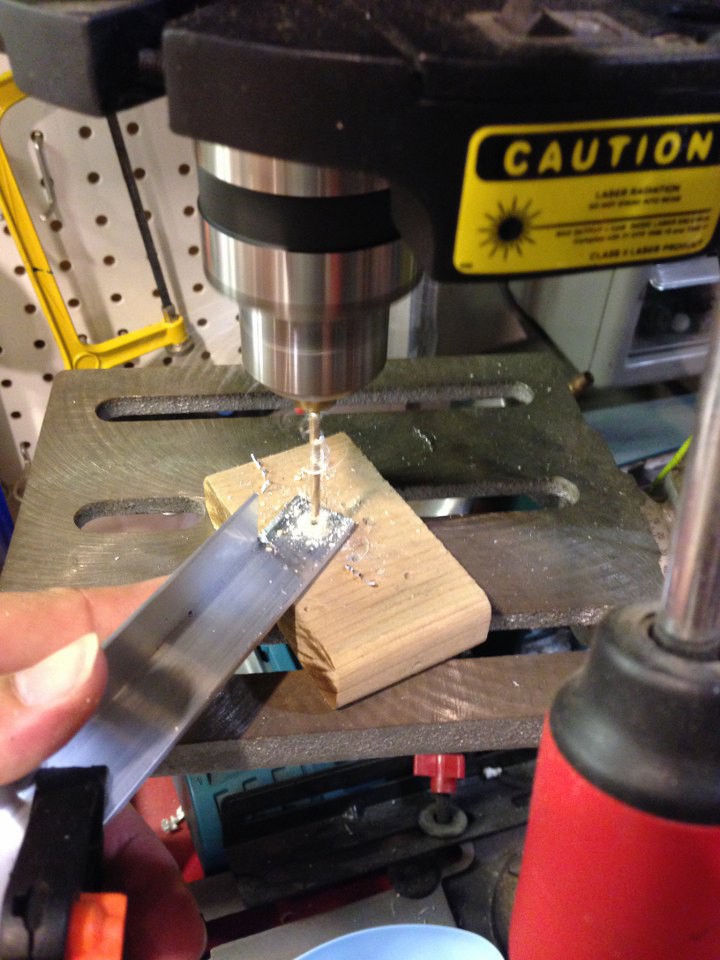
2. Prime your band saw and table drill for some aluminum action!
![]()
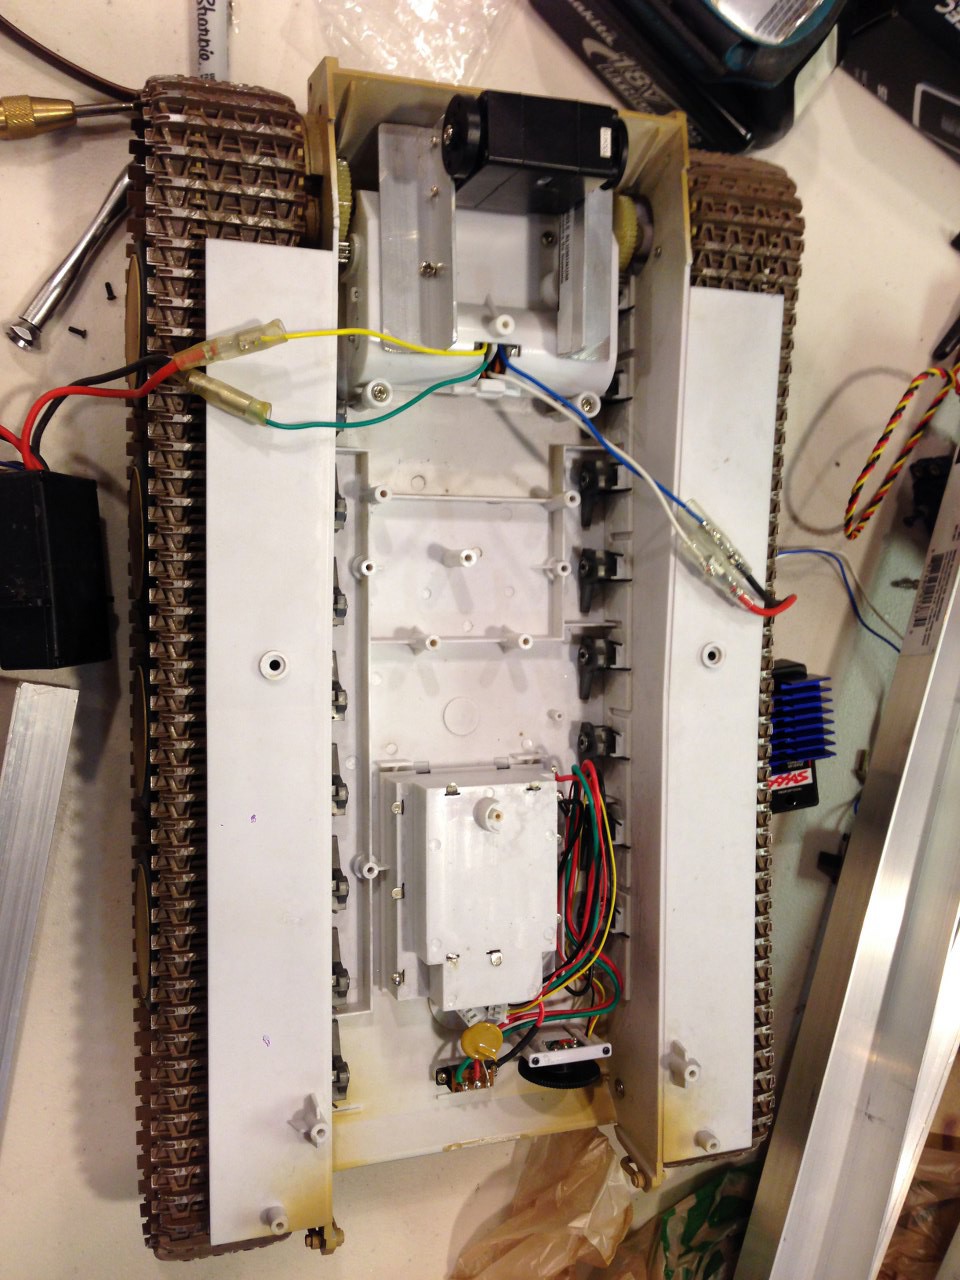
3. Play with your brand new RC tank and once you are bored...cut it open!!
![]()
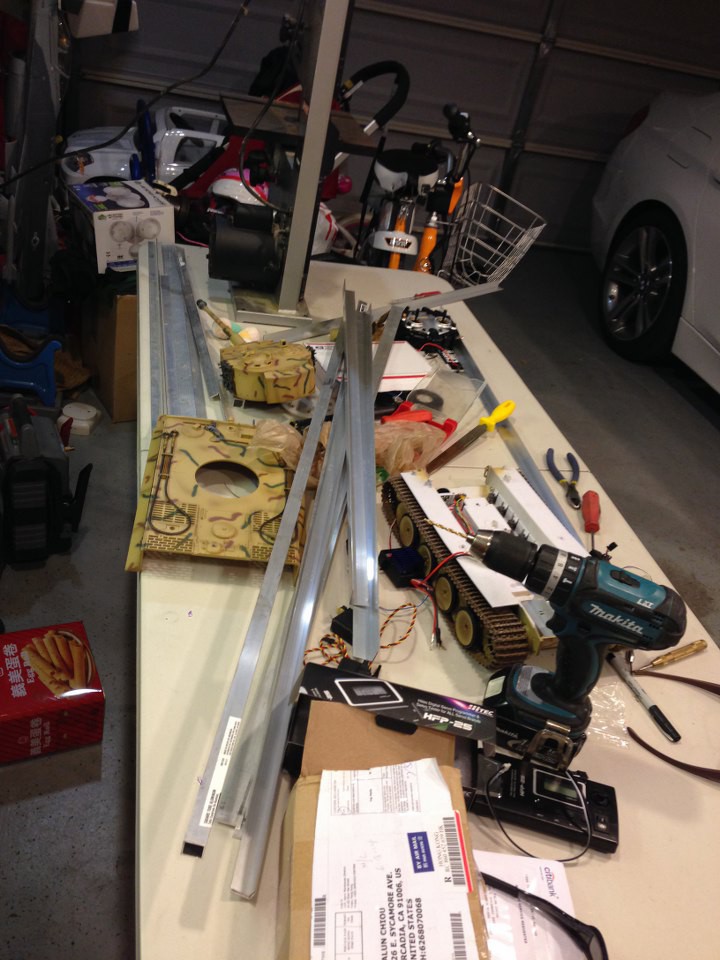
4. Buy aluminum angle bar and square tube from Home Depot, parts number
#887480013870, #887480013771, #887480013177, #887480017373, one for each.
![]()
5. Admire at the robotic specific servos from HobbyKing.com Model #TGY-S403P , and thanks god how much time this servo can save you to create a robotic arm! (It has a matching spines coming out of the case from opposite side)
![]()
6. Start the fabrication to mount the servo, game on guys!!
![]()
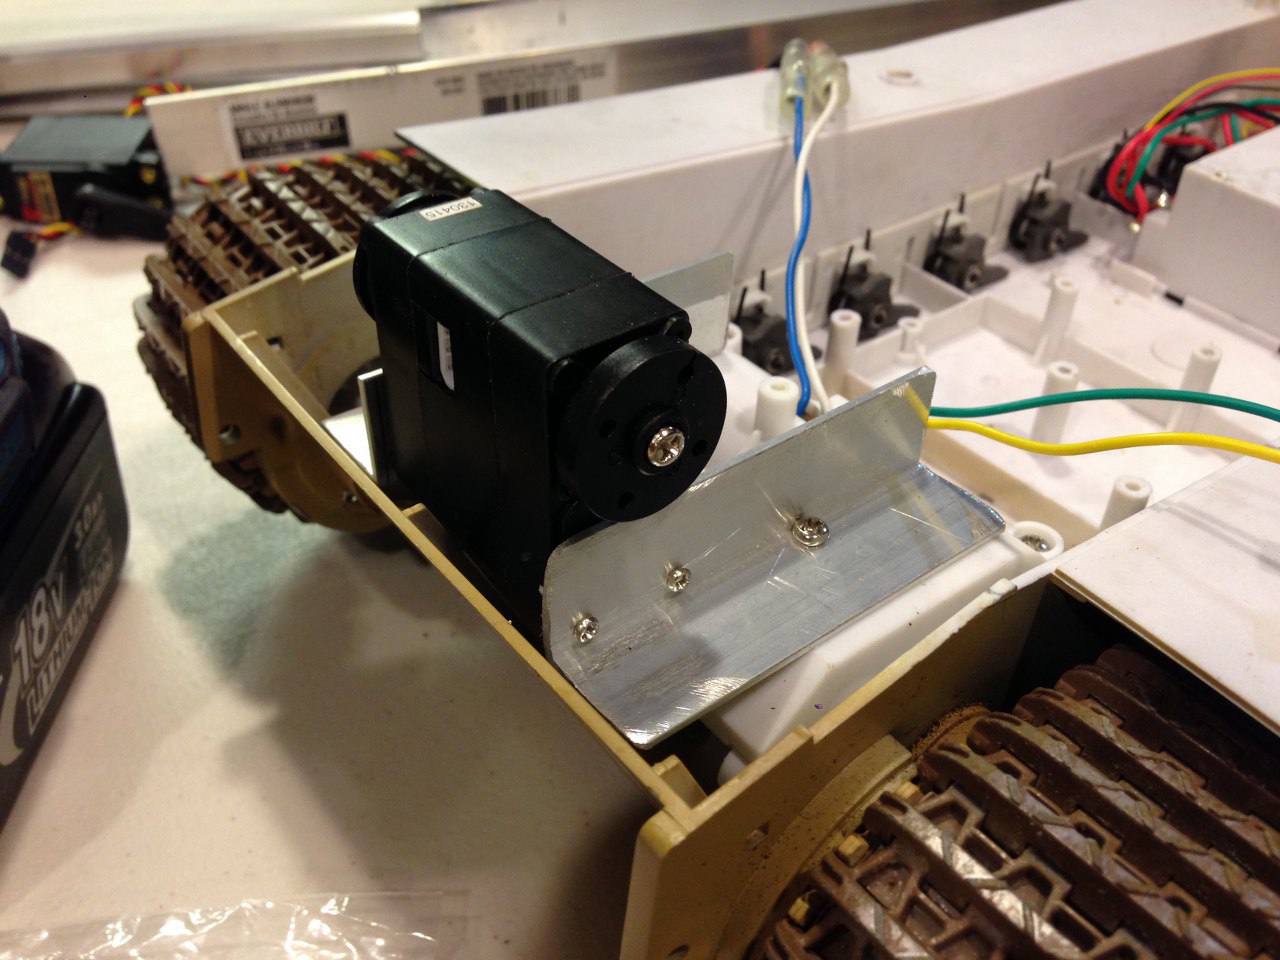
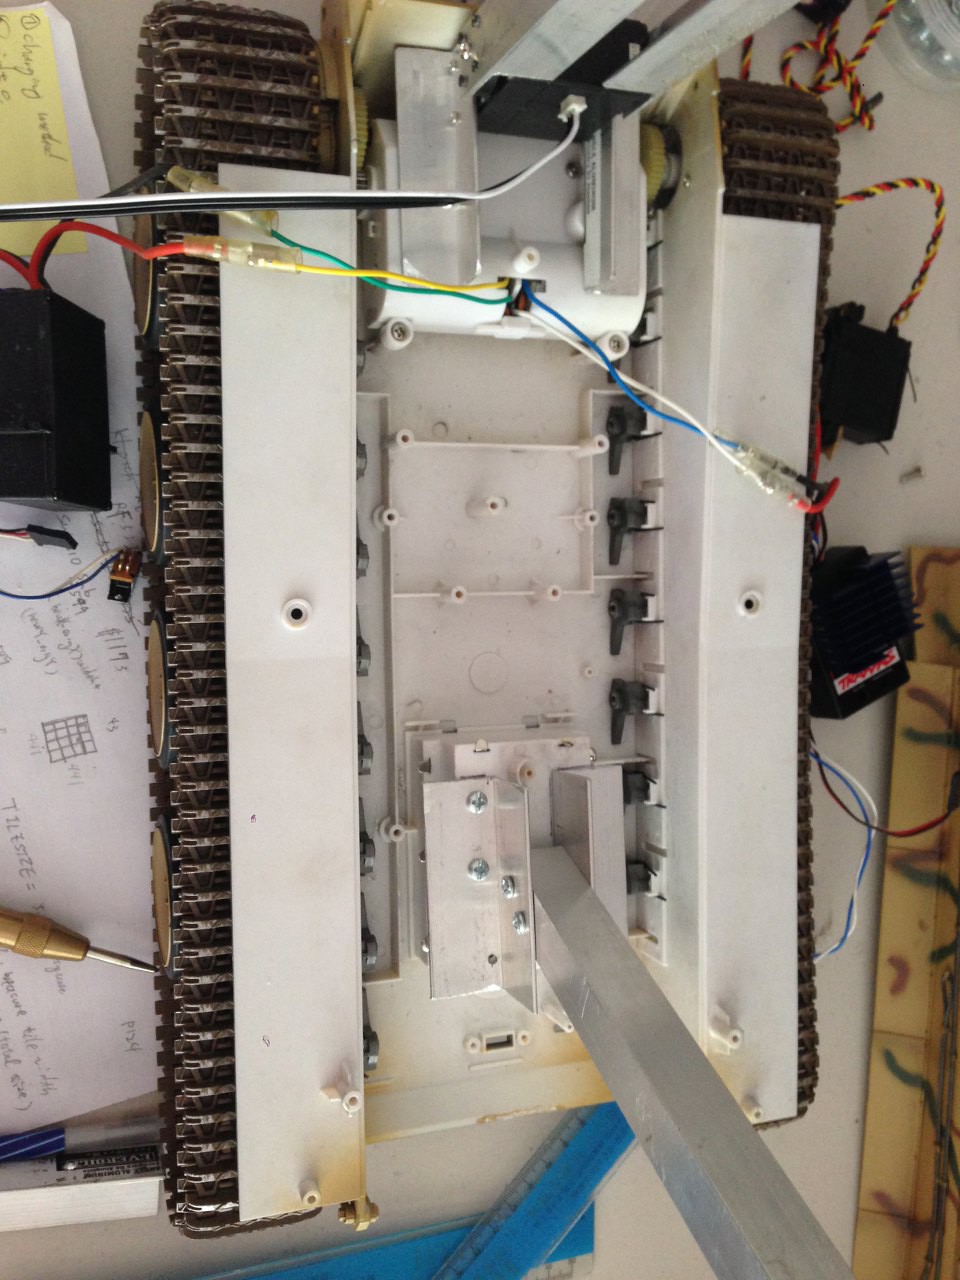
7. Mount the first servo onto the platform.
![]()
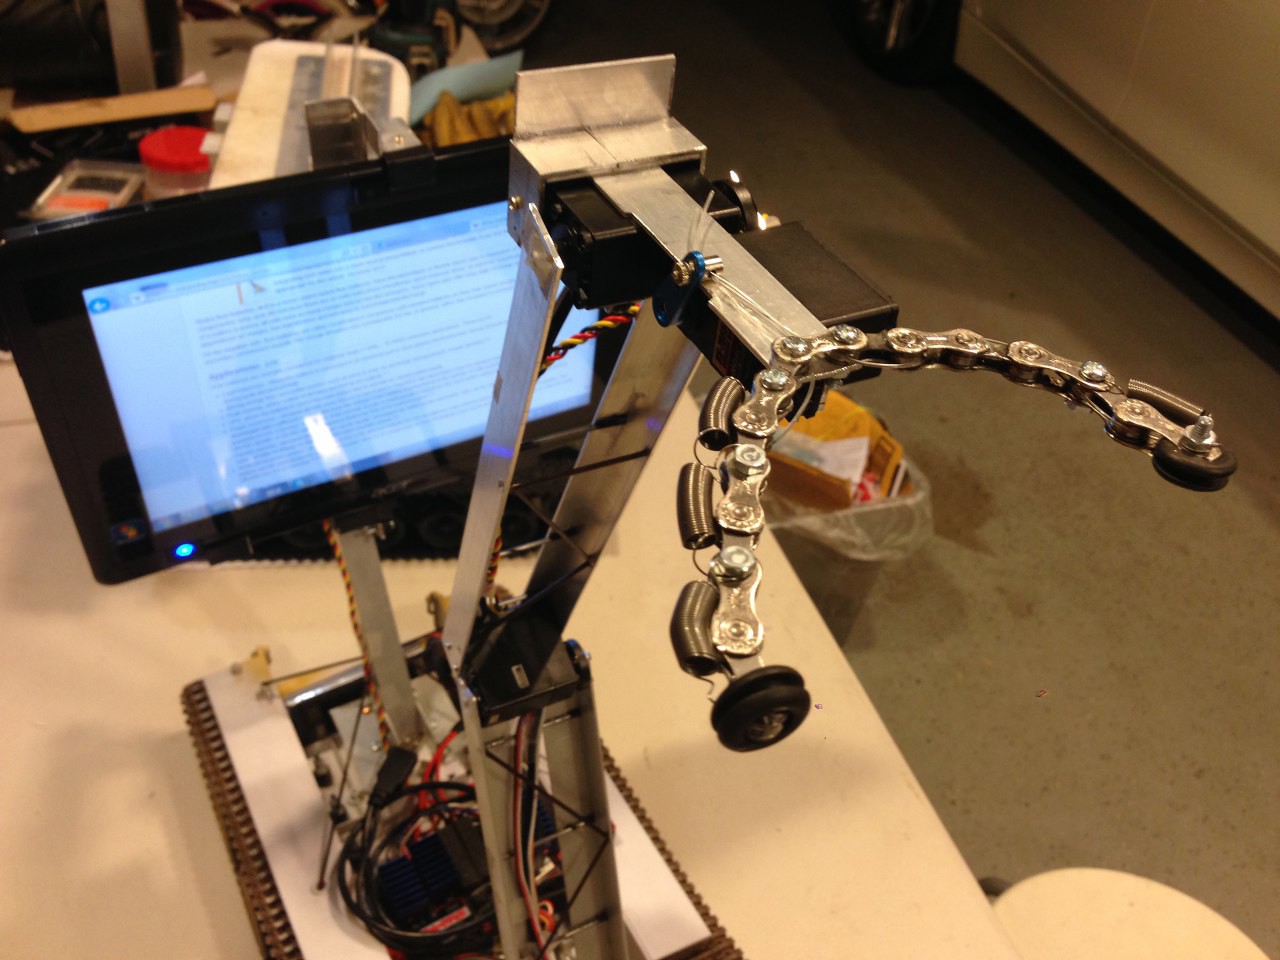
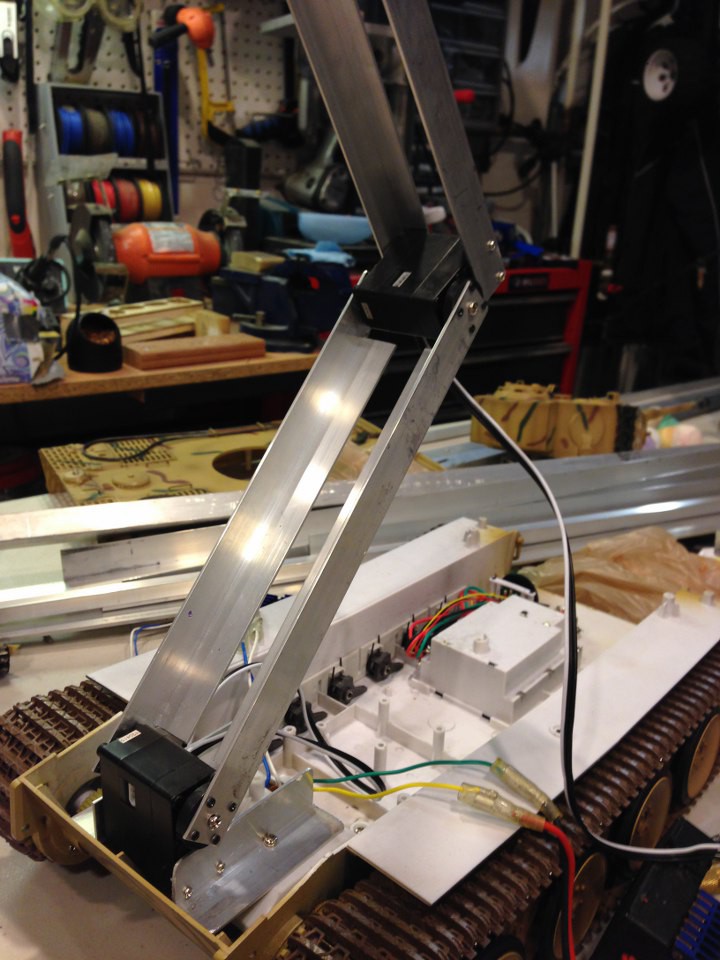
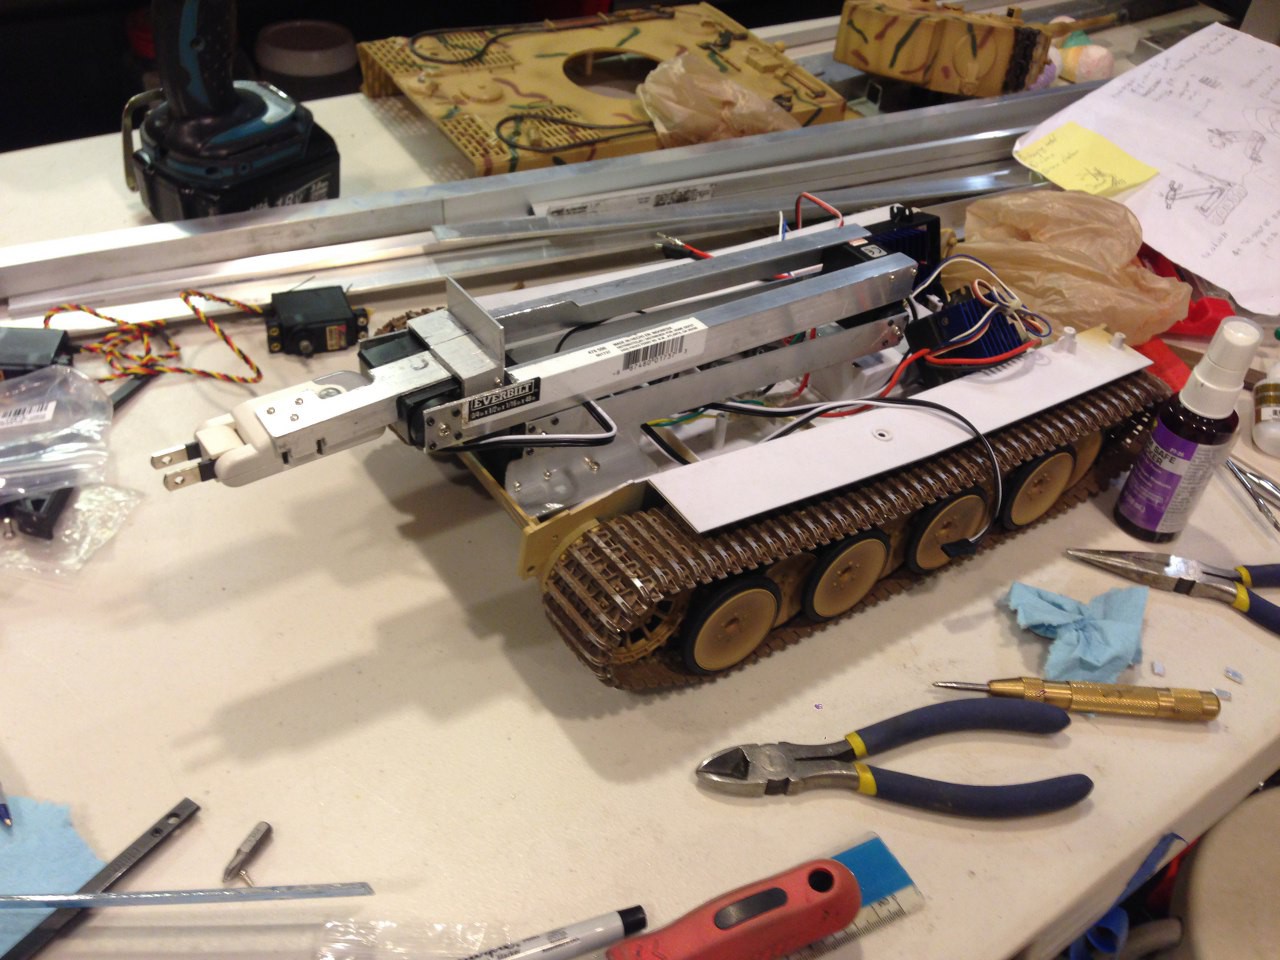
8. Fabricate the arms and mount the second servo, Take a closer look, now you really glad you bought the robotic specific servo. It make the job so much fun and easier!
![]()
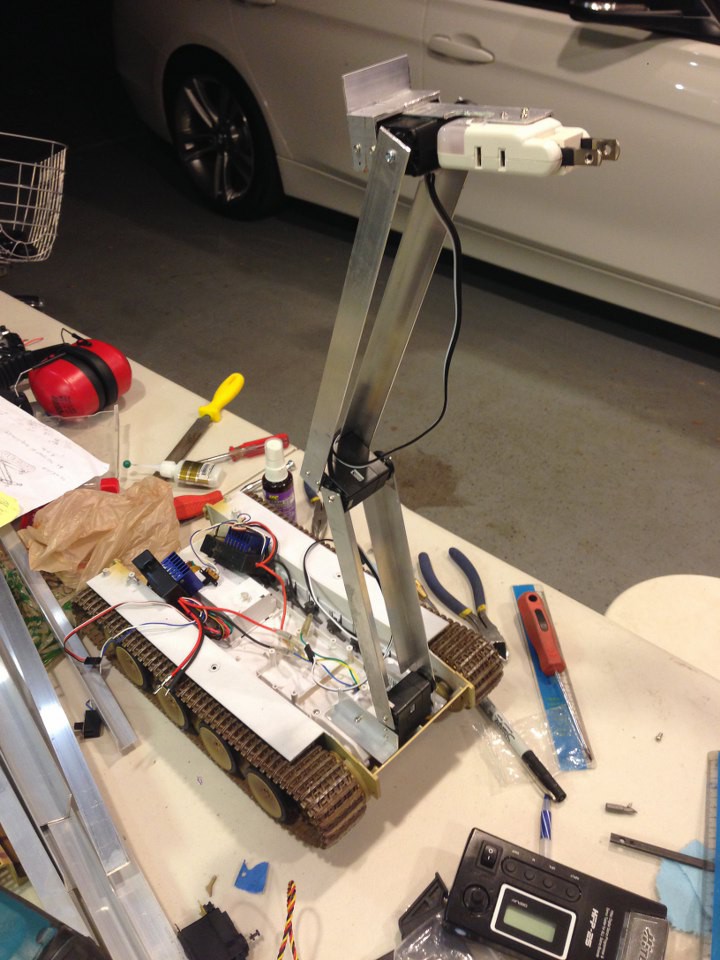
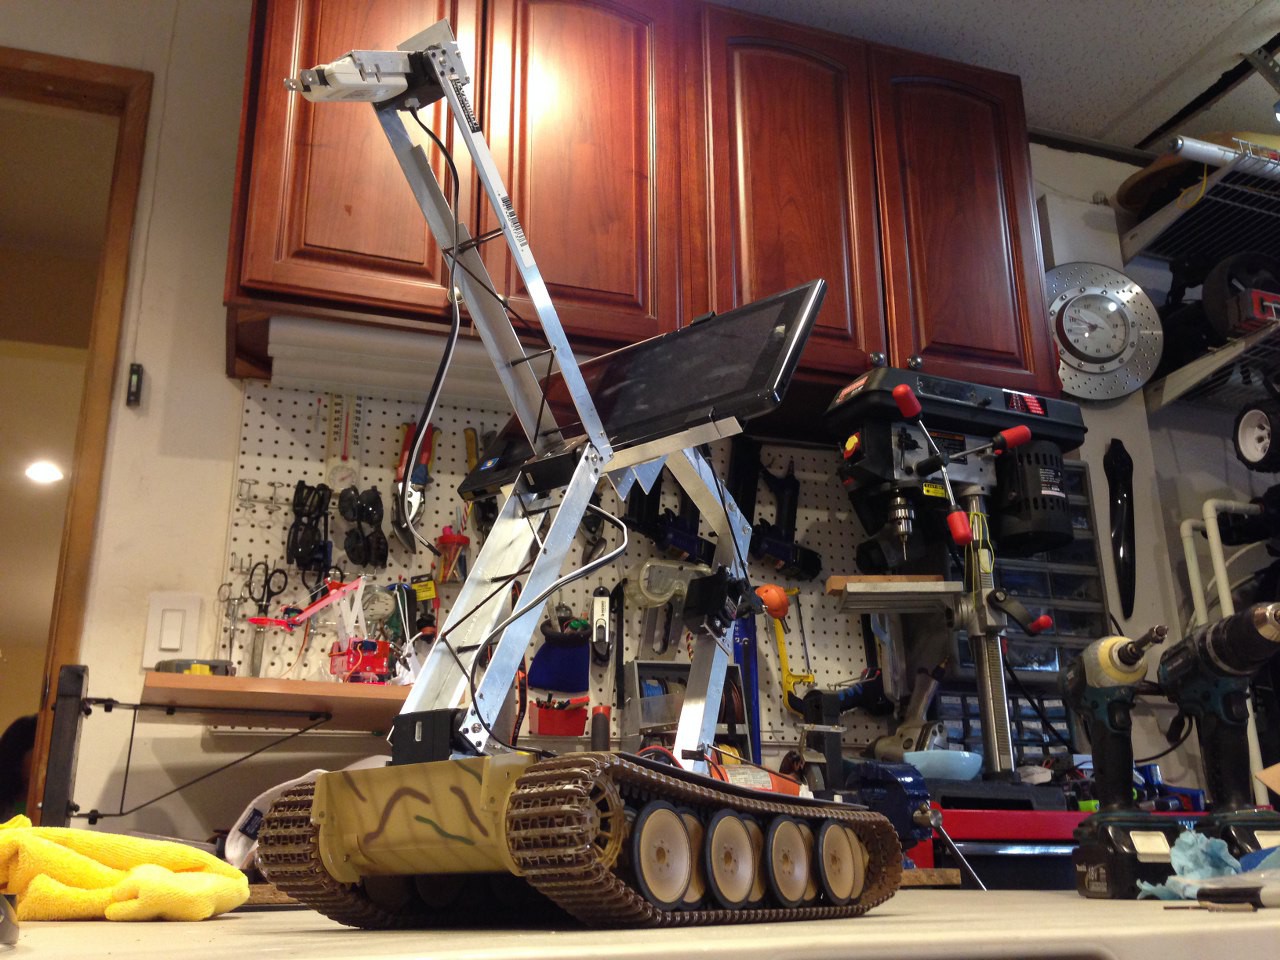
9. Finish up the third servo and attach your robotic hand or weapon at the end. In this case a 110v plug so that I can stick it into household outlet to recharge the robot while I'm away.
![]()
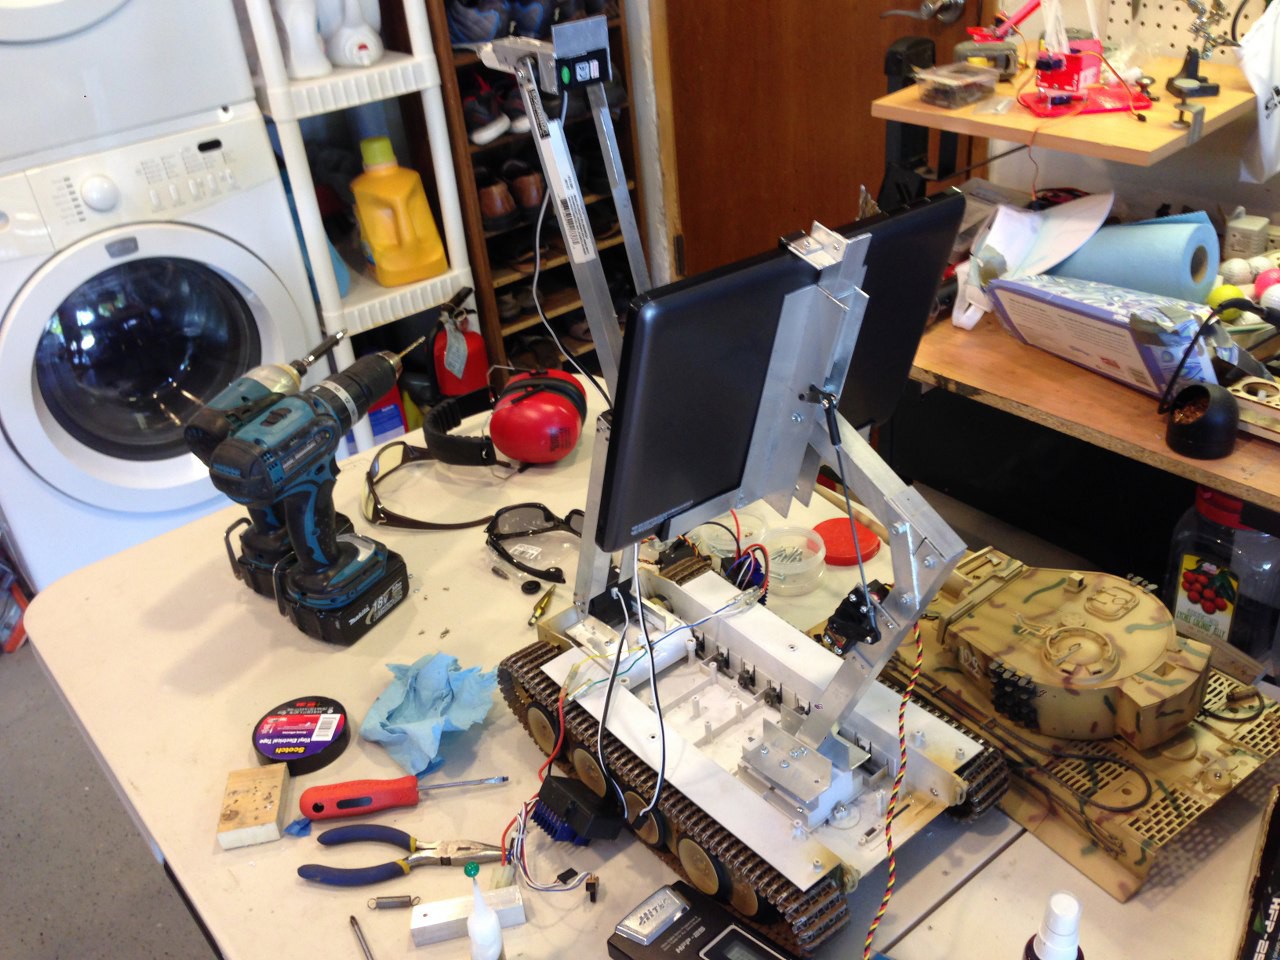
10. This is how it looks like when it fold down, oh yeah, looks sick !!
![]()
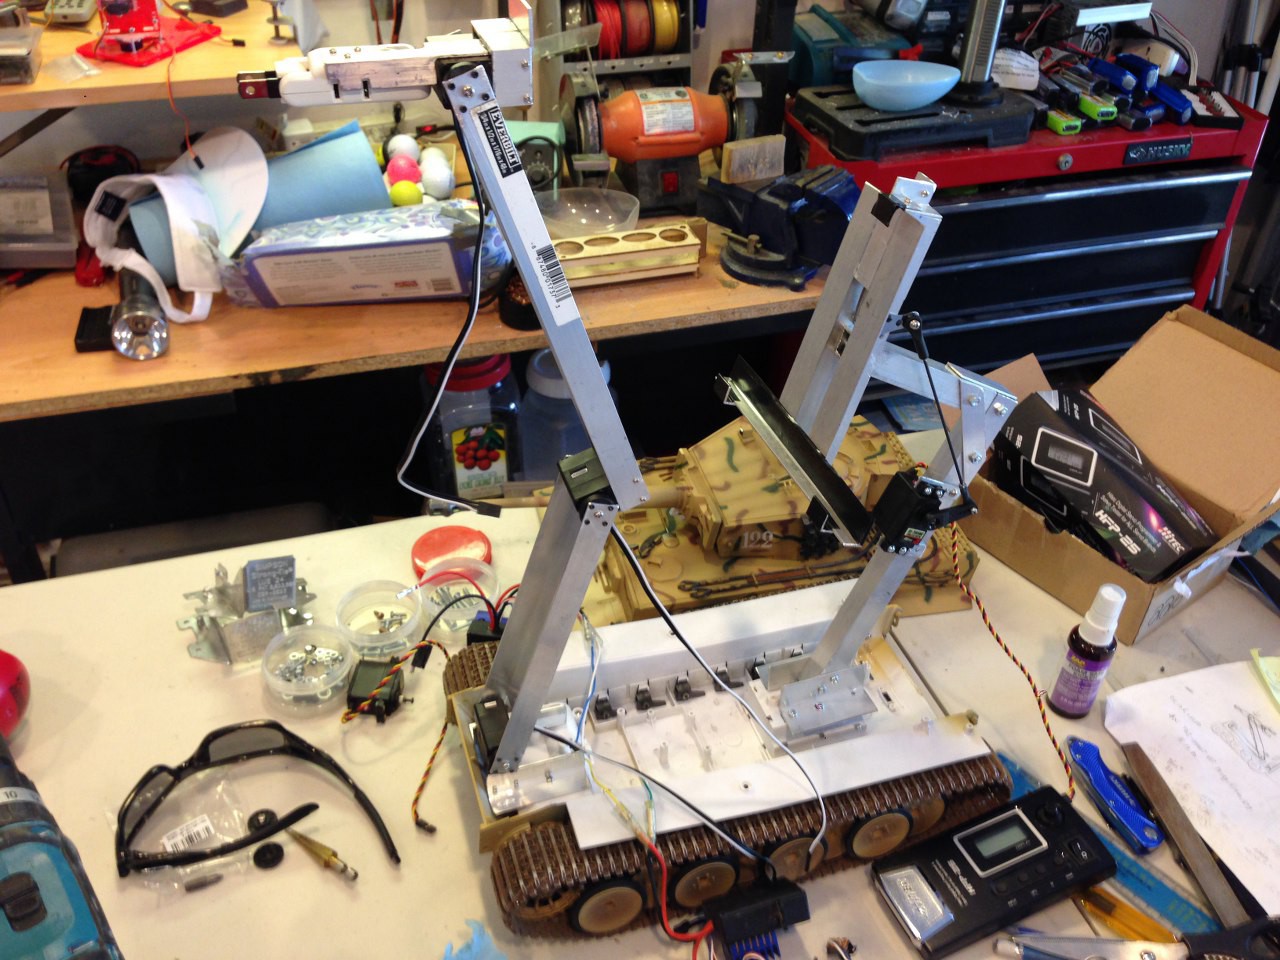
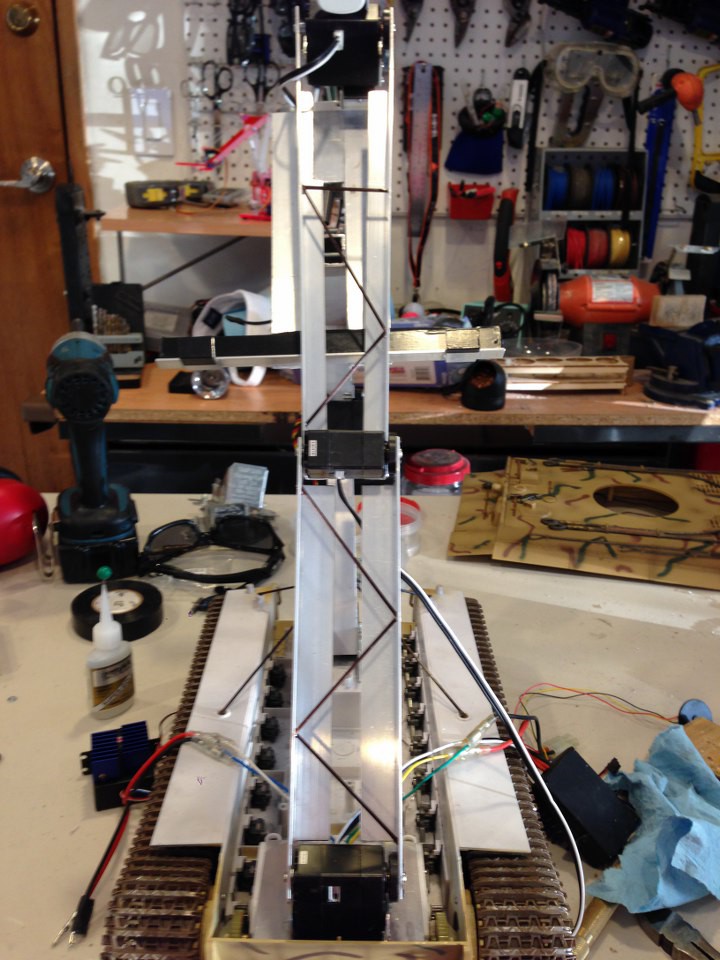
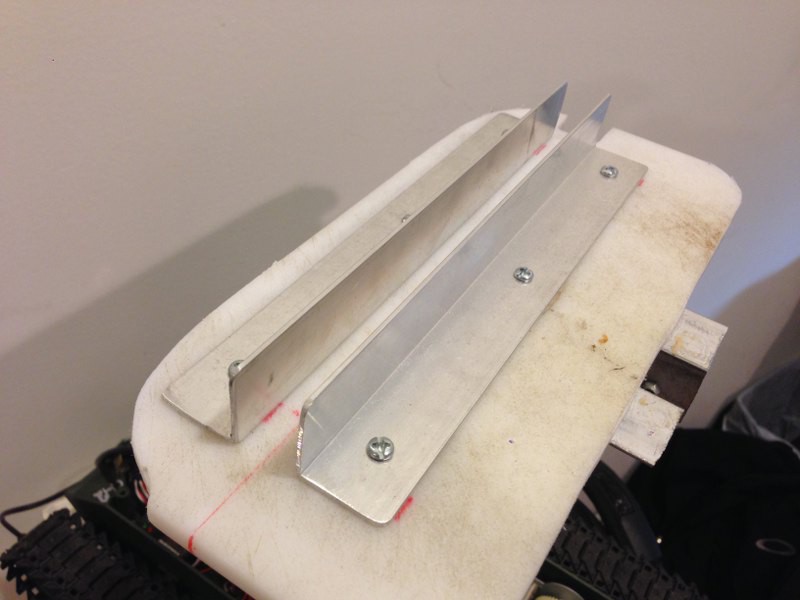
11. Start working on the structure to support the tablet, same fabrication but using the more sturdy aluminum square tube!
![]()
12. After 2 hours cutting and drilling this is how it looks like with the servo mounted on the stand, I am using regular servo on this one.
![]()
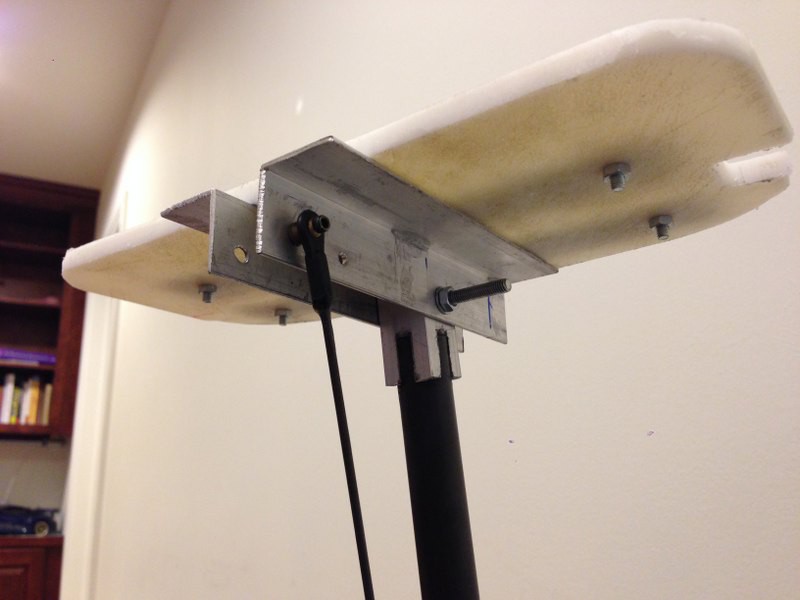
13. Test fit the tablet and fabricate a spring loaded clamp on top to clamp the tablet in place.
![]()
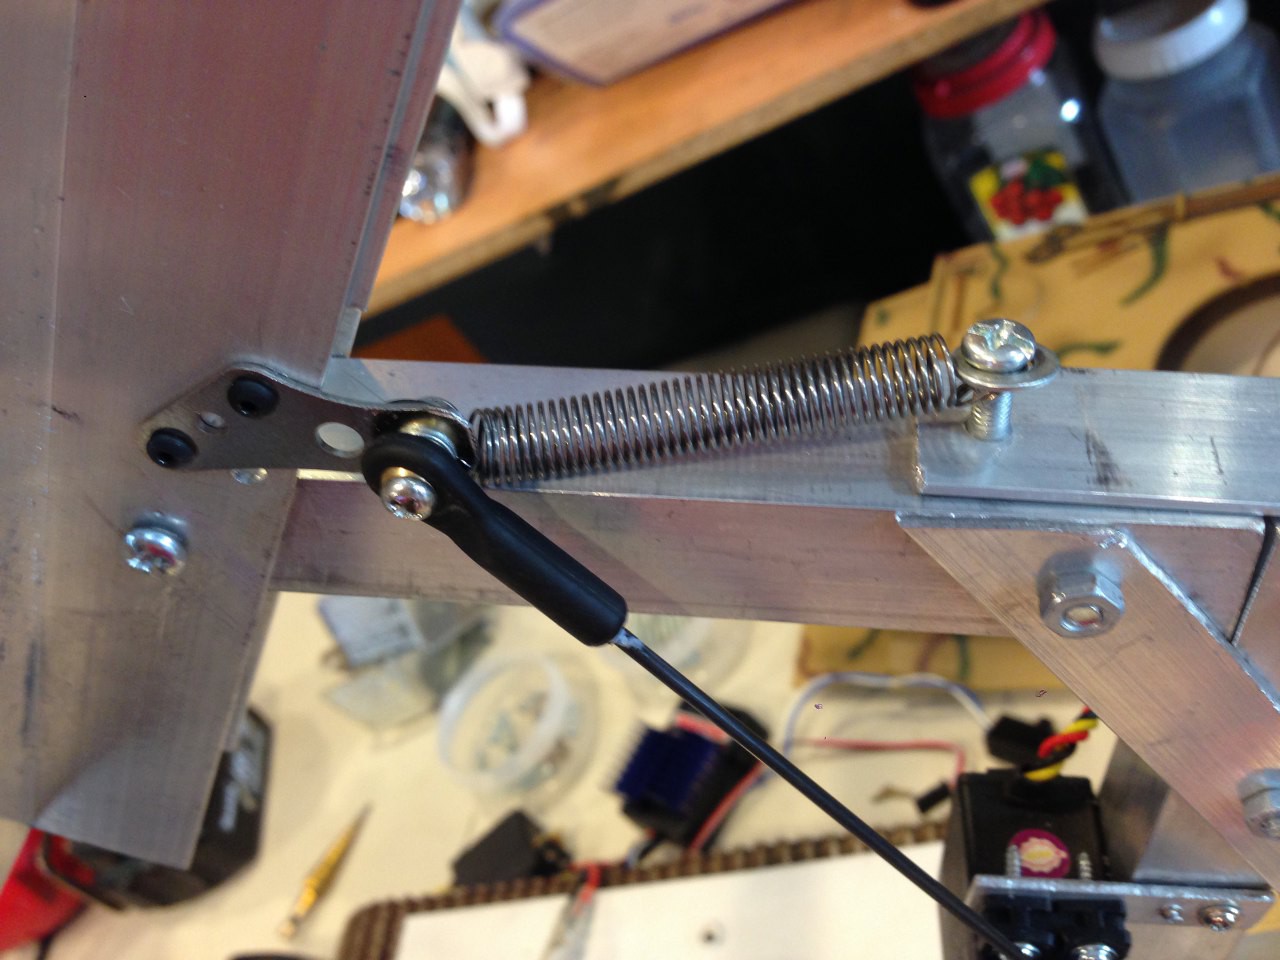
14. Install a spring to help with lifting the heavy tablet (my tablet is super heavy, it is heavier than two iPads in combine.)
![]()
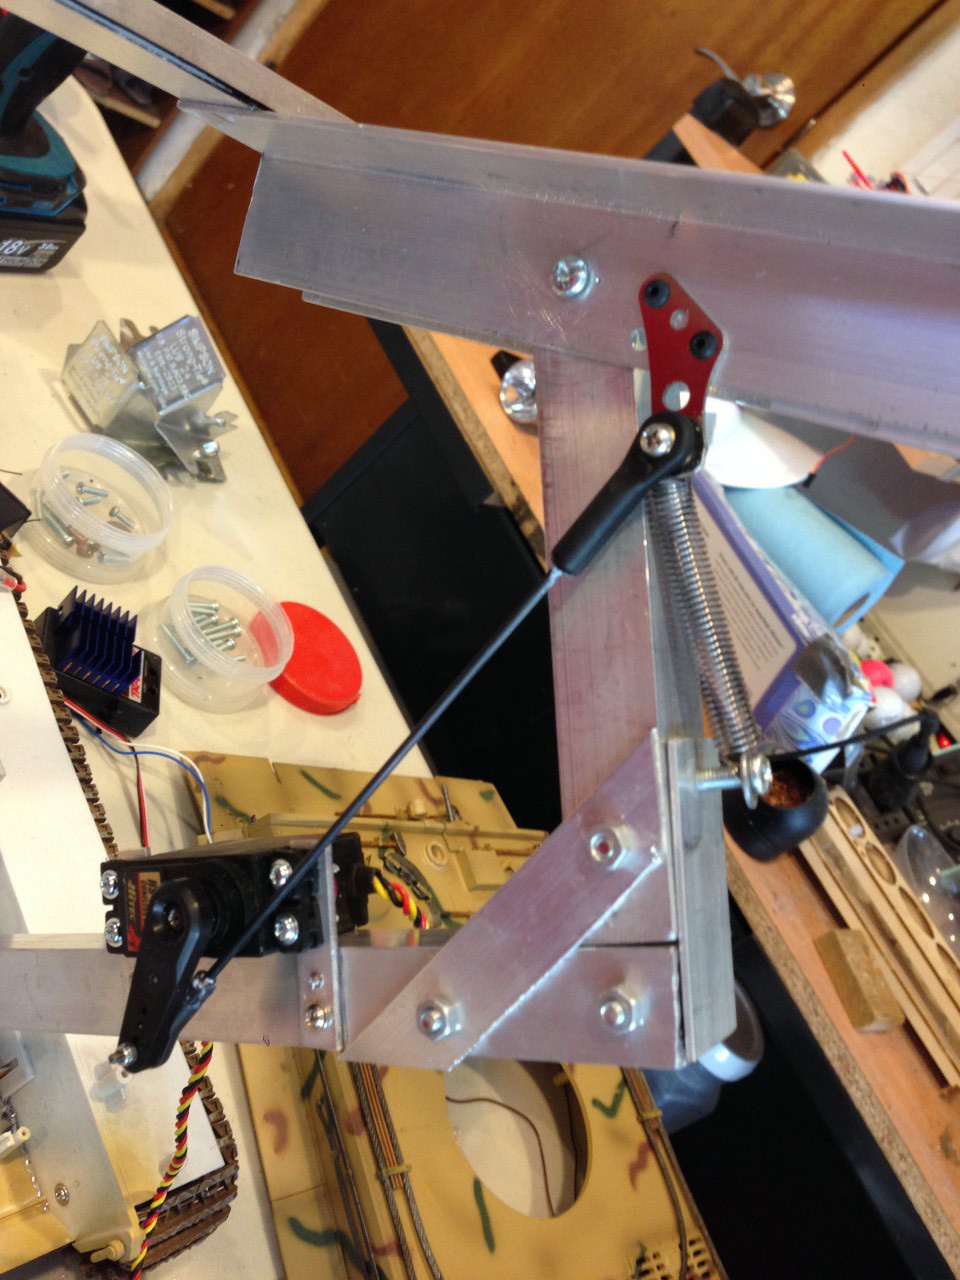
15. Closer look at the ball joint and spring loaded arm. This is where my RC gears really came in handy!!
![]()
16. Another closer look.
![]()
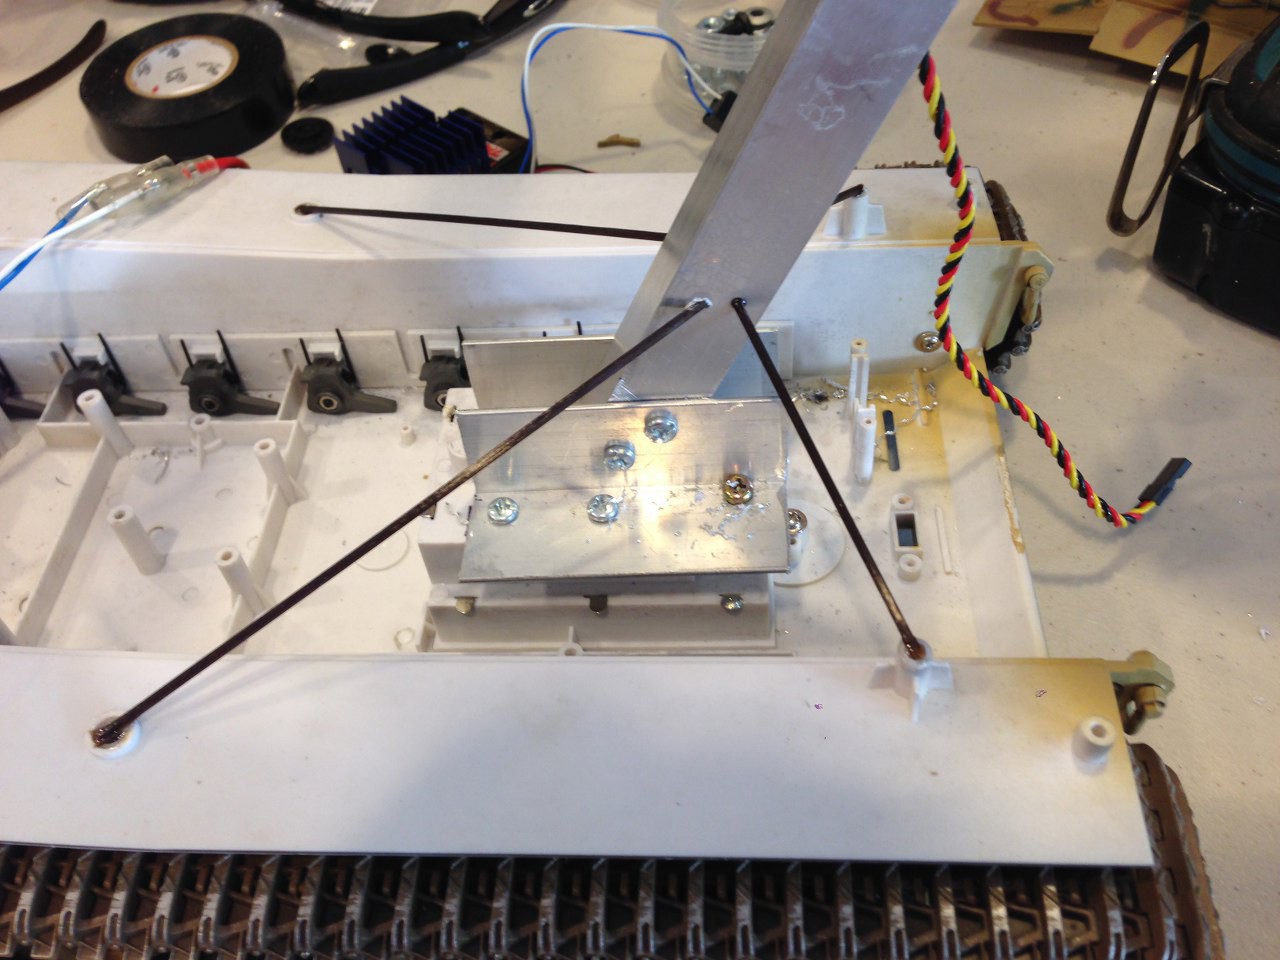
17. Call your good friend carbon fiber rod out to help you with the extra support, make sure they know where they belong and drill some holes and super glue the hack out of them.
![]()
18. More carbon fiber rod!! come on, these carbon rods are cheap and easy to cut so why not more re-enforcement?
![]()
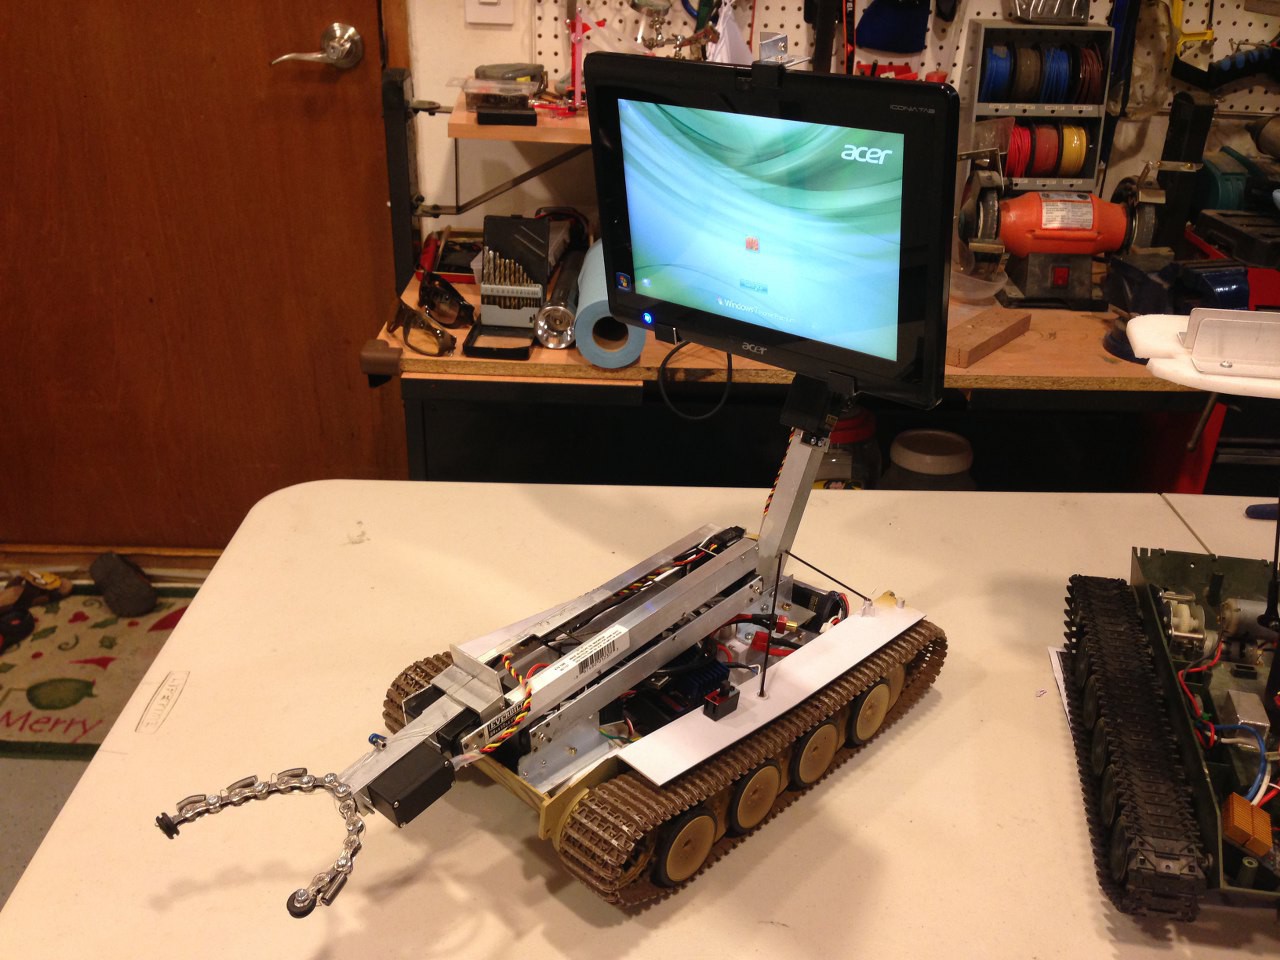
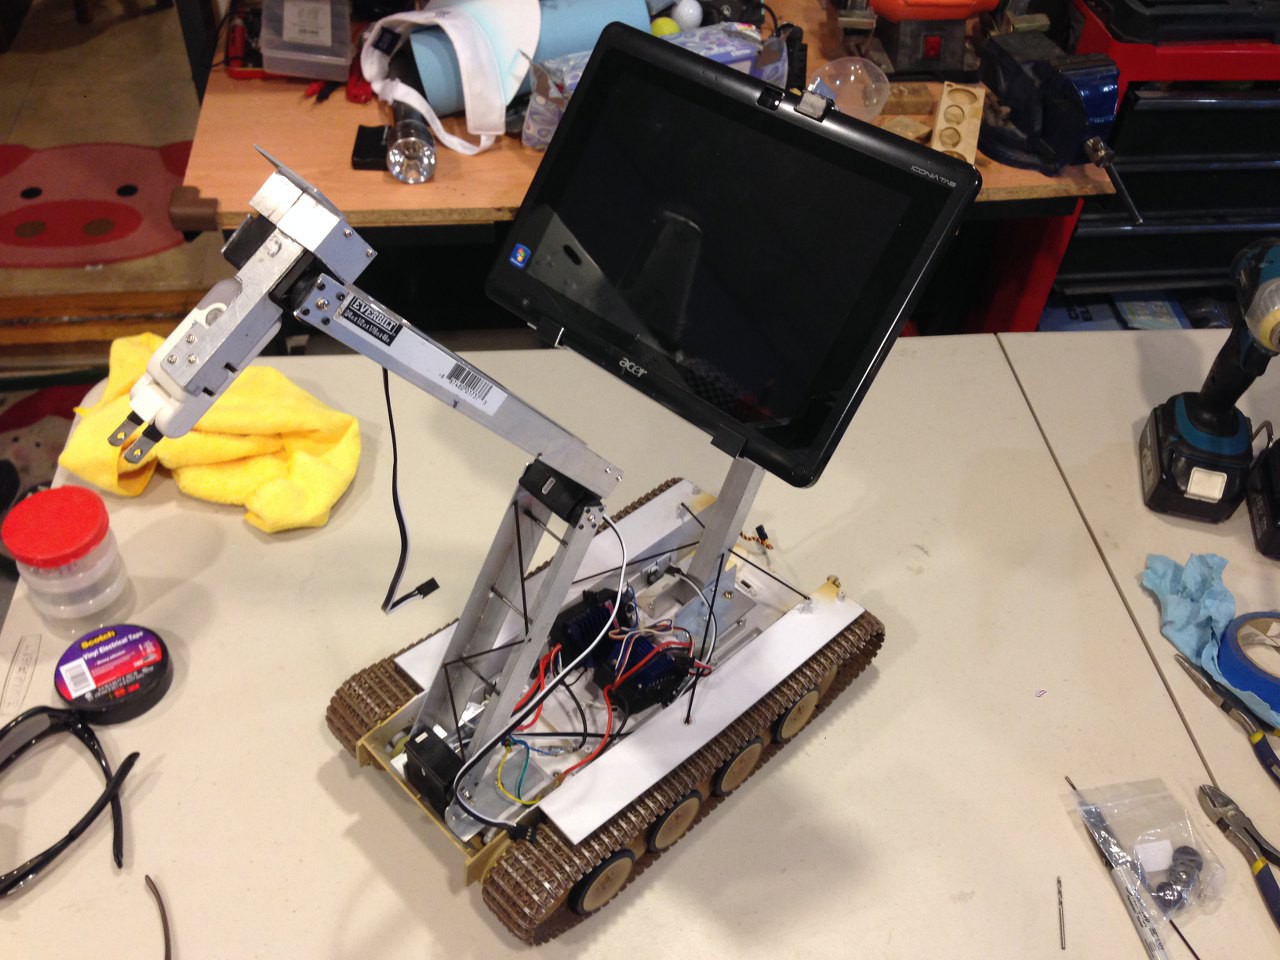
19. OMG... 20 hours later, I did it, say hello to Skype Robot Mark II
![]()
20. another angle
![]()
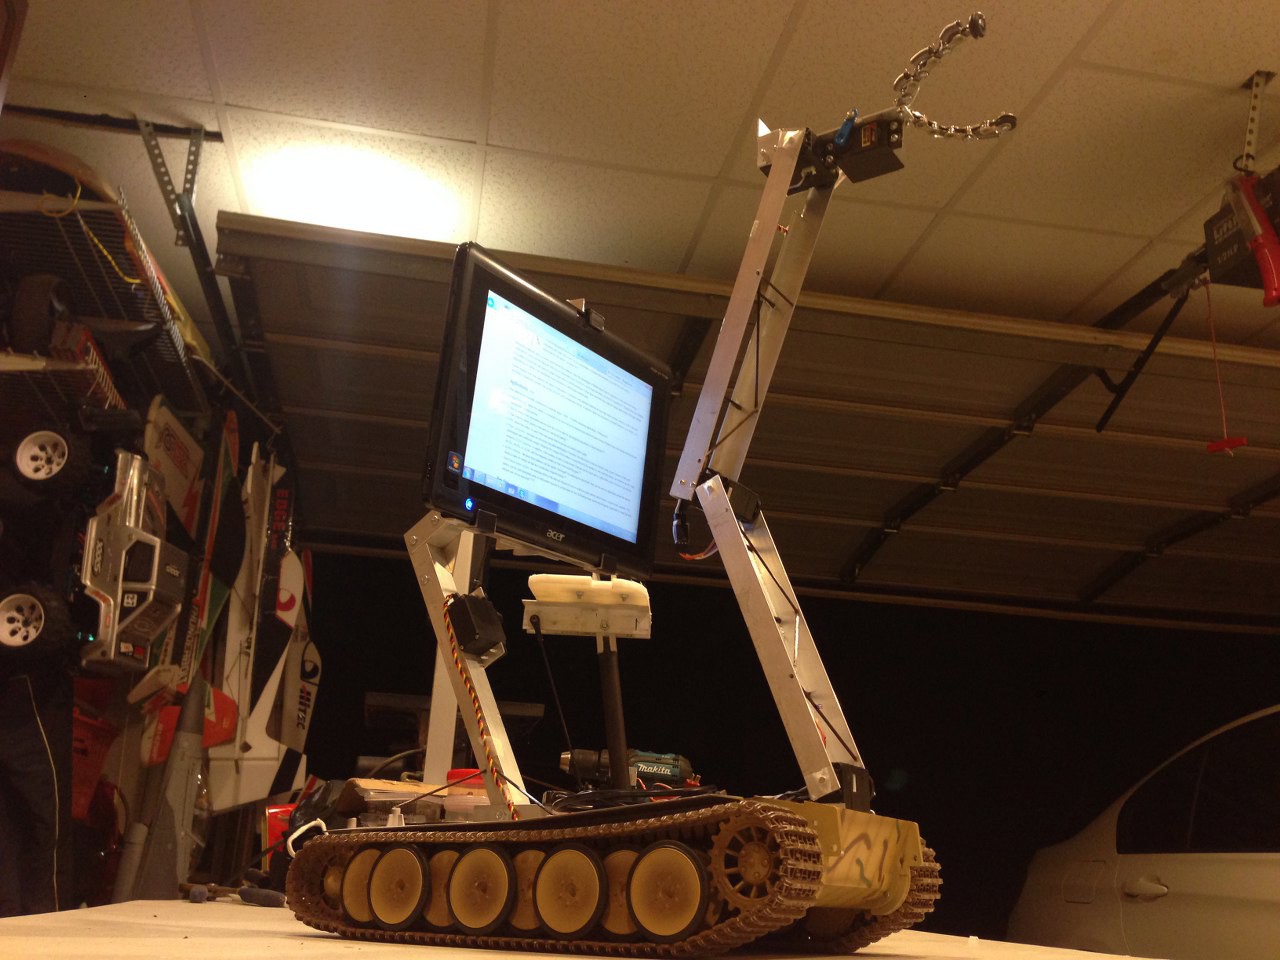
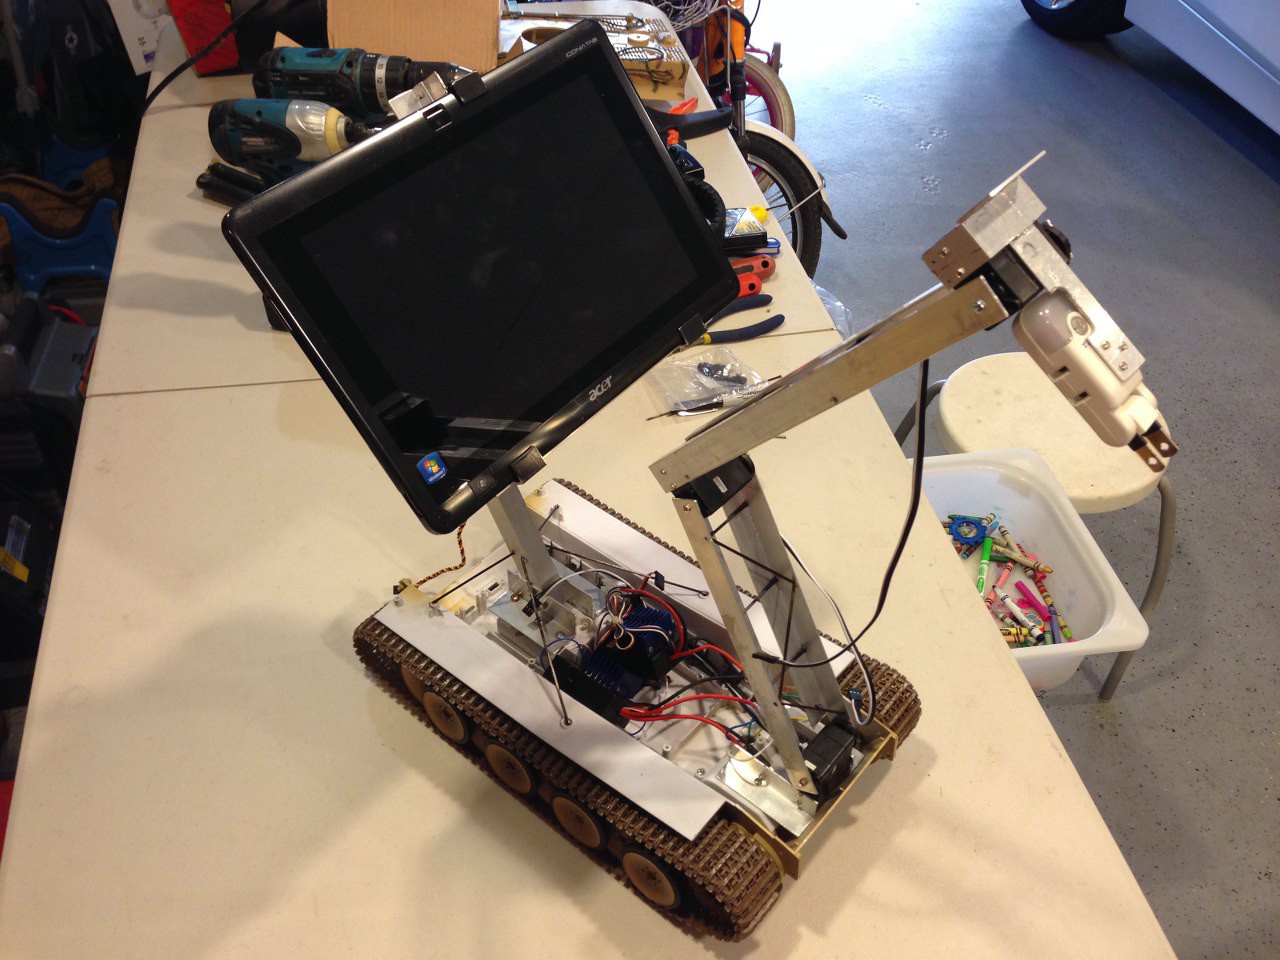
21. This is the money shot, look at that monster!
![]()
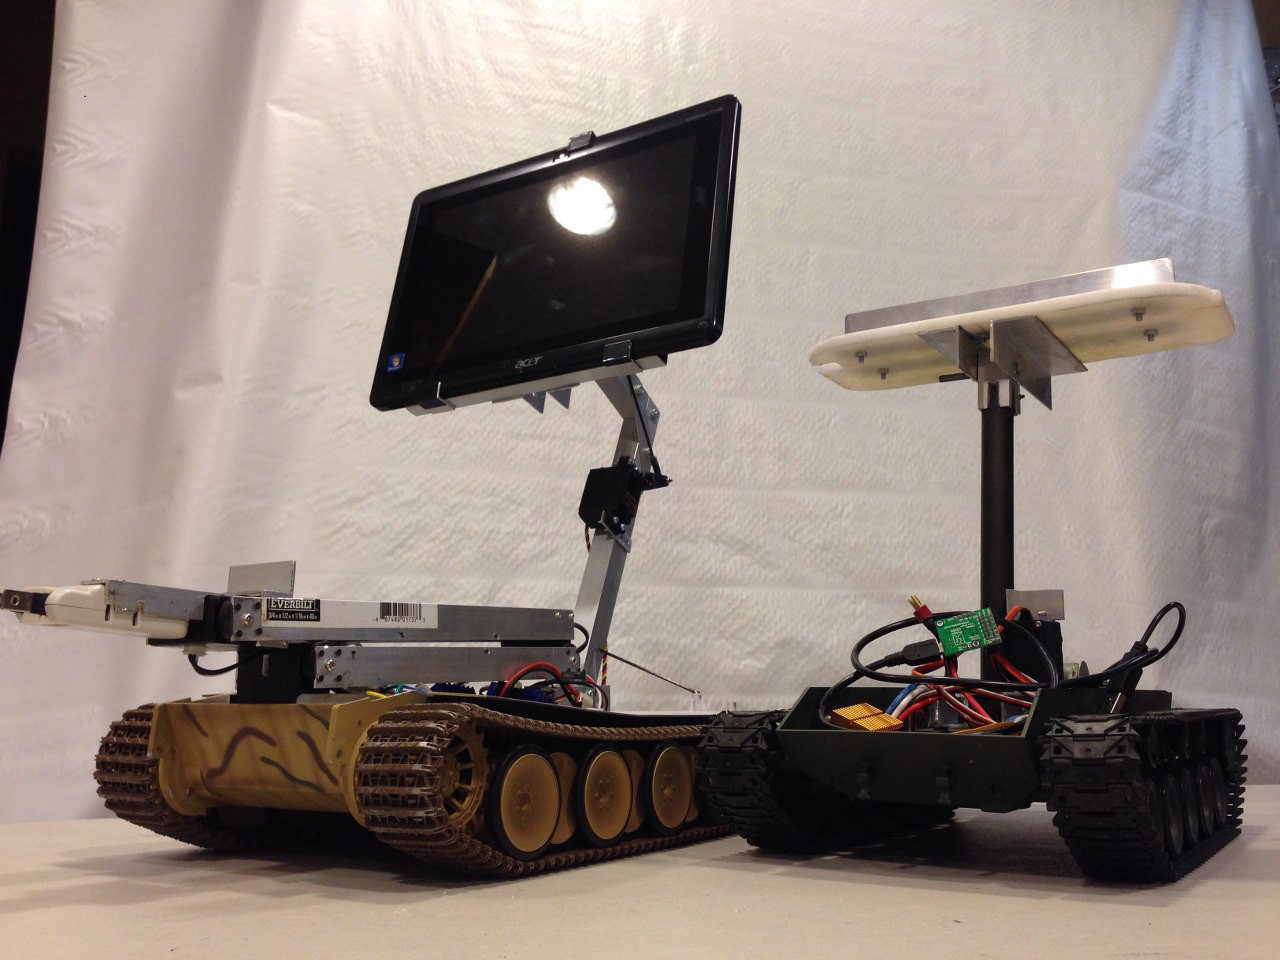
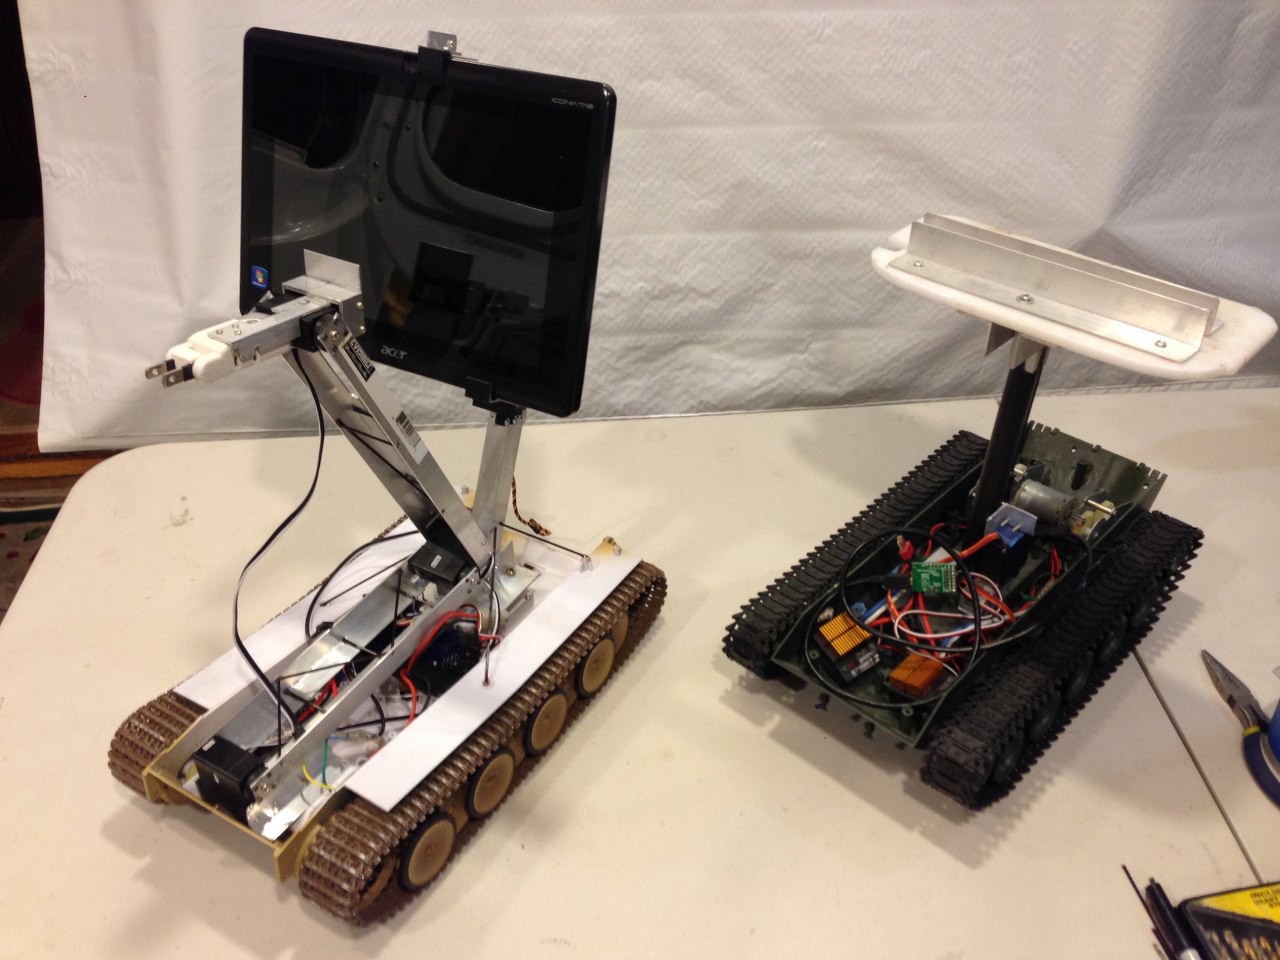
22. Mark I and Mark II side by side
![]()
23. One more side by side and call it a weekend guys! OH NOooo...tomorrow is Monday ;(
![]()
To be continued....
Next week let's move on to the wiring and program the Mark II with much more sophisticated robotic control code. Looking forward! Jack out!
-
Mark 2
06/17/2014 at 07:00 • 0 commentsWith the success of the Skype Robot Mark 1 platform, I've decided to reuse most of the components (hardware and software) and make a more useful robot out of it.
Wanna be more useful? first thing it got to have bigger arm to really grip on something, second it must have the ability to recharge itself! and third, the tablet(camera) must be able to tilt up/down more in order to see things more clearly, plus it got to have lighting system in order to see in the dark.
I've ordered a bunch of robotic servos from Hobbyking, note that these servos have two spines coming out from both side of the case. They look like good candidates for arm servos and tilt servo, only hope the torque spec state on their website (9.6kg / cm) is accurate.
![]()
![]()
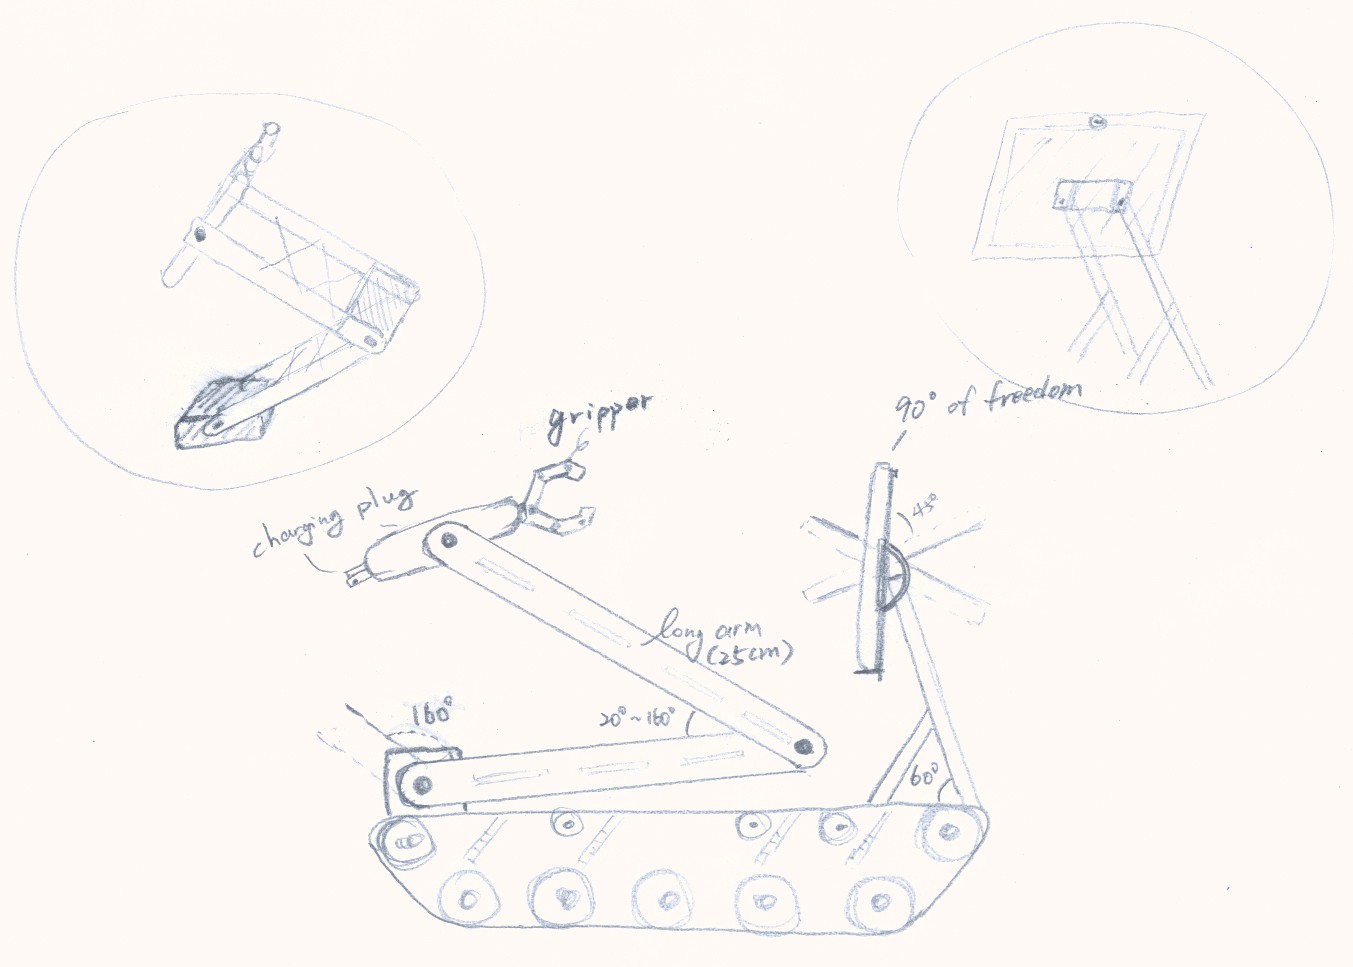
Below is the design scratch for the Mark2, featuring long servo arm with 'charging port' to plug into household 110v outlet and gripper on the other side. The tablet location is relocated to tail section.
The build will be started as soon as the servos arrive, pictures and more detail coming up so stay tune my friend!![]()
-
Performance test
05/29/2014 at 06:51 • 0 commentsOne BIG concern I have since day one is the lag between the control and the robot. So today I clean up my C++ code a bit and did a performance test over Wifi.
All I can say is that the lag from the control is absolutely minimum compare to the video transfer. I am going to do more testing over different network but pretty confident that the performance will be more than what I originally expected :)
-
Give robot a hand
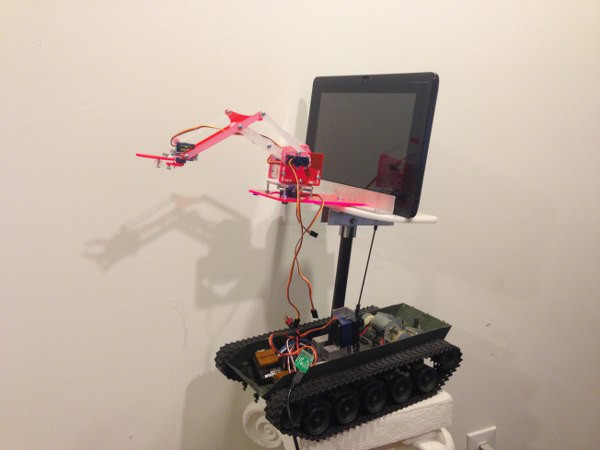
05/16/2014 at 06:45 • 0 commentsSince the USB controller has total of 6 channels and I only use 3 so far (left, right motor and the tilt servo) I've decided to purchase the MeArm robotic arm from ben.phenoptix and literately give my robot a hand! The MeArm is lightweight and affordable and only take about 2 hours to assemble. There are lot of other robotic arms out there but this should give you a good idea of what my robotic platform can do.
Now my robot got a better chance to survive in the case of disarming a bomb or simply getting obstacle out of the way.
![]()
![]()
okok... now I'm ready for some programming ...![]()
-
Mounting the device
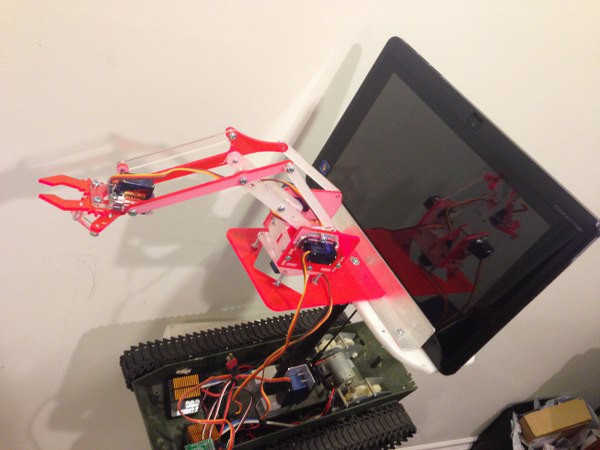
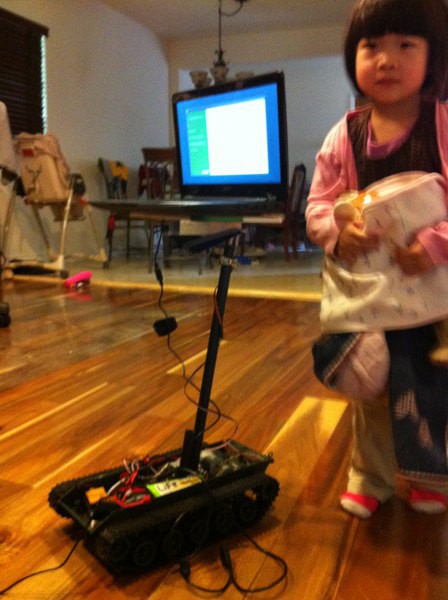
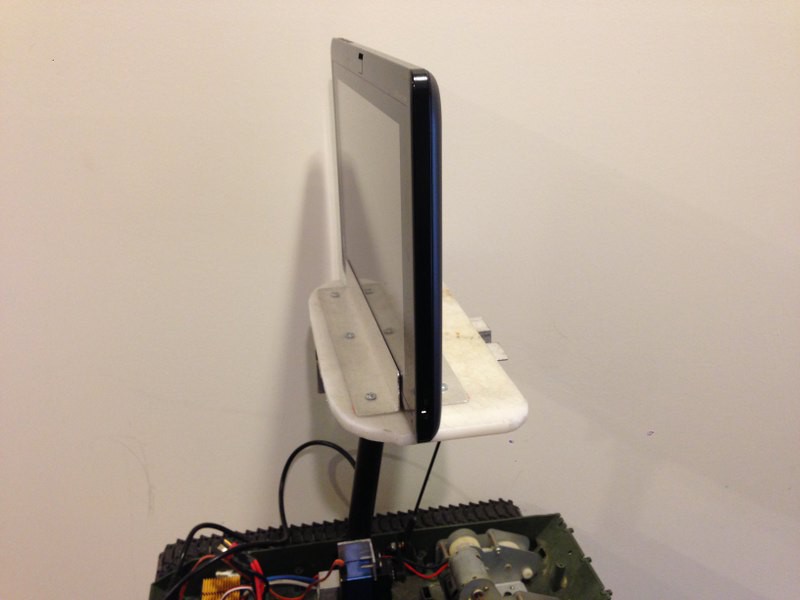
04/30/2014 at 03:32 • 0 commentsMounting the tablet or laptop could be challenging... personally I would love to mount the device the same height as my kid so I can have conversation easier. However the tablet I have is very heavy in compare to the tank platform therefore the robot is easily tilting over.
![]()
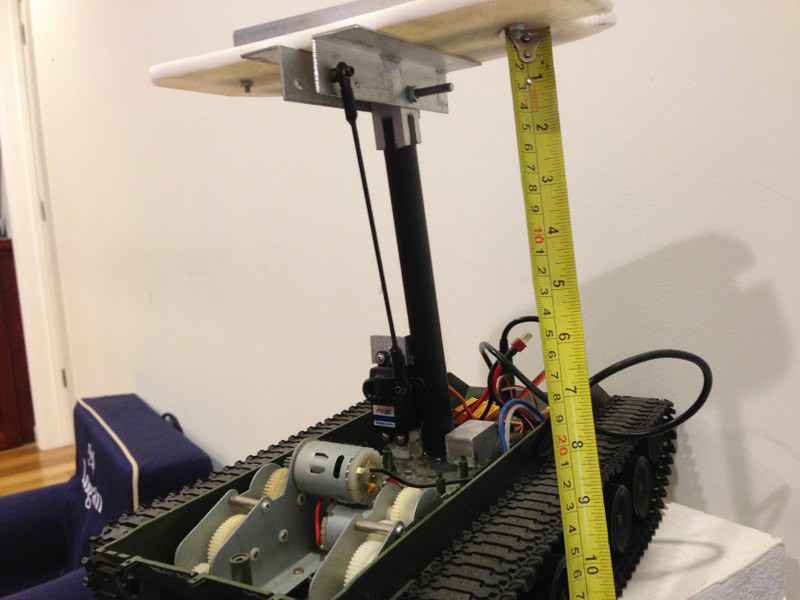
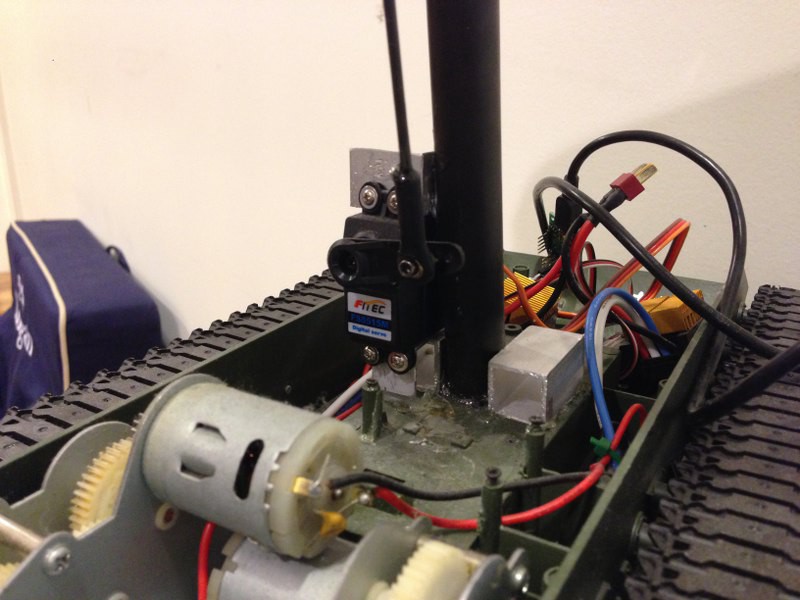
Solution is to cut the height in half and install a high torque servo to manage the "tilting angle" as shown below
![]()
The servo I pick is the high torque, low speed servo retired from my RC airplane . The widely available 9G servo is too weak for this application.
![]()
The material of the mounting pole is a combination of carbon fiber rod and aluminum square rod from home depot. Both materials can be easily cut with hand saw or band saw but you should save yourself time and money and stick with the aluminum... The only reason I use carbon fiber rod is I happened to have one hanging around and it looks cool, but it's such a pain in the axx to couple these two materials together. Again, aluminum square rod is the better choice of making the mounting pole.
![]()
and finally, I steal my wife's cutting board from the kitchen and turn it into the table for the laptop/tablet.
![]()
![]()
Next let's move on to the programming !!
To be continued....
-
The Start- choosing the platform
04/29/2014 at 06:43 • 0 commentsI am a hard-core RC hobbyist therefore I have several RC platform for me to choose from. My first pick is a race car that can go 40mph on flat road.... hmn..hmn... I definitely don't want this run into my kids... PASS....
![]()
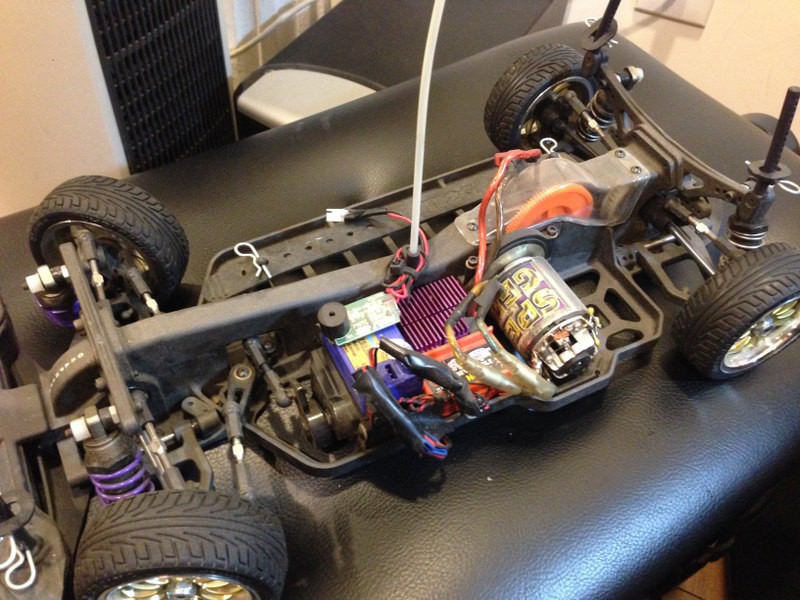
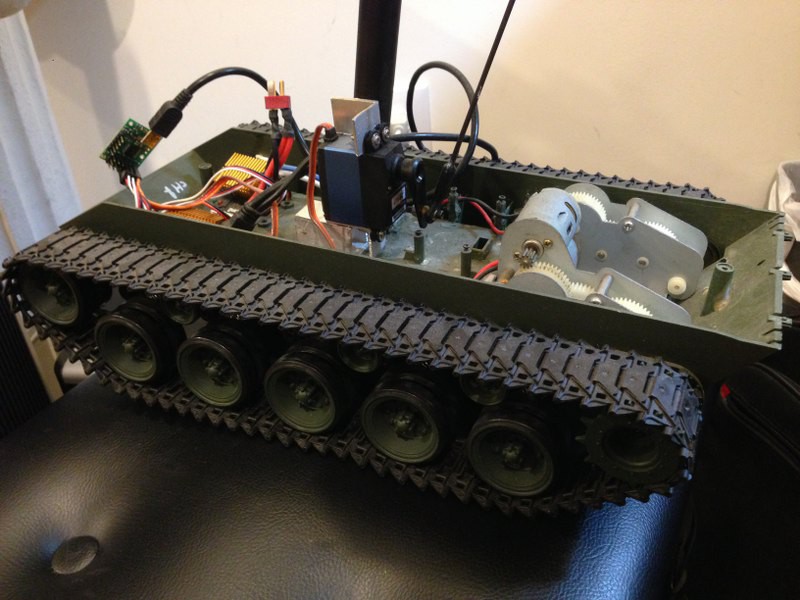
Then I found this broken 1:10 tank sitting in the storage collecting dust and decided to wake it up
![]()
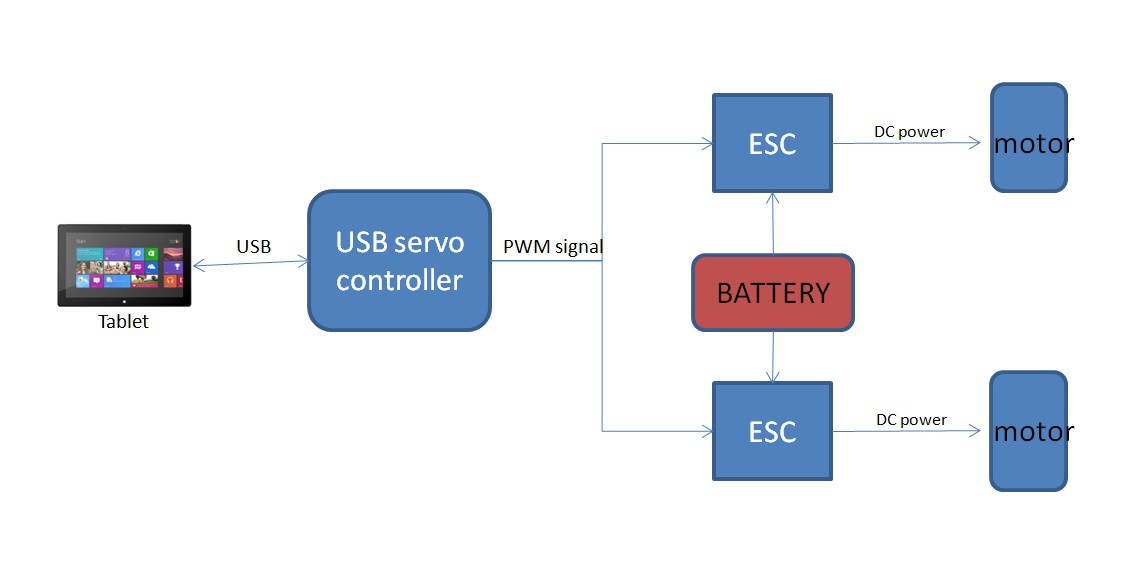
Most of the tank are control by two brushed motors driving left and right track. I had to install two ESCs to control the motor with PWM signal from the USB servo controller, see below diagram for detail:
![]()
![]()
I got my USB servo controller for $ 19.95 from
http://www.pololu.com/product/1350
Now we have the basic hardware setup, next will be mounting the tablet/laptop and do some programming !!
To be continued..