Close
0%
0%

Sonic Screwdriver

As you will probably know, this is the famous prop from Doctor Who, the television series from BBC. I just love this thing.

Similar projects worth following
I know that this is by far not the first sonic device on the internet. And even here on hackaday.io there are 2 projects. But seeing them reminded me of my started attempt - which I spend a lot of time, money, tinkering and "engineering" on - just rotting in a box. So by showing it here I hope I will take some time to work on it some more. My goals:

# controlling an RGB LED, IR LED, UV LED
# using a piezo speaker
# using a 433mHz sender
# 3 button menu (may change)
# reading a photodiode or resistor
# using a fader for intensity
# using an accelerometer

The stretch goals:
# combining first goals to awesome features
# make an awesome case for it

This is a table with some possible combinations and functions for the sonic screwdriver.

Menuinputoutputcombination result
RED, GREEN, BLUE, WW, UV, IR, MIX, LUMOSfaderRED, GREEN, BLUE, WW, UV, IRTurn on LEDs with intensity responding to fader (if pwm channel is given, otherwise just turn on the LED on press of the enter button)

LUMOS will turn on RGB and WW LED on max output

MIX will give you the mixed color of the last fader position for each color, this will also be the color of your screwdriver 

IR can be used for wiimote whiteboards

433ANARCHY433mHzwill turn on and off every 433 switch around you, depending the button you press with

DAZZ-rgb led, white ledRandomized switching of the LEDs like in the link - a non lethal weapon a doctor may approve.
http://hackaday.com/2009/09/28/open-source-weapon-makes-you-puke/

MAESTROaccelerometerrgb ledthrowing the ssd would result in a colorful representation of the forces on each axis
see the example "mpu2rgb"

https://github.com/davedarko/mpu6050

THEREMINphotoresistorpiezo speakeralso known as a light theremin
AUDIOphotoresistorpiezo speakeralmost the same as theremin, without tone but instead direct analog reading to pwm output

N/AIR, RGBRGB Remote for RGB LED stripes

N/Aaccelerometer
+
photoresistor
serial console3D scanning devise (probably very crude)
N/Afaderpiezo speakera trumpet or flute like instrument
N/AaccelerometerIR ledcontrolling IR helicopters and cars remotely

N/A-piezo speaker,
bar graph
metronome, using bargraph as binary display to show bpm / 10
N/Aaccelerometerpiezo speakeralarm triggered by movement

  • 1 × Arduino Pro Mini the real cheap ones from ebay for 5-6 bugs
  • 1 × 433mHz transponder the real cheap ones from ebay for 1-2 euros
  • 1 × mpu 6050 the real cheap ripoff for 2-3 euros
  • 1 × 10kOhm fader
  • 1 × RGB common anode LED 5mm

View all 10 components

  • easy way

    davedarko07/15/2015 at 00:38 0 comments

    I just thought about using the existing arduino on a "breakout board" - cut the edges off on the pinheader of the arduino and solder it to a board that connects the head and the variable resistor.

  • update 08/29 - the gremlins are here

    davedarko08/29/2014 at 20:11 0 comments

    I had to connect power and signals (probably soft-serial or IIC) and write up some software for the charlie-plexed POV display. This way you can wave the sonic around and read which program is selected.

  • pcbs still are like gremlins

    davedarko08/10/2014 at 07:48 0 comments

    I don't know where I wrote this, but I wrote this already. Don't order pcbs after midnight :D I missed 4 pins on the attiny for the charlie plexed menu I plan to control via IIC (or serial). This will need some adjustments. I hope they are still programmable by isp, when one pin is connected as a charlieplexed pin. 

  • update 08/08

    davedarko08/08/2014 at 14:27 0 comments

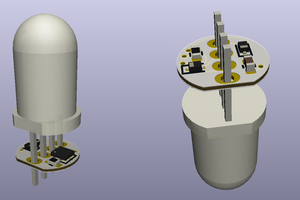
    I'm quite pleased with the head so far :) not sure about the display section yet and the mainboard is not designed yet, as well as the power section.

  • update 07/18

    davedarko07/18/2014 at 14:59 0 comments

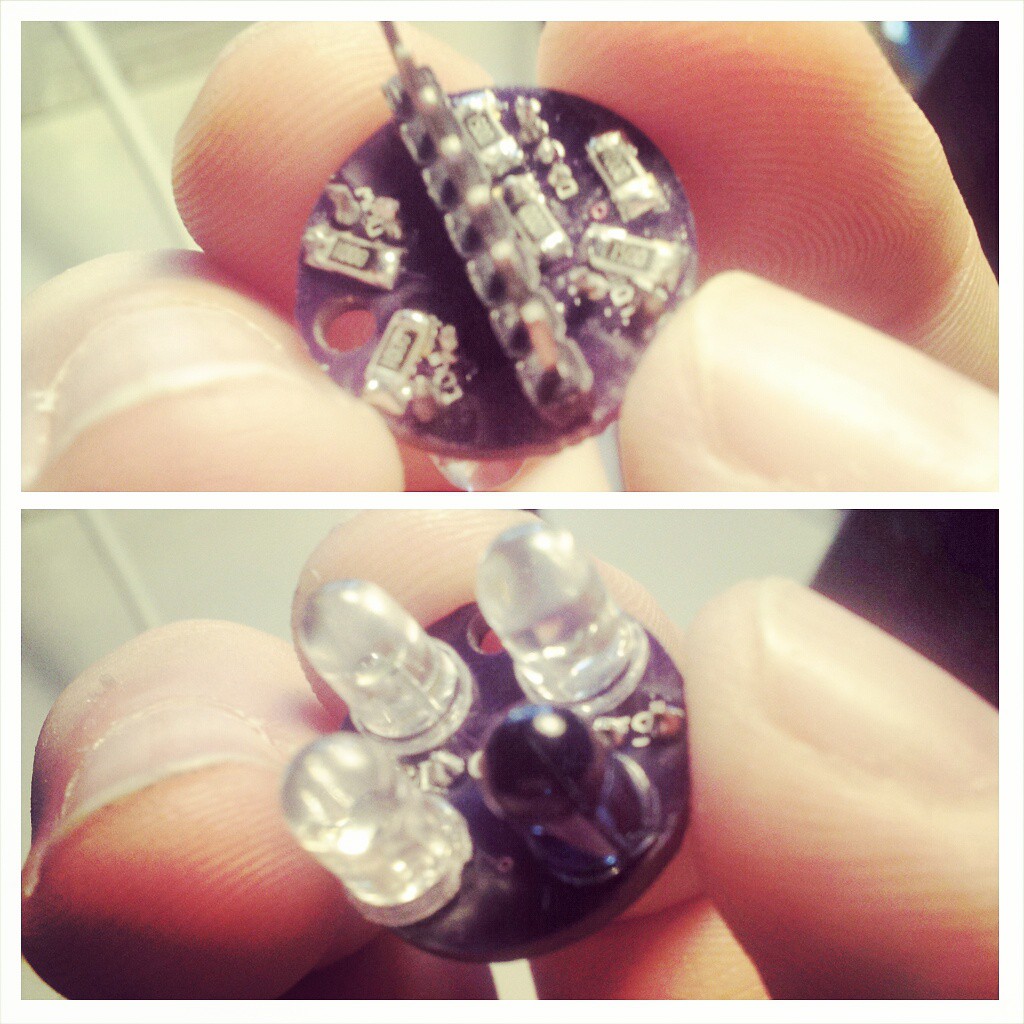
    Today I overcame my frustration with the connectors that were too small and had all the parts present to solder the first dome. I had to file the rgb LED legs down so that they would be thin enough to fit the holes. The IR led had very thick spacers that had to go too.  

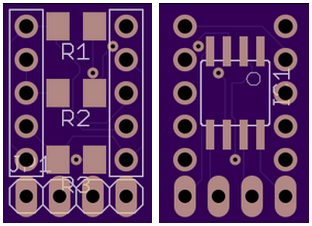
    The next pcb is already designed and ordered. It is merely an adapter board and holder of a 3mm photodiode that will have 4 1x2 pin header going to the next board   

  • update 07/10

    davedarko07/10/2014 at 22:04 0 comments

    So the LED boards came in yesterday and my bad luck with ordered pcbs seem to continue - the footprint of the RGB LED is to small! I guess that is somewhat the mistake of the user who made the part and the crux of 123d.circuits.io - nobody checks your work. Carefully drilling the holes bigger could work, but my drill bits are all broken and I have to wait for the 150Ohm smd resistors. 

    Since the atmega328 current per pin is about 40mA I think I will drop the ULN2803 for now and focus on the main board with the linear potentiometer and the led display and finally get a decent case and the power setup done.

    I also started a nice little distraction - LED nixie tubes http://hackaday.io/page/436

  • update 06/18

    davedarko06/18/2014 at 16:42 0 comments

    Hardware

    Today I finally ordered the LED dome board from circuits.io - I wanted to rebuild that with eagle but got frustrated with the available pinheaders and thought the time I would spend to create my own wasn't worth the 5usd I would save so what the heck. The other boards will be done in eagle, especially an arduino-a-like board as the mainboard.

    Software

    on the software side hasn't happen that much, I wrote a BPM clicker for it and a DAZZLER program, where the LEDs blink randomly as seen on hackaday.com http://hackaday.com/2009/09/28/open-source-weapon-makes-you-puke/

  • POV based LED menu part 2

    davedarko06/01/2014 at 17:35 0 comments

    So I got my motor driver for my scorcher6x6 and placed a 5led bargraph on it to test my POV algorhythms - works :)

  • looking for the right sound

    davedarko05/18/2014 at 21:05 0 comments

    I'm trying to get the sound right and this will be my link store.

    http://www.physicsforums.com/showthread.php?t=682430

  • stuff ordered and future designs

    davedarko05/17/2014 at 16:29 1 comment

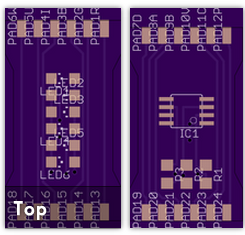
    Not happy with the warm-white LED and its brightness, I ordered some 40.000mcd LEDs along the BPW34 photodiode for gamma-ray detection, a shorter potentiometer and some extra long pin headers. I previously design the LED board with 123D circuits but want to train/force myself into eagle and use OSH Park directly (saving the fee comes in handy, too). My first board will be an attiny85 pcb for a charlieplexed 5 LED bargraph which I intend to control over IIC or soft-serial. I hope I will be able to solder those smd parts and not connect the via on Resistor 3 with both poles. 

View all 16 project logs

Enjoy this project?

Share

Discussions

Ethan Durrant wrote 09/25/2014 at 21:22 point
I have been planning on building my own sonic screwdriver design for a while, going to use IR communication as well as 2.4GHz RF with nRF24L01+ modules. Probably will be similar to yours, I am going to be documenting it here:
http://hackaday.io/project/3067
In the end I hope to use and ARM Cortex-M3 (STM32F103) MCU and have an accelerometer (because I already have a dev board with both). I like your idea of using a linear Potentiometer, makes it nice and sleek. I think I will use a pot with a knob on the end of something.

  Are you sure? yes | no

davedarko wrote 09/25/2014 at 22:02 point
Cool, i'm gonna follow that :) i too have an accelerometer on board and may switch the 433mHz stuff with the nrf24s. The poti will be fixed to the casing, so i can add buttons to the pcb and push it out like the one from tennant. I will follow yours, thanks for the hint!

  Are you sure? yes | no

Benchoff wrote 06/18/2014 at 18:00 point
If you're looking for some way to generate the 'sonic sound' algorithmically, you might want to look at this thing: http://hackaday.com/2011/11/01/annoy-your-sound-guy-even-more/

It's basically just throwing chars at a speaker, with a few people that have done very impressive stuff by throwing chars at /dev/audio.

There's one that actually covers a chiptune, so I think the sonic warble would be doable. Understanding it, though...

  Are you sure? yes | no

davedarko wrote 06/18/2014 at 18:11 point
I thought about 2-3 for functions to generate the sound wave but this looks interesting! It may at least serve as a nice menu option. I'm not so sure how I could manipulate those functions to make them sound just like the sonic, though. But thanks for the tip, I will have a look on it!

  Are you sure? yes | no

suzisidle wrote 04/30/2014 at 17:09 point
include an r.f.i.d. , clone your bank card and trip out shop assistants by paying for stuff with it, will work extra well if you wear a bow-tie/fez/rediculously long scarf or just arrive mysteriously in a big blue police box demanding fish fingers and custard!

  Are you sure? yes | no

davedarko wrote 04/30/2014 at 18:17 point
Bank cards are magnetic, but this is a _sonic_ screwdriver ;) Faking an rfid card seems to be doable with arduinos and attinys, but only on 125kHz basis. I only have 13.56mHz cards and reader laying around... so that's not an option for now. And I would have to free the pins for the SPI interface... so, naaaah. But I like your way of thinking :D

  Are you sure? yes | no

Similar Projects

Does this project spark your interest?

Become a member to follow this project and never miss any updates