davedarko
-
easy way
07/15/2015 at 00:38 • 0 commentsI just thought about using the existing arduino on a "breakout board" - cut the edges off on the pinheader of the arduino and solder it to a board that connects the head and the variable resistor.
-
update 08/29 - the gremlins are here
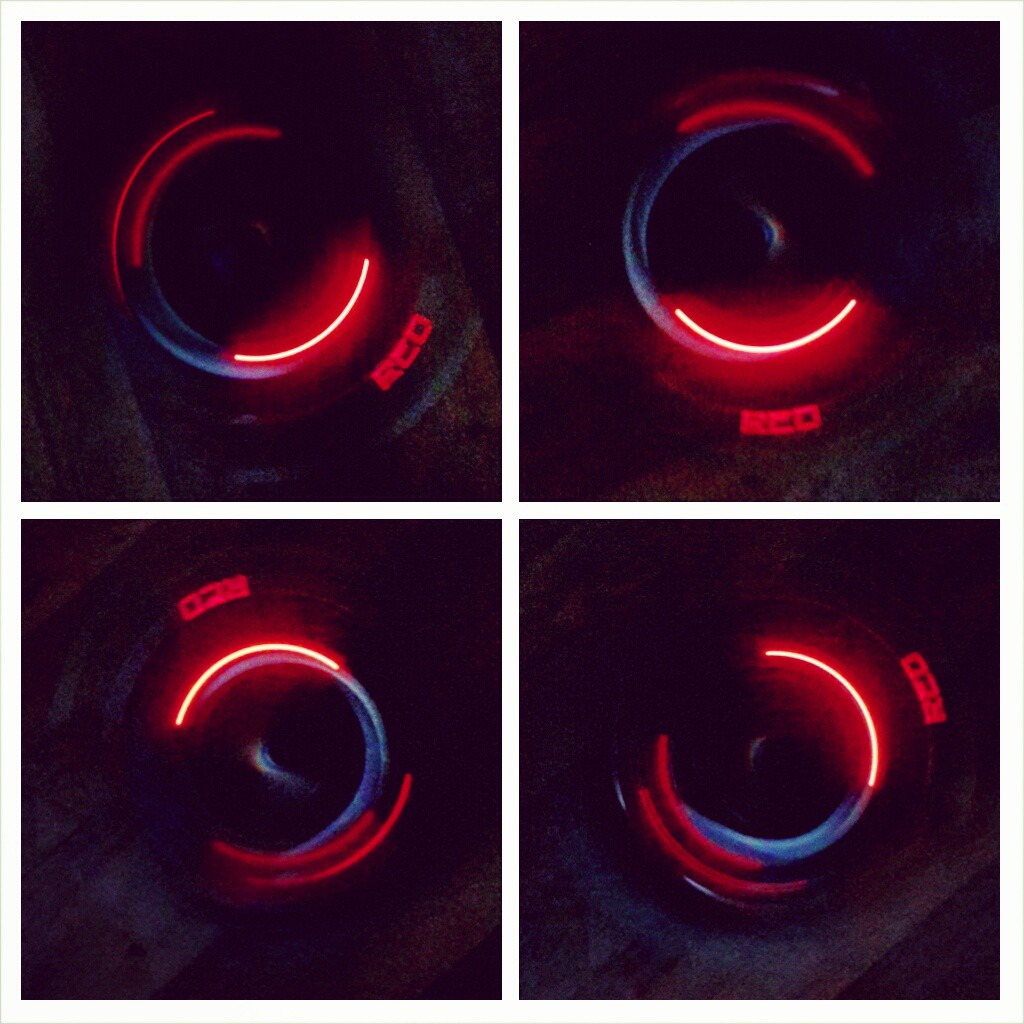
08/29/2014 at 20:11 • 0 commentsI had to connect power and signals (probably soft-serial or IIC) and write up some software for the charlie-plexed POV display. This way you can wave the sonic around and read which program is selected.
![]()
-
pcbs still are like gremlins
08/10/2014 at 07:48 • 0 commentsI don't know where I wrote this, but I wrote this already. Don't order pcbs after midnight :D I missed 4 pins on the attiny for the charlie plexed menu I plan to control via IIC (or serial). This will need some adjustments. I hope they are still programmable by isp, when one pin is connected as a charlieplexed pin.
![]()
-
update 08/08
08/08/2014 at 14:27 • 0 commentsI'm quite pleased with the head so far :) not sure about the display section yet and the mainboard is not designed yet, as well as the power section.
![]()
-
update 07/18
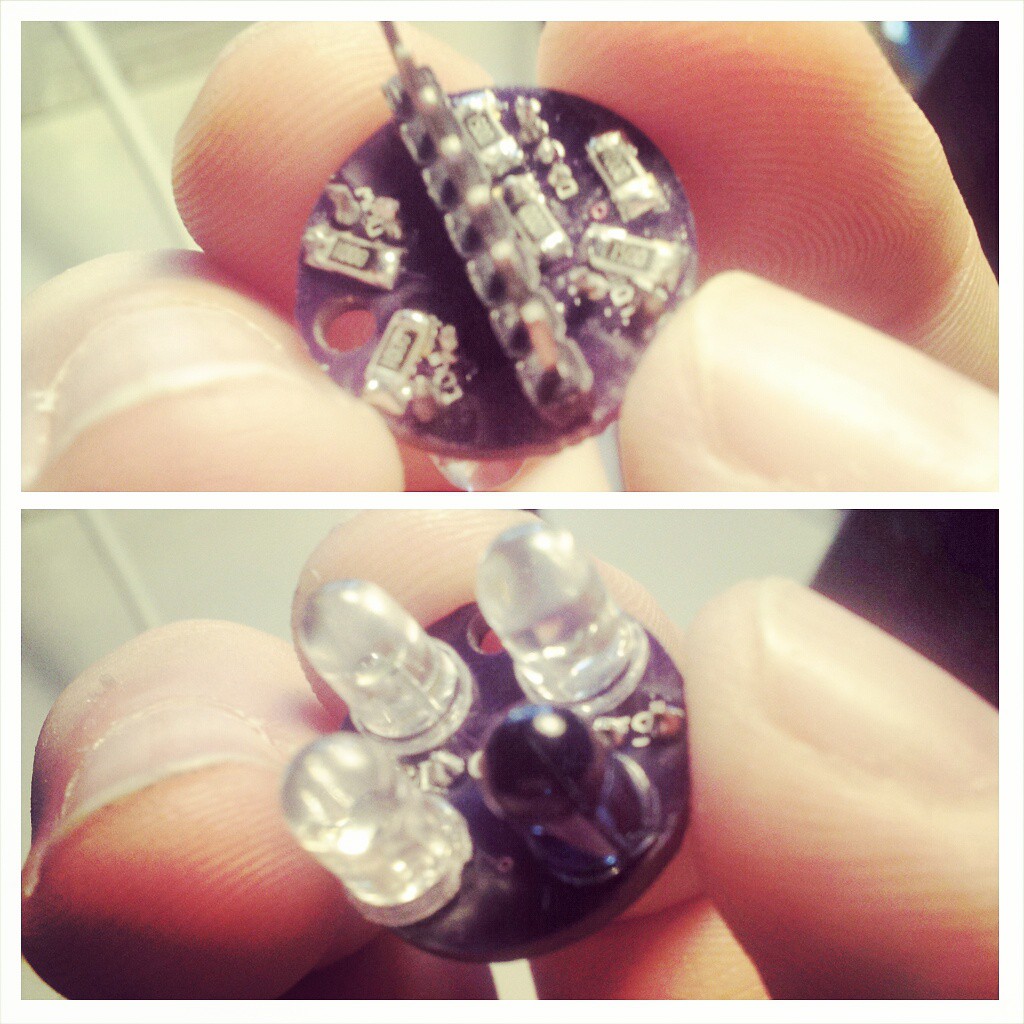
07/18/2014 at 14:59 • 0 commentsToday I overcame my frustration with the connectors that were too small and had all the parts present to solder the first dome. I had to file the rgb LED legs down so that they would be thin enough to fit the holes. The IR led had very thick spacers that had to go too.
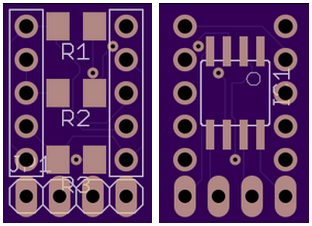
The next pcb is already designed and ordered. It is merely an adapter board and holder of a 3mm photodiode that will have 4 1x2 pin header going to the next board
![]()
-
update 07/10
07/10/2014 at 22:04 • 0 commentsSo the LED boards came in yesterday and my bad luck with ordered pcbs seem to continue - the footprint of the RGB LED is to small! I guess that is somewhat the mistake of the user who made the part and the crux of 123d.circuits.io - nobody checks your work. Carefully drilling the holes bigger could work, but my drill bits are all broken and I have to wait for the 150Ohm smd resistors.
Since the atmega328 current per pin is about 40mA I think I will drop the ULN2803 for now and focus on the main board with the linear potentiometer and the led display and finally get a decent case and the power setup done.
I also started a nice little distraction - LED nixie tubes http://hackaday.io/page/436
-
update 06/18
06/18/2014 at 16:42 • 0 commentsHardware
Today I finally ordered the LED dome board from circuits.io - I wanted to rebuild that with eagle but got frustrated with the available pinheaders and thought the time I would spend to create my own wasn't worth the 5usd I would save so what the heck. The other boards will be done in eagle, especially an arduino-a-like board as the mainboard.
Software
on the software side hasn't happen that much, I wrote a BPM clicker for it and a DAZZLER program, where the LEDs blink randomly as seen on hackaday.com http://hackaday.com/2009/09/28/open-source-weapon-makes-you-puke/
-
POV based LED menu part 2
06/01/2014 at 17:35 • 0 commentsSo I got my motor driver for my scorcher6x6 and placed a 5led bargraph on it to test my POV algorhythms - works :)
![]()
-
looking for the right sound
05/18/2014 at 21:05 • 0 commentsI'm trying to get the sound right and this will be my link store.
-
stuff ordered and future designs
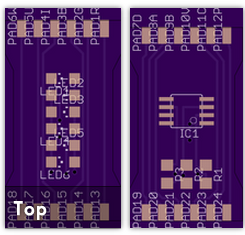
05/17/2014 at 16:29 • 1 commentNot happy with the warm-white LED and its brightness, I ordered some 40.000mcd LEDs along the BPW34 photodiode for gamma-ray detection, a shorter potentiometer and some extra long pin headers. I previously design the LED board with 123D circuits but want to train/force myself into eagle and use OSH Park directly (saving the fee comes in handy, too). My first board will be an attiny85 pcb for a charlieplexed 5 LED bargraph which I intend to control over IIC or soft-serial. I hope I will be able to solder those smd parts and not connect the via on Resistor 3 with both poles.
![]()
Sonic Screwdriver
As you will probably know, this is the famous prop from Doctor Who, the television series from BBC. I just love this thing.