 nick.r.brewer
-
1Step 1
Software/Programming
Install OS onto the Raspberry Pi
- https://www.raspberrypi.org/downloads/
Follow these instructions to install MPD
Run these scripts
- sudo apt-get update
- sudo apt-get install build-essential python-dev python-smbus python-pip python-imaging python-numpy
Follow these instructions for the TFT Display
- https://github.com/adafruit/Adafruit_Python_ILI9341
Create Folders
- in /, create a new folder and call it "radio"
Change MPD Permissions
- Run this line in terminal "sudo chown -R pi /var/lib/mpd/"
- Follow instructions to install Adafruit GPIO
- https://github.com/adafruit/Adafruit_Python_GPIO
Force Headphone Jack
- run "sudo raspi-config"
- Under Advanced Options find A9 Audio
- Click Force 3.5mm ('headphone') jack
- Click finish to exit raspi-config
Download Python Code
- https://github.com/nickbrewer/Radio
- TFT Screen - radio.py
- HDMI/Composite - radio_screen.py
-
2Step 2
Assemble Components
(Please note the video used an HDMI screen instead of the TFT display, the assembly is exactly the same)
From this point on, if you're not using the TFT screen, please ignore it when mentioned in these instructions.
-
3Step 3
Solder together the amplifier
![]()
- https://learn.adafruit.com/adafruit-20w-stereo-audio-amplifier-class-d-max9744?view=all
-
4Step 4
Wiring
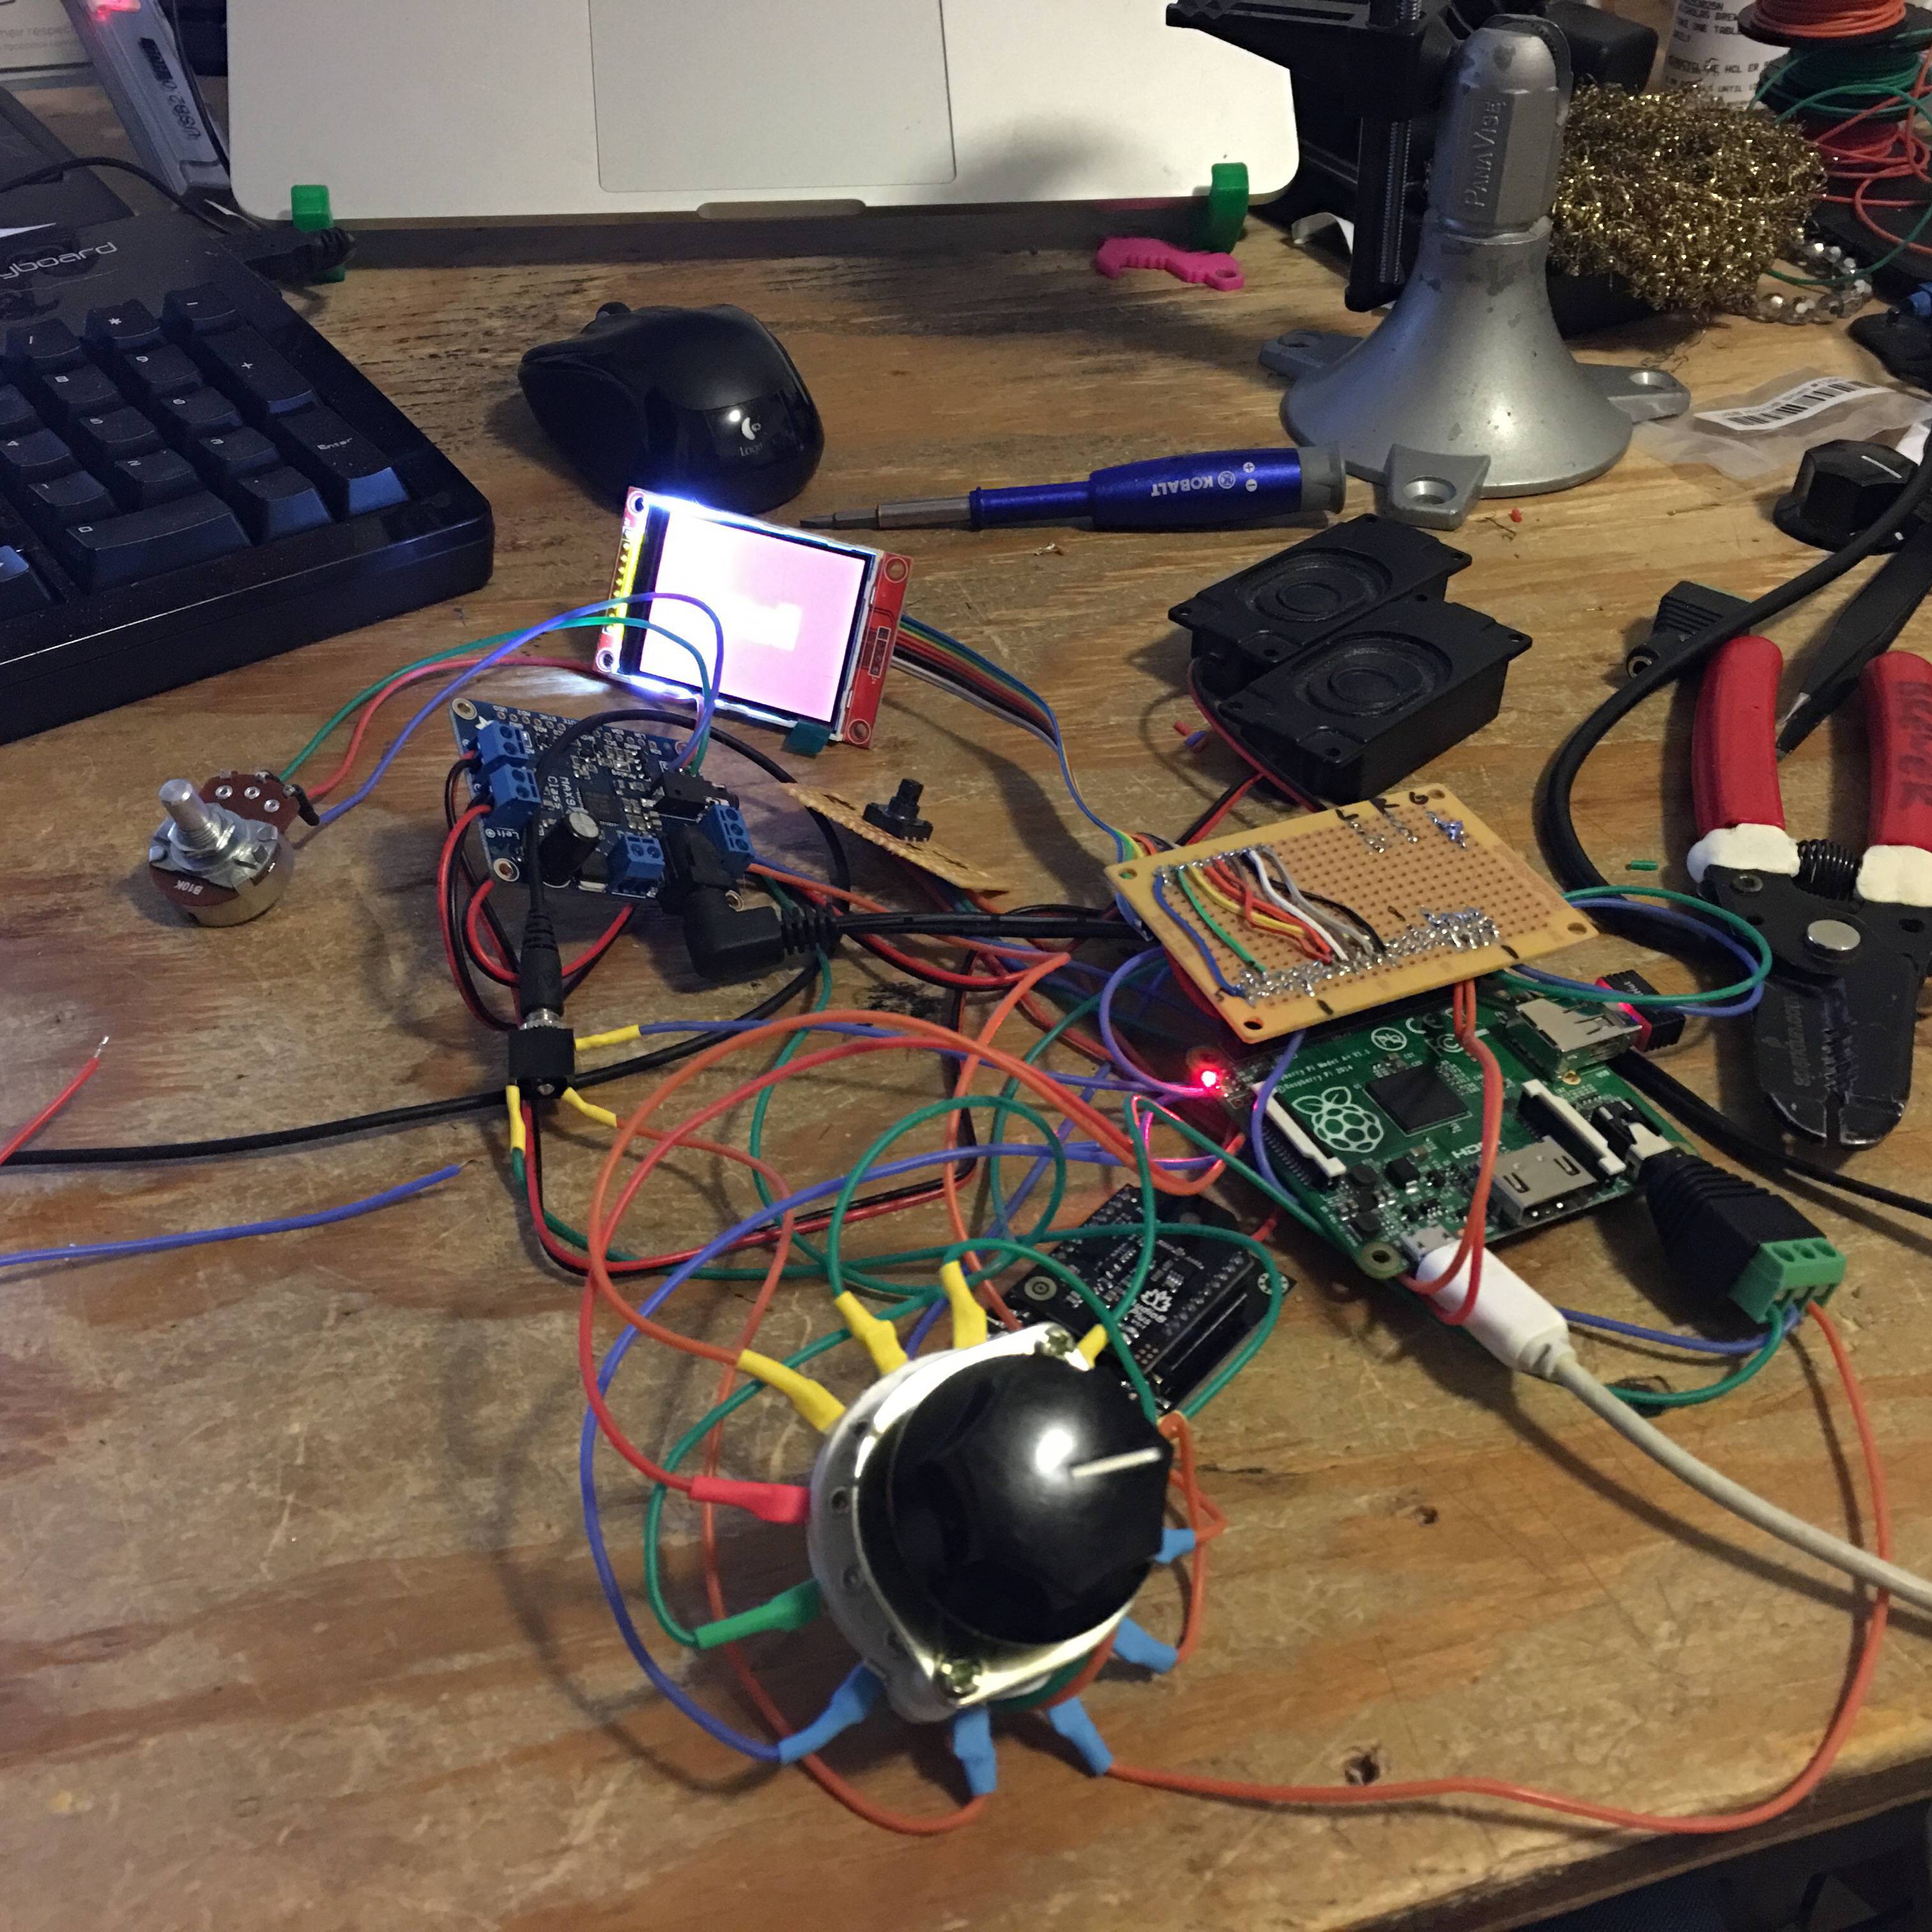
Wire the whole mess together. I apologize for the lack of in depth pictures. If you build this, go with the method that's most comfortable for you.
In my case, I built a hat for the Raspberry Pi and broke it out from there.
I'll try to explain this mess a bit.
- The pot is wired to the amplifier
- Each of the inputs (bluetooth/aux/RPi) are all wired identically (follow the pinout guide/3P3T guide in the next step)
- The speakers are wired to the amplifier
- The power isn't shown in this picture, but I have a 5V power supply plugged into the back of the radio and that is wired directly to both the amp and the Raspberry Pi.
![]()
-
5Step 5
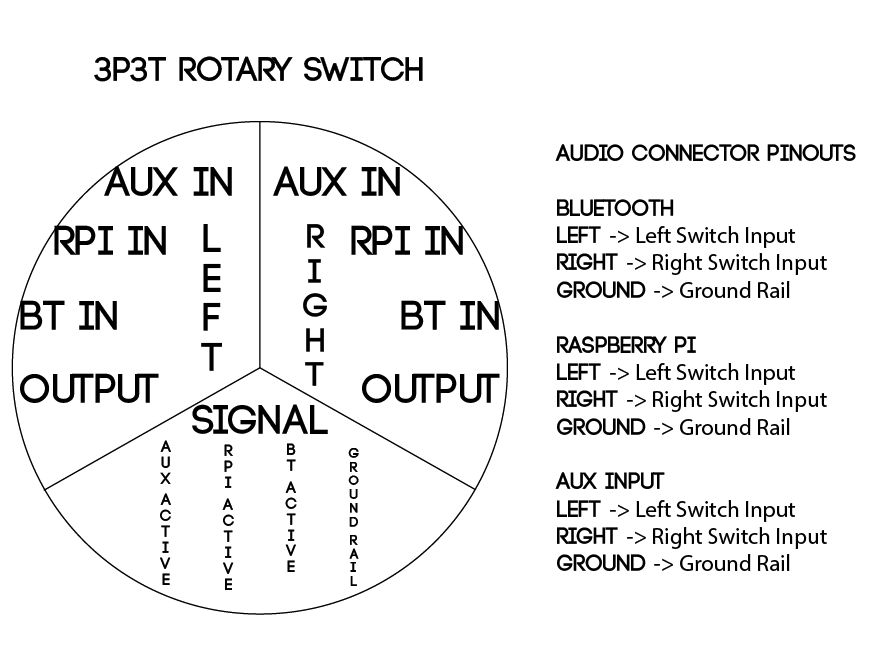
Switch Pinout
![]()
-
6Step 6
Raspberry Pi Pinout
![]()
-
7Step 7
Cathedral Radio Build
I used an X-Carve for several parts, but there is no reason you couldn't use a 3D Printer or any other method of creating a neat case for this project.
All the files are located in the files portion of this build.
- Cut out one cathedral rib and use that as a template with a hand router. (I found this cut down on the cnc time significantly)
- Cut out the front panel (I used several different sized bits for this)
- Cut out the back panel- Glue the ribs together to give it about 5" of depth
- Sand/stain the entire thing
-
8Step 8
Print Buttons (Optional)
I have access to a 3D Printer, so I printed the button/knobs (also included in the files).
This step is really optional because there are tons of knobs out there, find what you like and run with it.
Cathedral Raspberry Pi Internet Radio
I set out to build a RPi radio with bluetooth and aux inputs that simply switched between the stations I programmed into it.


Discussions
Become a Hackaday.io Member
Create an account to leave a comment. Already have an account? Log In.