 Víctor Mayoral Vilches
-
1Step 1
Step 1: Assemble the drone kit
Required time: 30 minutes
Once you get all the components start by assembling your drone:
- Get the black frame together and place the motors on top.
- Fix the ESC (Electronic Speed Controllers) to the frame using some tape and connect them to the motors.
- Put together the power (red) and ground (black) ends of the ESCs into the individualcable (to be connected later to the battery) and fix everything underneath the frame.
- Adjust the power module connectors to the battery ones. There several ways to do this but here's a quick one: a) cut the connectors and solder battery and power module together (do it one at a time, careful with short circuits!). b) cut the other end of the power module and resolder the battery connector (previously cut) there. c) Done!, this will allow us to easily connect and disconnect the "battery+power module" to the drone.
- Place the "battery+power module" pack underneath, use the velcro included in the package to do so.
Step 2: Get the autopilot ready
Required time: 30 minutes
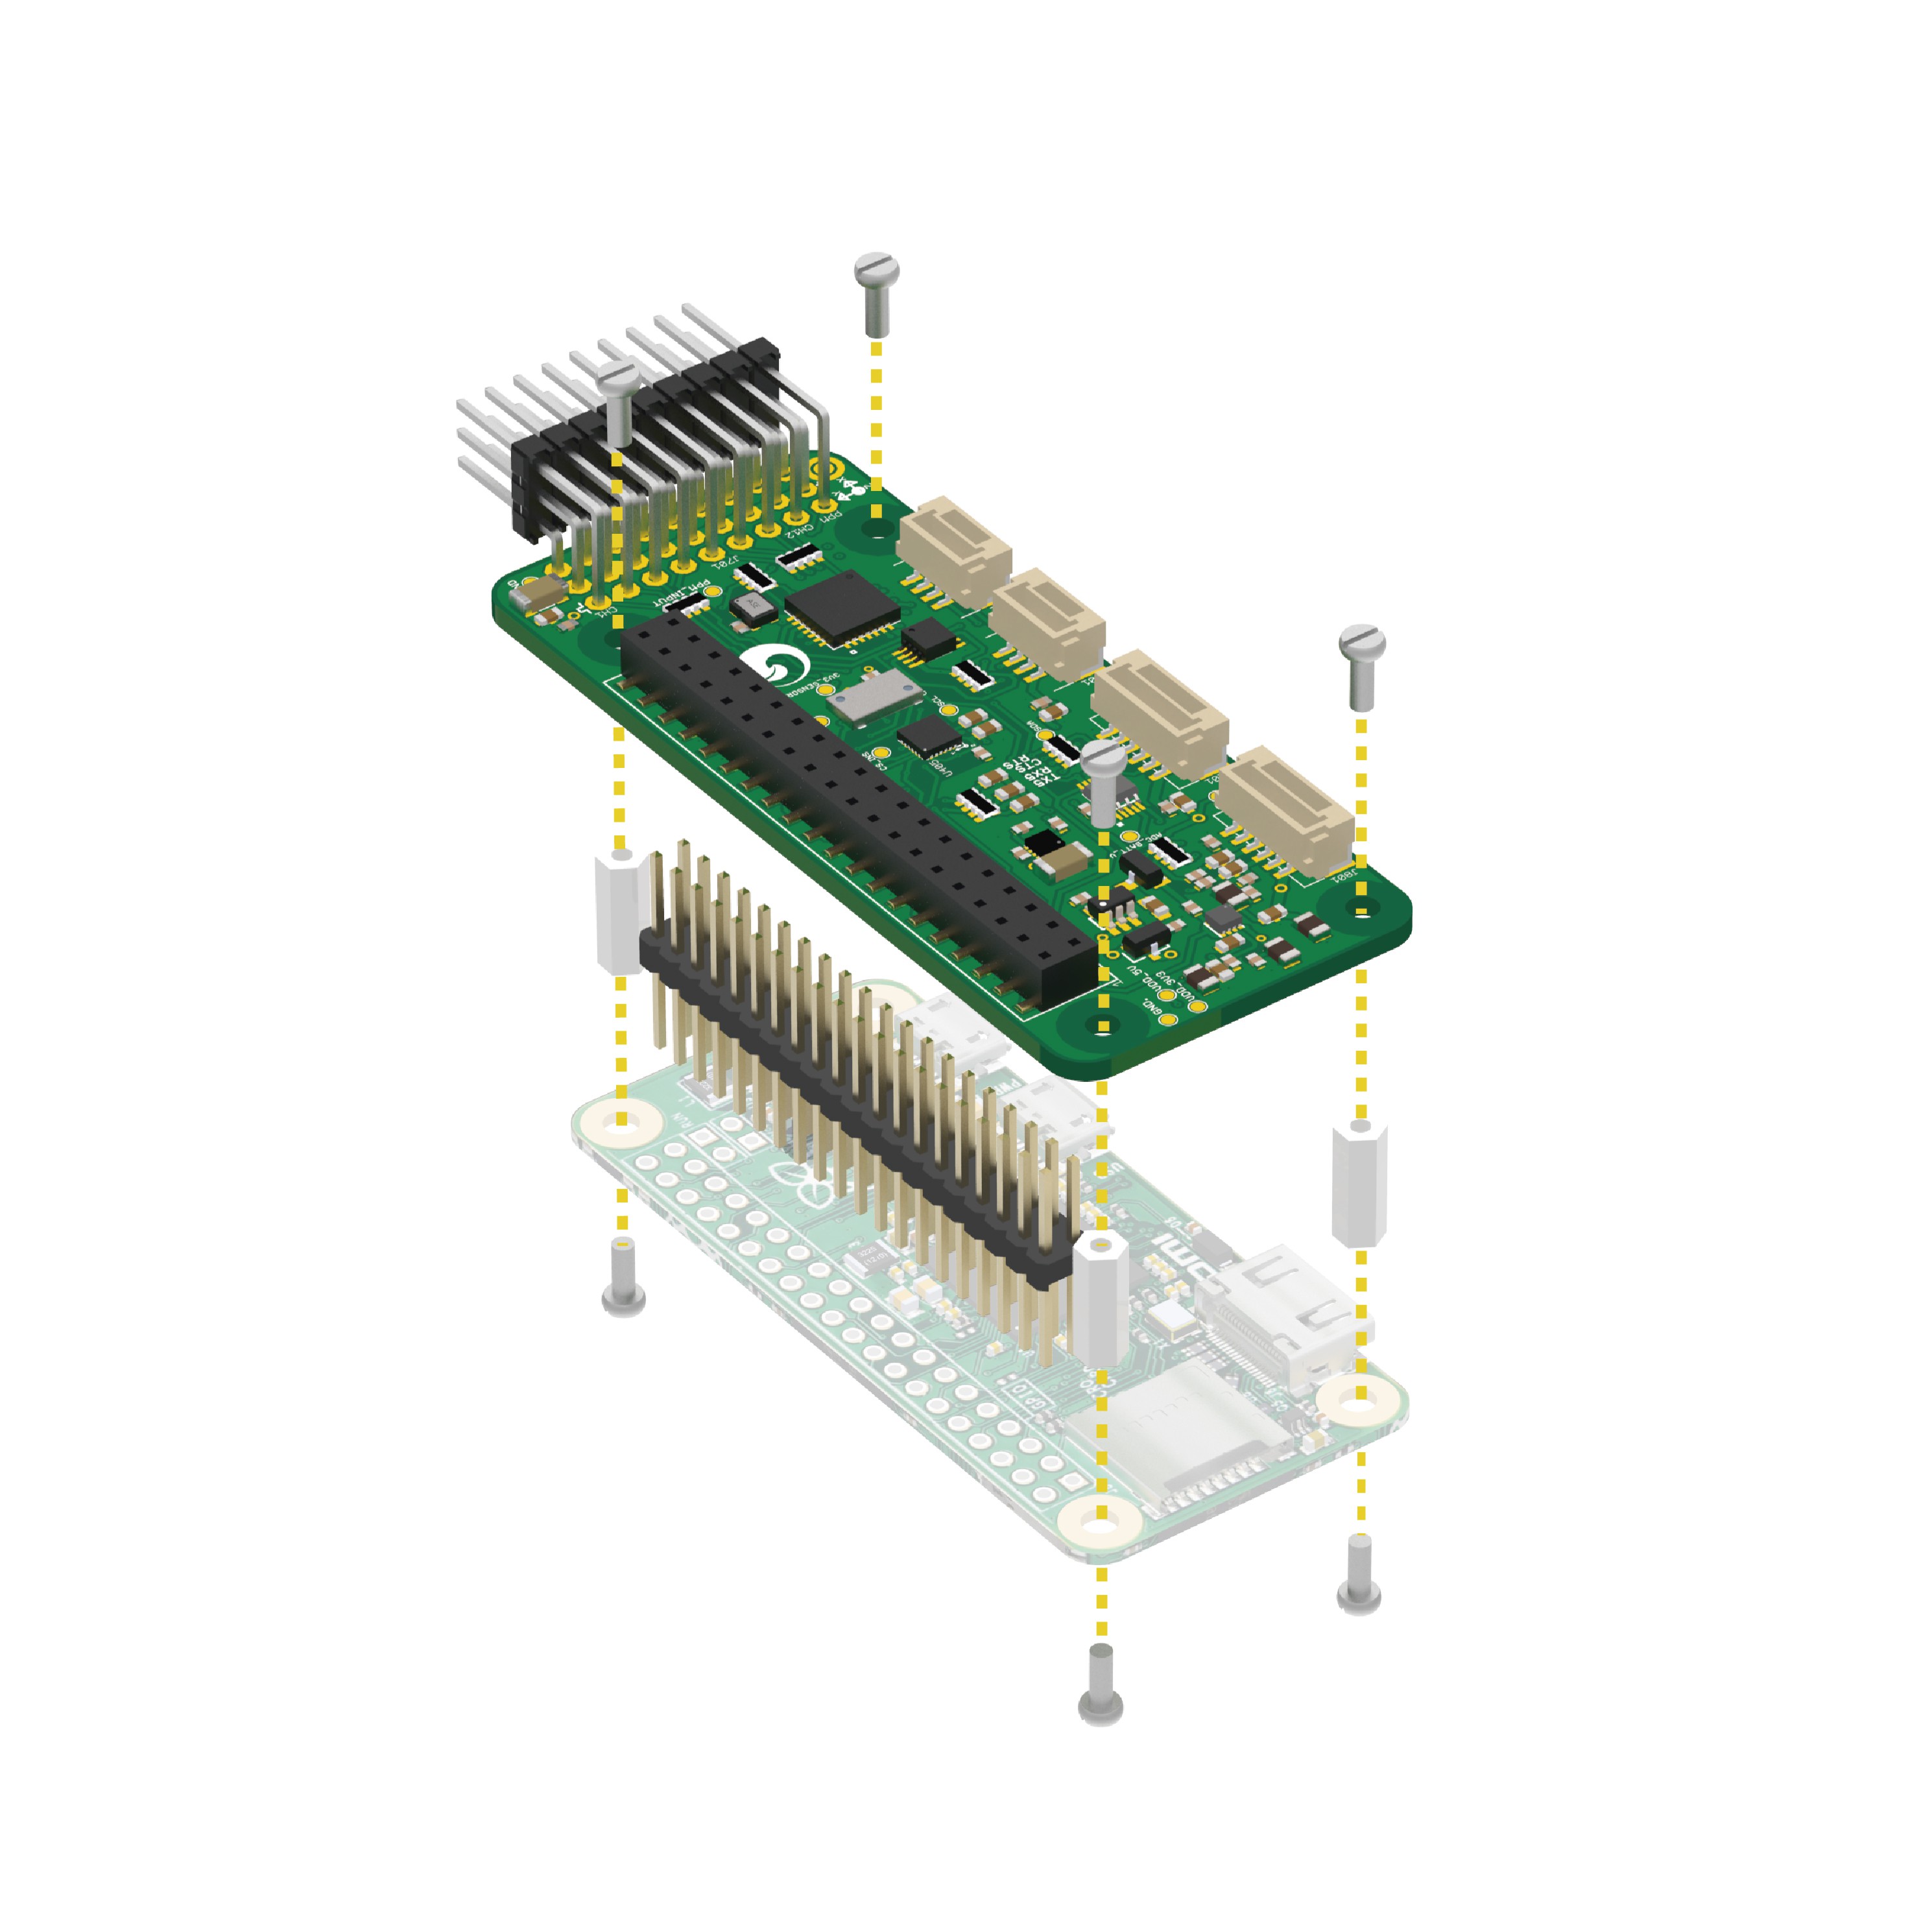
Connect the PXFmini shield on top of the Raspberry Pi Zero as described in the following image:
The PXFmini (stands for PixHawk Fire Cape mini), a 69€ autopilot shield for the Raspberry Pi to build robots and drones.![]()
You're almost done but you still need to get the right software on the Raspberry Pi Zero+PXFmini set. This should include the flight stack, an appropriate kernel, enabled daemons that auto-launch on boot, and additional goodies...
![]()
Fortunately, if you purchased the PXFmini from Erle Robotics you'll get access to their Debian images which include all this so just fetch a PXFmini compatible Debian image and flash it into a microSD card.
Step 3: Mount the autopilot
Required time: 5 minutes
![]() PXFmini mounted on top of the Raspberry Pi Zero assembled in the drone
PXFmini mounted on top of the Raspberry Pi Zero assembled in the droneMounting the autopilot (Raspberry Pi Zero + PXFmini) in the drone can be done using several methods. Pick yours and connect the JST GH cable from the power module to the PXFmini. This will to power the autopilot when the battery gets connected.
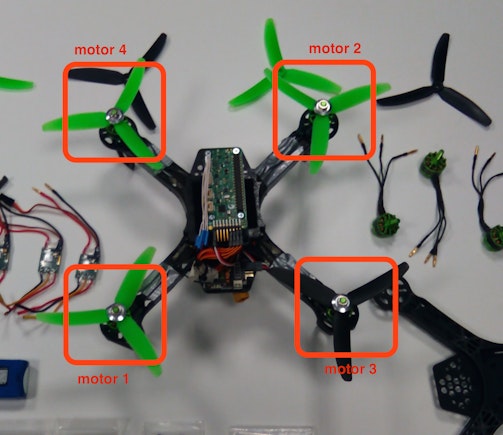
Next is mounting the PWM channels in the autopilot. Get your ESC cables and connect ESC 1 (corresponding with motor 1) to PWM channel 1, ESC 2 to PWM 2 and so on.
![]()
Step 4: Mount the propellers and get it flying!
Required time: 15 minutes
There's two kinds of propellers clockwise (marked with an "R") and counter-clockwise. Place the clockwise propellers in motor 3 and 4 and the counter-clockwise ones in motors 1 and 2.
Finally, you'll need a way to control your drone. I propose two methods:
- WiFi + gamepad: Have the autopilot create its own WiFi network with a USB dongle (Erle Robotics images support this by default) and use a common gamepath to control the drone through a Ground Control Station.
- WiFi + ROS: Do you happen to know about the Robot Operating System(ROS)? You can use a ROS node to visualize the flight mode, state and control the drone. Have a look at
- Traditional RC: Alternatively you could buy an RC controller with PPMSUM-enabled receiver and attach it to the autopilot (to the PPM-SUM input channel).
Pi0drone
A $200 smart Linux drone with the Pi Zero and the PXFmini autopilot shield.


Discussions
Become a Hackaday.io Member
Create an account to leave a comment. Already have an account? Log In.
Could you potentially use an app on an android phone to control the drone.
Are you sure? yes | no