Audrey Robinel
-
The sensor servo turret
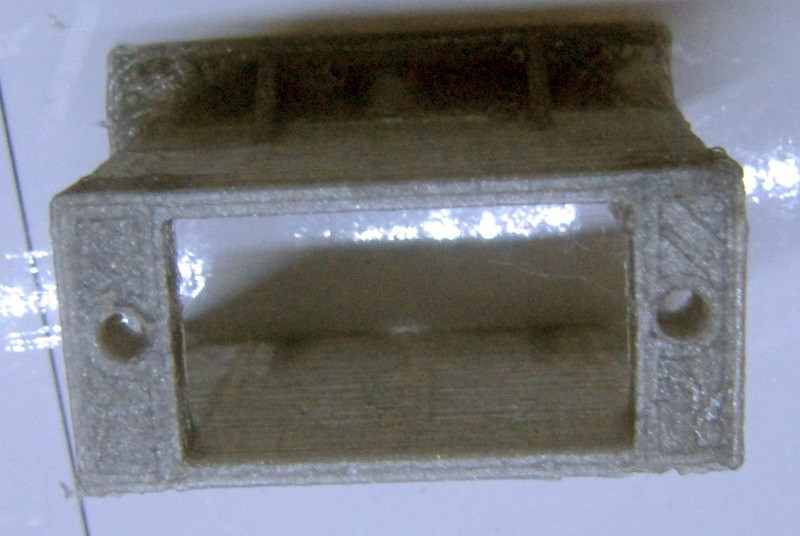
02/29/2016 at 22:48 • 0 commentsOn the front of the robot, there are fixation holes for a servomotor. This servomotor is there to provide a rotation capability to the distance sensor. The user will thus be able to program a sweeping motion, or simply check distance right and left.
I designed the part using the servoHolder. It will have to be improved for printing without support, since it printed with bridging defects. However, it does not hinder the functionality of the part.
The defects can be seen on this version in the darker area.
![]()
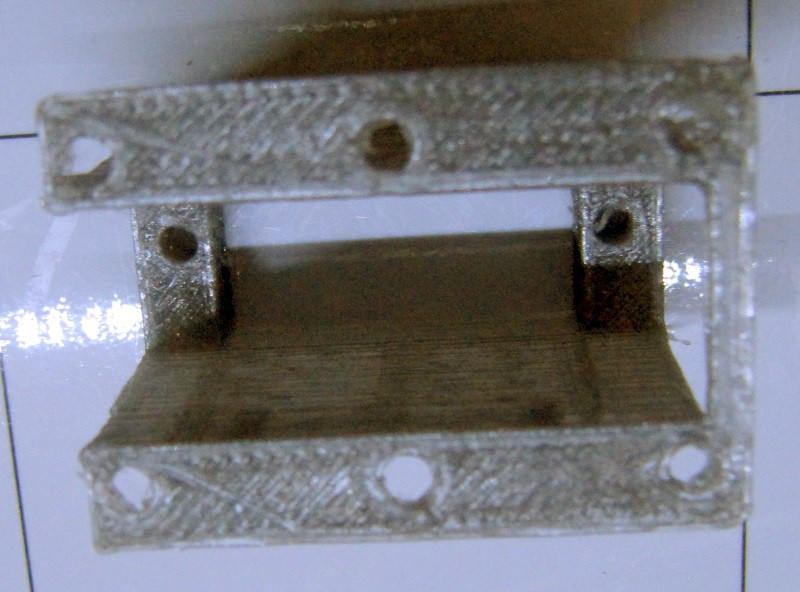
However, when spinning the part, nothing shows :
![]()
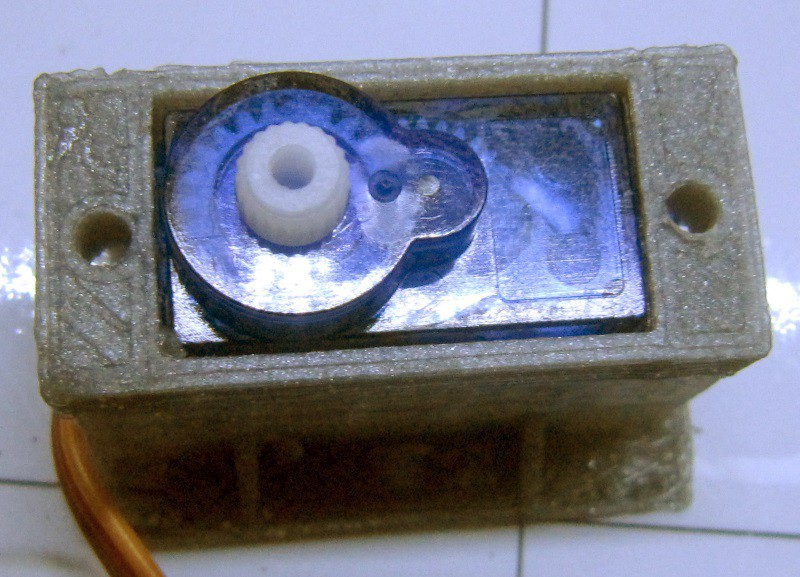
Furthermore, the servo fits perfectly :
![]()
There are holes on the bottom of the holder to secure it on the chassis, using 3mm screws.
Here is the part used for those pictures, but feel free to check the github for the latest version.
-
The chassis
02/28/2016 at 20:22 • 0 commentsAs with R.Hasika, another of my robots, i decided to make a single piece chassis. This choice is justified by the simplicity requirement of the project. I want it to be as simple to assemble as possible. Such a chassis will also limit the parts count. However, that doesn't means that it's not upgradable. First of all, all the design files are open source, and can be modified freely. Second, the chassis have been designed in order to provide structural strength to the robot as well as securing some obligatory parts. However, many fixation points have also been added to the chassis to make it upgradable.
Here is a render of the chassis :
![]()
Note that there is also an open bottom version to save plastic if needs be. This one prints in less than 2 hours on my printrbot simple metal with no support nor any special tricks. It is meant to be easy printed. I printed it with around 10m of filament with 10% infill, out of the same PLA i used for the wheels. Here is what it looks like when printed :
![]()
A good surprise is that the gray PLA i have is not totally opaque. i'll see how well an RGB LED performs behind the thin walls.
Here is a top view of the chassis :
![]()
The two openings on the left are for the servomotors.The right side is the front, and is kept opened for contact sensors and IR/ultrasonic range measurements. With the holes in the front, a third servomotor (regular one in this case) can be mounted to allow a scanning motion for the distance sensor(s).
The chassis is quite light, with 32 grams.
The clear area in the middle is the place where the 18650 battery fits.
-
Wheels
02/28/2016 at 07:24 • 0 commentsThe continuous rotation servos that i use for this robot needs wheels to move it. Since i forgot to buy the corresponding wheels, i decided to make my own. Those wheels are made of two elements : the wheel in itself, made to be printed out of stiff plastic (PLA, ABS, Nylon...), and the tire, made for printing with flexible and rubbery filament, such as ninjaflex or semiflex.
The wheels
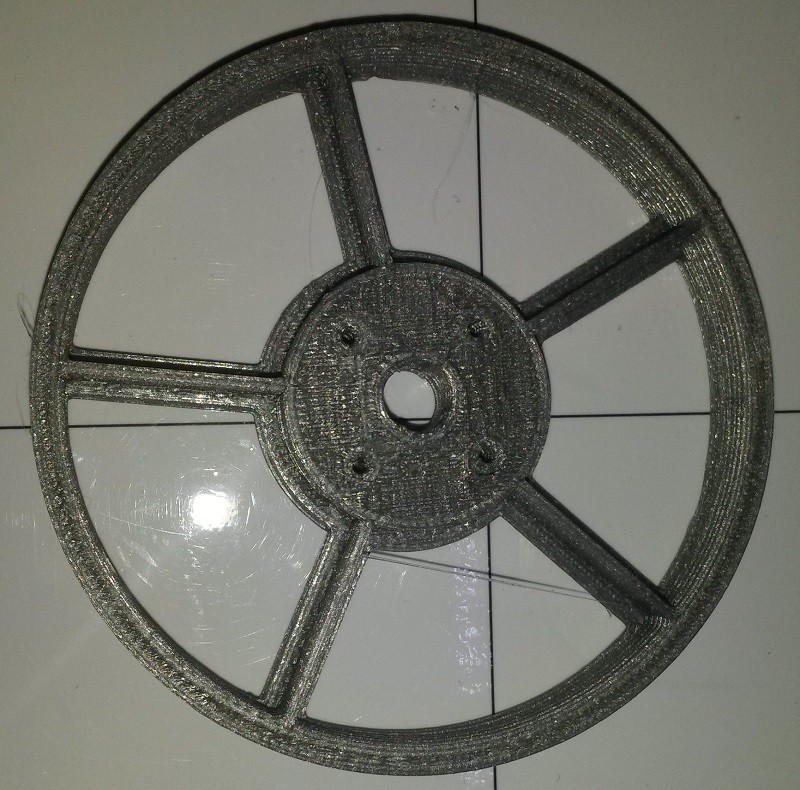
I made the wheels dimension so that it keeps the robot level with the omnidirectionnal wheel that i am using as a third contact point on this robot. I decided to make my wheels a bit like car wheels, ie not a plain disc, but a central hub for fixations, arms exiting from the hub, and the rim itself around all of that. I chose to have 5 arms because that's what i see on most cars, so i guess it must make sense either from a technical or aesthetic standpoint. Anyway, i made a parametric file for creating a wheel of configurable diameter, with also a configurable number of arms. All the files are available on the github of the project, including stl files ready for printing.
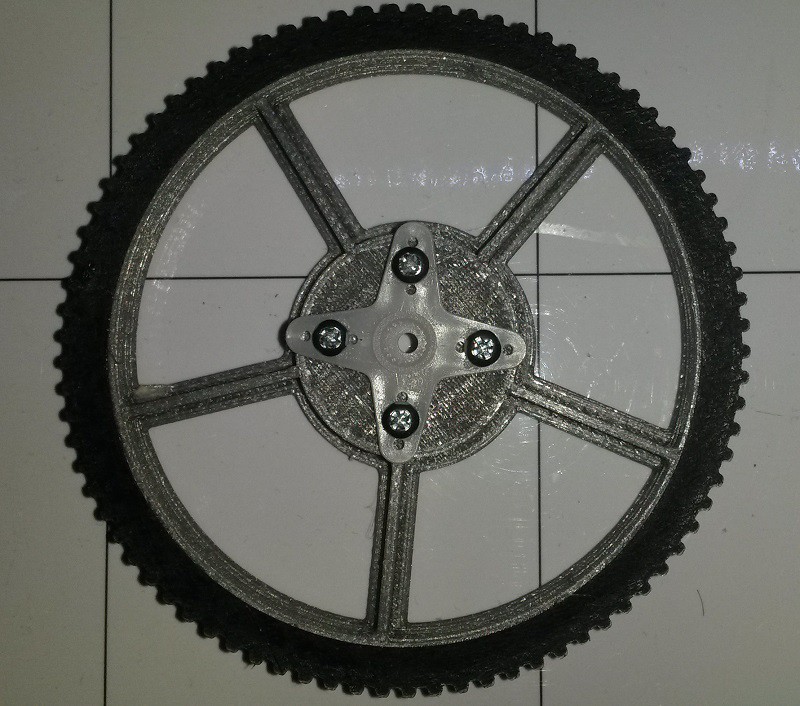
Here is the look of my wheels once printed :
![]() The central hole is for the servo screw (wider than needed for easy access), and the 4 holes surrounding it are there to secure the servo horns. Those are 2mm diameter holes.
The central hole is for the servo screw (wider than needed for easy access), and the 4 holes surrounding it are there to secure the servo horns. Those are 2mm diameter holes.The tires
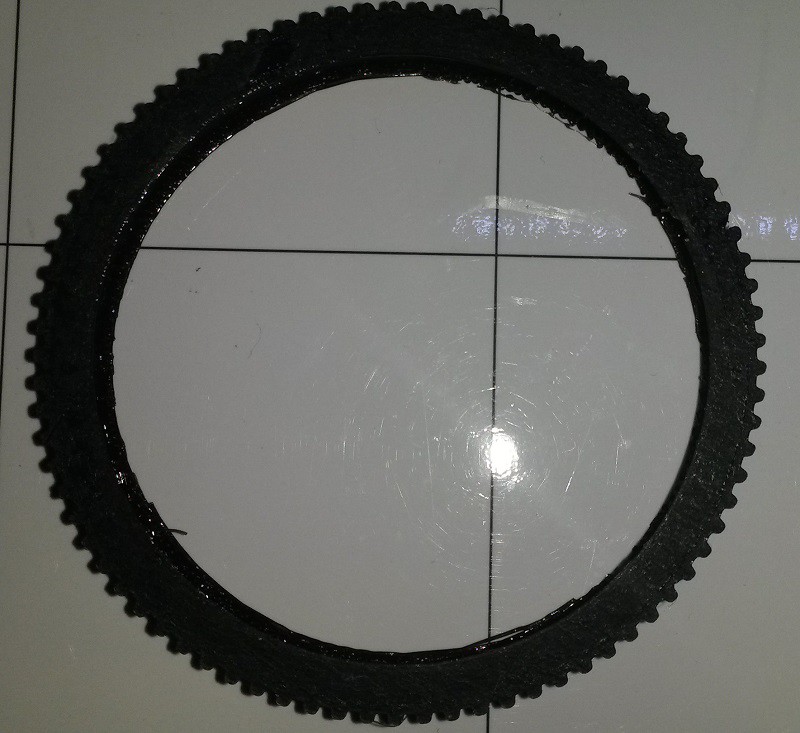
The tires are made to be printed out of ninjaflex or semiflex. Again, the files are available on the github, with the stl. I managed to print the tires properly without any support or special tricks, only a slow speed of 30mm/s.
Here is the result :
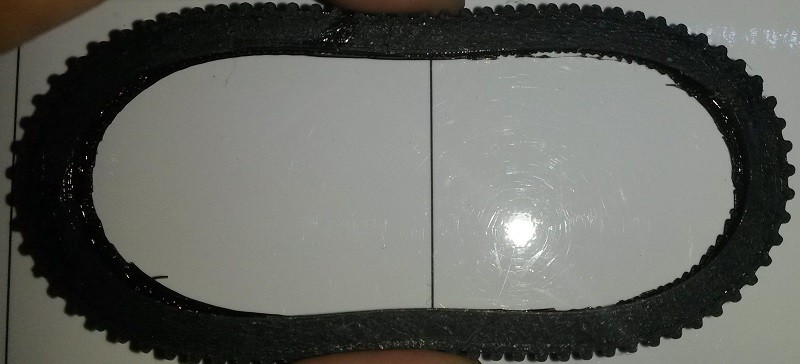
![]() I made the tires 97% the size of the wheels so that with the elasticity of the material, it stays firmly on the wheel. On the next picture, you can see that this really is flexible filament :
I made the tires 97% the size of the wheels so that with the elasticity of the material, it stays firmly on the wheel. On the next picture, you can see that this really is flexible filament : ![]() For better grip in some cases, i added small bars (1mm thick) on the outside of the tire. There are 81 of those (because it's (3²)², and it seemed fine in the render). Again, this is a parametric design, and only one variable sets this, so if one wants to have a certain number of "tooths" it is entirely possible.
For better grip in some cases, i added small bars (1mm thick) on the outside of the tire. There are 81 of those (because it's (3²)², and it seemed fine in the render). Again, this is a parametric design, and only one variable sets this, so if one wants to have a certain number of "tooths" it is entirely possible.In order to place the tires on the wheel, only a bit of force is needed, and some patience to get it in place. Once there, it does not move, thanks to the lips on the side of the tire.
The tires provides a really good grip to those wheels. Without, they would be really slippery.
I have not yet tested semiflex here, and it may require to have a 99% diameter or more since it's much less elastic.
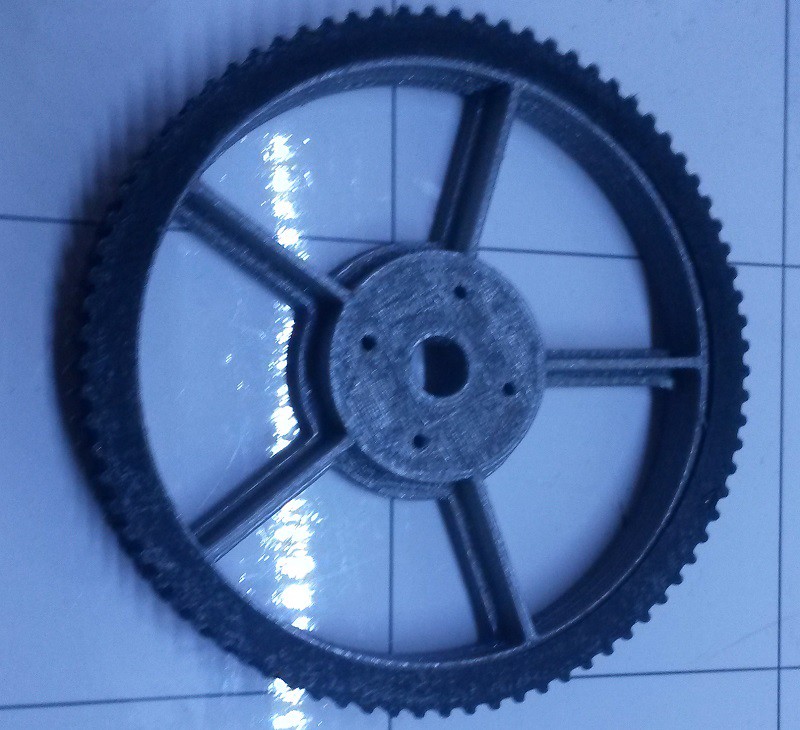
The assembled wheel
Once the tire is on the wheel, we get this result :
![]()
The next step is to secure the servo horns with the m2 screws. I drill the servo horns at 2mm in the 1mm existing holes (middle holes on each corner), obtaining the result depicted below.
![]()
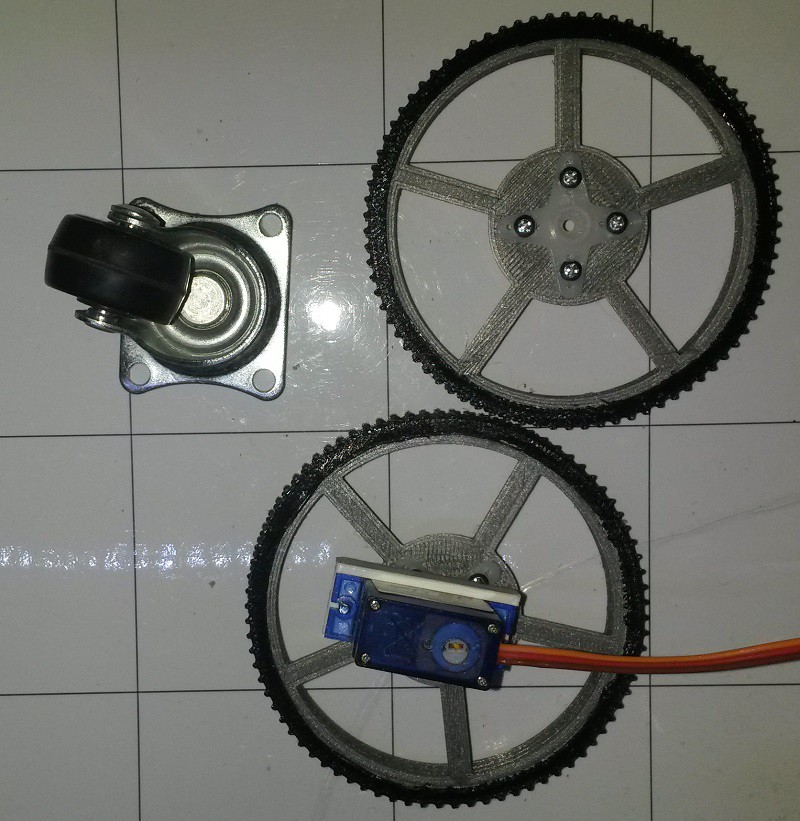
Then we can put the wheels on the servos and secure them with the tiny screw provided with the servo.
![]()
-
Motorisation
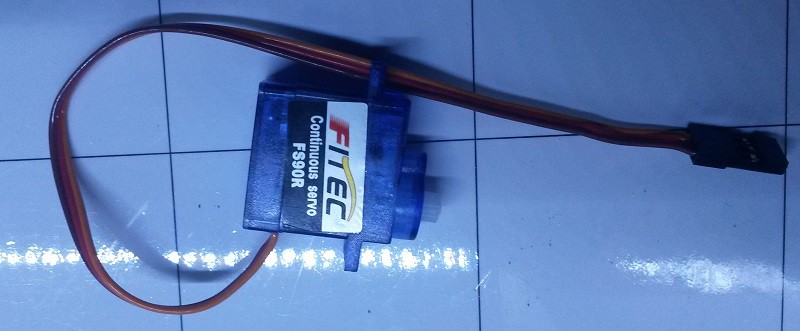
02/28/2016 at 06:53 • 0 commentsI want this robot to be simple. One way to make a really simple robot is to use continuous rotation servos. This is the plan for R.Ian. I have FITEC FS90R continuous rotation servomotors in my parts box, and thus i will use them for the first version of this robot.
Here is what it looks like :
![FEETECH FS90R Micro Continuous Rotation Servo]()
The specs at 6V are the following :
- no load speed : 130RPM ;
- 1.5 kg-cm torque (21 oz-in)
- 9g
- 23.2×12.5×22mm
Those are cheap servos, i paid 5$ each at Pololu (product 2820).
A pair of those will use 2 digital pins on an Arduino, with an approximative speed control (well not really accurate without any feedback, and we'll se how accurate we can get with feedback).
However, i did forget to take the corresponding wheels, which is why i'll be designing an printing my own.
R.Ian, simple and easy built robot for education
R.Ian is meant so be simple to build but have interesting capabilities useful for teaching programming