-
11Step 11
gdoPi.local - Python Script
If everything is working so far, you should be ready to test the relay/camera function via openHAB-triggered MQTT messages.
Download the the ctrlGDO.py file and change ownership to 'pi':
chown pi:pi ctrlGDO.py
Edit the file to include your unique values for Twilio function
- account_side
- auth_token
- to=
- from_=
- to=
- from_=
Twilio Notice
I've included option for MMS if you change the calling parameter from "sms" to "mms." However, this will only work if you are storing the camera image to a location that the Twilio service can access. If you have it storing where've suggested so far, it should be protected from prying eyes by your firewall. So you'll either have to open up your firewall to use this option, or you'll need to push the images to some location outside your LAN's firewall.)
Execution
If all goes well, you should see the following display in your terminal window, indicating that it is now listening for certain MQTT topics to trigger it to react.pi@gdoPi:~ $ python ctrlGDO.py Garage Door Opener MQTT script rc: 0 Subscribed: 1 (0,)
Examples
Now if you click on the relay's toggle button, you hear your relay clack and should see:
Garage door triggered.
Processing request for visual update.
SMS XXXXXXXXXXXXXXXXXXXXXXXX sent.
If you click on the camera's refresh button, you should see:Processing request for visual update.
-
12Step 12
gdoPi.local - Setup WiFi
Assuming that you don't have Cat5e/6 run from your network into the garage, you'll probably want to setup wifi on the gdoPi. Again, things have changed considerably between Wheezy and Jessie.
The best article I've found on doing this with the new Jessie is:
http://qdosmsq.dunbar-it.co.uk/blog/2016/01/raspberry-pi-pizero-raspbian-jessie-networking-and-wifi-setup/In essence, you will need to edit the following three files:
- /etc/network/interfaces
source-directory /etc/network/interfaces.d auto lo iface lo inet loopback auto eth0 allow-hotplug eth0 iface eth0 inet manual auto wlan0 allow-hotplug wlan0 iface wlan0 inet manual wpa-conf /etc/wpa_supplicant/wpa_supplicant.conf - /etc/wpa_supplicant/wpa_supplicant.conf
country=US
ctrl_interface=DIR=/var/run/wpa_supplicant GROUP=netdev
update_config=1

network={
    ssid = "XXXXX"
    psk = "YYYYY"
    scan_ssid=1
    priority=1
}
Security best practice is to turn off SSID broadcasting on your wifi router, but doing so means that you must explicitly list it here and must set 'scan_ssid' to '1'. The priority is not necessary as long as this is the only network defined. - /etc/dhcpcd.conf -- Not absolutely necessary to edit unless you desire to prescribe static IP addresses. Historically, that's been a good idea for servers--which these guys are sorta' playing server-type roles. If you decide to implement static IPs, do check out the site I listed above.
- /etc/network/interfaces
-
13Step 13
Garage Time!
Once you've confirmed everything is working as expected, it's time to move from the bench to gdoPi's the permanent home in the garage. Remember to attach the Normally Open (N.O.) output on the relay board to the garage door contacts. Power it on, and start ctrlGDO.py. You should be ready to go.
Note:
As of right now, I have not created the steps for starting this python script at boot time. That's something I plan to get around to over the next week or so. There are also several other software tweaks I have in mind.
And please do remember that you do all of this at your own risk!! I take no responsibility for your actions!
-
14Step 14
my.openHAB - Secure, External Access
If you want to be able to access your openHAB environment via your cellphone from anywhere except your own LAN's wifi, you must provide a means for openHAB to receive communique's from the other side of your firewall. You could tackle the chore on your own, or you could take a shortcut and use openHAB's companion cloud service @ https://my.openhab.org/.
If you choose to accept their offer, I would recommend following their instructions very closely. In essence, you must install another addon for my.openHAB bindings. I've already uncommented the two openhab.cfg lines, but you'll still need to put your correct network ID in the 'security:netmask=' variable.
Pay special attention to restarting the RPi or the openHAB service once you've installed the aforementioned addon.
You'll need to copy and paste the UUID and secret codes into the my.openHAB new user form.
ACTIVATION! Don't overlook the need to activate your account from the email they send you. Otherwise, you'll never get it to work.
-
15Step 15
openHAB on Smartphones
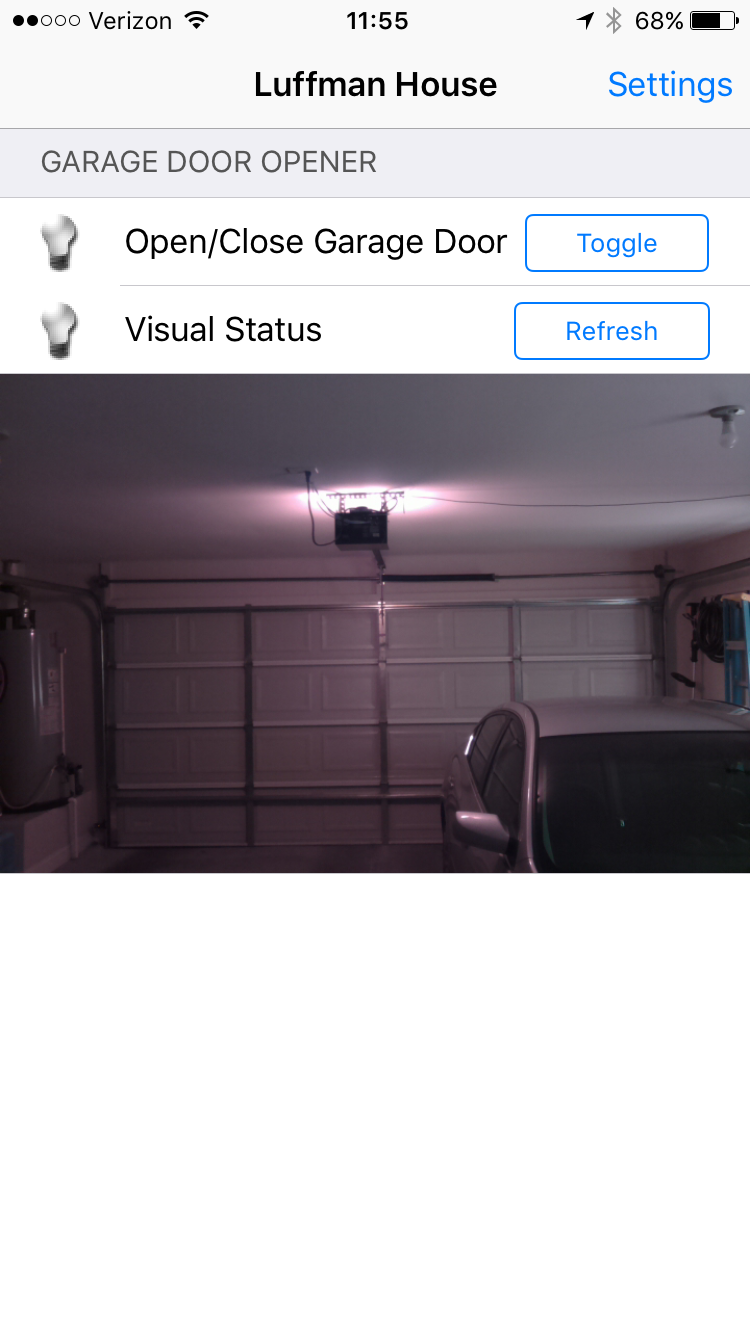
Can't speak as to Android, but it's pretty straightforward on iOS. Download the app from Apple store, and give it the URLs and my.openHAB username/password that the my.openHAB documentation suggests.
Screenshot w/ door closed
Screenshot w/ door now open & SMS notice received
Home Automation - Garage Door Opener
Extract best practices from existing garage door projects. Build version that suites my needs; eventually integrate into other HA efforts.


Discussions
Become a Hackaday.io Member
Create an account to leave a comment. Already have an account? Log In.
Hi luffmanb,
If I don't need the SMS, can I leave out the Step 4? I am guessing the message from will still be delivered to the OPENHAB via the MQTT client?
Are you sure? yes | no